
British Tank Destroyer FV4005 Stage II
According to Tank Encylopedia’s ‘The Online Tank Museum’ -
In the late 1940s, the British War Office (WO) was concerned that – after the debut of the IS-3 in 1945 – the Soviet Union would continue to develop heavily armored tanks. As such, the War Office filed a requirement for the development of a gun capable of defeating a 60-degree sloped plate, 6 inches (152 mm) thick, at up to 2,000 yards (1,830 meters), and a suitable vehicle to carry it.
This requirement led to the development of the ‘Ordnance, Quick-Firing, 183 mm, Tank, L4 Gun’, the largest purpose-built anti-tank gun to have ever been created. It was intended that this gun would be mounted on a new ‘Heavy Gun Tank’ based on the FV200 series chassis. This was designated the ‘Tank, Heavy No. 2, 183 mm Gun, FV215’.
A project was also launched to find a way to get the gun into action quickly on an existing hull. This could then be constructed quickly should the Cold War turn hot before the FV215 was ready.
This is where the FV4005 project comes in.
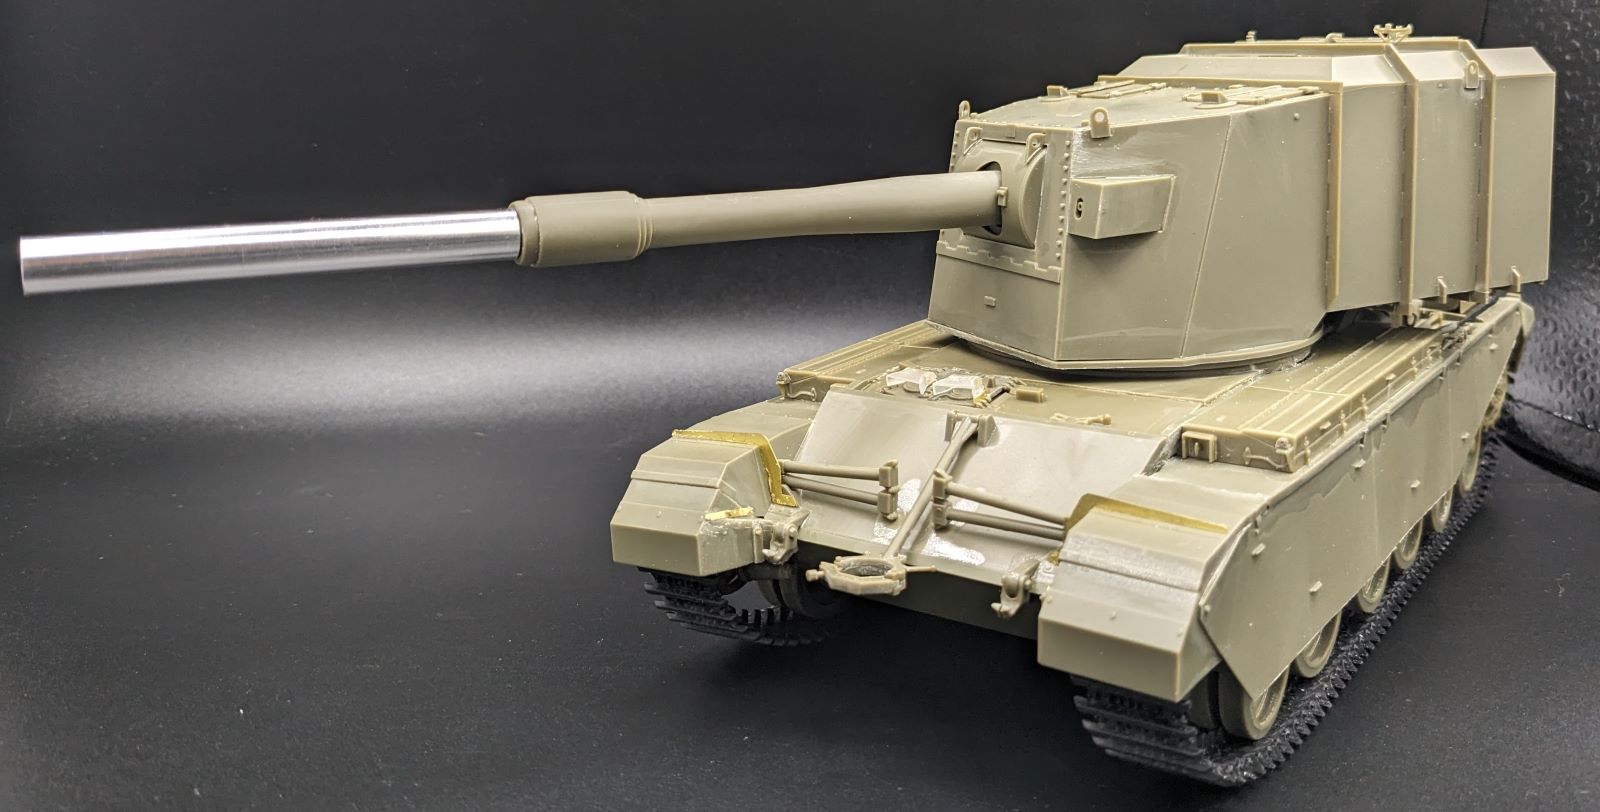
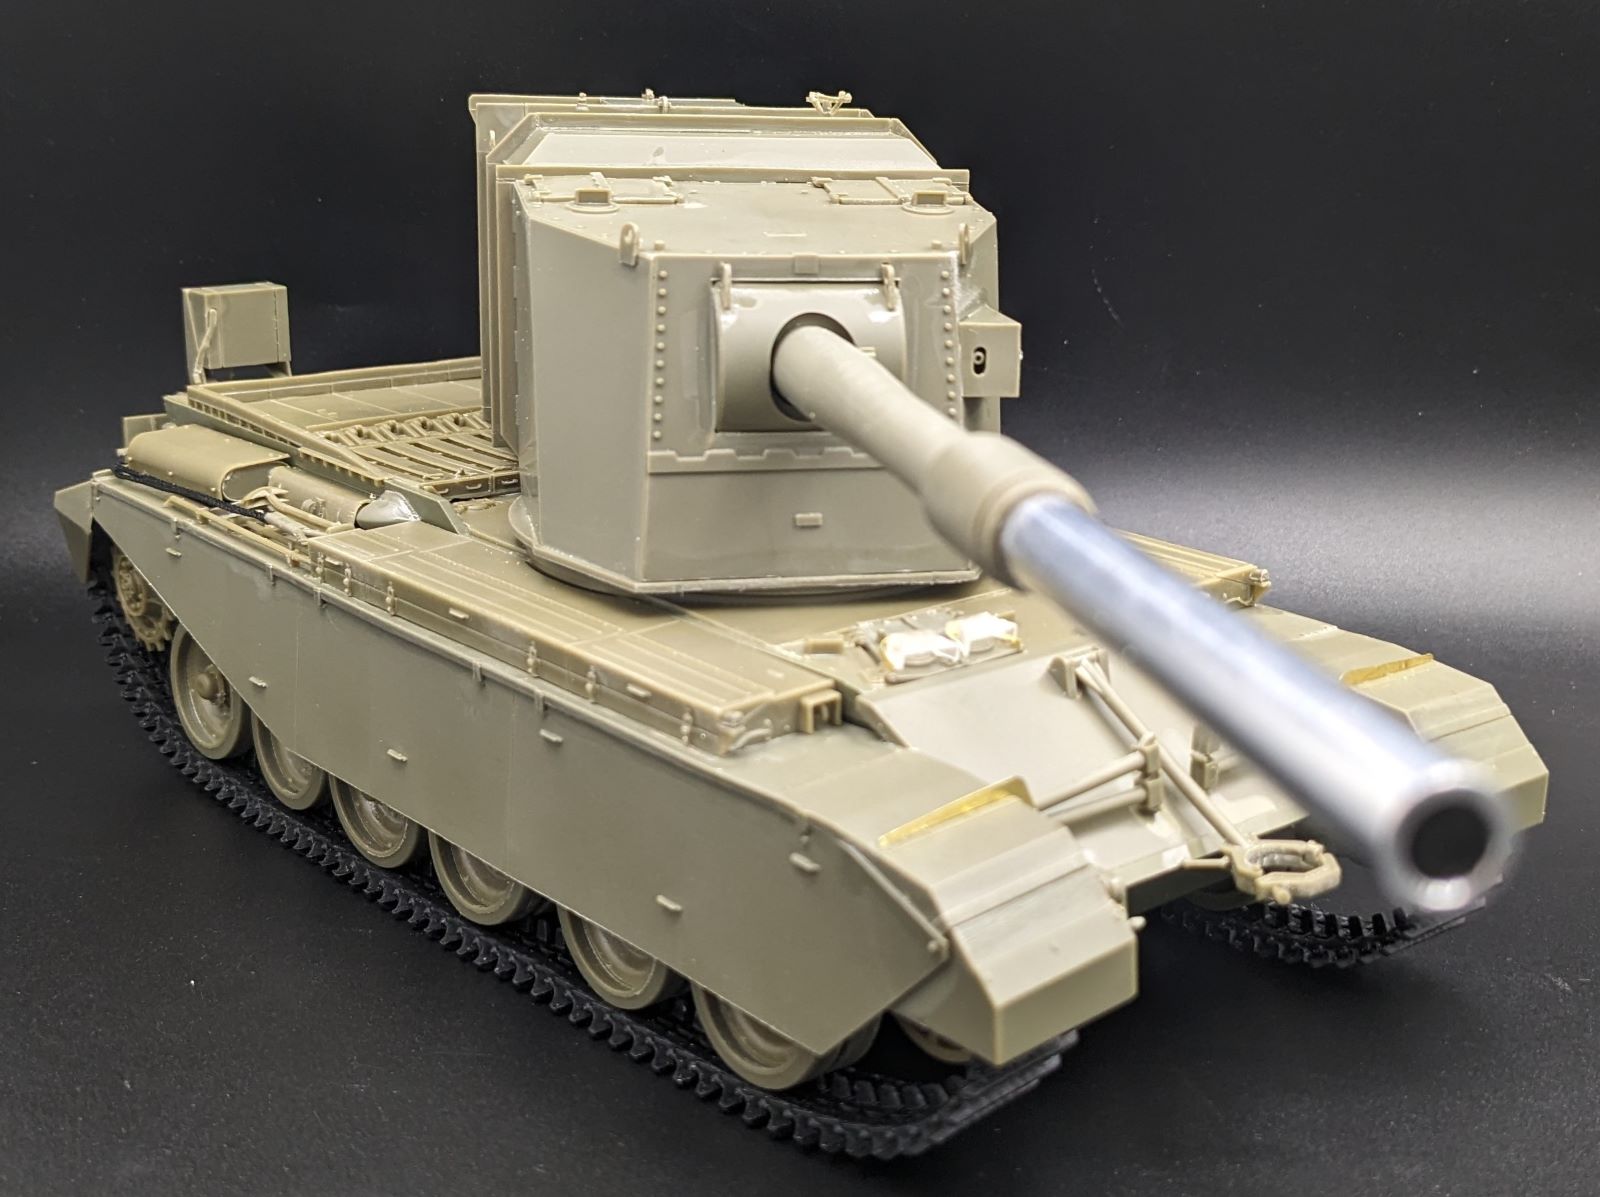
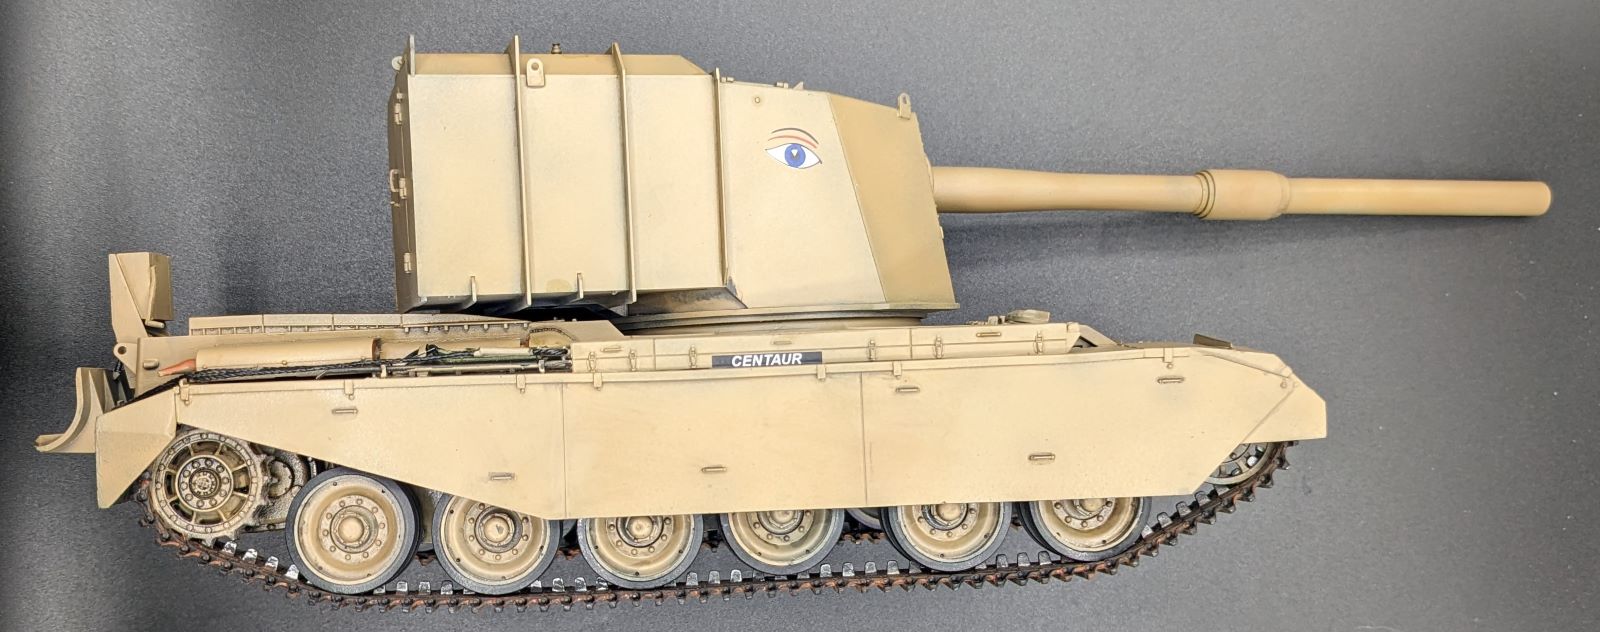
This is a rare, heavy self-propelled anti-tank gun, with only three built before the end of the program due to British observations that the Russians were moving from heavy toward main battle tanks; one was built in an open turret configuration, the other two in an enclosed “splinter-proof” 14mm thick casemate. The chassis was the already established and largely unmodified Centurion Mk.3 hull, and the FV4005s were unofficially named “Centaur”. A hand-cranked winch was attached to the rear hull to operate the spade (“earth anchor”) to transfer recoil forces from the chassis to the ground.
Only one Stage 2 turret remains, and it was mated with a Centurion hull where it stands on guard at the Bovington tank museum. Interest in this tank destroyer was most likely rekindled by the online game World of Tanks. There are only two 1/35 models available of this rare tank destroyer; the first is 2020’s Amusing Hobby release with one decal option, and this new AFV club offering with four marking options (three of which are fictional): British, Canadian, Australian and New Zealand.
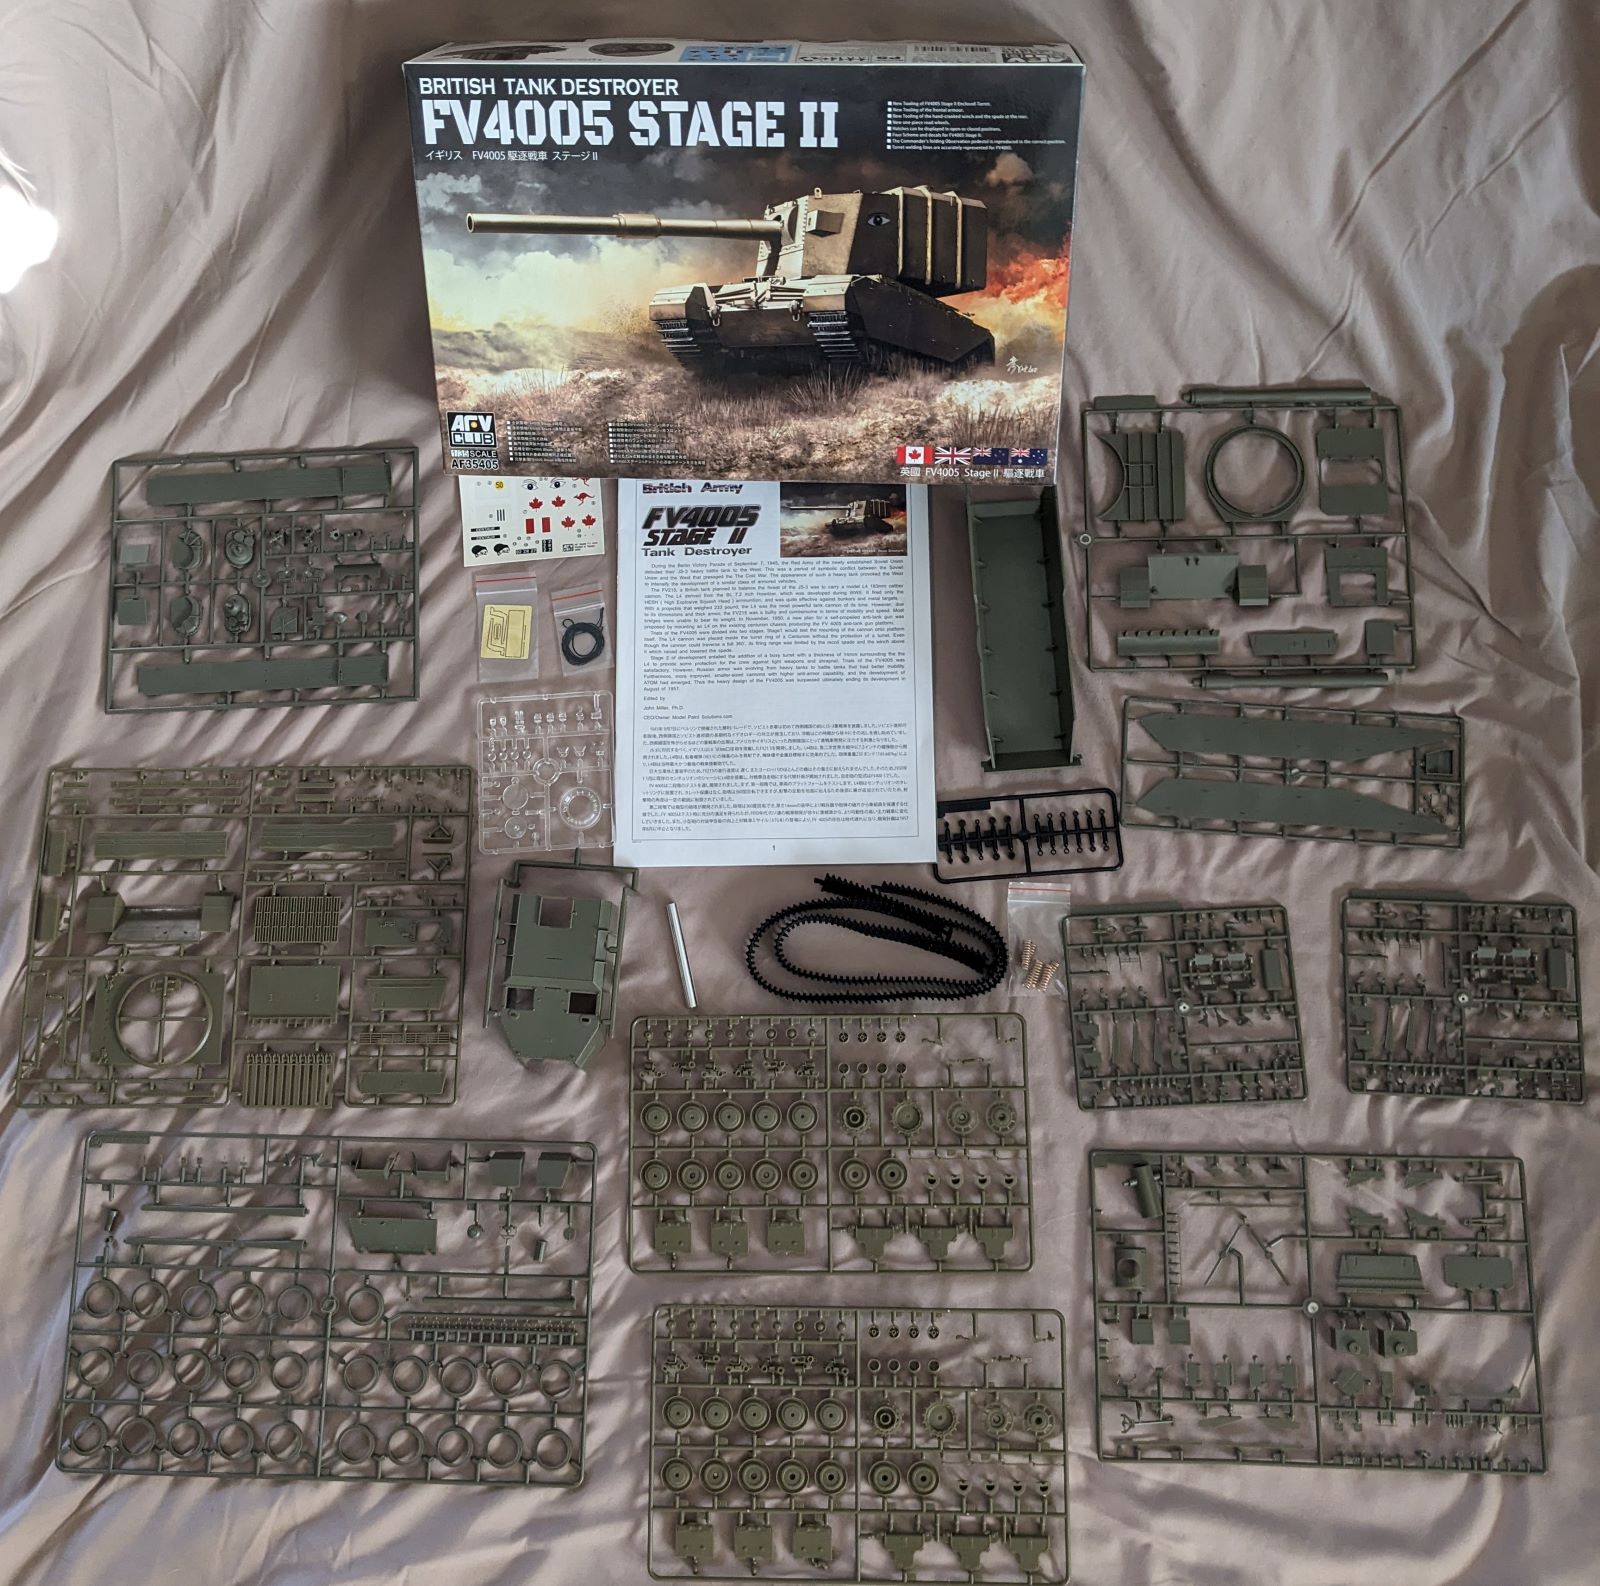
Upon opening the rigid box top opener cover, there is a tabbed inner box (I had to tape the tabs to keep the lower box half together when not enclosed in the top box half) that does a good job of protecting the kit’s ten plastic sprues, clear sprue for glass, two rubber tracks, rubber poly caps, metal barrel end, small PE fret, twine for cables, chassis tub, turret and decals. The 16-page instruction manual covers 27 steps building up the chassis, hull, and large main gun.
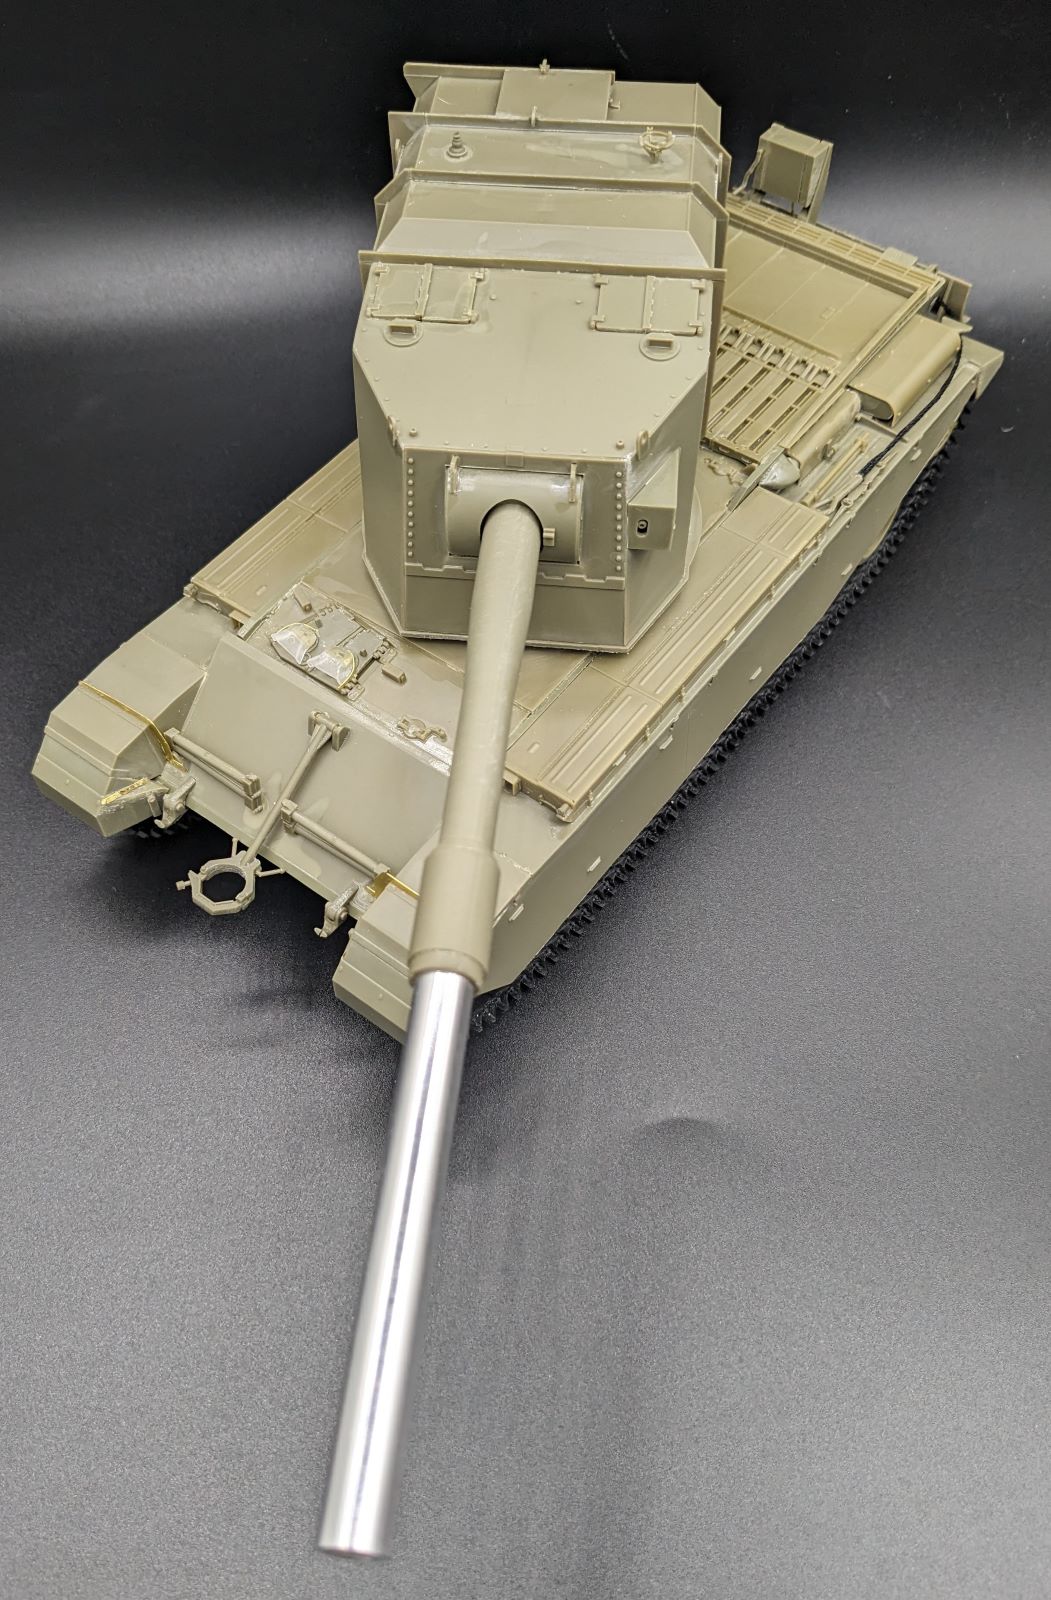
The model builds straightforwardly, and the sequence is logical. There are several spare parts for different Centurion hulls (you could probably make the Bovington Tank Museum gate guardian with these parts), along with two other Centurion Mark tank barrels. The first 20 steps are for the Centurion Mark 3 chassis along with the FV4005 specific accessories, the final seven steps are the turret and main gun (well done with a metal end piece complete with rifling). There are minor notes that are identified here by their instruction step:
- Step 6: The track shield support pieces (B20 - six of them) can be easily broken off, so take care or install them just before the shields in Step 19.
- Step 7: Study the return rollers (E6 and E7) indentations as they are hard to line up to ensure the two pieces are linear when complete (believe me, you will know if they are out of alignment if they aren’t installed correctly.
- Step 9: The intake screen supports (two each B16 to B17, and two each B10 and B11) must be mated correctly to fit in O8). Positively tabbed pieces would have made this much easier, but dry fitting does help. Fortunately, once installed, they are hard to see.
- Step 10: Install part C31 to C41 before installing C38 to the hull to ensure proper alignment and fit of C37 in Step 11.
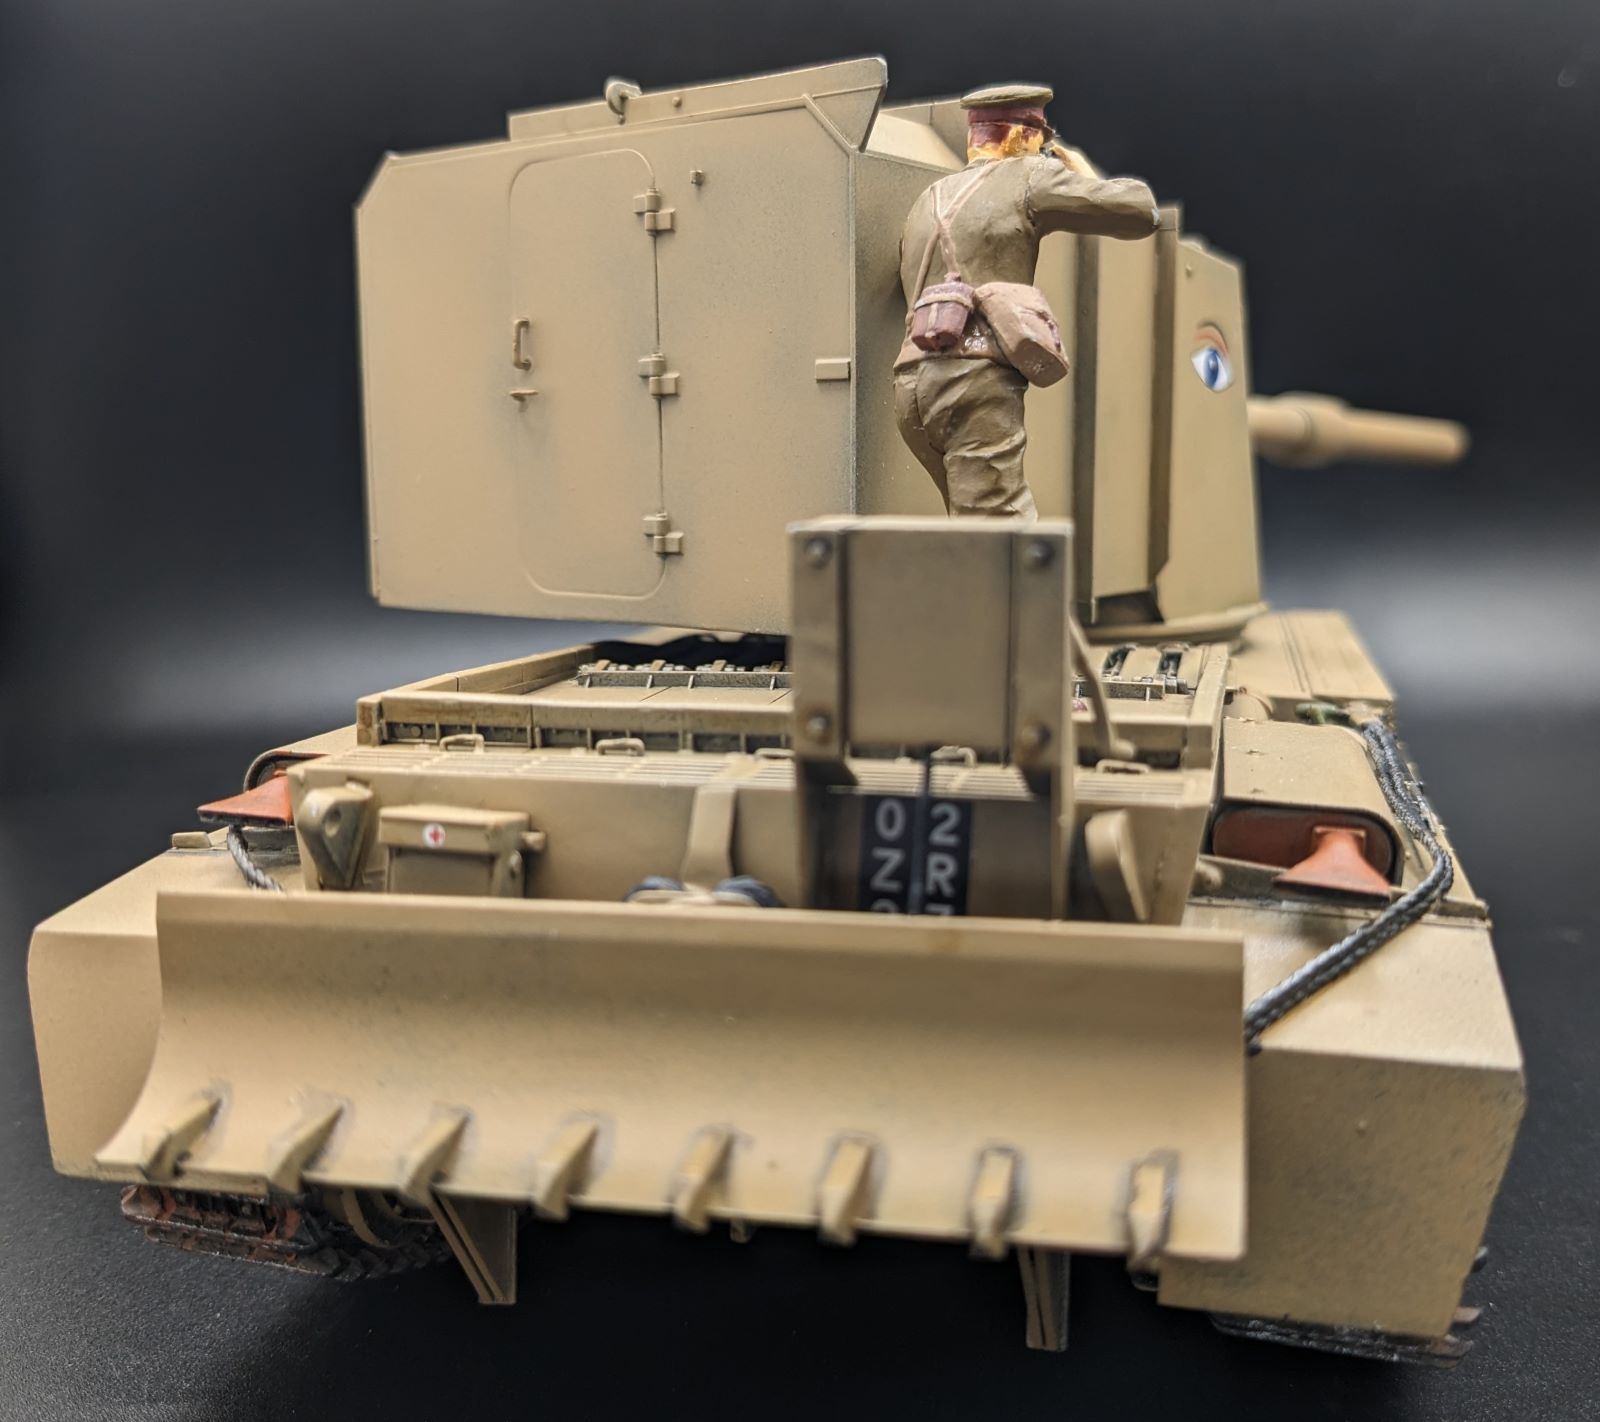
- Step 13: The firing spade at the rear of the chassis has three options, each with their corresponding length of “cable” plastic to the hand crank winch: firing position (P7), mid-way down (P45 and the short twine-JB), and stowed (P38).
- Step 15: The rear mudguard W12 is not tabbed, so refer to instructions on its proper placement to ensure fit of the track shield K2 in Step 19.
- Step 17: The rear mudguard W13 is not tabbed, so refer to instructions on its proper placement to ensure fit of the track shield K1 in Step 19.
- Step 18: If you want to display the driver’s hatch open, there are prominent sink marks on the side of both hatch halves, H15 and H16.
- Step 20: The string for the towing cables is a good thickness and a white glue and water solution gives them the appropriate “weight” for this scale.
- Step 22: The prominent turret roof periscopes are molded in solid plastic, not clear plastic.
- Step 25: If the rear turret door, with the commander’s chair, is to be open, there are prominent sink marks.
- Step 26: The main gun cradle has two options: securing the main gun or stowed; each option has its own parts.
- Step 26, Part II: The two different antennae on the rear turret are not marked. They are B35 (starboard) and P3 (port). The rear roof hatch locks and hinge are also not marked; the locks (2) are P40, and the hinge is P9.
I followed the instructions, and it was relatively easy to build with the notes outlined above. Attention and care must be used as there are a lot of fiddly bits, primarily in the form of handles.
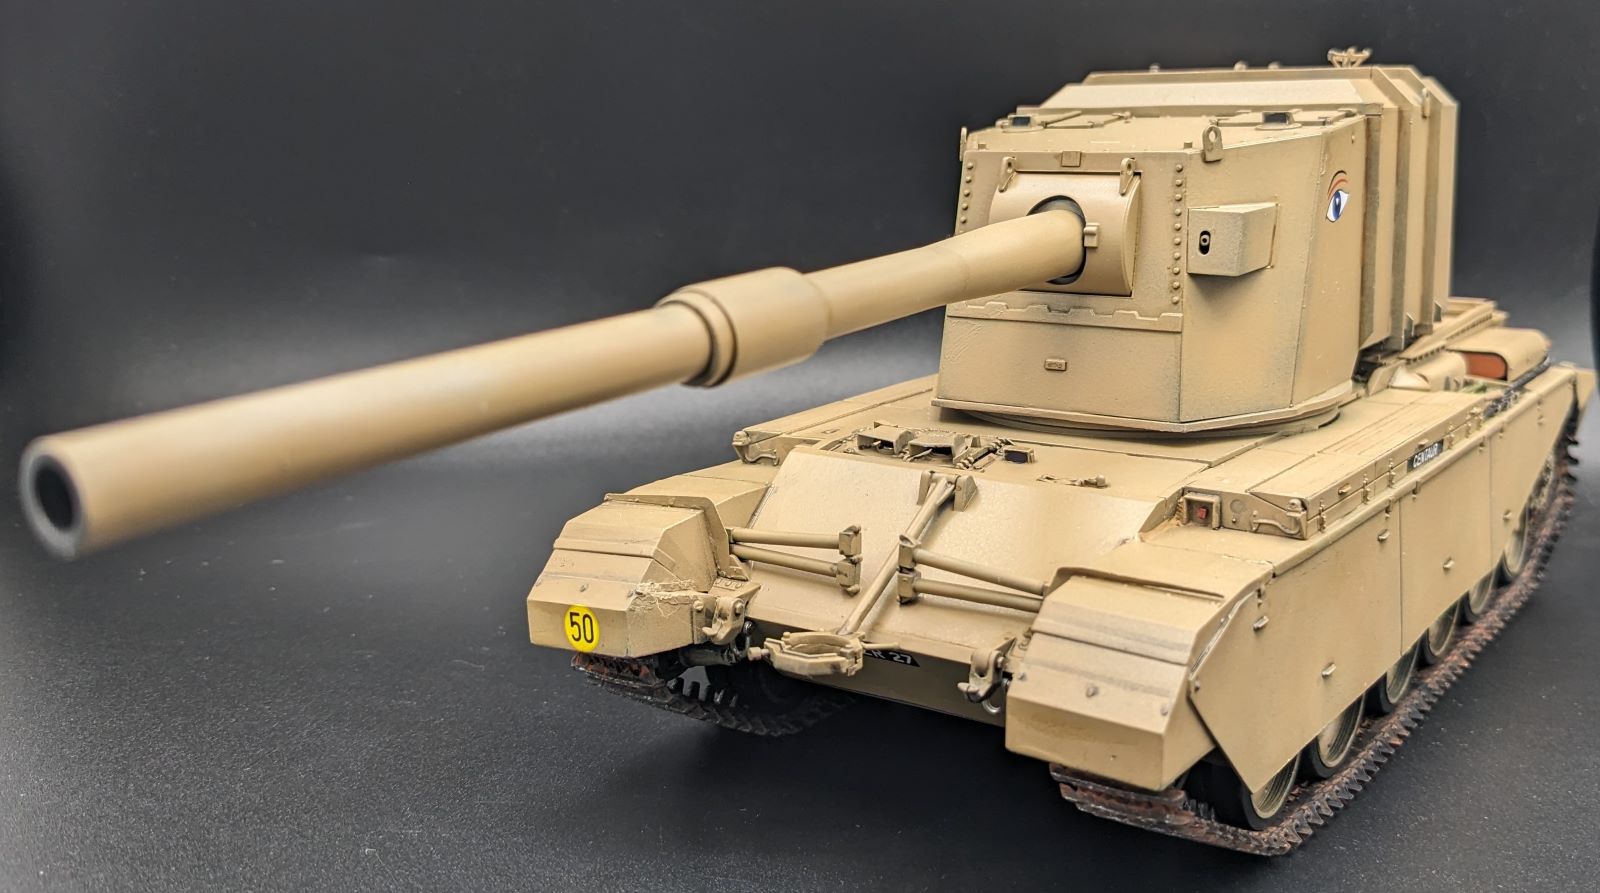
There are four marking options for this model, but as the only color photograph I could find was an overall green version of the Bovington Tank Museum’s gate guardian (on a newer Mark 12 Centurion hull). For this model, the first (A) scheme was chosen – khaki brown with the iconic Royal Tank Regiment Chinese Eyes.
I had a lot of fun building this rare gem from AFV Club. It is a lesser-known British Cold War proof of concept tank destroyer, that builds into a great model with lots of detail. While this is not a kit for beginners with its small parts, lack of locating tabs on a few parts, and sometimes unclear instructions noted above, it does build into a beautifully large and impressive model. I look forward to seeing what more talented modelers can do with this kit.
Profuse thanks to AFV Club and IPMS/USA for providing the review sample.

Comments
FV4005, 1/35 AFV club
Many thanks for this, Andy, especially the work you have put into clarifying the instructions. I have recently bought this kit, and hope to be building it at some time in the next few months, so your notes will be very useful. I went to an event last year called "Tankfest", at the Tank Museum in Bovington, here in the UK, and saw this incredible vehicle, newly restored, in action, driving around the display arena. It is absolutely enormous! I hope my model, when complete, will be able to give an impression of the sheer presence of the real thing so, again, thank you for taking the time and trouble to share your experience of the kit.
Very best wishes,
Ian.
Thanks
Thanks for the great story
IPMS USA
Add new comment
This site is protected by reCAPTCHA and the Google Privacy Policy and Terms of Service apply.
Similar Reviews