
The Blue Knight of Milan
In the Box and Molding Quality
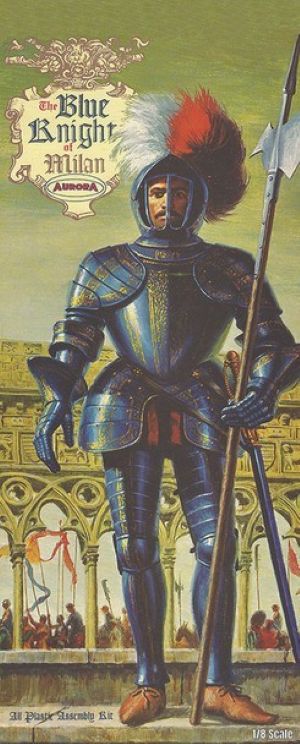
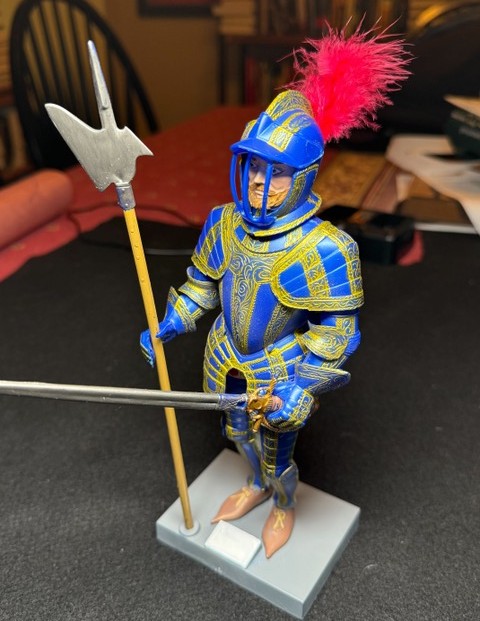
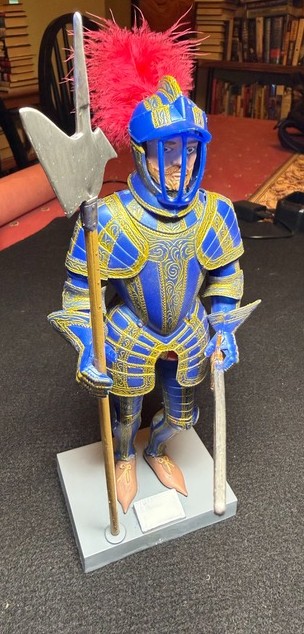
Atlantis Models has re-released the classic Aurora 1:8 scale Blue Knight of Milan figure kit, which originally appeared in 1958. As the current owner of the Aurora trademark, Atlantis included the original box art and period instructions. The kit comprises approximately 35 parts molded in a metallic blue styrene, spread across several sprues, along with the traditional small red feather plume. The molding quality is generally good. Minor flash was present, primarily along the parting lines, but was easily removed during part preparation. Ejector pin marks were either absent or located in areas that would be hidden after assembly.
The figure is in a characteristic, upright stance, typical of the original Aurora line. Details on the armor and the figure's head are crisp. The halberd (combined battleaxe and spear) and sword are both molded as single pieces. Many of the armor decorations were actually elaborately painted, and in some instances gilded (gold or other metal inlay). While not intended for battle, such decorative armor was not unknown in battles of the Dark Ages. The other original Aurora figures in this series include the Silver Knight of Augsburg, the Black Knight of Nurnberg, the Red Knight of Vienna, and the Gold Knight of Nice (mounted). All kits in this series were based on artifacts in the Wallace Collection in London.
Assembly and Fit
The build sequence, as outlined in the single, exploded-assembly diagram on the back of the instruction sheet, is clear and sufficient. The kit assembly is straightforward, and the parts generally fit well, especially considering the age of the molds. The main figure components (torso halves and limbs) came together with minimal gaps; however, modelers should anticipate the need to fill several exposed seams, particularly along the arms. The kit's design effectively uses interior seams, minimizing the amount of filling and sanding required. Testors Model Master Liquid Cement was used for assembly.
Notes Regarding Assembly
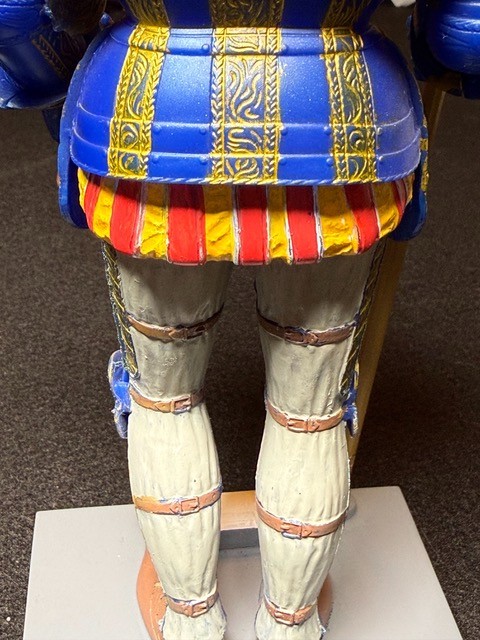
The lower body, including the legs and pantaloons, were assembled first and mounted to the lightweight rectangular display base, which provides modest stability. The base was painted with Krylon Light Grey Primer. I am considering filling it with weights to improve the stability of this tall, lightweight, and top-heavy figure.
I attempted to lightly sand the small rectangular raised section with the title “MILAN 1520”. This nearly worked by taking advantage of the letters in raised relief, but the grey primer here wasn’t uniform and I botched it. I attempted to create dark blue letters against the grey background, but the relief was too small, and some letters were soon obliterated. It almost worked, but it meant that I had damaged all the lettering on the plaque, so I left it blank white for now.
The upper torso and head/helmet were assembled separately. Other online reviews suggested fitting the head loosely inside the helmet assembly before mounting this entire sub-assembly to the body.
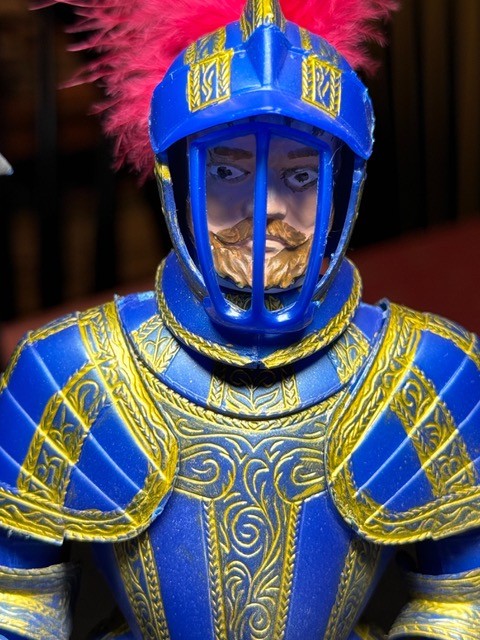
The helmet consists of two halves, a visor, and a grill/face guard. Besides the two main helmet halves, none of these joining seams are keyed or positively located. This approach, assembling the head and helmet prior to joining the body, simplifies the often-fiddly process of fitting the helmet over an already-attached head. The grill/face guard was attached last, after all the other sub-assemblies were joined into the final assembly.
The arms, each assembled from two halves, have offset keying features where they attach to the body and the hands. Modelers should ensure these features are correctly aligned to preserve the intended orientation.
Painting and Finishing
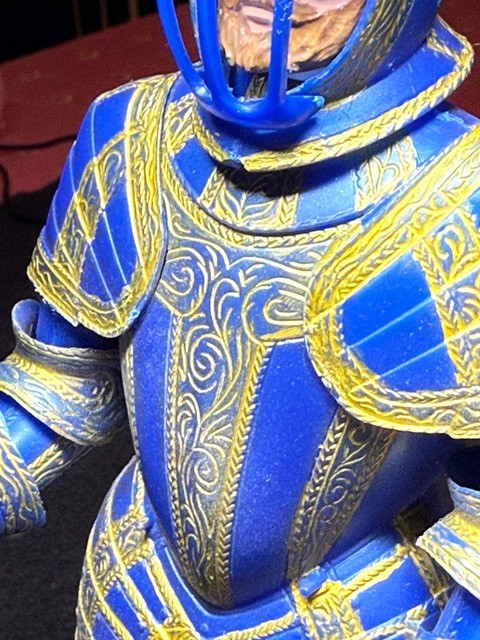
The unique feature of this kit is the subtle metallic blue styrene used for the main armor plates. I chose to capitalize on this feature by only painting the gold inlay details and leaving the armor panels unpainted. Applying an opaque or heavily metallic blue finish would negate the unique inherent color and luster of the plastic. A clear coat was applied to the finished model.
Detail painting was carried out using various AK Interactive acrylic paint markers (Playmarkers and Real Color Markers) for precision and control:
| Component | AK Interactive Product & Color |
|---|---|
| Gold Inlay Bands | Playmarker Gold (AKM031) |
| Lance/Sword Blade | Playmarker Gunmetal (AKM001) |
| Sword Hilt | Playmarker Bronze (AKM032) |
| Halberd Shaft | Playmarker Wood (AKM022) |
| Pantaloons | Playmarker Red (AKM018) & Yellow (AKM016) |
| Face | Playmarker White (AKM003) base, Pink Skin (AKM010) |
| Beard/Hair | Playmarker Leather (AKM023) |
| Leg Armor Straps | Real Color Marker Brown (RCM007) |
| Shoelaces | Real Color Marker Buff (RCM008) |
In-Depth Technique: Gold Inlay (Gilding) Simulation
The primary challenge in finishing this kit was simulating the gilded (gold inlay) details on the armor. The new AK Interactive Playmarker Gold, a pump-style acrylic marker, was used to apply paint over the recessed patterns. Due to the generous paint flow of these markers, a "wiping" technique was used to simulate an embossed or inlaid effect.
The process involved applying the gold paint and then immediately wiping the excess away before the acrylic paint dried. The best results were achieved by wiping along the length of the banded patterns, which prevented smudging onto the adjacent bare blue plastic. It is difficult to avoid wiping paint from bare areas where it is not needed, while retaining the paint in the recessed pattern where it is needed.
The wiping tool must not be reused, lest the wet paint removed will just ruin another area meant to be bare. While numerous Q-tips were used, I found my bare finger to be the most effective wiping tool. You have ten of them, and it’s hard to run out of fresh sections of fingertips that are free of paint. Wiping is most effective on bare plastic, simplifying the clean-up of any smudges. I used dry Q-tips, toothpicks, and fingernails to remove paint from bare plastic where it didn’t belong. Wiping wet paint is a quick, time-saving painting technique where embedded details need to be highlighted and minor imperfections are deemed acceptable.
The newer AK Playmarkers use a filament type of brush tip that is engorged with paint when the pump at the rear of the pen is pushed. These Playmarkers are always considered wet, and when pumped, can and likely will drip paint, so it is important not to use these Playmarkers where dripping paint is a problem. Working over a drop cloth, disposable paper towel, or cardboard is recommended to avoid unwanted paint stains on carpets or work surfaces. In addition, care should be taken to rinse the tip in water before storage, and close attention paid to the alignment of the cap and pen to ensure the tip isn’t bent when you try recapping the pen.
Conclusion and Recommendation
The Atlantis re-issue of the Blue Knight of Milan is an enjoyable, straightforward build that provides a solid foundation for modeling from the original Aurora mold. The unique metallic blue styrene is a distinctive feature, but ultimately did not enhance the final model's appearance. The main challenge lies in the detail work, particularly the gold inlay, which was effectively handled using the AK Markers, and a quick wiping technique.
This kit is a highly recommended piece of modeling nostalgia for fans of classic Aurora kits and figure modelers seeking an iconic, large-scale figure that can be completed relatively fast. I would like to thank Atlantis Models for providing this kit for review and to IPMS/USA for the opportunity to perform this assessment.

Comments
Add new comment
This site is protected by reCAPTCHA and the Google Privacy Policy and Terms of Service apply.
Similar Reviews