
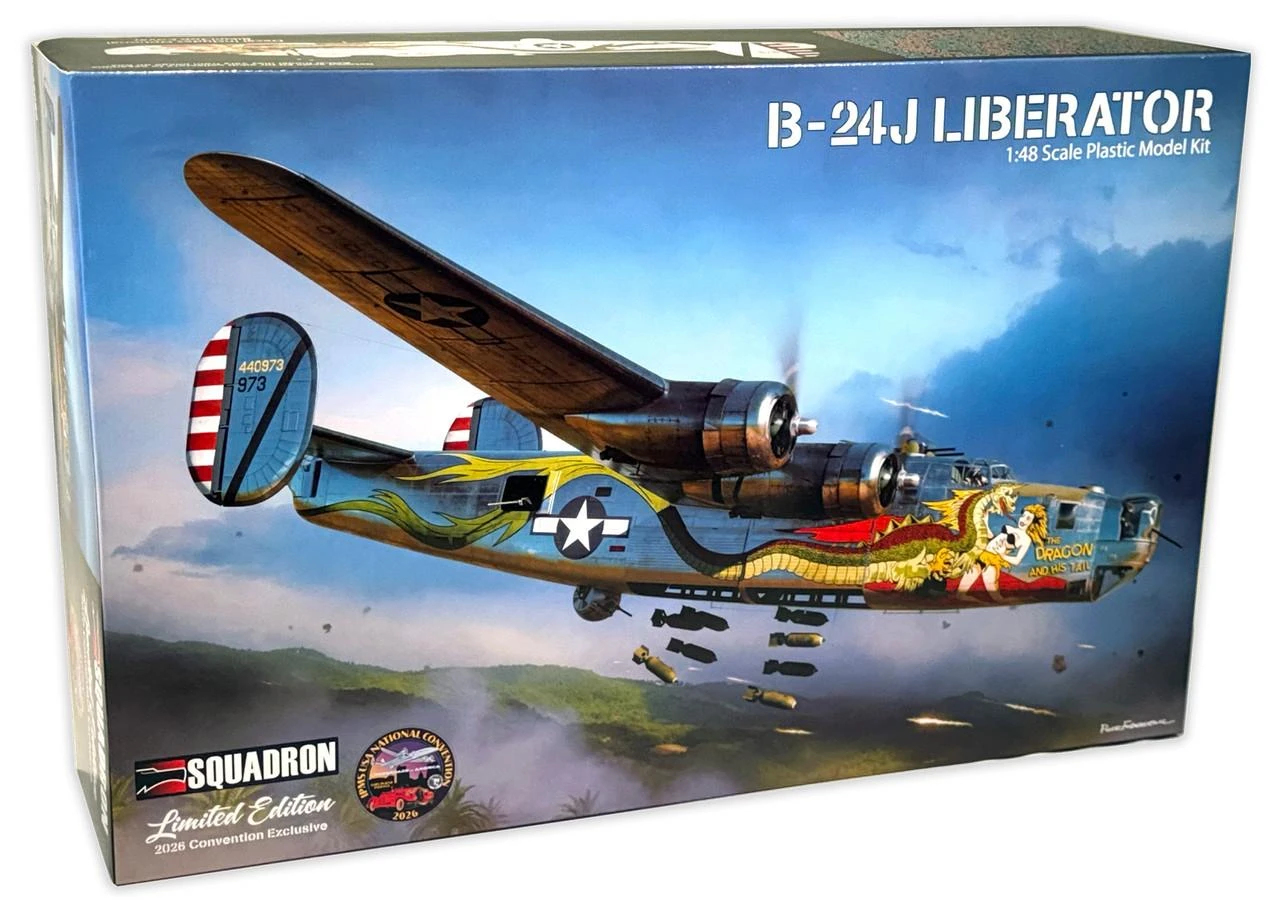
B-24J "Dragon and his Tail"
When the reviewer corps received Squadrons B-24J “Dragon and His Tail” kit, I said heck yeah, I’ll do it. By the way, I actually used my training and worked a bunch of sheet metal and other stuff on a B-24 over the years when I was the MX rep for a Museum; Specifically, the Willow run Ford-built “J” model Serial Number 44-48781that was, until recently, at Barksdale AFB and is now at Savannah. I also have Bert Kinsey and Rock Roszak’s B-24 Liberator collaboration with Detail and Scale sitting next to me as I write this.
Being an old guy, I have had occasion to build several Monogram 1/48 B-24’s over the years. The kit came out in my HS grad year of ’76, and I had a really enjoyable time with it. Shep Paine’s diorama folder was part of the deal, and until just last year when Squadron released a Cletrac in 3-d resin, the Monogram B-24 kit was the only place to find the tug. That was back when I didn’t know what a seam filler was or why to use it, etc., etc. Modeling seemed more fun back then, but I digress…
Has the new HobbyBoss Liberator surpassed the Monogram kit? Yep. I wanted to know how far, so this opportunity presented itself in the correct timeframe, as I had just pulled one out the stash Monogram kit in anticipation of one last Liberator.
Here are things I noticed when comparing and contrasting the old queen verses the newer princess:
HB Surface detail is very well done, not trench-like, and panels and rivet details are very fine and all delivered in engraved format. Not Eduard caliber, but I’m cool with that. Overall fit of the kit has been excellent, with only a few areas to address, Monogram was state of the art raised panel lines, (which I still don’t mind).
Most of the build time was consumed by interior detail, much of which was not readily visible in the end. No matter, it was fun; speaking of the turrets, the .50 caliber waist guns and all the turret guns are very nice out of the box with perforated cooling sleeves and detailed breeches. The turret guns all have sheet metal turret slot closures for each elevating slot and look very nice when finished and they fit well too! The entry doors for the front and back turrets are posable and are a first anywhere that I am aware of. Turret framing and detail for interiors are comprehensive and matched to the clear parts. The ammunition feed-chutes are to scale and flexible black vinyl. Painted steel color, they look great. I don’t know where the waist guns went in the shop floor area, so they aren’t installed. I try to be careful but things happen…
Interior detailing of the fuselage was extensive and comprehensive, including welcome O2 bottles and walkaround bottles, along with suit heater boxes and various other bits and bobs. The solid waste toilet is also included… Ammunition boxes and feed trays for the tail guns are also part of the kit. An aftermarket instrument panel is worth investing in, and if you have time and eyes/hands to do the work, adding all the throttle, mixture and prop pitch levers would be worthwhile. Same for seat harnesses for all positions requiring them…
Main gear wells are extremely detailed, no more making a bunch of sheet plastic replacements…The nose gear ceiling needs bracing in the open area between the ceiling and the flight deck, otherwise the risk of flexing is real with all the pressure on the single leg.
The bomb bay is well detailed, but the bombs are of a kind I am not familiar with so they were not used. They looked like a cross between parafrags and standard 500lb weapon fins… and the fuses were only multi-bladed versions for the aft booster well between the fins. I leave others in the BB-stacking business to figure them out…
Bomb doors have edge corrugation detail; very well done. Optionally closed doors are provided.
Construction areas requiring attention:
- With all the details and prep work, there are a lot of bulkheads and places where accurate location requires one to put everything in before assembling the fuselage halves. I found this difficult, and areas I would not bother with include adding some of the aft fuselage lower bulkheads which won’t be noticed anyway. Also, the attaching of the horizontal stabilizer did not require all the nubbins and bulkheads, just the front and sides worked fine when it came time to install them. I also had difficulty getting the lower fuselage around the bomb bay and forward nose sections to close up.
Recommendation: USE a metal nose gear. When I got the kit, I the SAC gear was out of stock, and Ross of SAC graciously provided me a set for the review build. SAC’s total duplication of all the kit parts including the main gear, when carefully cemented in place, does a fine job of holding up several full ounces of lead, BB’s, etc., required to keep this kit on the nose gear. (1+1/2 oz of lead sinkers in the navigator compartment, and a bunch of BB’s on both sides of the lower fuselage just in front of the bomb bay and behind the nose gear. (See the images for how I did it using masking tape to keep everything out of the upper cockpit and bomb bay, and several applications of superglue to make it work). Too Bad Terry Dean’s cast lead nose weights are not available anymore, they did a great job on the Monogram kit…
HB would have you install the lower ball turret assembly, then install the exterior sheet metal panel over it afterwards. They also omit installing an O-2 bottle, but since there were extras in the kit, I cemented one on the retracting arm for the turret. Fit was awkward and required putty for the exterior panel, so next time I’ll install the panel FIRST, take care of the seams, THEN install the lower retractable turret.
HobbyBoss addressed several previous Liberator model quirks on its new release.
- First, if you purchased and attempted to build the large scale HobbyBoss 1/32 Liberator, you might have noticed (but conveniently ignored) one major flaw (along with others, like what seems to be mandatory split gun turret clear plastic) , and that’s the wing thickness, and airfoil being too thin. I was fearful the kit would not address this …. fortunately, HobbyBoss seems to have addressed the airfoil and wing mounting on their 1/48 kits, The wing roots are accurate and tight-fitting with an excellent, functional large spar box through both sides of the Fuselage (don’t forget to install this during your build from Iinside the fuselage before you assemble the fuselage halves…, it will require surgery to fix if you neglect this step). Major points to the design team for fixing this.
- Three known problems with Monogram’s version included a too-flat canopy area, a bit of wonky incidence fit in the horizontal Stabilizer, and “enough to make you wince” fit issues with the engine cowlings. i.e. modeling skills required.
- Hobbyboss fixed all these areas up to a point. The clear parts for the cockpit are perfectly transparent with well-defined frames, correctly shaped, and look good from profile. The stabilizer has correct incidence, and the engine cowlings are exquisite in their fit. No putty! But the half-moon oil cooler intakes, although a three-piece cowl front is used to ensure some depth, are still not correct. My mentor, Gerry Asher, pointed out the fact, then directed me to the set of his Fox one company corrected engines and cowling (with cooling flaps open) for the Monogram B-24, which will direct my efforts in the future with other Liberator builds.
- Continuing the theme-engines: The HobbyBoss kit engines are weak looking. For those that want to , there are aftermarket options.
- Engine cylinder and gearbox dome facings on the Monogram kit were actually very well done for the time, given that you have a two-bank radial engine, and the kit came with appropriate detail to look convincing with just a basic wash and detail paint. HobbyBoss engines are not an improvement, even if an attempt at ignition wiring was made using flat PE. (you get to guess how to use it, as well… no ignition plugs or holes are on the cylinders).
- The pushrods are too fat and clunky, and overall replacements from the usual vendors are a must. My mentor in this would be Gerry Asher of Fox 1 productions; he did a correction for the Monogram engine, which totally addressed the poor fit on the cowling sides, along with the new, deeper and correctly lengthened “smiley faces”. Open cowl flaps with in ternal detail, too…Having invested in them a while back I pulled them out of the kit box and, sure ‘nuff’,they are correct. Dangit. I invested in a set of Reskit cowls (closed) and props (you get early tulip shape and late paddle-blade shape props as well),,, The cost almost drove me away, but hey… it’s a hobby where occasional fits of insanity are appropriate. I did not use these on this build due to time constraints.
- The kit propellers look to be a “git it done” effort, with soft bolt detail on the propeller hubs front and half castings, which on the actual item has two bolts per blade. The Hydraulic pitch dome is also a bit anemic.
Major flaw time on both Monogram and HB kits: the nose and tail gun turrets have a seam through the middle of a clear blister area on the real aircraft. There is not a lot of internal detail in the turrets for Monogram, either.
- This is where working on the actual aircraft came in handy; the curator of the museum had contracted an aircraft canopy company to manufacture clear parts for the open nose turret, and asked me to install the three- piece Plexiglas turret cover on over the open gun turret metal and frame, and the actual item is a three-piece vertical affair with the entire upper/front section molded as one part, with two side turret sections, all held in place by a bunch of screws between them on a clear Plexiglas frame glued to the mating surfaces. This should have been addressed with a kit of this size and the current age of molding technology. The interior details and .50 caliber guns are all marvelous and a definite improvement on the modern kit, but the clear parts are a letdown with the defensive armament. The solution is to make your own or join the crowd in buying a (as of last week) $30 per turret cast solution. It’s an appropriate cost because clear casting resin is pushing $140 for a two-quart set of quality two-part resin. It doesn’t have a long shelf life either, so economics dictate you better be casting a lot to use all that resin you just paid for, and it takes 2 days to hard-cure in a platinum Silicone mold due to the thin nature of the turret plexiglas. Vacform is a lower cost method, and I’m sacrificing one of my Koster sets for this build…
- I had mentioned this last line because I neglected to install the blistered, larger dome nose cheek windows from the inside, so I attempted to sand down the mounting frame and do a field mod. It looks ok but do it right next time. DAHT had pronounced blisters on the cheeks, the cockpit side sliding windows, and the engineer’s windows just under the top turret; I am not fighting that battle for now. The kit did not include them, so you are on your own to figure it out.
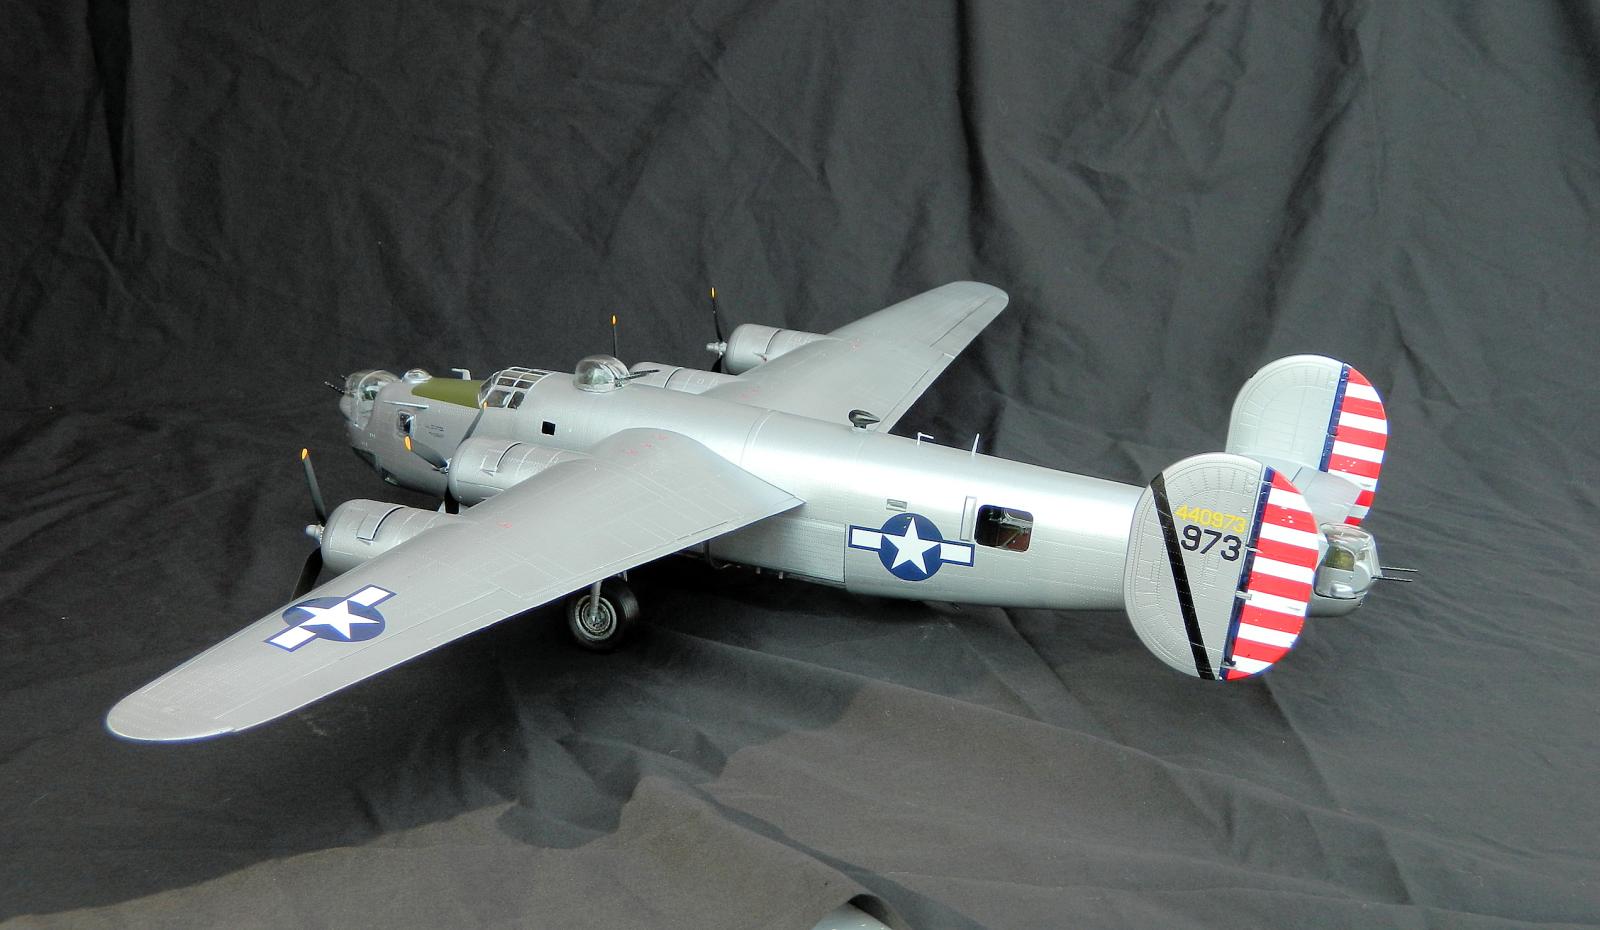
- Decals were well done. The Dragon is a massive, complicated decal, and I was able to (mostly) avoid tearing it up. I DID have to use both sets included in the kit to get a final result due to having put the dragon’s face and scantily-clad lady too far down and back, and the decal did not want to budge, even with plenty of fluid lubricant.
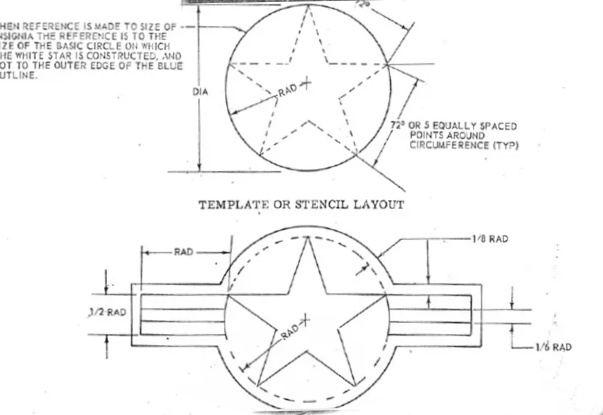
- Two other minor details: The Cockades (Stars and bars) are inaccurate, as the stars are printed extending all the way to the edge of the blue surround. This is a common error, and you need to acquire the correct version for your Dragon where the stars only go to the 1/8th Radius point where the bars or “wings” of the insignia are present. Even though this T.O. Drawing is a modern version with the red stripe, the original Cockades can be readily observed in most late WWII images. Also, the bars are too fat in the vertical plane.
- See in pitcures
Here are excerpts from the T.O. 1-1-4 I was mentioning…
I was able to use the red, white, and blue striped rudder decals over gloss white; without too much fuss. Lining them up is difficult, and if I were to do it again with more time, I’d paint them on for ease. I did this with the black diagonal stripe, as it was simple to prep the stripe with masking over the overall gloss black required for the base of the natural metal paint.
Speaking of that, most of the skin of the B-24 was constructed of the same hardness of duraluminum, and therefore the only real difference in panels was inconsequential, with the exception of the fabric-covered control surfaces. The multi-tone effect is more noticeable on later war designs (Think B-29) due to improvements in basic metallurgy.
- Historical note: If you pull up the plethora of images of this aircraft from the net, (one of the best is at Kingman, in 1948 right before the aircraft was smelted down), the observant will note two things: the lower bikini bottom is on the original, but here is NO top. One is provided in the kit for the sensitive among us, but the controversy where a commander’s spouse dictated putting an end to the scantily clad figures, occurred in Japan during the KOREAN war, not WWII.
I had to rush a bit to finish; using a Koster “high hat” top turret clear section to replace the Kit included Martin early turret: I also replaced the main gear wheels and tires with True Details resin items; they look a lot better with their tread. I had manufactured a sheet-metal mud cover for the nose gear wheel, which was the only kit-supplied rubber/vinyl tire and styrene hub, which actually worked pretty well excepting the missing tread (the kit tires have no tread and are too round when placed on the tarmac).
Result was a very nice B-24J.
Squadron, Thanks for re-boxing and providing this limited run item for the masses.
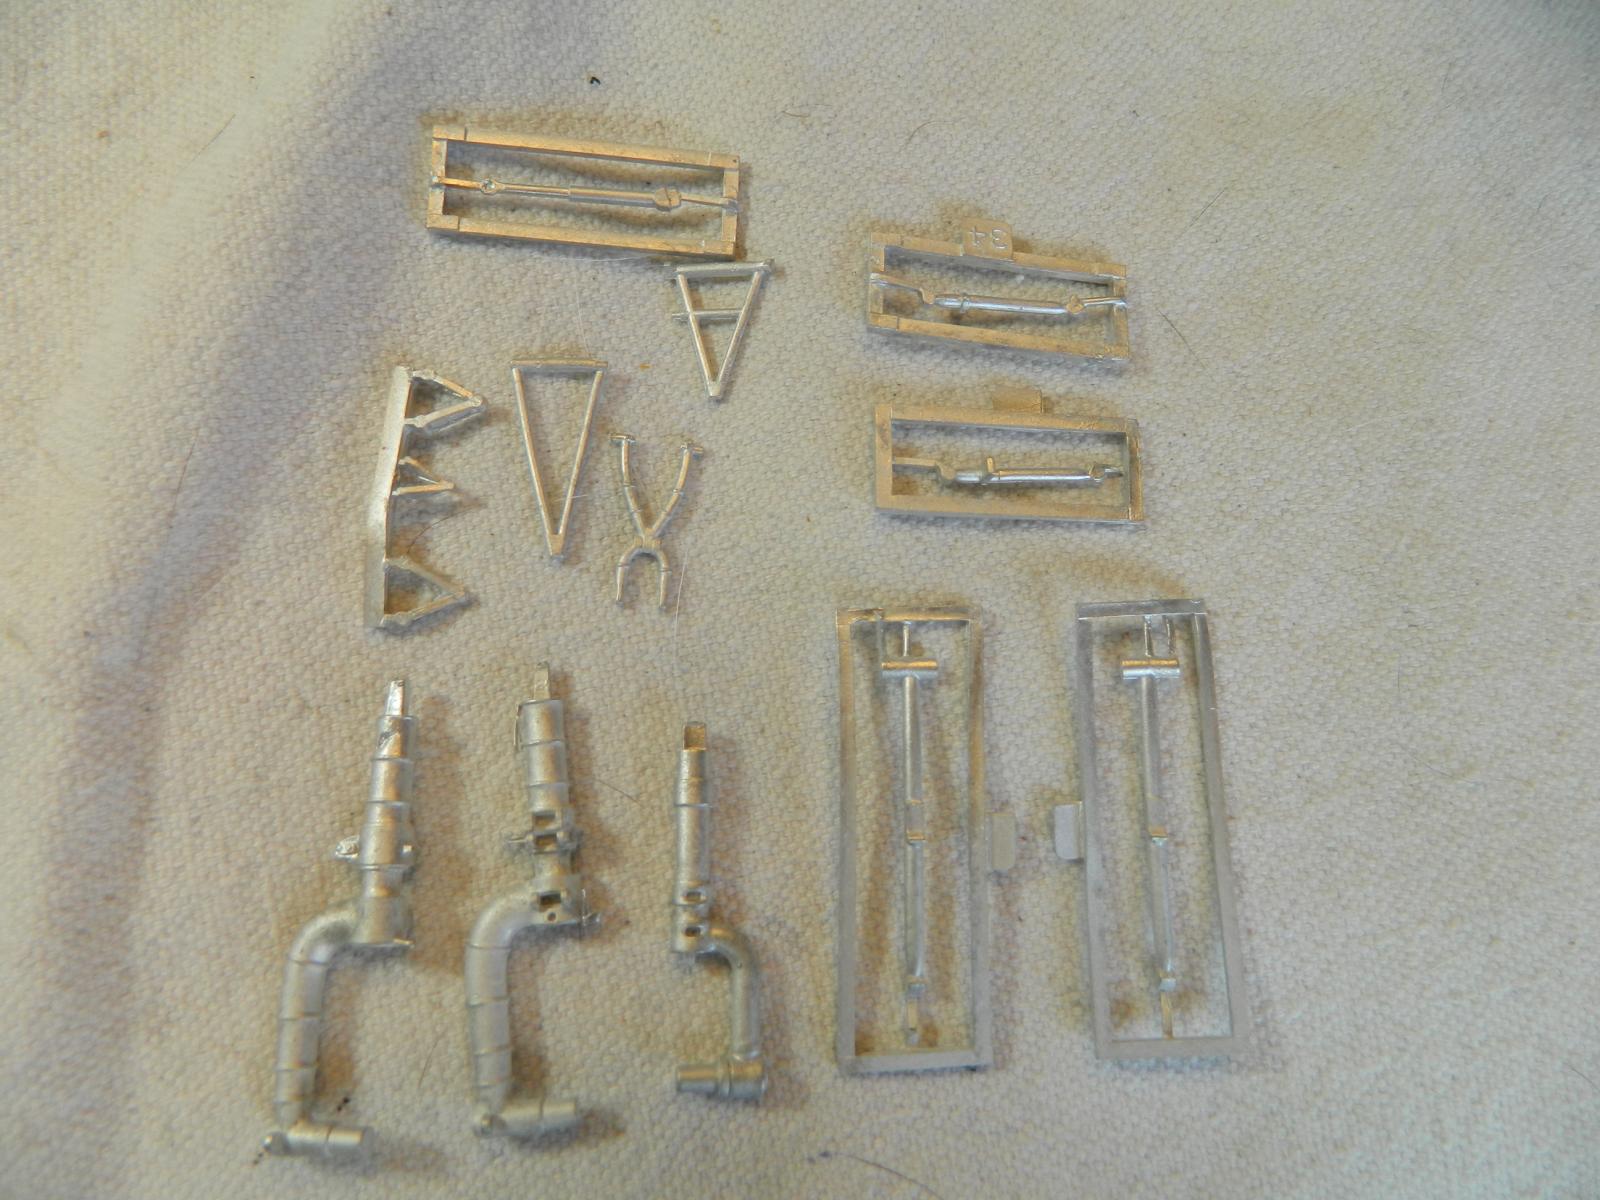
SAC Gear
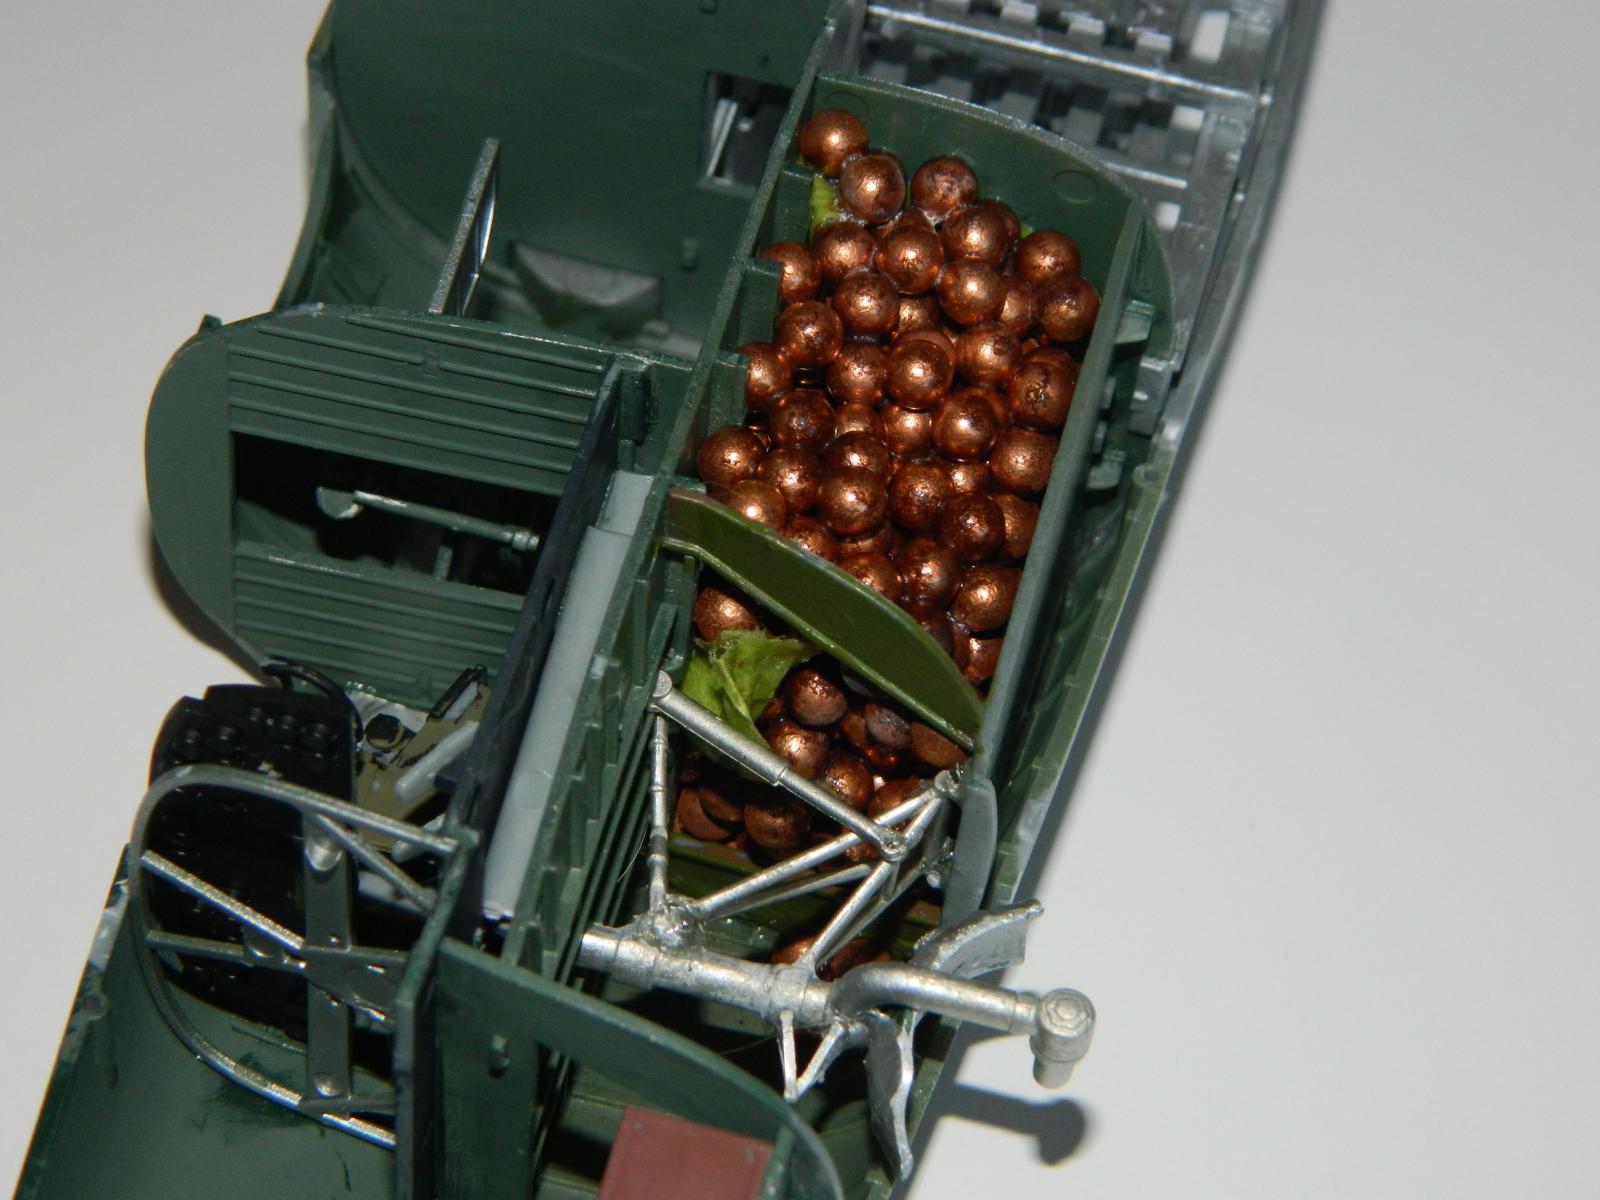
Lots of Nose Weight
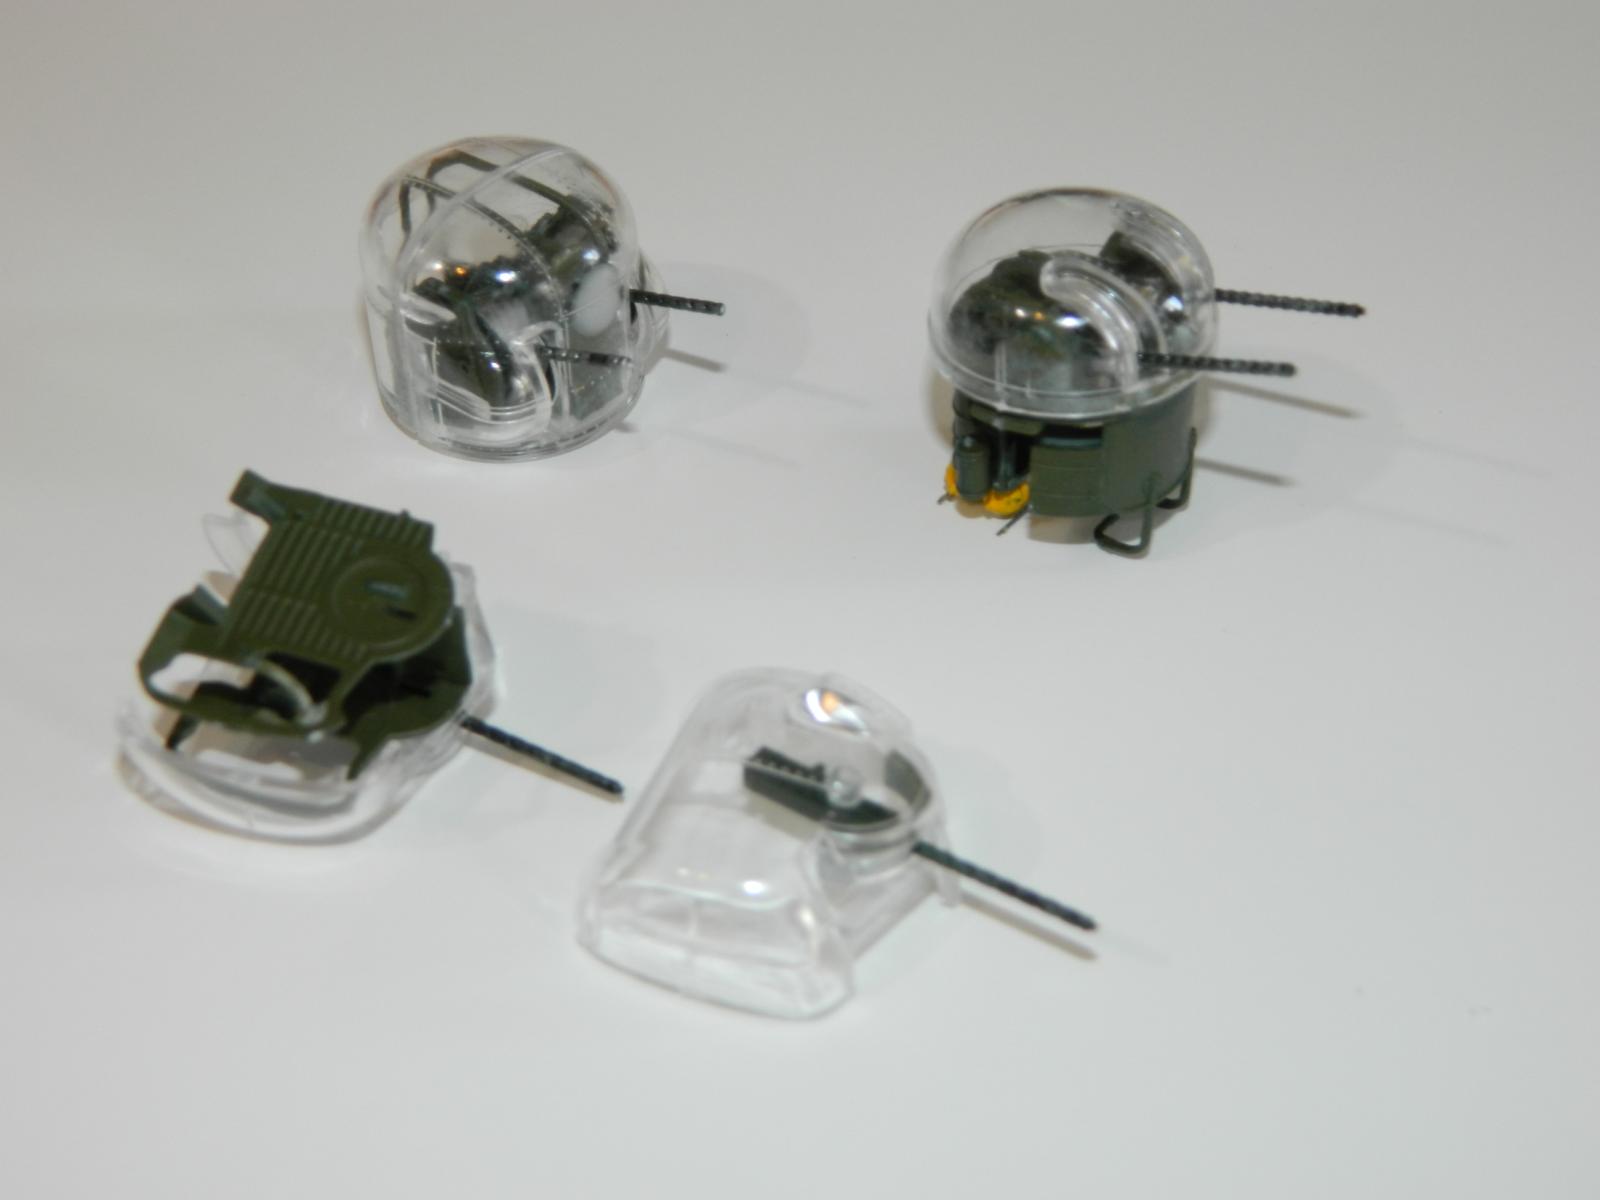
Turrrets with Detail
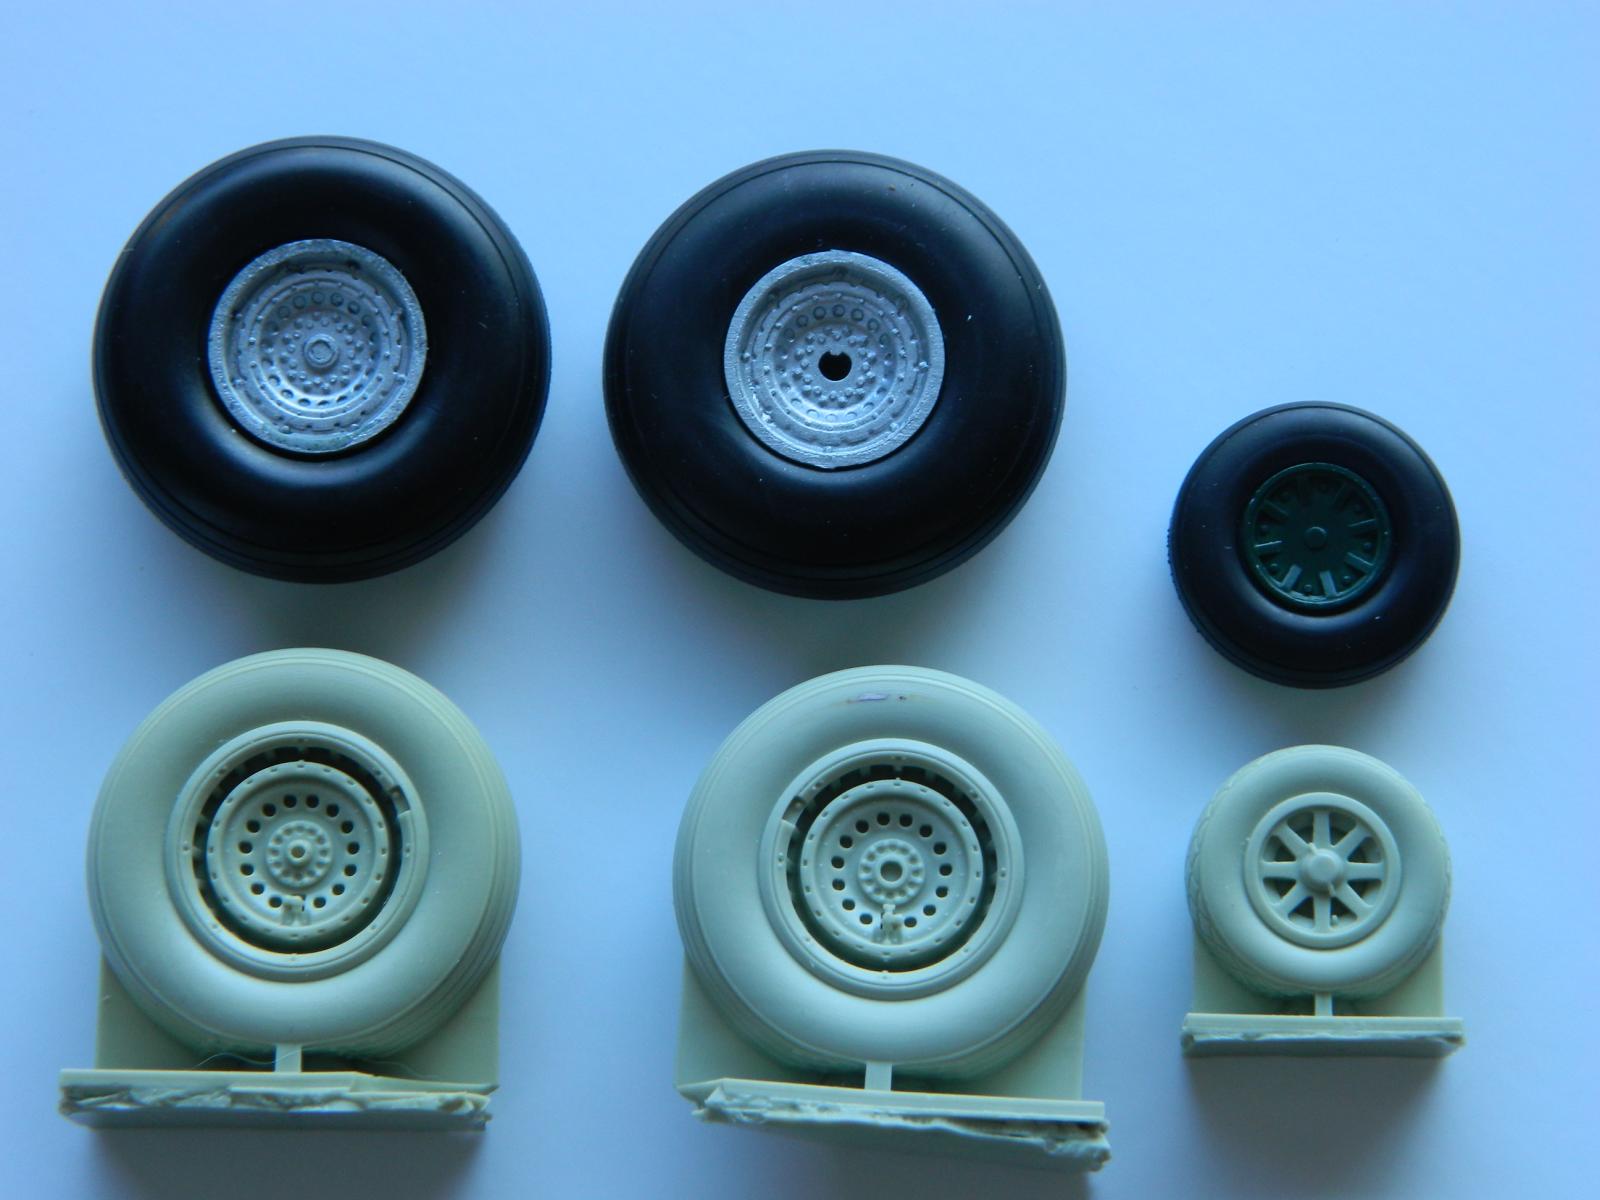
Kit Tires vs. Resin
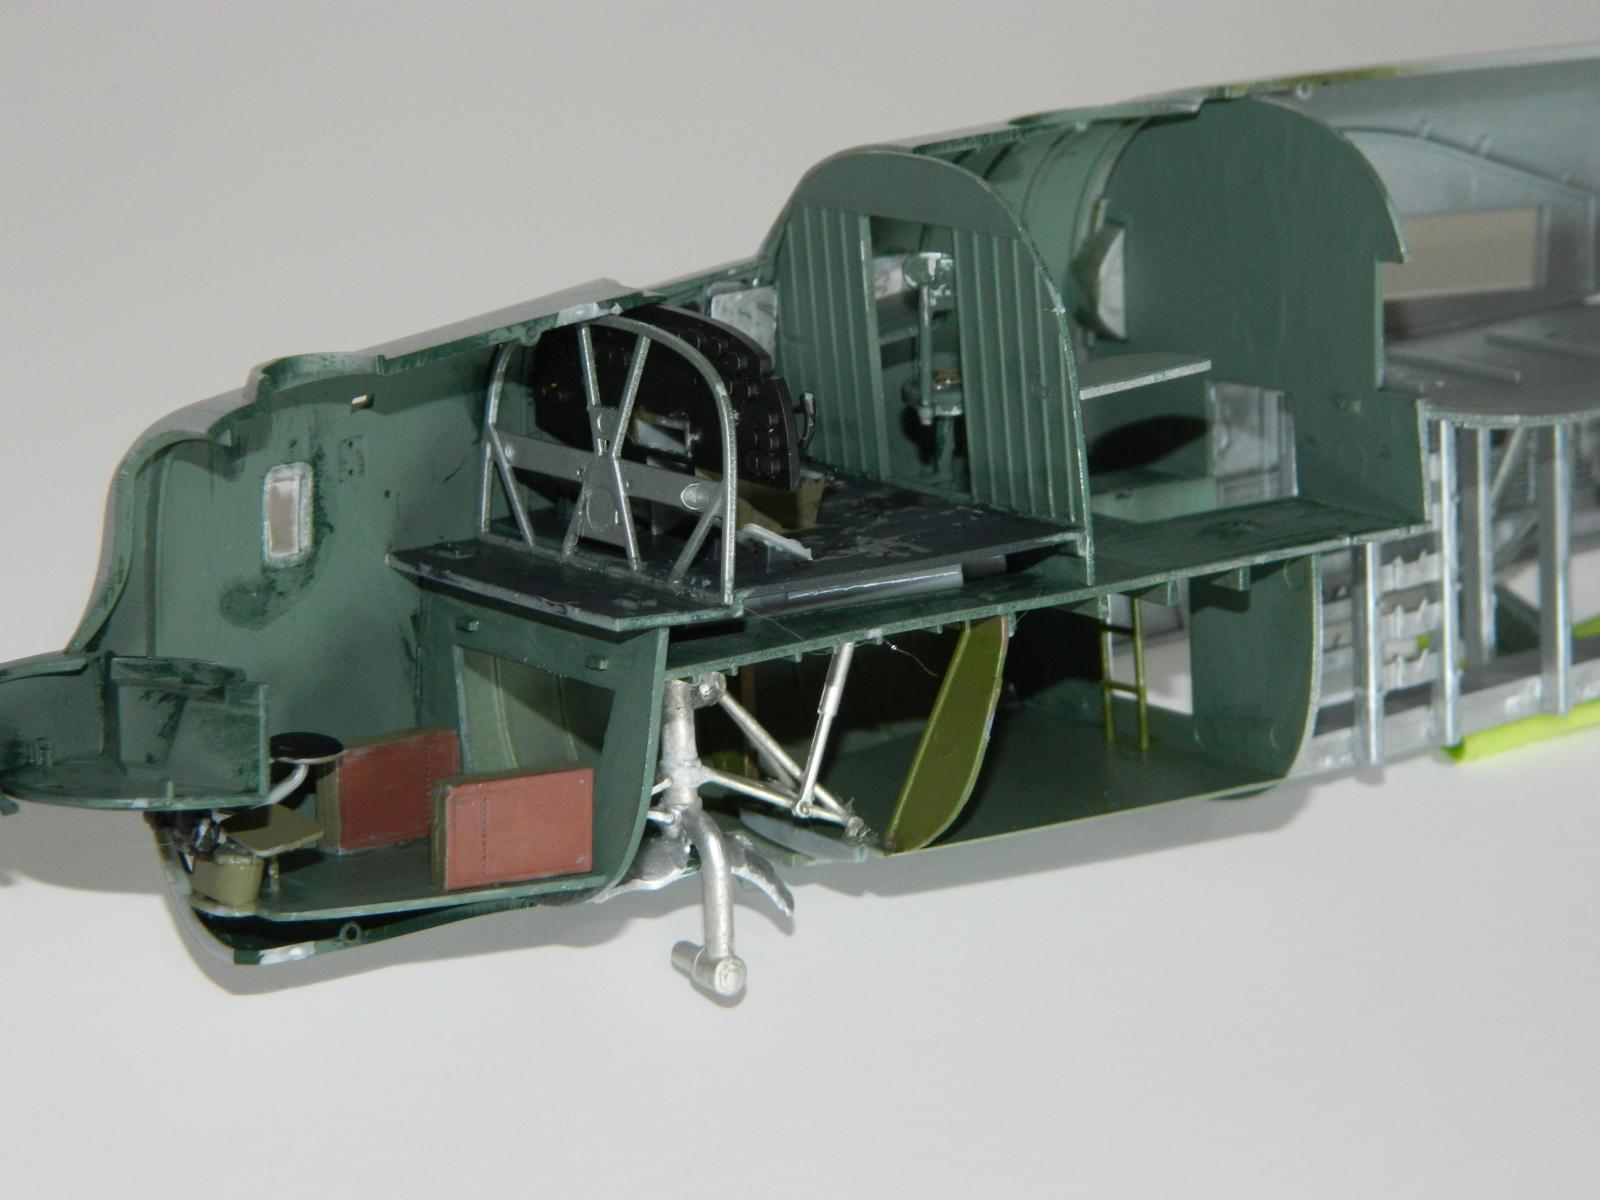
Nose Interior
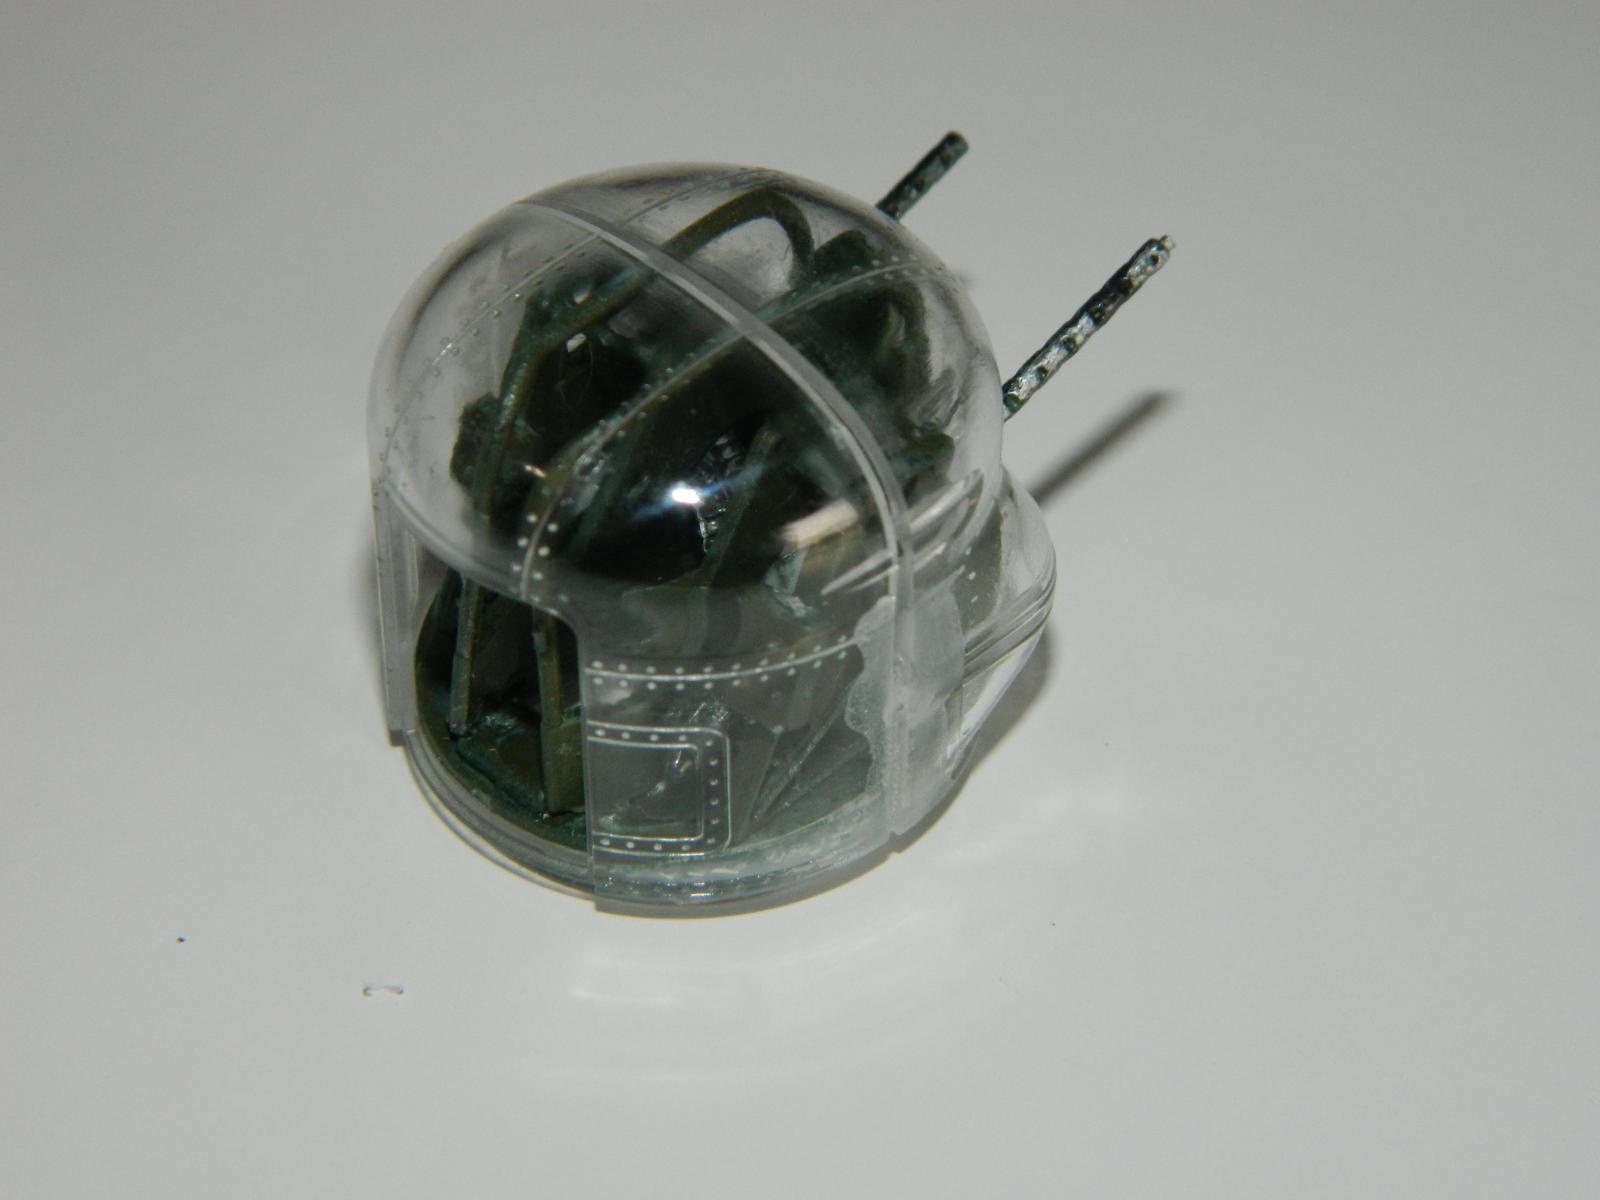
Nose Turret
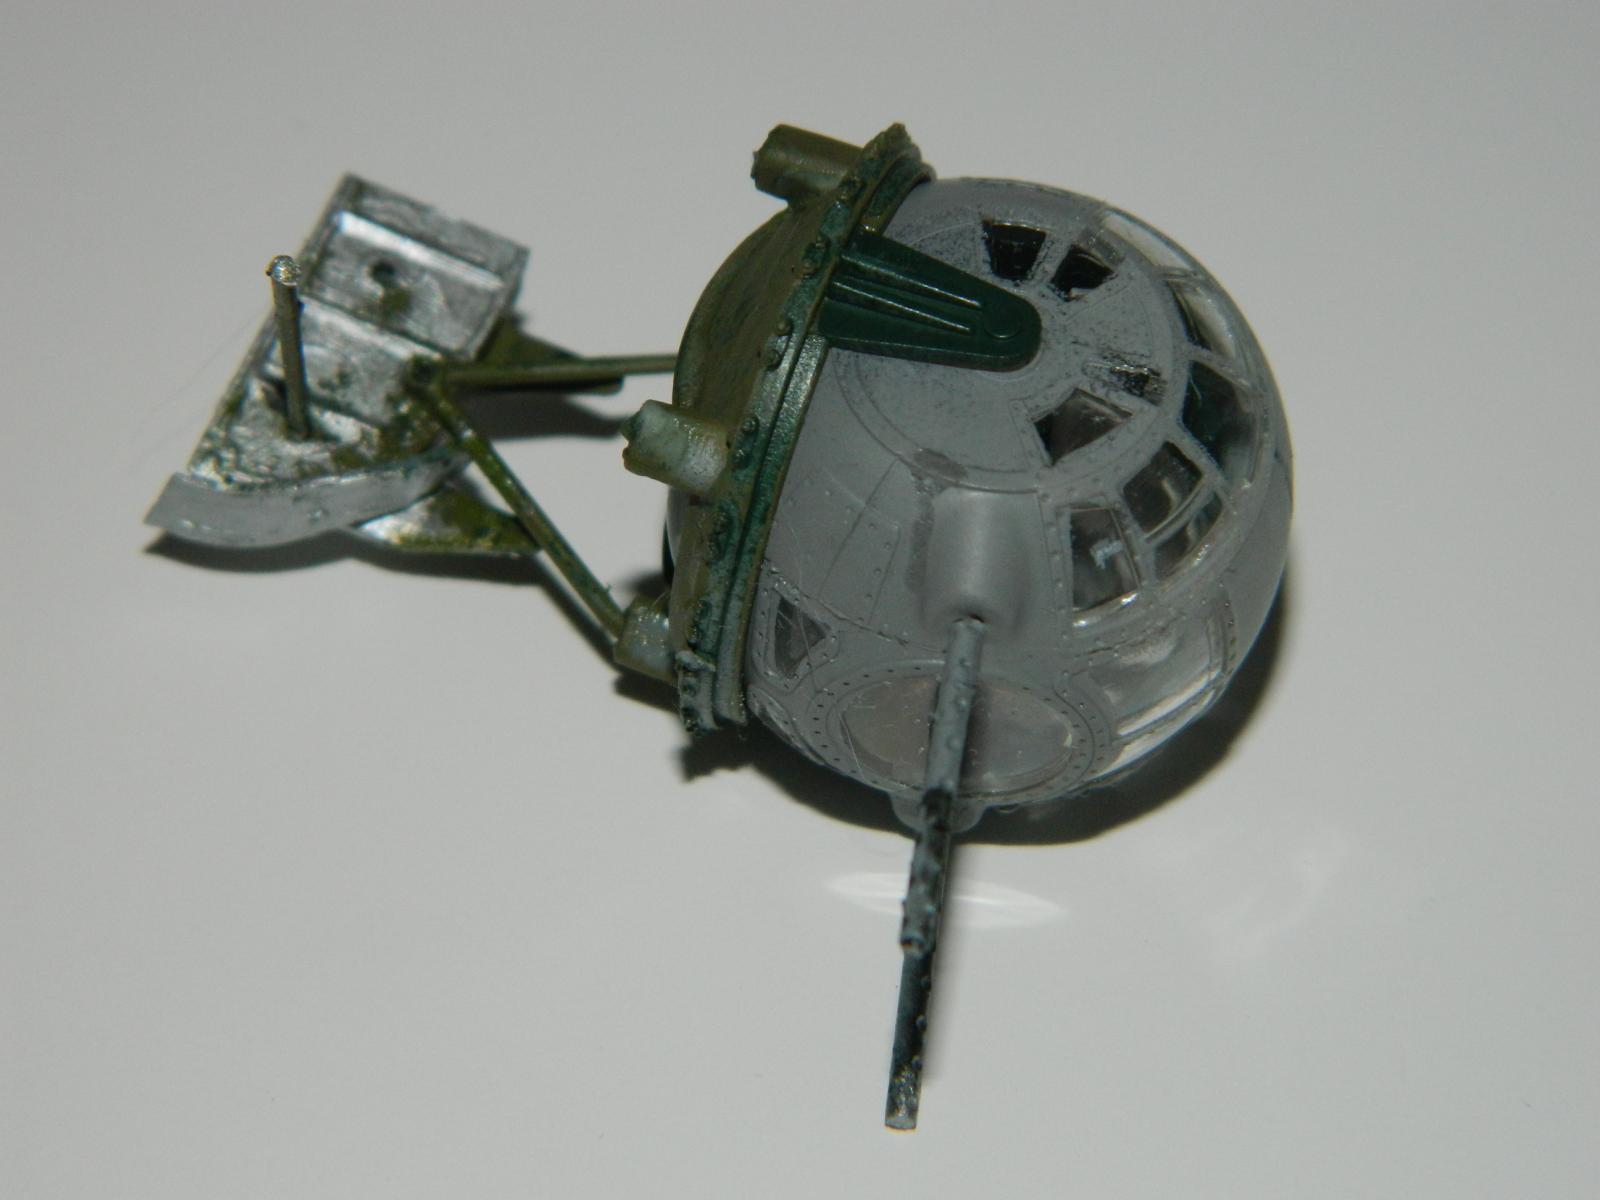
Belly Turret
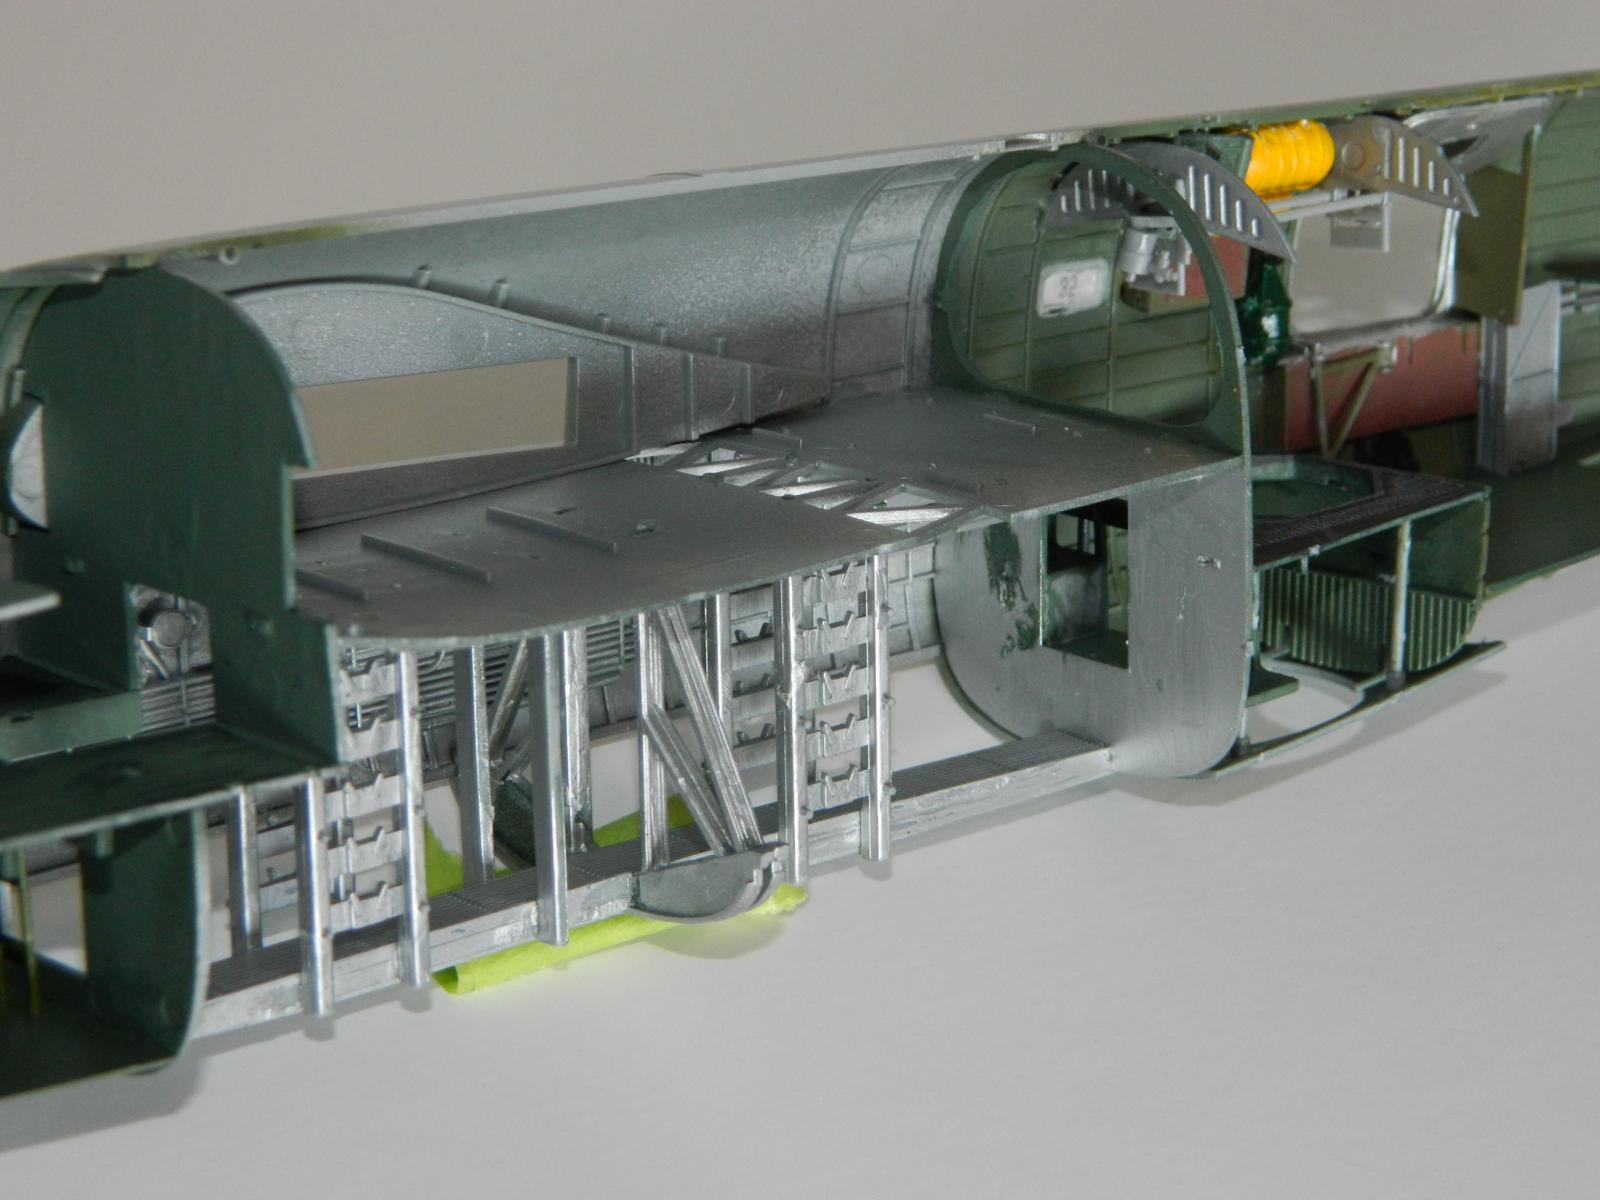
Bomb Bay and Right Rear Fuselage
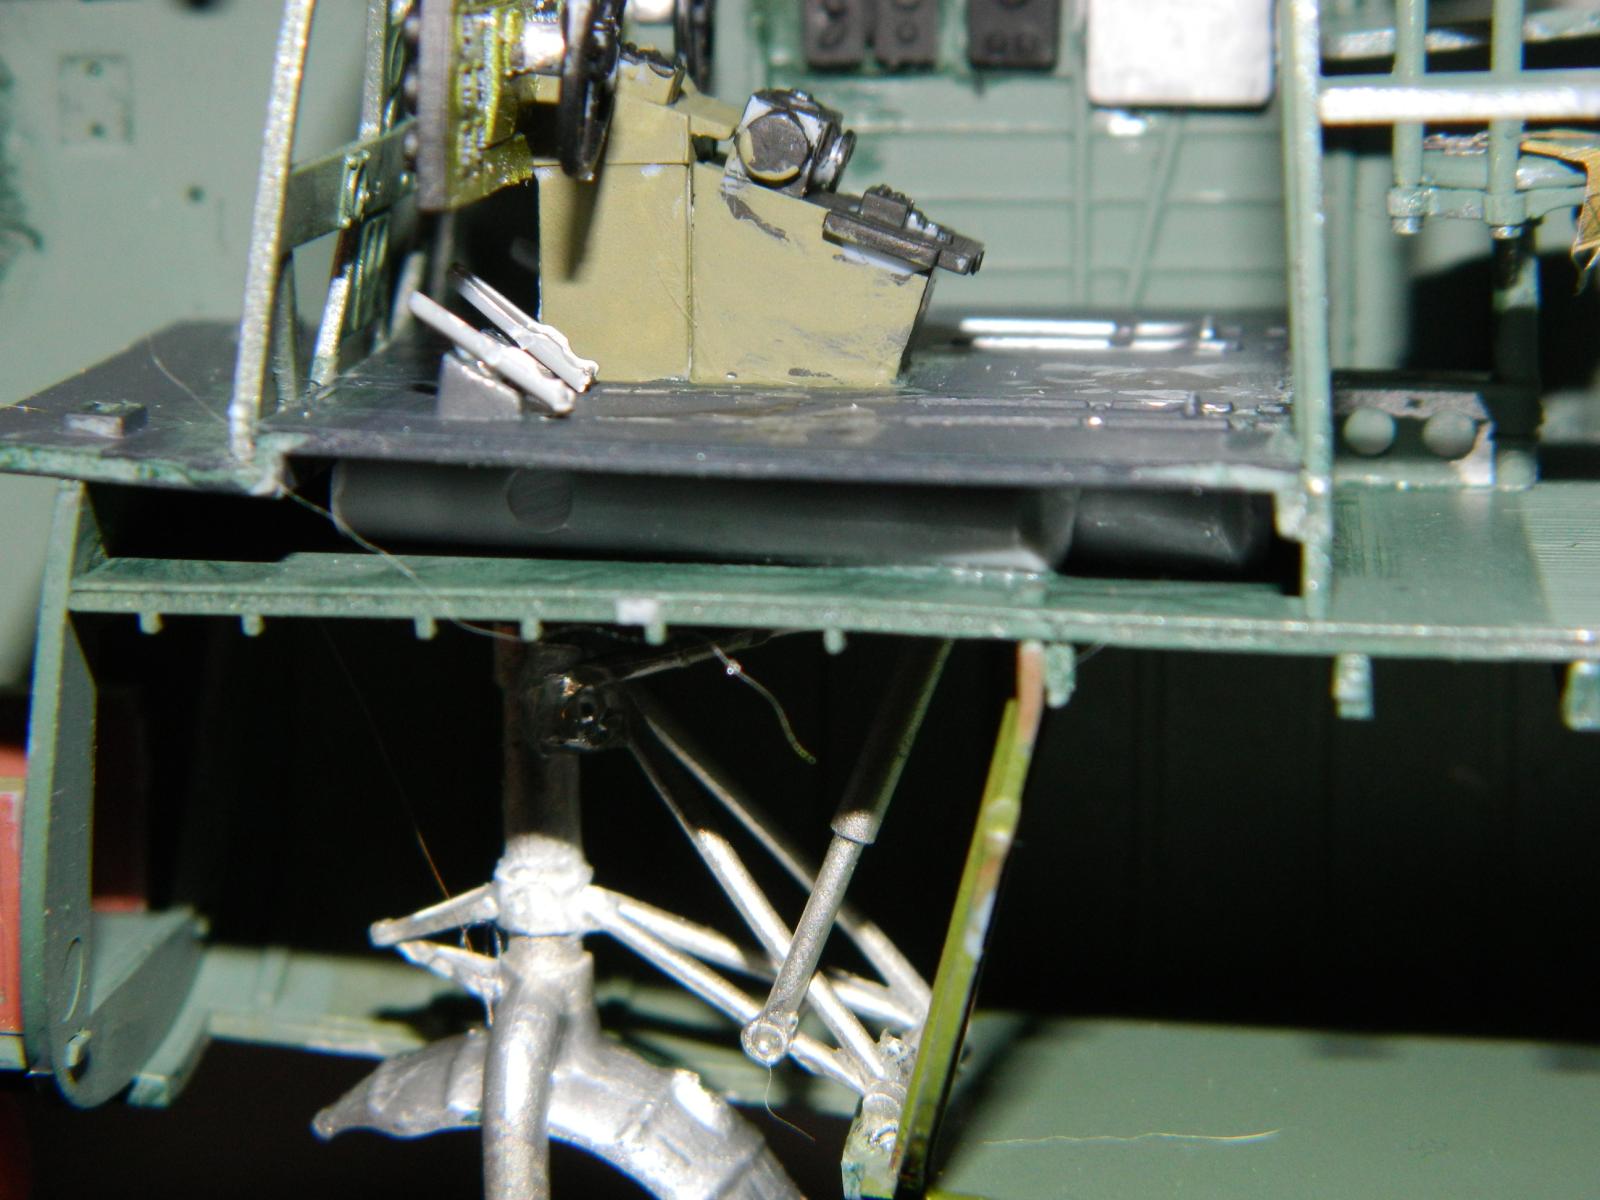
Nose Gear Bracing
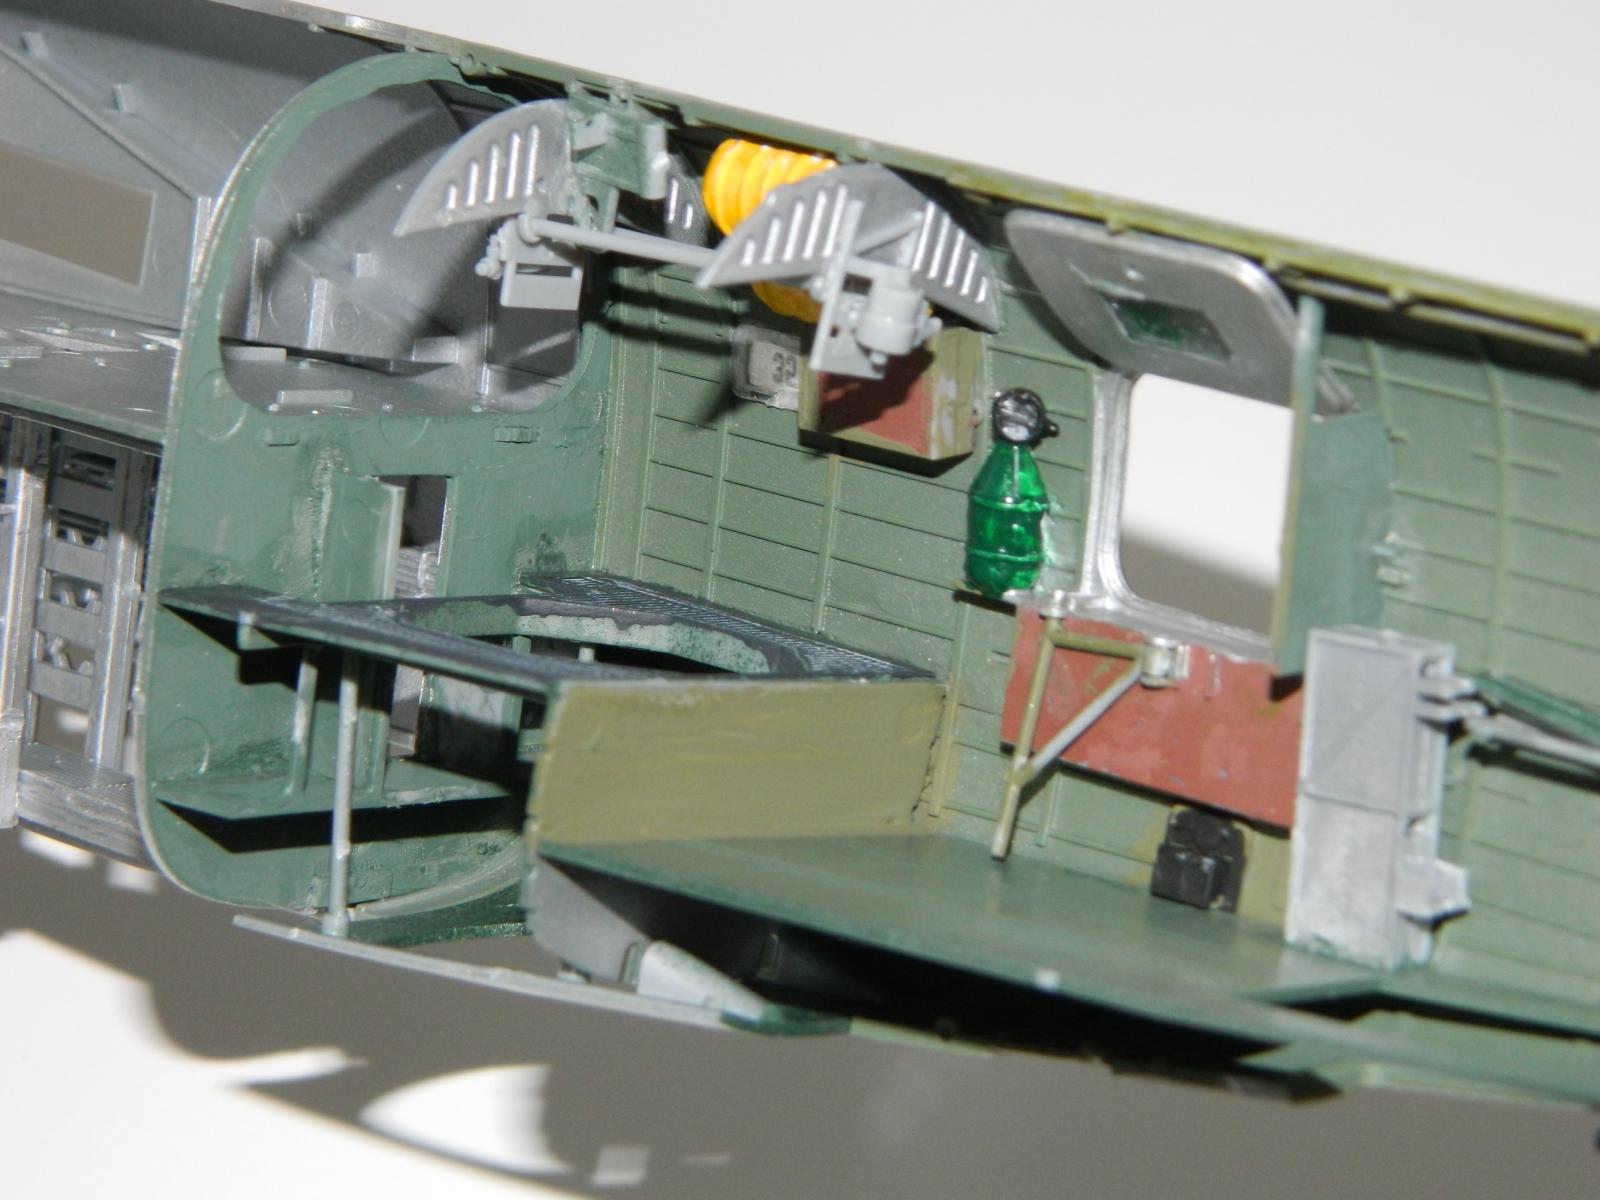
Center Fuselage
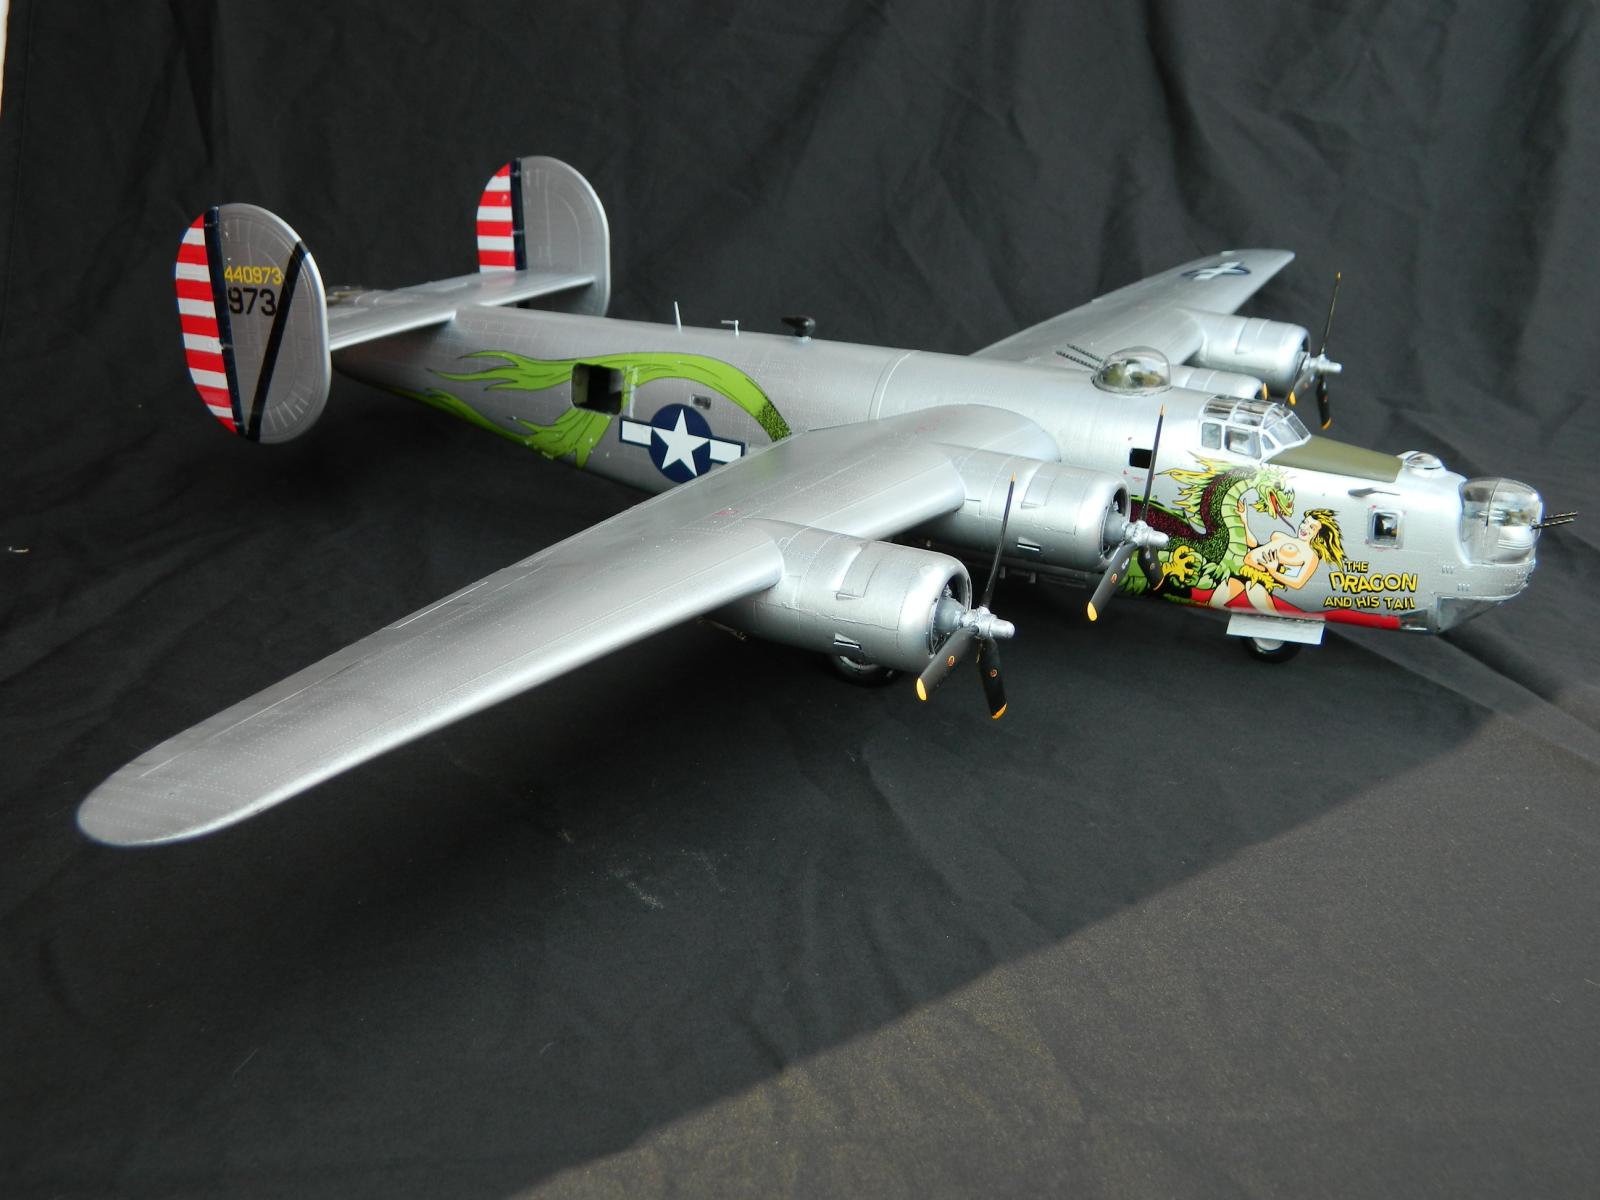
Finished
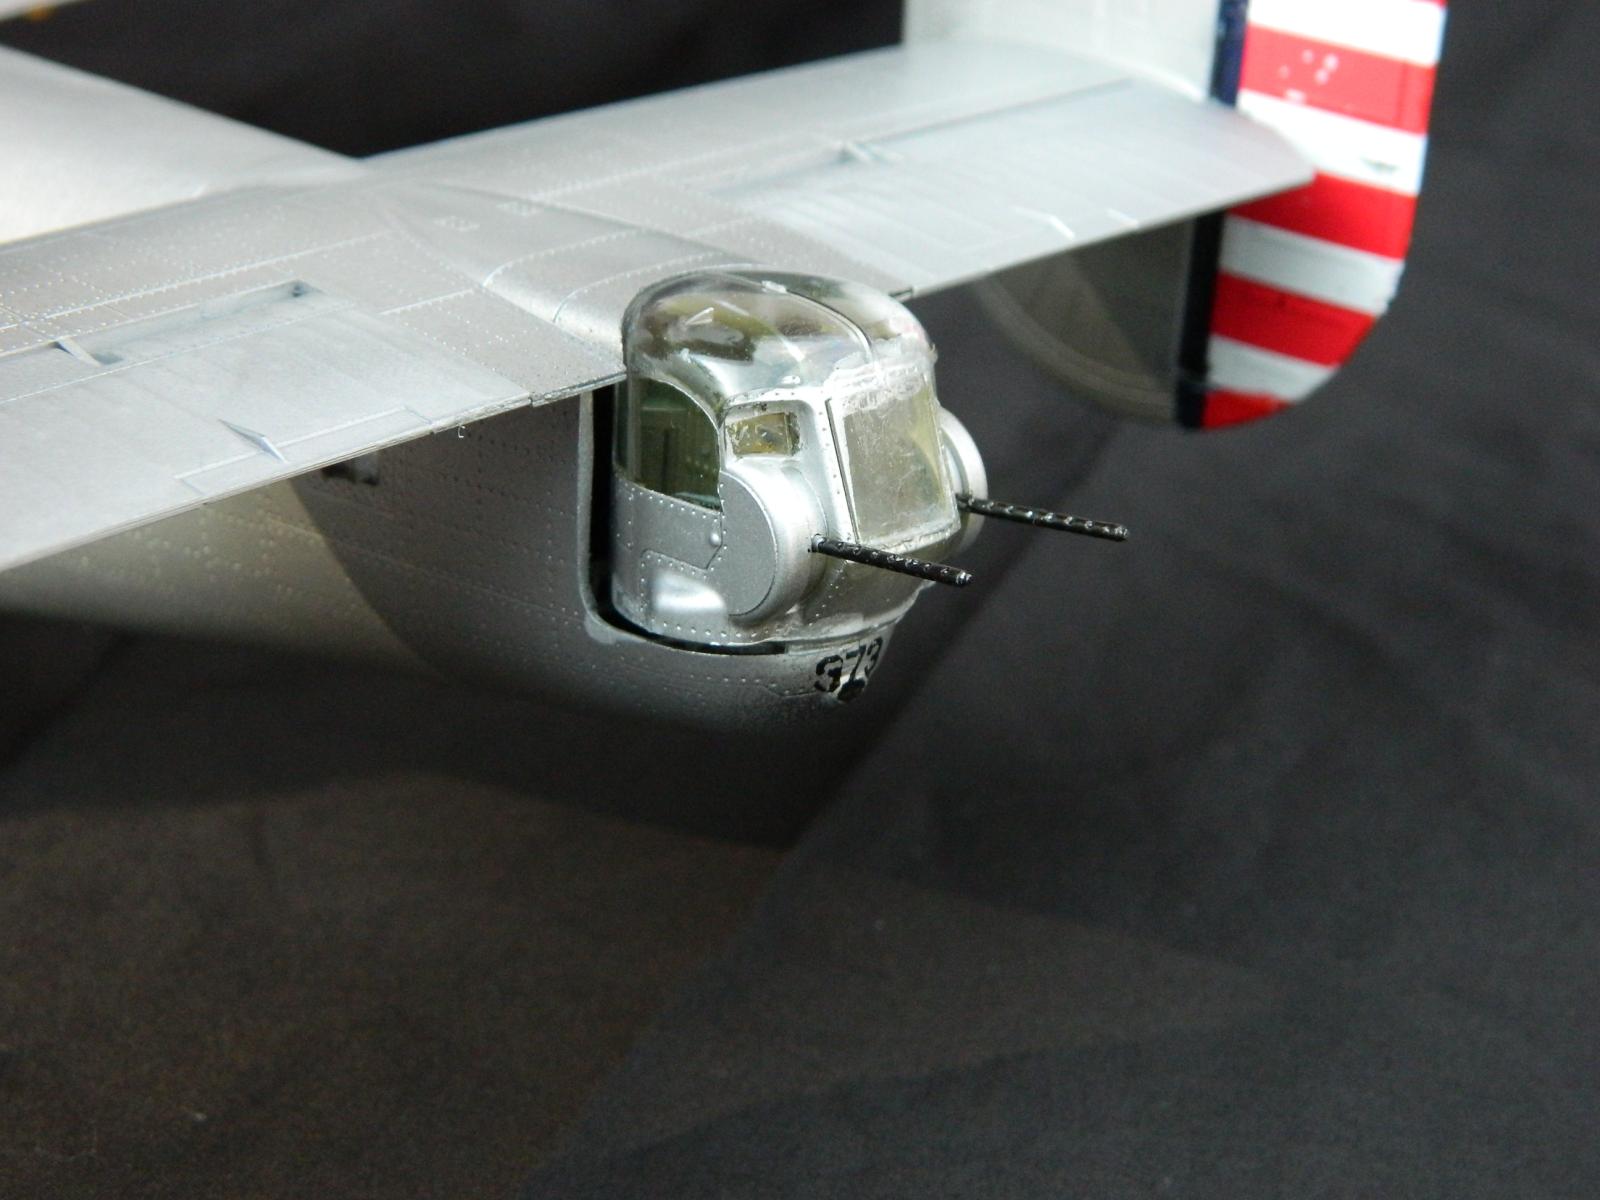
Finished- Tail Turret
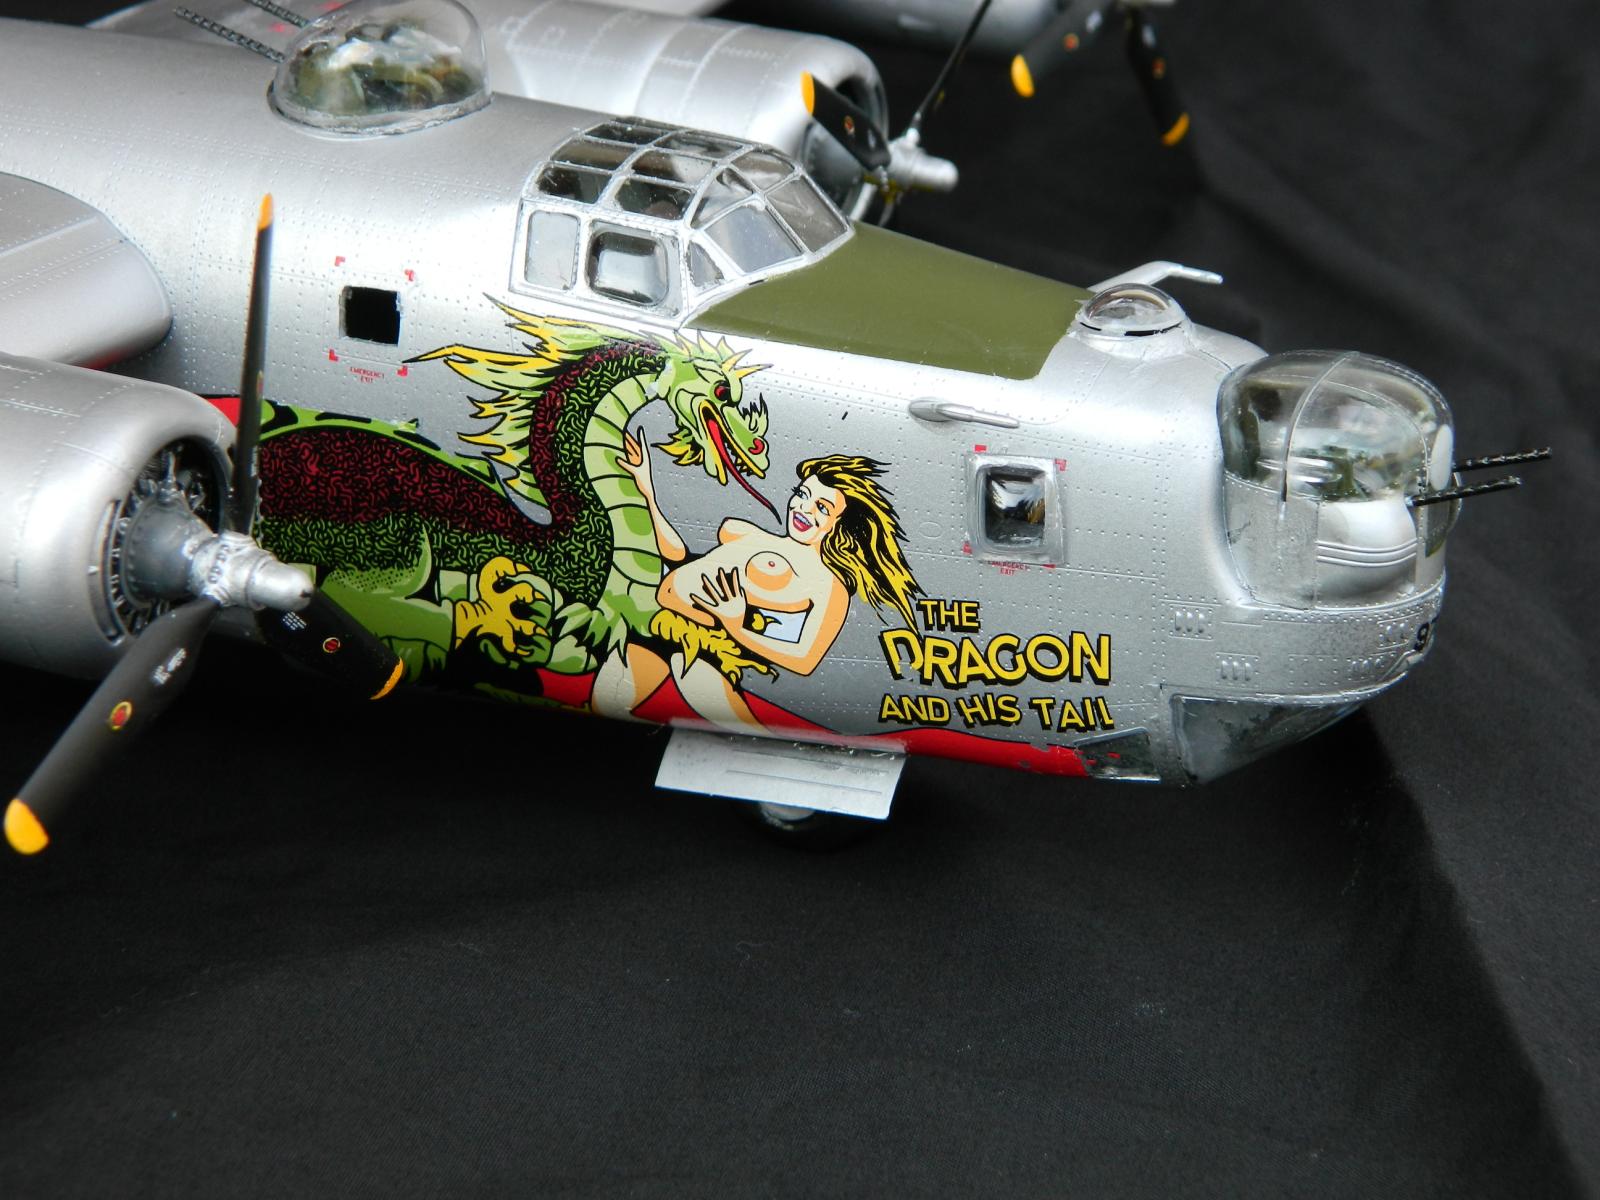
Finished
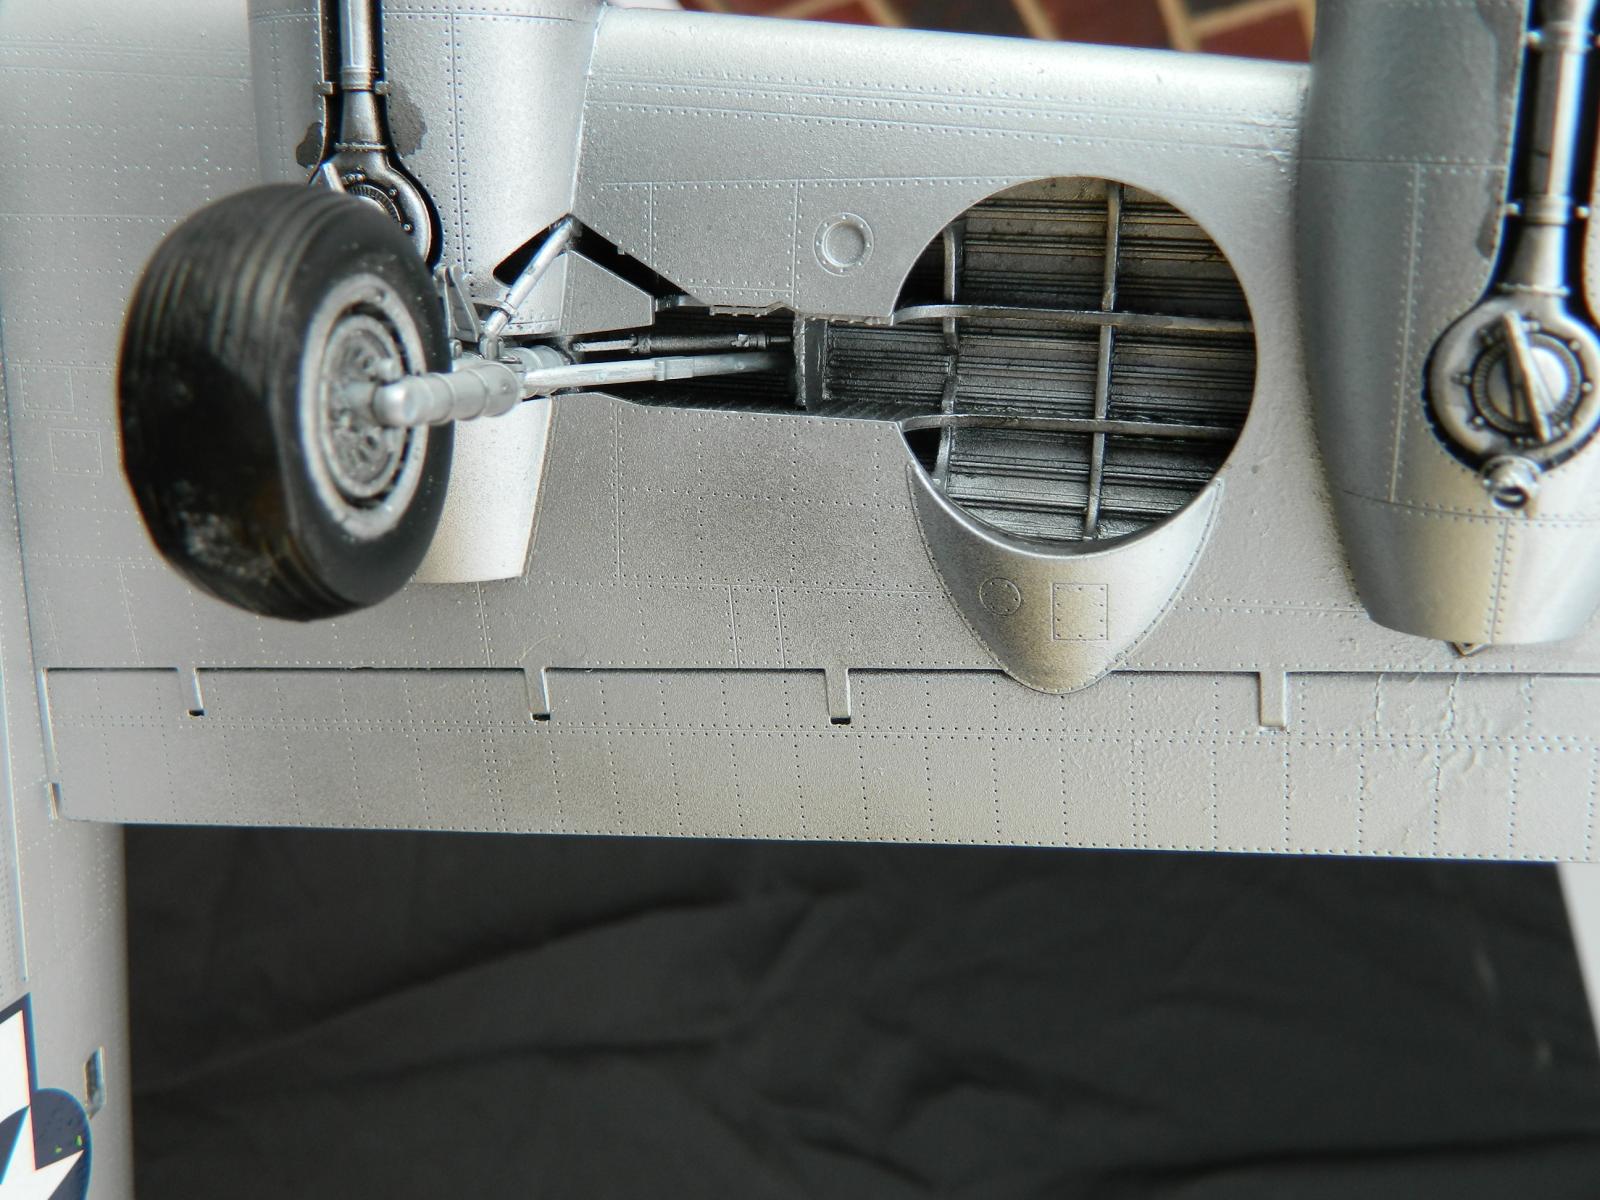
Finished- Main Gear Wells
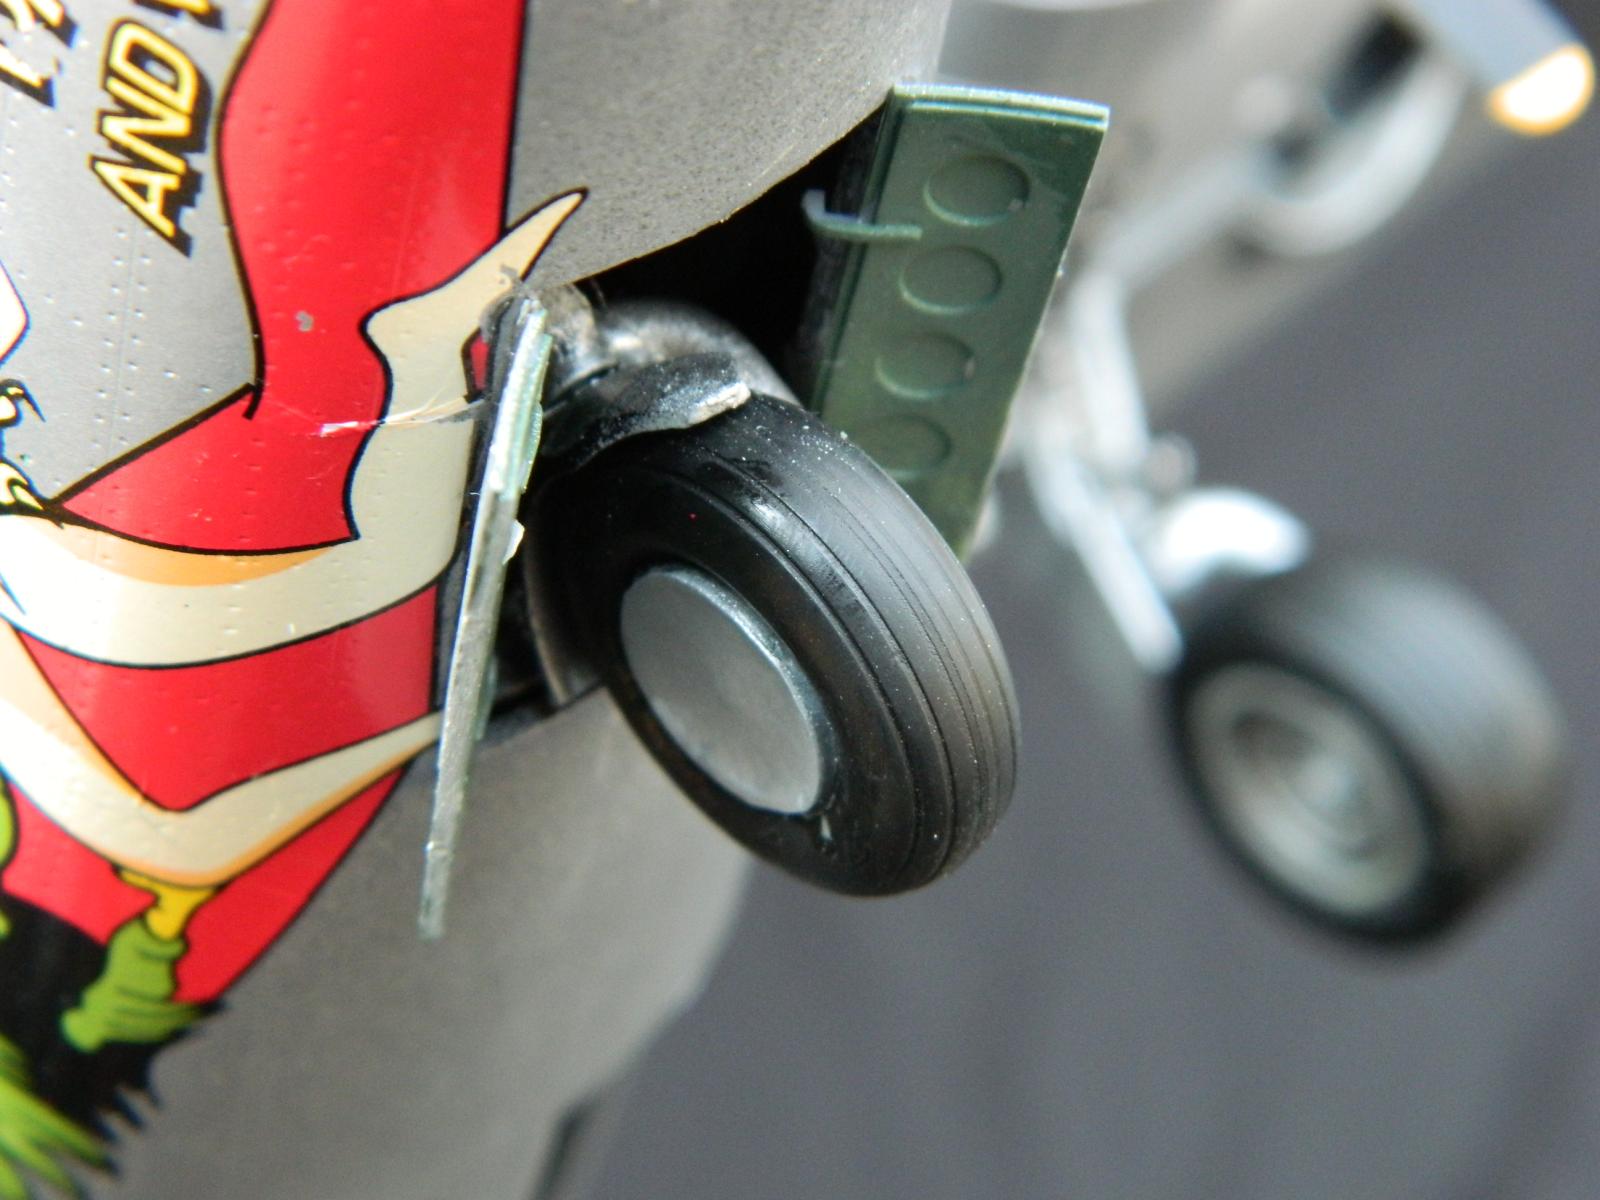
Finished- Nose Gear
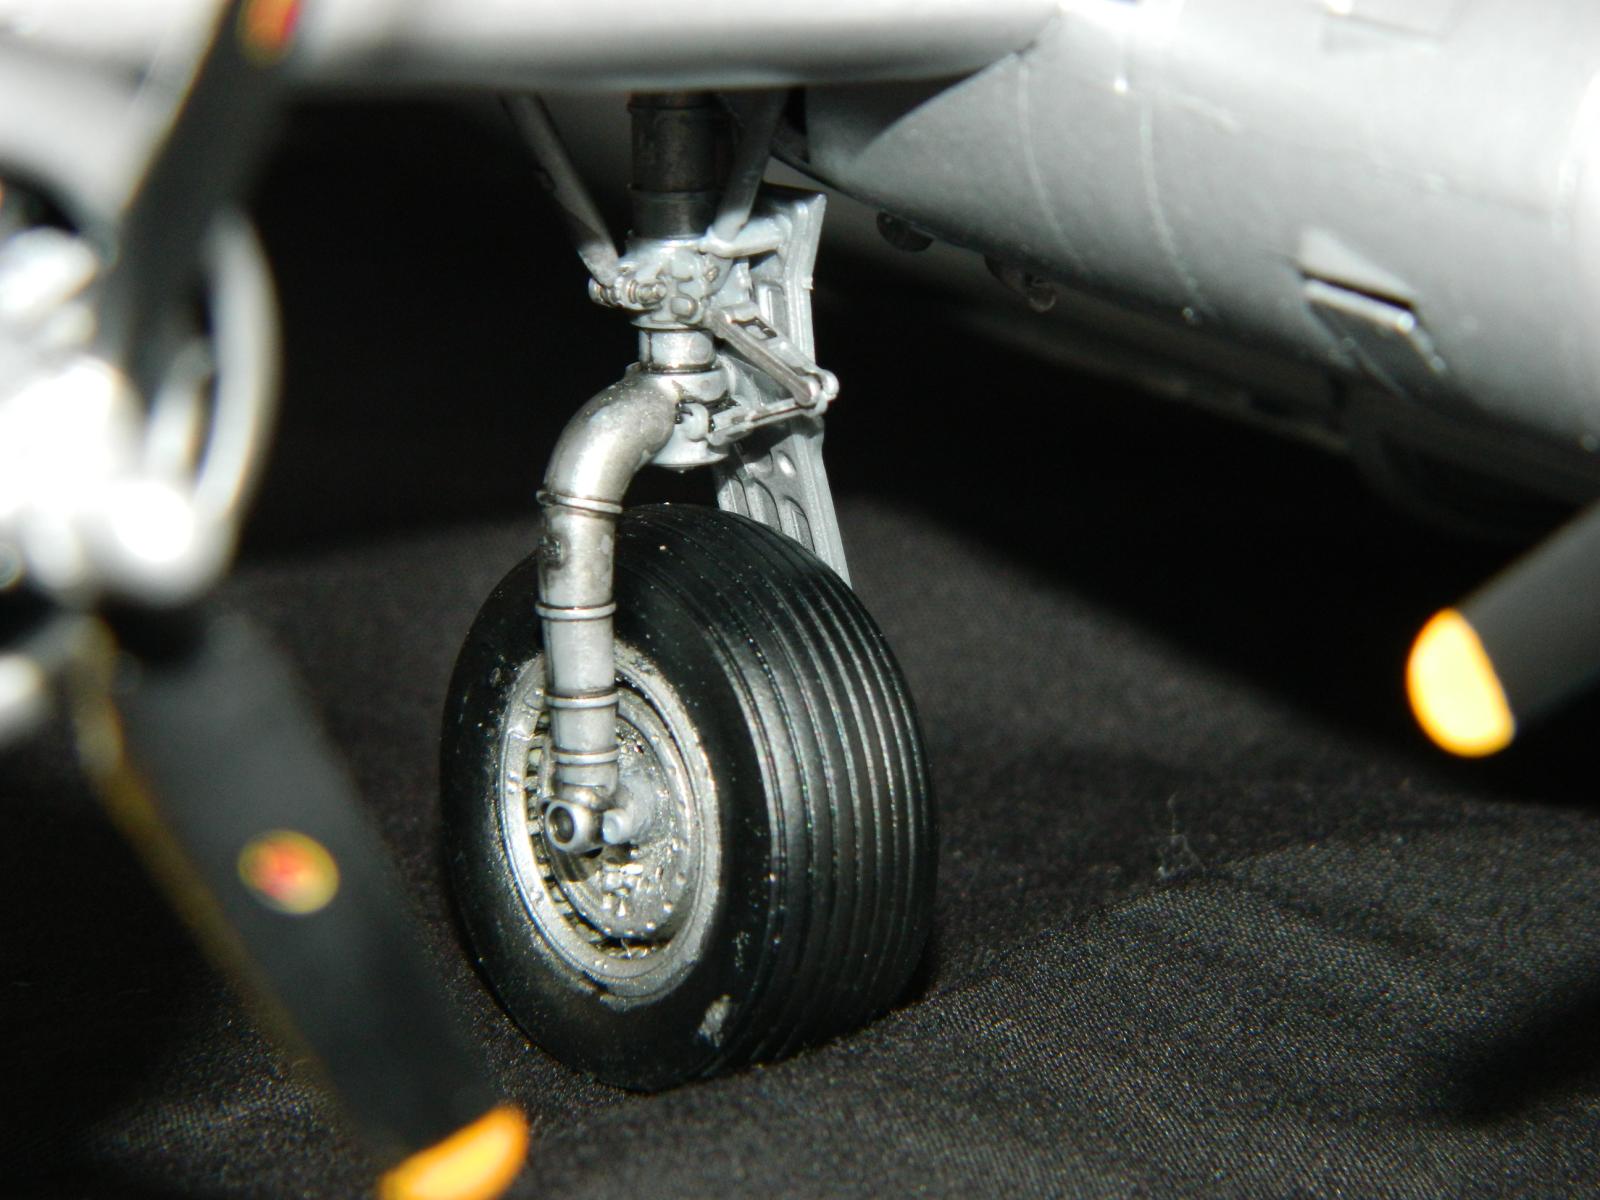
Finished- SAC Gear
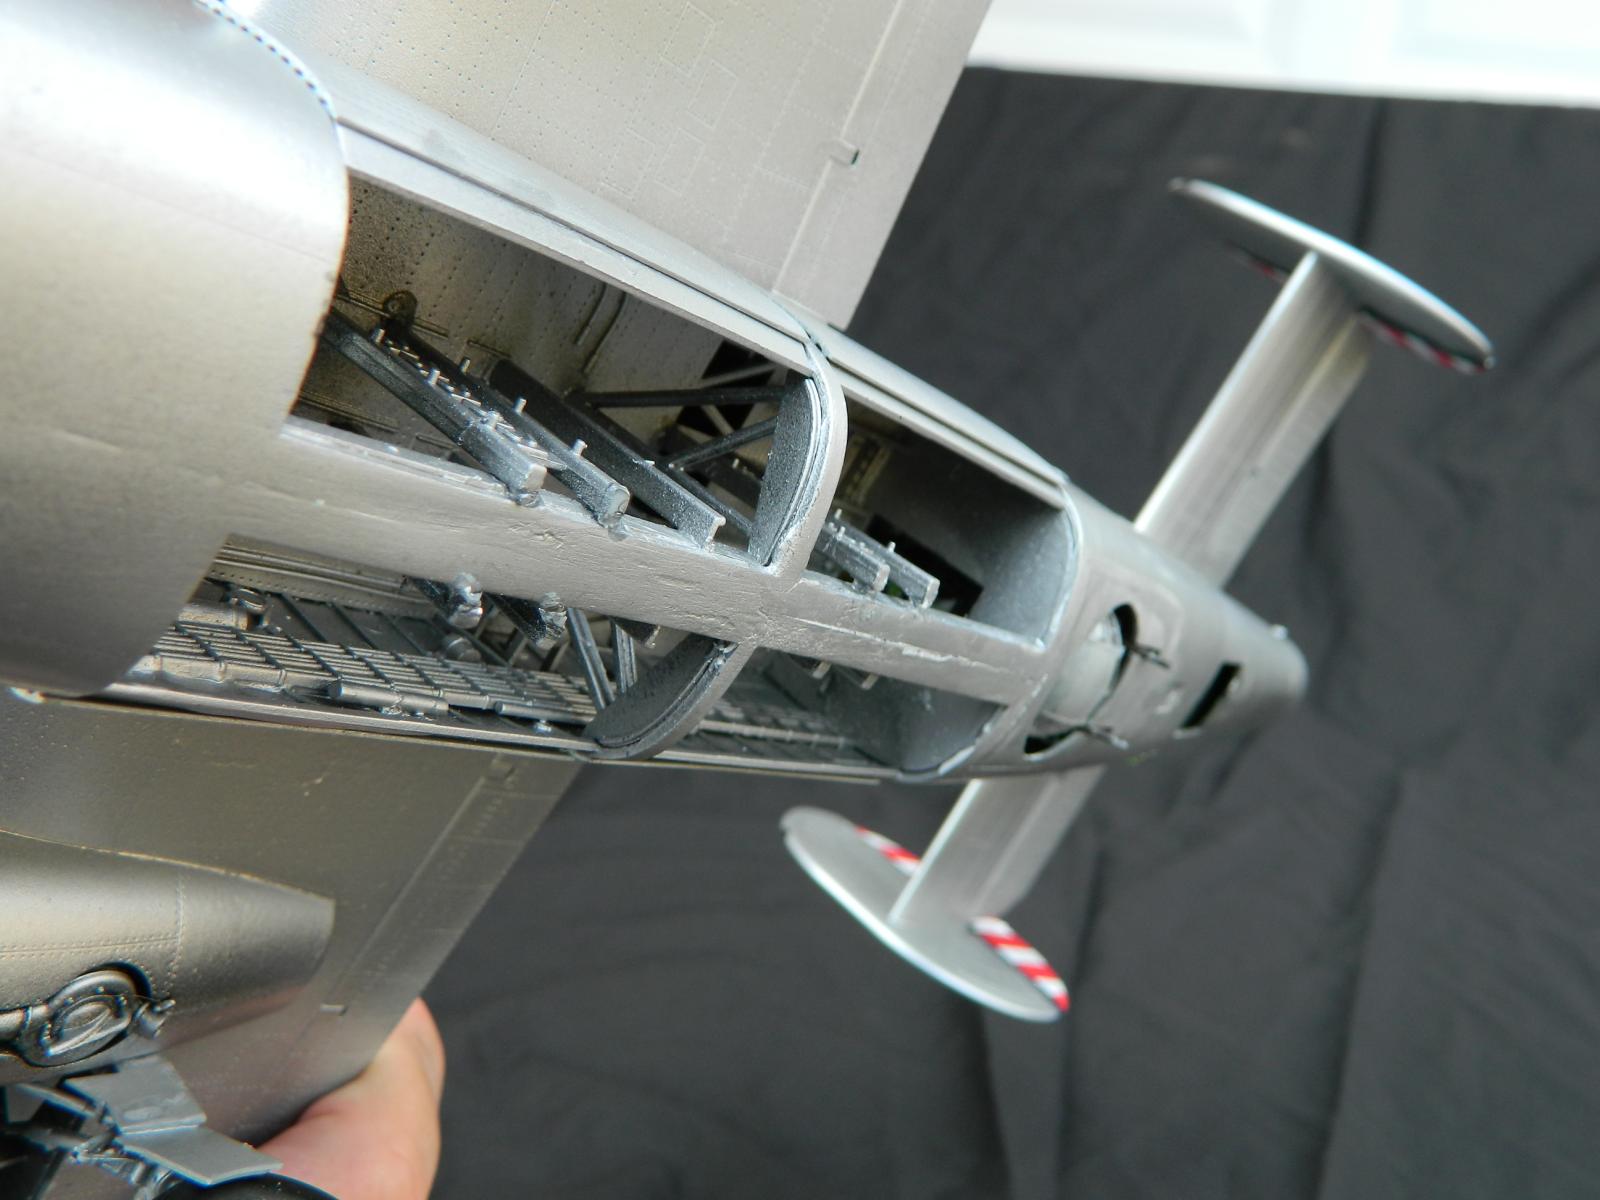
Finished
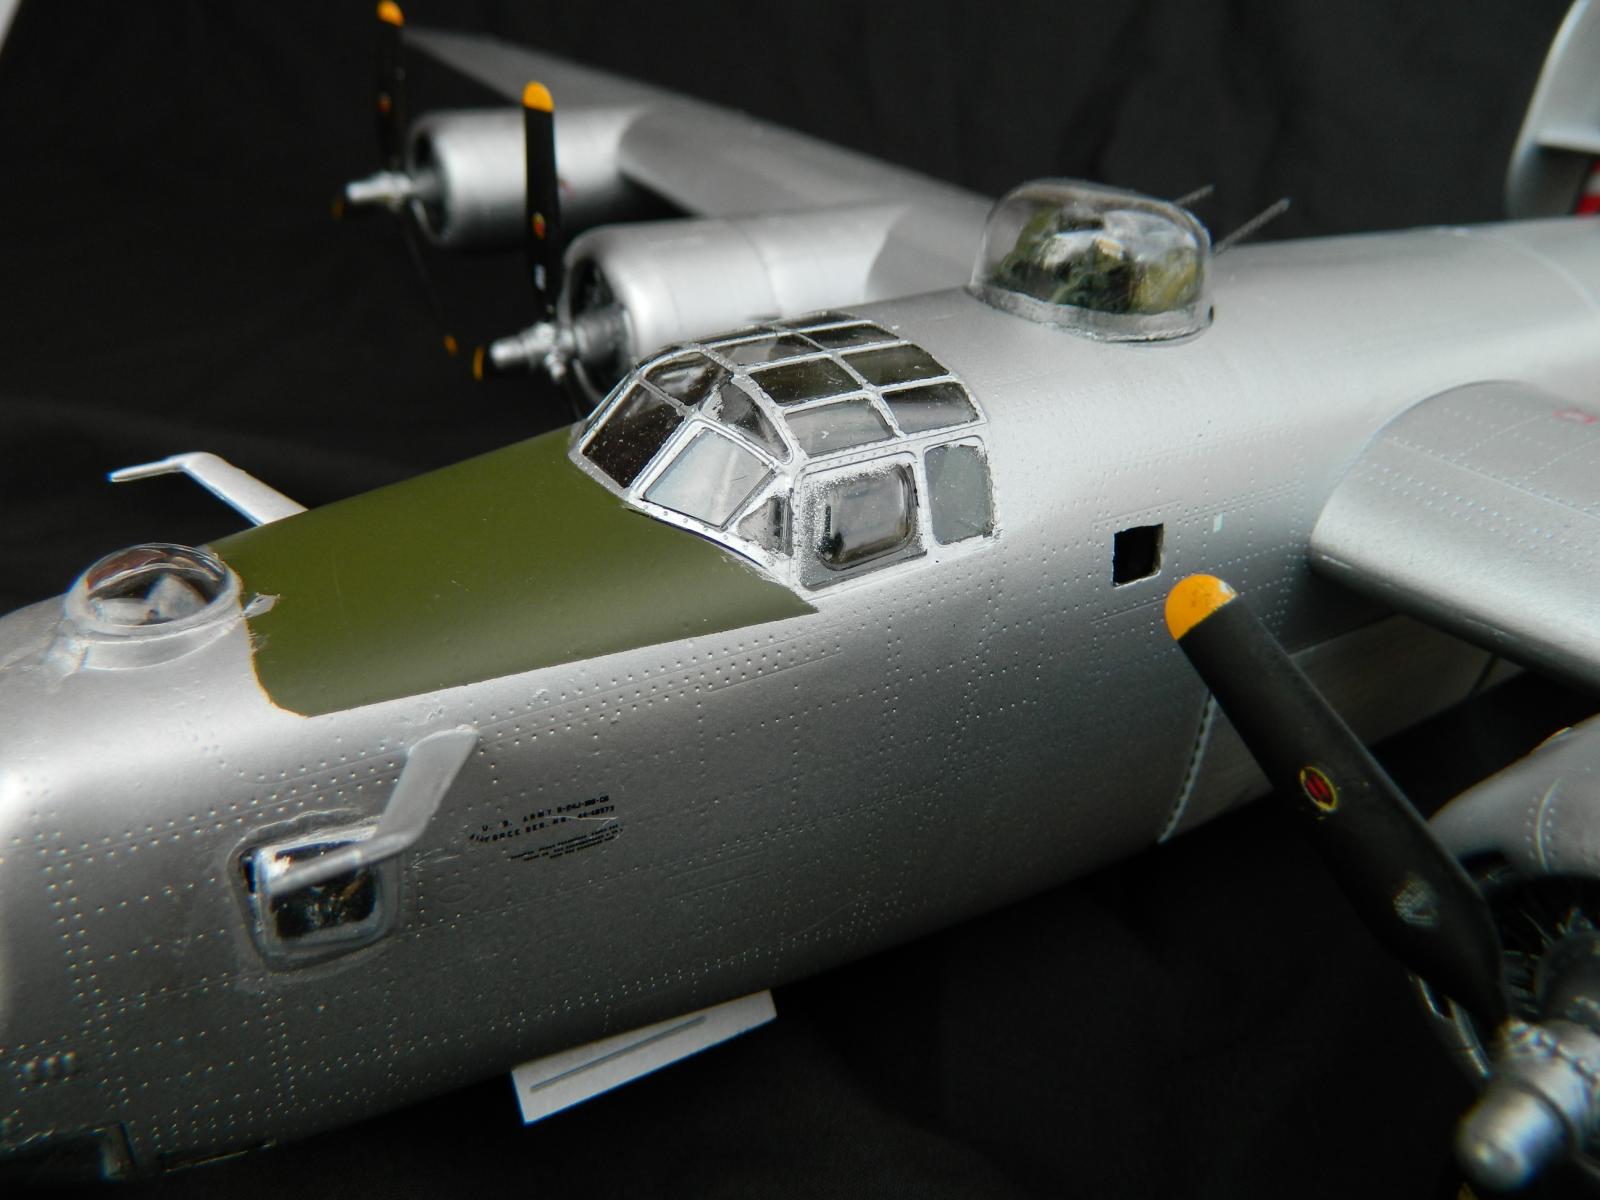
Finished
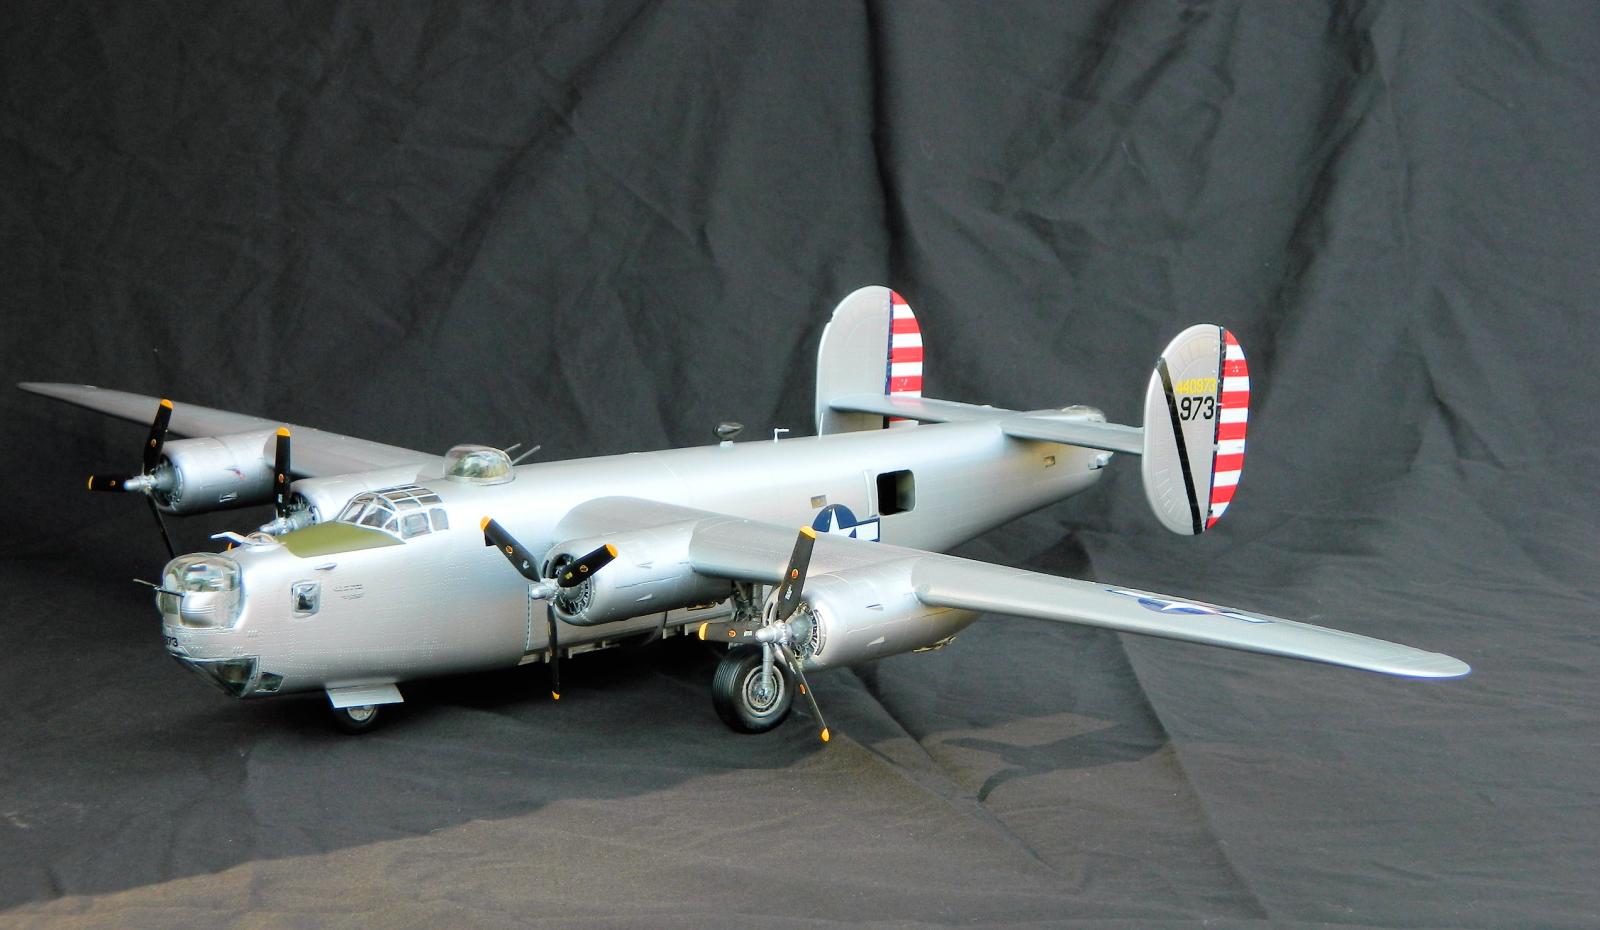
Finished
Finished
Comments
Add new comment
This site is protected by reCAPTCHA and the Google Privacy Policy and Terms of Service apply.
Similar Reviews