
Avro Lancaster B Mk. I Nose Art Kit
Somewhat of a trend in the hobby industry of late has been certain manufacturers releasing detailed, stand alone models of ship components. Fujimi has a 1/200th scale kit of a main gun turret from the Yamato battleship, Meng released two 1/35th scale kits of Russian Naval vessel armaments: a 130mm gun turret and the Kastean Close-In Weapons System. While Naval armaments are fine, what if your modeling interests are aircraft? Fear not gentle reader, HK Models has come to the rescue.
HK Models is releasing a complete kit of the nose section from their 1/32nd scale Avro Lancaster. This 'Nose Art' kit features all the bits from the full-size model, leaving you with a detailed, standalone replica of the Lancaster's pilot, bomb aimer/forward gunner, flight engineer, navigator, and radio operator positions. (The other two crew members sat in the mid and aft sections of the fuselage.)
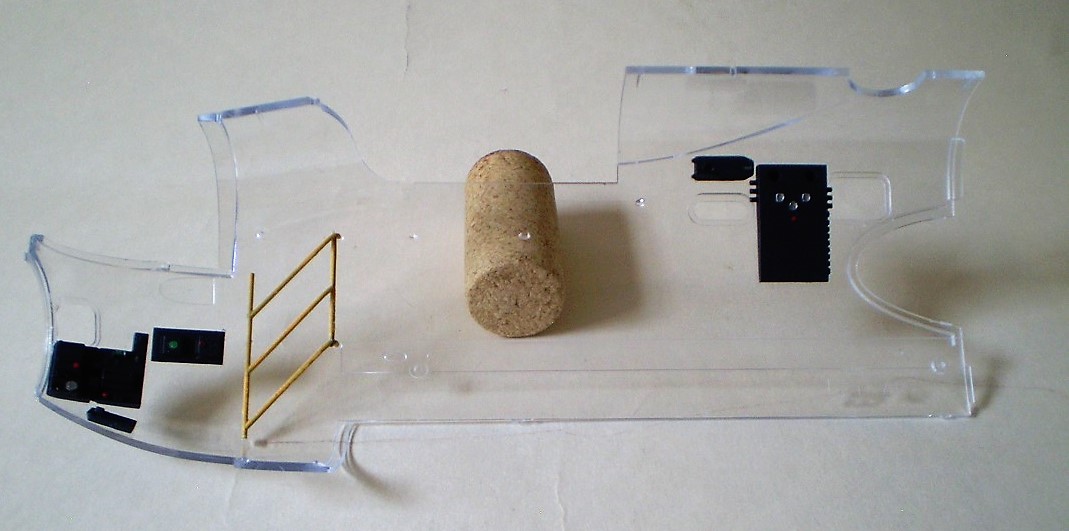
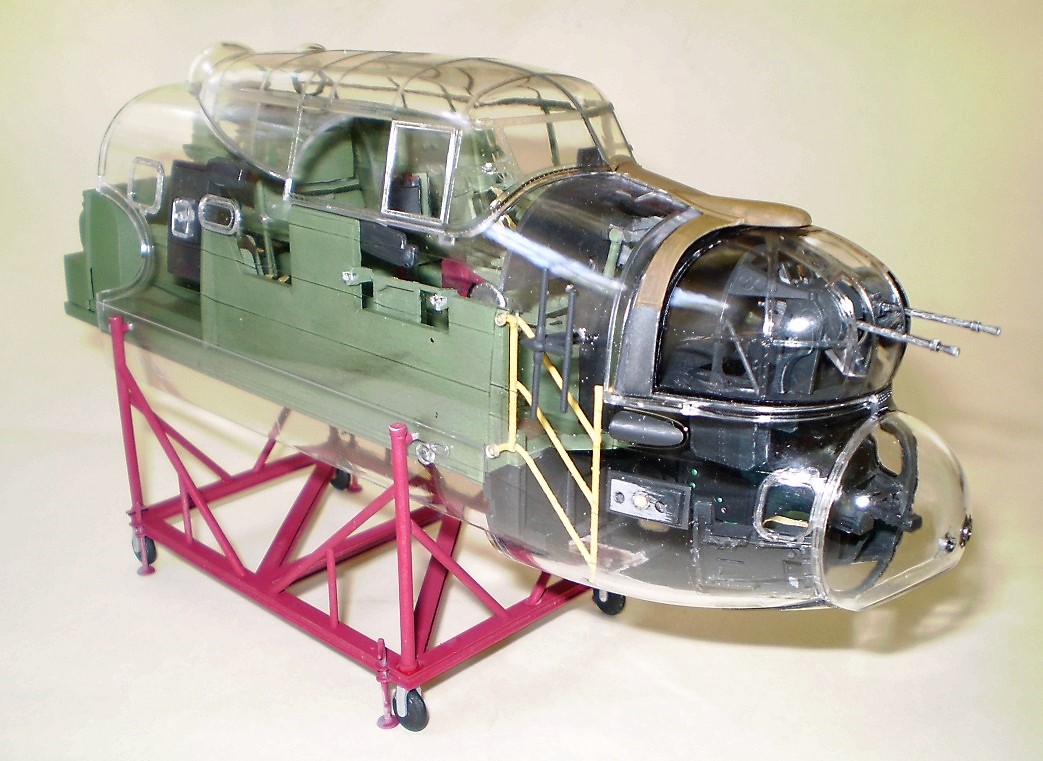
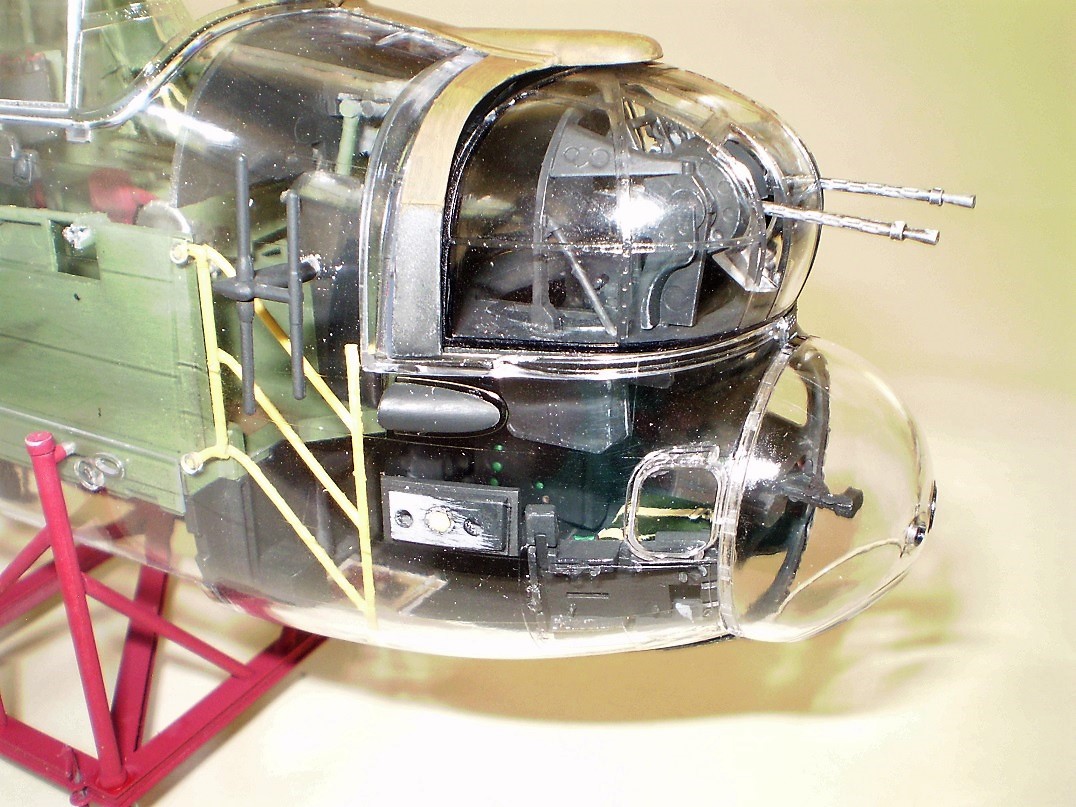
Don't concern yourself with not being able to see all the detail when you’re finished. HK Models has provided the right fuselage side in clear plastic that will allow for a see-through model of this kit. Additionally, there is a cradle/construction dolly included to appropriately show off your 'Nose Art'.
Per Wikipedia: “The standard crew for a Lancaster consisted of seven men, stationed in various positions in the fuselage. Starting at the nose, the bomb aimer had two positions to man. His primary location was lying prone on the floor of the nose of the aircraft, with access to the bomb sight controls facing forward, with the Mark XIV bomb sight on his left and bomb release selectors on the right. He also used his view out of the large transparent perspex nose cupola to assist the navigator with map reading. To man the Frazer Nash FN5 nose turret, he stood up placing himself in position behind the triggers of the twin .303 in (7.7 mm) guns.
On the roof of the bomb bay the pilot and flight engineer sat side by side under the expansive canopy, with the pilot sitting on the left on a raised portion of the floor. The flight engineer sat on a collapsible seat (known as a "second dickey seat") to the pilot's right, with the fuel selectors and gauges on a panel behind him and to his right.
Behind the pilot and flight engineer, and behind a curtain fitted to allow him to use light to work, sat the navigator. His position faced to port with a chart table in front of him. An instrument panel showing the airspeed, altitude, and other information required for navigation was mounted on the side of the fuselage above the chart table. The wireless operator's radios were mounted on the left-hand end of the chart table, facing the rear of the aircraft. Behind these and facing forwards the wireless operator sat on a seat at the front of the main spar. On his left was a window, and above him was the astrodome, used for visual signaling and by the navigator for celestial navigation.
Assembly begins with the cockpit. Oh wait! This is a kit of a cockpit so where else would one begin.... There are 171 kit parts in the box which includes a small fret of photo etch (seat belts, air scopes, etc.) and all the clear bits (canopy, windows, and such) plus the afore mentioned fuselage side panel.
Just to shake things up, I began with the last set of steps and built the construction dolly first. This cradle was used to move the completed, forward fuselage about in the factory. This is a fairly simple construction project although the assembly instructions did get some of the part numbers wrong. (The dolly wheels should be part # 9 and the casters should be part # 7). If you wish to use the dolly to display your 'Nose Art' kit you will need to drill out a few holes in the fuselage sides but that is clearly marked in the assembly instructions.
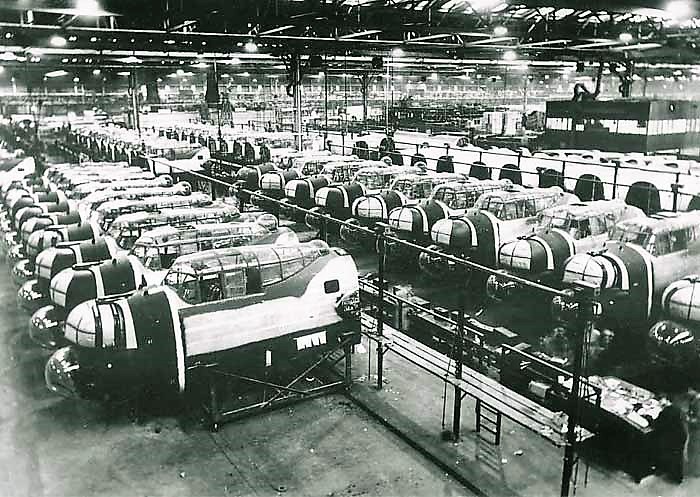
HK Models didn't designate a particular color for this cradle and a brief search of the internet didn't reveal much in the way of color photos. I did manage to find an image of some red/ white scaffolding used in the final assemble stage of the Lancaster, so I went with an overall reddish shade. These things were probably banged around a lot in the factory, so a weathered or well used look might be appropriate.
Now it is on to the actual cockpit and that begins with the pilot seat. But before you dive into building, pay careful attention to the assembly instructions. Make careful note of what needs to be removed and what needs to stay on specific parts. HK Models lists color callouts for the various parts throughout assembly. A handy color guide is included which matches paints from AK Interactive, Tamiya, and Gunze/Mr. Hobby for the specific color.
The pilot seat is comprised of fourteen parts (some of which are very delicate) including photoetched seat belts. Of note is the seat headrest. This armored headrest was hinged and can be modeled folded down behind the seat. The assembly instructions show a large yellow circle painted on the headrest. Allegedly this was gas sensitive paint that would alert crewman to the presence of unhealthy agents. But I like the other explanation better. The Lancaster only had one pilot and this spot was the optional place to whack the seat to awaken the pilot when they dozed off.
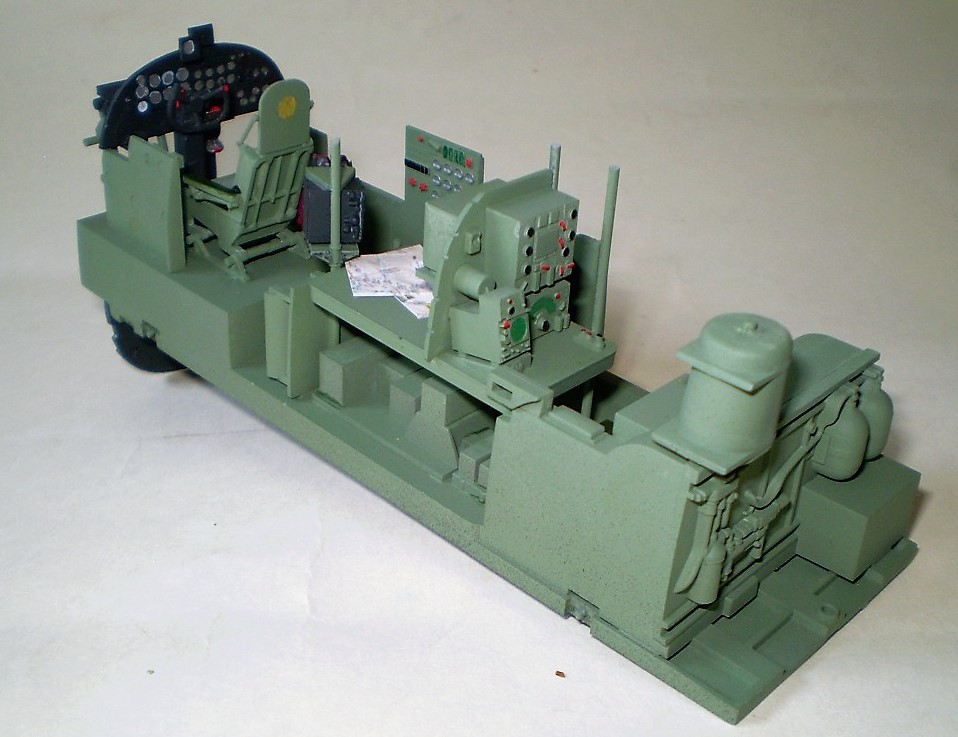
Various components for the bomb aimer, wireless operator, and navigator stations come next as well as some additional detail components for the pilot (rudder pedals, control column, etc.). There are seven parts for the pilot's forward instrument panel but, sadly, no decals for the instruments. Both Eduard (cockpit details, seat belts, canopy masks) and Airscale (instrument panels) have after-market bits to enhance this area. I went with 'hand painting' the instrument dials with a silver Sharpie and a toothpick to apply assorted colors to the other instruments. All of these subassemblies as well as side walls and additional detail bits get attached to the cockpit floor which is actually the roof of the forward bomb bay. Which gives a whole new meaning to “being on the hot seat”!
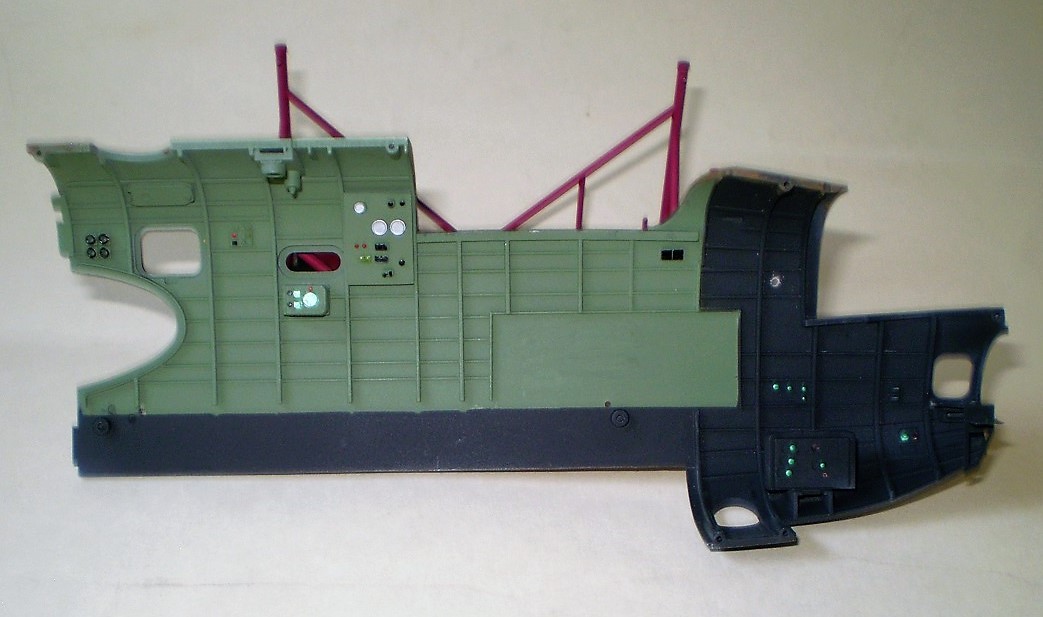
There are a number of ejector pin marks on the backside of the instrument panel, bomb bay bulkhead, wireless operator’s panel, and a cockpit side panel (one with the flight engineer’s instruments molded onto it). That side panel (part # P 1) may be the problematic one as the rear side will be visible through the clear fuselage. Speaking of that clear fuselage side, HK Models has embossed it with their logo and the part number. If you remove those, get out the polishing compound as that removal might leave a mark.
Another aspect of using the clear fuselage side that may present a challenge are the number of parts (fuze/ instrument panels, etc.) that are added to the inside of the forward fuselage side for the bomb aimer station. One challenge of note are the attachment points on the clear fuselage side. Those attachment points seemed a bit vague. What isn't so vague is the need to paint most of these parts before you attach them to the clear fuselage. The inside of both fuselage sides have excellent molded detail to which all those previously mentioned extra bits (fuse panels, controls, etc.) get added. HK Models even provides an alternative photoetch bit (mounting bracket) for one of the bomb aimers aiming devices.
Next on the assembly agenda is the twenty-two part forward gun turret. The gun barrels are designed to be added later should you wish to avoid the possibility of knocking them off as you continue your 'Nose Art' model. Master Models has brass, replacement barrels for this kit. This step is the first use of the excellent, clear parts for this kit. Due to the size of this kit you may wish to give some thought to painting the inner canopy framing as you progress through your build. A black Sharpie might ease this task. Be careful removing all the clear parts from the sprues, I didn't and wound up with some laborious polishing to remove the sprue attachment points from some of the clear parts.
The interior assembly gets sandwiched between the two fuselage halves. Remember you have the choice of either a clear side panel or the traditional (non see-through, of course) plastic part. Pitot tubes, cooling vents, and some other bits are the last things added to the outer fuselage. I added some maps to the navigator's station just for grins. If you look closely you can just make out the Port of Calais.
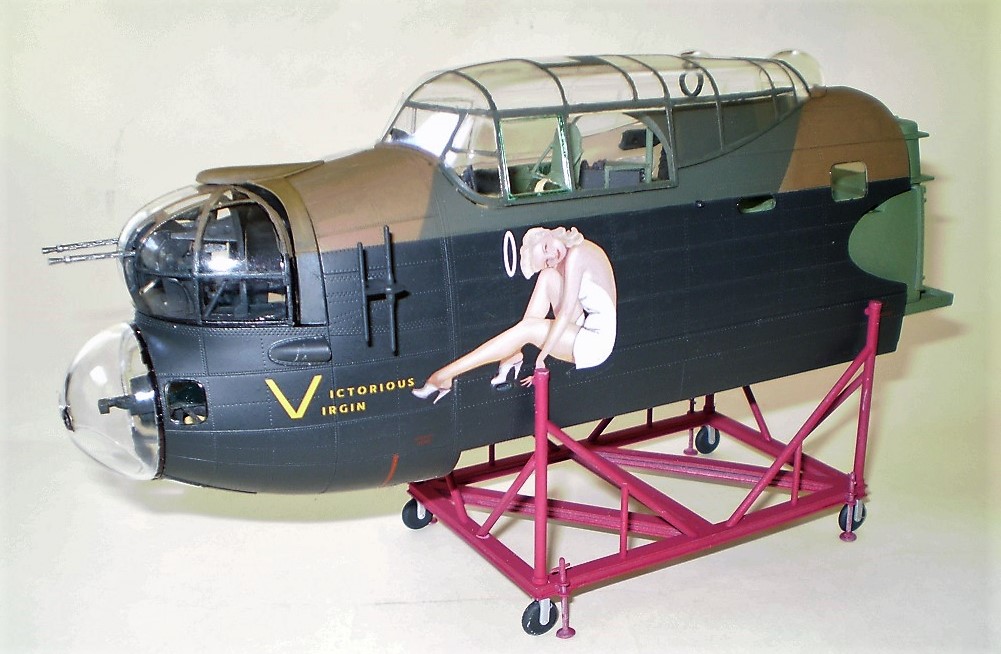
HK Models provides marking options for four different aircraft: one from the RAF, two RAAF (Australian) and one Canadian bird (the option I choose). As you only apply decals to just one side, this task is pretty quick and simple. The decals settled down beautifully. Having previously drilled out some mounting holes in the fuselage panels, the 'Nose Art' model gets placed in the transport trolley/shop cradle. The only thing left to do is sit back and admire your handy work.
The Avro Lancaster B Mk.I 'Nose Art' Kit from HK Models is a neat, easy to build, space saving model of the business end of that iconic British bomber. For the avid (or rabid) detailer out there, there are ample opportunities to add a plethora of extra bits (wiring, control cables, etc.). And the fun part about detailing this kit is that it isn't the entire aircraft. Not only does this offering save space, it will be a real time saver as well. Just be sure to give this impressive kit a place of honor in your display space of choice.
My thanks to HK Models and IPMS/USA for the review copy.
Support Your Local Hobby Shop!

Clear fuselage
Construction dolly courtesy Vintage Wings of Canada
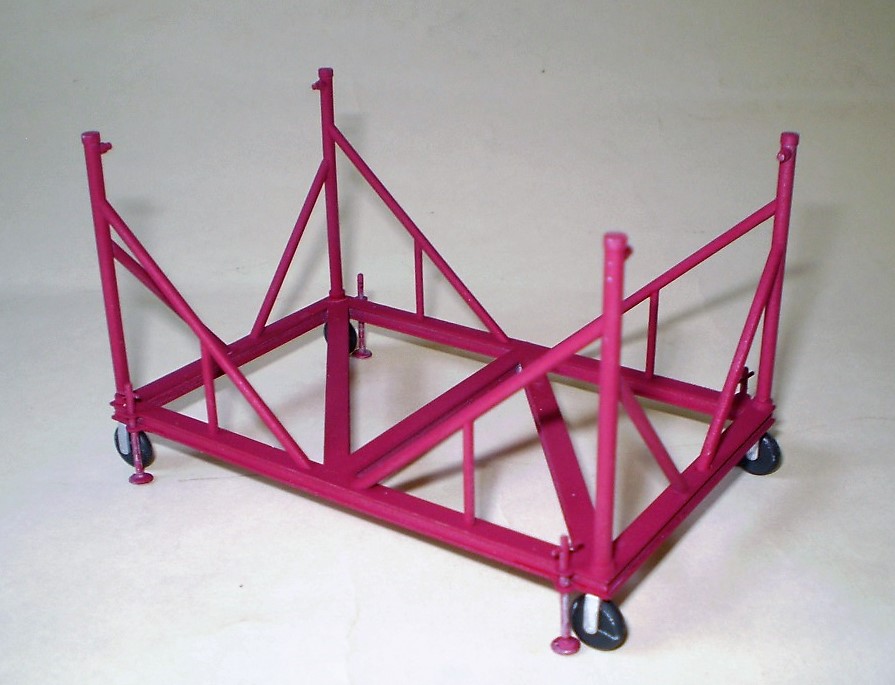
Construction trolley
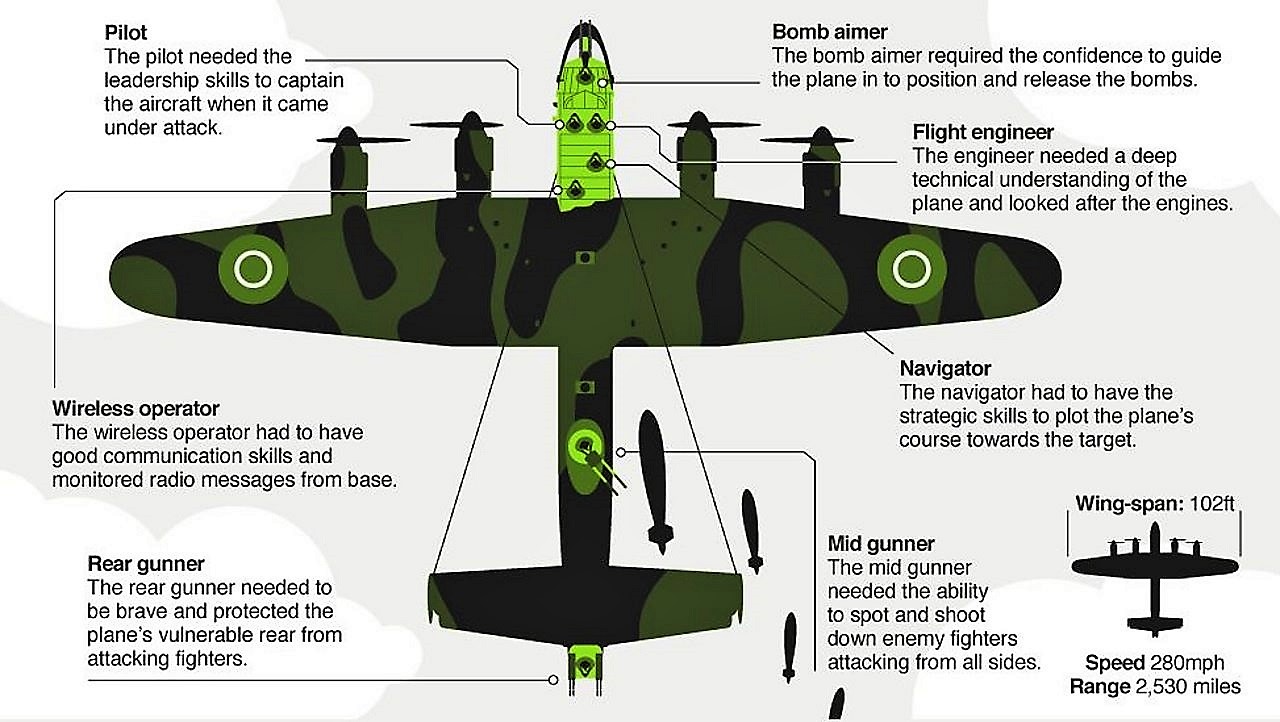
Crew configuration courtesy BBC

Fuselage interior details
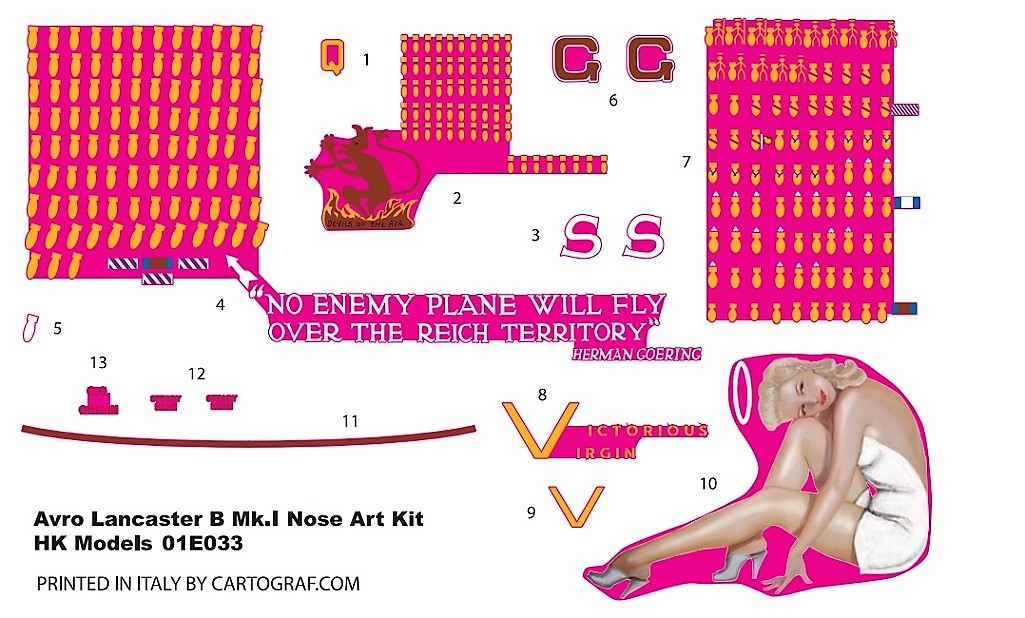
Lancaster nose art decals
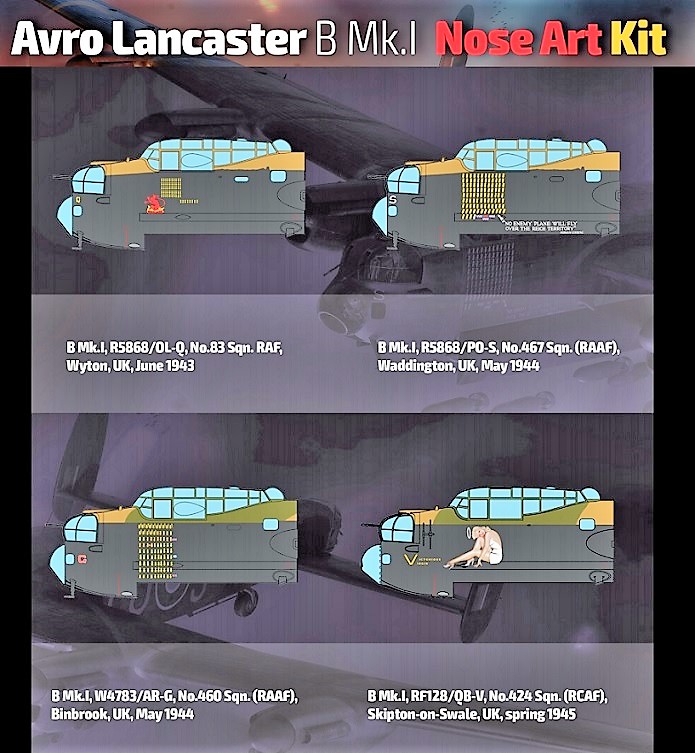
Lancaster nose marking options
Left fuselage
Navigator pilot positions
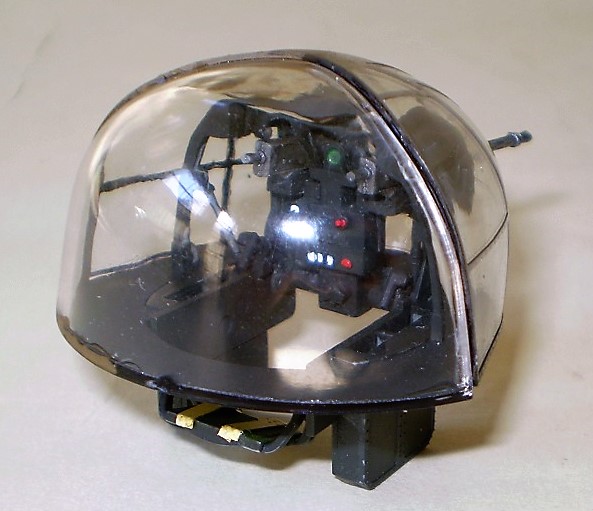
Nose turret

Nose turret
Completed model
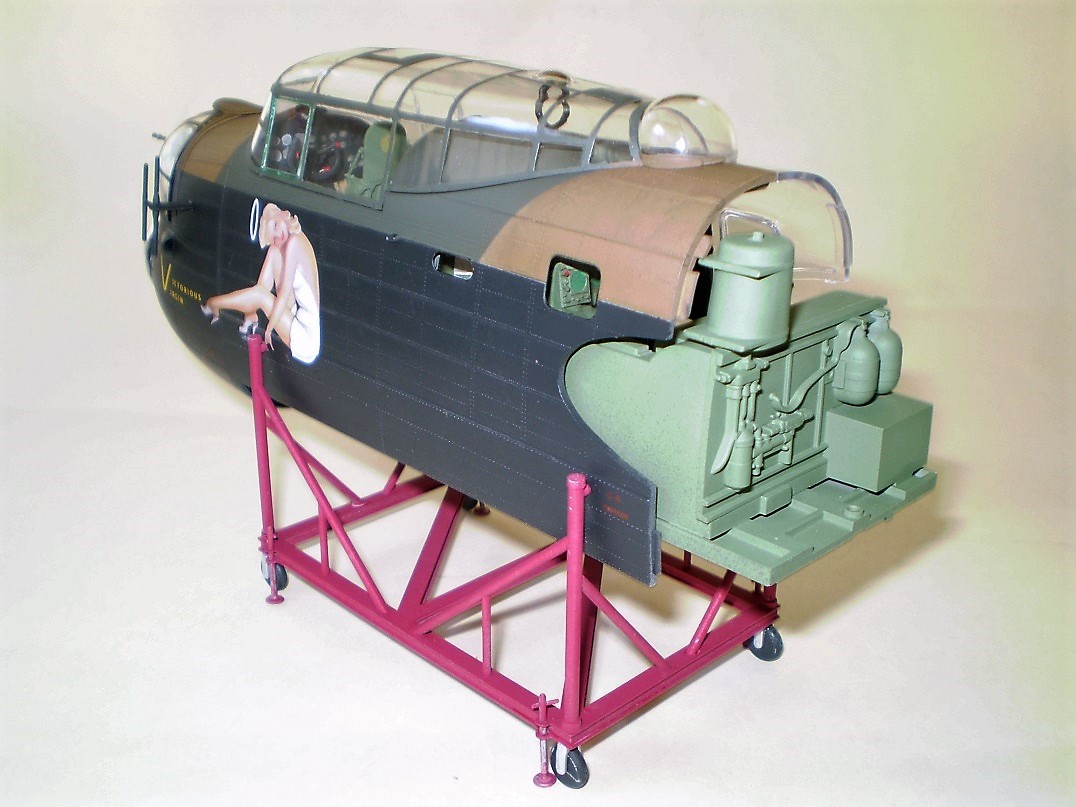
Completed model
Completed model
Nose detail

Comments
Add new comment
This site is protected by reCAPTCHA and the Google Privacy Policy and Terms of Service apply.
Similar Reviews