
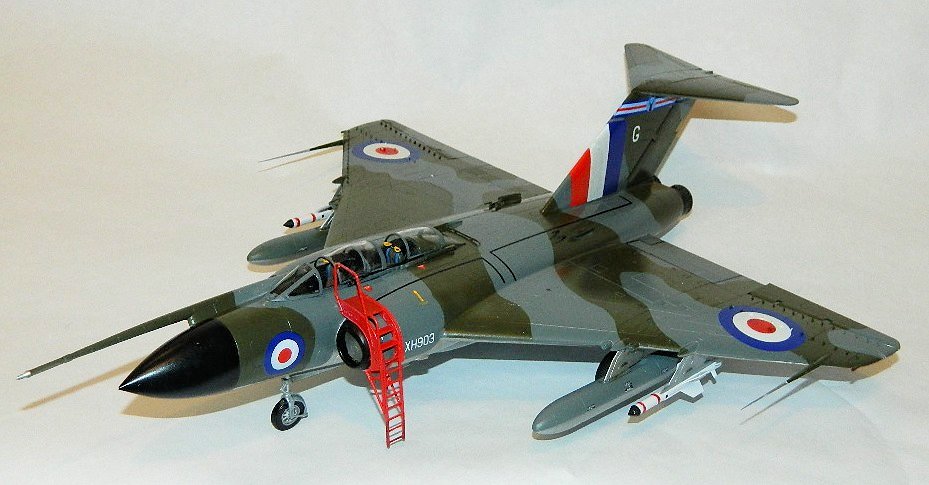
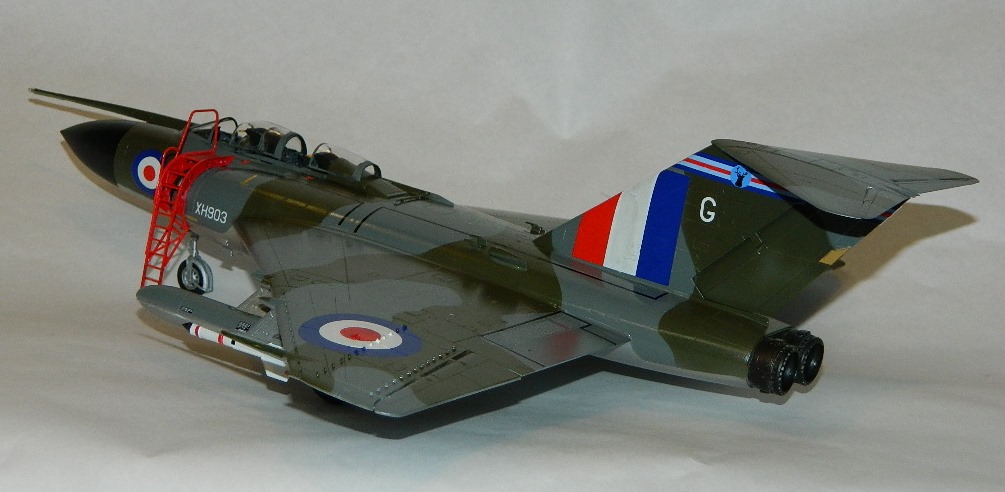
Gloster Javelin FAW 9/9R
Couple of thank you notes up front; to Hornby for bringing Airfix back from the abyss and turning it around; an Injection-molded 1/48 Javelin is one we could only dream of in the past, and here it is! And to Hornby America, who provided IPMS USA this great model of an iconic British cold war fighter. (And thanks to Dave and Dick for the build opportunity!)
The last time I built a “flatiron” as these were called, was the old Dynavector 1/48 vacuum molded kit about 15 years ago. It had a wealth of detail, and was actually very easy to build. The kit is still viable (I have another one sitting on the shelf waiting to e built), but the Injected version is far better in the full-Monty detail realm. The only tricky part was installing the forest of vortex generators on the wings, as these were brass tiny brass tabs with small spears to push into holes on the wing… surprisingly enough, they worked well on the soft plastic and were very durable. Ah, the old days….
There was a certain amount of trepidation on opening the box lid to this kit. First, the sales effort that went into the packaging… eye-catching artwork, details on what is in the box, and “it’s really RED” for the majority of the package background. That’s not why I buy kits, but I found the box distinctive.
Inside are well molded, standard Airfix light gray parts. Up front: detail is absolutely marvelous! As I pulled each sprue out, I was more than impressed, and thought, “here is a basic injection kit that will be fun verses a fight to build.” The panel engraving is a bit heavy but no “rivets everywhere”; what IS there is supposed to be there. The instructions are easy to follow, but will require a bit of attention in a couple of areas which I will address later. Color callouts are included on the painting guides for each jet, so the only thing you need to do is pay attention. They reference the Airfix/Humbrol line of paint numbers, but have an actual title attached so you can use paints available to your particular part of the world if the proprietary paints are not available. Thanks Airfix for changing course! In the old days a major complaint of we “foreign builders” was paint numbers referenced proprietary paint numbers without proper title, requiring one acquire paints from overseas, or to research the actual colors and do a match with what we had…
Also included is a stencil guide; the decal sheet contains everything required for one of three different aircraft, and all you have to do it carefully apply them. Speaking of the decals; they worked well, but I had some issues with them being a bit stiff to conform around curves, and also over the vortex generators on the wing. They had cutouts already pre-opened in them, but I still had flaking and tearing when installing them. Solvaset was a bit too strong in some cases, but was required; I just did touch up painting. Color density and accuracy were spot on.
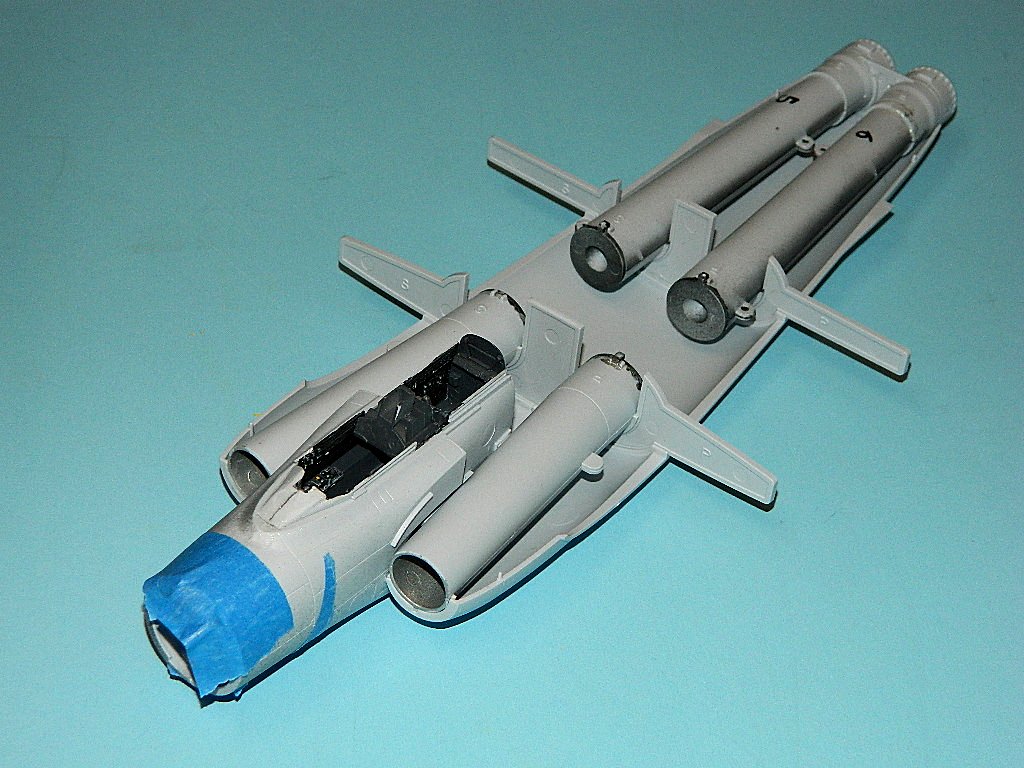
Construction begins with the nose gear well. I was not paying attention and put the sidewalls on backwards; the instructions clearly show where the mounting trunnions go (forward of the wheel hump, as the nose gear retracts to the rear) but somehow I botched it. I only discovered it after I had the nose section together, so be forewarned, there is no positive front/back on either side. As we say in maintenance, if someone can put it on backwards, they will…
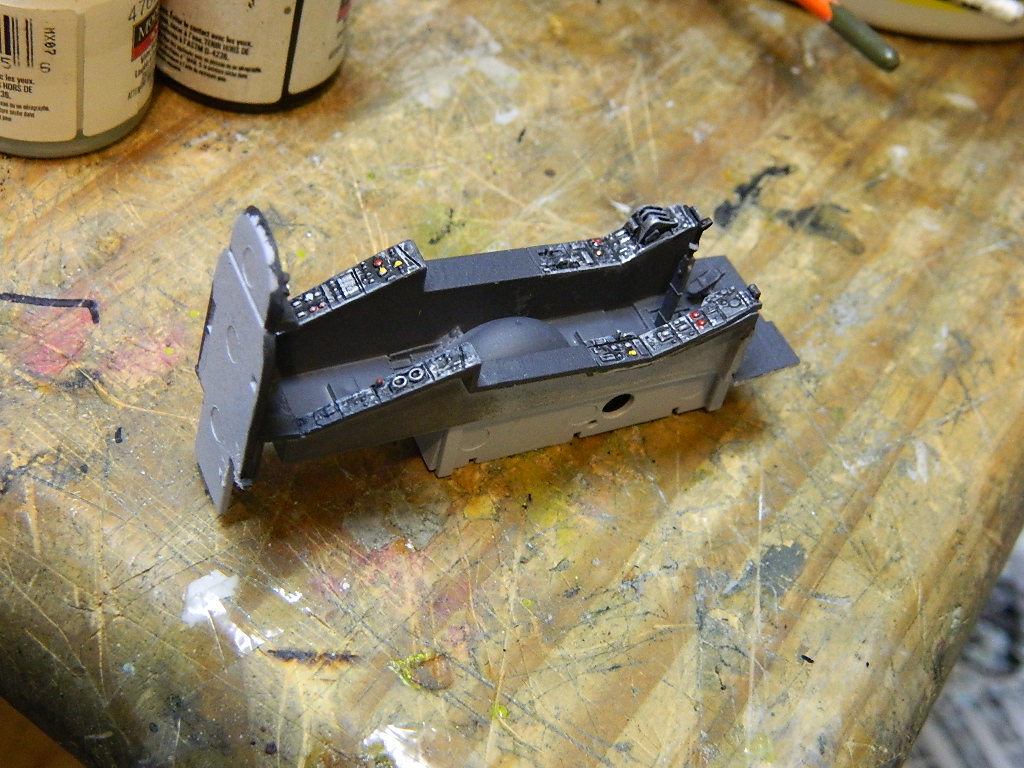
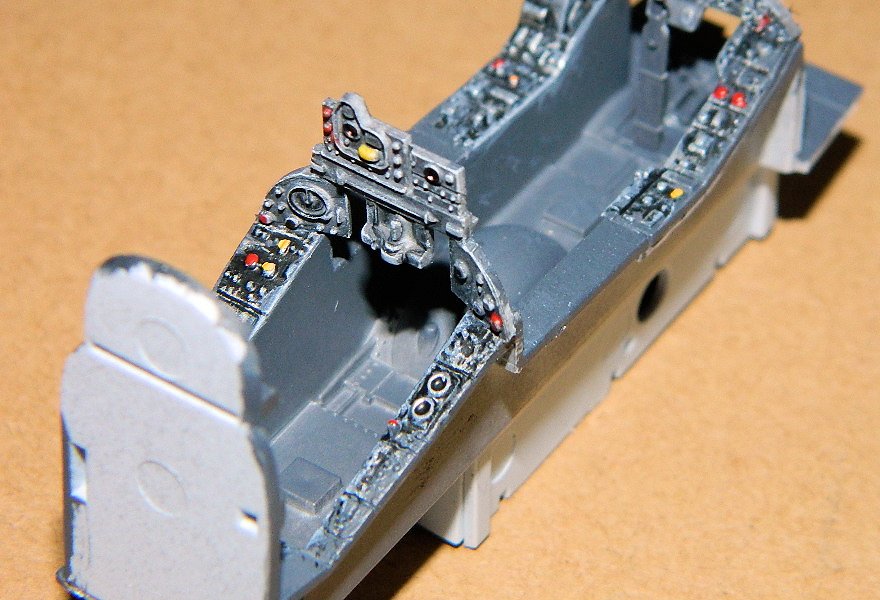
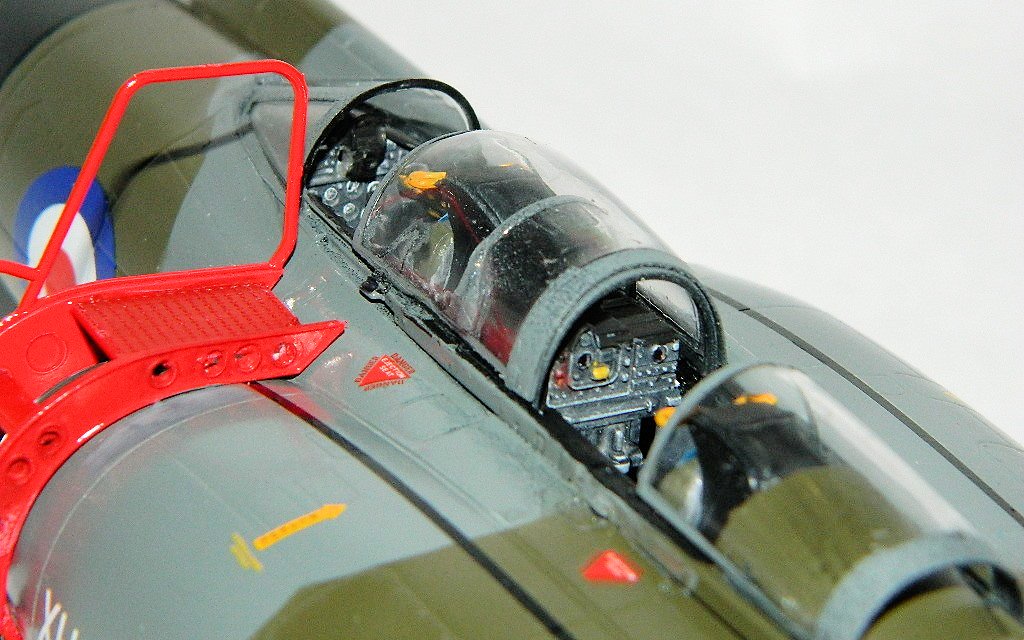
The cockpit is next; certainly an aftermarket company will develop a detailed interior, but until then the kit item will suffice; with the predominant color being interior black, it’s a coal hole and hard to see in there. A decal is provided for the main instrument panel; the sidewalls and consoles, with careful painting, look good. I left off the Mark 5 ejection seats until later to facilitate a bit more detail and painting; they, again, are basic but sufficient. You will need to add harnesses to them, and there is not a lot on this seat out there that I can find. If I remember correctly the original F-4 Phantom B/C series had Mark 5 seats before the Mark 7 was installed, so that is where you might find sources of aftermarket seats with better detail if you desire. This whole assembly is trapped in the between the two exterior forward upper fuselage sections; the interior is a totally separate area from the outer shells, and all fits extremely well.
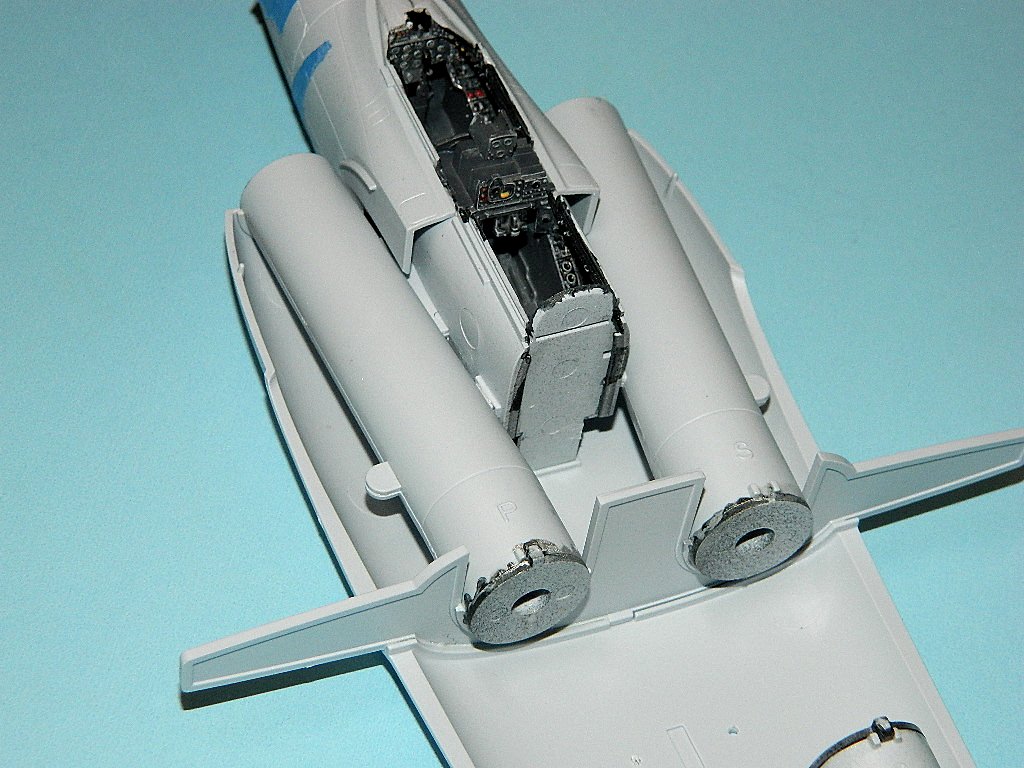
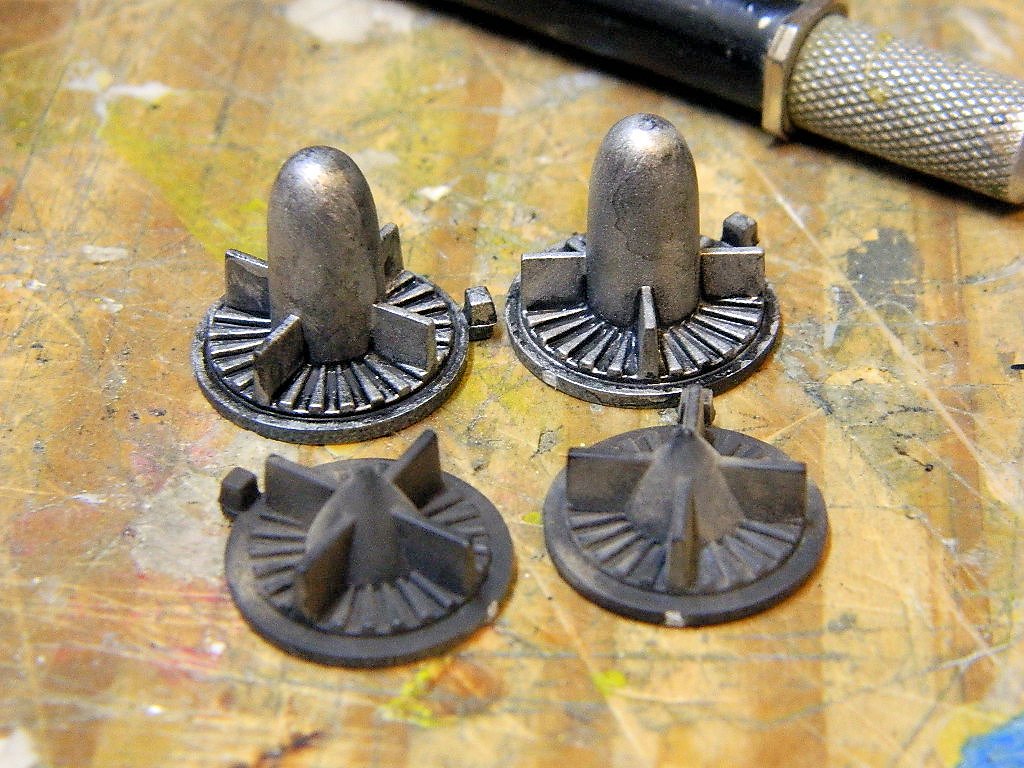
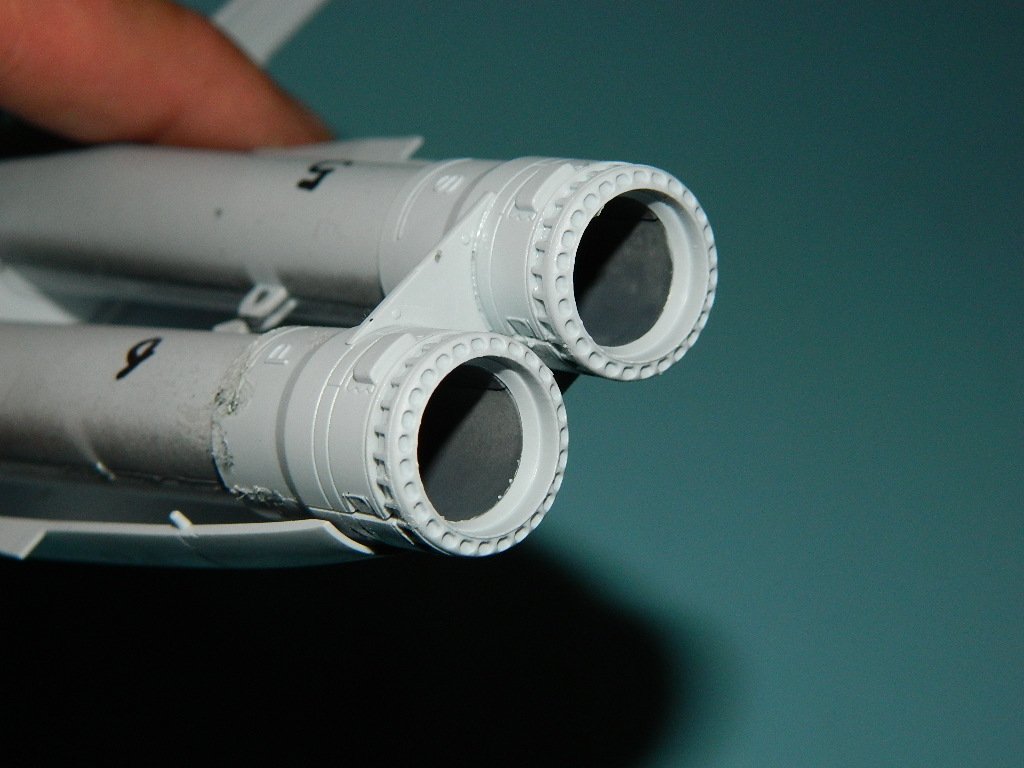
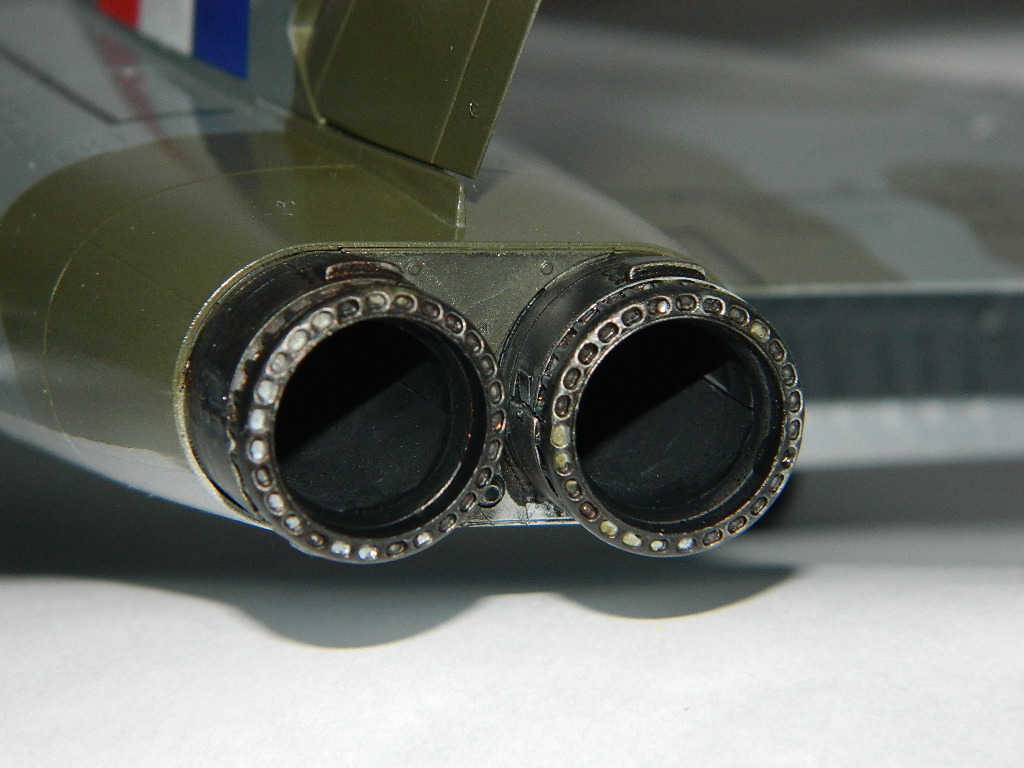
The intake and exhaust parts, which are labelled P and S for port and starboard, are excellent. The actual intakes themselves could be put in backwards, but the fit would be horrible (the intake fronts are slightly oval, while the aft portion where the compressor blades are is round; that’s your clue). The exhaust tubes are full depth with a turbine section and spray bar assembly, but you cannot see them from the back unless you have a good flashlight or borescope; from the example I saw in person a long time ago South of Lowestoft (the outdoor museum name escapes me), it was too far to even see on the real thing… “but I know it’s there”. External detail is excellent for the exhaust nozzles, just work at getting the wash in the engraved areas. (I missed a couple of holes which you can see on the photos).
At this point you decide whether to open the mounting holes from the inside for the lower fuselage fuel tank “canoes”. You must do this before you install the forward fuselage and bulkhead assemblies.
On the intakes, I assembled them with liquid cement, (Ambroid Weld-on) and after a couple of applications of Mr Surfacer, used a dowel and wet/dry paper wrapped around it to smooth the inside seams. I then brush painted the interior with Tamiya aluminum, and two coats showed the seam had been eliminated. These are then mounted to a the forward fuselage sides, and an aft bulkhead which serves dual duty as a forward main spar for the wing.
I used the same technique for the turbine exhausts, except that I painted them flat black beforehand, and then cemented them together. As the forward intake trunking, the exhausts fit into a spar assembly for the aft portion of the wing, along with the tail bulkhead. The upper and lower fuselage sections fit perfectly. Afterwards, the jet intake lips are added, and with a bit of filler and more wet/dry on a dowel with paint, result in a seamless intake run.
Wings are simple, with very detailed wheel wells, and options for extended or closed speed brakes. The previously mentioned spars add excellent strength to the assembly; Same for the lower wing flaps; I have only seen these jets with the flaps extended, so I can’t validate if the speed brakes are ever open on the ground. Ailerons are moveable as well.
Next step is the tail fin, moveable rudder, and horizontal stab. Everything seems to fit into place without trouble, but my fin had a bit of slop requiring care in installation to prevent a cockeyed appearance.
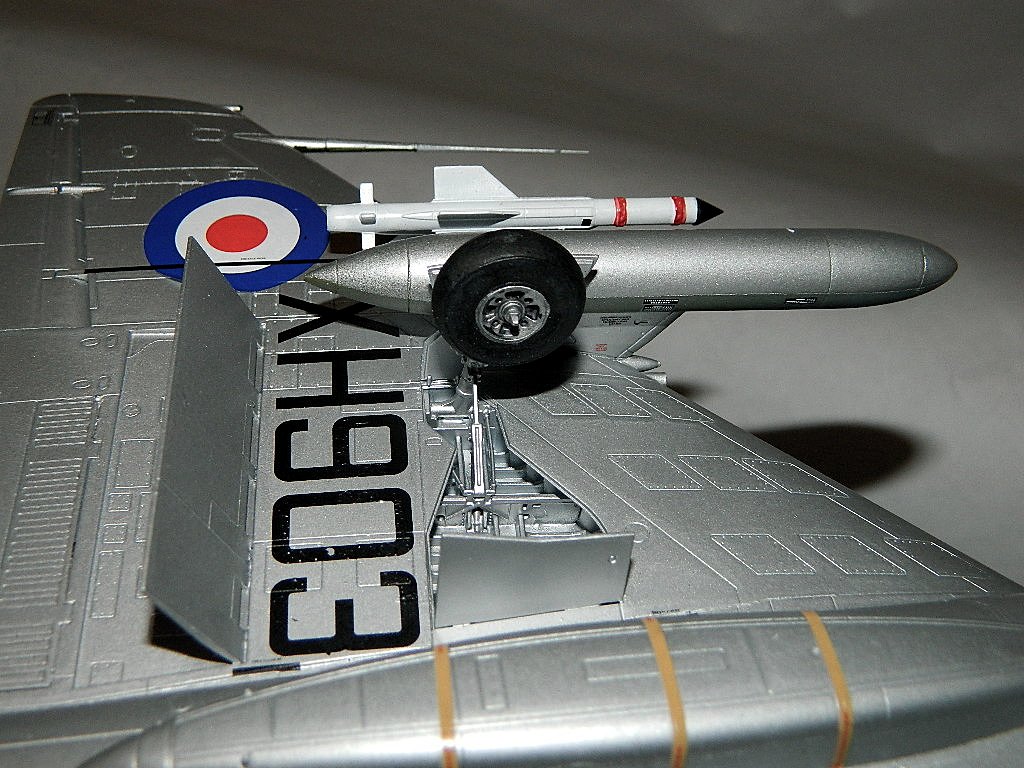
Landing gear. This will take a bit of your patience, and removes the kit from the amateur to the mid-to-experienced level due to a requirement to feed tiny parts through ribs, while aligning everything to get them in place and then glue it all together. I will state Ross at SAC is developing a set of his metal gear for this kit; I personally feel it will be a worthwhile investment, as the nose gear in particular is very “scale” in dimensions, let that read “fragile”, and I anticipate eventual failure of the plastic if I move this thing around much. All the parts can be positively located in place with care, (and following the instructions) and it all works in the end .
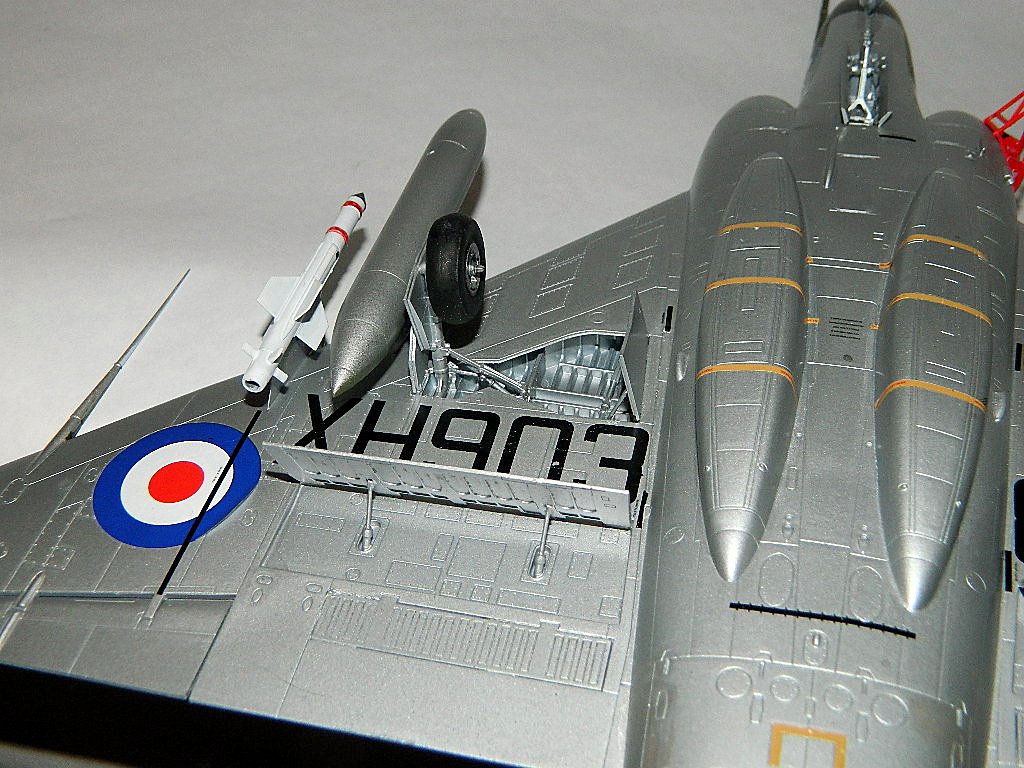
External stores are next; you need to decide on four Firestreak Missiles, or a combination of external tanks and Firestreaks. The instructions show what parts go where; be careful here as the external tanks have a “cranked” or outboard slant on the top part of their mounting pylons.
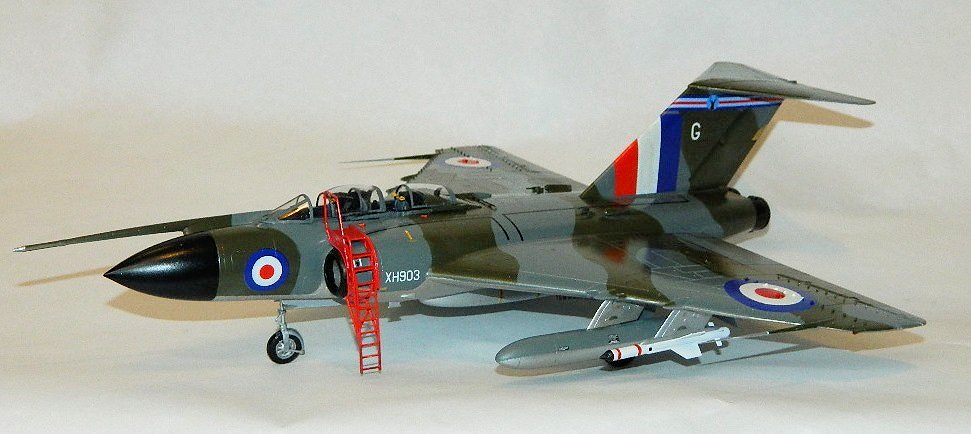
The final steps have you install the various intakes, antenna, and probes, along with the cockpit framing; I was a bit confused as to how the frames went on, but eventually figured them out. (Now is the time to choose an open or closed canopy) I went ahead and painted the model now; as it is easy to do the “speed silver” lower overall, (with the gear installed; I used Tamiya bare metal spray) with the standard RAF dark gray/green topside. All these birds were glossy finish, and I used Tamiya gloss to good effect. The aforementioned decals took me three nights to apply, and I over-coated them afterwards with no problems. Nice thing about the flatiron is the “buzz numbers” on the bottom of the wing to not overlap over any landing gear like they do on other aircraft; very simple. The canopy clear parts and air refueling probe were added last, along with the crew access ladder. (This item adds visual interest, and the kit also has intake and exhaust plugs to show the bird in dispersal if desired)
The last items added were the wingtip leading edge antennas; even though they are long, slender, and fragile, they seemed to handle well and did not break when “tweaked”. Brass replacements might be in order here…
In conclusion, this was an excellent kit, and all the on-line raving is appropriate. It’s as good as the 1997 Airfix Lightning kits… Thanks again to Hornby-America for providing IPMS USA this kit and the opportunity for me to review it!


Comments
Add new comment
This site is protected by reCAPTCHA and the Google Privacy Policy and Terms of Service apply.
Similar Reviews