
Arado 234b
First, welcome to FLY models and thanks very much for sending us this great kit to review… and to the IPMS USA review corps leadership for sending this kit and the landing gear accessory to the crazy builder in Oklahoma…
I purposely did not open any other review commentary on the new Fly Arado 234B-2/B-2N kit… my impression was to be that of someone who just invested in a new company and wondered how it was going to come out.
To the people at FLY… You need not worry; this is one magnificent effort and I’m VERY impressed!
The box belies the size of the aircraft; the Arado is about the size of a B-26, and therefore has a commanding presence in this scale. As I removed the kit items from the box, the initial impression was one of high quality for a “limited run” model. Plastic parts are well formed and have delicate detail; the resin parts are flawless, and the decal sheet holds great promise. The clear parts are just that; clear and distortion-free. They are not cloudy, but a bit of future may be called for. We’ll see…Injection molded parts count is not daunting, unlike many of the uber-kits on the market. Don’t get me wrong, I like those too, but sometimes things get too complicated. This was a relatively simple aircraft design, and the model does it justice.
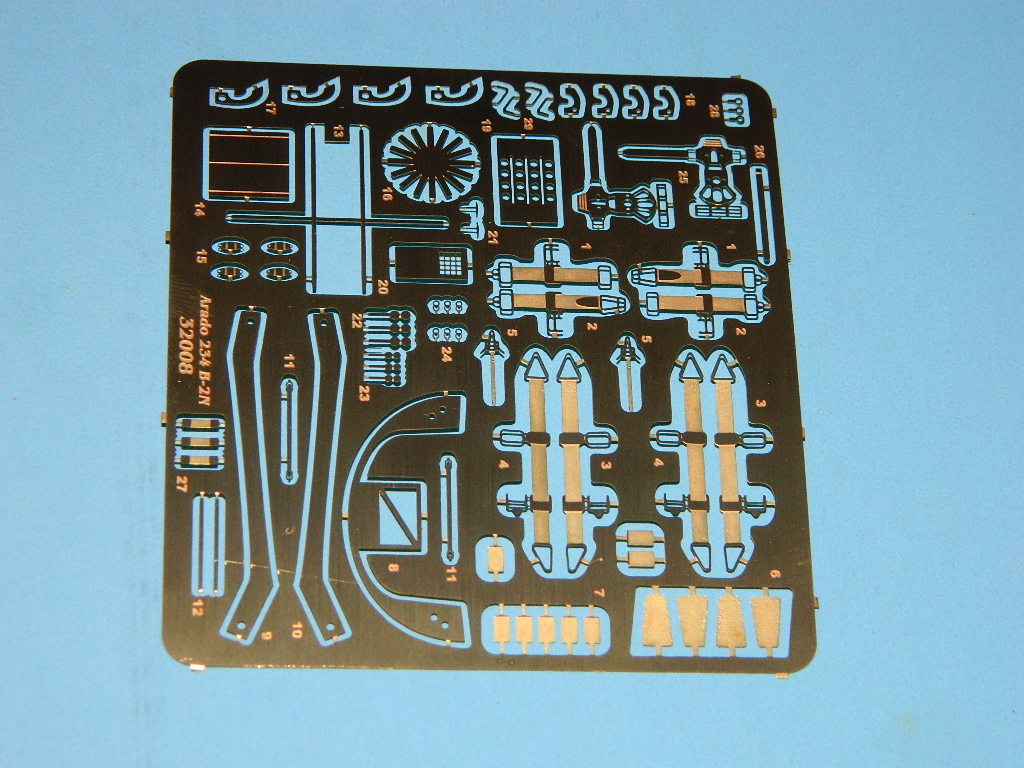
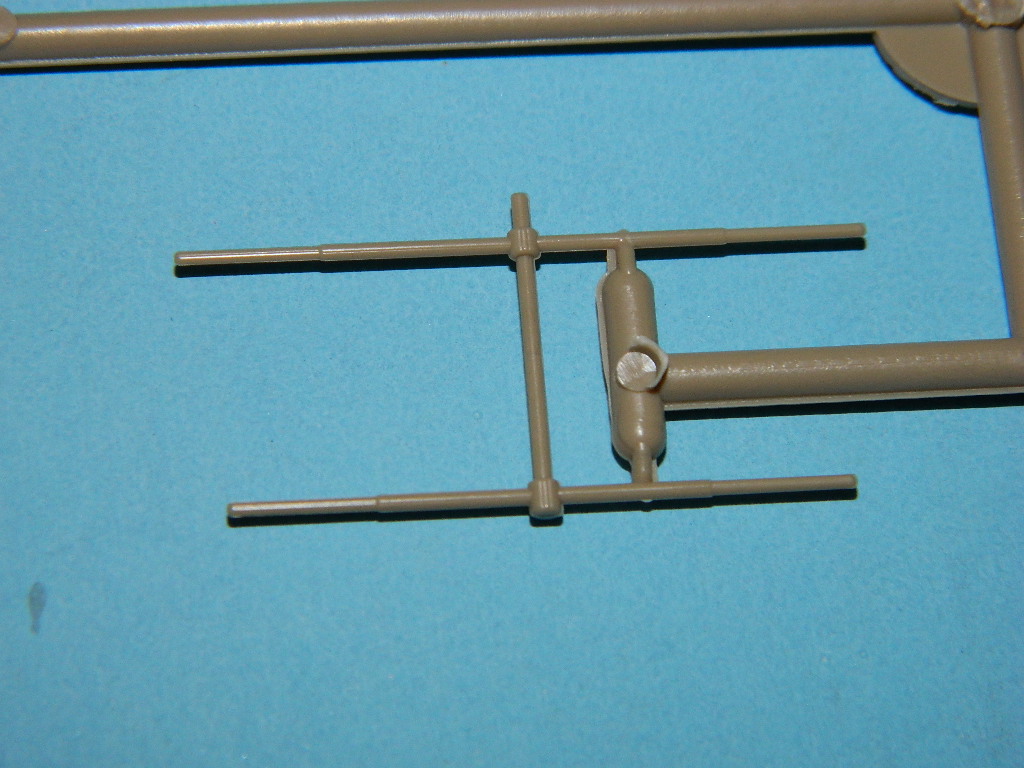
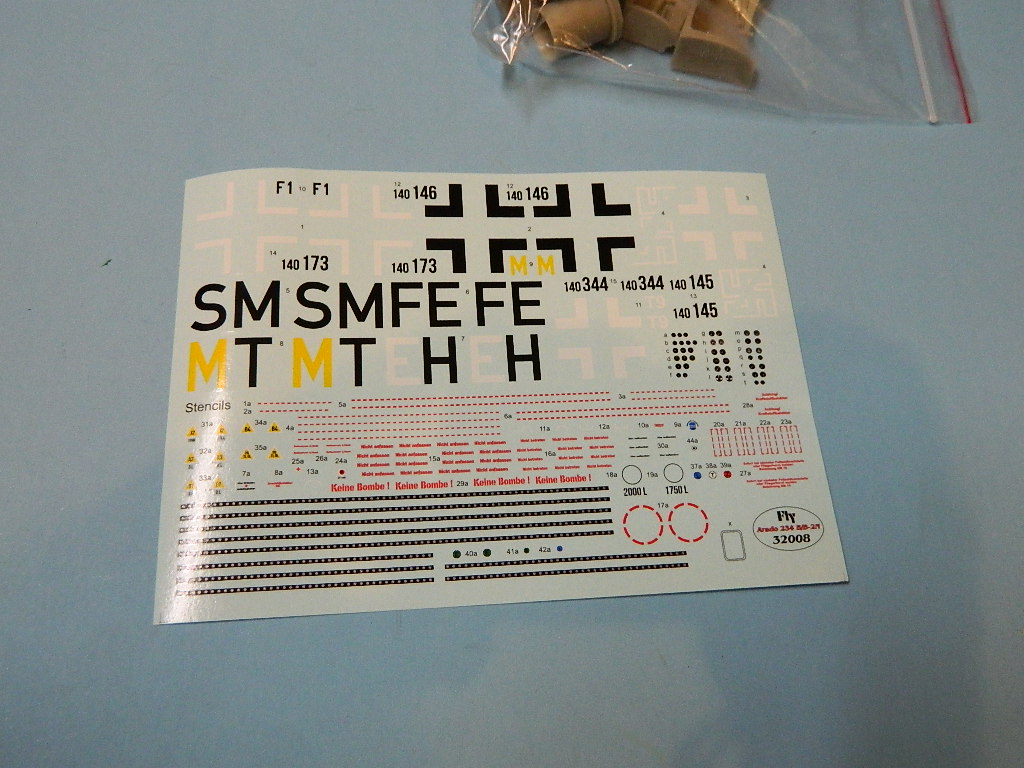
Besides the light greenish-tan injection molded main airframe parts, there is a Photoetch fret with cockpit and structural details, clear canopy upper and lower sections, as well as the aft canopy hatch, Automatic Direction Finding blister, and navigation lights. A separate plastic sprue is included with the nose radar antenna, and the all-important resin bits, including the massive twin 30MM cannon pod to be mounted in the bomb recess. Two bits of string of different size are included, to be used for the tail drag parachute cable, and the underwing rocket pack parachute lanyards. Nice details!
The beginning is one very important step for a multi-media kit: Preparation! I cleaned the resin by putting all the parts in a plastic ziplock bag and soaking in “bleach-white” tire cleaner for an hour; it does a great job of removing any mold release or residues, and after a light “toothbrushing” and warm water rinse, the parts came out ready for primer. (Wear protective gloves and glasses while doing this… The stuff will attack your skin and burn your eyes. When everything was dried, I used my normal Duplicolor automotive “hot rod primer” gray on all the parts; it closely resembles the appropriate RLM color for the cockpit, and affords a base on which to use Vallejo acrylics, which is my new paint “weapon of choice”. I also took this time to spray the enclosed brass fret as well… Primer is a must on metal.
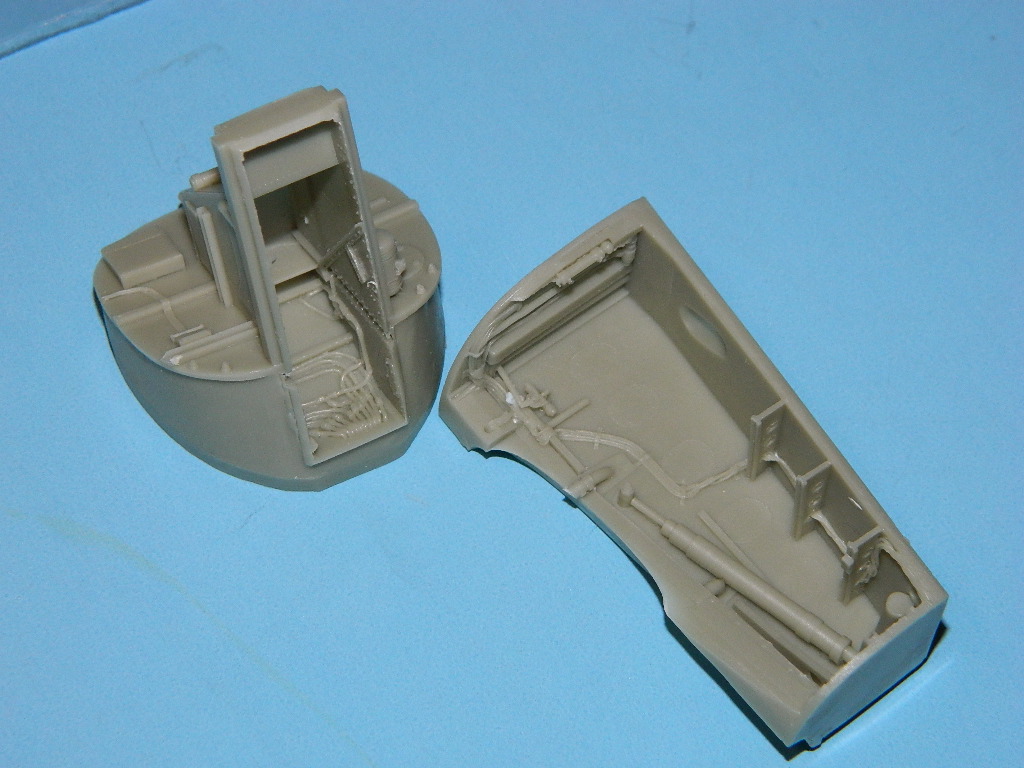
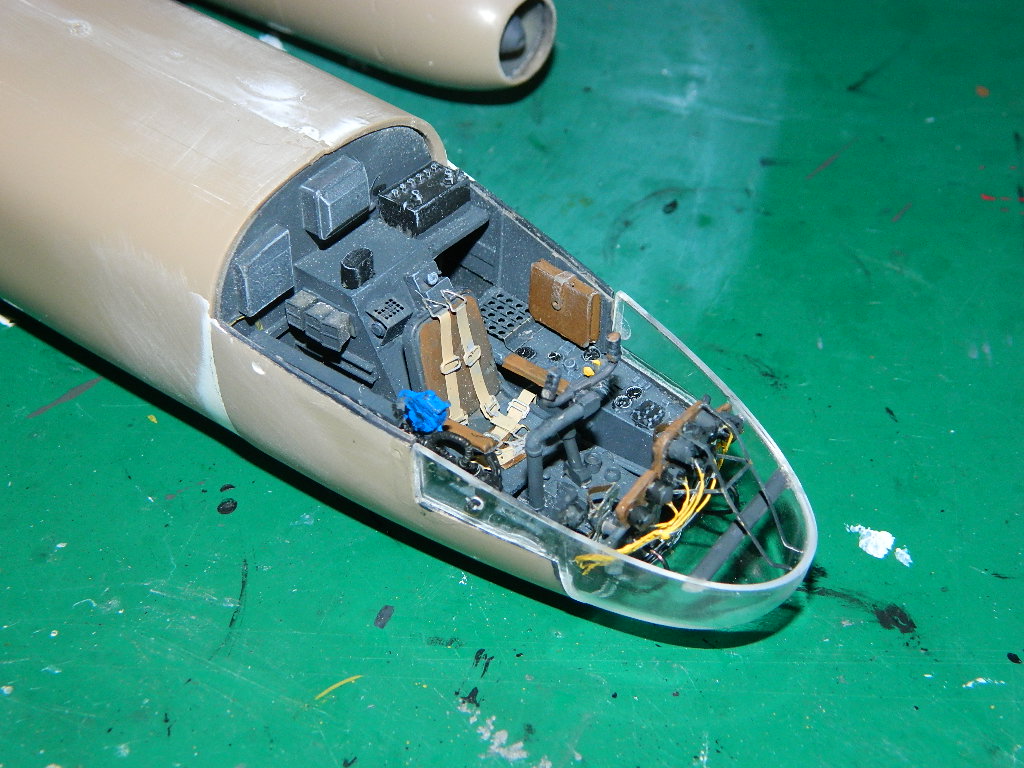
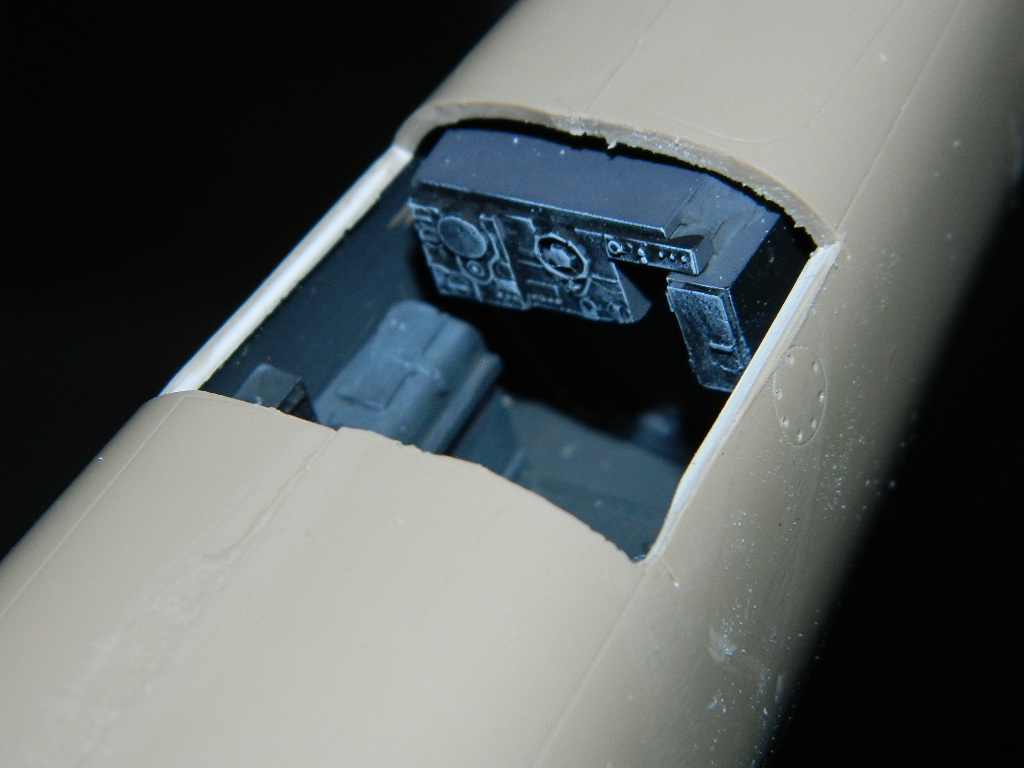
I pulled up the references on the Arado on the net, and what is in the kit looks correct. First bits to install were the resin main wheel wells. They fit perfectly and stayed in place with superglue. Then I moved to the aft cockpit assembly; this was appropriately detailed, and everything fit well (and accurately) between the two fuselage halves. You will be required to remove part of the overhead fuselage to install the clear hatch assembly; I taped the two fuselage halves together, used hatch to mark the location of the required cuts, used some masking tape to mark out the cut locations, and attacked… first with a fresh #11 blade to make pre-cut marks for el saw du razor, then proceeded to remove the hatch area. When done, a bit of work with the sharp knife, and we were done. The hatch fit VERY well.
Ok so the radio operator’s hatch required a bit of putty to fair in; I used Tamiya white putty with a bit of gray paint mixed in to prevent the interior “ooze” effect, (you know, white putty against a gray interior just looks bad), and when this had dried sanded everything down until it was flush. (See the picture). Then I used progressively finer sanding pads with water, finally finishing off with plastic polish and a touch of Future floor polish to bring back the shine. After a day I masked off the overhead window, and it was done…
By the way, fit of the major kit parts is impressive; there are no locating pins or sockets on any mating surfaces, but due to Fly’s diligence and manufacturing accuracy, everything matches up! The fuselage halves are sturdy and did not have ANY error or offset… same for the wing halves… the wing and control surface trailing edges are very fine, and the only area really needing a bit of touch up was at the leading edge of the main wing roots. The stabilizers also fit well, with tongue and slot installation, and only required a smear of Vallejo putty to fair in the roots. I use liquid cement as a matter of course, and was totally impressed with how everything lined up on this model. High marks to FLY!!!
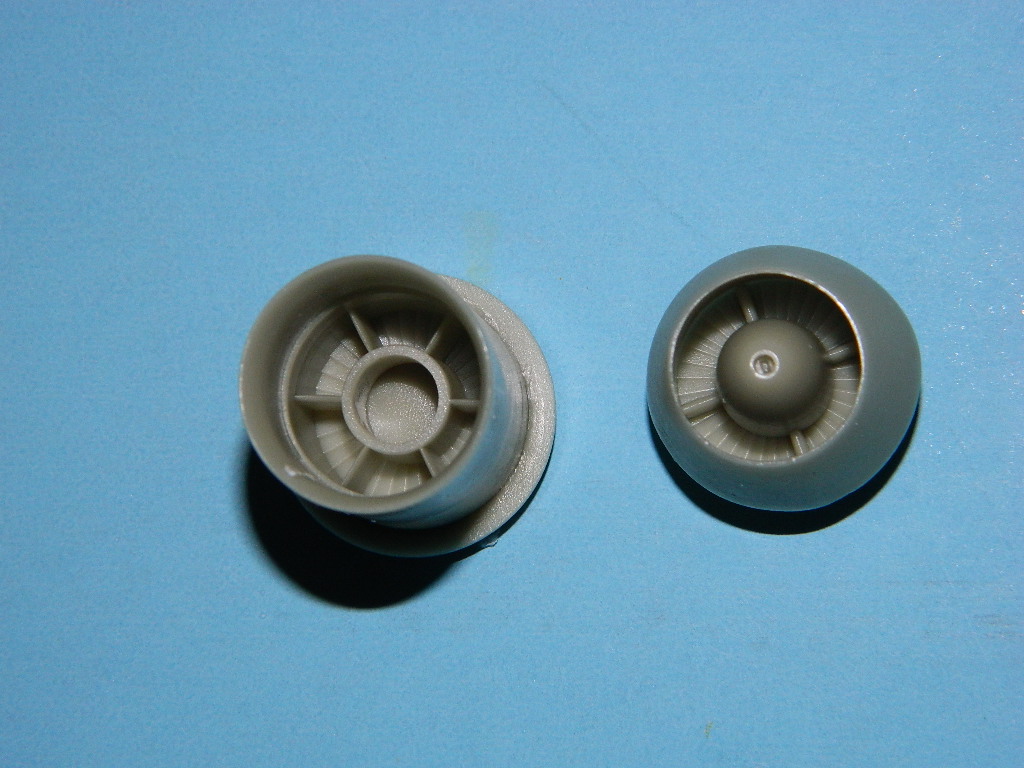
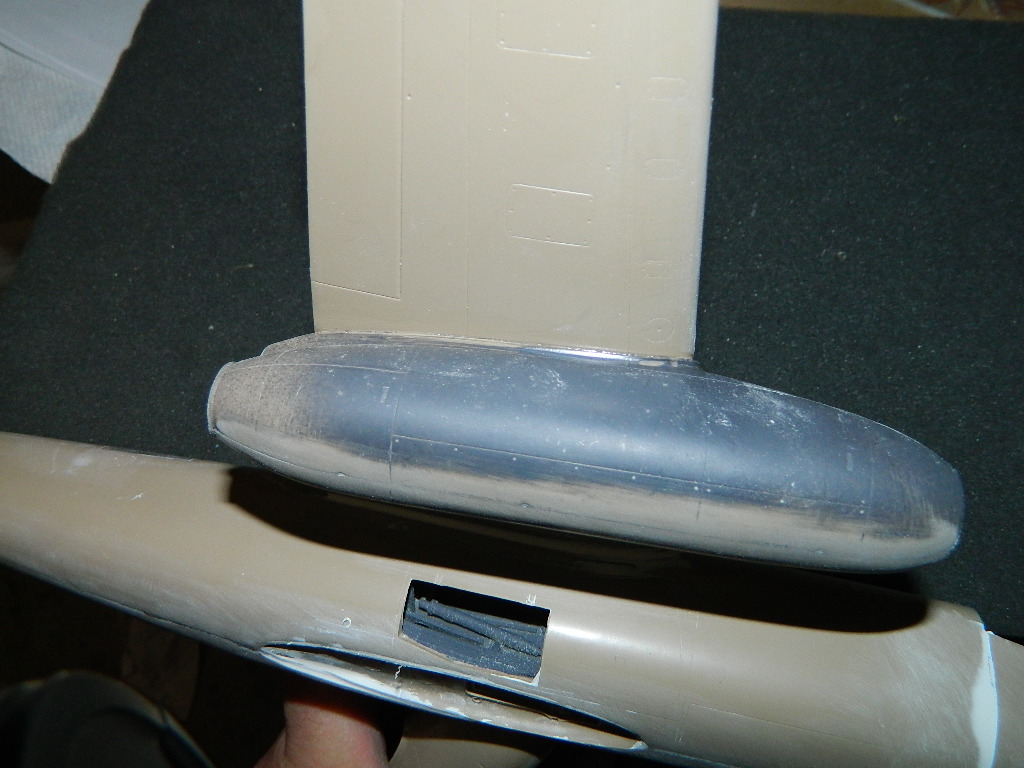
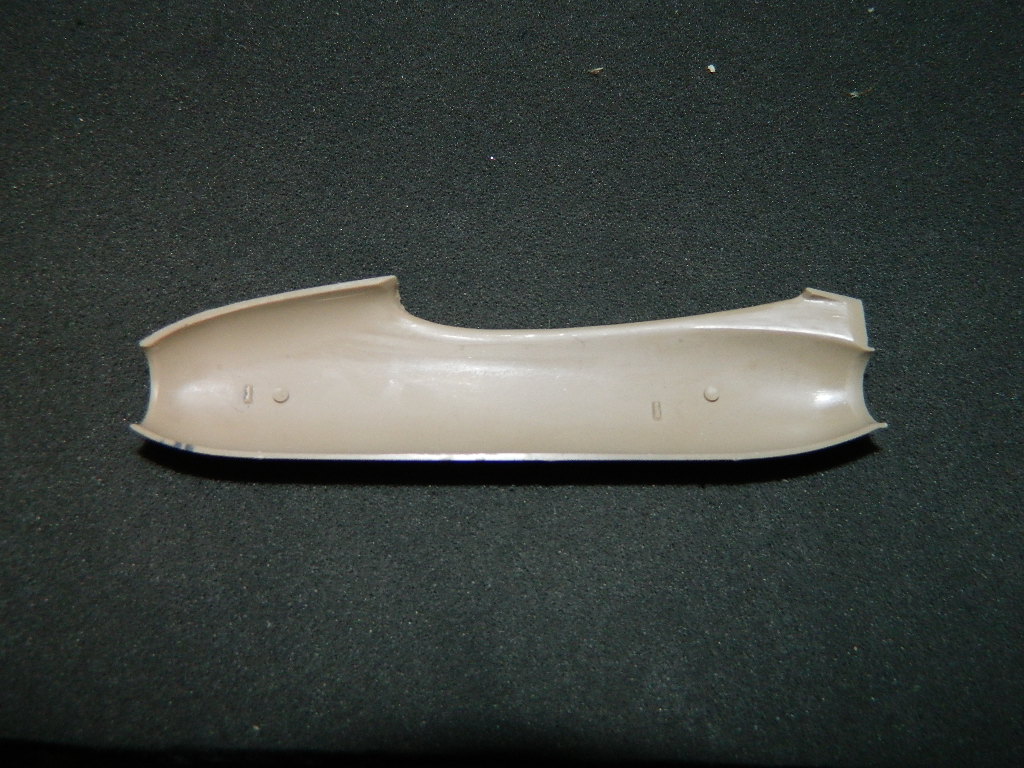
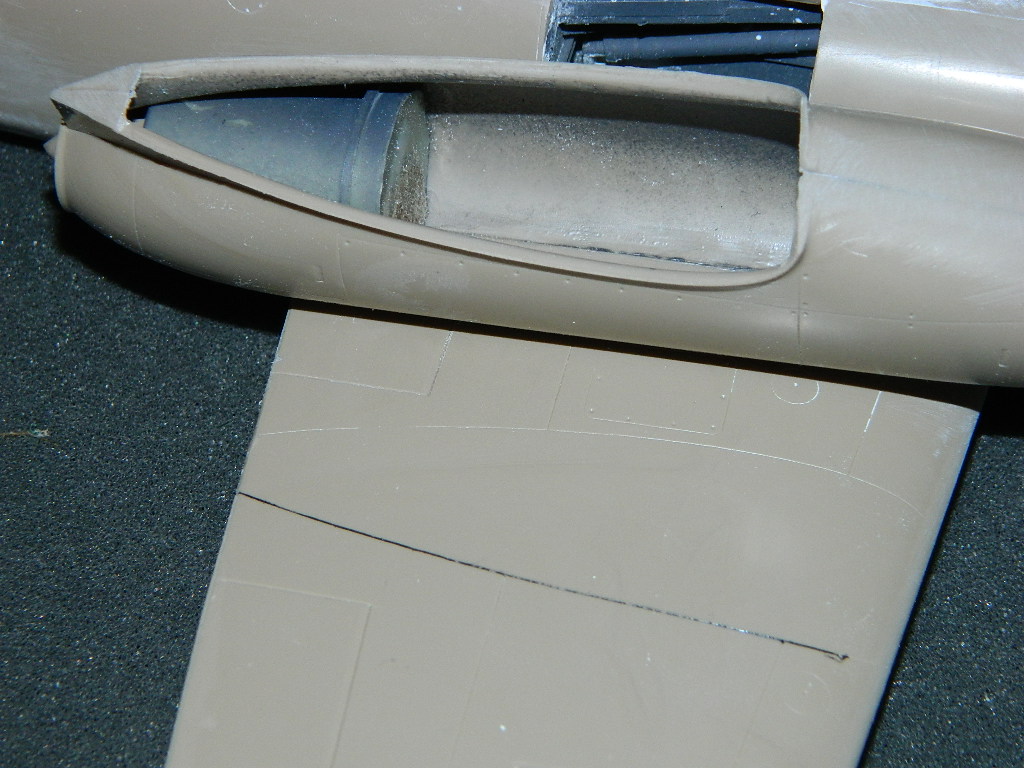
The engine nacelles were tackled next. Like the fuselage, the two nacelle parts fit almost perfectly, needing only a bit of work with a sanding stick to clean up the ooze. A note about the resin intake and exhaust… They both have pour stubs on the back but you do not have to remove them. On the interior of the nacelle are index marks to facilitate supergluing them into place. I opted to just push them forward against the lip of each section, put a few drops of CA down the side, and then hit with accelerator. They both fit perfectly! The aft exhaust ‘tulip” flow straighteners are two halves each; after assembly and cleanup, they were a press-fit into the turbine section. More great engineering! When ready to cement into place, I used the scribe marks on the lower wing section to line everything up… use a fine sharpie or pencil, hold in place, and flow liquid cement into the join… no filler required on the lower section! Only a touch of filler was required on the upper section where it wraps around the leading edge.
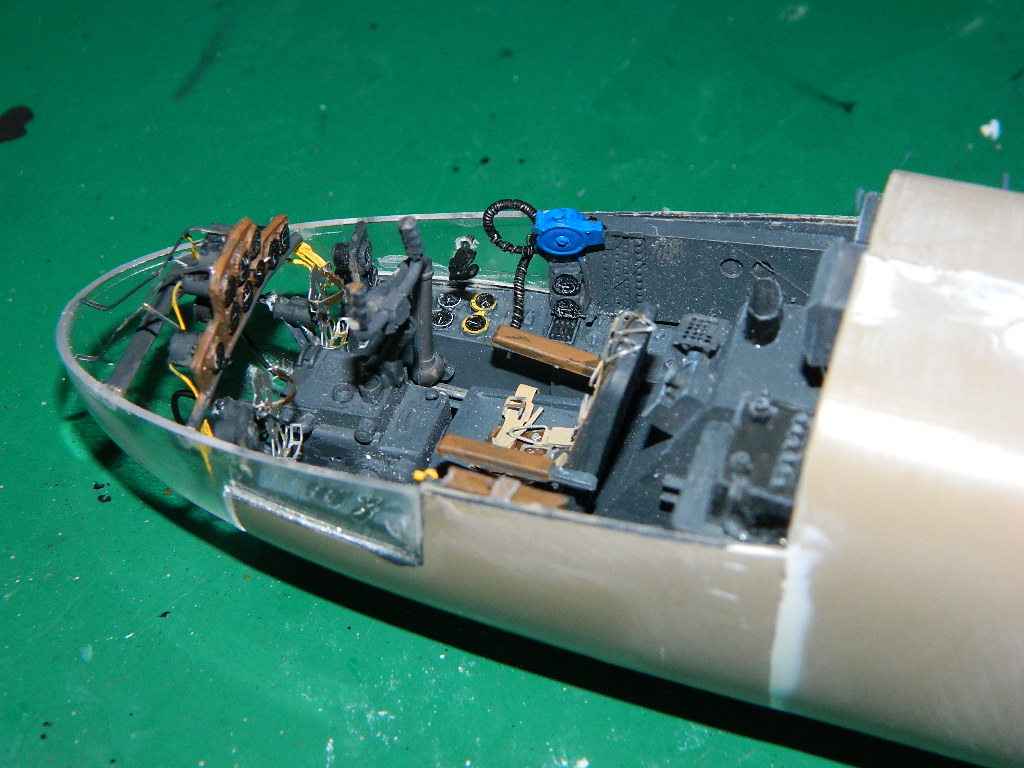
Next up was the forward cockpit. No color details are provided, so pull up your internet resources (or the now-defunct “Wings” magazine article on the Smithsonian rebuild from around 1978) This only required one to carefully paint and attach everything… I painted the instrument panel with woodgrain effect, the bezels black, and then applied the individual instrument decals from the kit sheet. A bit of Solvaset, and you can clear coat the dials for added interest. Resin instrument housings were then added to the back of the panel; please note wiring for the instruments and rudder brake lines are not included… as the canopy is so large and optically clear, it would be noticed in this scale. A drill was used to clean out holes on the lower back of the housings, to which I added the instrument wiring from 20 Gauge jewelry wire. This was painted flat yellow then routed to the sides. The forward panel mount bracing is a one-part PE assembly, carefully folded.
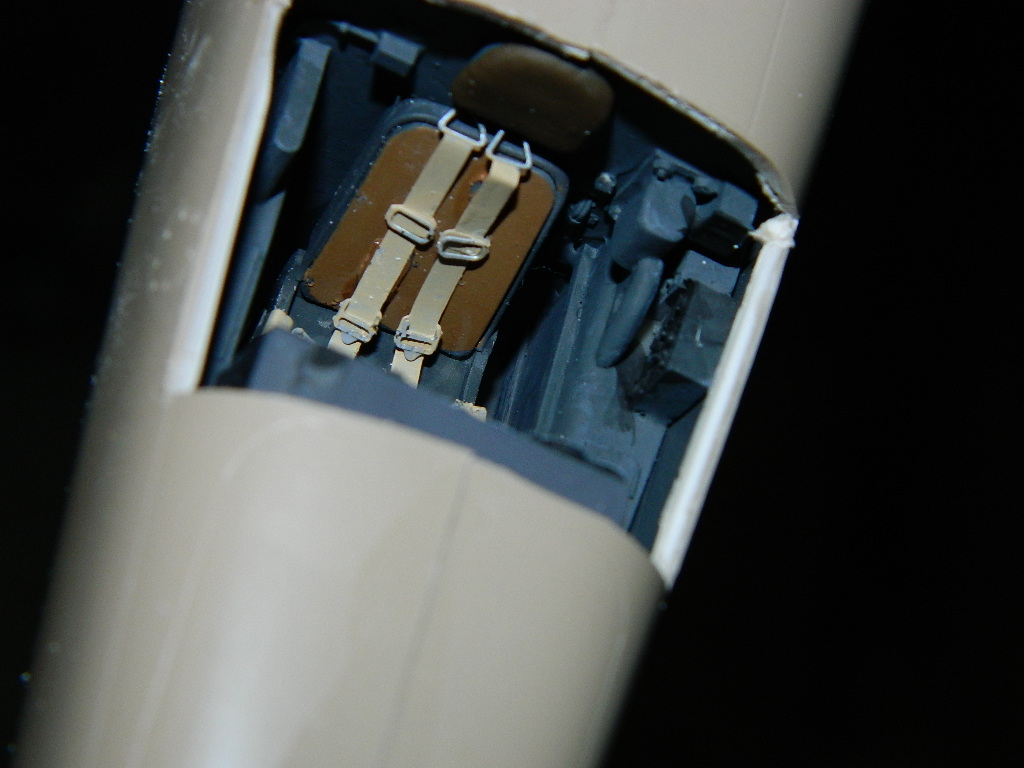
The seat harness was painted and installed in the seat, as were the armrests. Rudder pedals were carefully removed, folded, and installed; the brake lines were fabricated from 24 Gauge jewelry wire, added to the back of the pedal mounts, and routed under the pedal mounts… when painted, all these wires and line details looked great and added to the overall impression of a “busy” office. I had previously mounted the PE throttle levers, which were inadvertently “cleaned off” in one of my hand movements. Ol’ bear paws got in the way again… so I cut a couple of pieces of plastic strip, which were then painted silver and placed into the slots. The yellow handles were painted with thickened paint and look ok to me…
One detail I found interesting was the inclusion of a flare pistol, mounted to the forward canopy. I will now tackle the drilling of holes to facilitate installing the night fighter antenna array; there are details on this with the instruction sheet; we’ll see how I do.
Simple things make a difference… and this has been a fun build of one of my favorite aircraft. So far FLY has my vote as a contender for best new kit manufacturer of the year…


Comments
Add new comment
This site is protected by reCAPTCHA and the Google Privacy Policy and Terms of Service apply.
Similar Reviews