
F/A-18F Super Hornet
Coming in under budget, on schedule and underway the McDonnell Douglas F/A -18 E/F have replaced 4 separate aircraft for the US Navy. The Super Hornet has more powerful engines and can carry war weapons further then the previous Legacy Hornets. Congress was quick to approve the new Hornet which is an advanced derivative of the existing Hornet.
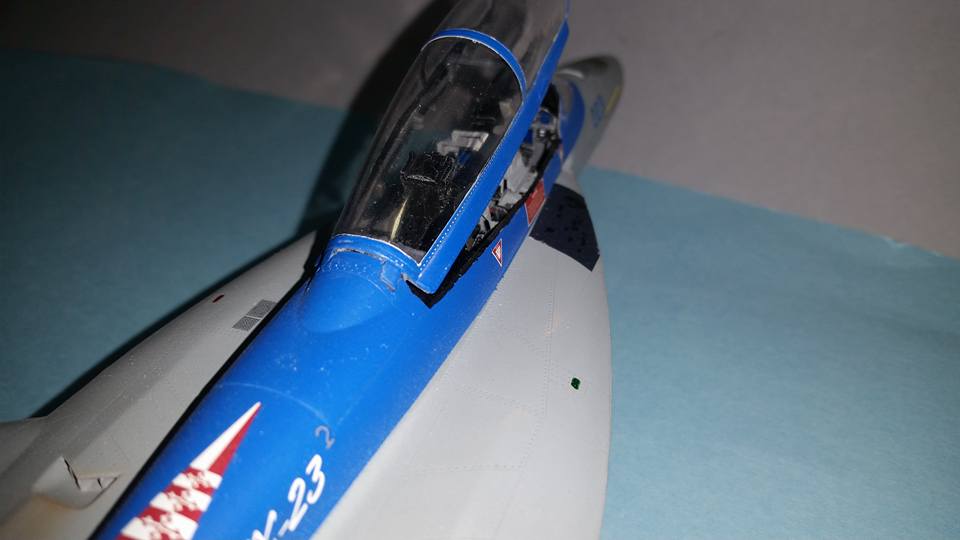
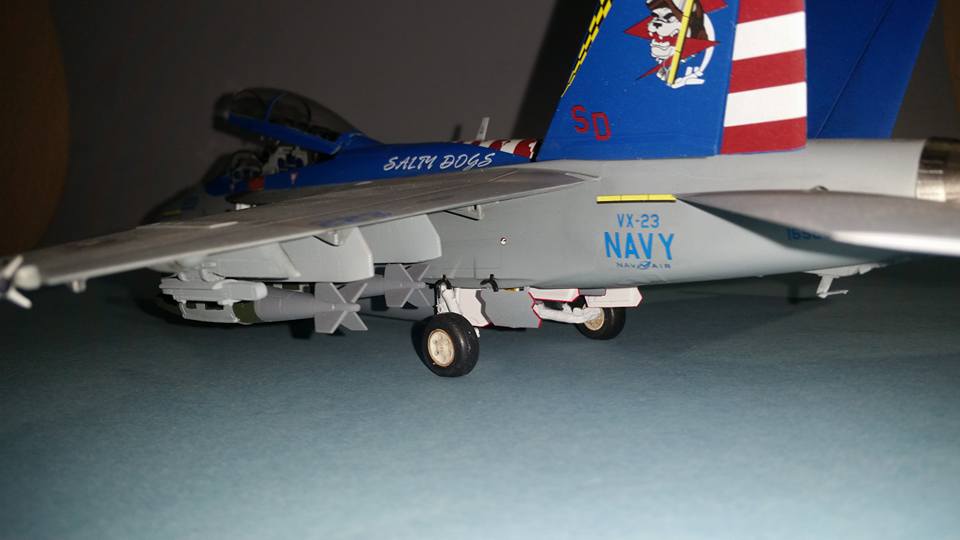
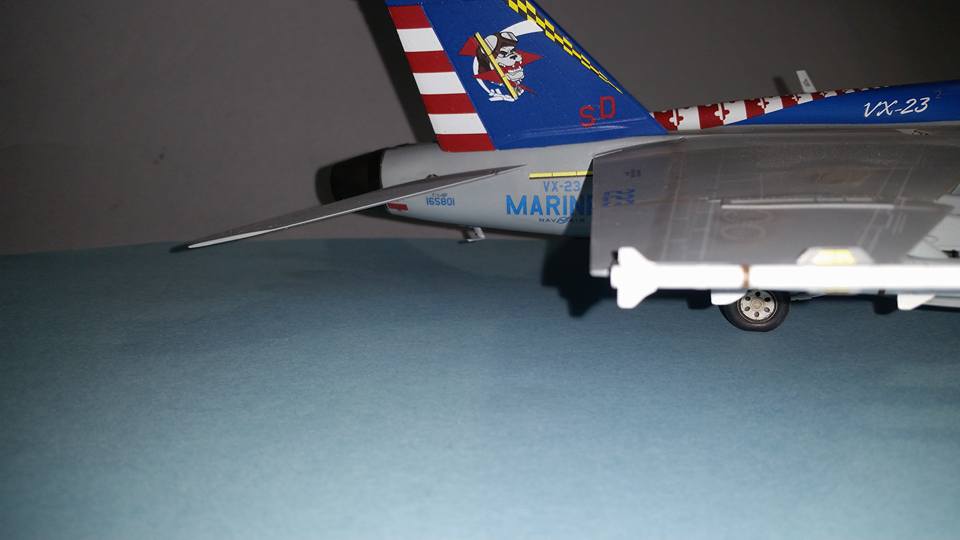
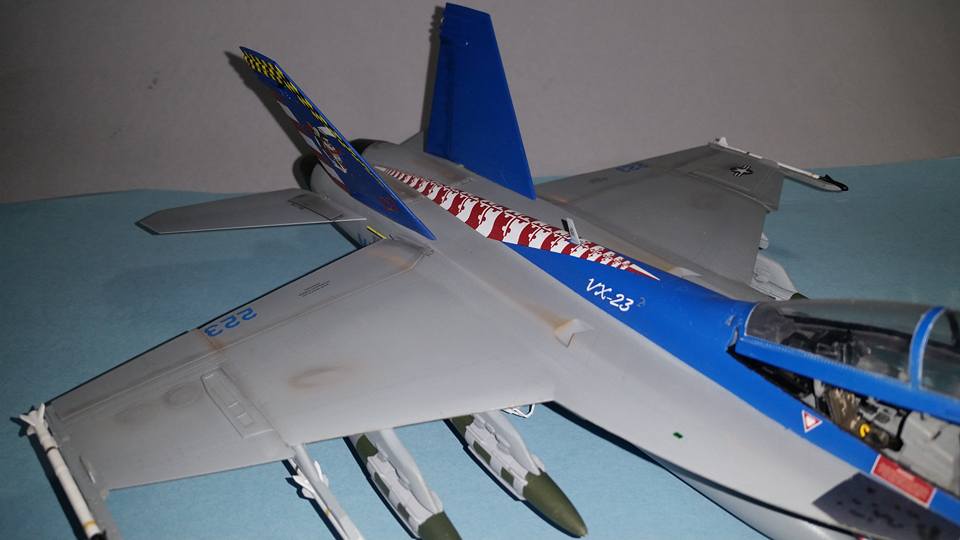
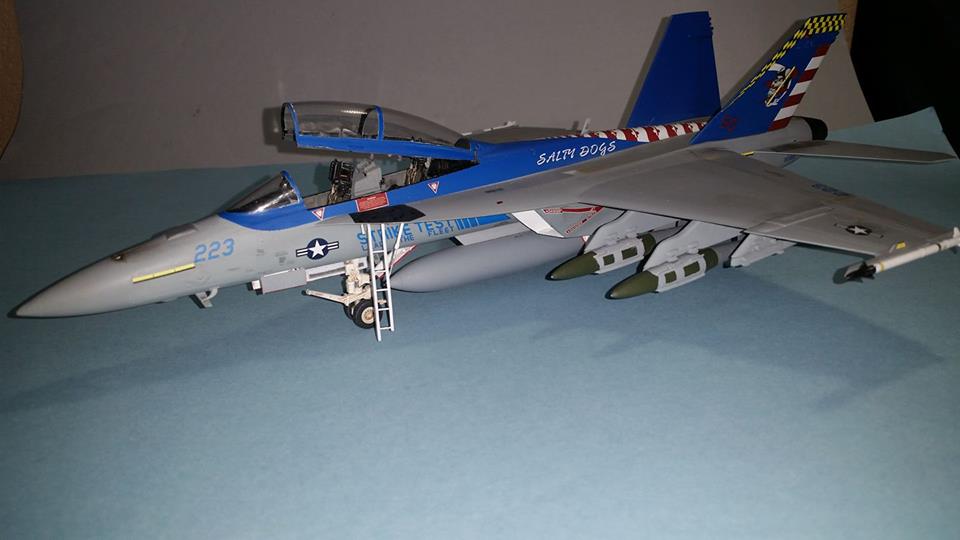
Revell has recently re-released both versions of the new modern Super Hornet. The version I chose to model is a specially decorated version of the Super Hornet from VX-23 “Salty Dogs” (Air Test and Evaluation Squadron 23) NAS Pax River, Maryland. Sporting very bright blue diamond stripe with red and white checks down the spine and bright blue vertical stabilizers, this is remarkably attractive aircraft. The second airframe on the decal sheet is A CAG bird from VFA-32 the Fighting Swordsman's from Navel Air Station Oceania, Virginia Beach Virginia.
Parts Count
- 5 parts on one crystal clear sprue
- 171 parts on eleven medium grey sprue
- 29 steps, 20 page instruction manual with paint guide and parts list
- 6” x 10” decal sheet with markings for two airframes
- 165801 VX-23 “Salty Dogs” NAS Pax River
- 16661 VFA-32 “Fighting Swordsmen” NAS Oceana
Like with most Revell aircraft models, the construction begins with the cockpit interior and four part ejection seats. I give Revell kudos for their excellent detailed ejection seats common with most Revell aircraft kits. With the seats built I moved on to the nine part cockpit tub interior where instruments faces can be painted in or decaled. I chose to do a little of both, painting the base color light ghost gray and the instrument boxes flat black. I then cut to fit the decals which set into the small instrument faces of multi-function display screens. After drybrushing the buttons and dials I placed small drops of clear acrylic paint over the instrument faces and decals to give them a glass look. Correctly Revell included all four control sticks/throttles with this kit. Steps one and two are dedicated to the construction and painting of the cockpit interior. With the proper application of paint, decals and a little drybrushing the bang seats and cockpit interior look just as good as any after market reproduction.
Step 3 is dedicated to the placement of the aircraft interior to the main body but first don’t forget to install Parts 114, 115 and 117 into the upper and lower fuselage halves.
With step 4 the engine intakes, engine faces, and the constructed main intake trunks are attached to the main lower body. I found parts 57, 55, 56 and 58 had major injection pens marks. It took me nearly 1 hour to sand and fill these injection pen marks. Prior to installing the main engine intakes to the main fuselage I used a modified latex paint poor to try to eliminate any further reveal of the seams. Another issue comes when installing the intakes to the lower main body portion. There is a major gap between parts 12 and 13 which needs to be filled and sanded repeatedly. Try not to damage any of the fine engraved detail here.
On step 5 is the placement of the upper fuselage to the lower fuselage which includes a little swivel piece for the rear elevators. If you're going to glue this in place, make sure that parts 123 and 122 lean back in such a manner as to accurately represent the droop in the elevators. You are going to find some difficulty in fitting the rear proportion of the main fuselage together. I found clamps and rubber bands held the parts around the stabilizer joint securely
The construction of the front nose section of the aircraft is in Step 6. Take your time to make sure everything lines up first while you're doing your gluing to avoid any strange gaps. I also took the time to add just a little weight to the nose at this point. 10 bb’s worked perfect for a little counter weight. Step 7 is the mating of the nose to the main body structure. Again like in step 6 be real careful with here your alignment so that you can minimize your filling and sanding later. Again I used some rubber bands and clamps to get everything to fit nice and tight.
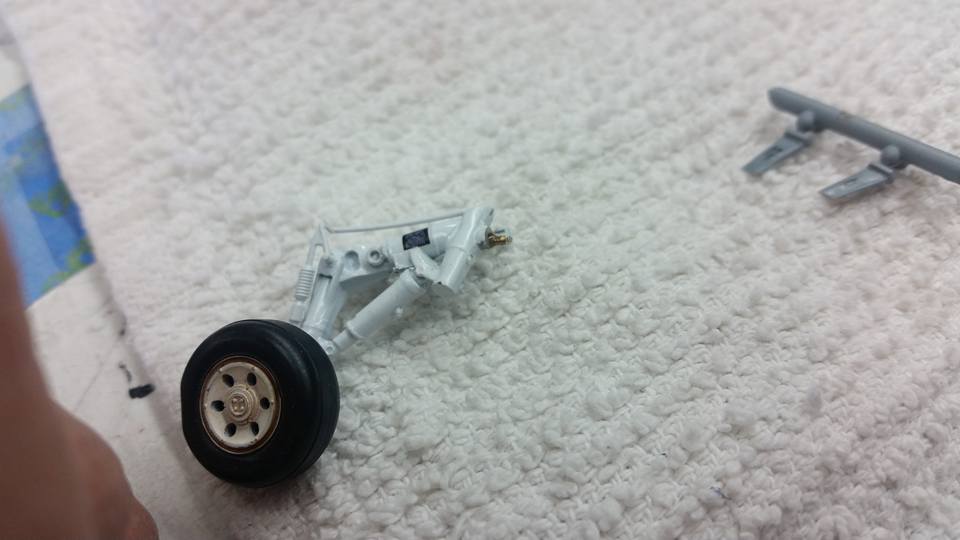
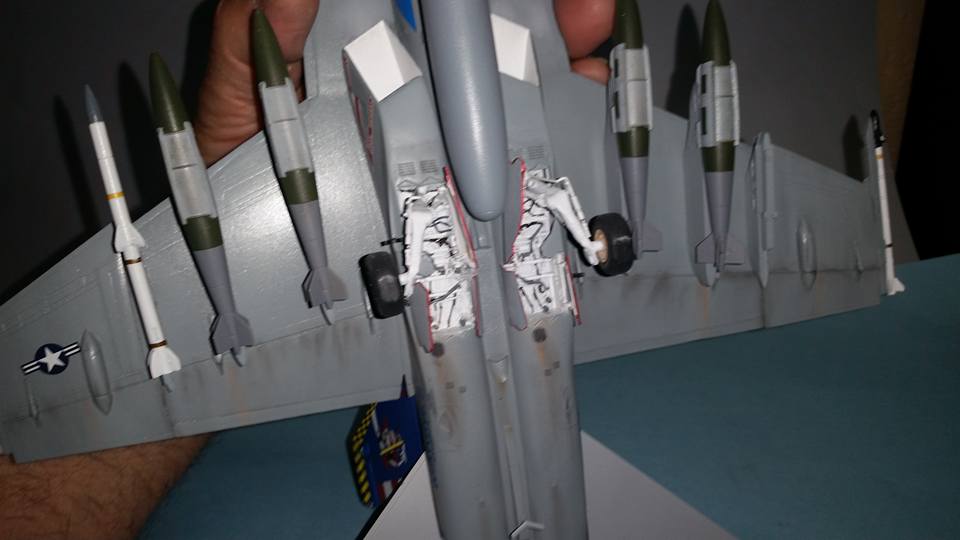
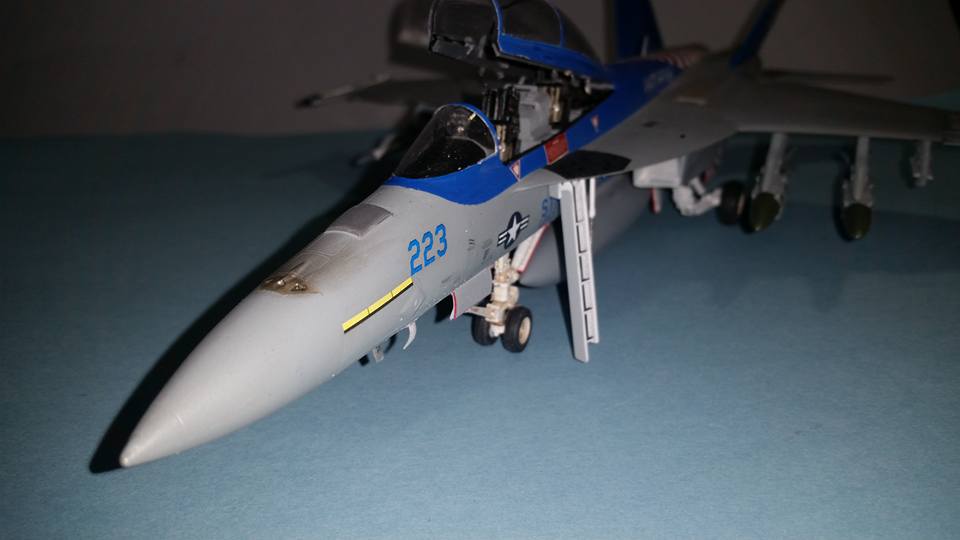
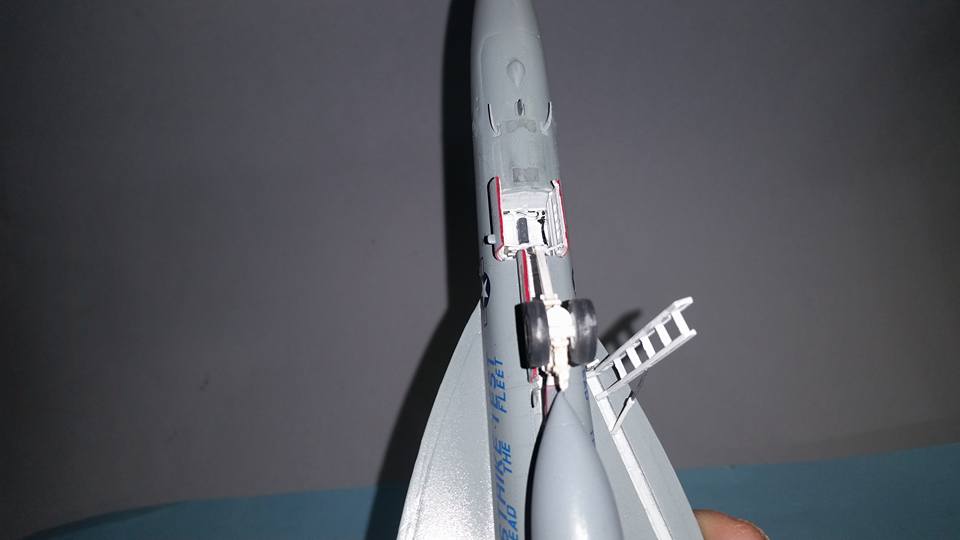
Painting and assembly of the exhaust cones is the next step. I left off the decals on the exhaust interior. Also exhaust cones are left off the plane until the last assembly sequences. Steps 9 through 12 are all about the front and main landing gear. There are a lot of minute finicky parts to this segment of the construction. Be particularly careful with part 48 and 47 as you apply them to the main landing struts as they are very fragile and stick out quite a bit. I had a difficult time getting the aircraft to sit level from the main landing gear and ended up using brass pins the hold the landing gear straight.
Simply put I drilled 1/16” hole in both the main landing gear male attachment and the corresponding female connection point. Two part J B Weld epoxy was used with 1/16” brass rod for the joint and the aircraft was allowed to sit in traction for 24 hours. Then the F/A-18F was strong enough to stand under its own weight.
The landing gear doors were painted gloss white on the inside and the appropriate underside color on the outside and then I used a fresh red Sharpie to outline the safety boundary. Retracting parts 65 and 66 do not attach well, just a little caution here to get them to appear true.
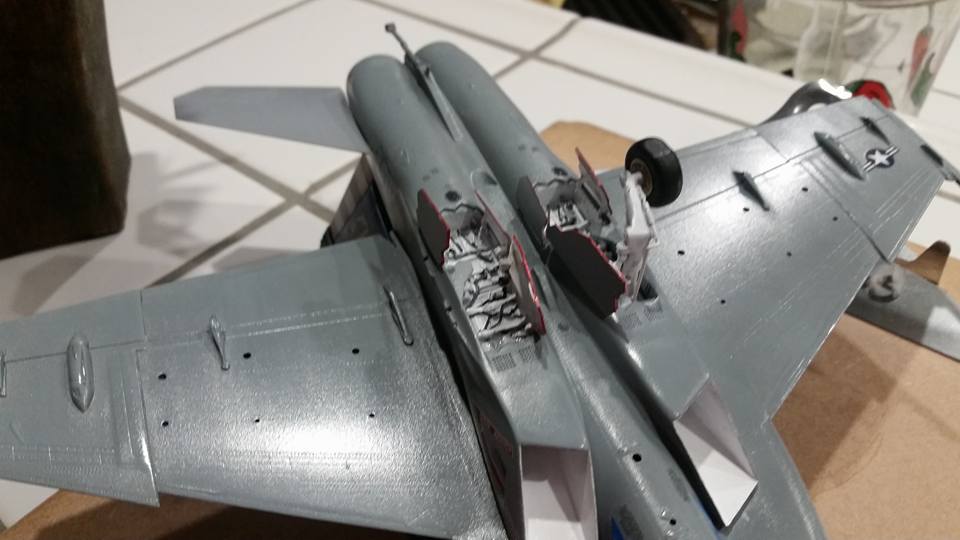
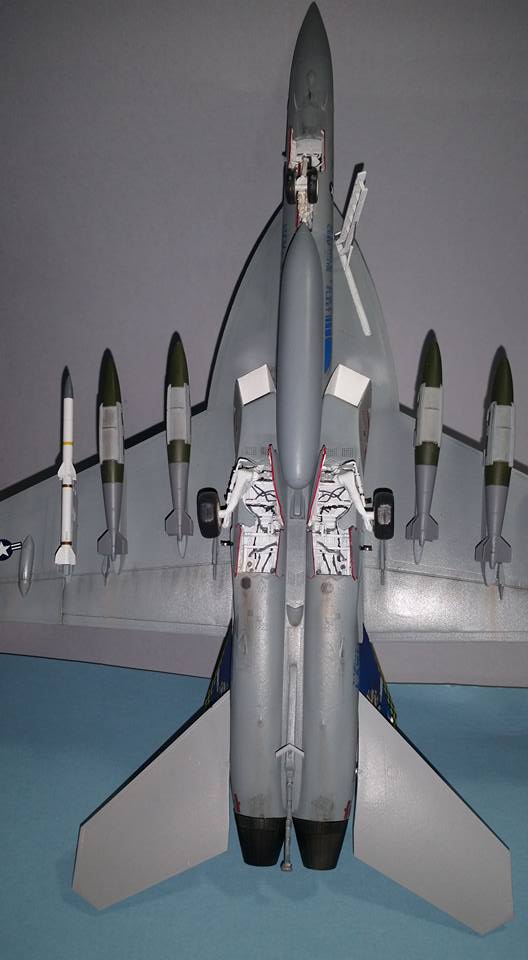
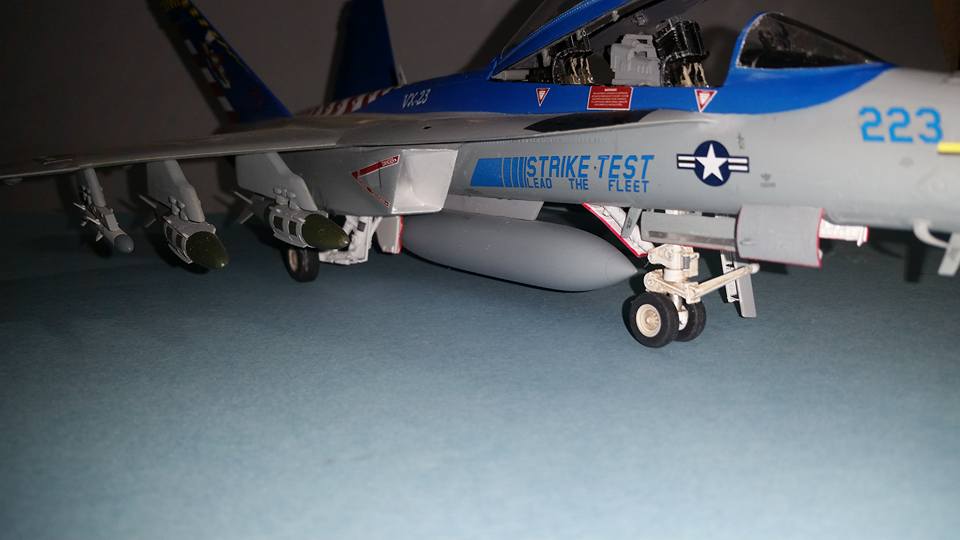
About this time at Step 13 and 14 you start adding the flap hinges and under wing hard points. Options for under wing stores are; AIM-X Sidewinders, AIM-120 AMRAAM, Mk-83 General Purpose Bombs, AN/ASQ -228 advanced FLIR, AGM-88 HARM, and one centerline drop tank.
Once you've made your choice of under wing stores the smaller details start to come together. Time to install things like lower antennas, pitot tubes, stabilizers, and elevators.
I like to build my models and small sub-assemblies and love when things can be constructed, painted, and set aside until final assembly. For the Super Hornet with its wild VX-23 paint scheme I chose to leave parts 8 and 9, the vertical stabilizers until near the end of construction. I had sprayed them Vallejo royal blue, gloss coated, decaled and then re-coated.
I masked my canopy using Tamiya yellow tape cut into small triangular pieces. The main canopy assembly has some nice details including interior railing. It might be a somewhat thick in the details but looks pleasant when painted up and installed
The boarding ladder consists of 9 parts and is very delicate to assemble. I left this off to the very last step right before installing the canopy reversing steps 25 and 26.
Throughout my construction I primarily used Mr. Hobby cement, Tamiya acrylic paint, and Alclad Lacquer metallic. Tamiya weathering kits were used to address the many stains and slight seasoning on this bird.
Revell has really stepped up its game when it comes to decals. I found their decals to be of excellent color and registry, precise consistency in thickness and flexibility, a sure necessity for completing such a complex paint and decal scheme.
No decal setting solution was necessary to get these details to sit down near-perfect.
Overall with 35 hours in total construction time, I found this aircraft a pleasure to build. I have already started a second version in order to make use of a new Furball decal sheet with markings for VFA-103. Considering the price of the competing kits to the Revell kit, this model is a fantastic buy and I would highly recommend adding an Revell F/A-18E or F Super Hornet to your inventory.
Thanks to Revell, Dick Montgomery, Dave Morressette, and the rest of the IPMS Reviewer Corp assistants and IPMS/USA for the chance to build and review this subject and I deeply apologize for the delay in getting this review out..


Canopy & Cockpit Left
Canopy & Cockpit Right

Tail Section
Landing Gear Leg & Wheel
Landing Gear Installation

Armament
Underside
Left Side

Right Side

Exhausts Top
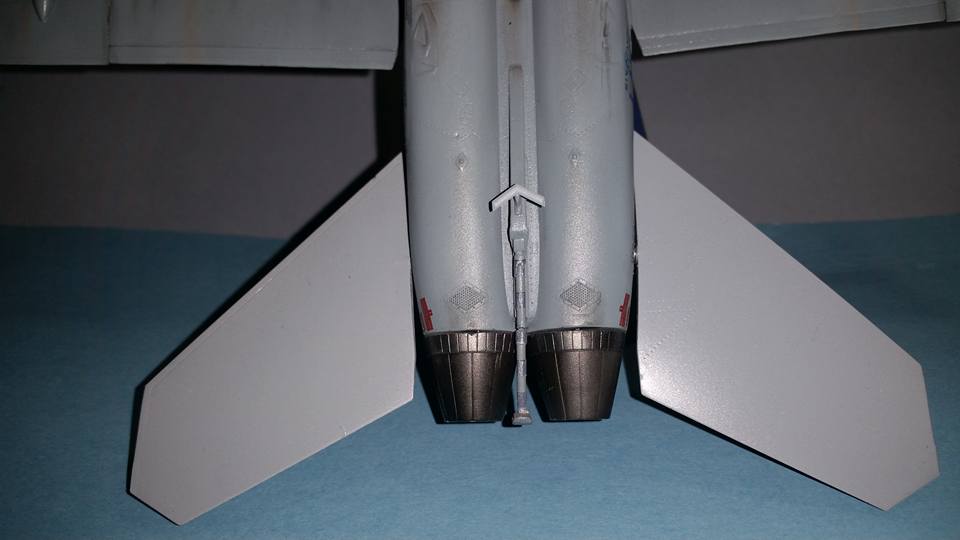
Exhausts Bottom
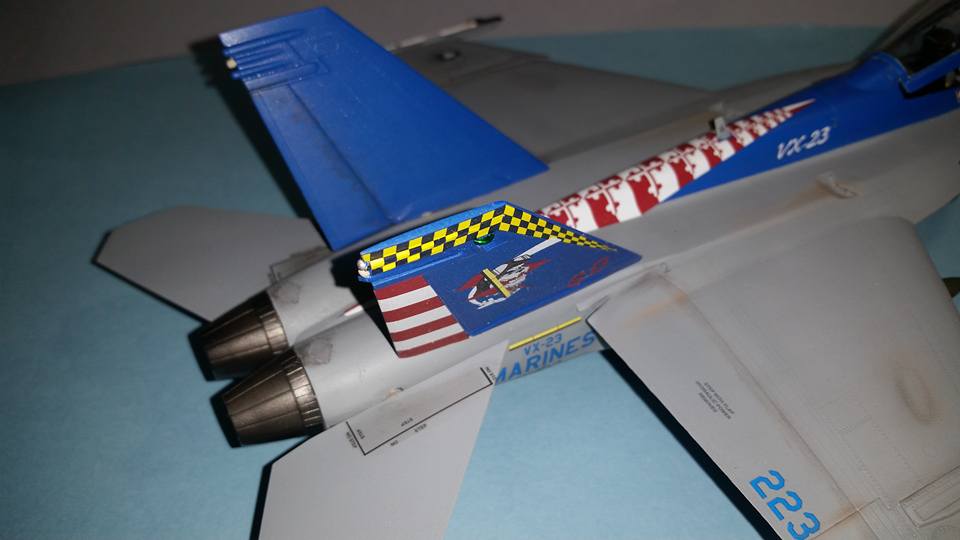
Tail & Top Special Markings

Boarding Ladder
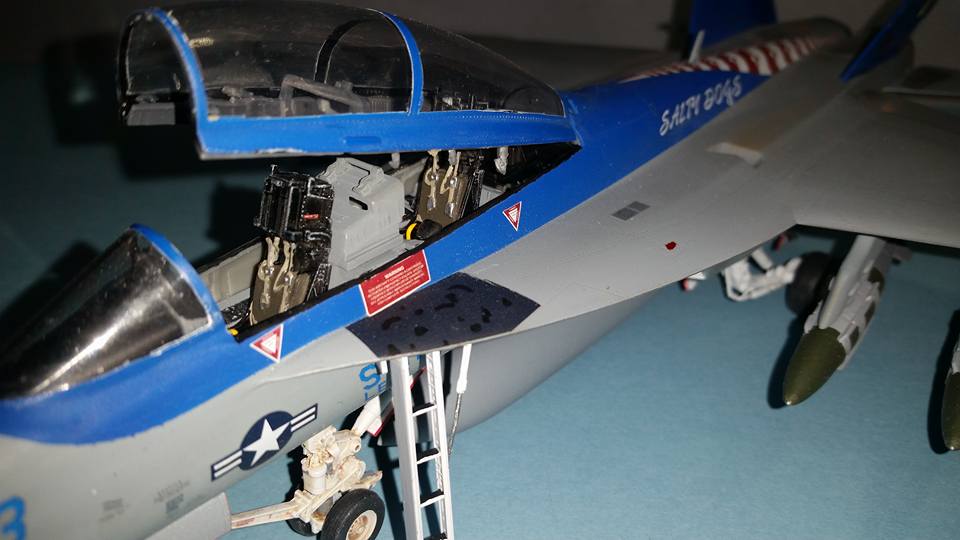
Cockpit from Left Front
Weathering on Underside

Right Side from Front
Left Side Rear
Right Side Top Front View
Right Side Front
Left Side Top Front
Nose Gear
Comments
Add new comment
This site is protected by reCAPTCHA and the Google Privacy Policy and Terms of Service apply.
Similar Reviews