
A6M2 Zero IJN (2 options)
The Aircraft
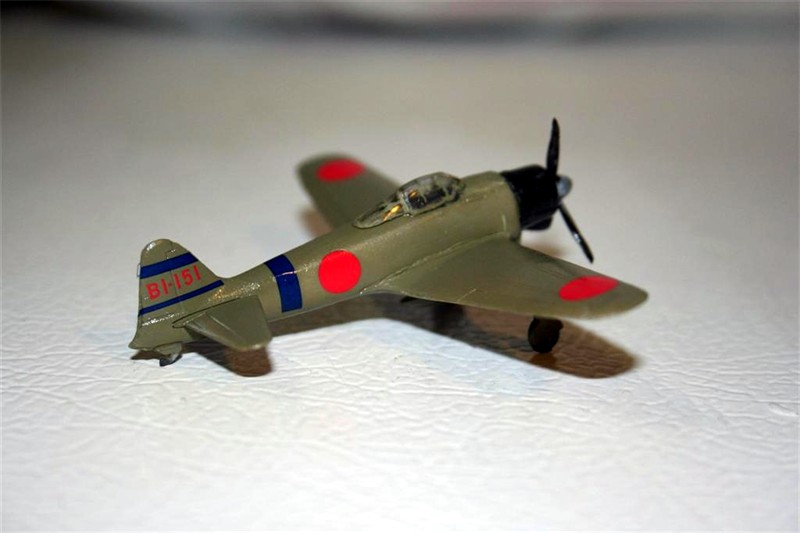
The A6M2 Zero-sen was the best carrier-based fighter in the world from 1940 to 1942, when more powerful Allied aircraft came on the scene. Fairly fast, very maneuverable, capable of a good rate of climb, it was dominant in the Pacific at the beginning of World War II. One of the markings for the Minicraft A6M2 is from the Soryu at Pearl Harbor, the other is for the “Akutan Zero” which crash landed almost intact in the Aleutians, and was flown by the US Navy for evaluation.
The Kit
Two sprues of light gray plastic and a clear canopy. The wing and horizontal stabilizer are each one piece, with 2 fuselage halves, and a separate cowling. The landing gear is one-piece, with the wheels and gear legs molded onto the doors. A separate set of doors for “gear up” are provided, along with a bladeless prop hub. The prop is one piece, and the tail wheel assembly is all one part. There’s a one-piece fuel tank provided.
The kit is not a new mold, with fine raised panel lines and no cockpit. Nevertheless Minicraft picked a very good example of the Zero for this kit.
Construction and Painting
This simple kit has three steps. There are 5 steps in the instructions, but 2 of them are for in-flight, 2 are for gear down, and 1 is common to both.
Normally John likes us to take “in process” photos of the model. These photos were taken less than an hour after starting the model. The fuselage required only a quick hit with the seam scraper, and a bit of putty in the wing/fuselage joint, using nail polish remover to smooth the putty, it was ready to paint in minutes. The overall greenish tan was easy to do. I brush painted the cockpit area and the cowling with Floquil Grimy Black, put a bit of silver on the landing gear legs and the prop hub, painted the wheels and prop blades black, and painted the canopy with a fine brush. I was now at about the 2-hour point. I applied Future to the whole aircraft and the outside of the gear legs, and I was ready for markings.
Decals
I did the Soryu’s aircraft. The decals are from Cartograf of Italy, and they are super. The fuselage stripe is a decal, and it’s perfectly configured to go around the rear of the plane with no problem as far as fit or alignment. The tail markings are 6 decals, 3 on each side, and I had no problems with the decals on these.
The Hinomarus went on nicely, and the decals snuggled down over the raised panel lines on the wings and fuselage nicely. There are 2 small decals which go on the landing gear legs. No problems there, either.
The only problem I had with decals is that the instructions show decals 10 and 11, which are “no step” areas on the wing trailing edge, and these markings aren’t on the sheet.
Final Assembly
Once I had another layer of Future on to protect the decals, I put on the tail wheel, landing gear, cowling, prop and canopy. Done, in about 3 hours, over a 4-day period, most of which was spent doing the decals.
Overall Evaluation
Recommended. Fit is excellent, and it’s a good kit to build when you’re not up for a difficult project. I loved the decals; both sets of markings are historically significant and interesting.
The simplicity of the build and the ease of assembly remind me of the good old days when I’d ride my bike home from the dime store in the afternoon with a kit in a bag, and it’d be done before bedtime.
Thanks to Minicraft and IPMS/USA for the interesting model project.


Comments
Add new comment
This site is protected by reCAPTCHA and the Google Privacy Policy and Terms of Service apply.
Similar Reviews