
’62 Corvette Gasser
This is a nice kit and a fun build. This kit is the second version of the ’62 Corvette released by Revell, following the 2012 release of the ’62 Corvette Roadster 2’n1 kit. The ’62 Gasser kit is for skill level III and ages 12+. The kit did not seem that difficult, and I think it would be fun for even advanced beginners.
Background
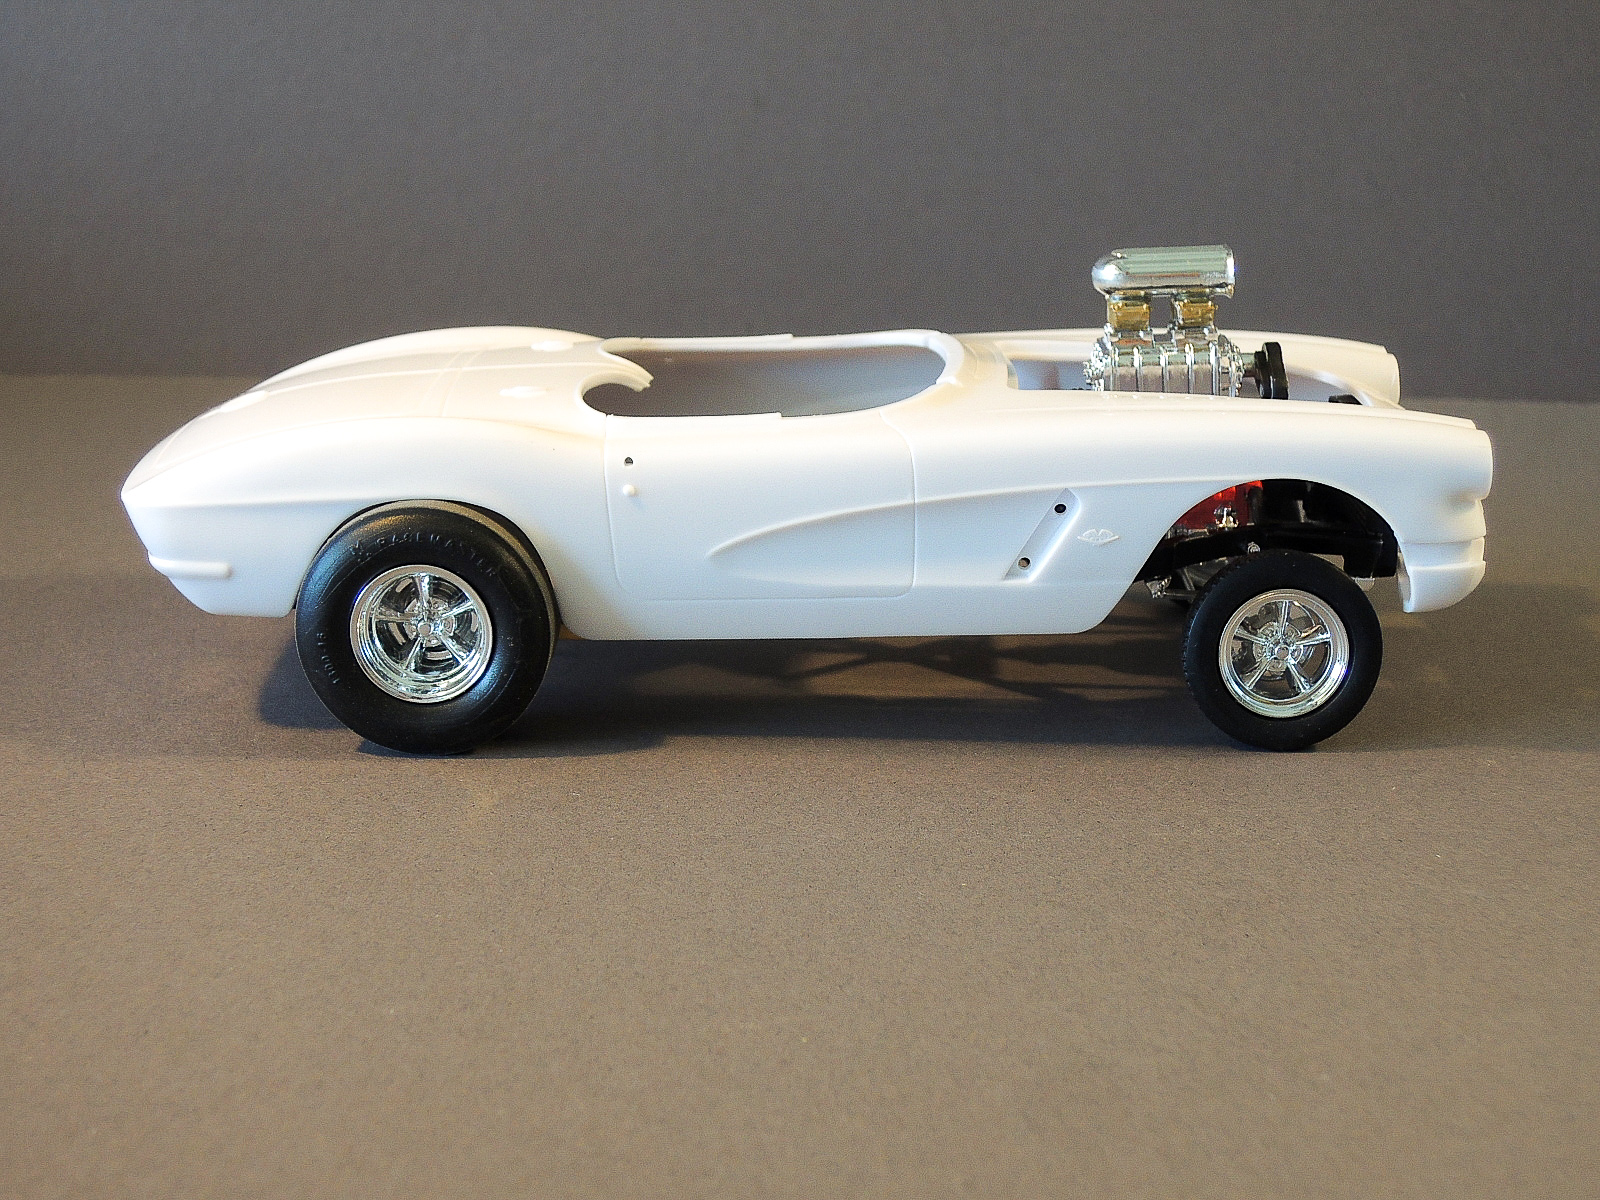
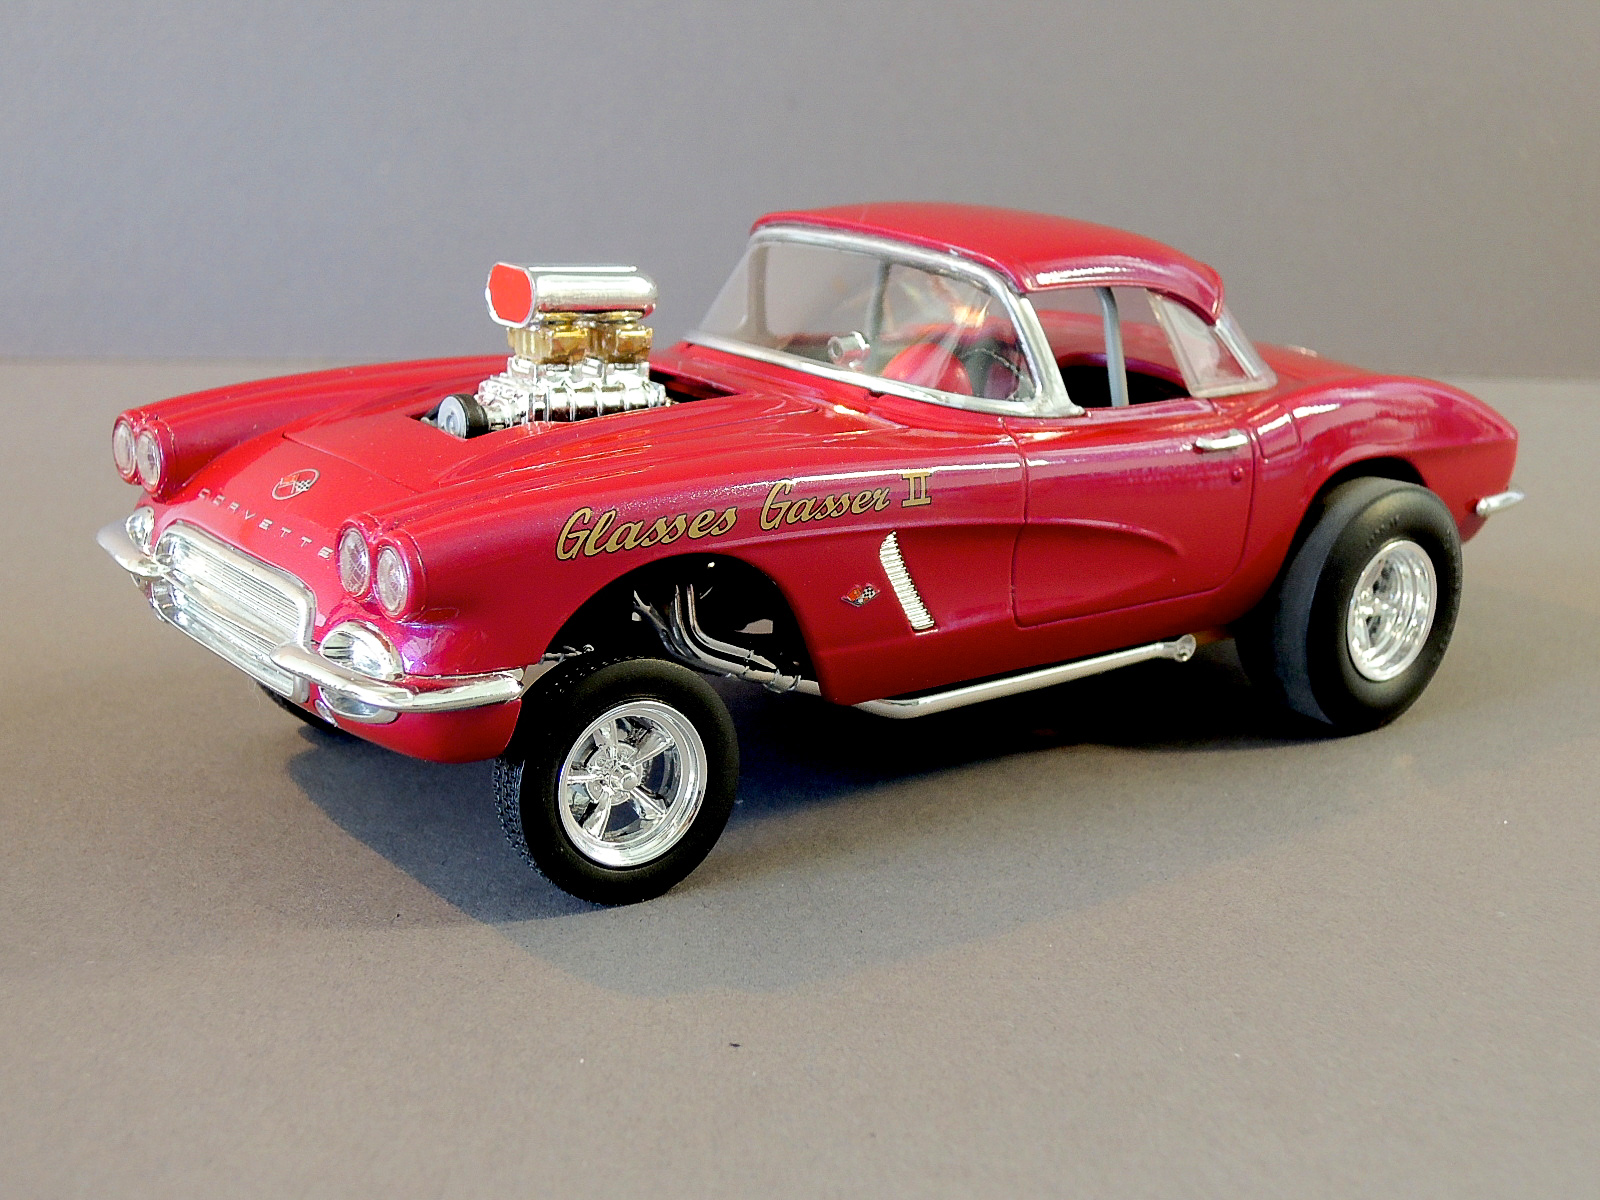
The Gasser kit recreates the ’62 Corvette converted by D&M Corvette Specialists into a street gasser with a blown small block Chevy engine. The original car’s body is nearly stock, and is replicated in the kit by the same stock body used in the Revell ’62 Roadster.
The instructions and decals have a 2013 copyright. The underside of the floor pan/interior has a 2012 copyright and is likely the same as the earlier ’62 Roadster kit. Online references indicate that the frame is a new tooling for the Gasser kit, and includes the chromed Gasser suspension.
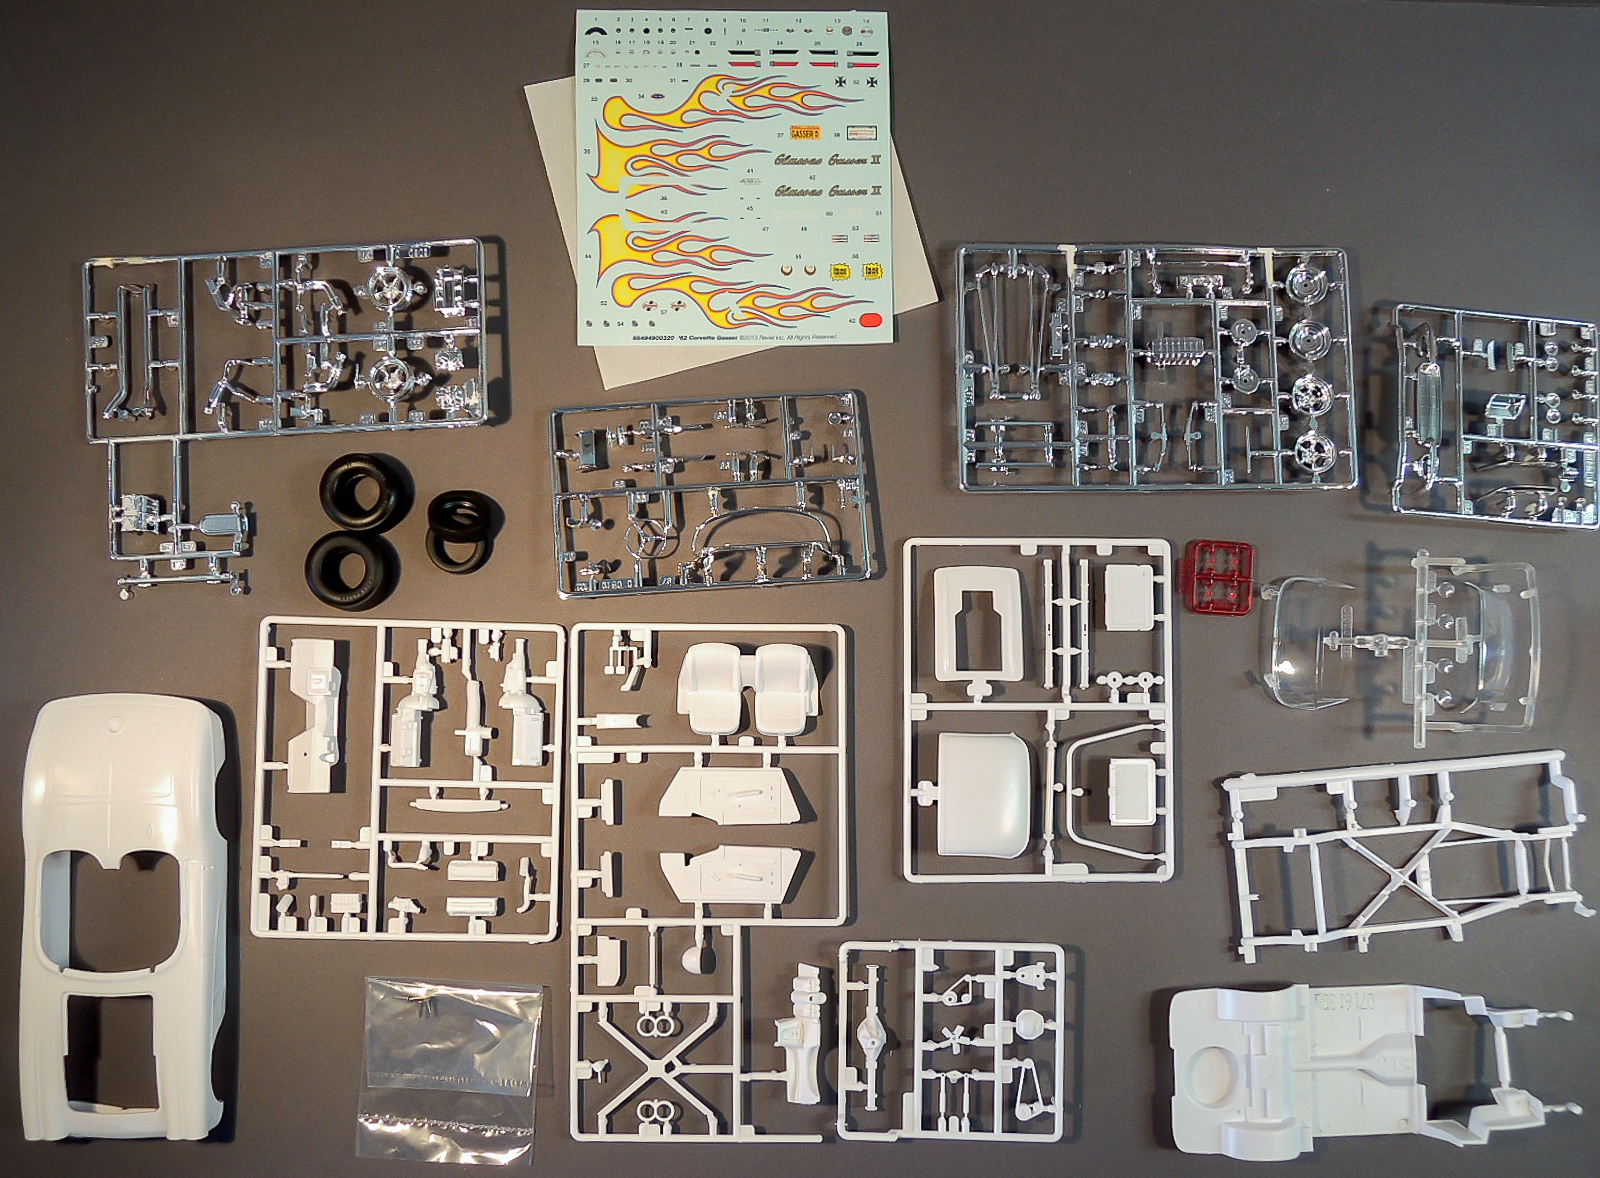
Contents
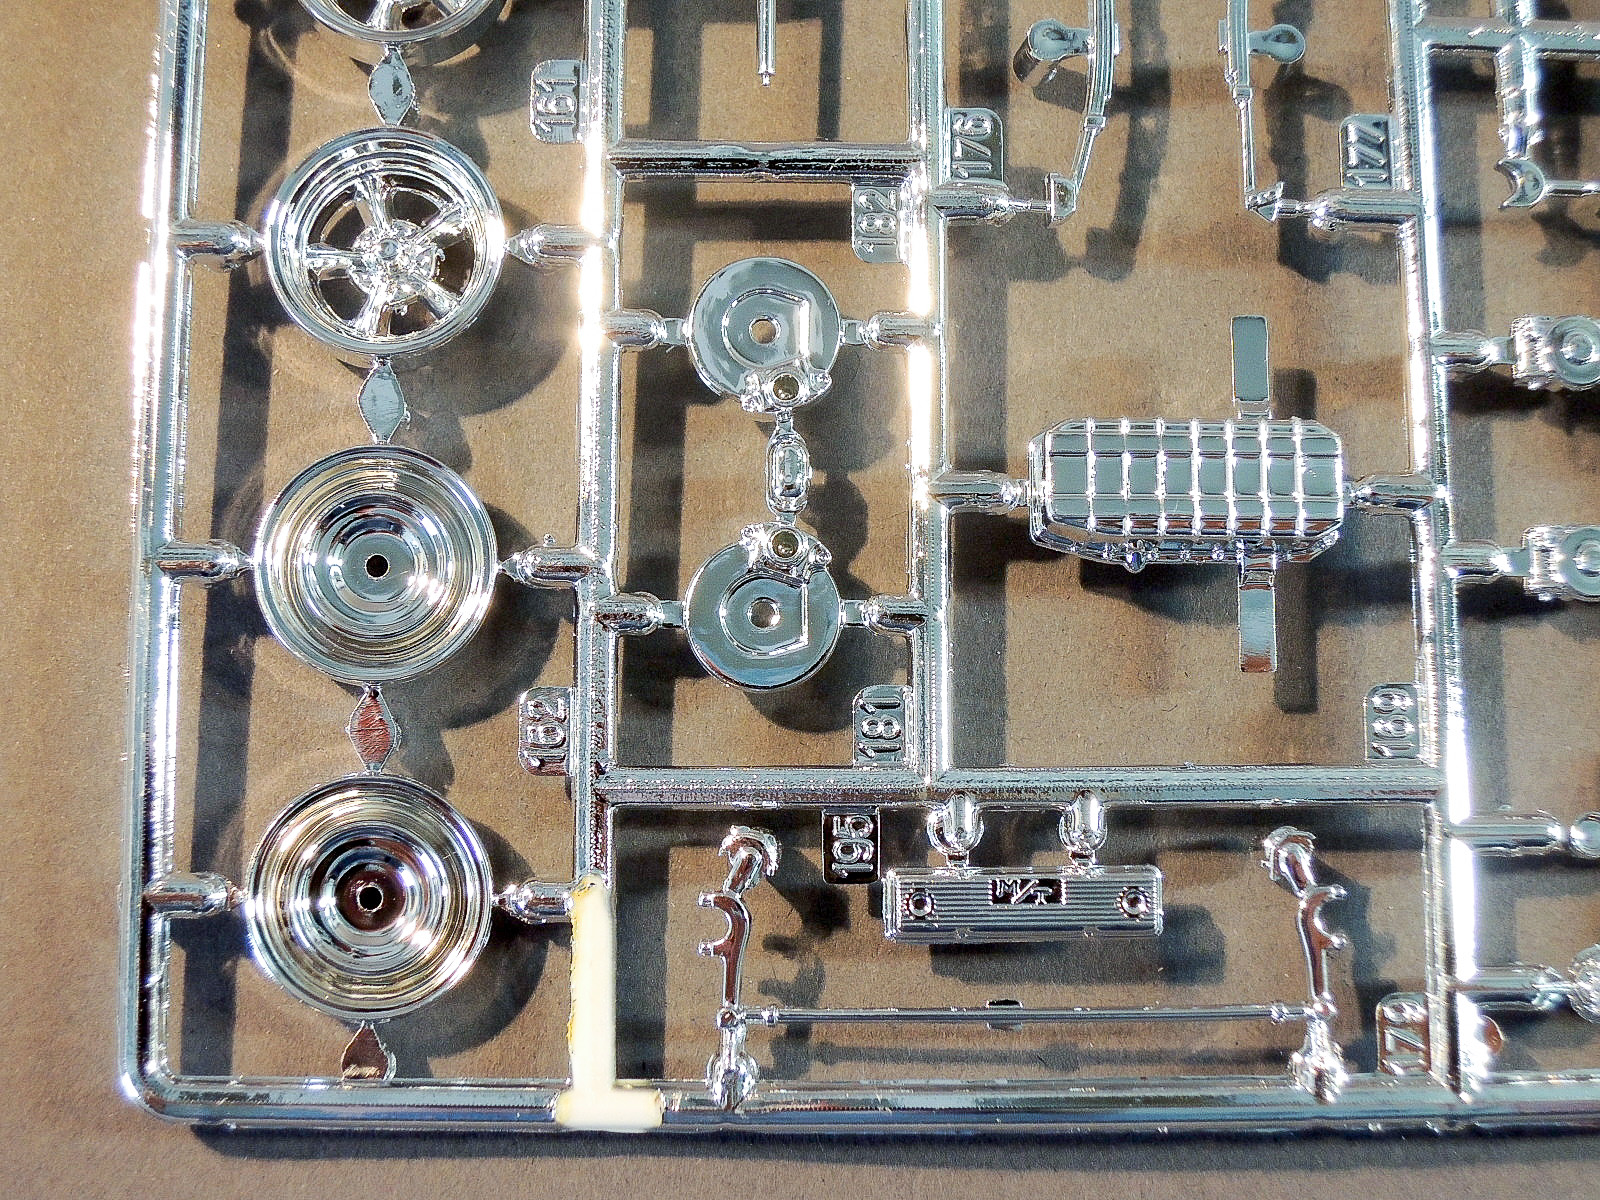
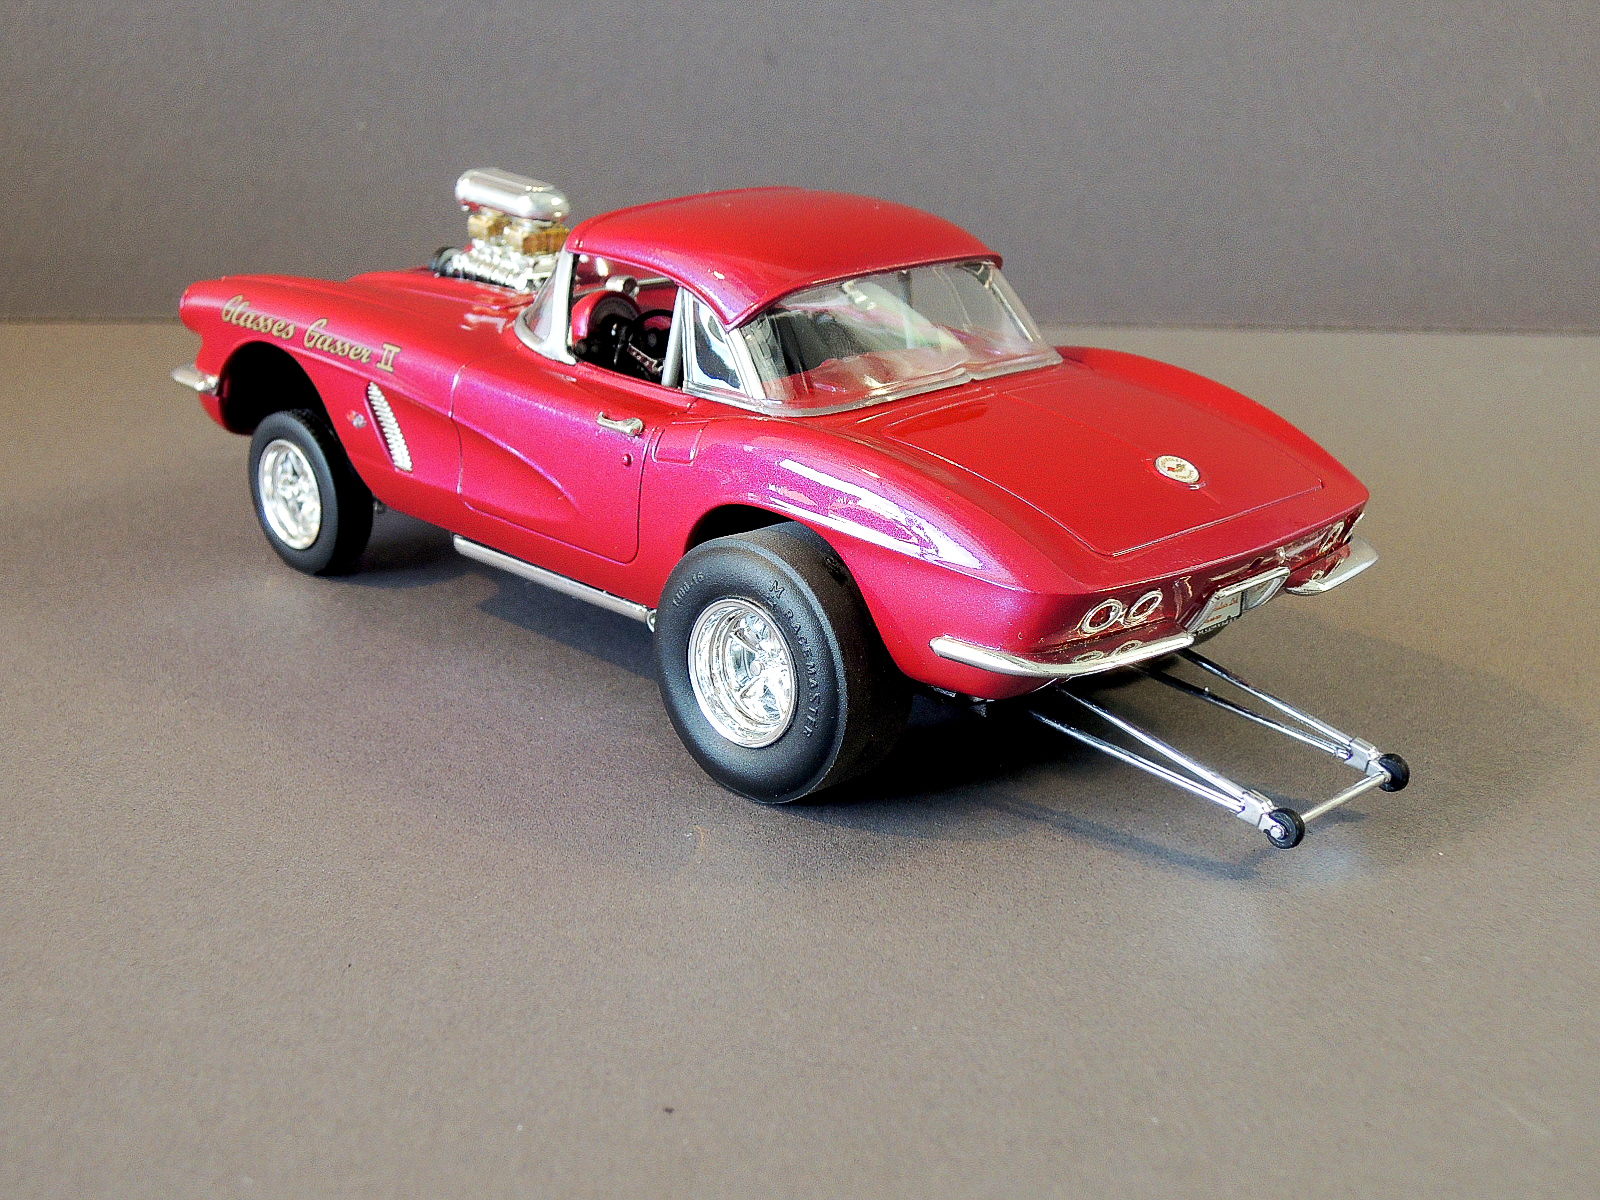
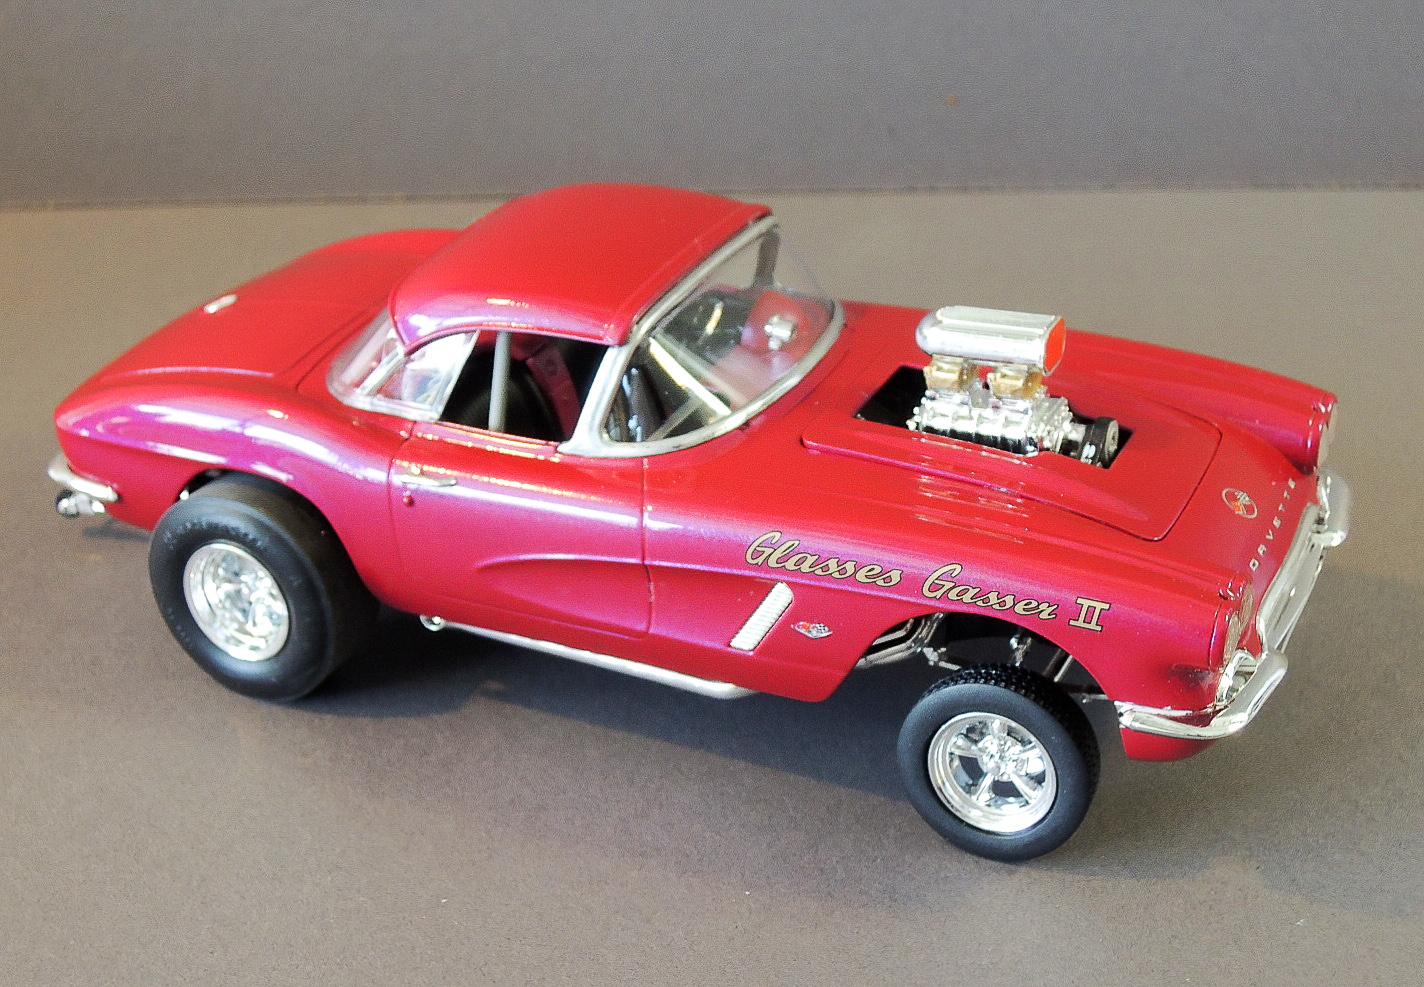
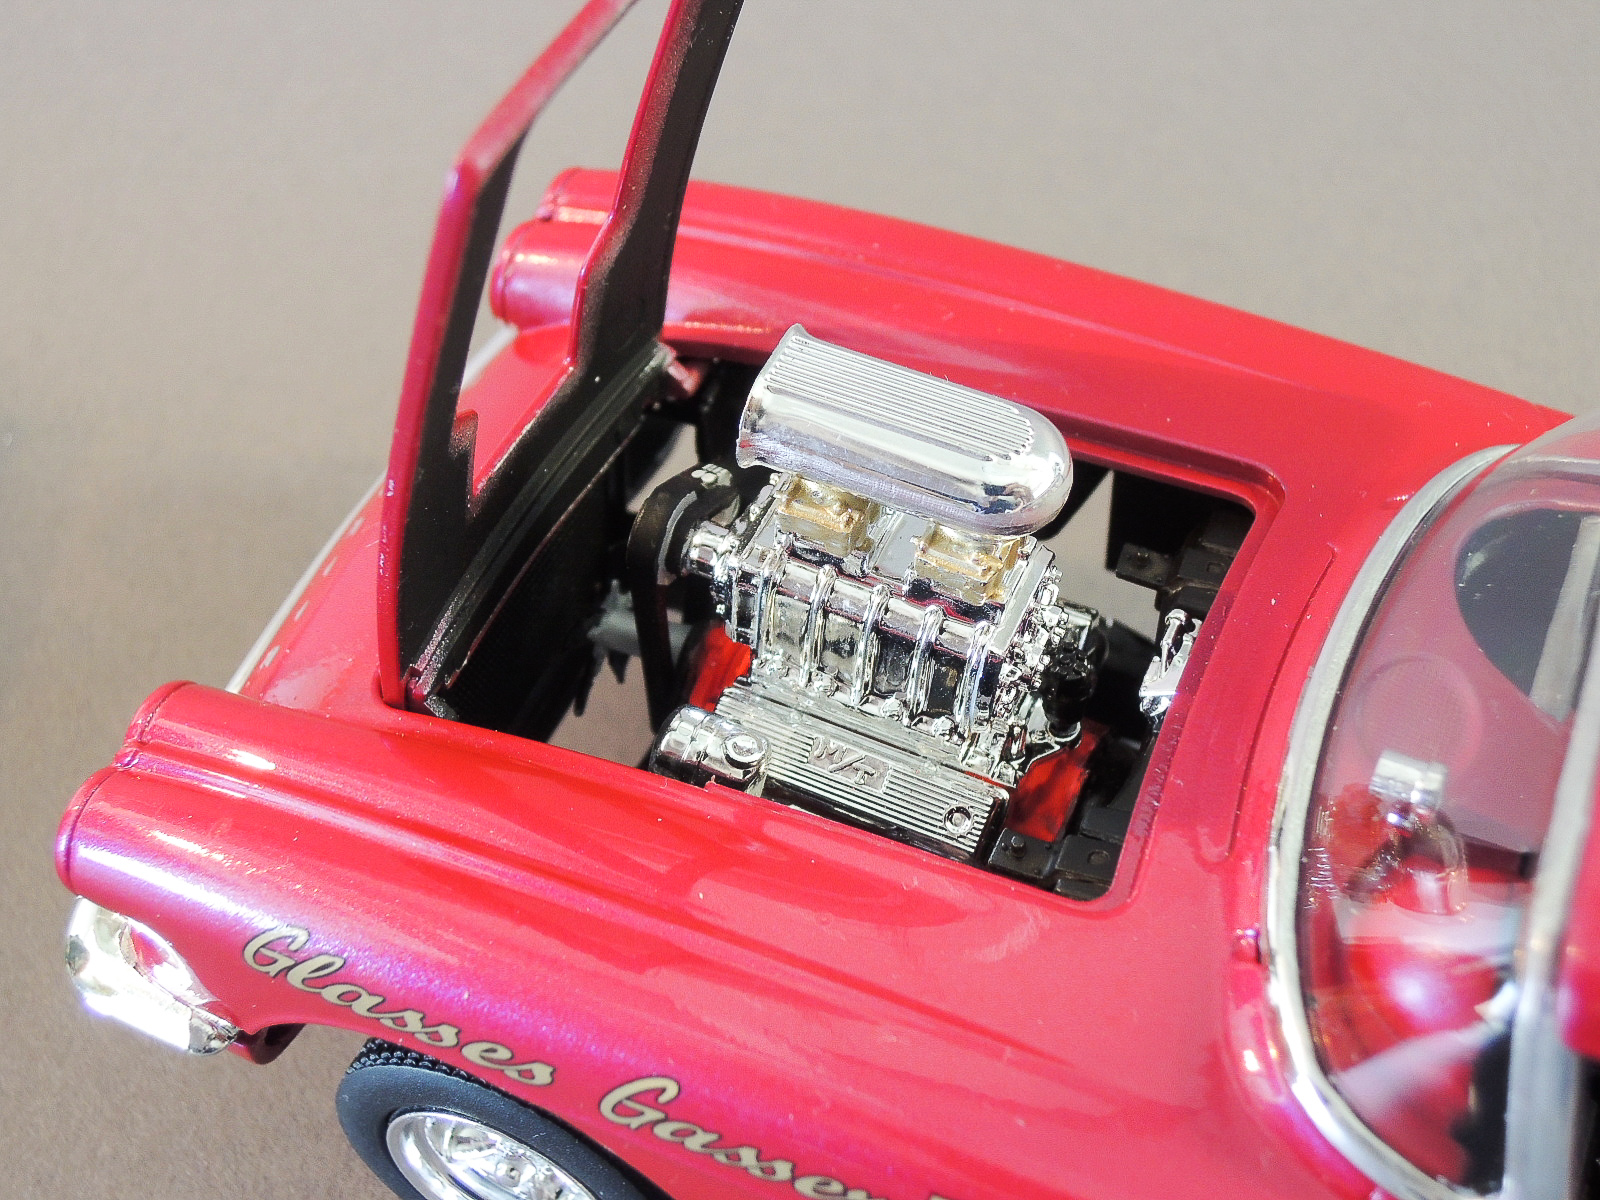
The kit includes a fully detailed drag racing engine, removable hardtop, gasser suspension, and rear wheelie bars. The kit includes 131 parts on five white plastic sprues, a white plastic body and chassis, one clear plastic sprue, one clear red sprue, four chrome plated sprues, four wheels, axle pins, instructions, and waterslide decals. The chrome plating is not overly thick and is usable without stripping. The sprue connection points are fairly large, and they will need to be cleaned up as the parts are removed. The chrome parts have more flash and prominent seams, and will need to be touched up with chrome paint if they are not stripped.
Detail on the plastic parts is fairly good, although a little soft. There is some apparent flash on parts, but only a minor amount. The clear plastic windshield and rear window are nice, clear, and reasonably thin. The kit includes a frame separate from the floor pan. The floor pan appears to be warped at the front inner fenders, although installation was not a problem.
The body is molded in one piece with closed doors and a closed trunk. The body appears to be very smooth with only very minor mold seems at the front and rear outside corners and across the front, just above the grill. There is also a small seam along the top of the fenders that need to be removed before painting. The tires are soft rubber with nice detail for the tread and sidewall lettering.
The instructions are 12 pages with 14 assembly steps. The instructions include a paint guide that calls out colors by name but does not include any manufacturers’ numbers. The instructions also include a list of part numbers with the part name called out, which is very helpful. Detailed paint colors are called out in the assembly steps, as well as the locations of decals. Chrome parts are indicated with an asterisk in the instructions.
Kit Assembly
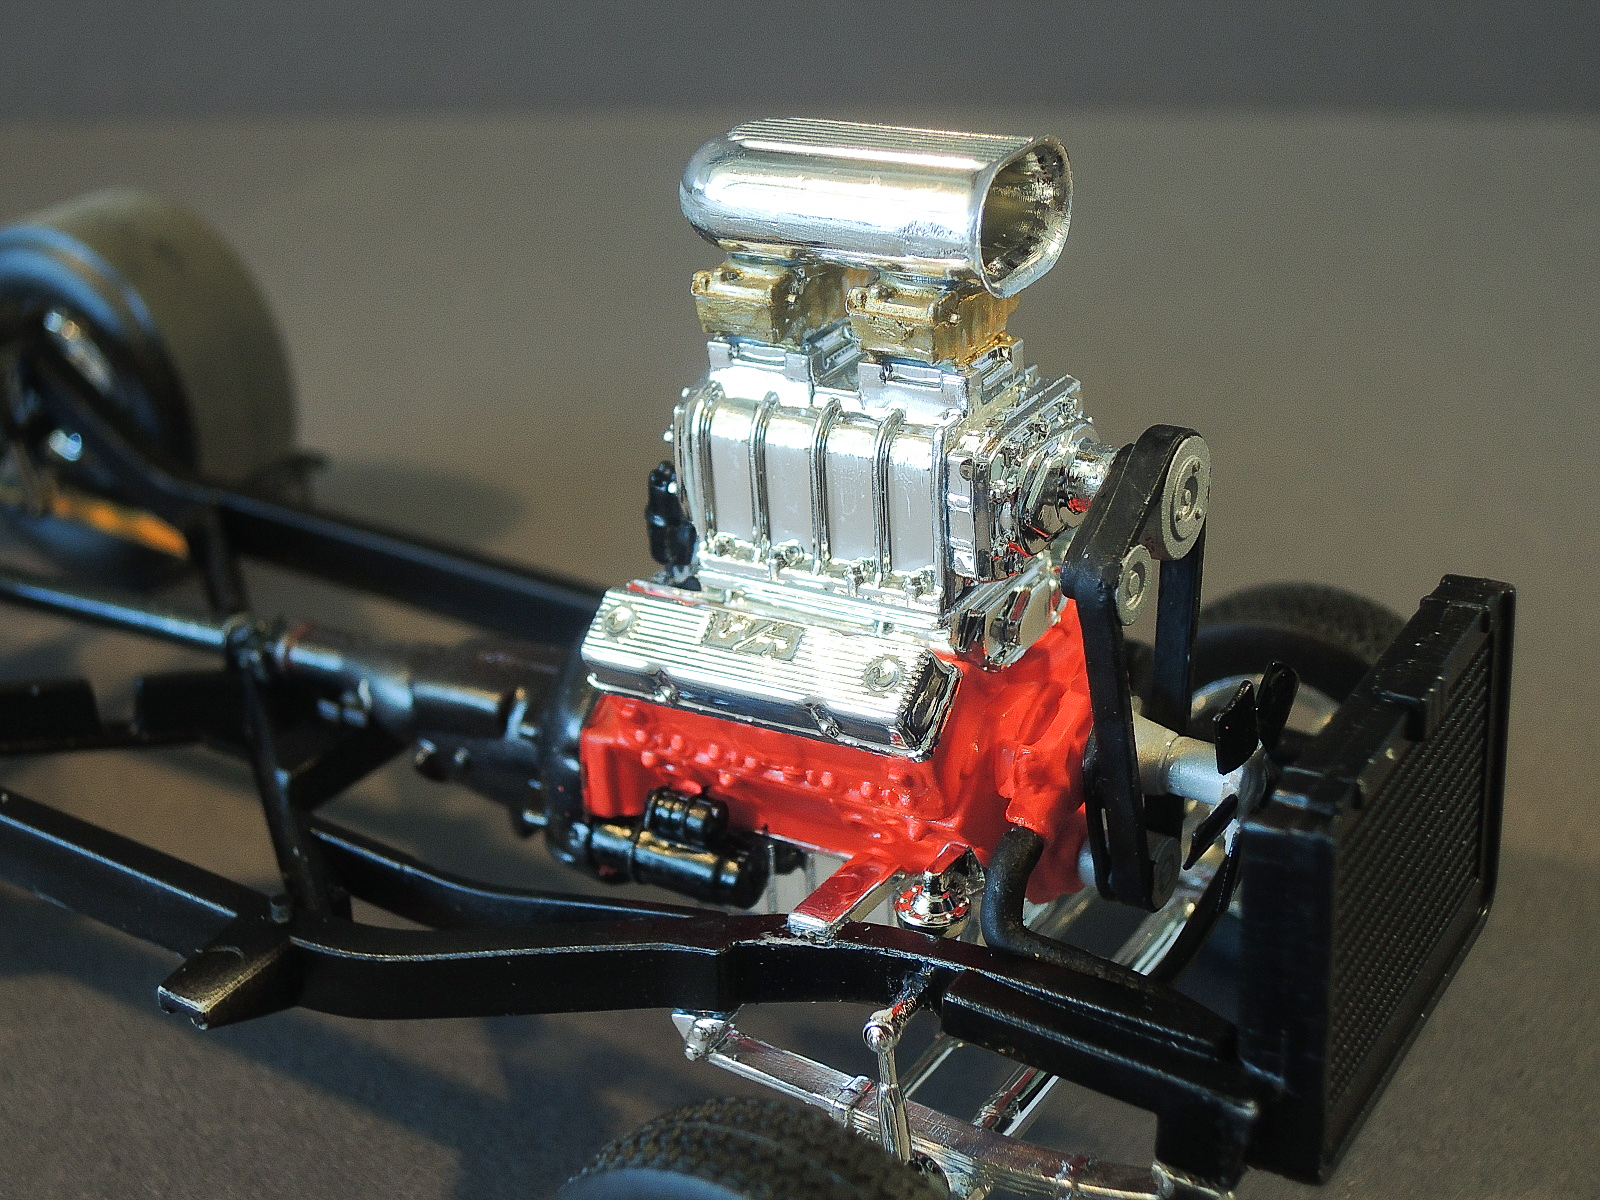
Assembly begins with the engine and exhaust headers in step #1, which go together well. I used the kit’s chrome pieces without stripping them. I used ModelMaster Chrome Silver paint to touch up the chrome where seams are removed and sprue connections cleaned up. Revell has separated each of the right and left exhaust pipes into two parts, which makes for a nice separation of the pipes. I glued the pieces together, but waited until the body was assembled to install the headers with the side exhaust pipes.
Steps #3 through #5 cover the assembly of the drivetrain and chassis. In step #3 the traction bars, parts #180 and #190, are chrome plated but called out to be yellow. The frame appears to be nice and straight, and has crisp detail including some nice welds on the underside. The leaf springs in step #3, parts #145, are molded much flatter than they appear in the diagram. I installed the front springs and axle prior to installing the engine, and then sprayed the chassis frame semi-gloss black.
In step #3 the angle for the steering box and column is a little vague. The instructions don’t show where the steering column gets connected when the firewall is installed.
In step #5 the smaller front wheels are nicely molded without a center seam. The rear slicks have a significant center seem and several deep injection points that I couldn't sand out. Revell has a nice system for the wheels using a free-spinning pin to fasten the wheels to the axles. This allows the wheels to spin, although the front wheel pins were a little sloppy in their connection. The ride height for this car is set very high.
In step #6 the inside of the firewall, part #6, has raised ejection pins that should be removed.
In step #7 the seatbelts are decals. Do not use too much Solvaset as the seatbelts should lie on top of the tucks in the upholstery. The door panels, parts #10 & #11, slope in considerably at the top. Use the stop on the inside of the firewall to locate the angle of the door panels.
In step #8 the top of the dash and the hood over the instrument cluster is painted in the body color. There are two sets of decals for the gauges, either black or white. The interior is assembled to the chassis prior to assembling the body, rather than to the underside of the body. The body did install with a good fit to the interior.
In step #9 the hood ends up being fairly loose when installed on the chassis.
In step #11 the wheelie bars are a little flimsy, so I glued them to the underside of the frame in addition to the axle.
In step #12 I did not install the windshield wipers, sun visors, or rear view mirrors, as they are over scaled and I thought they would clutter up the exterior.
Finishing
The body is a stock ’62 Corvette roadster. I primed the body parts with white Tamiya Fine Primer, followed by a Tamiya Silverleaf undercoat and a finish coat of ModelMaster Sunrise Red Pearl. The paint was covered with a DuPont two-part urethane clearcoat. The decals were installed on the painted surface before the clearcoat.
The Corvette labels and emblems are molded onto the body, but decals are provided for them also. I installed the decals over the molded emblems and used Solvaset to snuggle them down, which worked pretty well.
Summary
This is a really nice kit that goes together well and ends up with a nice model. More advanced beginners, as well as intermediate modelers, could easily build this kit. The engine is ready to be enhanced with wiring and additional detail by more experienced modelers.
This is a fun kit to build, and is recommended for all Corvette fans and drag racing fans. Thanks to Revell for another fine model and to IPMS for letting me review the kit.


Comments
Add new comment
This site is protected by reCAPTCHA and the Google Privacy Policy and Terms of Service apply.
Similar Reviews