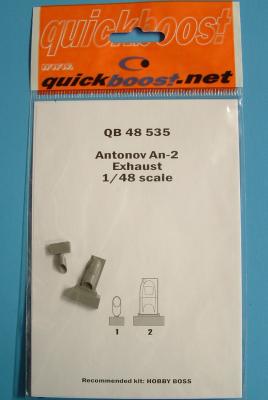
The AN-2 "Annushka" bi-plane (NATO designation “Colt”) is a throwback from a very earlier age, not only because it is a biplane, but because of the larger Shvetsov Ash-62 9 cylinder radial engine that powers it. On the right side of the plane is a single large exhaust pipe that belches fire and smoke when in operation. The pipe on the real AN-2 comes out from the engine at a shallow angle of incidence and then makes a radius bend outward to carry the exhaust away from the fuselage.
This latest weapons set from Aerobonus contains all the parts necessary to represent eight 3-inch aircraft rockets and the launch rails used with them on a variety of British aircraft. The set includes eight rocket bodies, along with four different 8-piece sets of warheads (for a total of 32 warheads). Also included is a photoetch set with clips to attach the rockets to the rails, individual rocket fins (32 of them) and a photoetch alignment tool to help set the fins properly in place. A comprehensive decal sheet completes the package.
Once the choice of warheads is made, assembly of the rockets is pretty straightforward. Be mindful, the resin is somewhat brittle; and around the insert holes in the rocket bodies, where the warheads fit, it is thin. The ends were already broken on two of the rockets in my set, and I chipped a third one assembling a tight fitting warhead. I had to re-sculpt the tubes with putty.
True Details has made a very nice 20mm Vulcan cannon for the Hasegawa F-104 kits. All the parts are well molded, have nice detail and clean up very easy. 13 parts make up this set including: Gun body (one with the shroud and one without), gun nuzzle, bracket, reservoir, hatch, control box, duct, regulator(X2) and gun body support(X2). You will have to use aftermarket or the kit barrels and neither the kit nor this set includes the braces that stabilize the barrels so you will have to make those.
One note - I wanted to use this in the new Italeri F-104 kit but it does not fit without a good bit of surgery although it gives me an excuse to pick up a Hasegawa kit now!!!
Overall, I would recommend this set as it has much more detail than what you get with the Hasegawa kit and it comes at a very reasonable price.
I would like to thank Squadron for supplying this set; IPMS for letting me review it and all of you for reading it.
Master Model from Poland specializes in metal turned parts for aftermarket kits. In my personal option they are among the best in the market. I really like their products.
This set is devoted to the weapons of the Hawker Typhoon. There are two options for that kit in 1/48 scale: Hasegawa and Monogram. This set can be used with all of the above, with different modifications in each case.
For all the makers you are instructed to drill holes in the wings for the fairings and to replace the plastic parts with the metal ones. In the case of the Hasegawa model (see photo) it could be possible to modify the wing fairing and just use the cannon barrel. You’ll lose a bit of detail, but you “gain” less effort to modify the kit. You are also provided with a small photo-etch fret to dress up with wing area around the cannon fairing.
Background
In 1972, the Shah of Iran visited the US to evaluate two interceptor airplanes, the F-14 and F-15, for protection of his borders against overflights of the MiG-25. A contract was signed to purchase a number of F-14s due to superior maneuverability and weaponry. As it turned out, the sale of some F-14s to Iran gave Grumman the funds that they needed to continue Tomcat production. The best pilots from Iran came to the US and were well trained in advance of the deliveries which started in 1974. During it’s time in the Imperial Iranian Air Force, IIAF, the Tomcat performed its role well.
In 1979 the Islamic Revolution toppled the Shah and established a harsh Islamic regime. A number of the trained personnel fled but many remained. Once Iraq invaded Iran, many of these former “Shah’s pilots” and technicians were allowed back in service and the Tomcats asserted themselves well against Iraq’s aircraft.
Thanks very much to our fantastic supporters at Hasegawa USA for providing IPMS USA yet another of their fine kits for review… we appreciate the opportunity to showcase some of the best models out there!
This is yet another re-release of Hasegawa’s first range mid-1980’s F-18 models. The molds have well-endured the test of time, and no flash is present on this kit. Engraved panels, simplified construction, and an absolutely cool decal sheet await…
Starting with the cockpit, decals are used for the instrument and side-console details. A two-piece ejection seat is provided, and use of the provided aircrew figure is recommended to avoid having to make a harness. A basic control stick rounds out the interior, and no problems will be experienced in construction here.
Master Model from Poland specializes in metal turned parts for aftermarket kits. In my personal option they are among the best in the market. I really like their products. This set is devoted to the weapons of the Hawker Typhoon. There are two options for that kit in 1/48 scale: Hasegawa and Monogram. This set can be used with all of the above, with different modifications in each case.
For each kit, you are instructed to drill holes in the wings for the fairings and to replace the plastic parts with the metal ones. You are also provided with a small photo-etch fret to dress up with wing area around the cannon fairing. Be aware that the outer and inward cannon fairings have different sizes and should not be used interchangeably. The instructions are very clear about which one is each and how to position them.
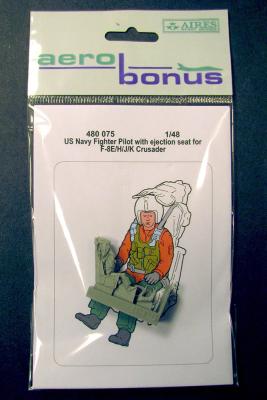
Aerobonus continues to expand its range of pilot/ejection seat combos with this Crusader pilot seated in his Martin Baker Mk7 seat. The arms and head are separate attachments, allowing for some variation with the positioning of each attachment. The detailing of the g-suit and survival vest easily defines these garments as separate from the flight suits. All the belts, straps and buckles are minutely detailed. The separate arms and head allows you to more easily position them after the seats are installed in the cockpit, so that they’re not interfering with the fit, and more realistically seated in the cockpit.
Upfront, I want to thank Aires and Quickboost for providing these fine aftermarket bits for our beloved models and to the IPMS USA a big thank you for allowing me to review this Quickboost product.
Admittedly I am proud of the fact I love the stubby World War II fighter. The Rita, Buffalo and certainly the Grumman Wildcat. I have several in my stash including the Hobby Boss and Tamiya 1/48 F4F-4 Wildcats kits.
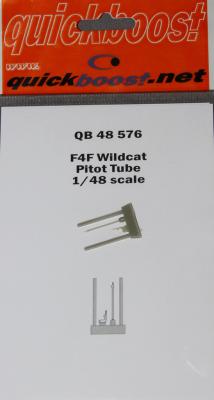
I snagged the Quickboost pitots for the Wildcat before even looking closely at the pitot tubes. Both kits are F4F-4’s and thus use the stubby angled pitot tube mounted near the port wingtip. No problem here, Quickboost provides both the angled pitot found on the F4F-4 as well as the longer straight version found on the F4F-3’s. Just a quick look at the comparison photos you will see the resin replacement parts are much less bulky and more defined than the stock parts. Unfortunately I don’t have a F4F-3 to compare the longer style pitot.
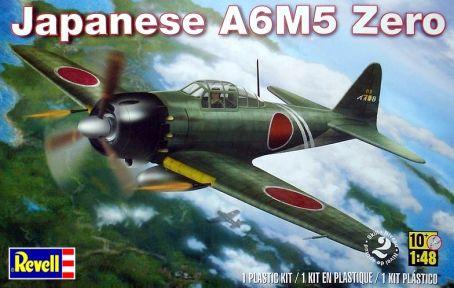
Manufactured by Mitsubishi Heavy Industries, the A6M5 Zero was a long range fighter aircraft flown by the Imperial Japanese Naval Air Service. Its first flight was on April 1st 1939 and entered service on July 1st 1940. More than ten thousand Zero aircraft were built.
Revell brings us another easy and fun to build kit. Being a skill level 2 kit, detail is a bit sparse in the cockpit department. It consists of only a pilot figure and a decaled instrument panel. Regardless, of the lean detail, this is a great little kit. The Zero is moulded in grey, and panel lines and detair are raised.
The kit went together nicely, and the fit of all parts were very precise. Other than some very minor "flash"on a few of the parts, the only predicament I encountered were the 4 small locating tabs on the bottom of the canopy. These locating tabes had to be removed to ensure the canopy had a flush fit with the fuselage.