

Tom Moon
Reviews By Author

|
German Tank Destroyer Sd Kfz 173 Jagdpanther Ausf G1Published:
This is kit comprised of about 600 styrene parts of which 508 are the track pieces, 2 frets of photo etched parts, an abundant set of poly caps and a set of braded wire for the tow cables. Not listed, but in the box was a metal barrel. It appears that it would replace part C13. The instructions include 4 different finishes, so you need to choose which one you want to make and then review the instruction to see which set you need to follow. I chose option 3 and then when thru the instruction crossing out the other options so only option 3 was showing. The 4 options are as follows:
|

|
Japanese Battleship Mikasa (1905) ArmamentPublished:
This set of replacement barrels for the 1/200 scale Mikasa. It includes 4 305mm (12”), 14 152mm (6”), 20 76mm (3”) and 12 47mm (1.85” Hotchkiss Guns). The 305mm and 152mm barrels are machined from aluminum and the other 2 are machined from brass. The 305mm barrels include brass trunnions. These are designed for Merit International IJN Pre-Dreadnought Battleship Mikasa. The 305mm is a straight replacement. The machining is quite good, and the only difference is that the plastic piece has what appears to be a cover on the end of the barrel while the metal barrel is bored out to depict the barrel in action. The rest of the barrels requires surgery to remove part of the old barrel and drilling out a locating hole for the replacement barrel to slip into. Here… more |

|
Pz.Kpfw.IV Ausf DPublished:
This is a plastic only kit comprised of about 62 styrene parts, no photo etched parts fret, and a standard set of instructions, they need to be reviewed carefully before gluing any parts together.
|

|
German Field KitchenPublished:
This is a multimedia kit comprised of 110+ styrene parts, one photo etched parts fret, and a standard set of instructions. They need to be reviewed very carefully before gluing any parts together.
|

|
M10/Achilles - A Visual History of the U.S. Army’s WWII Tank DestroyerPublished:
The book, "M10/Achilles, A Visual History of the U.S. Army’s WWII Tank Destroyer" by David Doyle, starts with a short introduction that details the start of US Army WW II Tank Destroyer strategy and then a brief history from the early war period thru the end of the war. The book is divided into 2 sections, the M10 and the Achilles. Each section has both black and white photos from the war years, and color photos from the surviving museum examples. Most of the photos are well done and in good focus. Some of the wartime photos are little grainy, but give a good idea of the M10/Achilles in action. The color photos are a mix of wide shots and detail close-ups. These close-ups are very well done and will help the modeler get the details done accurately. The… more |

|
Sd Kfz 171 Panther Ausf A Early ProductionPublished:
This is a single media kit comprised of 85+ styrene parts, DS tracks, no photo etched parts fret, and a standard set of instructions, they need to be reviewed very carefully before gluing any parts together.
|

|
Operation Agreement - Jewish Commandos and the Raid on TobrukPublished:
The book is divided into 10 chapters with an introduction, index, a Bibliography and Glossary of Abbreviations:
The book goes thru the history of the creation of the SIG (Special Interrogation Group) as formed by Jewish refugees from the Nazi regime. It then builds on the operations of the LRDG and SAS. Then it brings forth the North Africa Desert war from the beginning up to the time of the Raid on Tobruk. This was necessary to give the reader the background of why such a risky operation… more |
|
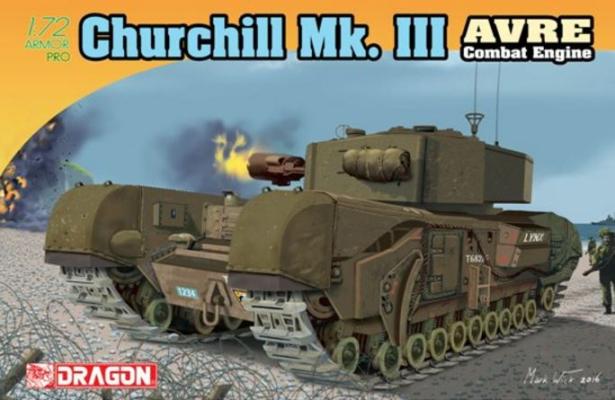
Churchill Mk. III AVRE Combat EnginePublished:
This is a multimedia kit comprised of 70+ styrene parts, DS tracks, no photo etched parts fret, and a standard set of instructions, they need to be reviewed very carefully before gluing any parts together.
|

|
Panzerkampfwagen Mk IV, 744(E) (A13) & UE Fuel Tank TrailerPublished:
This kit is a representation of the British Army’s A13 Cruiser Tank that was captured by the Germans and placed in service for the Russian Campaign. This is a multimedia kit but the use of the Photo-Etch is required, there are no optional plastic parts. Please be aware that some of the plastic parts are very, very small and will take a steady hand to get them off of the sprue without damage. And when they are off the sprue these minuscule parts do their very best to hide or get lost in the carpet or even on the work table. Step 1 This step builds the chassis and includes the springs for the axels. Step 2 This step builds the wheels drive sprocket and idler wheels, my particular sample had a short shot on some of the wheels. Bronco was very quick to replace those… more |
|
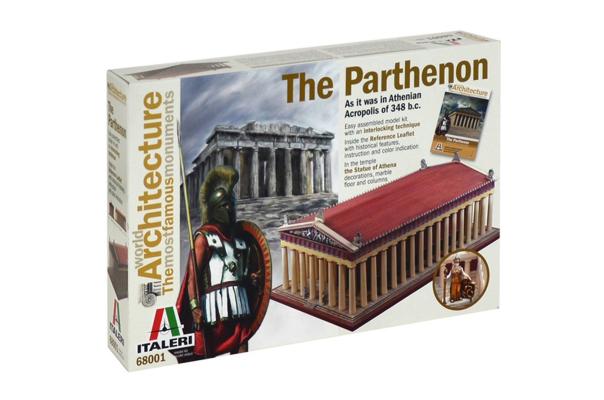
The ParthenonPublished:
The best way to start this model is to clip all the parts and mark them with the call out number as not all the columns are the same. Some are taller and others are shaped differently. Then clean up all the molding lines and paint these parts. The painting is problematic as they call out some colors like Marble and ask you to mix the following colors Flat Skin Tone Warm, Flat light flesh and flat white. There are no percentages and then to top it off they say the Pentelic marble is an impeccable white with uniform, weak yellow coloration along with a photo of what the real marble looks like. I just painted the base a general white with a subdued dark wash to show the seams and slight textured surface of the base. Speaking of the base, my sample was warped. I tried to use hot… more |