Last we left off, the airframe was together with the parts and we were ready to paint. In preparation, I added the landing gear. To me, this allows the plane to sit up off surfaces while drying and these were sturdy and fit perfectly with the best attachment points I have seen. To start, I used Tamiya acrylic high gloss white thinned with lacquer thinner and sprayed the bottom and slightly up the sides. I masked off the intakes as they had a great demarcation line from the previous painting and the great design. I also shot the flaps, the rudder on the tail and all the landing gear doors. This dried quickly and I masked off for the Gull Gray. I masked around the edges and the rudder and used my Gyrocut to get some wavy lines. Tamiya yellow tape was used for all masking. I sprayed the top with Xtracolor thinned with lacquer thinner and set the plane aside to dry for a few days. I also gave both horizontal stabs a coat of gloss white.
Welcome to the IPMS/USA Reviews site!
Introduction: The primary organization of the IPMS/USA Review website is by IPMS/USA National Contest Class. Within each Class there are sub-menus by kits, decals, books, etc. The Miscellaneous Class is for items that are not class specific or that cross two or more classes.
IPMS/USA Members: We encourage you to submit reviews, both here and to the Journal. To volunteer for membership in the IPMS/USA "Reviewers Corps" and submit your own reviews, please read the Guidelines For Submitting Product Reviews.
Manufacturers, publishers, and other industry members: IPMS/USA is pleased to offer your company the opportunity for product reviews. All product reviews are performed by IPMS/USA members, and are posted in the publicly-accessible section of our website. With very few exceptions, we perform full build reviews of new kit releases, aftermarket products, and supplies. If you would care to provide product samples for review, please contact John Noack, IPMS/USA 1st VP.
To learn more about IPMS/USA, please see our About Us page.
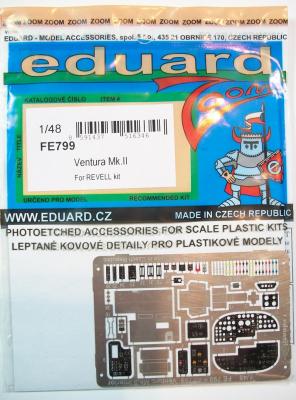
This is a photoetch Interior set to for the Revell Ventura MkII. This set is colored and adds a lot of needed detail to the cockpit and other areas. They really make the cockpit stand out.
In the packet is:
- 1 colored photoetch sheet
- 1 instruction sheet
Summary
This is a fantastic set for the set for a kit that needs them. I do find some of the small parts were very tricky to add. Also I would recommend install the assembled parts 34 and 14 into part 7 before you fully form it.
Thanks go to Eduard for providing this set to review and IPMS USA for allowing me to review it for them.
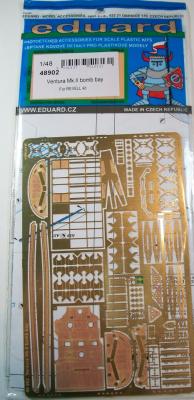
This is a photoetch bomb bay upgrade set to for the Revell Ventura MkII which has very simple molded details in the kit part and really needs them. One reason I put off buying the Revell kit was my disappointment in the bomb bay detail, this set make it very simple to really improve the kit.
In the packet is:
- 1 large photoetch steel sheet
- 1 instruction sheet
Summary
This is a fantastic set and the kit really needs this as it’s a major improvement. The set does require a lot of work removing the simple molded details on the kit parts especially part B6. But it’s well worth all the effort. The set also includes the bomb fins and spinners. I really loved the finish look of the bomb bay once this was done. If you have the Revell kit you have to get this set!
Thanks go to Eduard for providing this set to review and IPMS USA for allowing me to review it for them.
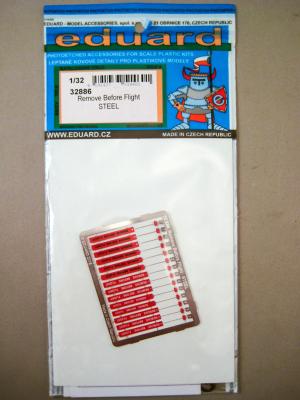
Every type of aircraft that has an ejection seat or explosive cartridges has a safety item that can be removed to make them safe to be around. That item is a Remove Before Flight safety pin. Every pin has a red tag attached to it so it can be removed before flight. Funny how that works.
Eduard has offered Remove Before Flight tags before in their normal line. They worked but they were very stiff. These new tags are much thinner and can be bent much more realistically.
Inside the usual Eduard packaging is one colored fret with coloring on both sides. The printed “Remove Before Flight” is only on one side. One set has some printing on the other side. The printing is crisp and looks great.
You will have to make the chords from wire. But that makes it easy to adjust the length of the flags.
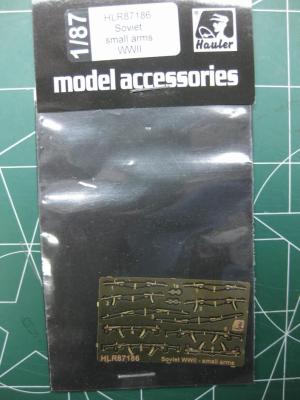
Most of the time, Figures in small scales, such as HO (1:87) are armed with weapons that roughly represent their 1:1 scale real-world counterparts at best, and more often than not, look like sticks or worse.
If you have any 1:87 scale WW2-era Soviet troops that need improved weapons, this is for you.
The kit is composed of 1 sheet of photo-etched brass, containing 10 WW2-era Soviet Small Arms, and 1 instruction sheet
The small arms are very highly detailed, historically accurate, and are folded in half to represent both 3D sides of the weapon. Iron sights and bolt-action levers, as well as magazines, and even triggers and trigger-guards are represented very well on the models.
As seen in the picture below, I have assembled the Mosin-Nagant standard infantry bolt-action rifle.


