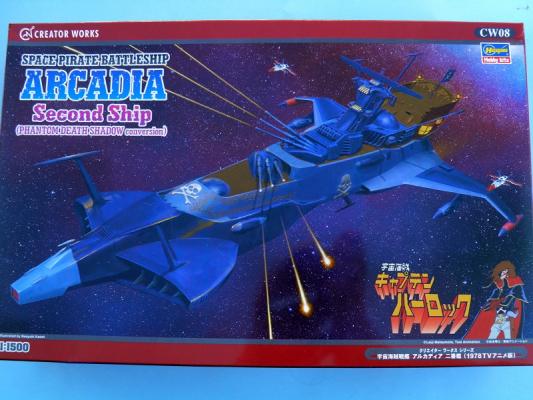
I really like how Hasagawa keeps releasing quality models of Japanese Anime vehicles. This one is one of the Arcadia ships (think there were 2, possibly 3 different versions) used by Space Pirate Captain Harlock. I found an English dubbed version on YouTube which, of course, featured the green ship instead of this one but still interesting to watch. I also found a fun site about the lack of continuity in the Harlock Universe that is worth a read if you like this kind of stuff.
What's New
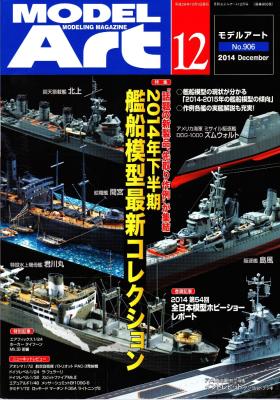
Model Art Magazine is a monthly magazine that covers aircraft, armor, ships and car modeling. Model Art started releasing magazines in 1966 and has evolved from there over the past forty eight years.
The December issue starts off with seven pages of models and modeling tools that were shown at the 2014 All Japan Plamodel Hobby Show
The main article this month is a feature using several model ship kits that were released in 2014. The article is composed of in progress shots of the kits, a diorama, line drawings and archive photos. Some of the kits used are the Fujimi 1/700 IJN Light Cruiser Kitakami 1945, Aoshima 1/700 IJN Seaplane tender Kimikawa-Maru and the Gallery 1/350 USS Intrepid.
Following the main article are several small monthly reoccurring articles. Some of these articles are Union Fleet Organized Course, Modeling JASDF and IJA/IJN Airplane Illustrated.
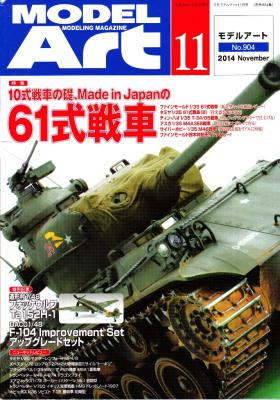
Model Art Magazine is a monthly magazine that covers aircraft, armor, ships and car modeling. Model Art started releasing magazines in 1966 and has evolved from there over the past forty eight years.
The November issue starts off with two quick articles. The first is a build article of the Zoukei-Mura SWS 1/48 Ta152H-1 and the second is on the Daco Products 1/48 F-104 Starfighter Improvement & Correction set.
The main article this month covers the design and development of the JGSDF Type 61 Tank. This article features five different 1/35 scale model kits including two different versions of the Type 61. The other three are a M4A3E8, M-46 and a T-34/85. These are used in the article to show the lineage to the Type 61. There is a multitude of color photos of these models throughout the article. Also included is a some technical drawings and a write up about Japans armor progression from the beginning of the JGSDF to modern times.
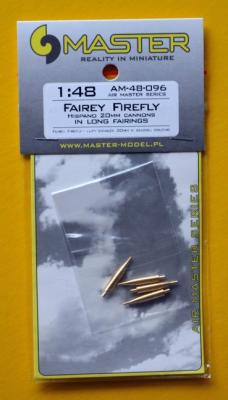
Master-Model provides modelers with exquisite miniature turned metal parts that can be used in place of kit parts to add extra detail to models. Their sets generally are available for builders in all popular scales. This set (AM-48-096) provides parts to assemble crisply detailed 1:48 scale Hispano 20mm cannon in long fairings for the Fairey Firefly.
The parts are designed to replace the injection molded ones in Special Hobby kits without significant surgery. The kits have holes on the wings’ leading edge to install injection molded parts so it is likely the Master-Model barrels will literally drop in place instead. (Although the size of the holes may need to be increased to 1.5mm diameter to accept the plug on the end of the fairings).
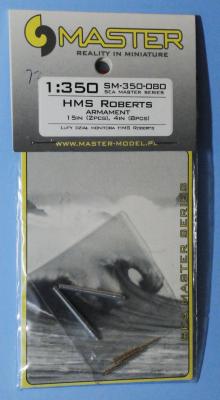
This Master Model set provides10 barrels: Two machined aluminum 15”/42 Mark I barrels, eight machined brass 4”/45 Mark XVI barrels, and a single page instruction sheet.
You will need to cut the styrene barrel off and drill a hole in the plastic breach. The directions call out a 1.5 mm bit (~#53) for the 15”/42 Mark I barrels and a 0.5mm bit (~#76) for the 4”/45 Mark XVI barrels. Be careful to center the drill bit on both x-axis and y-axis.
Be sure to use your favorite CA (super glue) or epoxy, as the normal plastic glues or solvents will not react with the aluminum or brass. Be careful painting the barrels, especially the brass ones since paint can easily foul the hollowed out muzzles.
Of note is the re-sealable packaging that Master Model uses making the parts easy to review and stuff back into the package securely. That being said, you will want to be careful handling the brass barrels as their small makes them quite easy to disappear.
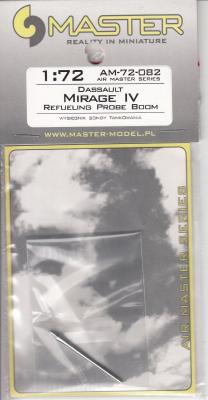
A while back (2009 if you want to know) I built a Heller Mirage IVP with the Pavla recce pod. Last week I got a new refueling probe for this kit.
The new probe from Master Model is a single piece of turned aluminum, exactly the same length as the Heller probe. All I had to do was remove the plastic probe from the nose of the Mirage IV, drill a larger hole where the probe goes, paint the new part and install the part with some CA to hold it.
As it turns out, there was one more step to this project. The Master Model part is a tiny bit smaller in diameter than the kit part. But it was the work of only a few minutes to trim the kit nose taper to fit. A little more paint to match, and it was done.
History Brief
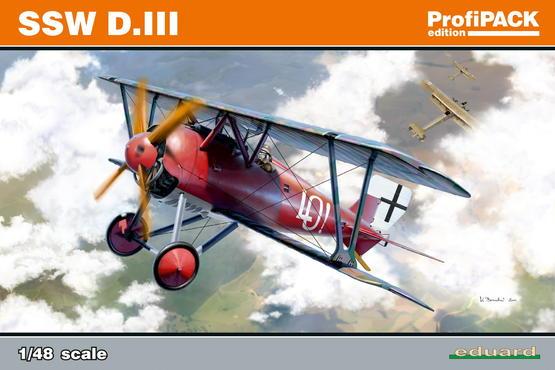
The SSW D.III was a German single-seat fighter built by the Siemens-Schuckert Werke and served as a home defense interceptor. The D.III was a development of the D.IIc prototype. Around 41 D.IIIs were delivered to the front between April and May 1918, most of them went to Jagdgeschwader II. It was powered by a 160 hp (119 kW) Siemens-Halske Sh.III bi-rotary engine. The pilots were enthusiastic about the new aircraft's handling and rate of climb, however, after only 7 to 10 hours of service the Sh.III engines had serious issues with piston seizure and overheating.
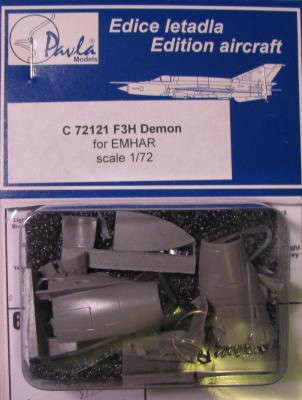
If you are looking to improve the cockpit, both inside and out, for your 1/72 scale EMHAR F-3H Demon, I would direct your attention to this cockpit and canopy set from Pavla Models. Recommended for the EMHAR kit released in 1991, this set provides a new front end for the plane in detailed resin, which is a step above the old plastic detail provided in the kit. Modelers with some experience in using resin parts should have no issues with utilizing this set, and experience with vacuum-formed canopies will be very important if using the windscreen and canopy included in the set.
From my perspective, Pavla Models continues to quietly add new items to their product lines in order to add detail to existing kits; many of these lines are intended for aircraft modelers, but there are some AFV items as well. Pavla Models provides replacement canopies that are vacuum-formed as well as cockpit sets, ejection seats, and general detail sets for aircraft.
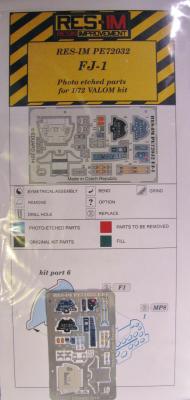
If you are looking to improve the appearance of your 1/72 scale FJ-1 Fury, I would direct your attention to this photo-etched set from Resin Improvements. Although recommended for the VALOM kit, I was able to use the set effectively with the release from SIGA with only some minor plastic and metal removal. Most of the cockpit parts are pre-painted, which makes them both quick and easy to use right out of the package. A modeler with some experience using photo-etched parts should not have any issues with utilizing this set.
One of the newer companies that the IPMS/USA has picked up for Review Corps items is Resin Improvements from the Czech Republic. Although I had not previously heard of the company, their web site shows a 2011 date on it. I also noted when the set arrived that the photo etch fret has “© Eduard 2014” engraved on one end. In addition, the instructions are identical to those found in Eduard photo etch detail sets.
Here is the third review of the three sets from Master Model which are all common in design but different in utility; IPMS USA sincerely appreciates Master’s support of our reviewer corps, and thanks to our leaders for sending these my way!
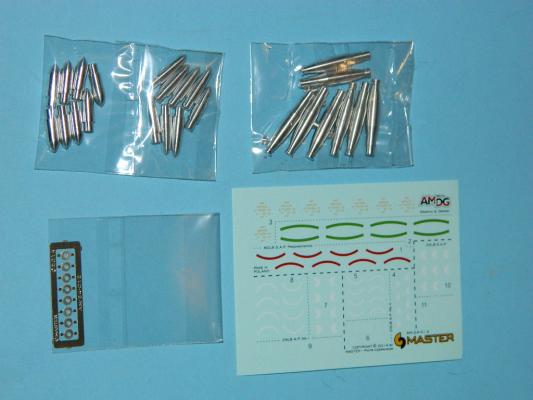
This set contains turned aluminum rocket noses and a decal sheet to provide warhead options for the previously reviewed Early and Late Master Details 1/24 British RP-3 rockets. (Sets 24 0011 and 24 0012).
The instructions are comprehensive, and explain coloring, details, and what each warhead is. I can see these used in the case of either ground attack against armor, such as on a Hurricane or Typhoon, or the Naval attack Mosquito squadrons.
All parts are individually bagged by item within the generic display header bag; this prevents damage and ensures you have the correct bits in the correct order.

