
SSW D.III
History Brief
The SSW D.III was a German single-seat fighter built by the Siemens-Schuckert Werke and served as a home defense interceptor. The D.III was a development of the D.IIc prototype. Around 41 D.IIIs were delivered to the front between April and May 1918, most of them went to Jagdgeschwader II. It was powered by a 160 hp (119 kW) Siemens-Halske Sh.III bi-rotary engine. The pilots were enthusiastic about the new aircraft's handling and rate of climb, however, after only 7 to 10 hours of service the Sh.III engines had serious issues with piston seizure and overheating.
In late May 1918, Jagdgeschwader II replaced its D.IIIs with the older Fokker Dr.I. The remaining D.III aircraft were returned to the Siemens-Schuckert factory. The problem was the Voltol mineral oil that was used because of castor oil shortages, plus, the tight-fitting engine cowling proved inadequate. The engine cowling was originally a full circle, so the bottom half was cut away to provide better airflow and improve cooling. In addition, the prop large spinner was given four louvers, also in an attempt to improve cooling. They were refitted with new Sh.IIIa engines and a larger rudder. A further 30 new production D.IIIs incorporated these modifications. Total production amounted to 80 aircraft. In July 1918 the D.III returned to active service as an interceptor with home defense squadrons. By this time, the D.III had been replaced in production by the Siemens-Schuckert D.IV.
The Product
My sample arrived in a sturdy box. The artwork features a red aircraft with side script reading ‘LO!’ belonging to Ltn. Ernest Udet in flight circling above British bombers somewhere over the front lines. Inside I found two sprues of gray plastic, one small acetate film for the windscreen, one color photo-etch fret, one small painting mask, a full-color instruction booklet and decals printed by Cartograf. The plastic features nicely detailed parts, but some may be put off by the heavy wing rib stitching. The parts were easily removed from the sprue and passed basic test fitting with flying colors. The sturdy acetate film has two windscreen outlines printed on it. The photo-etch fret has several items on it including lots of turnbuckles for the rigging and some parts are printed in color. The small painting masks are for a set of wheels, specifically for Udet’s aircraft the other options have decal covers. The instruction booklet is very well printed with easy to understand directions and illustrations. The build steps are well planned including the easy to see rigging drawings. The five option color plates are beautifully rendered with very interesting and colorful options. Lastly, the decals, WOW! Besides the German insignias and personal markings, the 3 sheet set includes complete wing-span lozenge pattern for upper and lower wings and flying control surfaces, also rib tape stripes which are very intimidating.
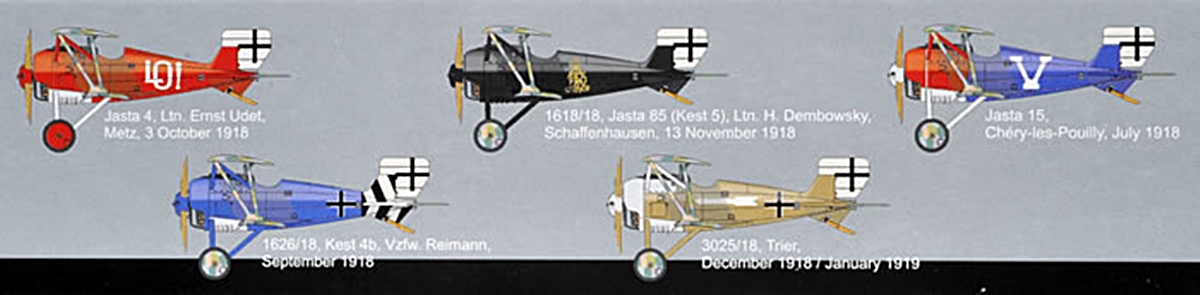
Marking Options
- SSW D.III, Jasta 4, Ltn. Ernst Udet, Metz, October 3, 1918
- SSW D.III 1618/18, Jasta 85 (Kest 5), Ltn. Heinrich Dembowsky, Schaffenhausen, November 13, 1918
- SSW D.III, Jasta 15, Chery-les-Pouilly, July, 1918
- SSW D.III 1626/18, Kest 4b, Vzfw. Reimann, September, 1918
- SSW D.III 3025/18, Trier, December, 1918 to January 1919
The Build
In the course of this build, I incorporated a few other review aftermarket items from Eduards Brassin line. This included the Brassin Engine and machine guns. These items have been posted as independent reviews on the IPMS web site.
I have included photos of both Brassin and kit parts.
Now on to the build. I first began with the cockpit and this involves adding internal ribs and aluminum fuel cells to the fuselage halves along with a few smaller bits. The pilot’s backrest/side railing is a bit tricky to line up and requires test fitting while glue sets. The lower wing incorporates the bottom fuselage. The cockpit floor, rudder pedals, control stick and pilot’s seat are all mounted on it. The seat can be built with a printed photo-etch back and looks great with the photo-etch seatbelts. The upper cowling doubles as the machine gun mount with a large ammo box attached to the bottom side. I then painted all the interior sections. I decided to not install the machine guns until after I combined the four subassemblies that make up the fuselage- two fuselage halves, the lower wing/cockpit section, and the upper cowling. This was a little tricky because a couple of inner support structures are added to the process. The firewall, oil-tank and engine sub-assembly was then built up and added next, followed by the lower ailerons, empennage, tail, elevator, and rudder. It was at this point I painted and decaled the exterior before continuing.
After what seemed to be a lifetime of tedious decaling and a bottle of Walthers Solvaset, I added the machine guns. I then installed the wing struts and upper wing and yes, it was a little tricky, but not impossible. Next the engine cowling, prop and landing gear were added without any problems. I finished up by adding the rigging. I first attached all the turnbuckles and then used e-z line.
The Bottom Line
It’s a five-star kit! I highly recommend it to the experienced modeler. I would like to thank Eduard and IPMS for the opportunity to present this outstanding model kit.

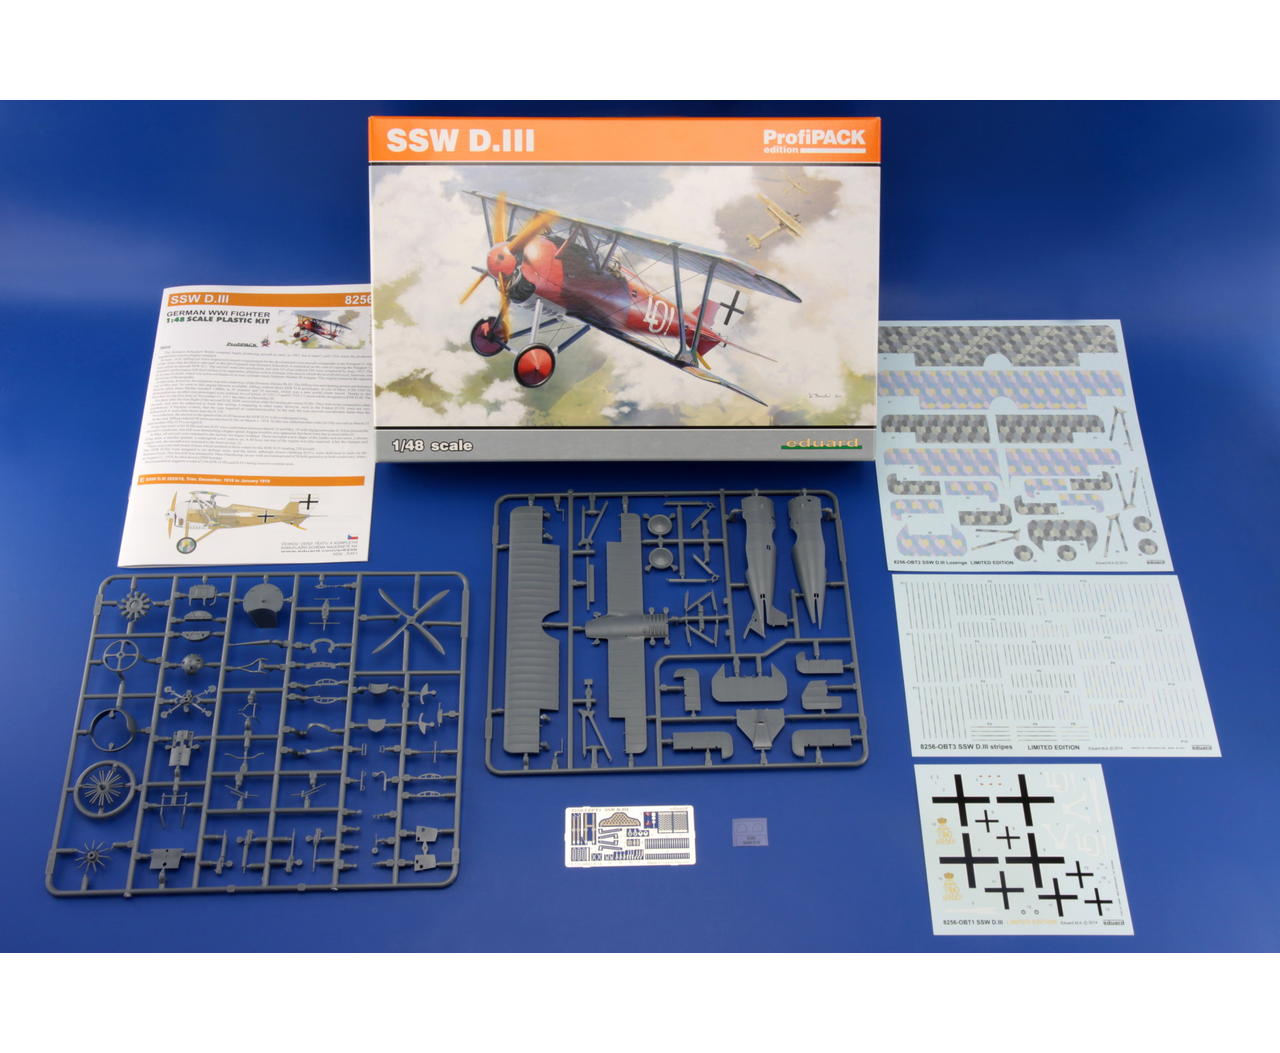
Contents
Painting & decal options

Decals
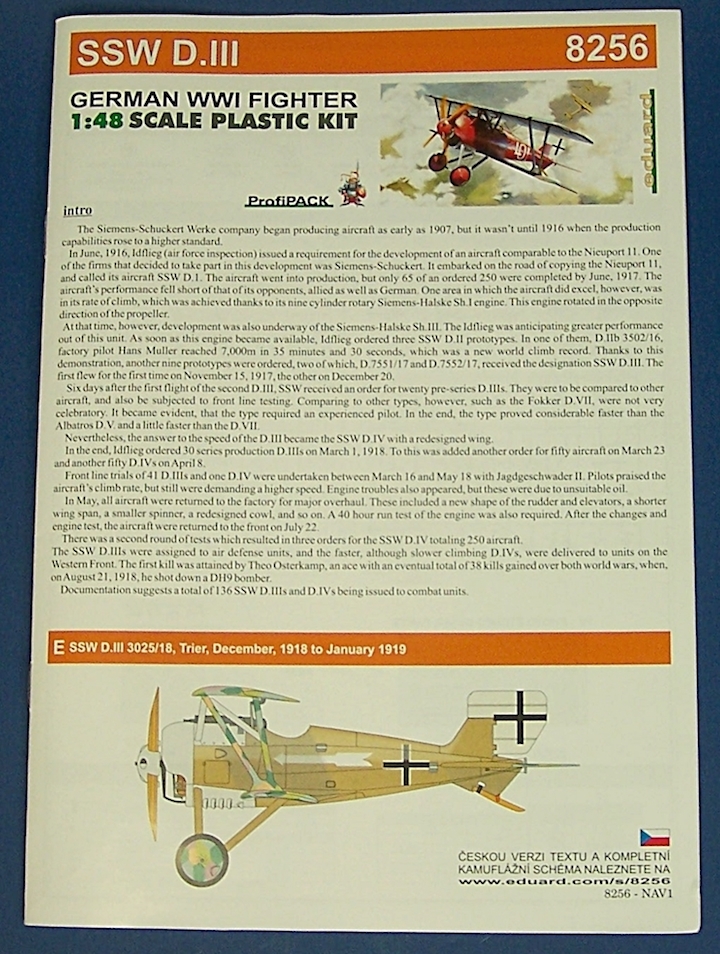
Instructions
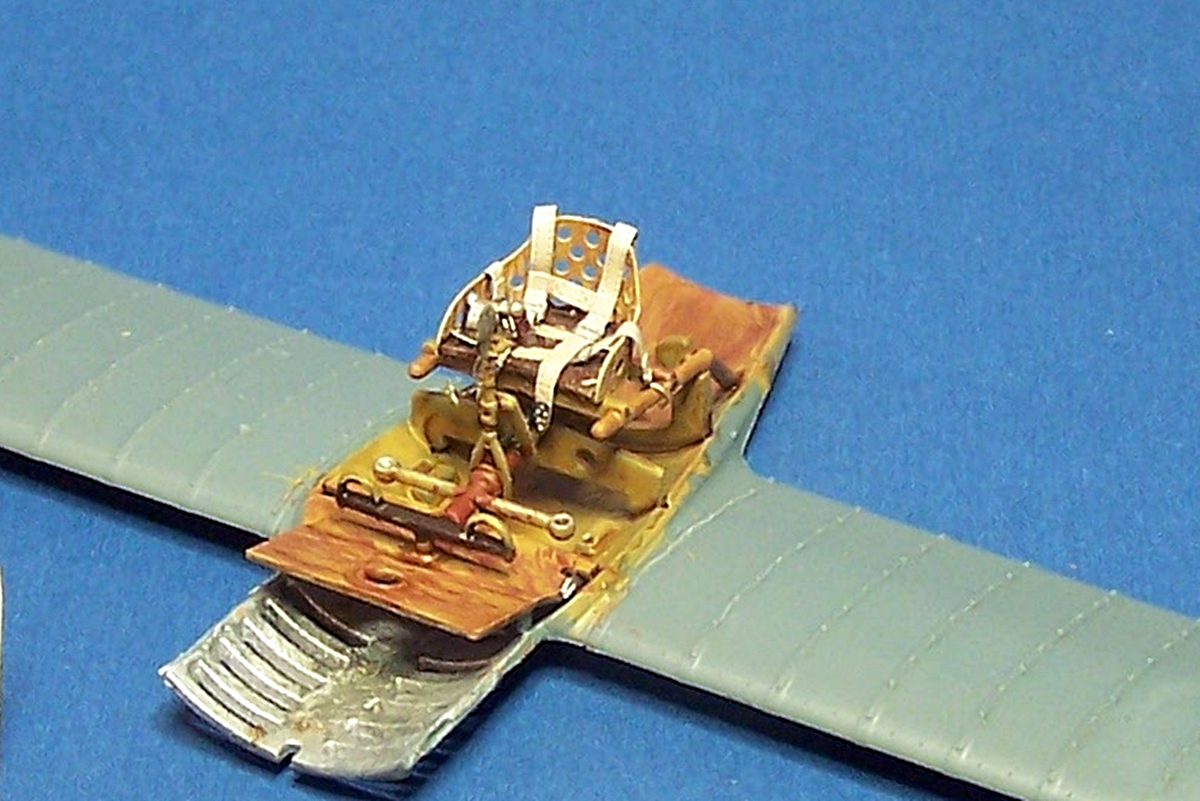
Cockpit-wing sub-component with photo-etch seatbelts

right-side cockpit
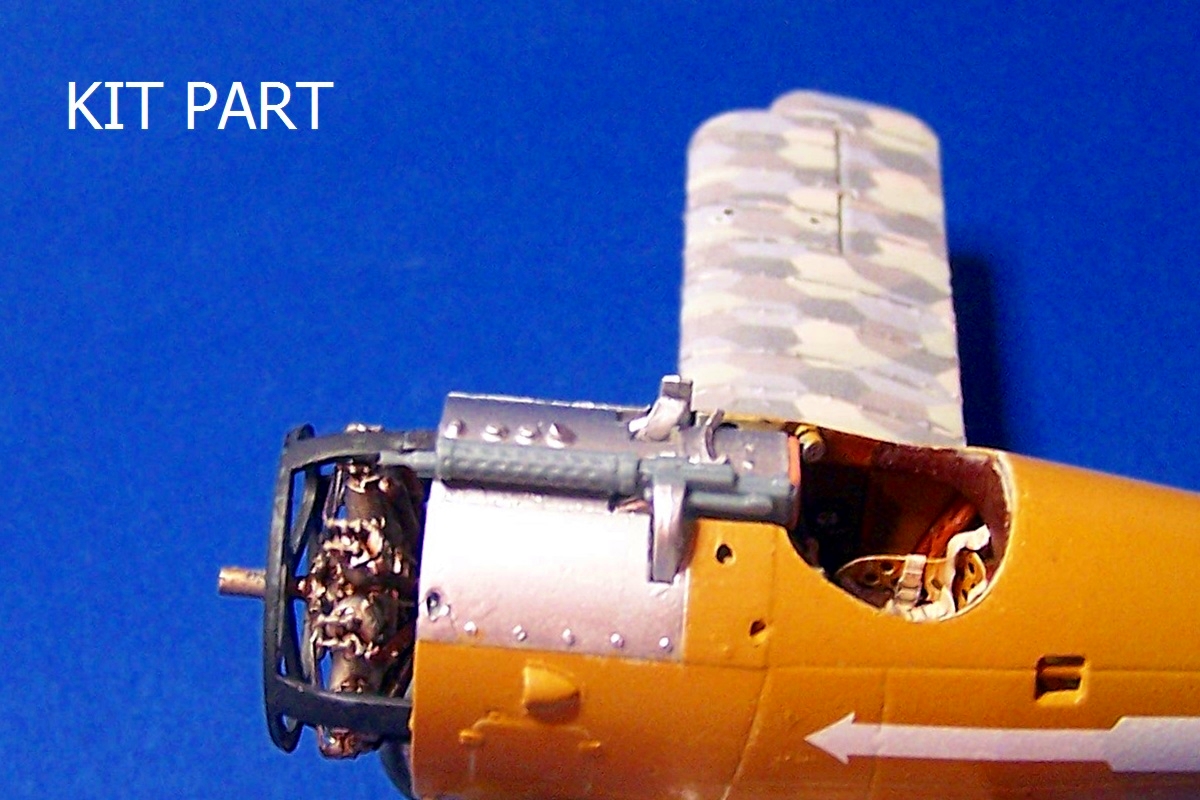
Kit part
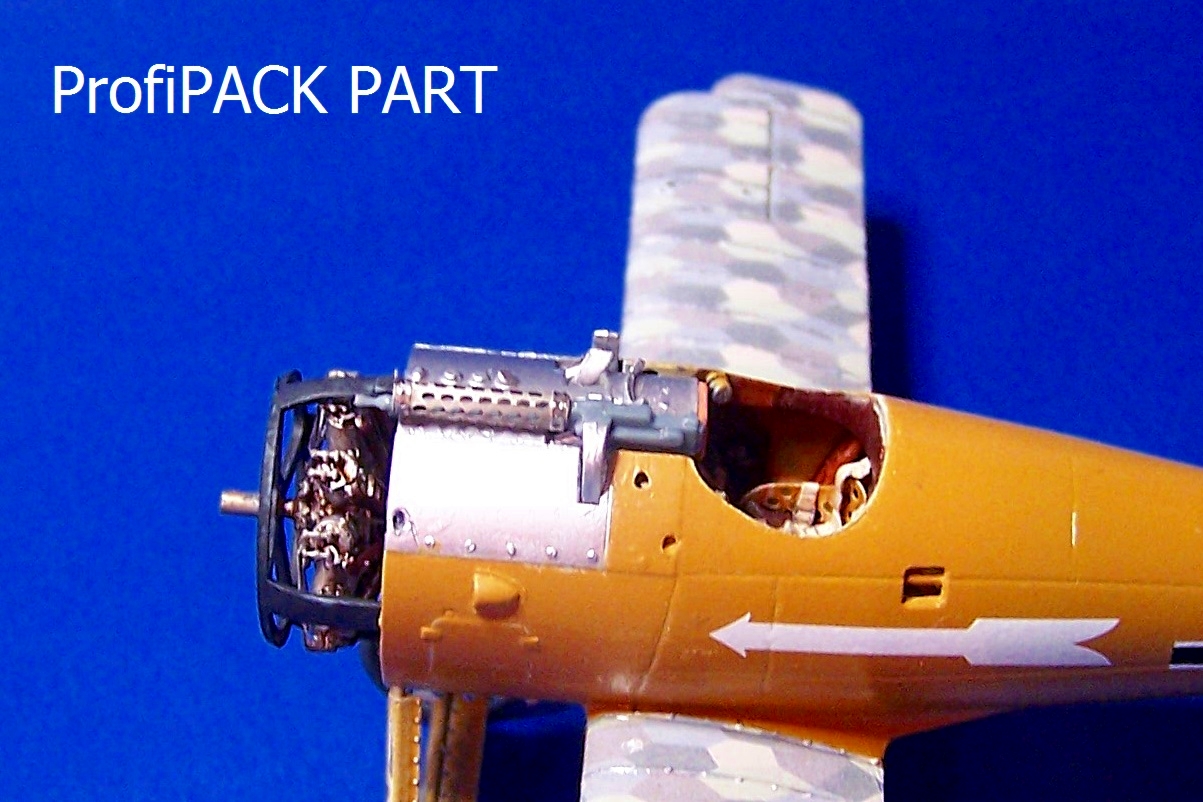
Profi Pack part
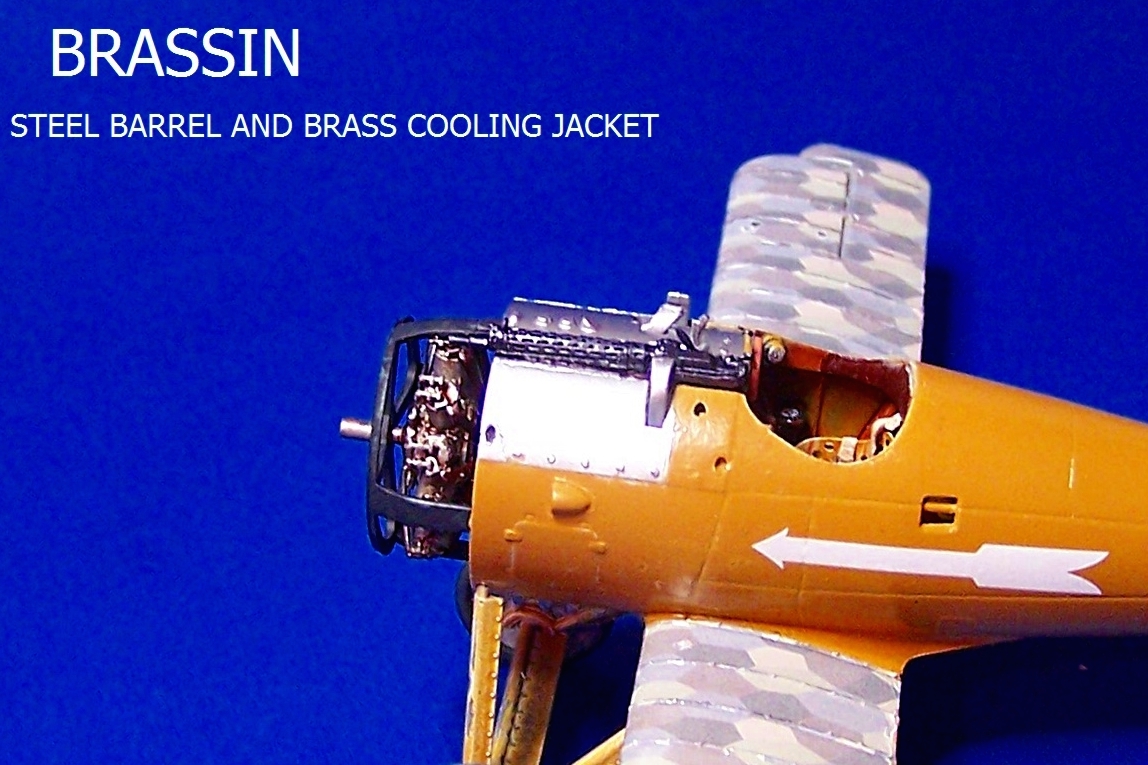
Aftermarket Brassin part
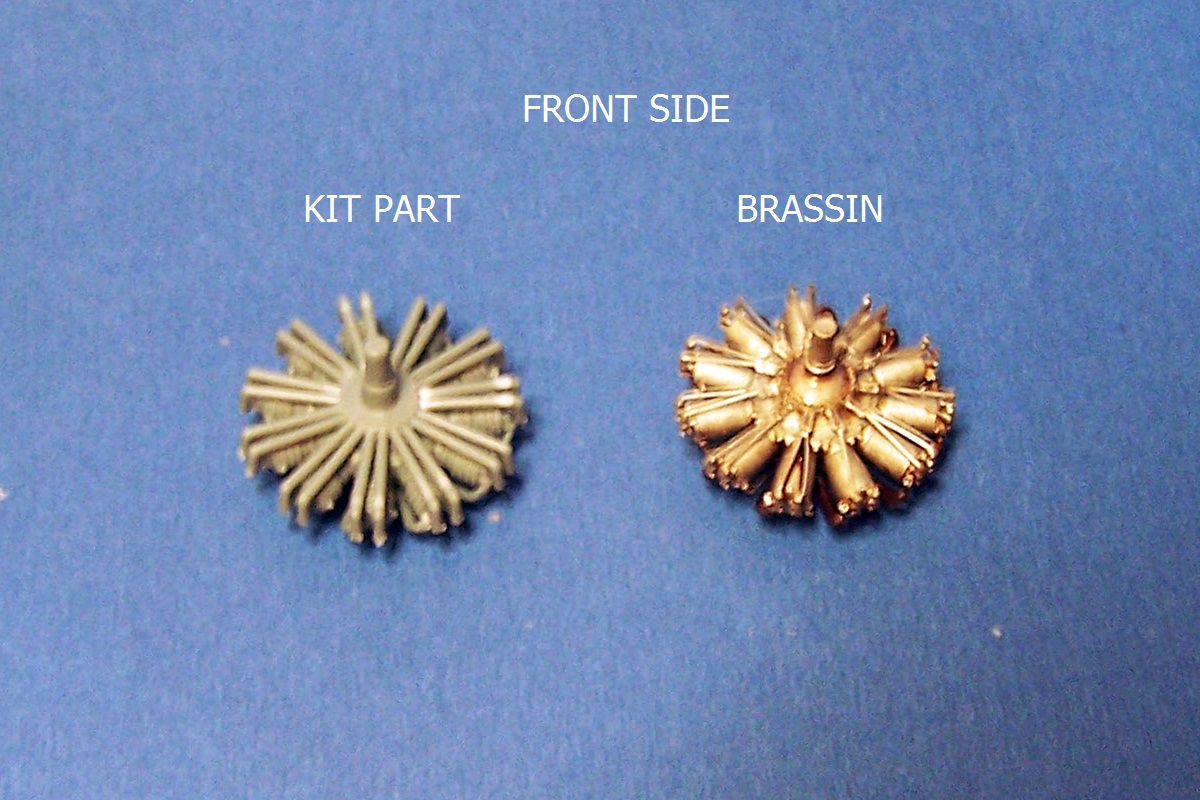
Engine comparison
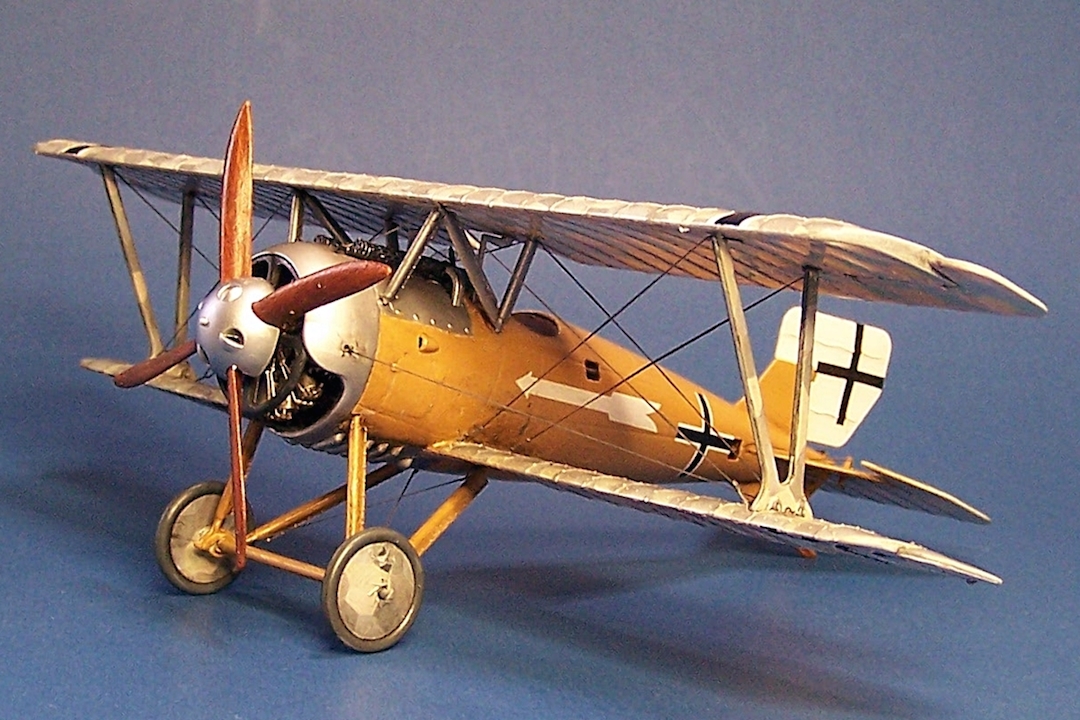
Completed model
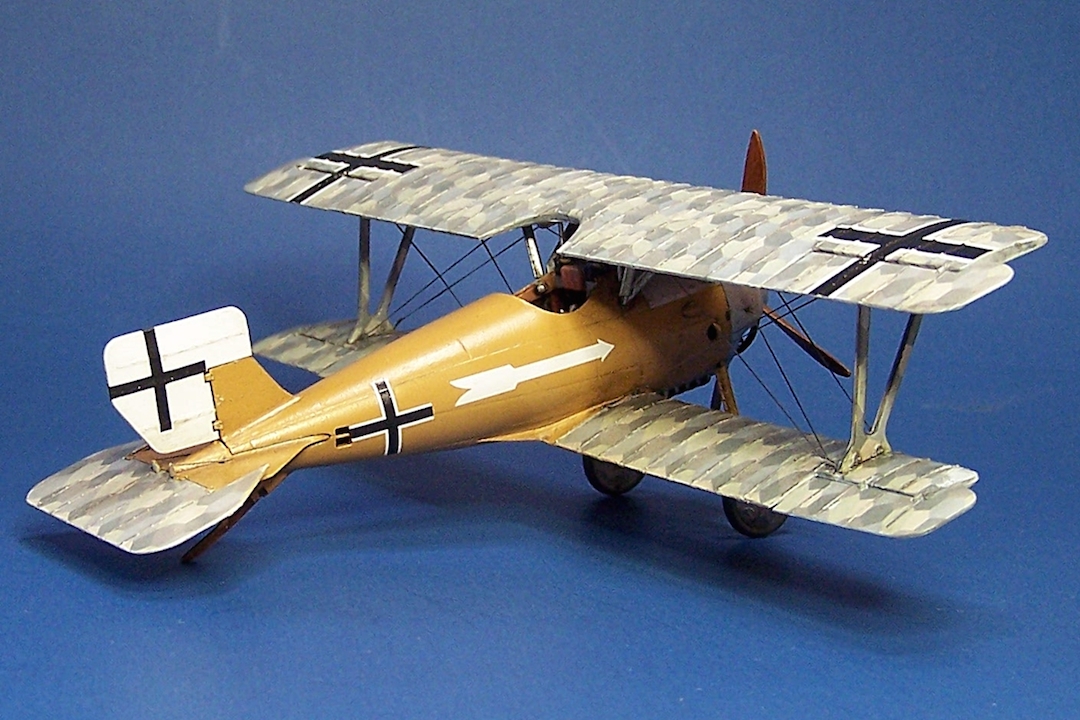
Completed model
Completed model

Completed model

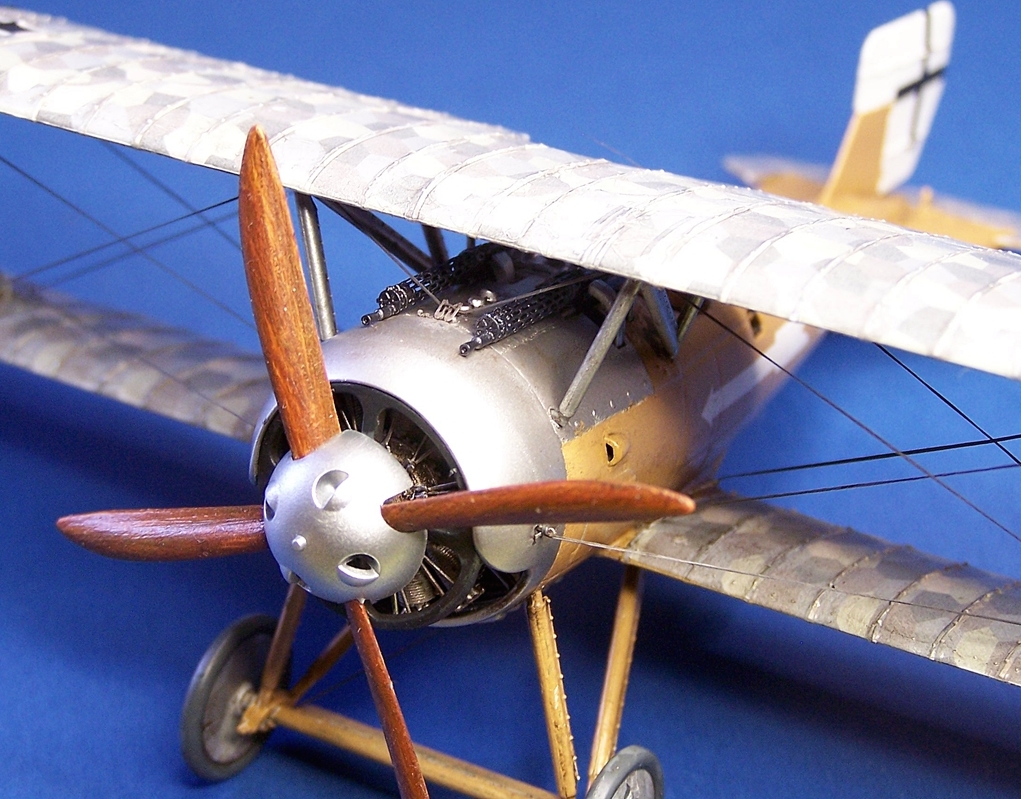
Close-up forward detail
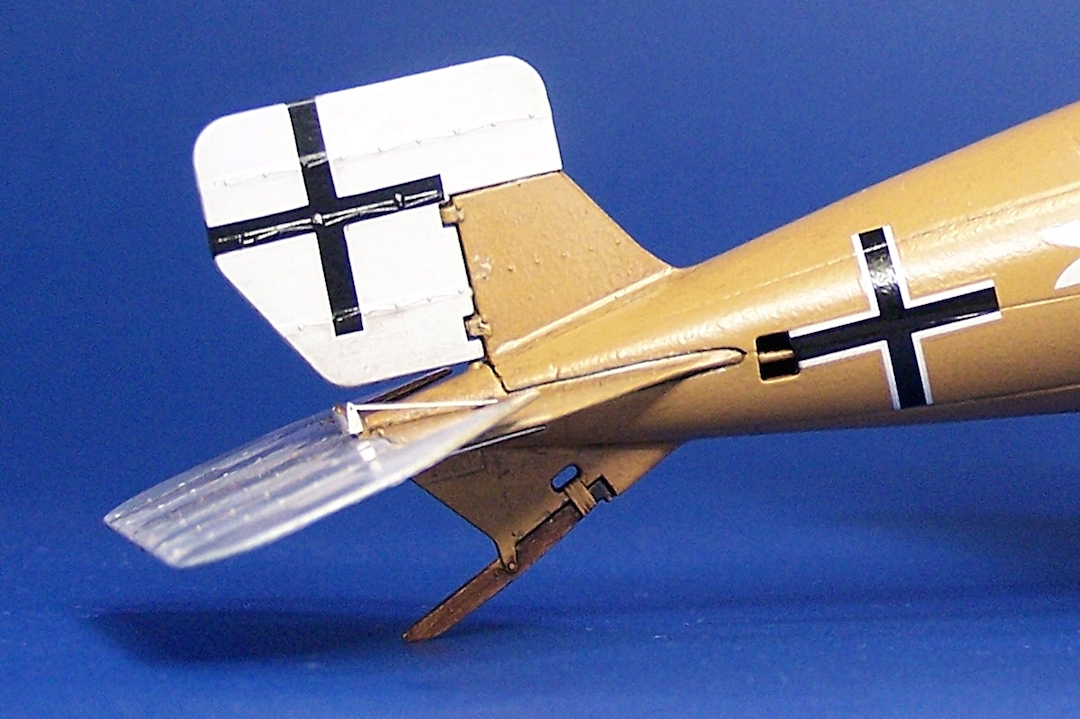
Close-up aft detail
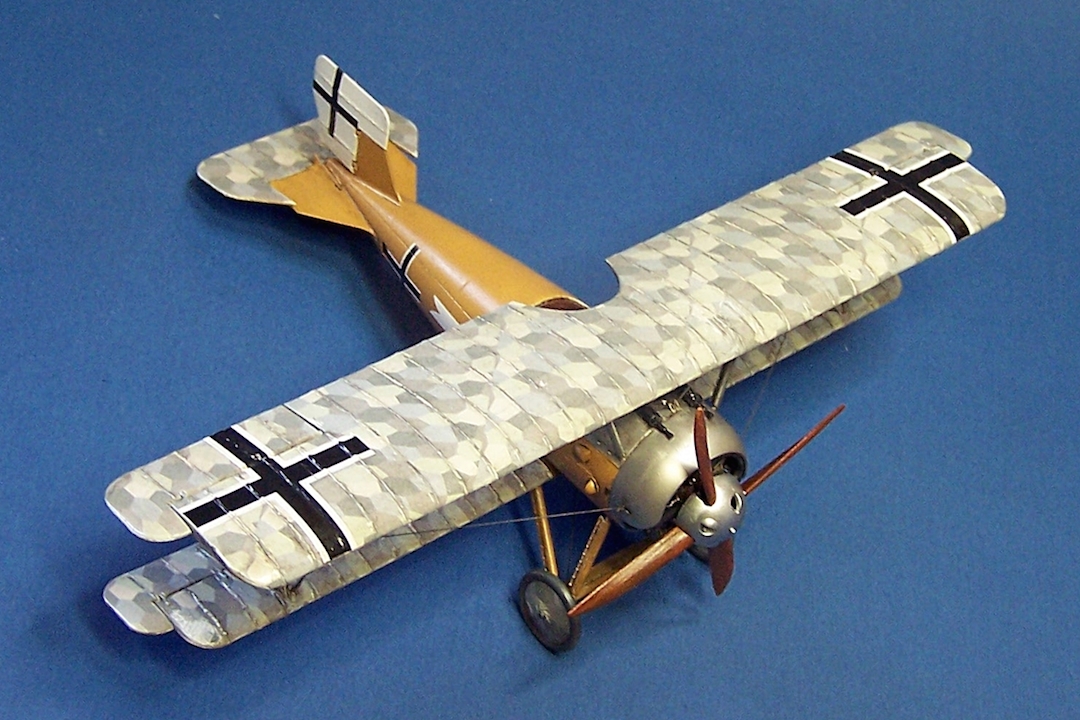
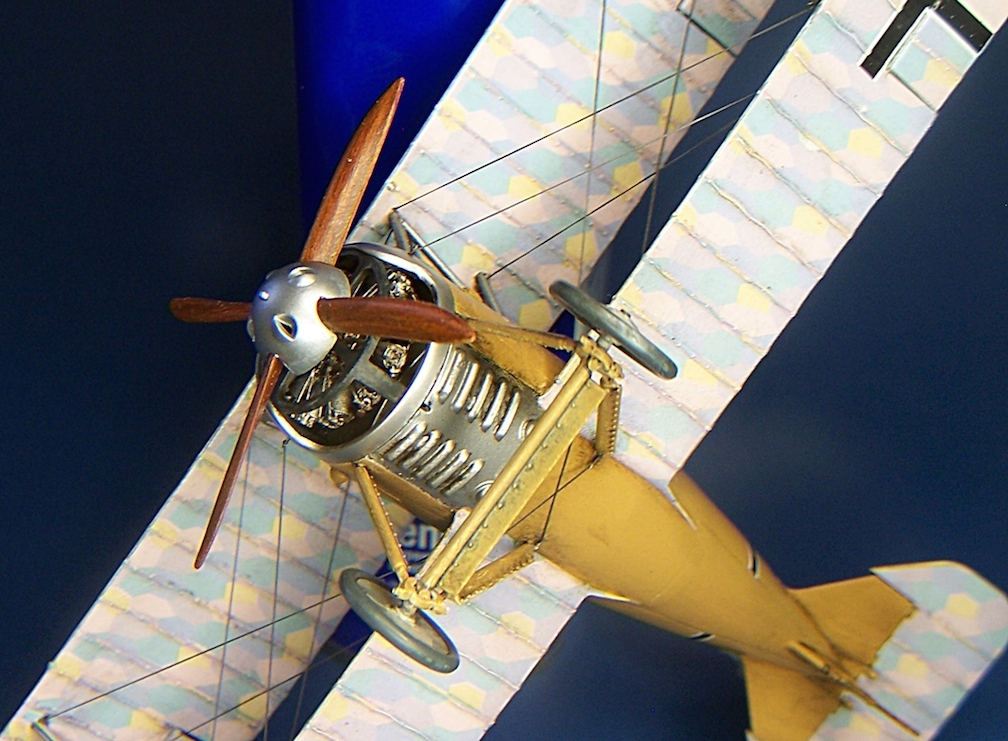
close-up above detail
Comments
Add new comment
This site is protected by reCAPTCHA and the Google Privacy Policy and Terms of Service apply.
Similar Reviews