
F3H Demon Cockpit Detail Set
If you are looking to improve the cockpit, both inside and out, for your 1/72 scale EMHAR F-3H Demon, I would direct your attention to this cockpit and canopy set from Pavla Models. Recommended for the EMHAR kit released in 1991, this set provides a new front end for the plane in detailed resin, which is a step above the old plastic detail provided in the kit. Modelers with some experience in using resin parts should have no issues with utilizing this set, and experience with vacuum-formed canopies will be very important if using the windscreen and canopy included in the set.
From my perspective, Pavla Models continues to quietly add new items to their product lines in order to add detail to existing kits; many of these lines are intended for aircraft modelers, but there are some AFV items as well. Pavla Models provides replacement canopies that are vacuum-formed as well as cockpit sets, ejection seats, and general detail sets for aircraft.
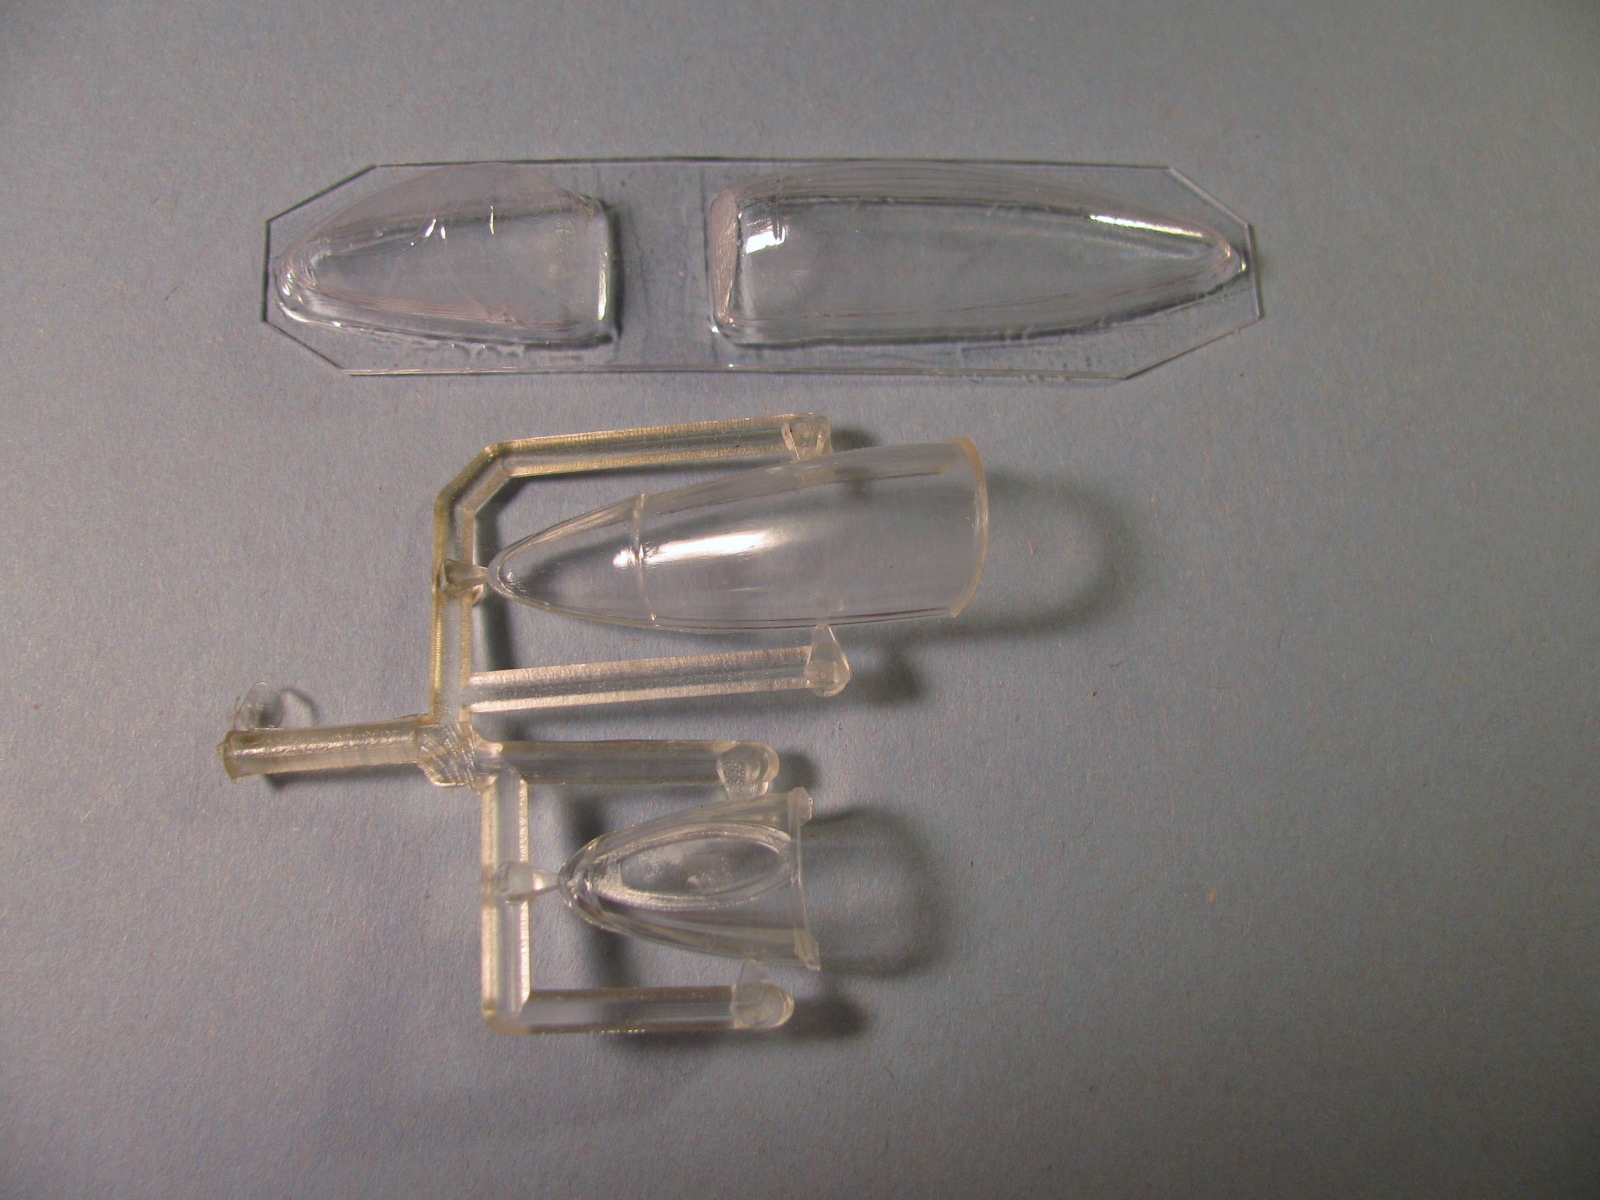
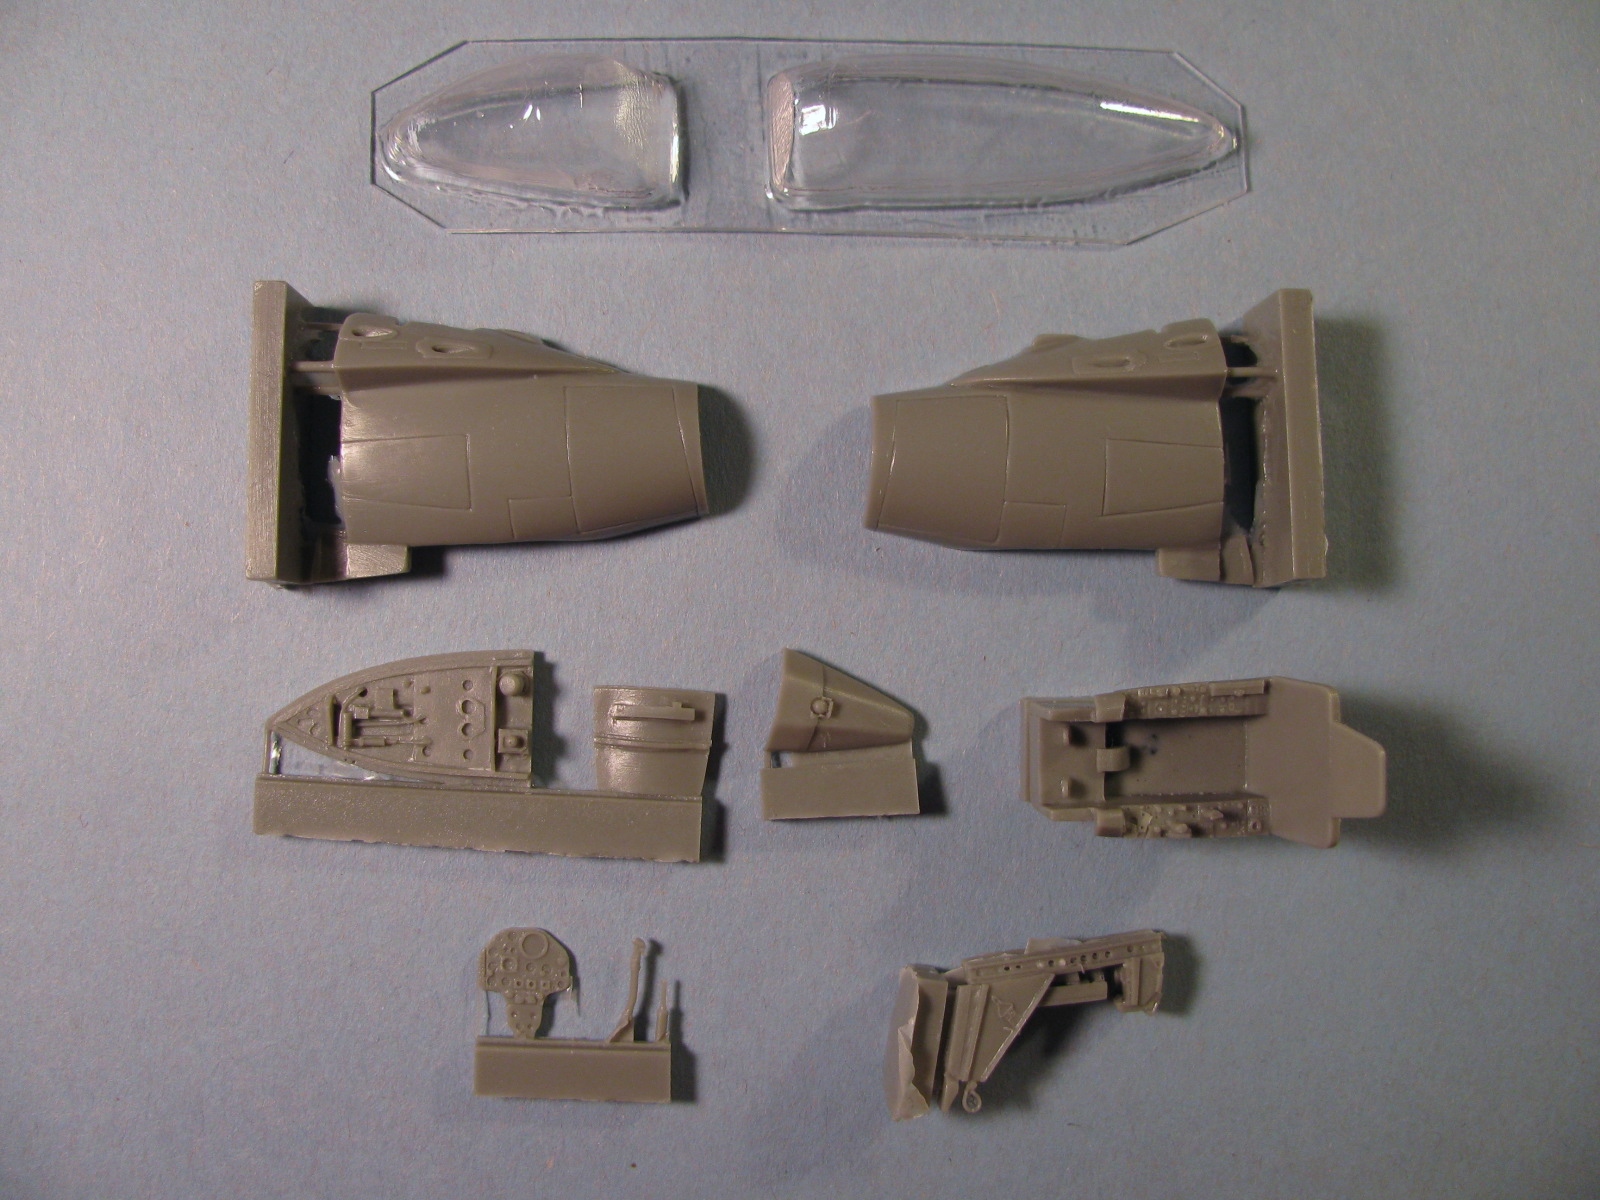
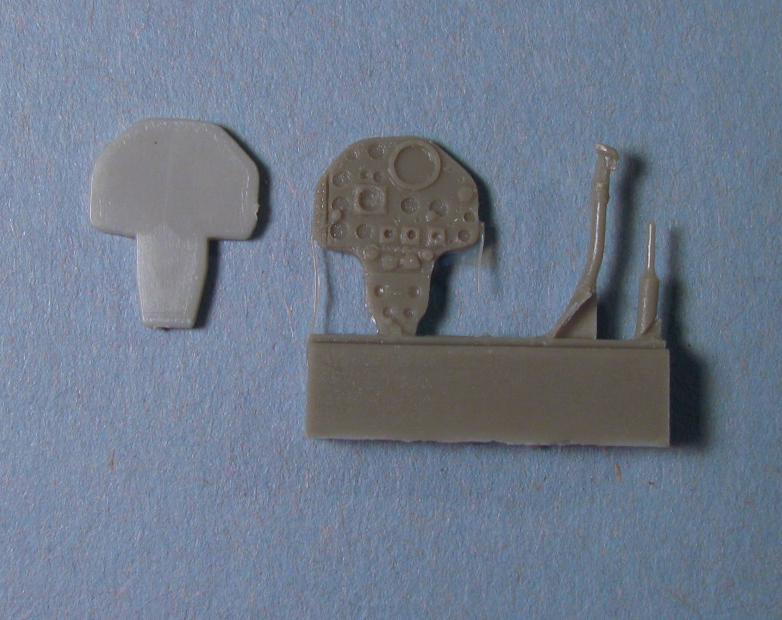
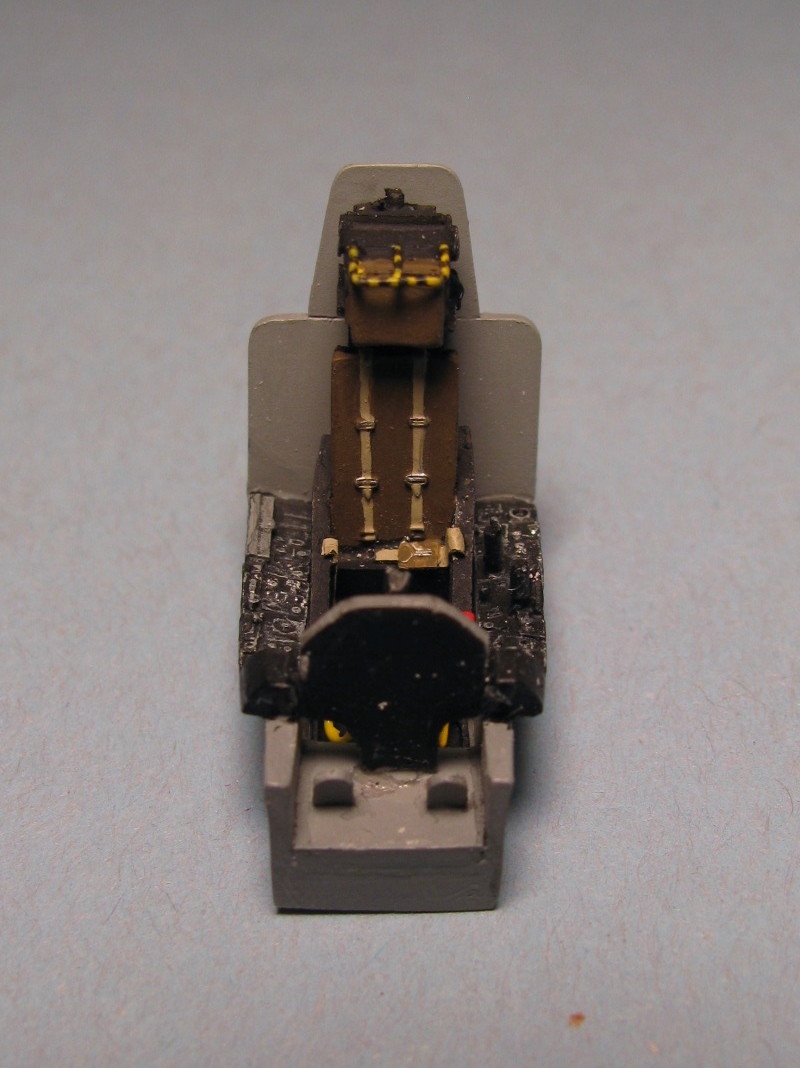
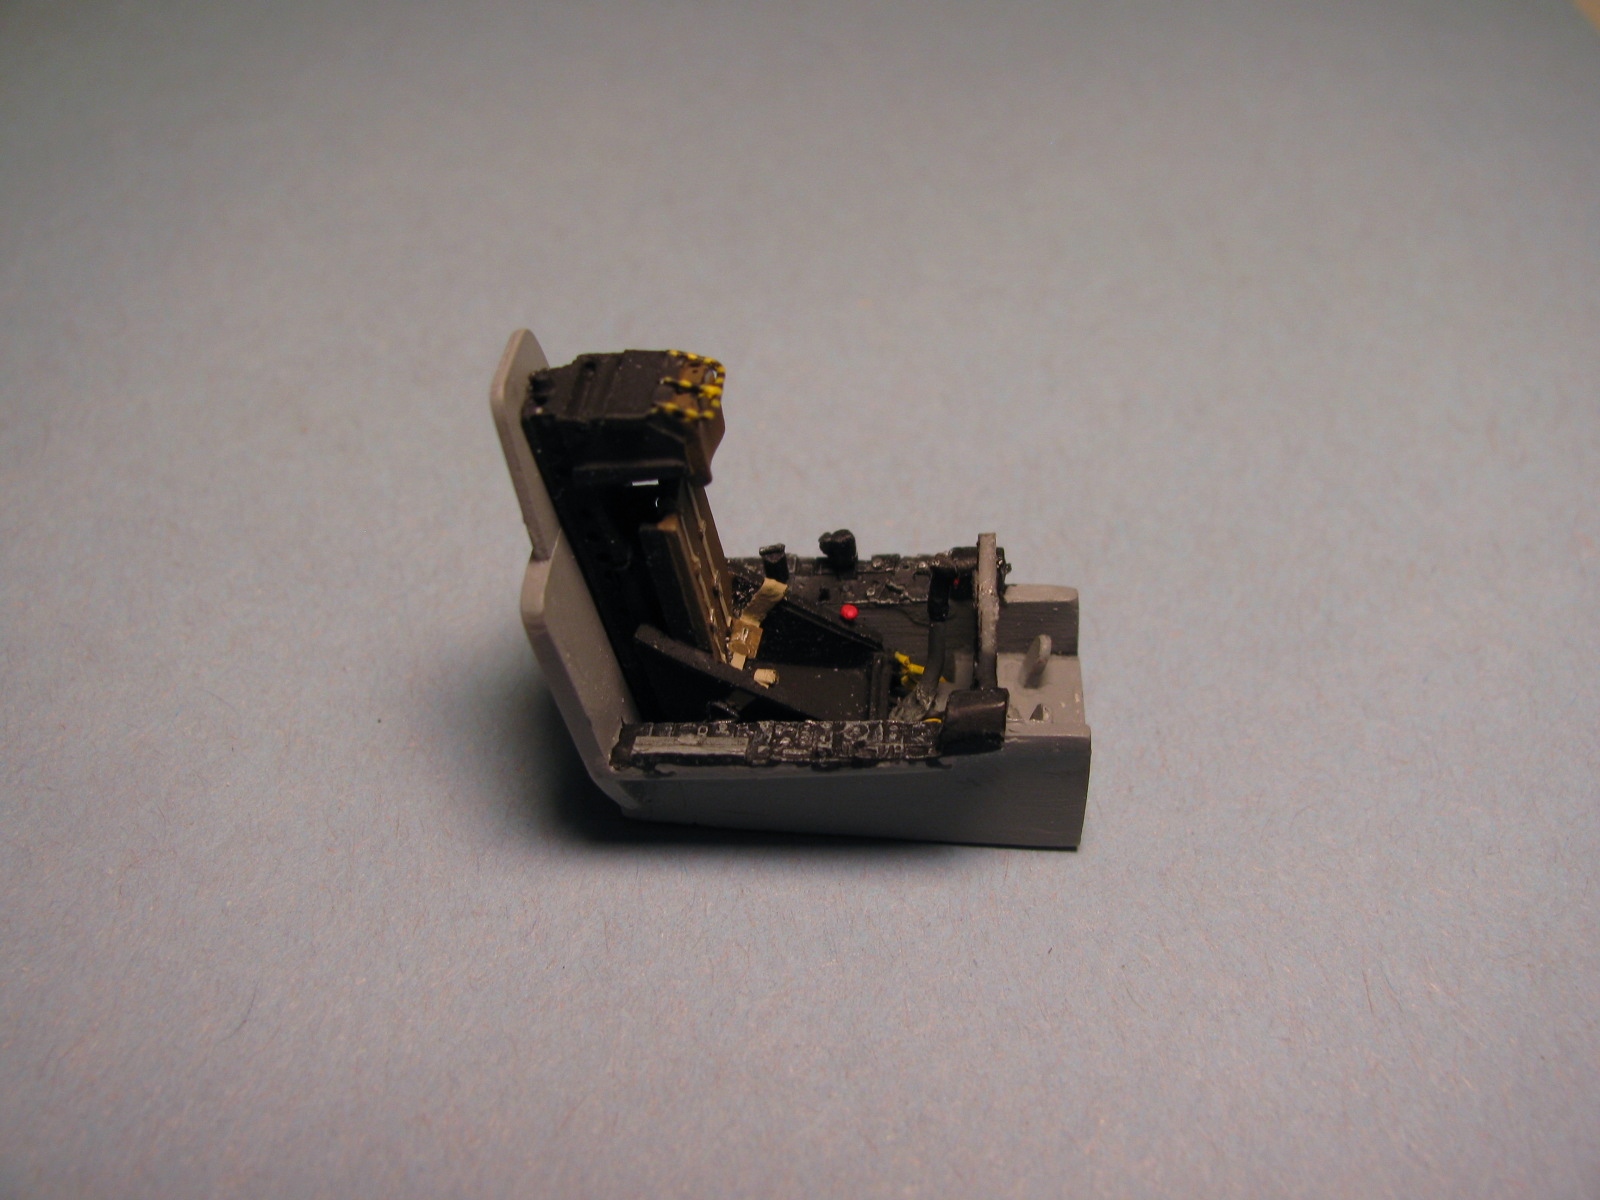
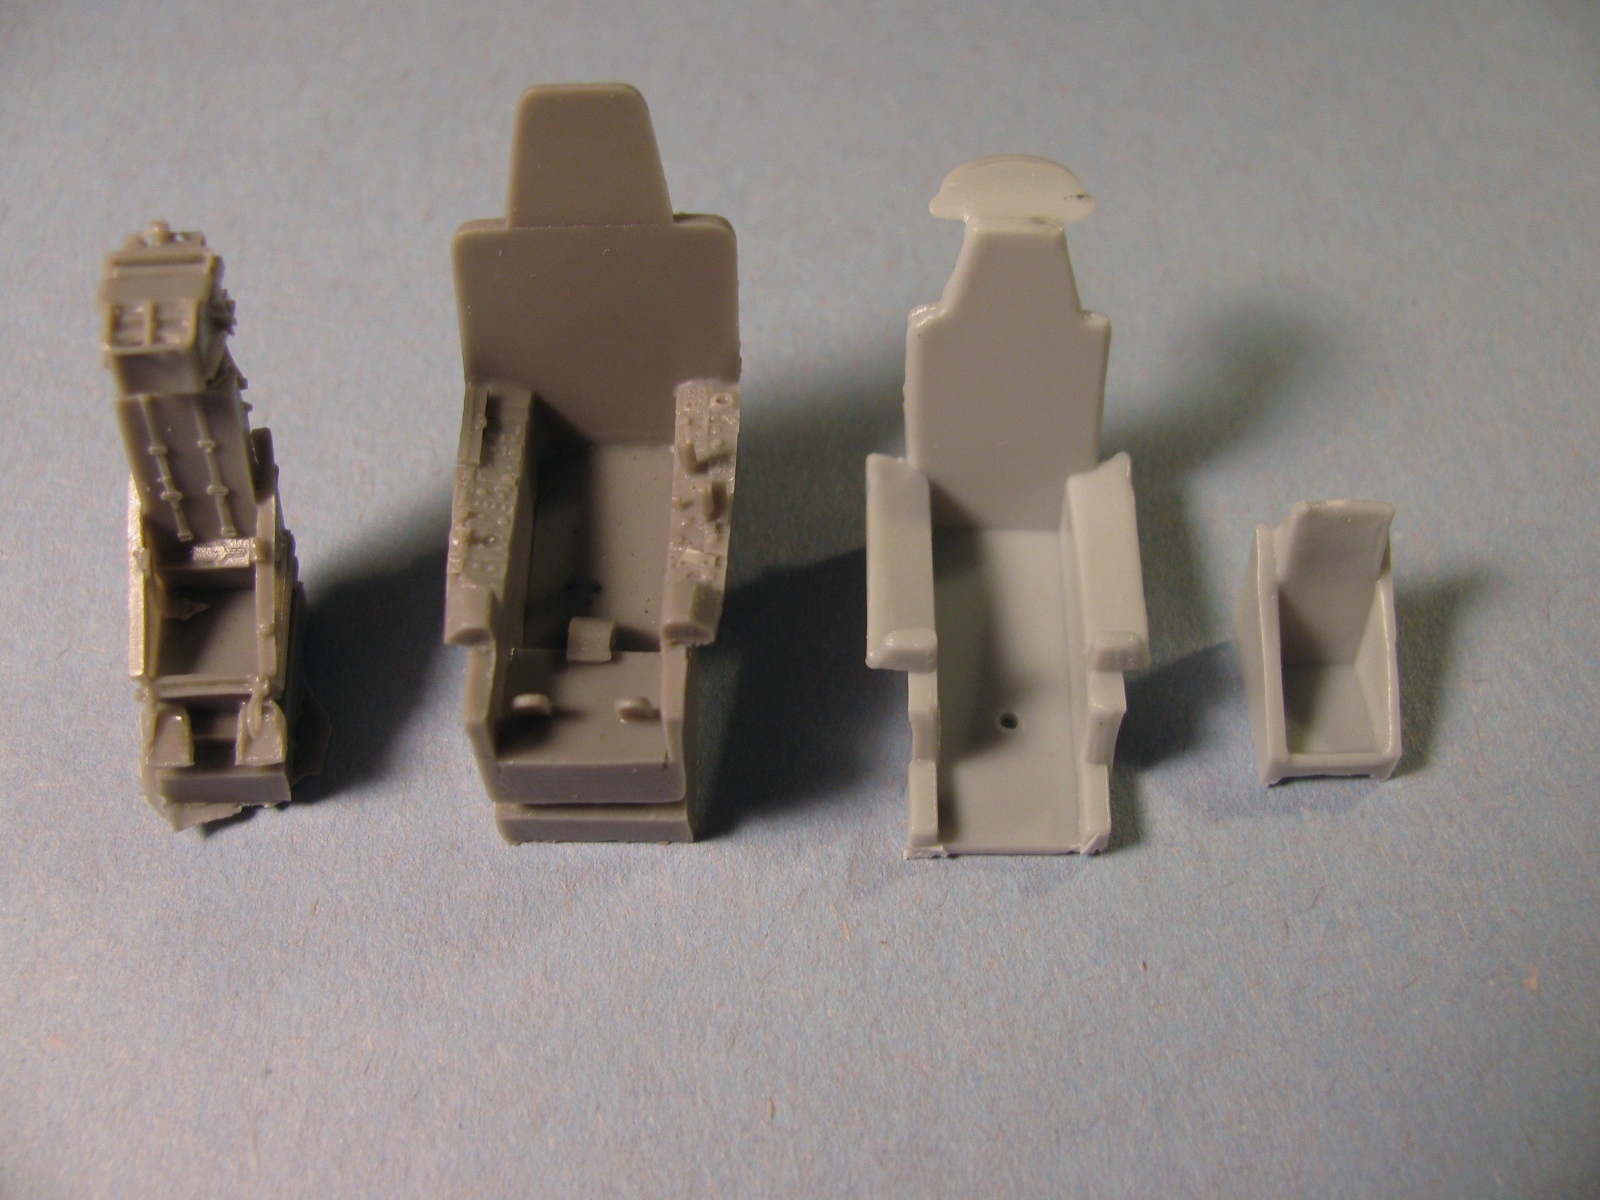
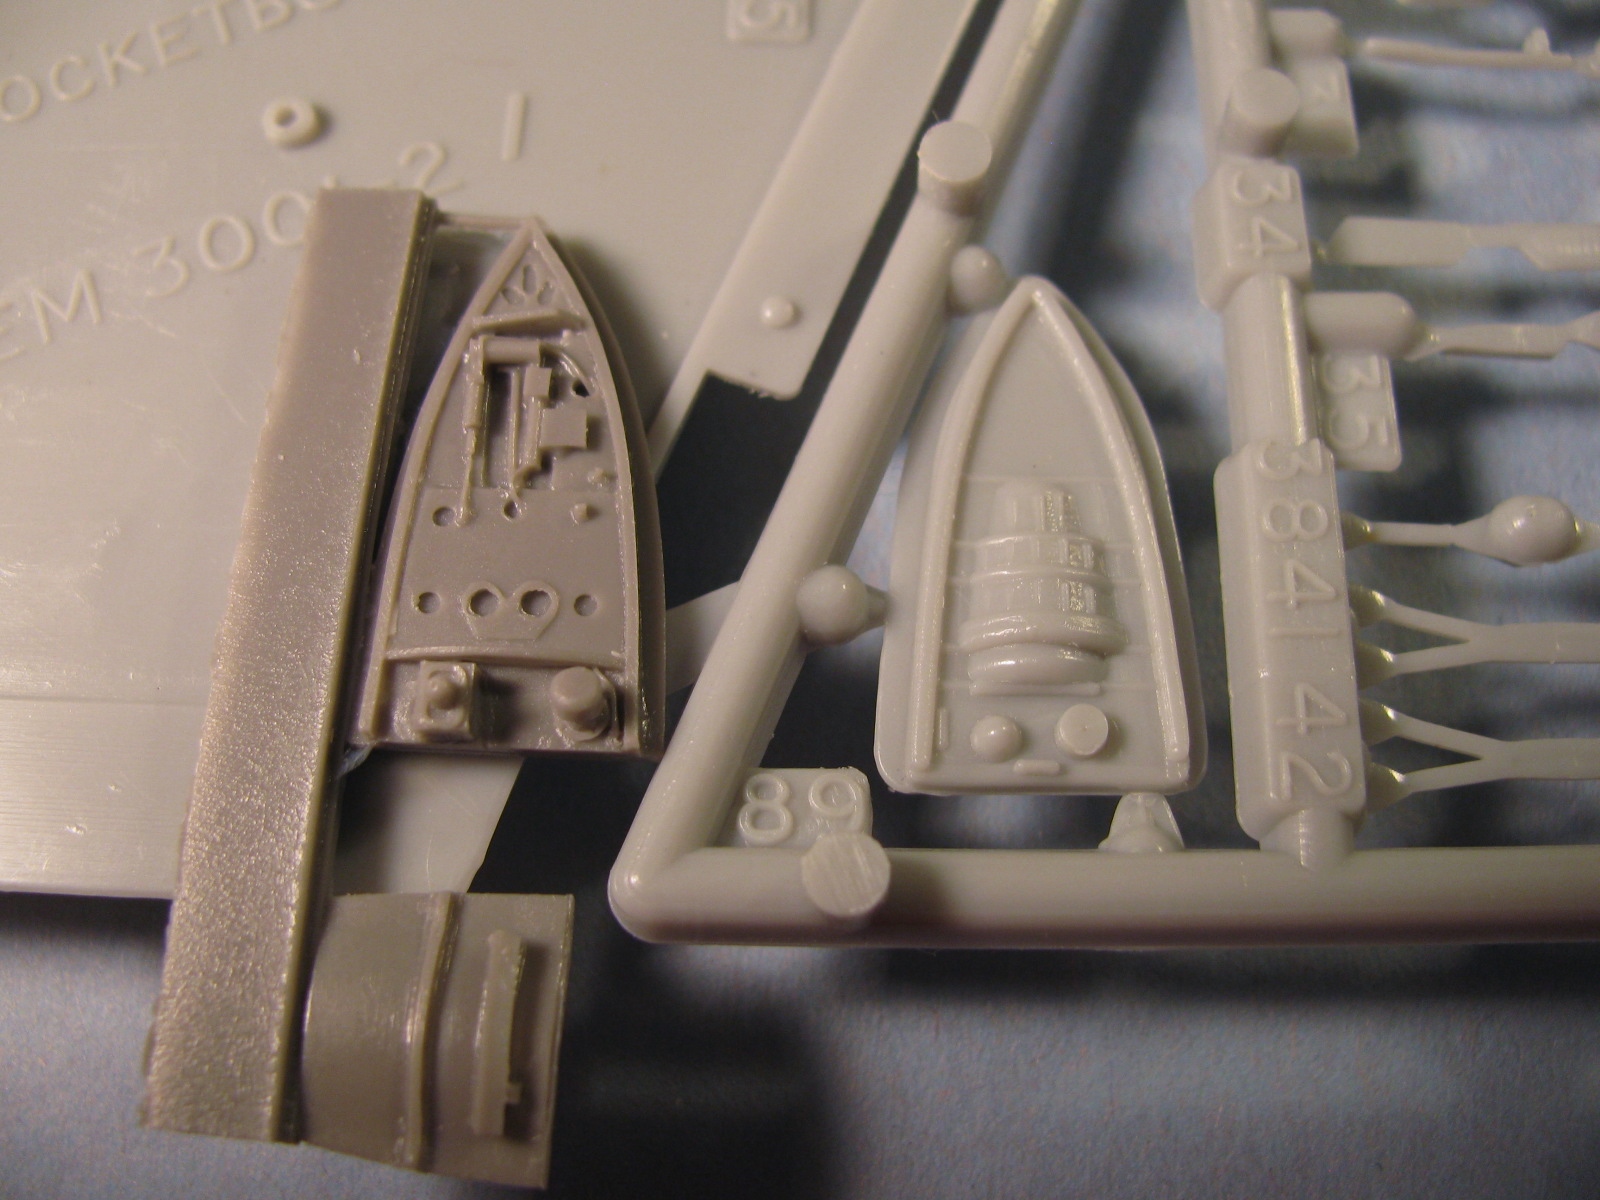
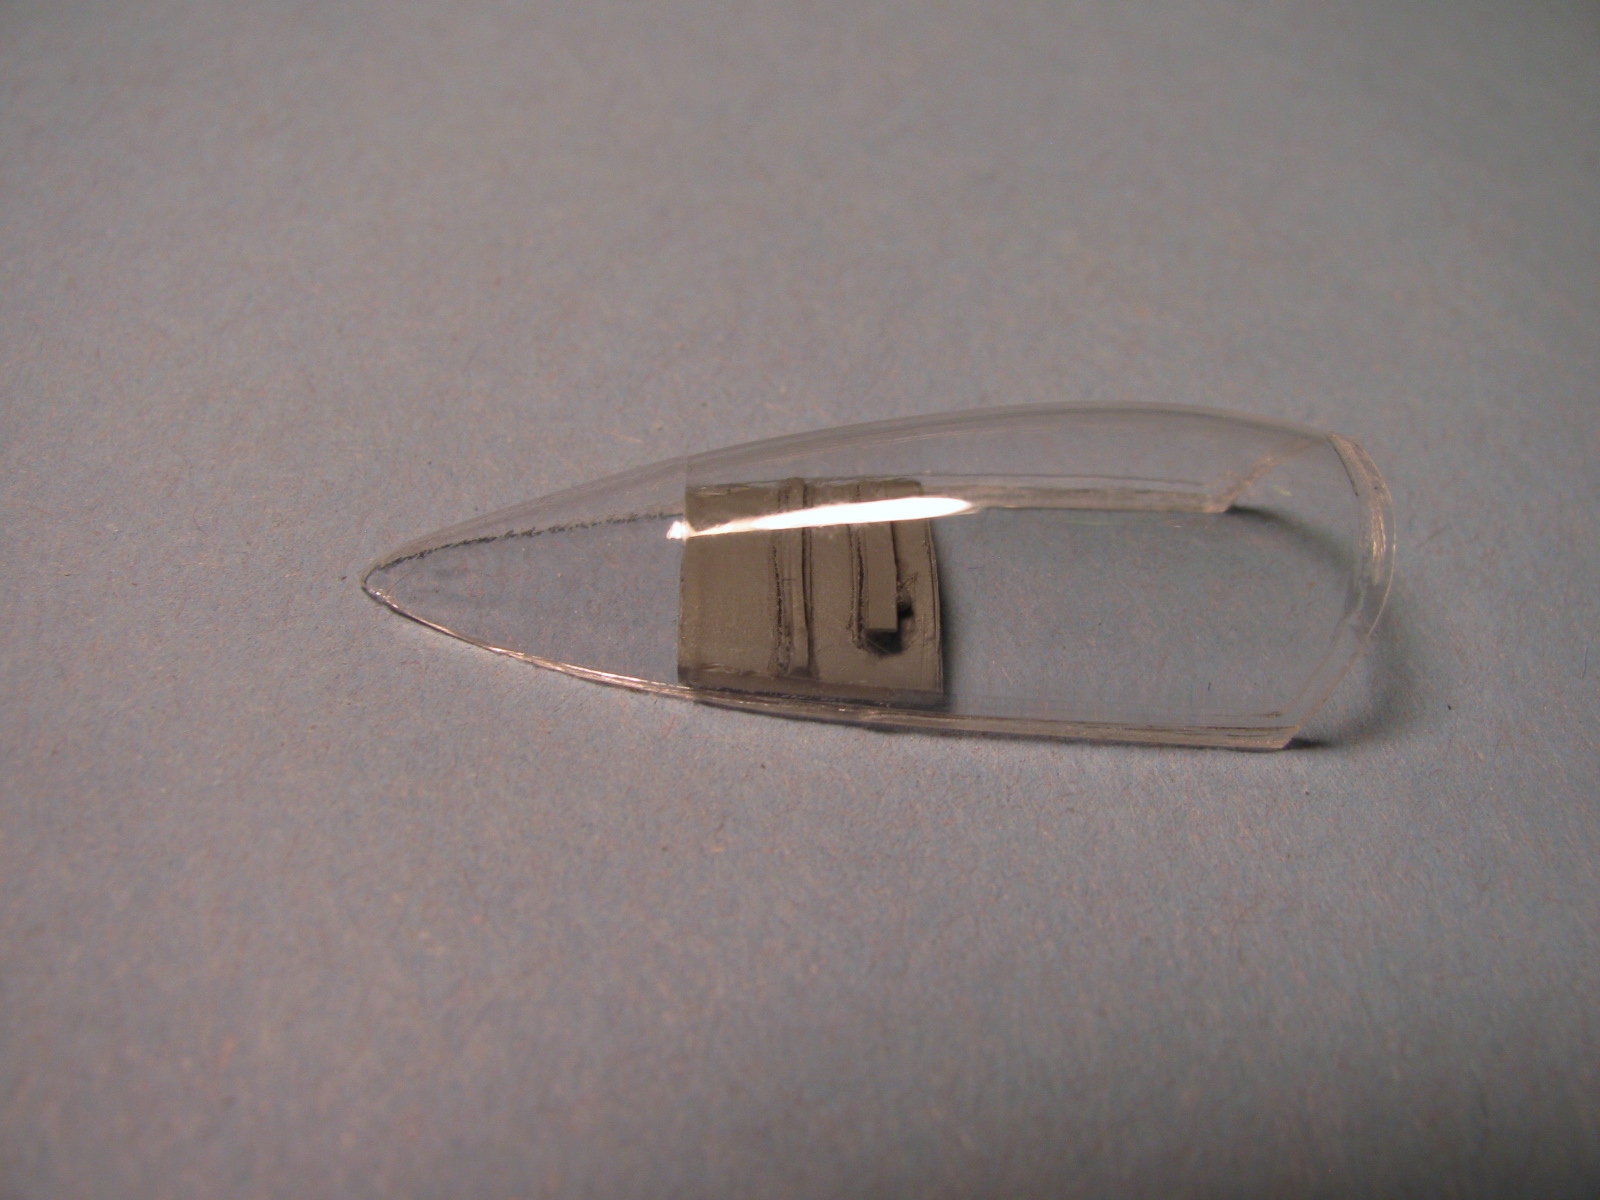
EMHAR released their 1/72 scale F-3H Demon back in 1991, but let us not do the math on that here, as it may cause some of us to feel dated. This detail set from Pavla Models provides ten resin parts that are cast in medium gray resin along with a vacuum-formed windscreen and canopy. The ejection seat as well as the other parts are beautifully cast, with a great level of detail, which provide a nice improvement over the plastic parts in the kit.
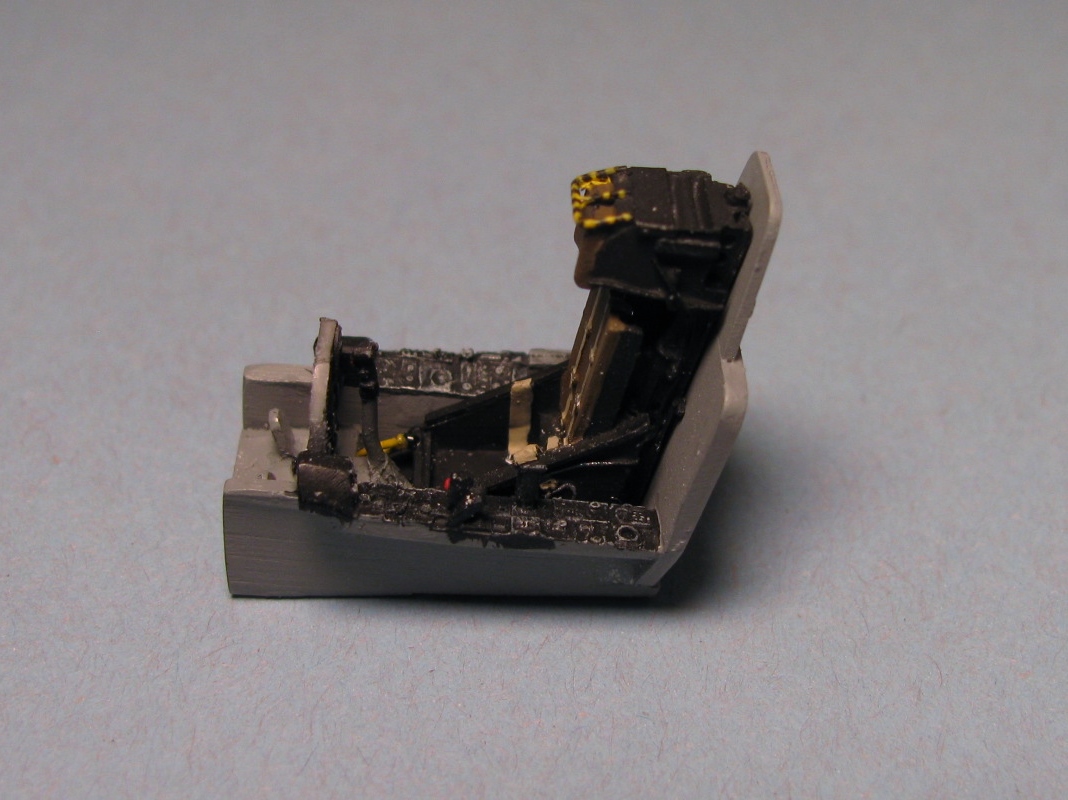
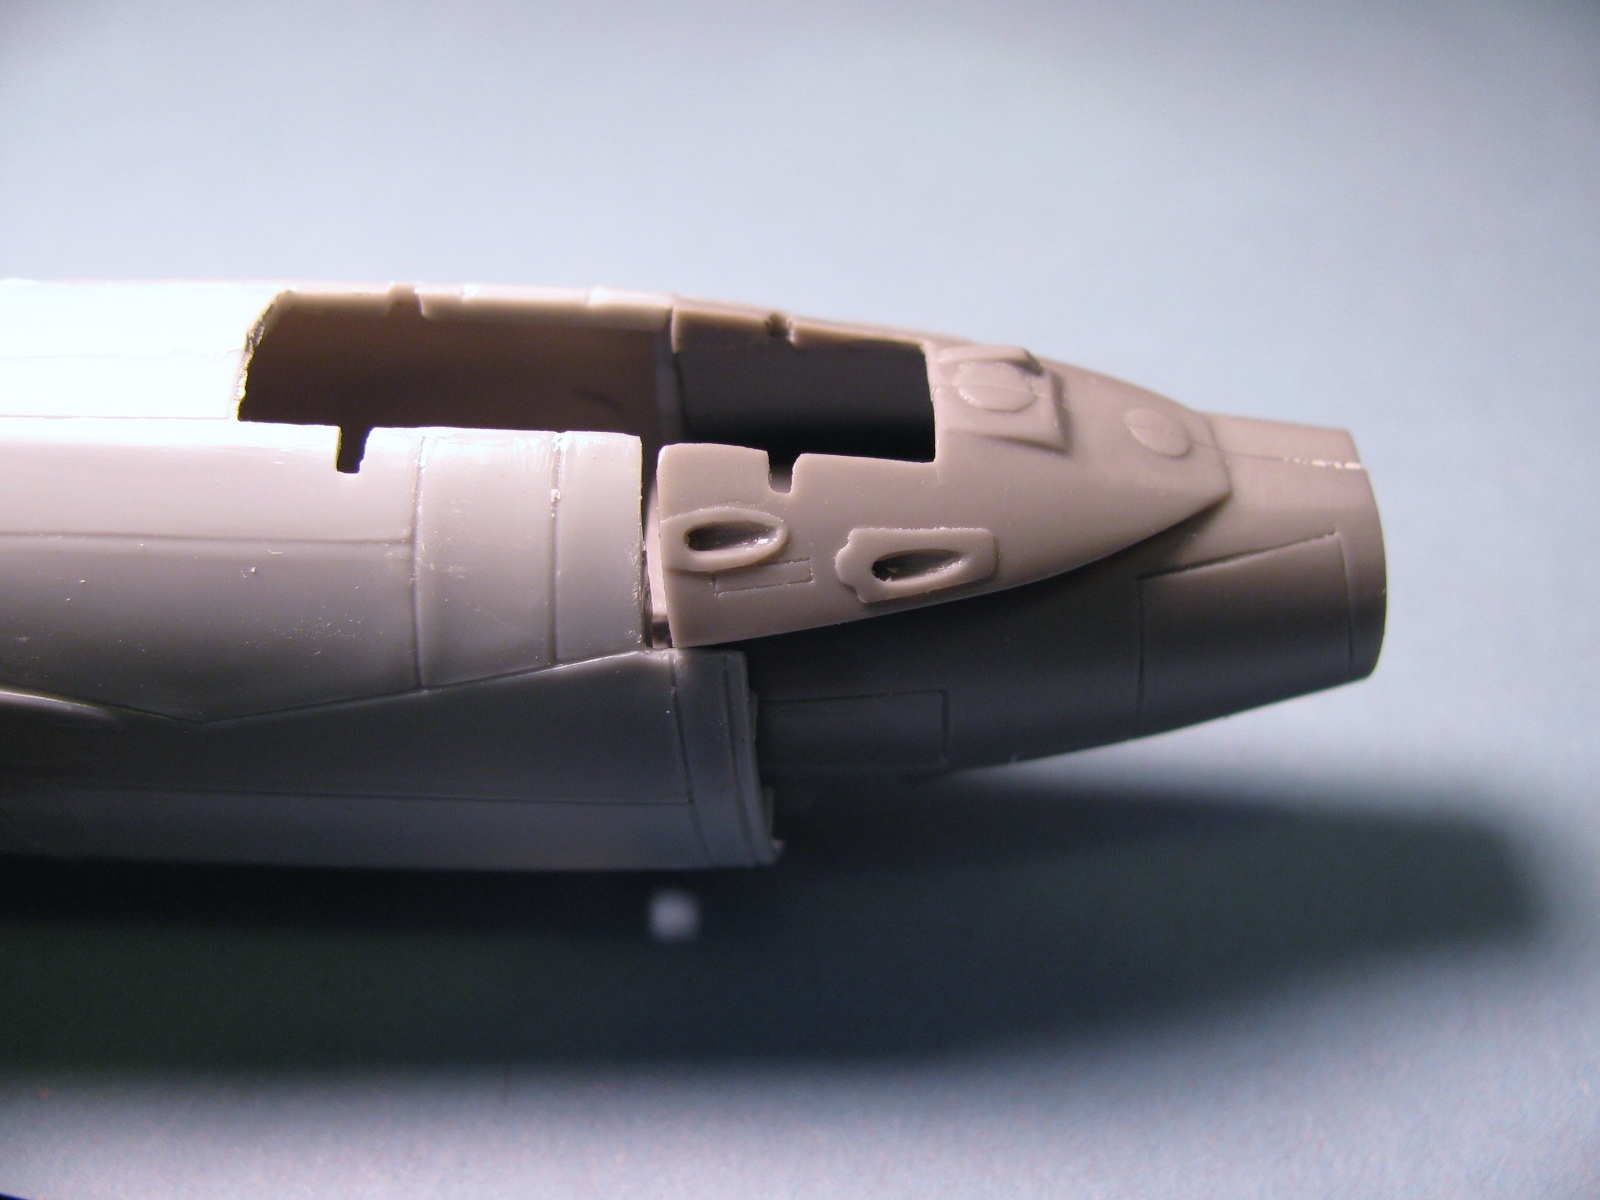
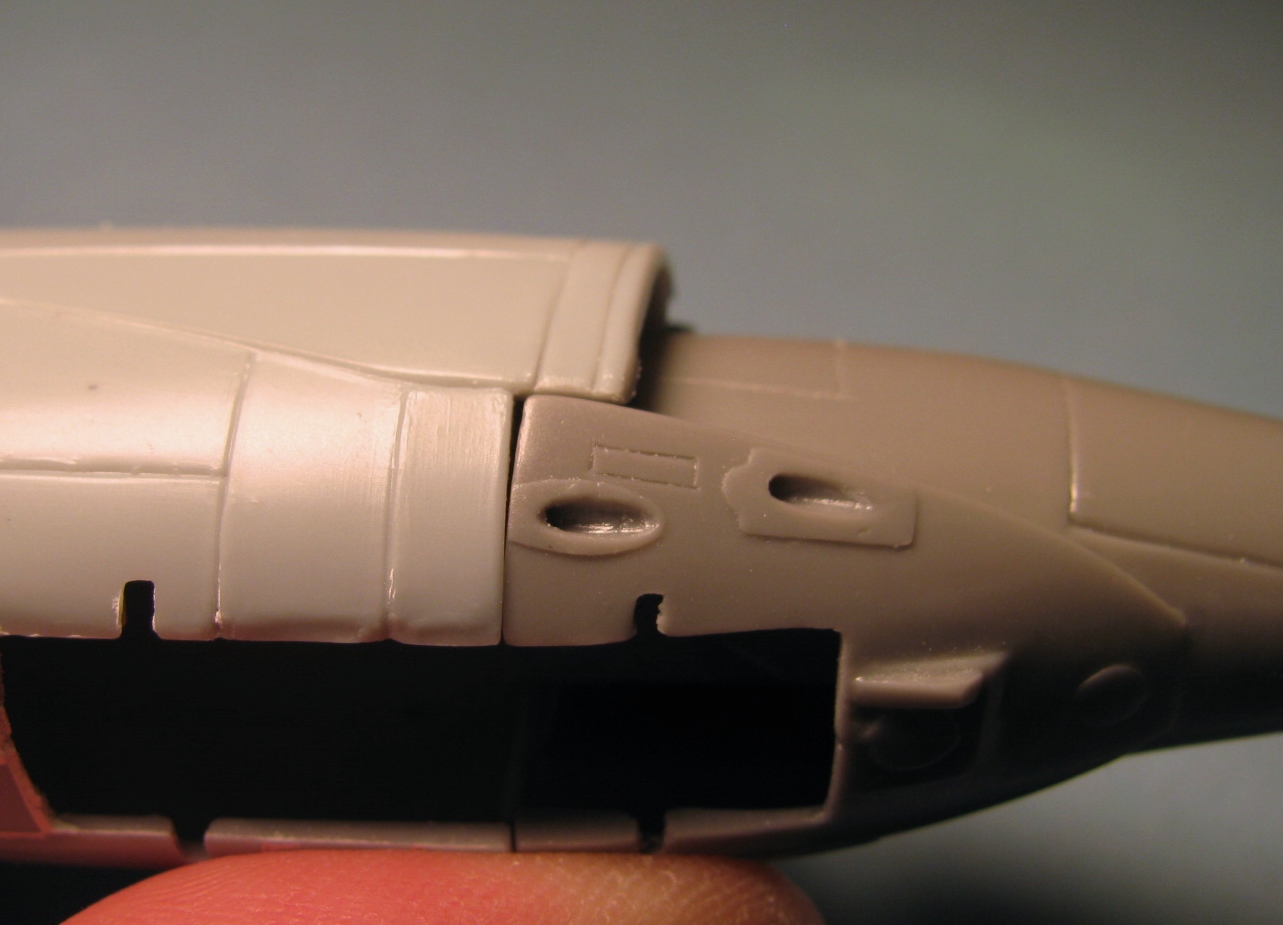
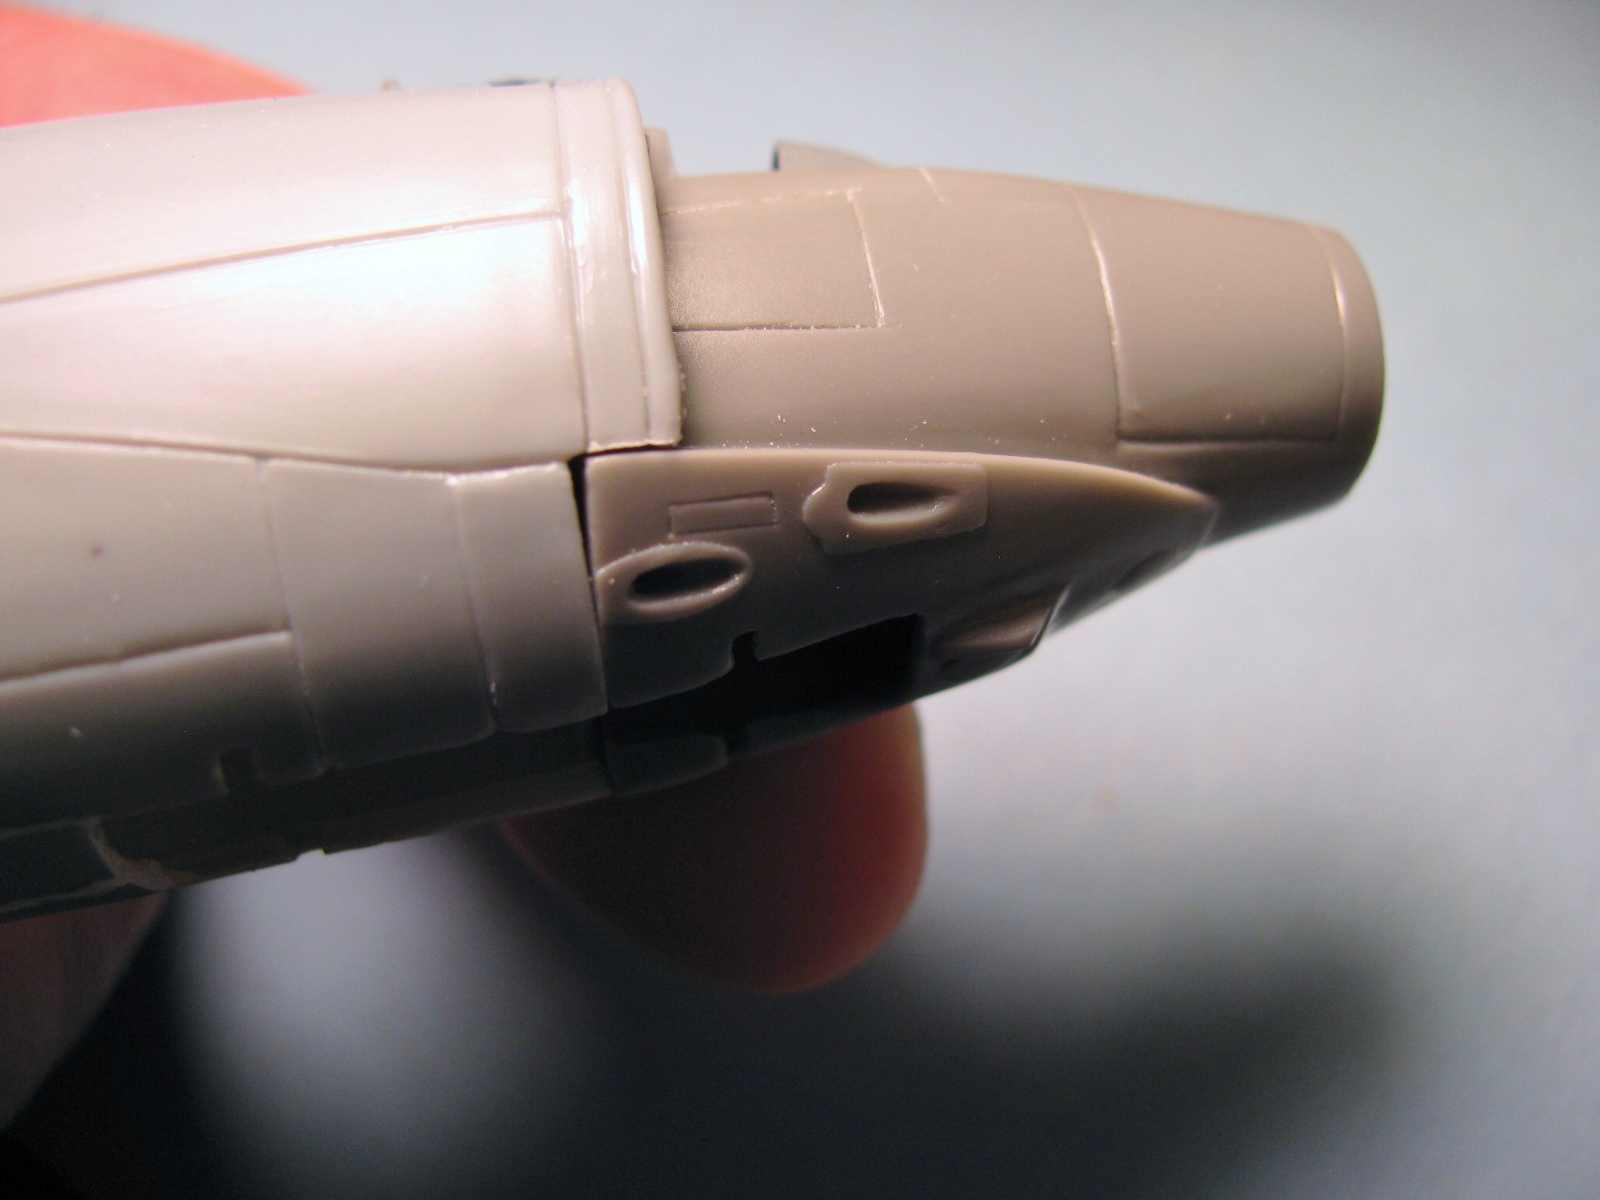
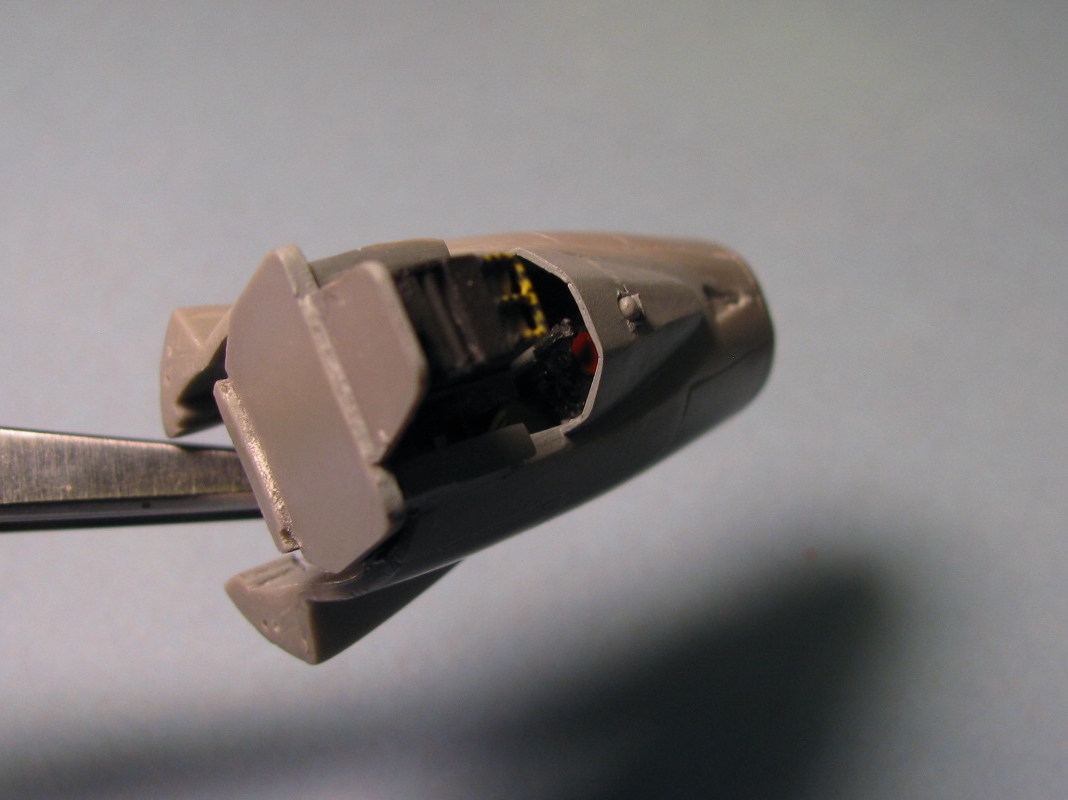
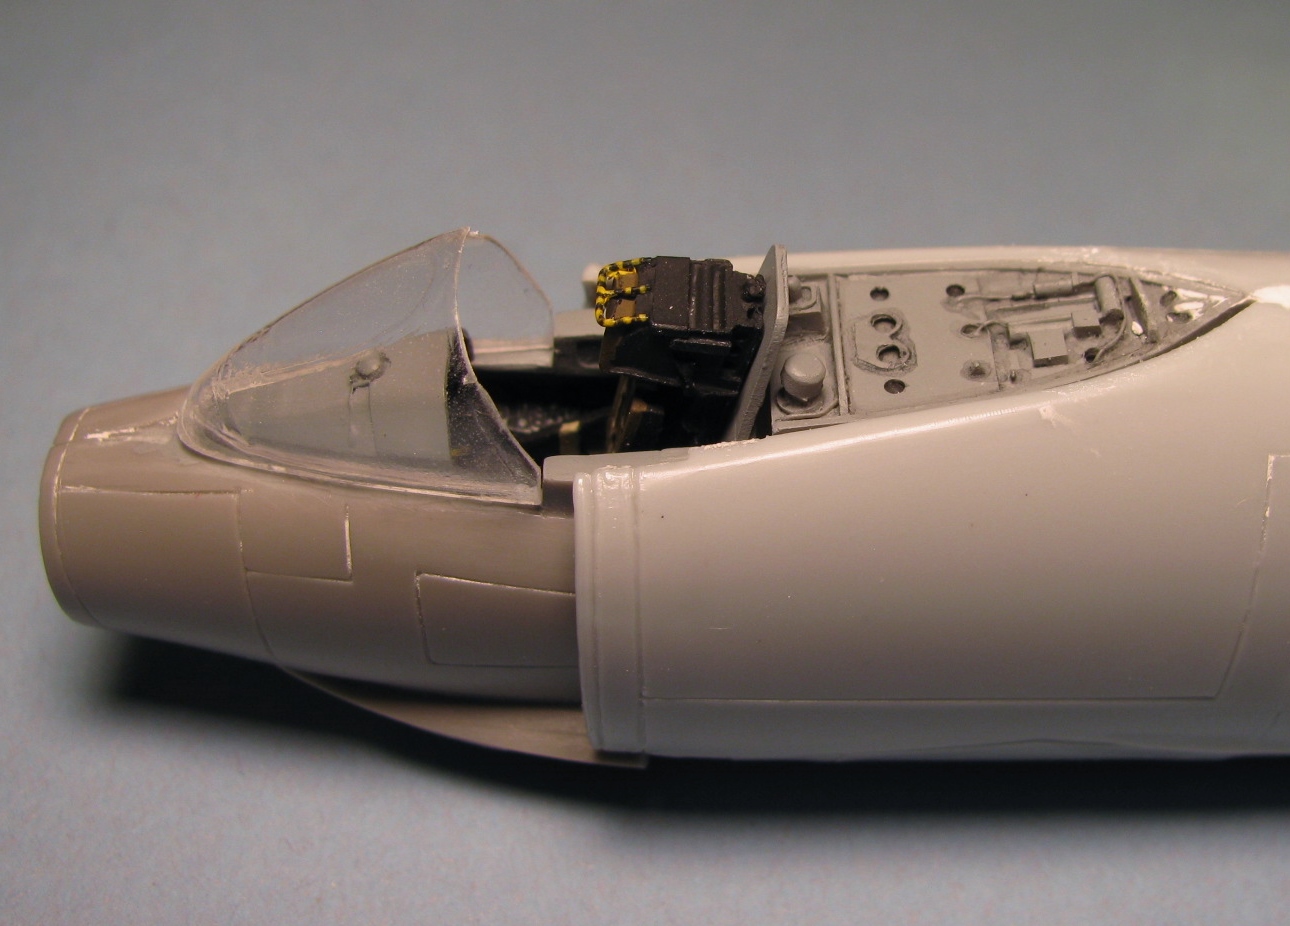
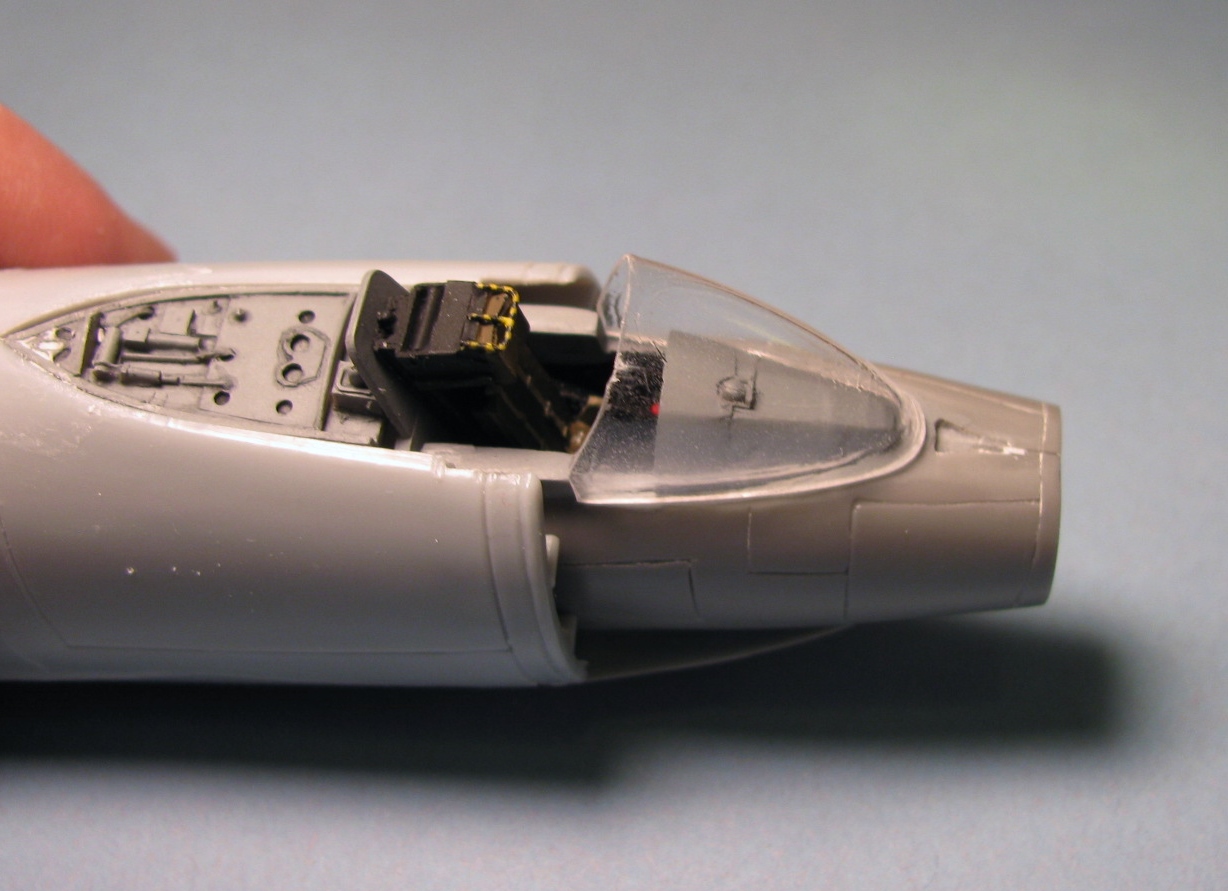
Rather than just replacing the interior cockpit, Pavla Models provides the parts to replace the entire front section of the plane, and they have a replacement resin nose cone that is also available (item U72-150). I found the resin to work as any other resin replacement parts that I have dealt with, but I did run into some fit issues with the control panel and its shroud. The mating between the finished assembly and the rest of the aircraft is not entirely clean, but neither is the fit if using the kit parts. A fair amount of patience and filler will be needed to make the mating area look passing, and that was part of the challenge with this kit to begin with. I utilized Model Master Acryl “Aircraft Interior Black” and “Dark Ghost Gray” for the majority of the painting needs in the cockpit.
My building tips for this set start with the need to be cautious when removing the pour plug on the cockpit/fuselage pieces as there is a small tab that should be present on the top of these parts. It is easy to make a straight cut across the length of these parts, which will result in the loss of the tabs, which may be able to be replaced with sheet styrene (just saying). If you have not dealt with vacuum-formed items before, use a new blade in your hobby knife, or a small, high tooth count, hobby saw blade to cut near your desired line, making sure to have some excess in place. You want to sand away the excess after cutting the parts free rather than attempting to cut them to size right away. Although the plastic used for the windscreen and canopy seems thick, the parts are not, and I will be adding styrene strips to reinforce the framing edges where the two meet. Finally, do not attach the back wall of the cockpit and the ejection seat to the rest of the assembly, but connect them to the rest of the fuselage, then slide the forward section on to meet the rest of the plane.
As far as my hits are concerned, the resin parts are molded very well, and the detail is far above the plastic parts provided by EMHAR. The parts were clean in that there was no extra resin to remove in the form of “flash”, just the pour plugs, as one would expect. The vacuum-formed canopy and windscreen are a nice improvement over the very thick, clear plastic parts included in the original kit.
My only real misses with this item were that I had to perform some fine-tuning in order to get the control panel to set correctly, which meant filing the top and sides a little, and my control panel shroud had gaps when installed on the cockpit assembly. I still believe that the control panel is set too deep, but the fit overall was best there.
In conclusion, I would highly recommend this cockpit set to anyone looking to improve the front office of his or her 1/72 scale F-3H Demon, as it is a great improvement over the original kit parts. The set is reasonably easy to use, especially if you have worked with resin parts previously, and you have experience with vacuum-formed parts.
I would like to thank the folks at Pavla Models for providing this cockpit set to the IPMS/USA for review, as well as to Dave Morrissette who runs the Review Corps for allowing me the opportunity to put the set to use. I always like to recognize the folks who help behind the scenes with the Review Corps for their efforts, and finally, my most sincere appreciation to all who take the time to read my comments.


Reviewer Bio
Scott Hollingshead

Scott retired from the commercial nuclear industry with over thirty years of experience in Maintenance, Engineering, and Training. Prior to that he served on two aircraft carriers during his time in the U.S. Navy. He has been building models for over 50 years with his first kit being purchased with money from his grandparents for his sixth birthday. With a stash that consists of more aircraft than anything else, Scott still enjoys building a little bit of everything (including but not limited to tanks, cars, show cars, military vehicles (aside from tanks), ships, figures, real space, and some science fiction), which keeps his stash growing. Scott and his wife Fern reside in southwest lower Michigan, not far from South Bend, Indiana, and have three adult children and currently three grandchildren as well as a small dog and a large cat.
Comments
Add new comment
This site is protected by reCAPTCHA and the Google Privacy Policy and Terms of Service apply.
Similar Reviews