
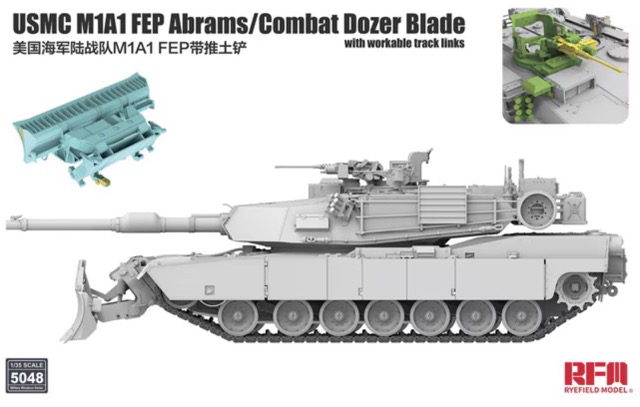
USMC M1A1 FEP Abrams with Combat Dozer Blade (Workable Track Links)
Historical and Reference Notes
There are any number of articles about the Abrams tanks, as it was used widely in the Gulf wars and is still being refitted and continually upgraded in the US Army and the US Marine Corps (though the USMC has now traded theirs and discontinued their use of tanks). It was a significant improvement to the M60 series tanks which it replaced This is the culmination of years of research and started in the early 90’s to build over 4600 Chobham armored Abrams tanks (with approximately half of them now in storage). These heavy tanks have almost all been upgraded in several packages each of which have some unique design qualities (including the M1A1, M1A2 SEPv2, and the most advanced M1A2 SEPv3). There are also a total 10,000 Abrams that have been produced worldwide. They range in weights over 147,200 pounds (66.8 tons) and can weigh up to and over 170,000 with added armor and protection details.
Other distinctive aspects of the Abrams is their 120 smooth bore main gun, a .50 caliber machine gun and up to two 7.62 machine guns, blow out panels for the ammunition storage, NBC protected turret, a gas turbine engine which will allow it to reach speeds of up to 60mph and several types of ammunition rounds including depleted uranium. These tanks saw combat during the Gulf War (Desert Shield and Desert Storm), War in in Afghanistan and recently in the Ukraine war. I believe there are at least six Rye Field Models of the Abrams and somewhere over a total of 70 separate kits of the M1A1 series.
I recommend several articles, including extensive notes about the Abrams FEP model:
- Wikipedia’s notes about the Abrams
- Notes specifically about the USMC’s FEP ADA504575.pdf
- Army Technology
- Scalemates
Fit and Finish
This M1A1 FEP kit is moulded in a light tan plastic with 28 separate sprue sections. Before I go further, I should note that there are over 1437 individual parts in this kit; scary huh? Admittedly this is a conservative part count (I suspect I may be a bit low) and I didn’t count the PE fret and the decals, but this figure alone may have you rethinking this project….I know I keep thinking ‘why am I doing this?’ Maybe I’m a glutton for punishment or just self-flagellation, however it’s not the first time I realized I’m the dodo who bought this kit!
However, the overall accuracy of this kit’s surface detail is outstanding and compare favorably with what photographs and line drawings show. This M1A1, like so many of the new releases from RFM, it just looks like the real tank itself. If very detailed parts are your thing, you’ll be happy with this model of the M1A1; if not you may feel compelled to give up.
The complexity of the kit is another aspect worth noting. For example constructing the barrel requires four sub-assemblies and a total of 18 individual parts.
Aside from these caveats, the kit’s overall fit is excellent. I happily dove into my Rye Field USMC M1A1 FEP kit and let the building begin….
Construction Notes
There are few, if any aspects of this build which posed any problems—it goes together in a basic pattern. Believe me, the 22 pages of kit instructions provide you with a deal of in depth instructions broken down in multiple steps and 24 assembly panels.
For the most part, each of construction notes and steps are well thought out, though several of the drawing details left me scratching my head and attempting to dry fit some of the detailed small parts wondering just where they should go. This is clearly where my Optivisor came into play (again in my humble opinion) and where I briefly considered my bourbon ration….).
The dozer blade is an entire construction task, taking from steps 7 through 13 and seven small subassemblies. The engineering of the barrel sections requires careful sanding to remove the seam lines, which are prominent. The full barrel assembly (step 14) requires 18 parts and is a task itself.
In several respects this kit reminds me of a puzzle; (1) where the instructions (step #6) do not provide actual locations for part locations, (2) how to properly place/glue small parts (this is bothersome and I found difficult to achieve), (3) and finally the track sections, where each section requires five individual pieces. I struggled with this part of the puzzle, spending almost three hours to assemble approximately 20% of one side of the track. I should also note that the very small guide horns on each track segment are difficult to mount and glue into place. (4) My costly solution was to replace the kit’s plastic ‘workable’ tracks with a replacement metal track set. Also, I had a difficult time dragging the track around both the idler wheels and the drive sprockets, as the space around these wheels just doesn’t allow enough room for track.
The last ‘issues’ was the large number small photo etch (PE part ‘Z’) parts, which I suspect will be most challenging for less experienced modelers.
Decals
The kit instructions contain six beautiful full color four-view illustrations. There are only a small number of decals involved in this build with six shown in three color side views. Of these, I chose the last, illustrating a USMC Abrams from the Alpha Company, 2nd Tank Battalion, 2nd Marine Division.
Painting
- Primer Used
- Mr. Surfacer 500 Surface preparation
- MRP Acrylic Lacquer Paint for Airbrush
- MRP-369 Field Green FS 34095
- AK Air Series – 3 Gren Acrylics
- AK11874 USMC Green FS 34095
- AK Real Color
- RC228 USMC Sand FS 33711
- ATOM
- ATOM-20074 Zinc Chromate Green
- ATOM-20167 Gun Metal
- Tamiya Color Acrylic Paint
- XF-59 Desert Yellow
- Mig Pigment
- Modelling Pigment North Africa Dust A-Mig-3003
- Pigment Fixer A-Mig-3000
- Track preparation & painting
- Mr Hobby – Mr. Finishing 1500 Black
- Vallejo Acrylic Metal Color 77.706
- Vallejo Acrylic Wash XF 76.521
- Vallejo Acrylic Wash XF 76.522
- Mission Models Worn Black Grey Tires MMP-105
I also used several AK Real Colors Markers for both touchup and to pick out small dials, and knobs.
- RCM 001 Rubber Black
My painting was followed by an overcoat sprayed coat of Alclad II Lacquer’s Aqua Gloss Clear (#ALC 600) as a base for the decals.
I completed my dry brushings, using Winsor & Newton’s Artist Oil color Naples Yellow Light, No. 426.
I sprayed my overall final finish using Testors Dullcoat Lacquer (#1160).
Reviewer’s Comments
As many reviews include models of the Abrams, I have long been interested in the semi-engineering versions of the tank which was until recently in the Marine Corps inventory. This model provides a great example of the Marine’s bladed M1A1 FEP, which has now been largely transferred to the Polish army.
The model is another example of RFM’s terrific kits. While it may be somewhat challenging for less experienced builders due to its large number of intricate parts, it will provide another example of what a great model should provide—just a beautiful model!
My thanks to Rye Field for making the kit and my wallet for supplying the kit and fun.
I purchased this kit myself and don’t have any regrets.


Comments
Add new comment
This site is protected by reCAPTCHA and the Google Privacy Policy and Terms of Service apply.
Similar Reviews