Sikorsky HO35-1, R-5/S-51, Westland WS-51, Hr.2/3 Landing Gear & Rotor Parts
IPMS/USA again thanks Ross and his Team at SAC for supporting the IPMS USA reviewer corps with one more of many monthly releases, with useful and well-thought out landing gear additions for those who build. And thanks to IPMS leadership for sending it to me to be reviewed.
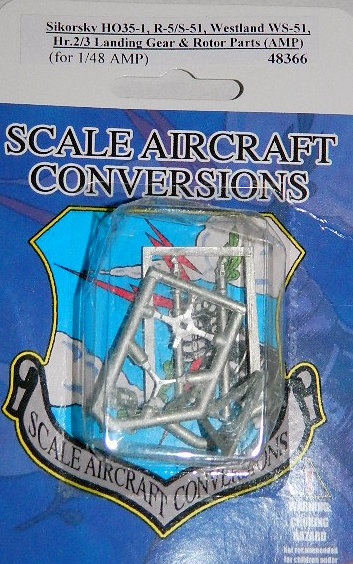
This set has eight parts: two nose gear halves, two shock struts for the main gear, a main rotorhead three-point blade swashplate, a cyclic main rotor mount plate with four points, a main rotor brace, and a tail rotor pitch link assembly. Rotor heads are the main focal point and the failure point of most rotary wing aircraft… and metal is the perfect solution for the fragile bits.
Speaking a fragile, I am adding a picture of how I remove SAC’s parts from the flow gates. Using my side cut nippers, I can easily cut through the white metal runner. I trim the gates first away from the part by section removal. This takes the stress off the actual part, as the metal actually expands as it moves away from the cut location. If you try to cut the part out of the gates, this frequently will cause the long, slender parts like the main gear strut to flex and bend; one benefit of white metal is you CAN bend it several times to get proper setup and installation. My method just removes an additional headache if you happen to add additional stress to the actual part verses just the flow gates. Make the cut, bend the flow gate away from the part attachment point, then cut the part off. This is a simple stress removal method!
On stronger parts: proof of this concept is the toy market. There are no truly scale toy rotors, as the little fingers spinning the blades would break the whole thing off in a second. This holds true for offices; your co-workers CANNOT resist spinning rotors and props with pencils, fingers, or other objects… (I believe I could make a really enlightening psychological study from this concept… )
My notes on plastic shafts come from the fact plastic is rarely up to the job; the only exceptions I can think of are from Academy and Meng, as their plastic seems uniquely strong yet flexible for landing gear parts. Same for Meng; their 1/48 P-51D plastic gear took much abuse before failure on the one of those I have built. AMP’s plastic is strong, but better to have the SAC metal on hand.
One thing I did do for this build was to drill out the plastic kit transmission housing after the cement had cured on the two-part assembly, and that was to use a piece of 1/16” piano wire to replace the rotor shaft. The kit parts are not designed to rotate, nor will the slim kit plastic shaft take any abuse. I also always make my main rotors on helicopters removable for transportation purposes… never mind the aforementioned “let’s play news pilot” spinners in the general public. (Can you tell this is a sensitive subject? Yep, I get tired of fixing broken stuff.)
Other modifications I made: after the main rotor head upper and lower halves had been liquid cement-welded together, I drilled a hole for the previously mentioned metal rotor shaft to fit in, then cemented the underside rotor head brace into place. Notice if you will the parts all have a square shaft hole in the center; this aligns everything to put the assembly into place; that means you will require additional diligence in aligning the parts yourself by Mk 1 Eyeball method. Others may have their technique, but I like mine…
The Main landing gear shafts were installed between the lower “a” frame fairing and the upper fuselage mount point. I had to drill out the AMP main gear frame fairing at the point where the wheels and gear parts all come together… the plastic was not quite opened enough to accept the lower shaft installation pin.
The tail rotor pitch control star is a simple “glue in place” parts. It’s in the photo, without the plastic rod pitch links because I can’t find my stash of plastic rod for the right size. Stretched sprue would work here…
Nose gear is a duplicate of the kit plastic, but stronger. The photo was taken after I hand-painted black primer on the parts after they were installed in place under the model. Time crunch and I got the painting done before I thought of showing the installed gear without primer, but certainly you all get the idea how it looks in place. The two part gear traps the wheel and tire on the nose gear shaft points, and it will be a while before this one goes to paint shop. More reviews await!
The main photo shows all the parts in place or ready to add to the finished model.
Back to the subject at hand; SAC metal parts are worth their weight in Titanium, and the white metal is a great compromise between cost and effectiveness… buy them for your kit and see.
Thanks to once again to Ross and his team for the fantastic review item, and John and Phil for the build review opportunity.


Comments
Add new comment
This site is protected by reCAPTCHA and the Google Privacy Policy and Terms of Service apply.
Similar Reviews