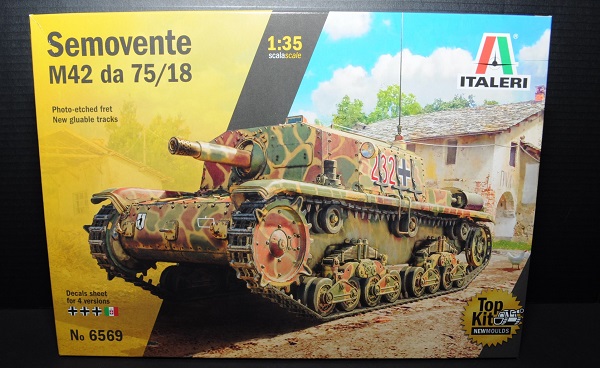
Semovente M42 da 75/18
The Semovente
The Royal Italian Army began to deploy self-propelled artillery guns at the end of the 1930s. Their purpose was to provide support for tanks and infantry units. The “Semovente” 75 /18 was developed on the back of the “M” series medium tank hull, and it soon became the most feared Italian armored vehicle. The 75mm howitzer was a highly effective anti-tank weapon and was capable of destroying the most heavily armored British and American tanks. The “Semovente” was also valued for its low profile, which made it difficult to locate.
First Impression
This 2020 Italeri release of the Semovente M42 da 75/18 is a rebox with new parts and new molds. The box contains four sprues of dark-yellow molded plastic, one PE, one decal sheet, and one set of vinyl tracks. Note: Check all of the bags for loose parts! The parts are flash free and are have very nice engraved detail. The vinyl tracks are molded in an anthracite color and look very nice on the finished model.
The 12-page instruction guide is easy to follow. Parts which are not used, are clearly marked on the sprue diagrams. Several parts are misidentified. Therefore, always double check against the diagrams and test fit! The last page has four full-color painting diagrams for Italian and German versions. The review sample depicts version A: PanzerJager 278 , Ancona, July 1944.
Assembly and Painting
This model can be built with open or closed hatches, and it is a reasonably easy model to build! You should decide early, which type you want to build. Constructions begins with the interior, which is fairly well detailed. Of course, if you opt for the closed version, none of this is visible. Since this model is small and considering there aren’t many parts, I am combining the painting process along with the build process in this review.
I first primed the main interior parts using gray primer. Next, I did the base painting of the floor, seats, transmission and engine. Once this is complete, the left & right sides, front and rear are attached. I then completed the last main interior component, which is the gun.
Before moving on to constructing the upper hull sections, I clear coated the interior, did basic weathering, and then dull-coated it. I moved on to upper hull sections as well as the idler & gear wheels. Please note: do not glue the wheels in place this early!
Next, I completed the turret and test fitted the track guards. Please note: these parts are not glued in place. I moved on to assembling the remaining idler wheels and test fitted them to the hull. Since I knew that I would be hand-painting the camo pattern, I did not want to permanently attach these too soon. This was the end of building all of the major components to this model.
To begin painting, I first used Vallejo dark yellow primer for the exterior. When dry, I airbrushed with Mission Models Dunkel Gelb, and when that was dry, clear coated it.
This is a small model. I considered airbrushing the camo pattern but decided to hand paint it. For this, I used Tamiya paints. Since I knew that I would be doing a bit of weathering at the end, I was not too concerned with painting the camo very precisely.
One of the photos shows some of the interior elements, which can only be put into place after the track guards are in place (radio, etc). I show them in place, but not painted. At this stage, the track guards are still not permanently glued into place.
When the camo on the bottom and the wheels was finished, I clear coated the entire bottom section, and then put together the tracks. These fit very well. I continued with the camo painting on the upper surfaces. There are three PE parts. I added these to their locations and continued with the painting. Next, I added the decals.
There are several options, which can affect your decal placement, depending on the version you select. One of these options is attaching Jerry cans to the sides of the hull. I recommend that before you add decals, decide which options you want to use, and test fit them for placement. On the review version (version A), if the Jerricans were attached to the hull, the German cross would be obscured. Therefore, I opted to not use them.
I added the final detail parts (tow cable, tools) and then began to apply weathering, which consisted of a variety of AK Interactive washes and rust products as well as several Vallejo pigment powers.
Summary
Overall, this is an excellent kit. It is reasonably easy to build, but more importantly, the fit is exceptional. The parts are flash free and the engraved lines & rivet details is very good. I recommend this kit very much. In terms of 1/35 Semovente kits, this new release by Italeri is a must!
Thank you to Italeri and to MRC for providing the review sample, to IPMS USA for the review opportunity.


Comments
Add new comment
This site is protected by reCAPTCHA and the Google Privacy Policy and Terms of Service apply.
Similar Reviews