
Rockwell Commander 114A & 114B
History
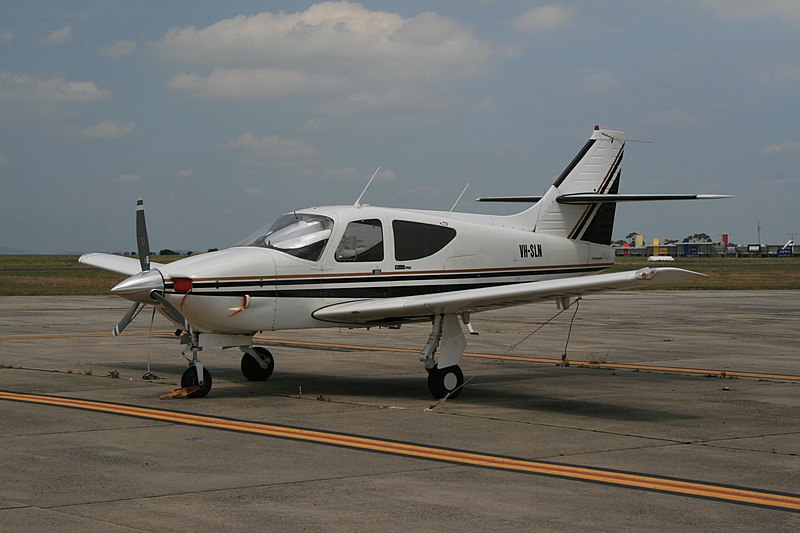
The Rockwell Commander was developed during the late sixties, its first flight being in 1970. It was intended to compete with the Beech Bonanza, Mooney M20, Piper Low Wings and high-performance Cessna products that were so common during that era.
However, after production started problems occurred that resulted in modifications that made the airframe heavier and more complex. As these problems were solved, more powerful engines were installed, but production ended in 1980 with a total of 1306 being produced. The Models 112TC, 114 A, and 114B are the subject of this kit. As popular as the airplane was, I saw very few of them at local airports, and only photographed a couple of them over the past fifty years. Actually, I was surprised that anyone would produce a 1/72 scale kit of this aircraft.
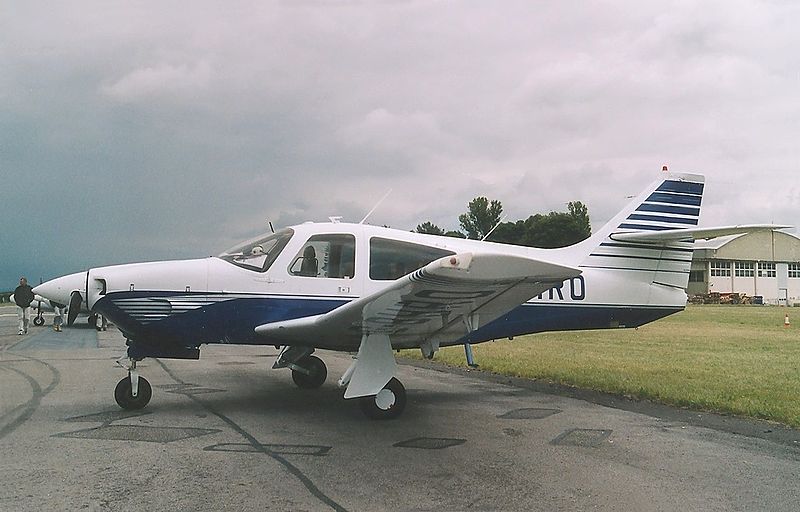
Search of the internet shows some information about the airplane, but most photos show foreign registered planes, leading me to believe that a large number of them were exported, and not many had U.S. registrations.
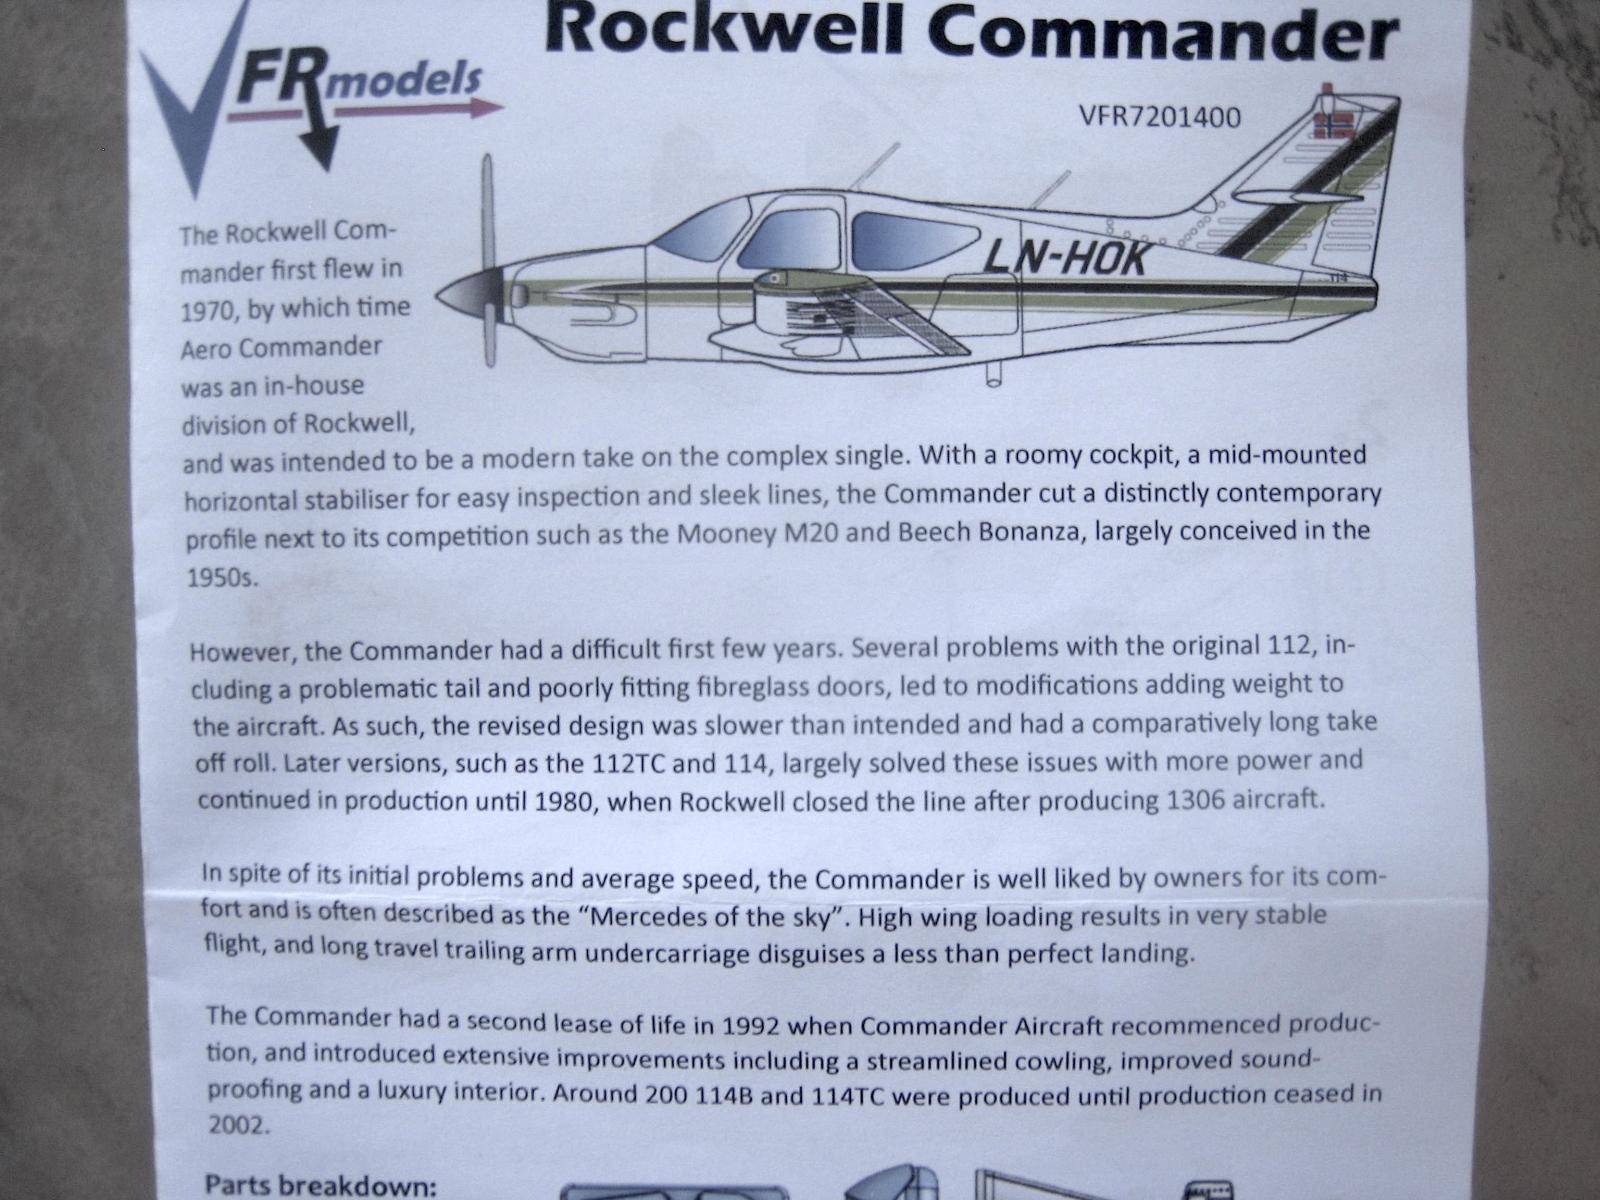
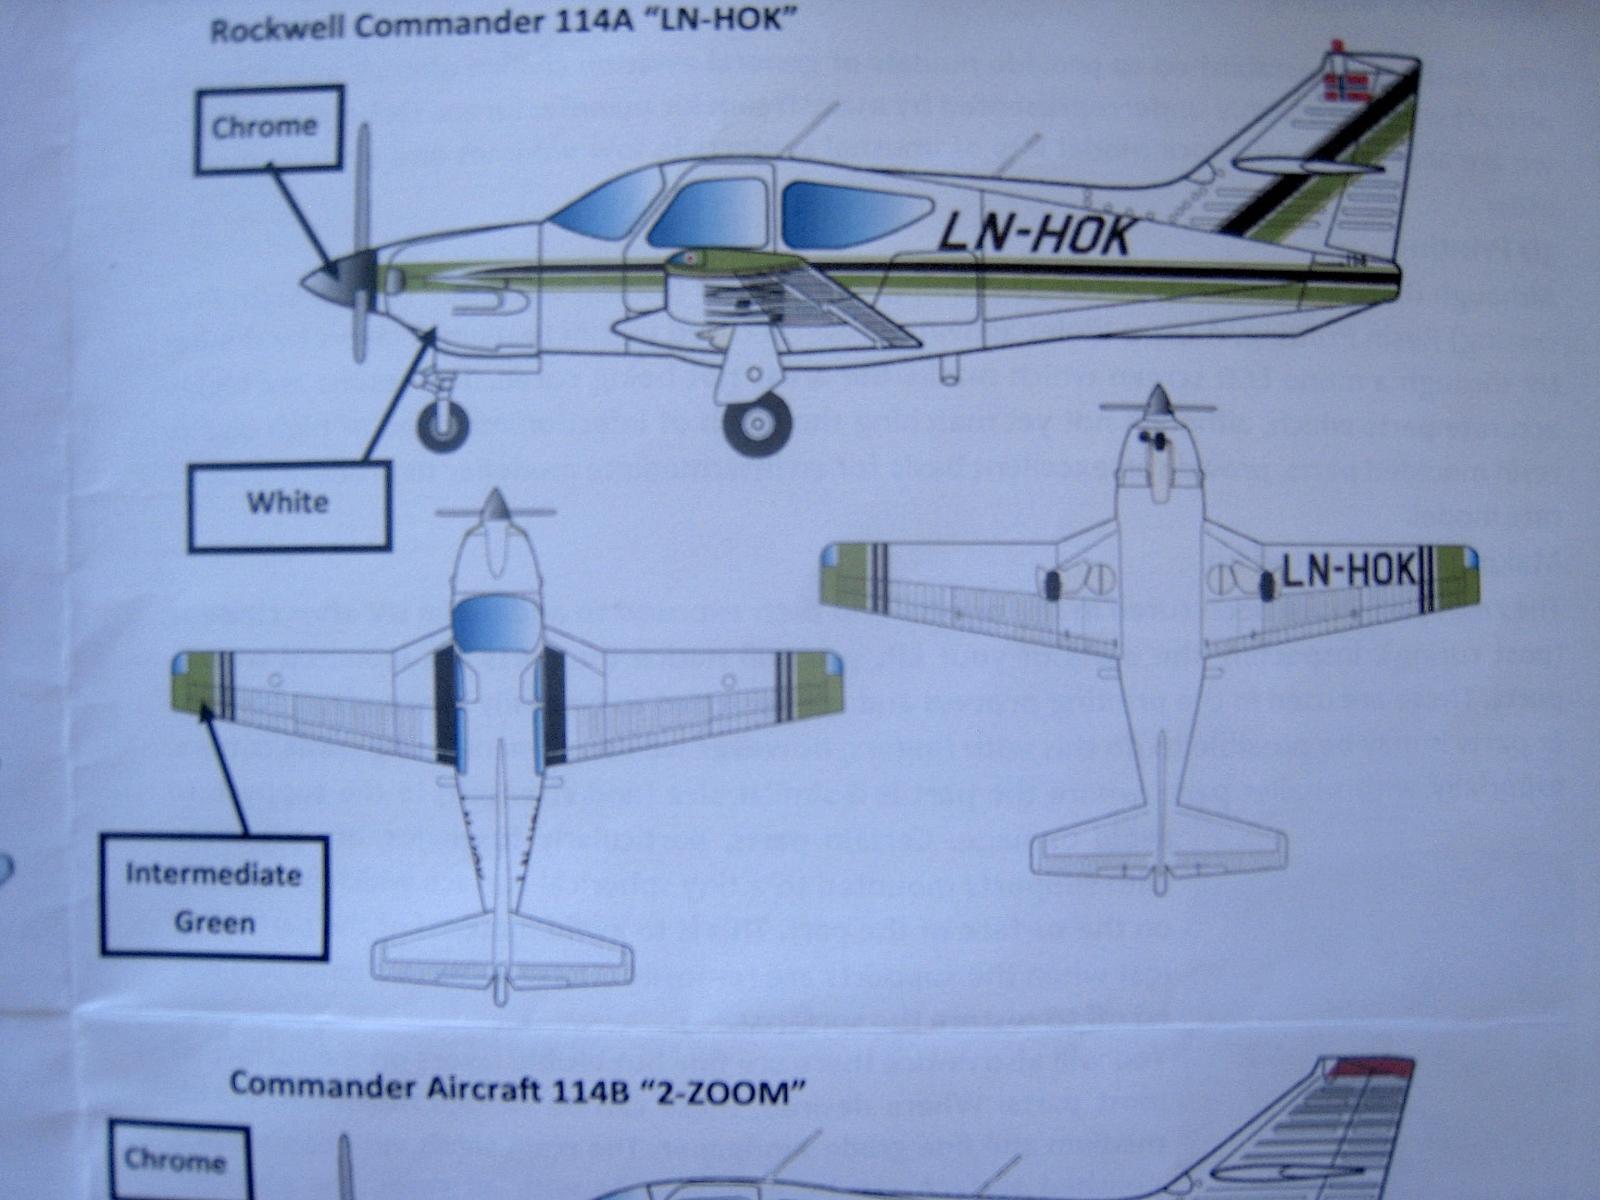
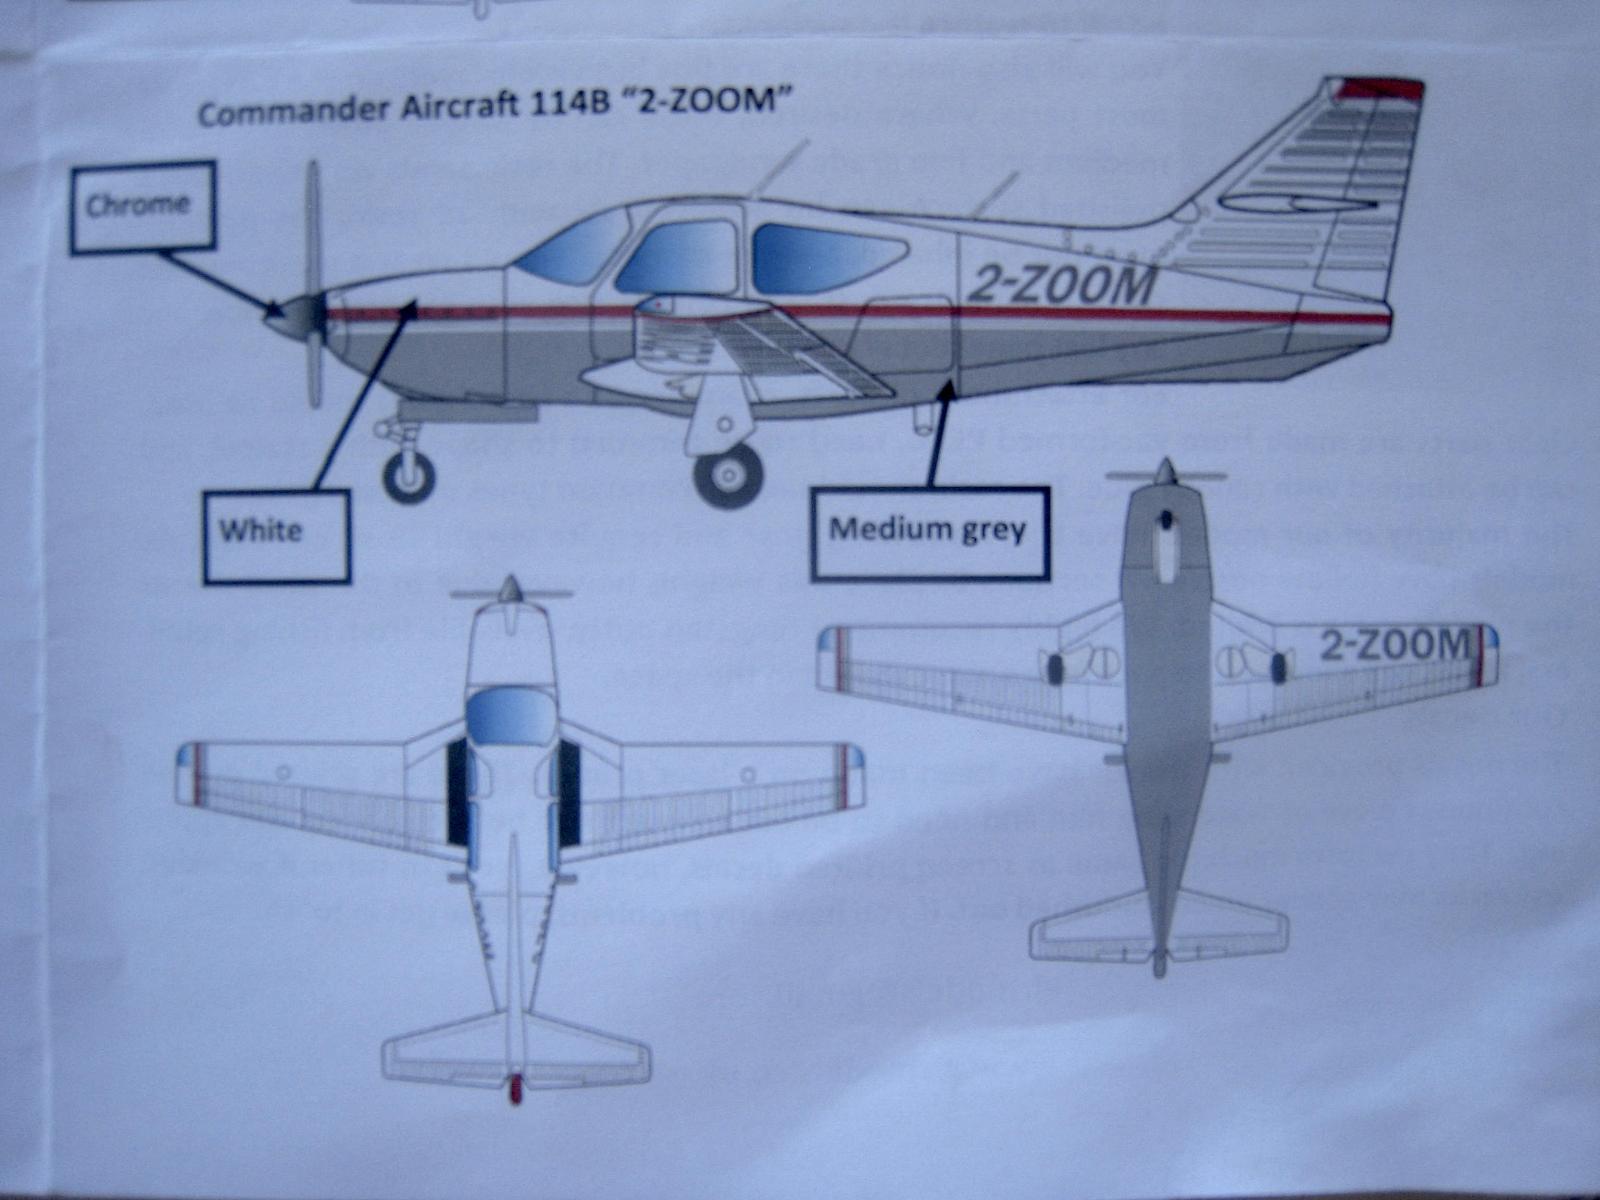
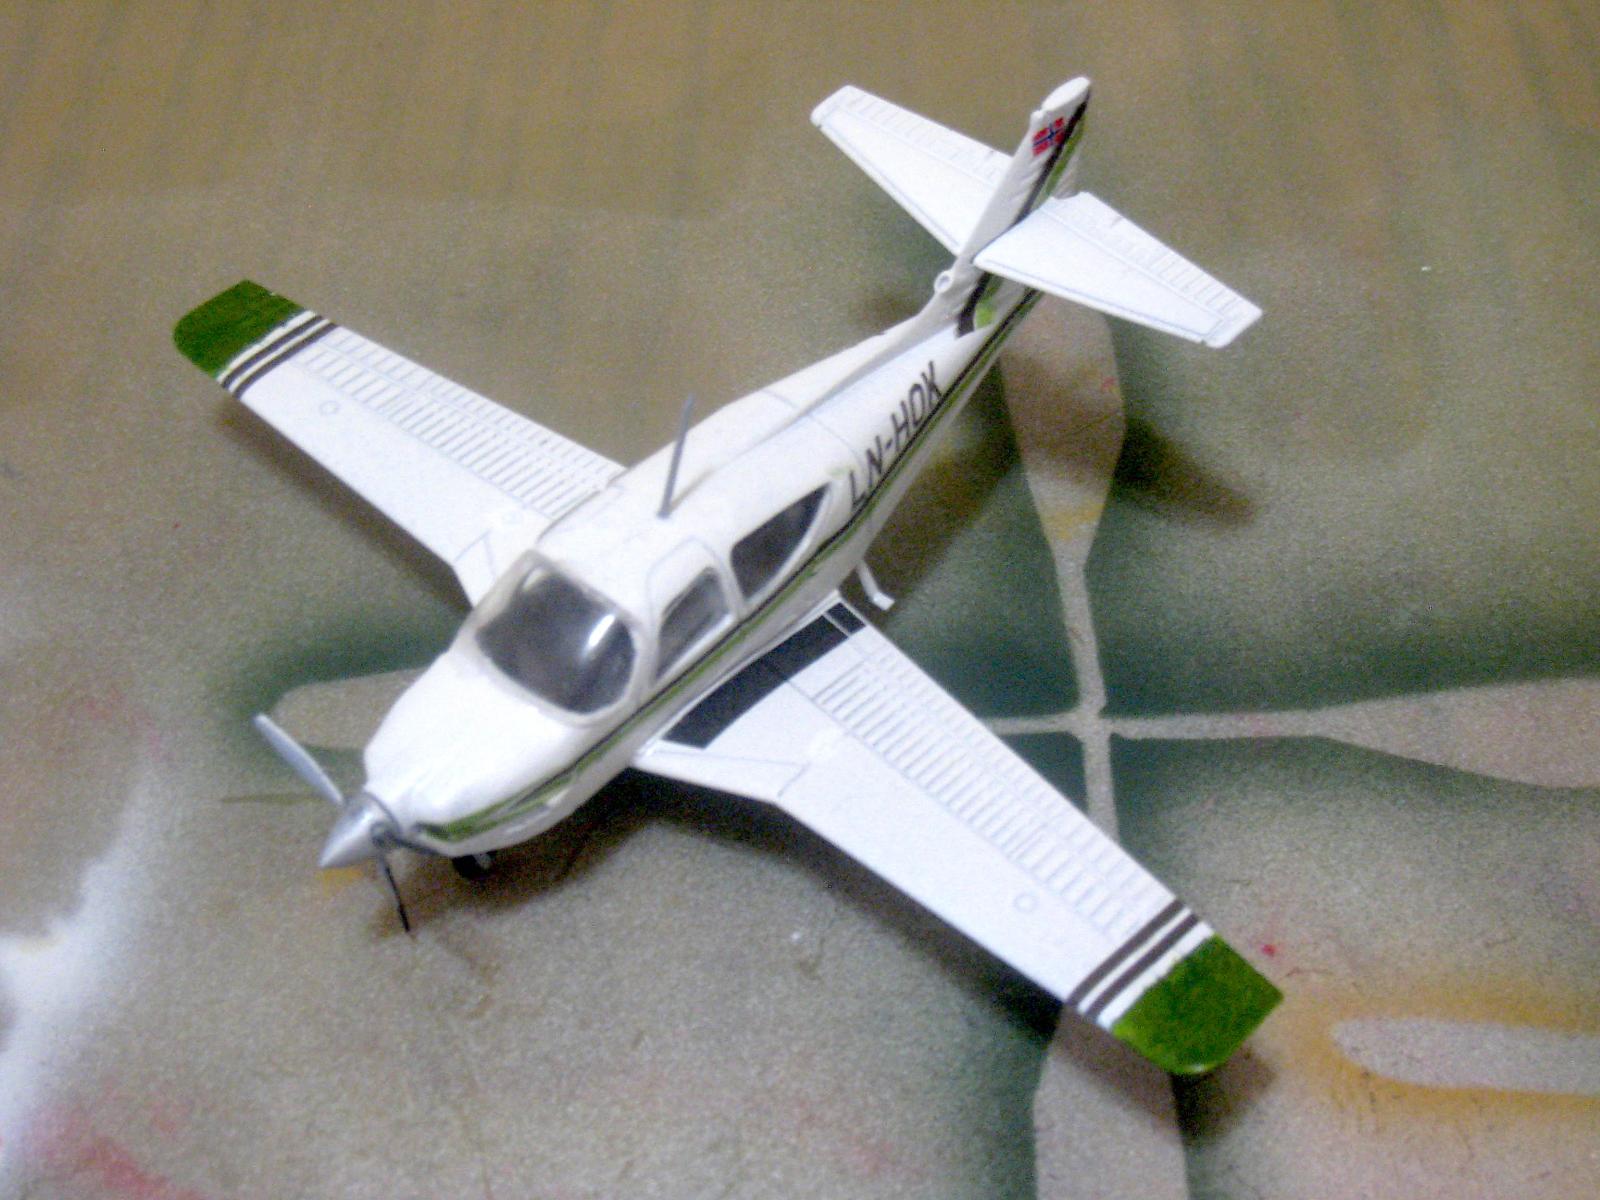
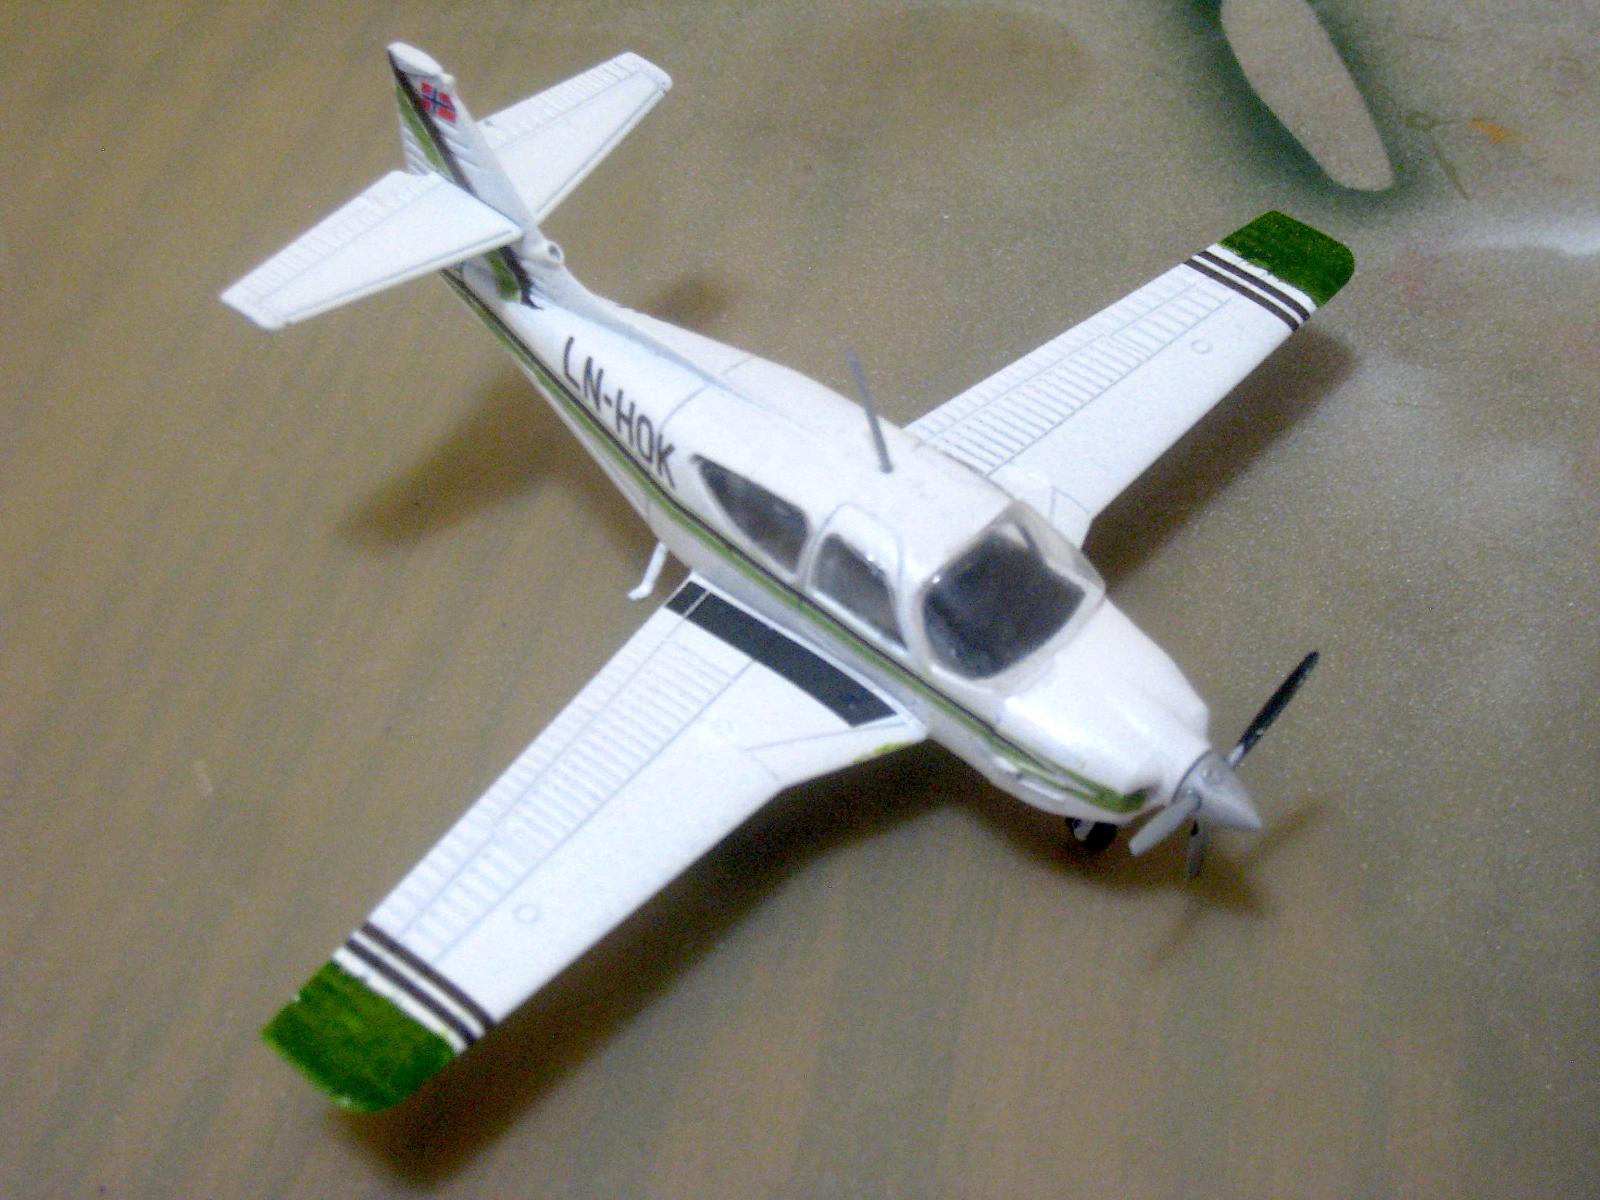
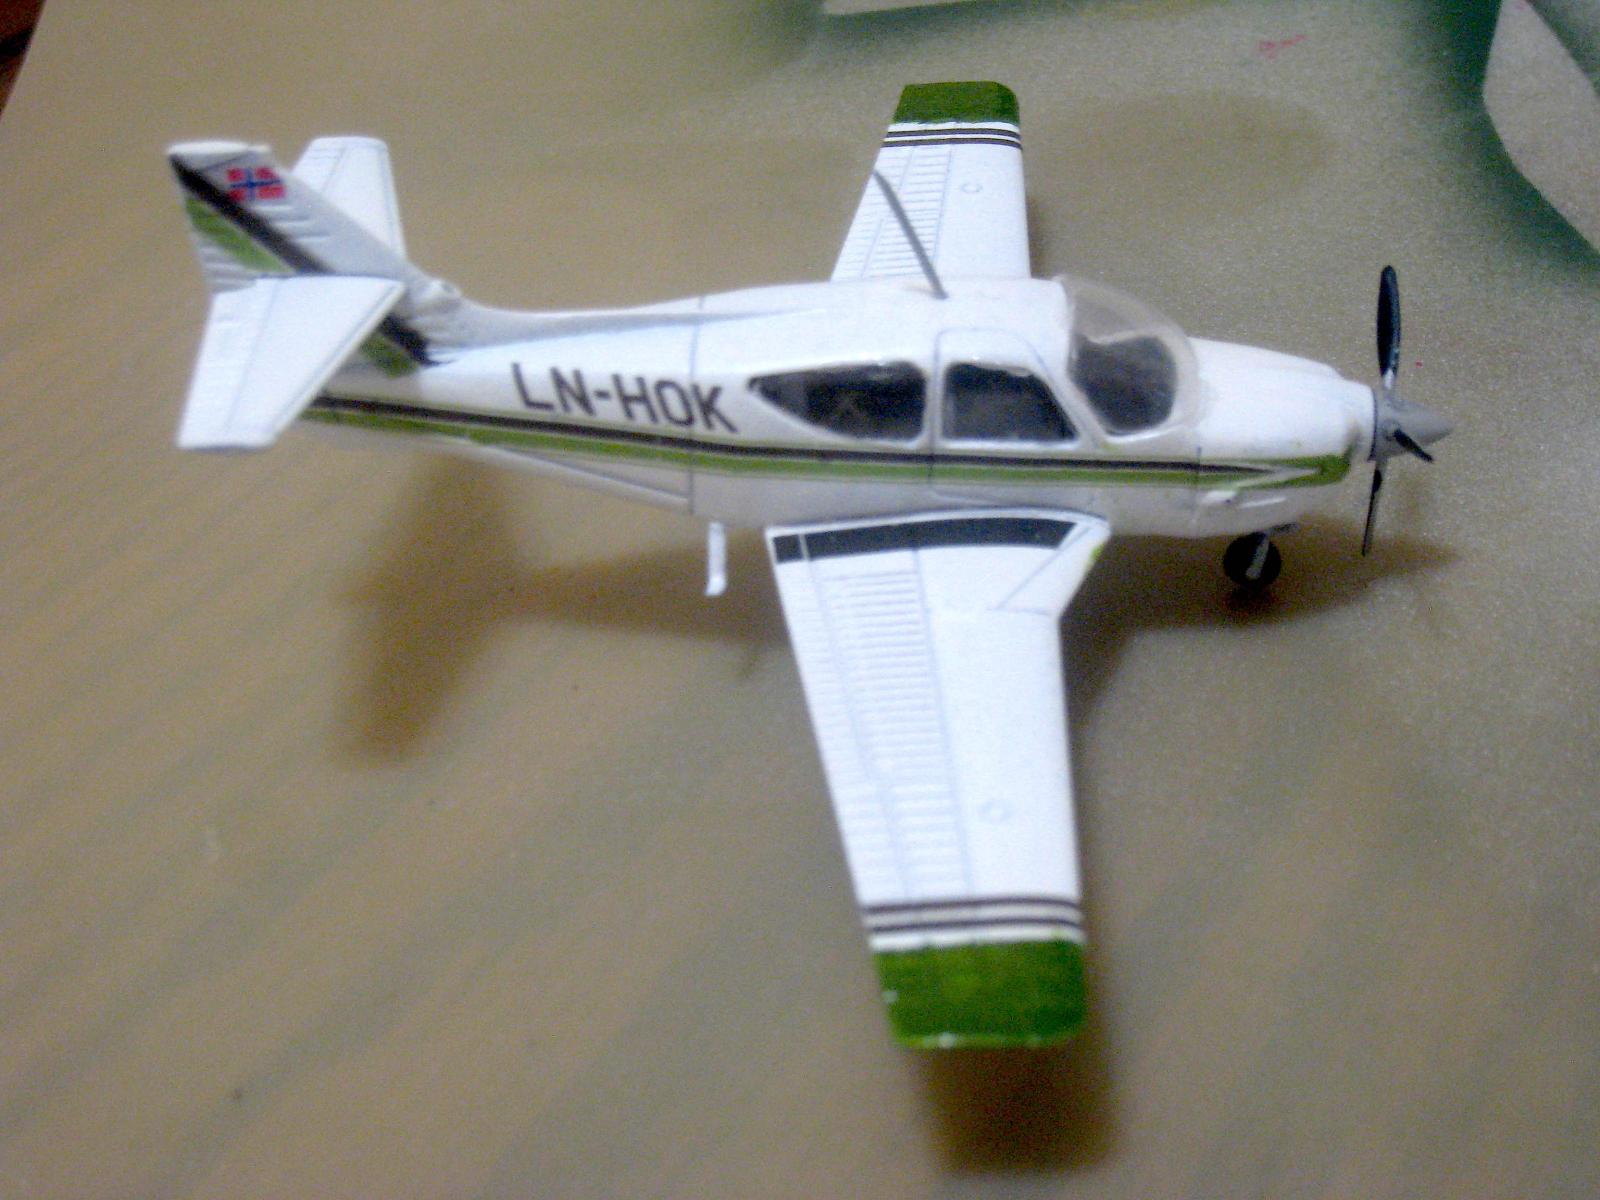
In addition, the kit decals proved rather strange. I would assume that the majority of the production aircraft were sold in the U.S., but the kit decals, which are of excellent quality, provide markings for one Norwegian model, a 114A, LN-HOK, and a 114B with the registration 2-ZOOM, which isn’t indicative of any particular country. There isn’t any explanation in the kit instructions as to what this airplane is, or where it was flown, but it does provide a marking variation that is rarely seen on airports or model display shelves.
References
The instructions provide a short description of the airplane and its history, but no historical data. Even the two airplanes for which decals are provided have no accompanying information on who operated these airplanes or even when they were flown.
The Kit
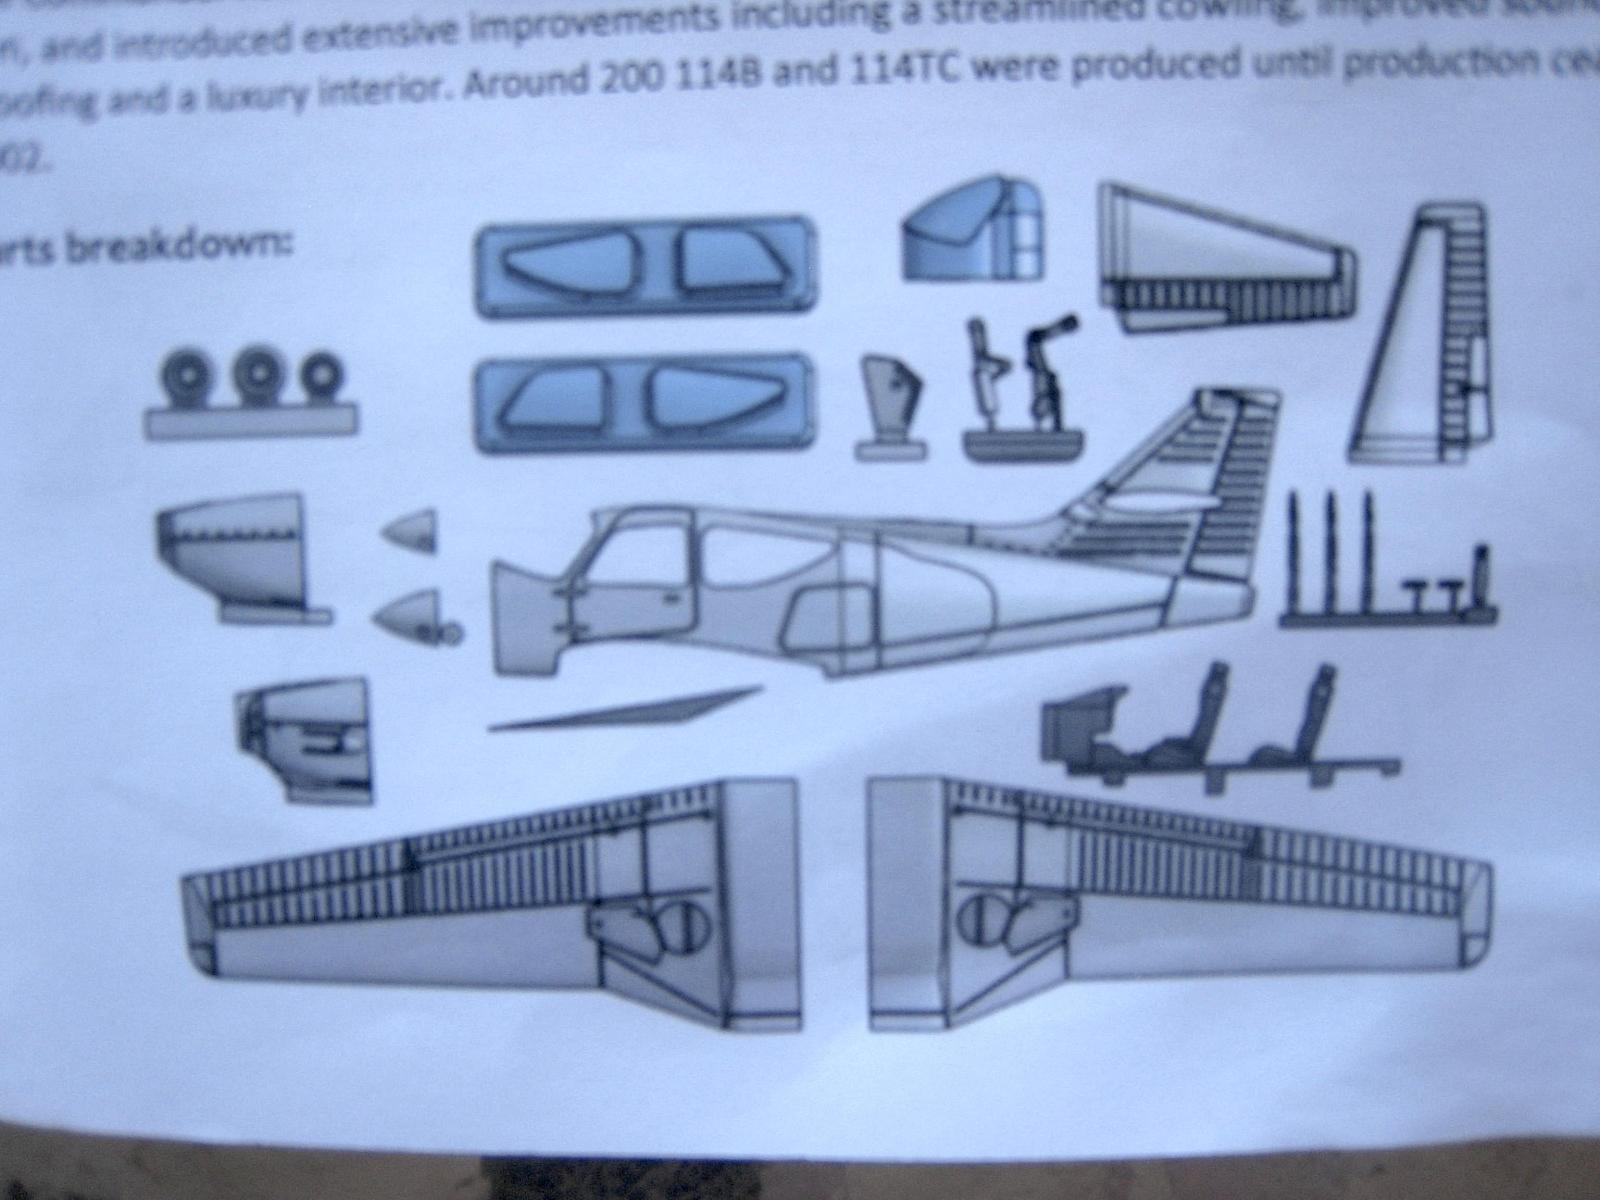
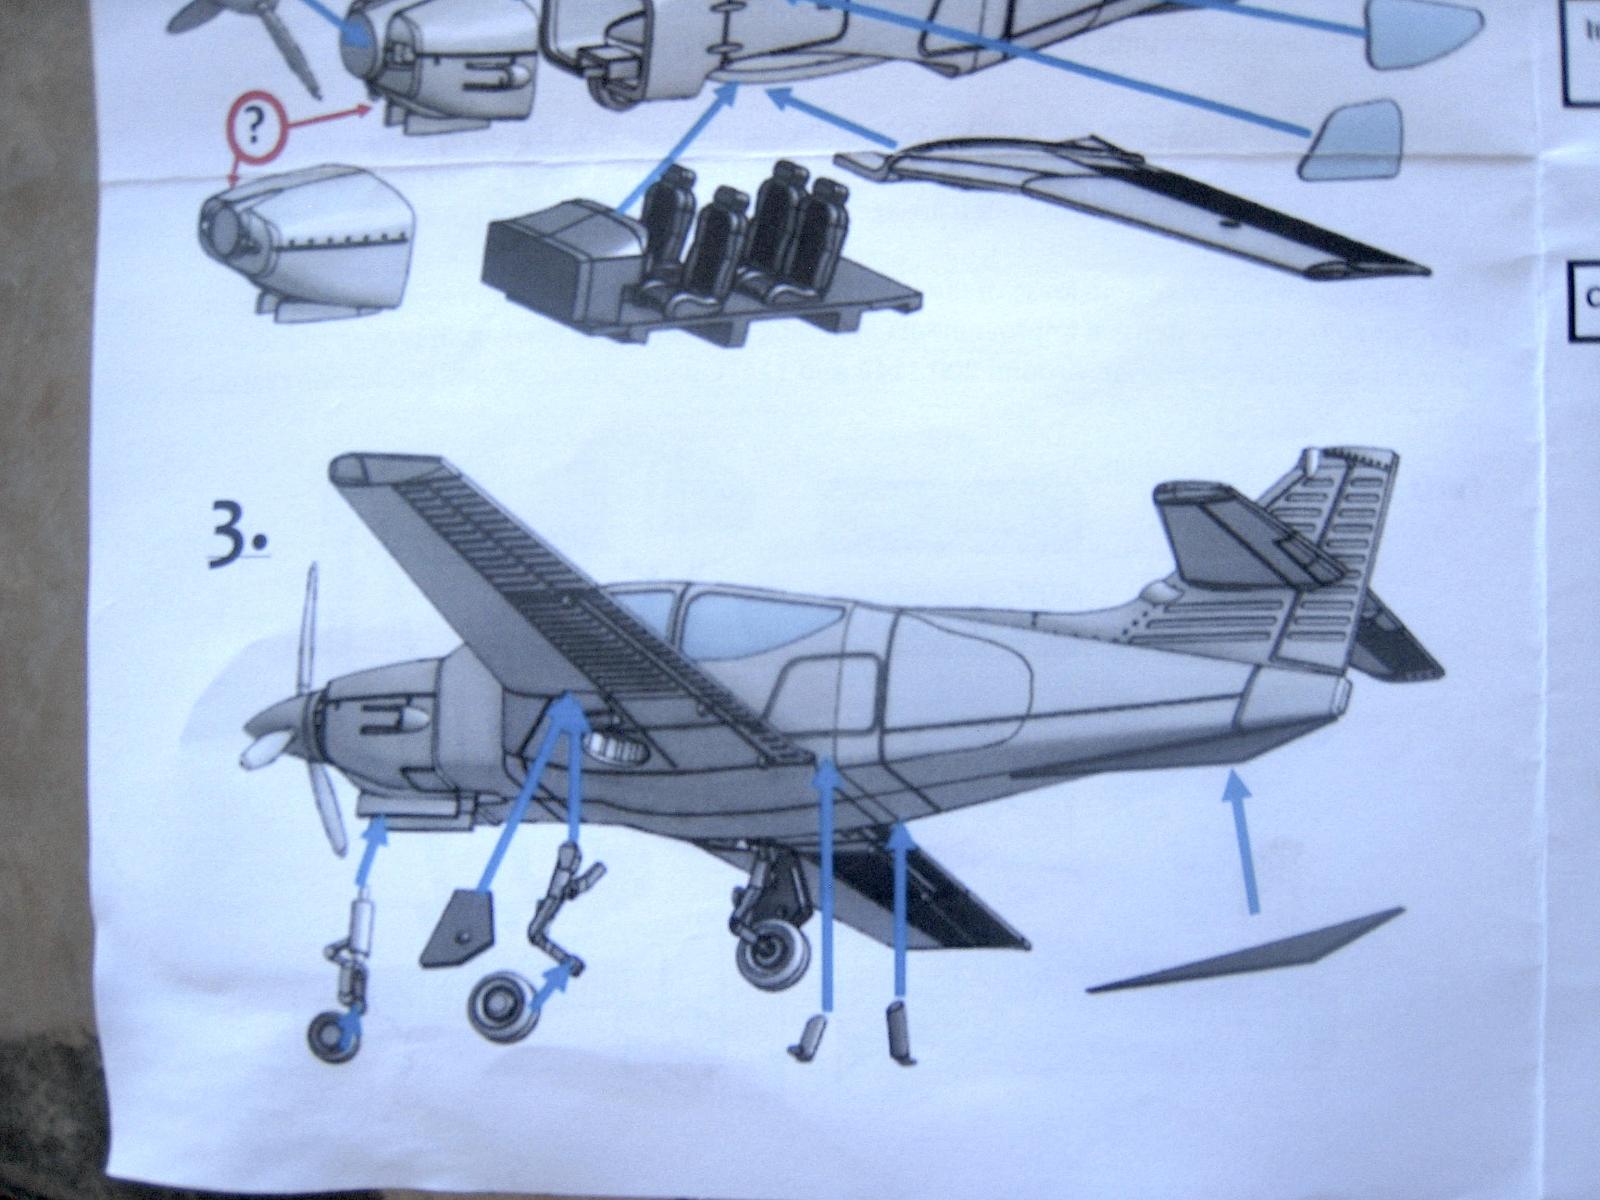
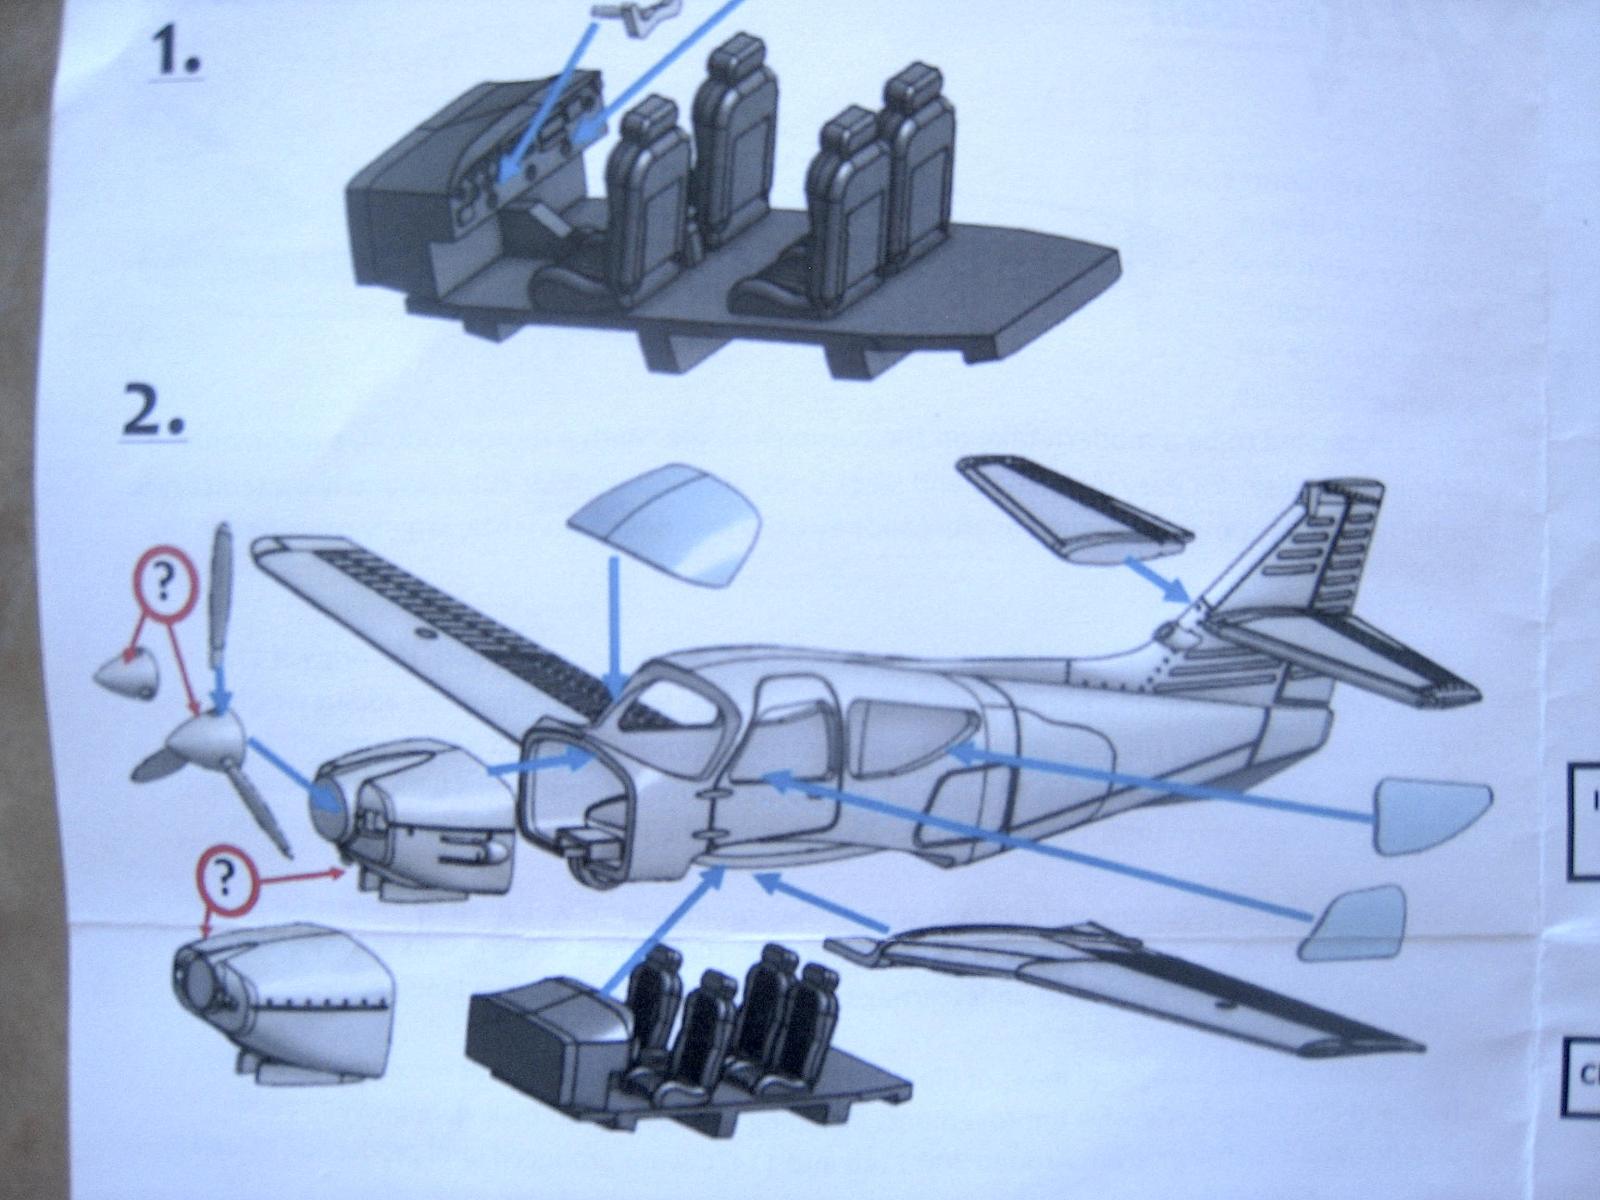
The kit consists of 15 resin cast assemblies and three vacuformed clear plastic parts containing the five required windows. The resin castings are very nicely done, although the makeup is kind of strange. The main fuselage consists of one piece, with openings in front, five window positions, and a large open space where the lower wing assemblies attach. However, the cockpit interior is made up of a floor, instrument panel, and four passenger and pilot seats. This is supposed to slide into the assembly, but my seat assembly was too big, and I had to spend quite a bit of time filing down the floor along the sides so it would fit in. It finally did. Of course the model has to be joined together with superglue, as the usual model cement will not work on this material.
Very little filler was required once the model was assembled, and I used regular Automotive Bondo filler.
Assembly
The kit goes together rather easily, although I did have some problems. The previously mentioned cabin floor assembly should be painted before assembly, but there is no indication as to what color it should be. I emailed the manufacturer to find out what colors they suggested, and although their reply was very quick, they didn’t know the interior colors either. I settled for light grey with a black instrument panel. I haven’t seen one of these airplanes at the local airport for years, so I couldn’t just drive out to the airport and look inside of one, if indeed, there is actually one there,
The wings join together, and can be glued together at the right dihedral angle. As for the elevators, they can’t be joined until they are attached to a pair of holes in the rudder unit. Here comes another problem. On the version that I built, there is a tail stripe marking that starts at the rear top part of the rudder and runs down to the fuselage. It goes right through where the elevators attach, and cutting the decal stripes can be rather dicey. I managed, but I would suggest that the easier way would be to assemble the fuselage without adding the elevators, then attaching the decal stripes after painting. Then you could just take an xacto knife and trace the attachment hold, cutting through the decal sheet, and then attaching the elevators after everything is painted.
The cabin seat assembly is nicely cast, but once it is installed and the windows are in place, you can’t see anything inside, so there is really no need to detail the instrument panel. I added masking tape seat belts, but I can’t see them through the glass. Also, there are two control wheels that attach to the instrument panel, but you can’t see these either. But by putting them in there, at least you’ll know they are there.
Another very tedious job is attaching the windshield and cabin windows. Vacuformed windows are provided, and they are weakly marked, but they each need to be carefully trimmed to fit the openings in the fuselage. This can take some time. Of course, after they are fitted into the holes, they need to be glued or they will just pop out. I waited until after painting to install mine, and the whole process took over half an hour.
The kit comes with two engine cowlings, one for each version. The cowlings are open in the back, and the instructions say to install some kind of weight in the cowling because the plane will sit on its tail if not weighted down. I used lead shot from shotgun shell loading materials, and it worked fine. There are two spinners provided, one for each model. The prop blades fit into holes in the spinners, and there are a couple of steps that should be mounted just behind where the flaps attach to the rear fuselage.
Painting and Finishing
I waited until after I painted the airplane to attach the windows. I did the all white version, so I had to brush paint the wingtips with a light green that almost matched the decal sheet green. I used acrylic white, and airbrushed the entire airplane. I then attached the decals, which were excellent. They need to be trimmed right to the edges, but this wasn’t a problem. I sprayed the plane with a gloss coat material, and it looks great. I wouldn’t advise installing the windows before painting, as they would have to be masked, and they would probably pop loose if they were masked.
There is no mention of radio antennas in the instruction, although the drawings show what appear to be VHF whip antennas along the rear fuselage spine. The plane is too modern for LF wire antennas.
Conclusions and Recommendations
This is a very nice little kit, and if you are into civilian aircraft this company, VFR, certainly deserves your attention. Their website shows a lot of different civilian airplanes that they have produced over the years, although I would think that if they are doing American civilian light aircraft, they should do planes like the Aeronca Champ, Taylorcraft, Luscombe, Piper Cub, Ercoupe, and similar types. But then, most modelers do military types, and there doesn’t seem to be a lot of interest in modeling those civilian types.
These are certainly worth getting although I wouldn’t recommend one of these for a beginner. Get one and try it out. Happy modeling.

Comments
2-ZOOM
“2-“ is the registration prefix for Guernsey (Channel Islands).
Add new comment
This site is protected by reCAPTCHA and the Google Privacy Policy and Terms of Service apply.
Similar Reviews