
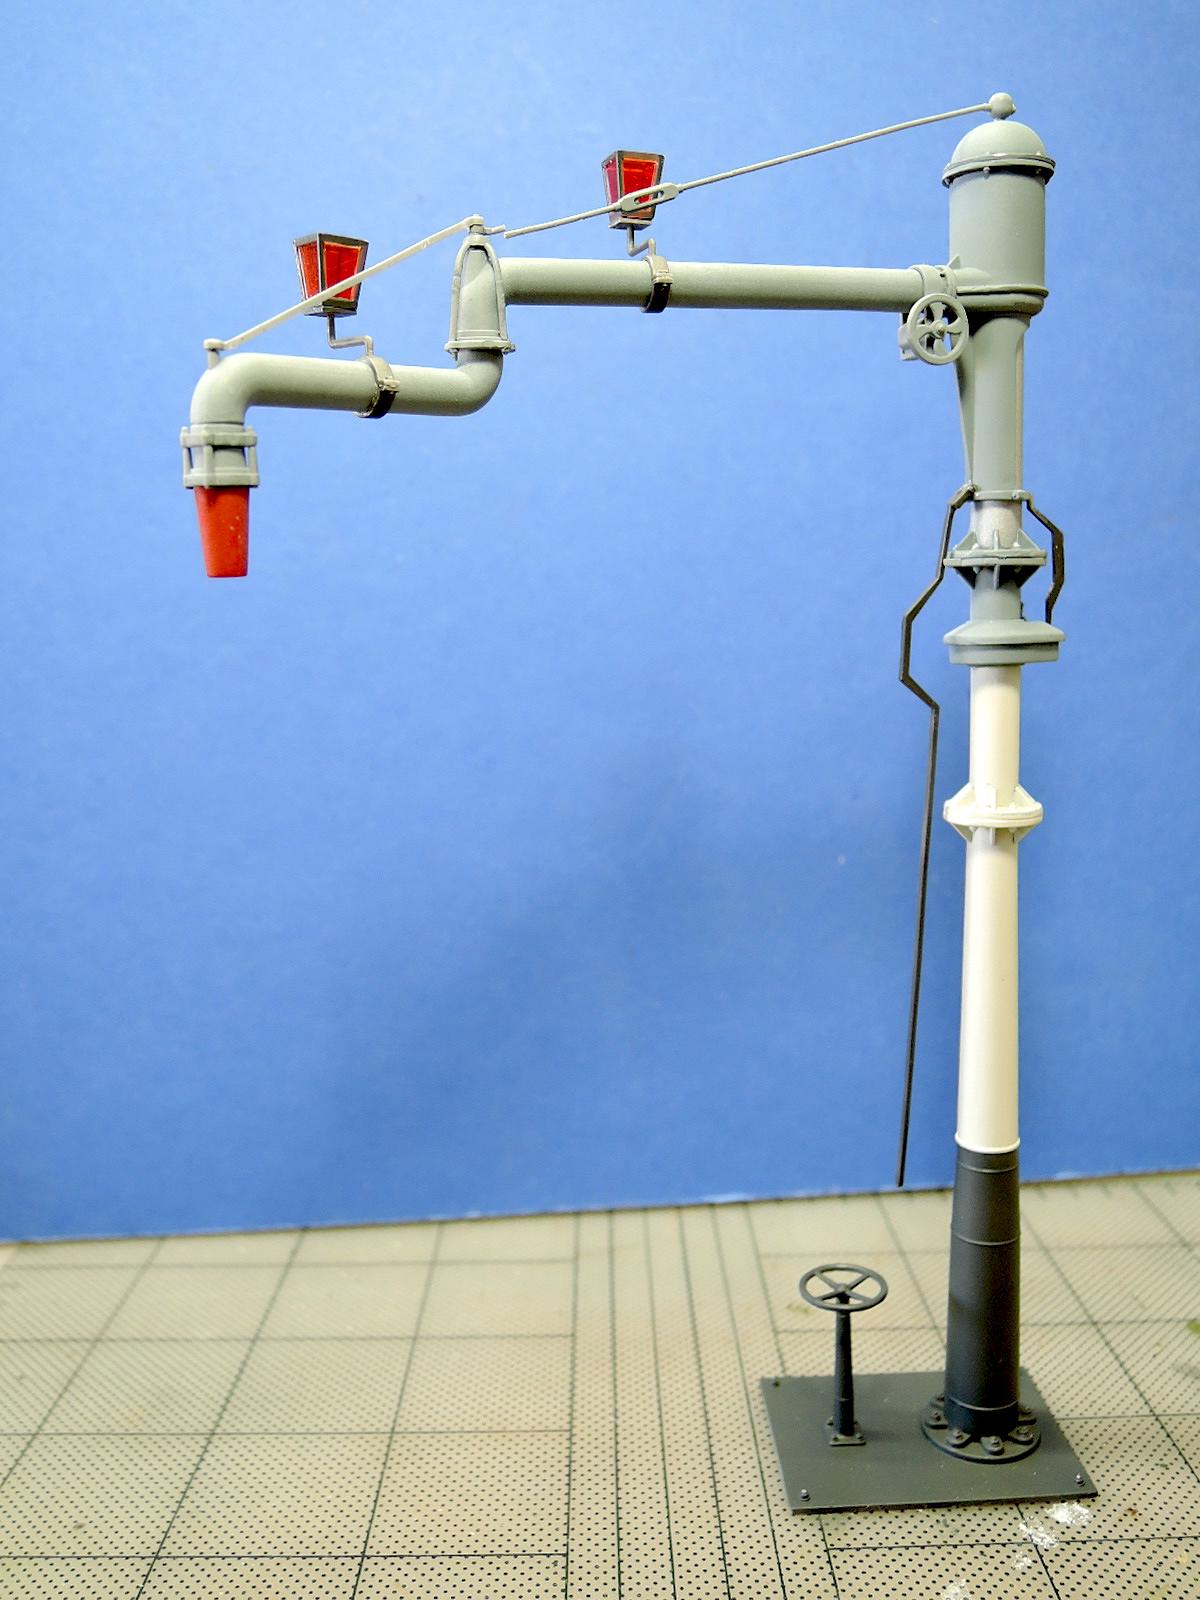
Railroad Water Crane
The water crane is the type used at German railyards during World War II and will be an excellent addition to railroad dioramas. This is another great kit from MiniArt with fine detail and excellent fit of the parts.
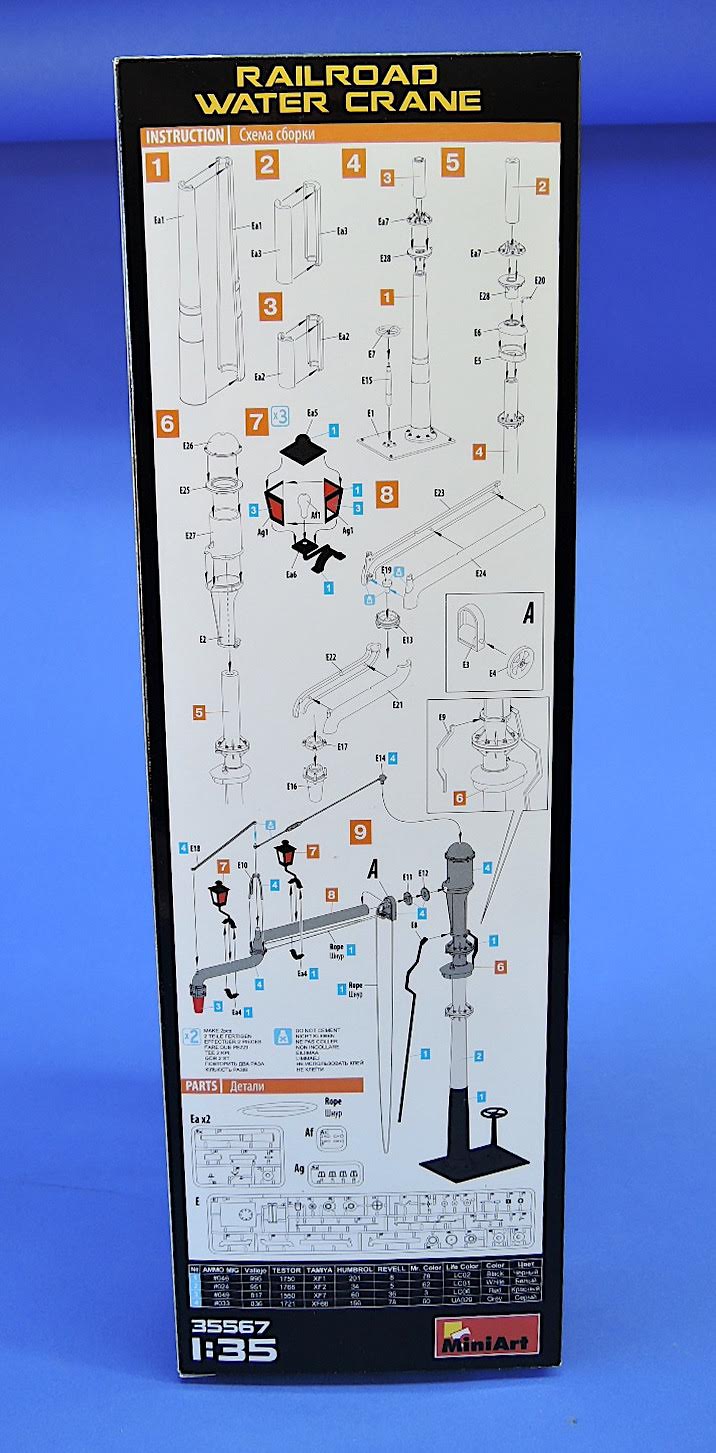
The kit comes in a 4.75 x 15.25 x 1.75 end opening box. It includes three gray plastic sprues and two clear plastic sprues with 50 parts. There is also a length of thread included for the water crane pulley rope. The model will measure 175 mm (6 7/8”) tall. My package did not include sprue Af which is the light bulbs for the two lanterns. I sent an email off to MiniArt and got a quick reply that a replacement was on its way. Great customer service by MiniArt!
Paint colors are called in AMMO MIG, Vallejo, Testor, Tamiya, Humbrol, Revell, Mr. Color, and Lifecolor numbers, so it shouldn’t be hard to find a match.
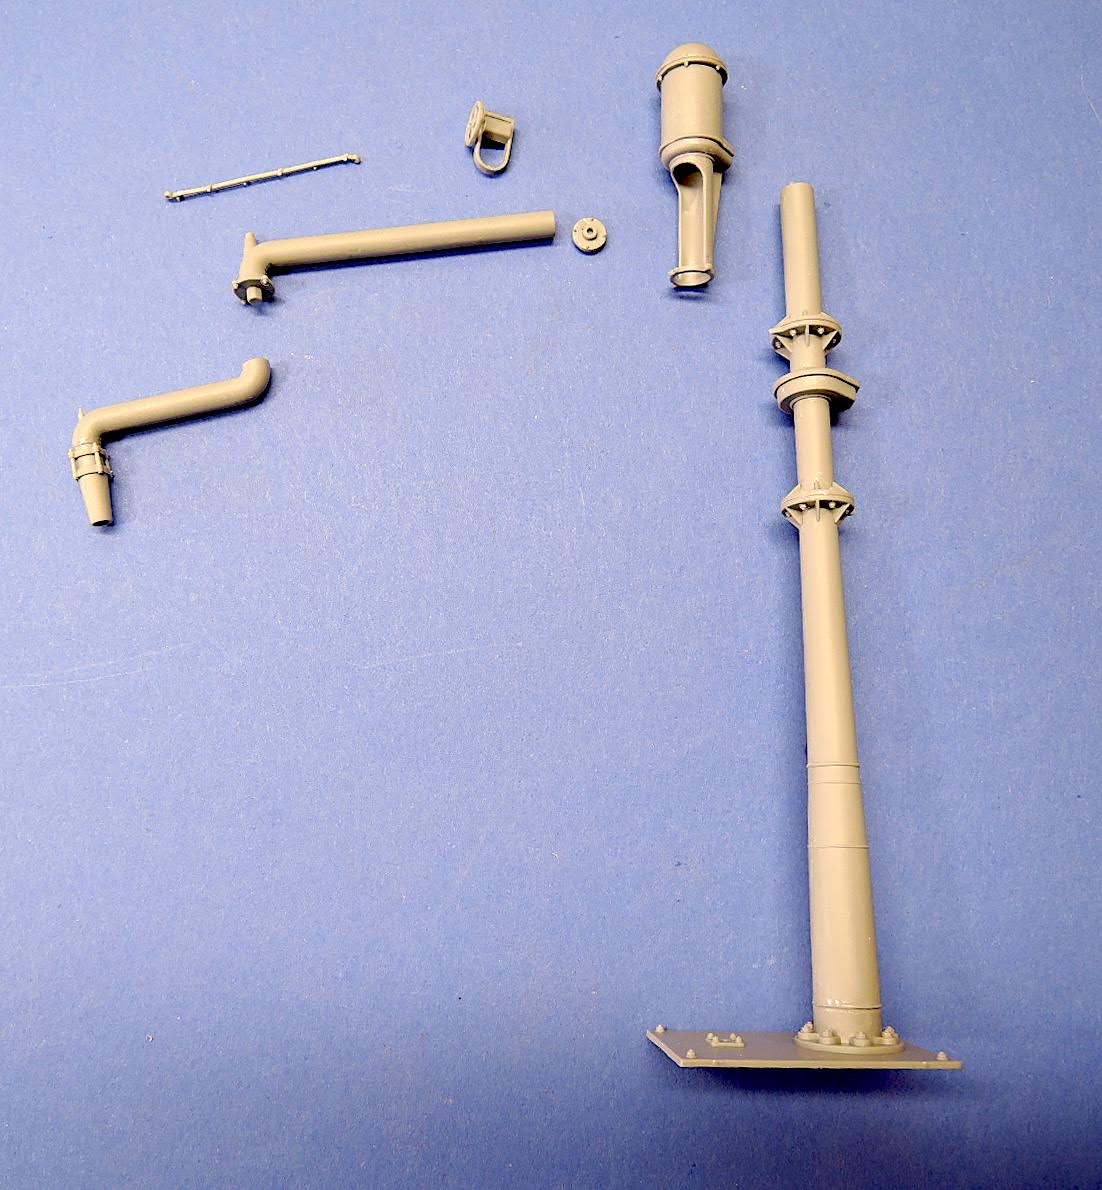
Assembly begins with the first 5 steps that build the main pipe elements for the water crane. The pipe sections are halves that fit together nicely but will still need some sanding and clean up for a smooth surface.
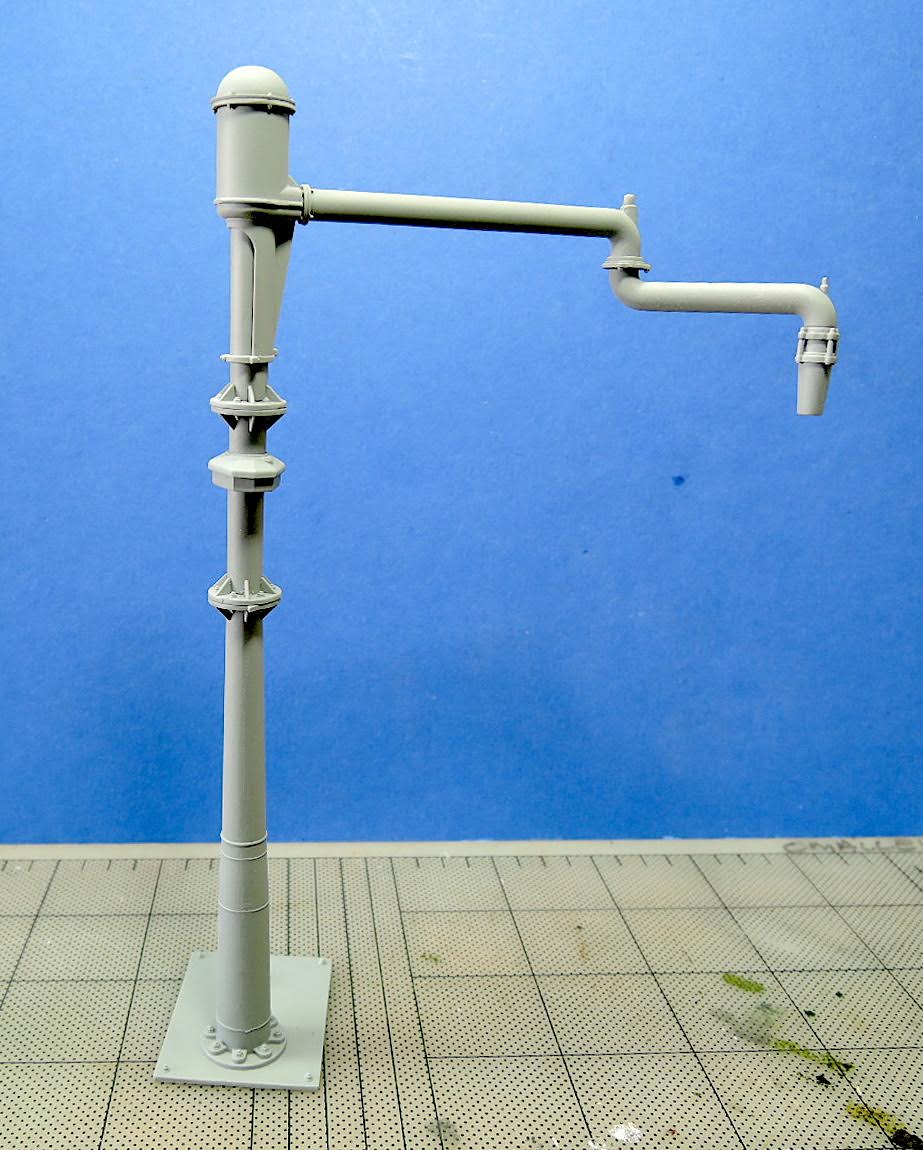
The upper section of the water crane is assembled in step 6, again with great fit of the parts. This portion of the tower should slip over the lower section of the tower without glue to allow the water crane to rotate. This is not noted in the instructions but was confirmed by MiniArt.
Step 8 assembles the outrigger pipes for the water crane. Careful gluing of parts E19 and E13 will allow the outside section of the pipe to rotate slightly.
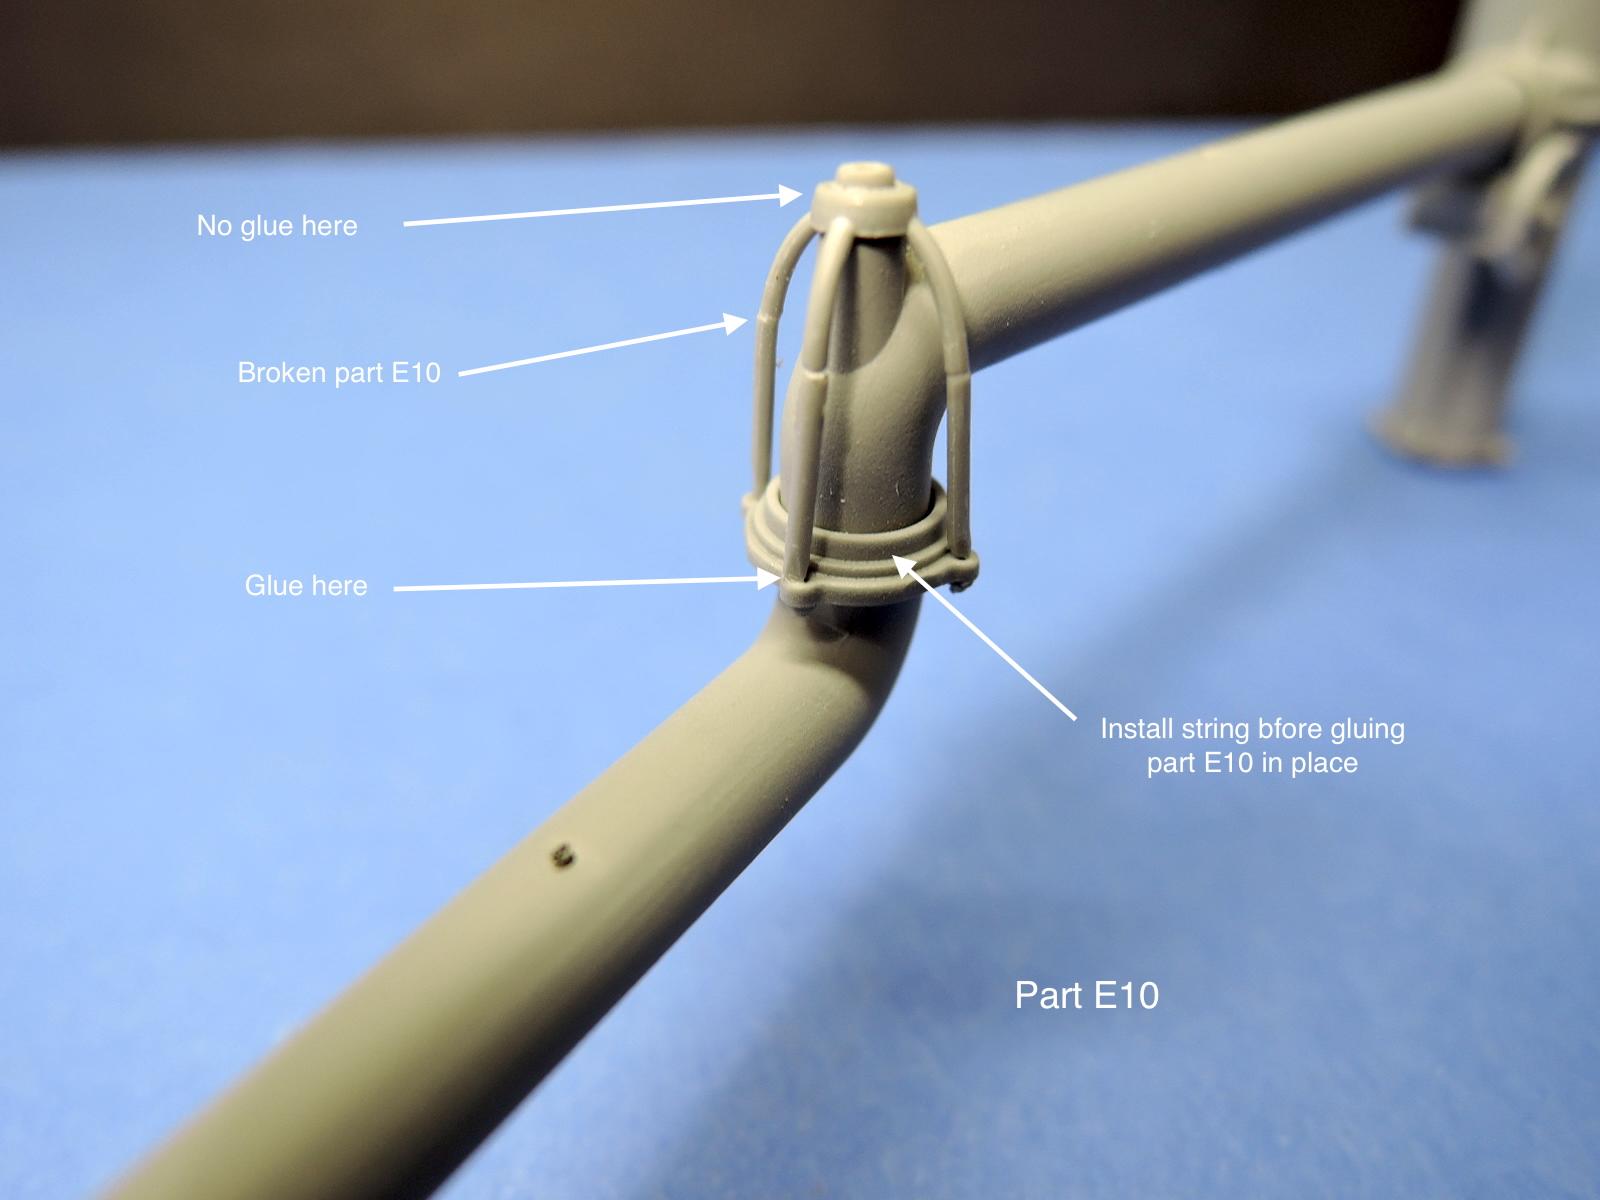
The last step, number 9, has lots of important steps. The outrigger pipes from step 8 are installed on the main tower in this step. Part E10 is a cage that goes beneath the support rods for the pipe and attaches to the outer pipe section. This part was broken on the sprue when I received the kit, and broke several more times during assembly. Before this cage is installed, the piece of rope should be attached back to the cable bracket part E3. The rope cannot be fastened to the outrigger pipes, part E13, or it will prevent the pipes from rotating. The longer support rod, part E14, can be anchored to the inner pipe section, but not to part E10. The shorter support rod, E18, should not be cemented to the longer support rod, again to allow the pipe sections to rotate. The instructions could be a little clearer on which parts to cement or not cement.
The control rods, parts E8 and E9 are installed in step 9. They are only fastened at the top end and need to be held out so they clear part E6 when rotating. The attachment of these 2 rods is very delicate. The final piece in this step is installing the vertical rope loop around the pulley, part E4. I glued the string together in a loop and then hung it with a weight after wrapping it around on the pulley to get it to hang straight.
I spent about 14 hours assembling, finishing, and weathering the kit. The assembly was about half the time and the finishing and weathering the other half.
Conclusion
This is a very nice little kit with excellent fit of the parts and very nice detail. There are a few small fussy pieces to assemble, but it will be a nice addition to railyard dioramas. Another wonderful kit from MiniArt! Thanks to MiniArt for producing these great kits and furnishing the review sample to IPMS for review.


Comments
Add new comment
This site is protected by reCAPTCHA and the Google Privacy Policy and Terms of Service apply.
Similar Reviews