
Pz.Kpfw. 35(t)
In the mid 1930’s, the nation of Czechoslovakia had one of the most sophisticated military arms manufacturing industries in Europe. Upon the German annexation of the Czech territories known as the Sudetenland in 1938, and the occupation of the entire country in 1939, the Czech armament factories fell into the hands of German forces. Two main tanks originated from these factories, known as the Panzer 35(t) and Panzer 38(t) to the Germans (“t” is short for the German word for Czechoslovakia, “Tschechoslowakei”). The Panzer 38(t) chassis soldiered on throughout World War Two as the basis for a number of tank destroyers and self propelled flak guns, while the Panzer 35(t) had a shorter career.
Academy has produced a state-of-the-art kit of the Panzer 35(t) in what one might call in today’s modeling language a non-hi tech model. There are no photo etched parts in this kit, or turned aluminum barrels, and the plastic parts count is low by the standards of others such as Bronco. This, however, does NOT mean that this is an inferior kit in any way. In fact, what it does make it is an eminently buildable kit, a bit of fresh air in today’s “1000-part model” market.
Academy’s instructions are very well laid out and easy to comprehend. The building sections number only 11 in total, and I found no errors involving mislabeled parts or missing assembly sequences. There is a nice parts locating diagram included on the main instruction sheet. In addition to the construction instructions, there is a separate double-sided painting and markings sheet.
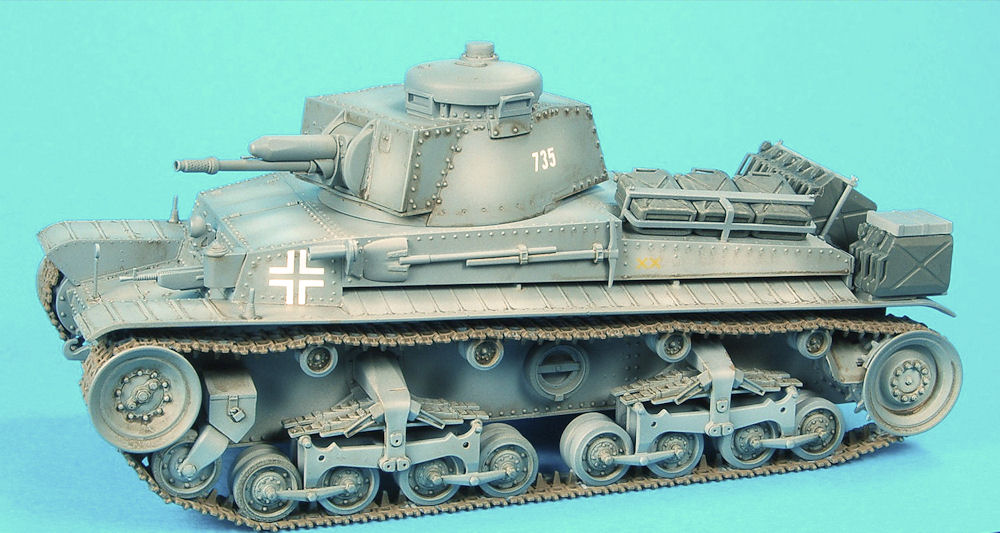
The parts are molded in gray plastic, with very nice surface detail. The plastic is rather soft, but this is not a detriment in any way. The parts felt a bit greasy to me, so after the model was constructed but before the painting began, I have it a nice bath in some warm water and Simple Green all-purpose cleaner. As for visible ejection pin marks, there were only a couple, and they were easily filled with liquid putty and sanded smooth. The kit comes with injection molded link and length tracks, with the upper run on each side already nicely pre-sagged.
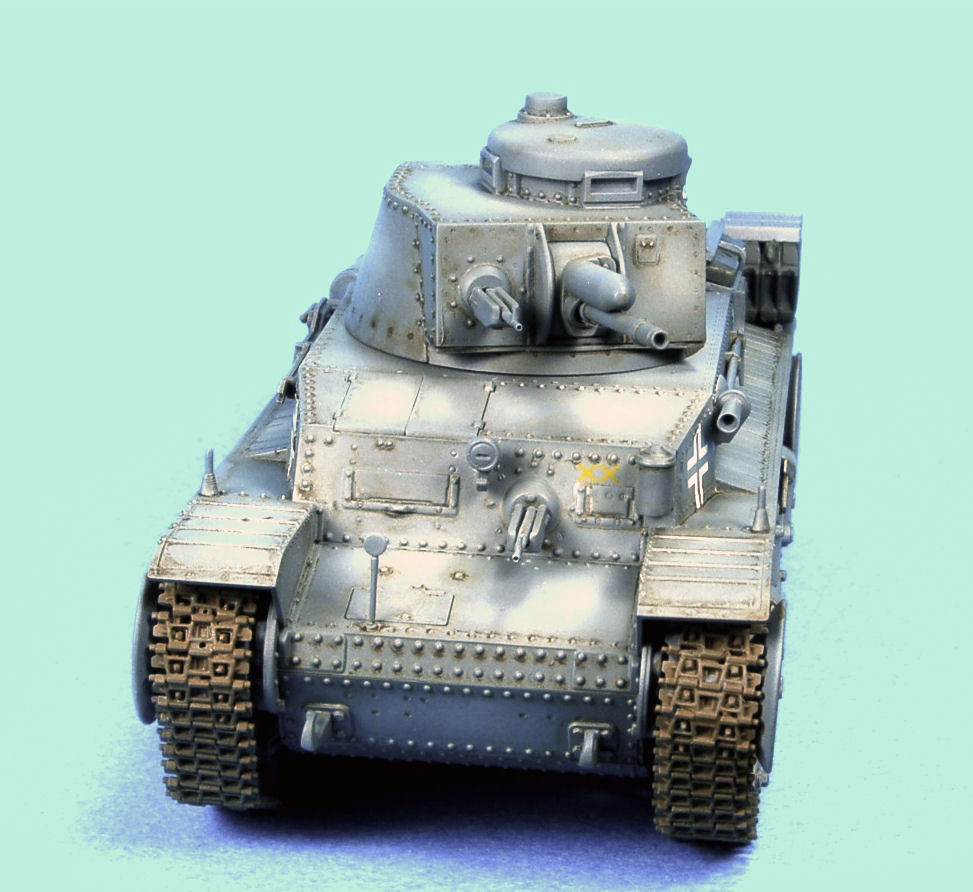
One small issue with my kit: the Panzer 35(t) was of riveted construction, and so the model parts are festooned with protruding rivets. A small number of these were missing on the kit parts, apparently having been knocked off during the packaging process. I then managed to knock a couple of additional ones off myself as I went about building the kit. So be careful! Replacing the rivets was achieved by slicing some off not so obvious parts such as the underside of the hull.
The fit of all the parts was exemplary. All that was required was careful test-fitting of each part with the next and, if needed, a little trimming and/or sanding. The only use of putty occurred in Step 8 of the construction sequence, with the construction of the two-part muffler, Parts E16 and E4. Nothing major at all, and immediately fixed.
The weakest part of the kit is the two figures, driver and commander. The driver is a half-figure; the commander is a full-body one. Detail is only average, and if you like to put figures with your models, I would find some replacements. Me, I can’t paint figures and steer clear of them anyway, so for me this wasn’t a problem area.
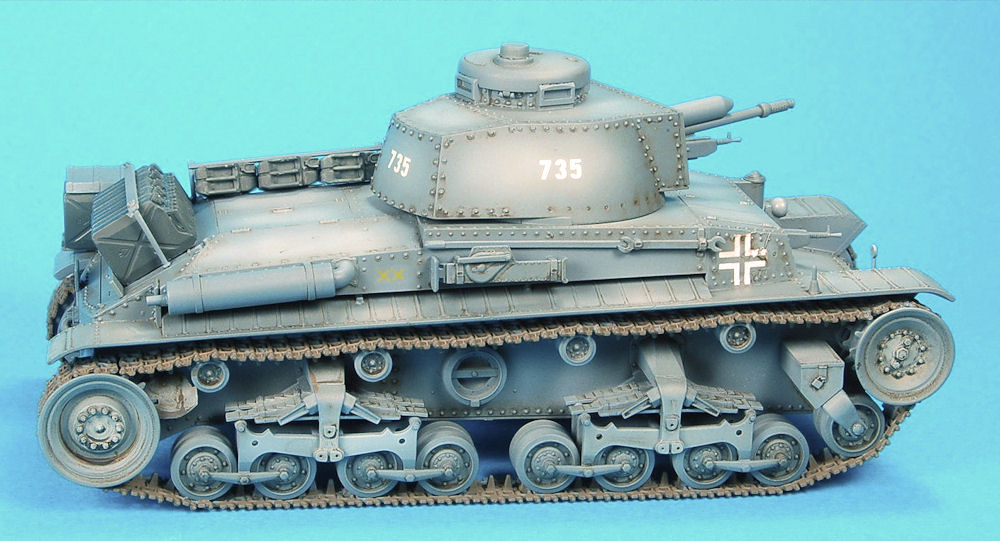
The other weak area of the kit was the decals. The decals and painting diagrams allow the modeler to build two vehicles, one from the 6th Panzer Division, France, May 1940, while the other is also from the 6th Panzer Division, Russia 1941. The markings for these are relatively simple, consisting of white German crosses and small yellow divisional markings. The decal film was a tad on the thick side, though the markings themselves were well printed. When applied to flat surfaces, there is no real issue. However, whenever the decals were placed on surfaces with raised rivet detail, they refused to snuggle down properly over the rivets. I used my favorite decal setting solutions from Gunze Sangyo, but without success. I then brought out the big gun, Solvaset, but again, with no noticeable results. So, if you have a chance, replace the white crosses (these are the ones that needed to go over the rivets) with spares from the likes of Cartograf or any other brand you trust.
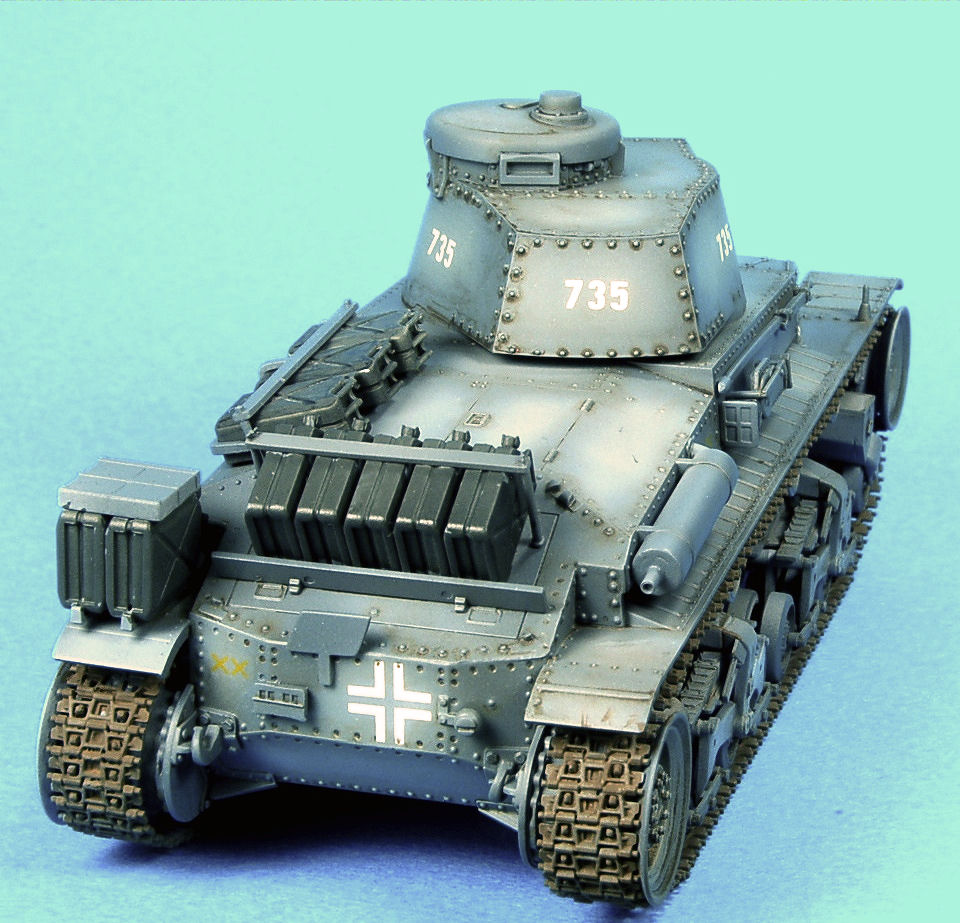
The model was painted with Tamiya German Grey XF-63, and then panel fade was achieved by mixing in a little Tamiya White XF-2. These acrylic lacquer paints from Tamiya were thinned with Mr Color Self Leveling Thinner, then airbrushed on. To prevent the model from being a monotone lump, I painted the jerry cans that sit atop the rear of the hull a dark grey color from the acrylic range by Vallejo, while the track links were hand-brushed with Vallejo Track Color. Once the paint was dry, some Tamiya X-22 clear gloss was airbrushed on the model to prepare for the application of the decals. When the decals had dried thoroughly, another coat of clear gloss was applied to seal them. Various applications of artist’s oils were used to make pin washes, and this all results in a very nice-looking model.
I would like to thank Model Rectifier Corp. for providing IPMS/USA with this very pleasant-to-build model of an important early war “German” tank, and IPMS for allowing me to review it. Anyone with modest modeling skills should have no problems whatsoever with turning this kit into a very nice addition to their completed collection of models.

Comments
Add new comment
This site is protected by reCAPTCHA and the Google Privacy Policy and Terms of Service apply.
Similar Reviews