
Polikarpov PO-2 Soviet Light Night Bomber
History
The Polikarpov U-2, later PO-2, was designed as a light training biplane, and first appeared in 1928. It was a two seat, of mainly wooden construction, training aircraft similar in many respects to most late twenties biplanes, and had all of the characteristics required for a military trainer, including rugged construction, a low powered but reliable powerplant, and excellent flying characteristics. It so impressed Soviet authorities that it was produced in very large numbers, over 30,000 being completed by Russian and foreign factories and maintenance units between 1928 and 1953, and the last ones weren’t built in Poland until 1959. The PO-2 served mainly as a primary trainer at first, but eventually was pressed into service as a crop duster, military liaison aircraft, med and general supply aircraft, and later as a reconnaissance and light bombing type. During the war, many were used by units made up of women pilots and ground crews, who were very effective in harassing the Germans by making night attacks and keeping them awake. They were called the “Night Witches”, and certainly played an important part in the conduct of the war. A number of PO-2’s have survived, where they are either displayed in museums or are flown by enthusiasts wishing to preserve the aircraft’s history. An internet source lists 36 basic designations for the type, although some are duplications since during the war, the airplane was redesignated from U-2 to PO-2 in honor of the designer, Nikolai Polikarpov, a practice which recognized the efforts of creative designers in the Soviet Union. For example, the Soviet I-26 fighter was later redesignated Yak-1 honoring its designer, Yakovlev, for the same reason.
References
Aside from the internet, there aren’t too many references available on the aircraft, and even on line, there are few photos available. There was a book published by Kagero entitled Polikarpov Po-2, which included 44 pages, 175 photos, color information, and a set of Polish decals in 1/72 and 1/48 scale. The book is based on an example on display in the Polish aviation Museum, and is written in Polish and English. Basically, it gives a lot of information on the museum aircraft, and the excellent color photos illustrate all of the major details of the aircraft. There are two side profile drawings of the museum aircraft, and several color photos of a Polish civil flying example, SP-YPB. If you are looking for detail, this is an excellent resource, but if you are looking for various color schemes and markings carried by the aircraft, you won’t find these here. There are some sites on line with a lot more information, and even the instructions in various kits of the aircraft have more information on different aircraft that this book does. One good source uis Wings Palette. Seeing as how there were numerous variants of the aircraft, there must be hundreds of possible color schemes and markings for the aircraft. Good luck on that one.
Instructions
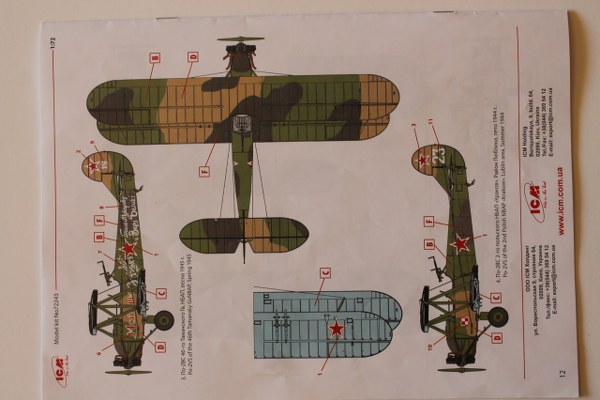
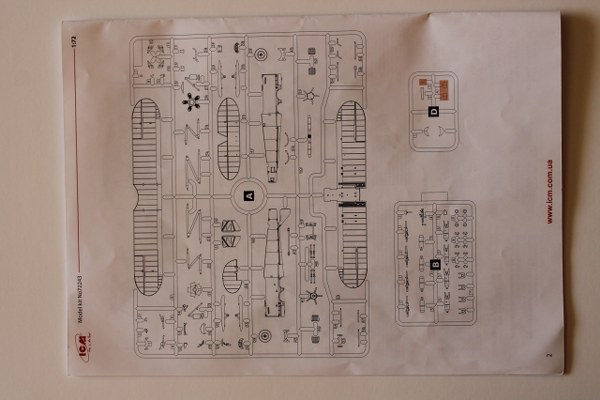
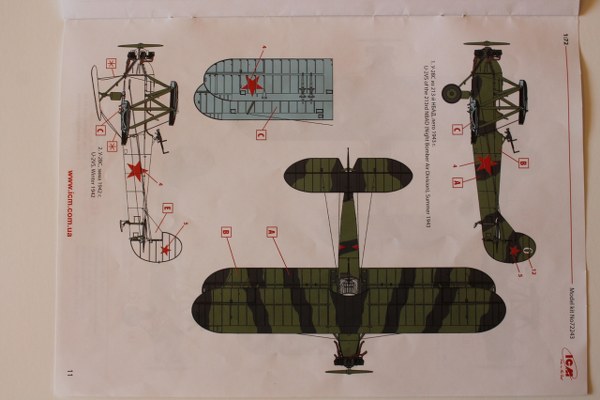
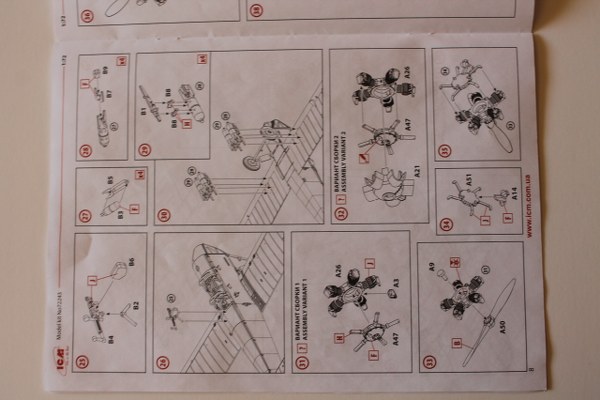
The instruction sheet for this model consists of 12 8 ½ x 11 inch pages of text and drawings. The text is in Russian and English, and the drawings are mainly pictorial, with little if any text required. The drawings are large, clear, and very useful during the assembly process. The last two pages provide good 1/72 scale color drawings showing the four aircraft for which decals are provided. All are armed attack aircraft, and one features skis and snow camouflage. One good feature is the inclusion of the flying and landing wire and the control cable positions, as this airplane had a lot of each. They used to say that if you put a bird in between the wires in a biplane, and it got out, there was a cable or wire missing. That would certainly be true with this airplane.
One problem with the instructions is that the drawings are confusing. The engine is shown as being entirely “gunmetal grey” in the side view color drawings, while the instructions show a mixture of gunmetal, steel, and gunship grey. The engine on the color photos of the airplane in the Kagero book shows a silver crankcase with black cylinders and a dark green propeller. The really confusing part is the undersides of all four of the aircraft for which decals are provided. These are shown in the side views as being black with some sky blue details, while in the underside views in the instructions, the undersides of all of the airplanes are painted a sky blue shade, typical of Russian aircraft of that era. I am not aware of Soviet night attack aircraft being painted black underneath, but it stands to reason that they probably were. This is an area that suggests more research.
The Kit
This kit was originally issued around 2013, and I know this because I built one and wrote the review for this website during that year. Maybe this amounts to justification for what we reviewers do, because I noted a couple of problems with the 2013 kit, which was numbered #72241, and comparing the two kits, I found that the producers had completely redone the moldings, correcting the major error, which had the prop rotating in the wrong direction. I noticed this because I’ve hand propped real airplanes all my life, and this one just jumped out at me. It is nice to know that kit producers pay attention and want to get it right.
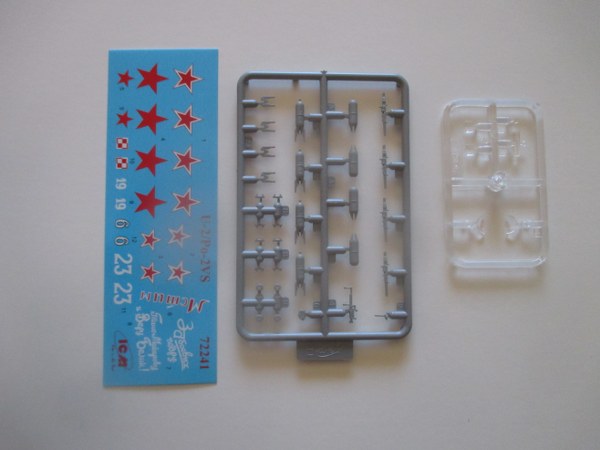
The original issue from 2013 that I built was #72241. I’ve seen references to a #72242 for the same airplane, and this one is #72243, which says that there have been two reissues. I haven’t seen #72242, so I can’t comment on it.
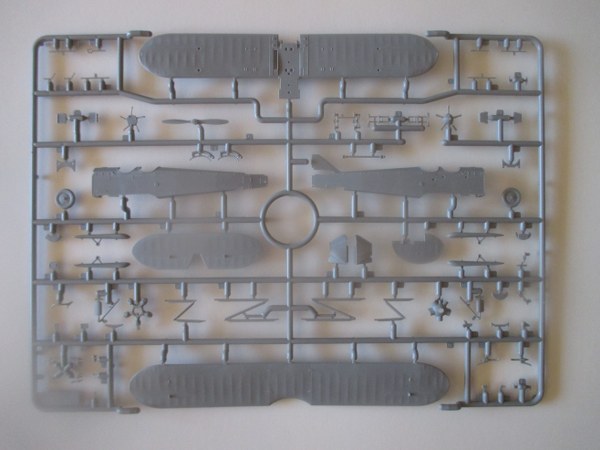
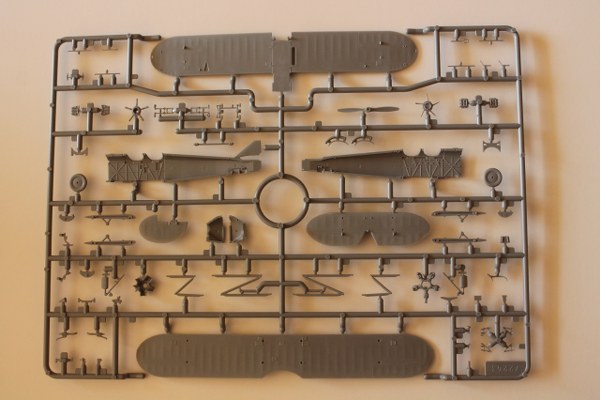
The main sprue has 56 parts, the small armament sprue has 31 parts, and the clear sprue has two windshields. There is almost no flash, and the detailing is extremely well done, with the wing fabric being better than I’ve seen in a long time, and excellent cockpit interior sidewall detail just waiting for superdetailing. There are a lot of small detail parts, but if you are careful, they shouldn’t escape, and the effect will be tremendous. This kit is very well done, and was a pleasure to build. And the propeller turns in the proper direction.
One problem I encountered with the basic airframe assembly is that the seats, which consist of 6 parts each, are quite flimsy, and their attachment points to the cockpit floor, which is located on the lower wing center section, are very weak. However, the whole thing went together OK, and once the seats were installed and the fuselage halves were joined, there was no problem.
Assembly
The kit goes together pretty easily. The fuselage halves match up and required very little filler. I had to use pretty heavy clamps to get the lower wing section to stay in place, and the vertical and horizontal tail units were very thin, although they lined up perfectly. The wings and tail unit lined up perfectly, and after painting, the upper wings were attached to the airframe using superglue in the little holes provided for the mounting struts. The struts themselves, while very nicely done, required considerable trimming, as they each had several attachment points on the leading edges of the struts. In fact, the underwing skids, about ½ inch long, had four attachment points that needed to be trimmed, and one of mine broke off, with part of the unit escaping. I replaced them with plastic rod bent to the appropriate shape. Although the landing gear struts went on easily, the same can’t be said for the skis. I suspect that the wheels would have gone on more easily, but the skis had very tiny holes on the mountings, which were supposed to attach to the very small tabs on the landing gear strut. The problem was to get the ski mounted in the correct position, as my model was to be sitting on the ground, or snow. I tried regular Tenax cement, but I had to devise a jig to hold the airplane in the right position, and the Tenax was not fast drying enough to hold it in place. I finally tried super glue, and this worked, but it took a long time (overnight) to dry. Once dry, the gear is very fragile, and must be handled with extreme care. The wire bracing helped.
Painting and Finishing
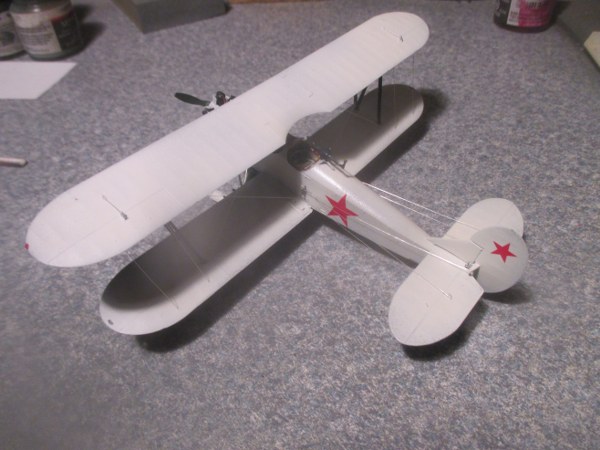
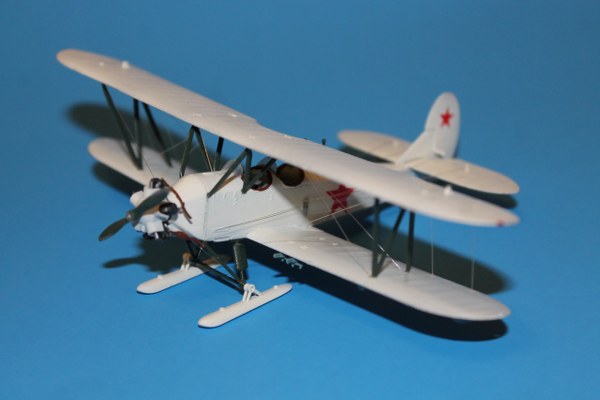
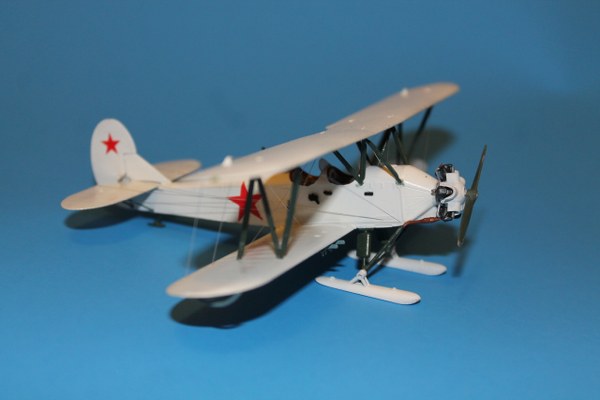
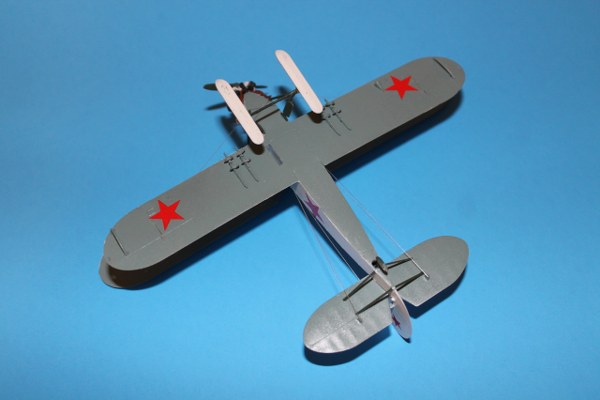
Unless you intend to paint the entire airplane one color, I would suggest doing all of the major painting before attaching the upper wing. The airplane is fragile enough that applying and removing masking tape on the airframe would be very critical, and you are just about assured that something will break. In the case of the snow-camouflaged PO-2 that I built, the undersides were sky blue, the upper surfaces were white, and the wing and landing gear struts were Russian green. I realize that most of those snow camouflage schemes probably had green showing through due to weathering and wear and tear, but I just painted mine white and let it go at that.
Detailing and Rigging
Once the airplane is completely assembled, the details can be added. The instructions state that the small details, such as the control horns for the elevator cables, located on the fuselage sides even with the cockpits, and the small venture tubes on the fuselage sides should be installed at an early stage of assembly. I waited until the plane was completely assembled, and added them just before I installed the rigging wires and control cables. I used my tried and true method of using unstranded electronic wire for these, and it was really not as difficult as it looks. White glue dabs held the wires and cables in place, and wires make it look like a real biplane. Fortunately, all of the flying and landing wires on this airplane are single wires, so there are no parallel wires to consider. However, the rudder and elevator control cables are parallel, but you can get away with single wires if you want to.
The windshields are very tiny, and attach just ahead of the cockpits. They had small tabs on the bottom, but there were no corresponding mounting holes in the fuselage ahead of the cockpits, even though it shows on the instructions. I just trimmed off the little pegs and mounted the windshields without them. There is another clear plastic piece, part # D2, which is a window located on the right wing root, and which was there to allow one of the crew members to use a bomb sight. There is a part, #A2, which apparently is the bombsight, which mounts on the right side of the fuselage. My clear part didn’t fit properly, and flew away when I tried to mount it in the wing, and I never found it I , however, filled the small hole with clear plastic filler, and it looks OK. The PO-2 in the Polish museum just has an open space, so there were variations on this detail.
Conclusions and Recommendations
There are several kits of the Russian U-2/PO-2 biplane in 1/72 scale listed in the Burns Guide, , including ABC, Ace, A-Model, Frog, KP, Omega, and Ursus, and the ICM kit has been around for at least 7 years. I have only built the KP kit, and it is a totally acceptable kit, so don’t throw any away if you have them. The revised ICM kit is probably the best available at the moment, and although it is not intended for inexperienced modelers, it is certainly buildable, and I would recommend it highly. This is a very important airplane in the history of aviation, considering that over 30,000 were built, and certainly should be represented in any collection of 1/72 models, covering the thirties, forties, fifties, and even later periods. I have built 5 so far, three KP kits and 2 ICM kits, covering military versions and even a crop duster variant. The kit has a lot of potential, and is certainly worth getting several of.
Thanks to ICM for the review sample.

Comments
Add new comment
This site is protected by reCAPTCHA and the Google Privacy Policy and Terms of Service apply.
Similar Reviews