
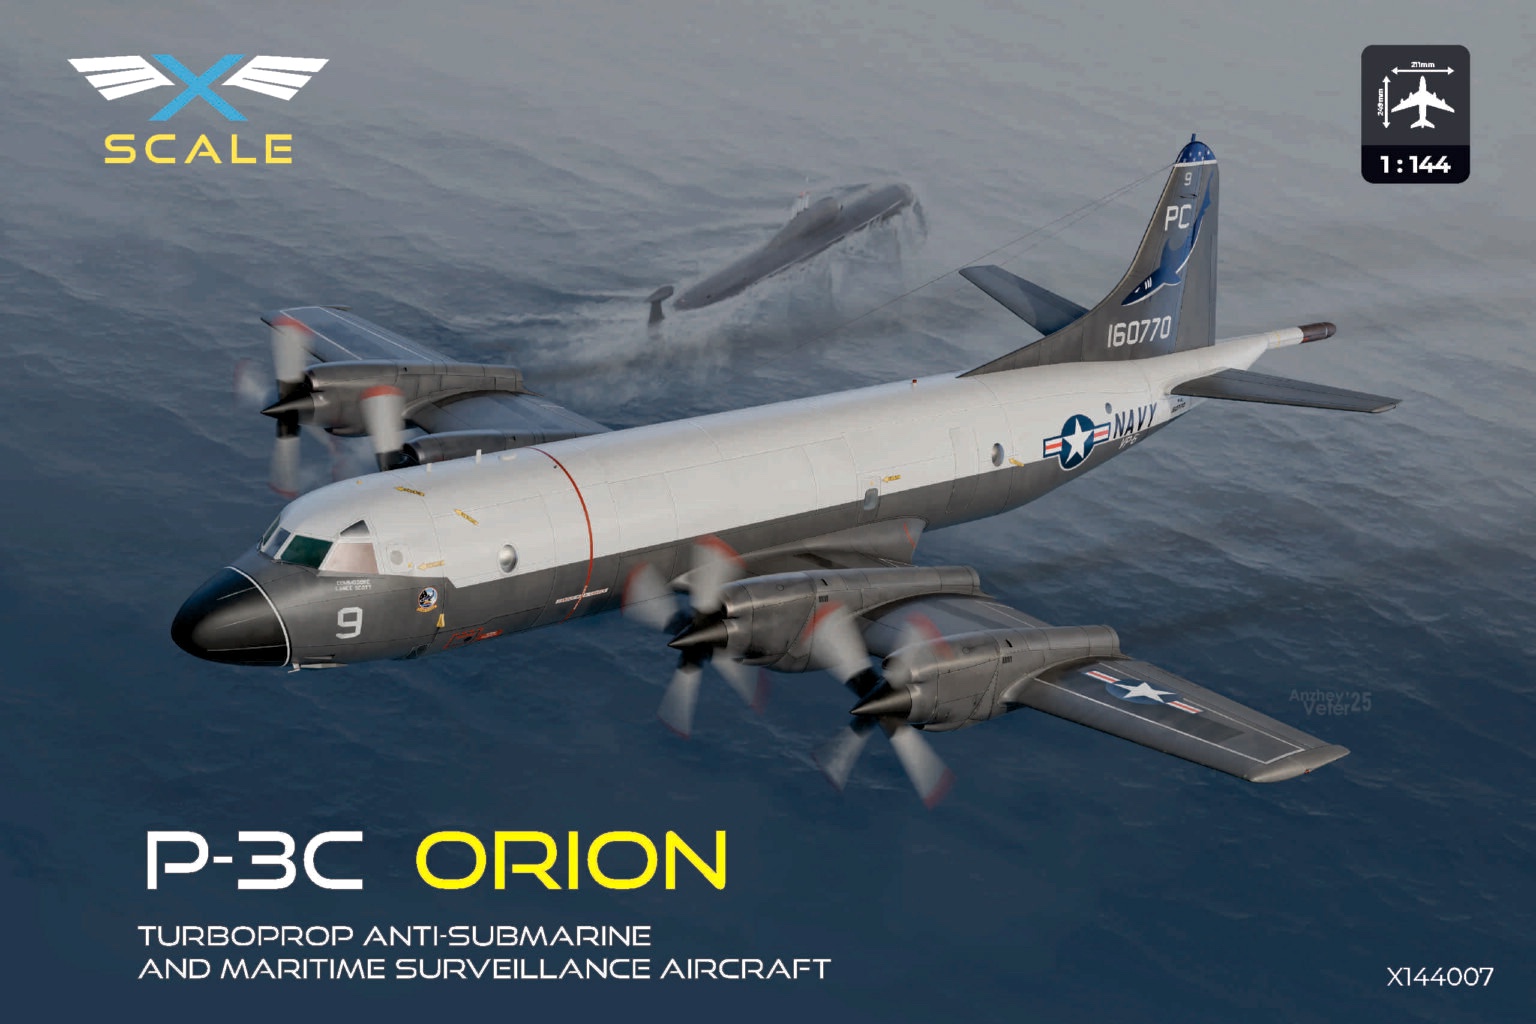
P-3C Orion, Turboprop Anti-Submarine and Maritime Surveillance Aircraft
The P-3 Orion entered US Navy service in the mid-1960’s and is now being slowly replaced by the P-8A Poseidon. I find it interesting both were based on civilian airliners: the Lockheed Electra II and the Boeing B737-800 respectively.
A top-opening box that has an attractively painted P-3 on the cover is chock full of plastic parts. Eight runners hold 158 parts molded in medium gray plastic and another for the clear parts. Surface detail is recessed and very impressive for this scale. There are five decal marking options: two US Navy, one each for the Australian AF, Netherlands Navy, and the Japan Maritime Self Defense Force. Finally, there is a set of masks for the clear parts and wheels and a full-color instruction booklet which includes a parts map, decal guide for each scheme, and a color guide for Mr Hobby, Tamiya, ICM, and Hataka paints.
Overall, this model looked like a straightforward build, which it was, but I did find a couple of “snags” along the way. I generally followed the 36 step build which started with the cockpit. I found it easier to assemble the pieces in the left side of the fuselage rather than standing alone. Cockpit fit was OK but required some sanding/filing to get the fuselage halves snugly together. X-Scale reminds us to add weight to the nose but doesn’t suggest an amount. I have their Electra II kit which indicated 5 grams of weight, so I added 7 grams just to be sure. I taped the major parts together to test this weight to ensure it wasn’t a tail-sitter. No problem, so I thought. The small clears parts, excluding the windscreen, stand proud of the fuselage. I chose not to use them because it would be quicker for the review to later use a clear liquid filler rather than sand them flush. However, I recommend you take time to do the former.
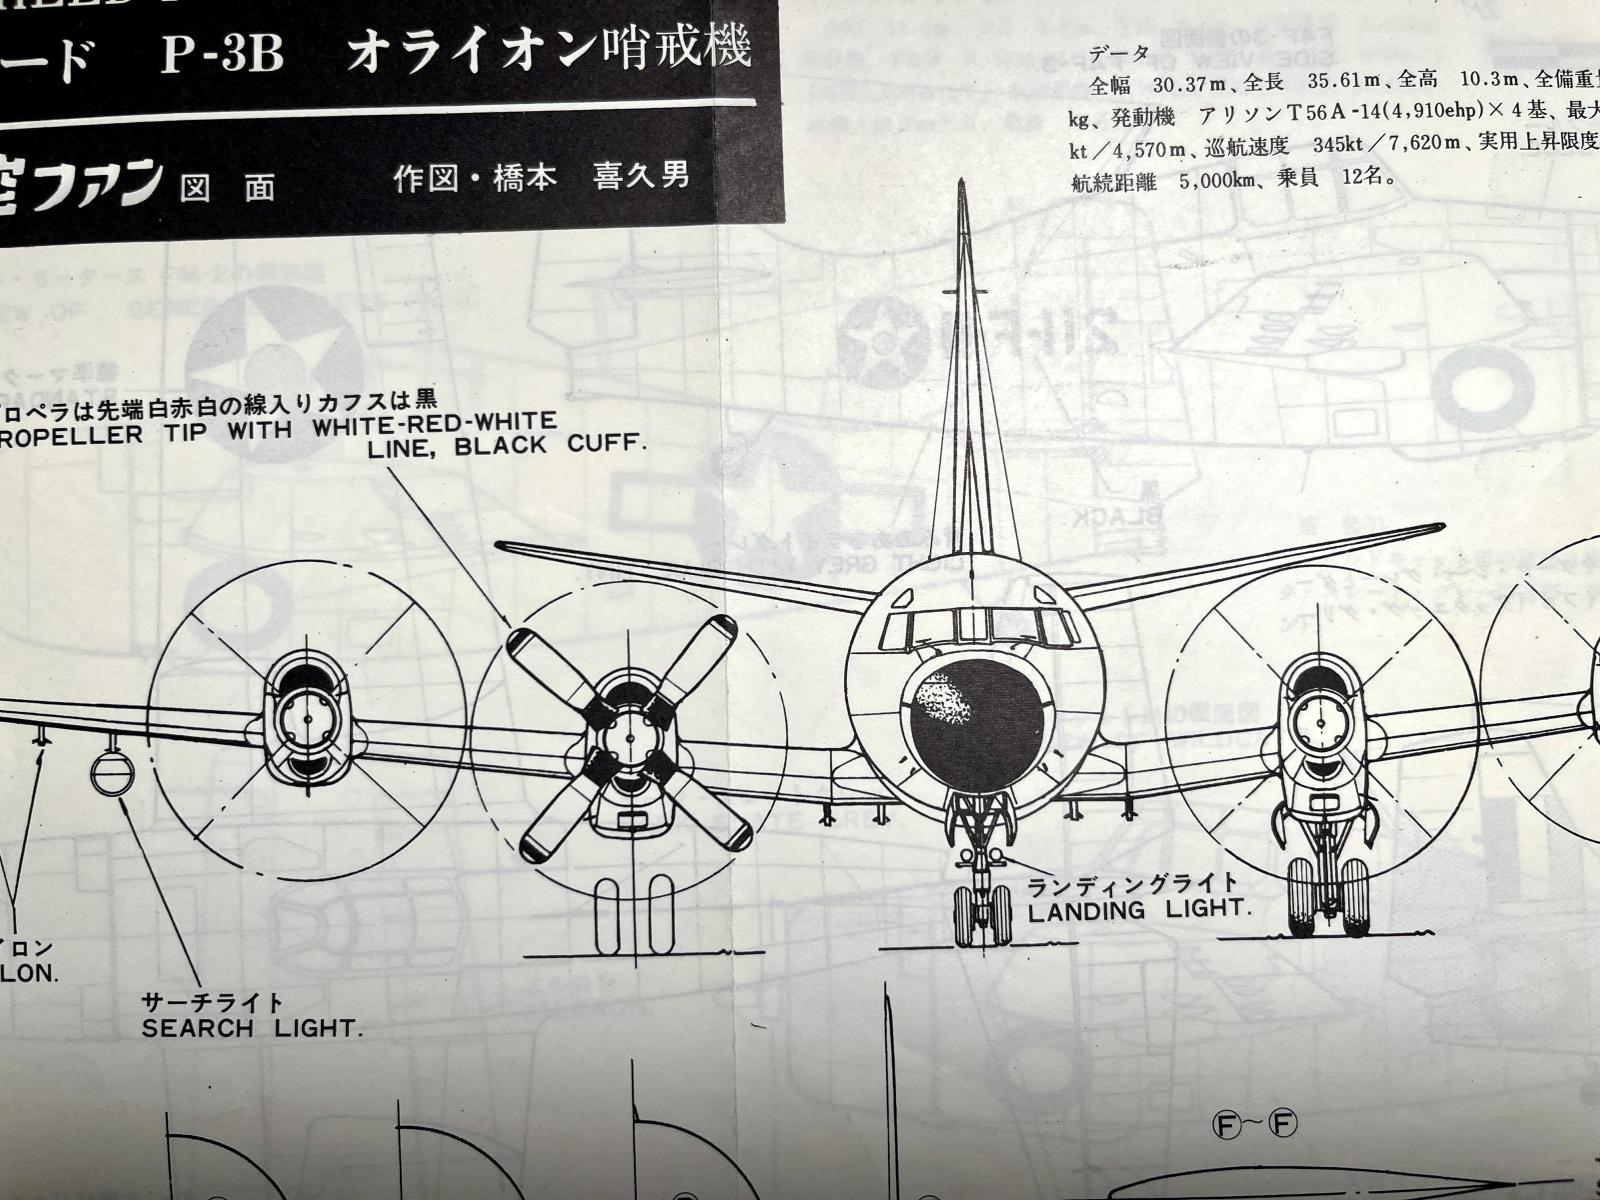
Wings are next and here I encountered my first snag. The main wheel well walls needed trimming to fit, and they sort of “slide” into place. Once the wings were together, I built the four engine nacelles and mounted the inboards. I immediately noticed they did not sit correctly on the wing - standing at an angle to the top of the wing with its dihedral instead of perpendicular to the ground. Check out the drawing in the picture section. Removing some plastic from the outboard lower edges of the nacelles corrected this problem. The wing assembly includes the bottom of the fuselage and needs trimming its aft edge to fit. Along those same lines, the sonobuoy section goes in place just aft of the wings but is too long by about a 1/32 of an inch which I removed with a UMM razor saw.
X-Scale chose to make the horizontal and vertical stabilizers, each with two pieces, separated from the fuselage. The smaller lower pieces fit into the upper stabilizer pieces but do not follow existing panel lines. They are parabola shaped set into the center of the stabilizers. This was probably to get thin (in scale) leading and trailing edges. The catch is you have to fill/sand the seams thus erasing the recessed detail which then necessitates re-scribing. Their fit to the fuselage is good.
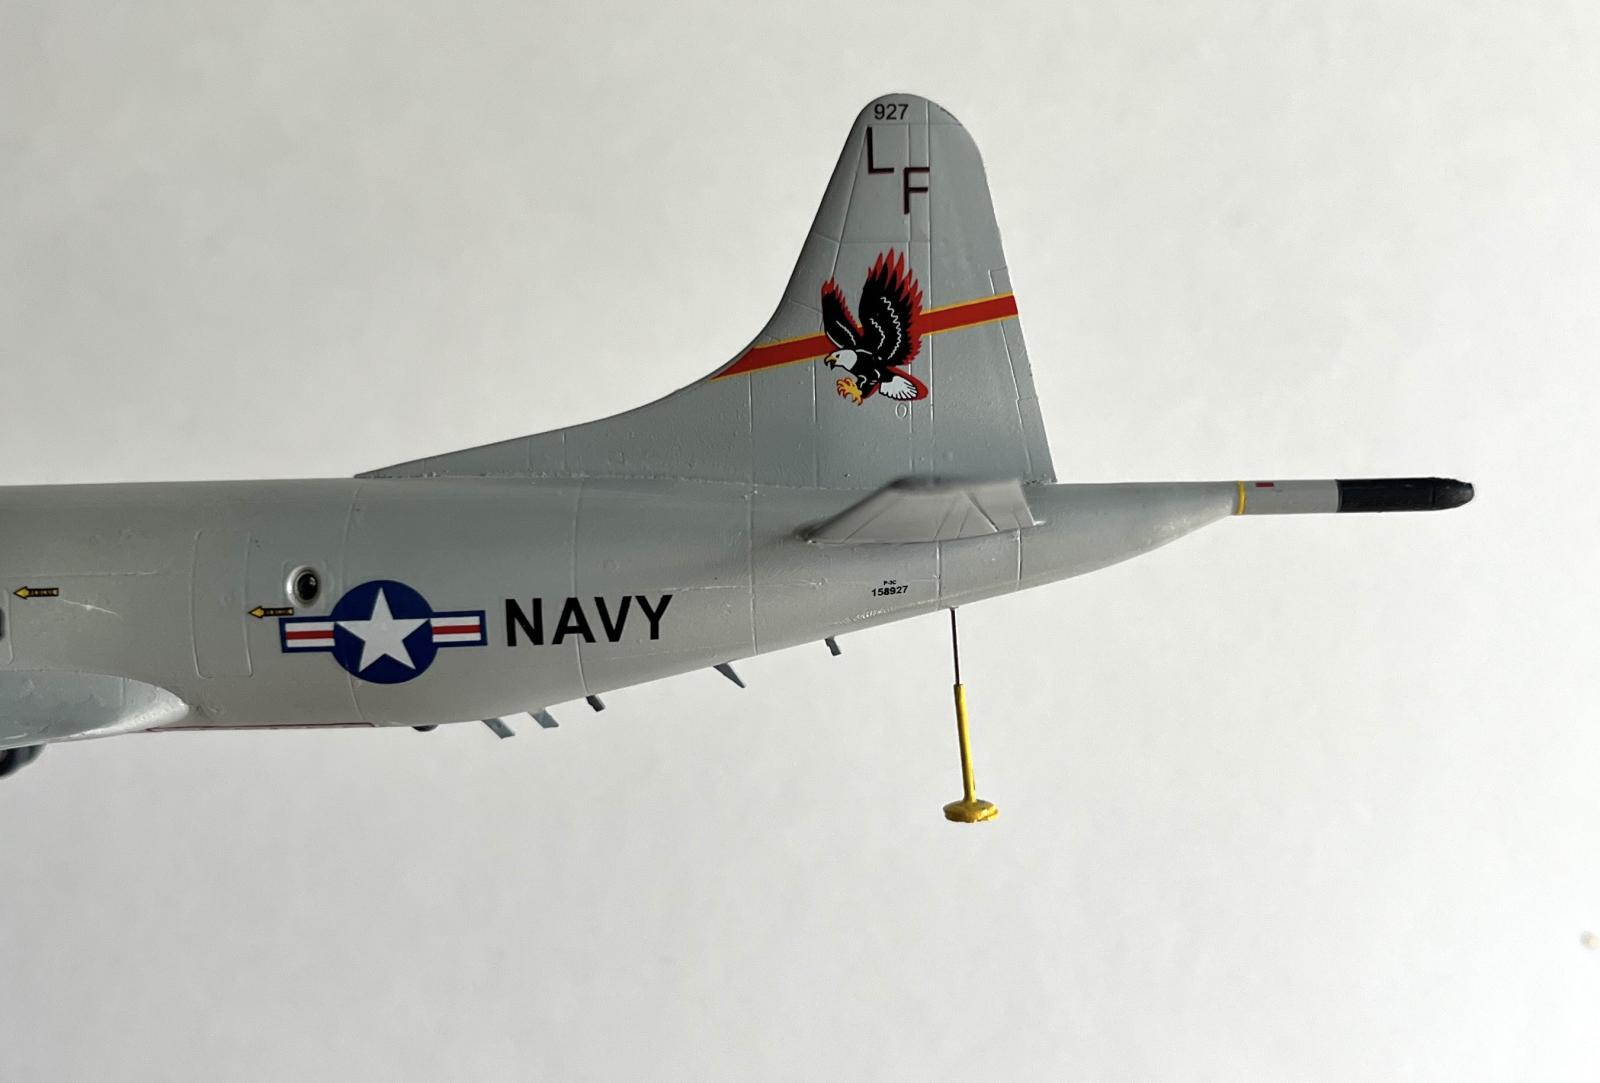
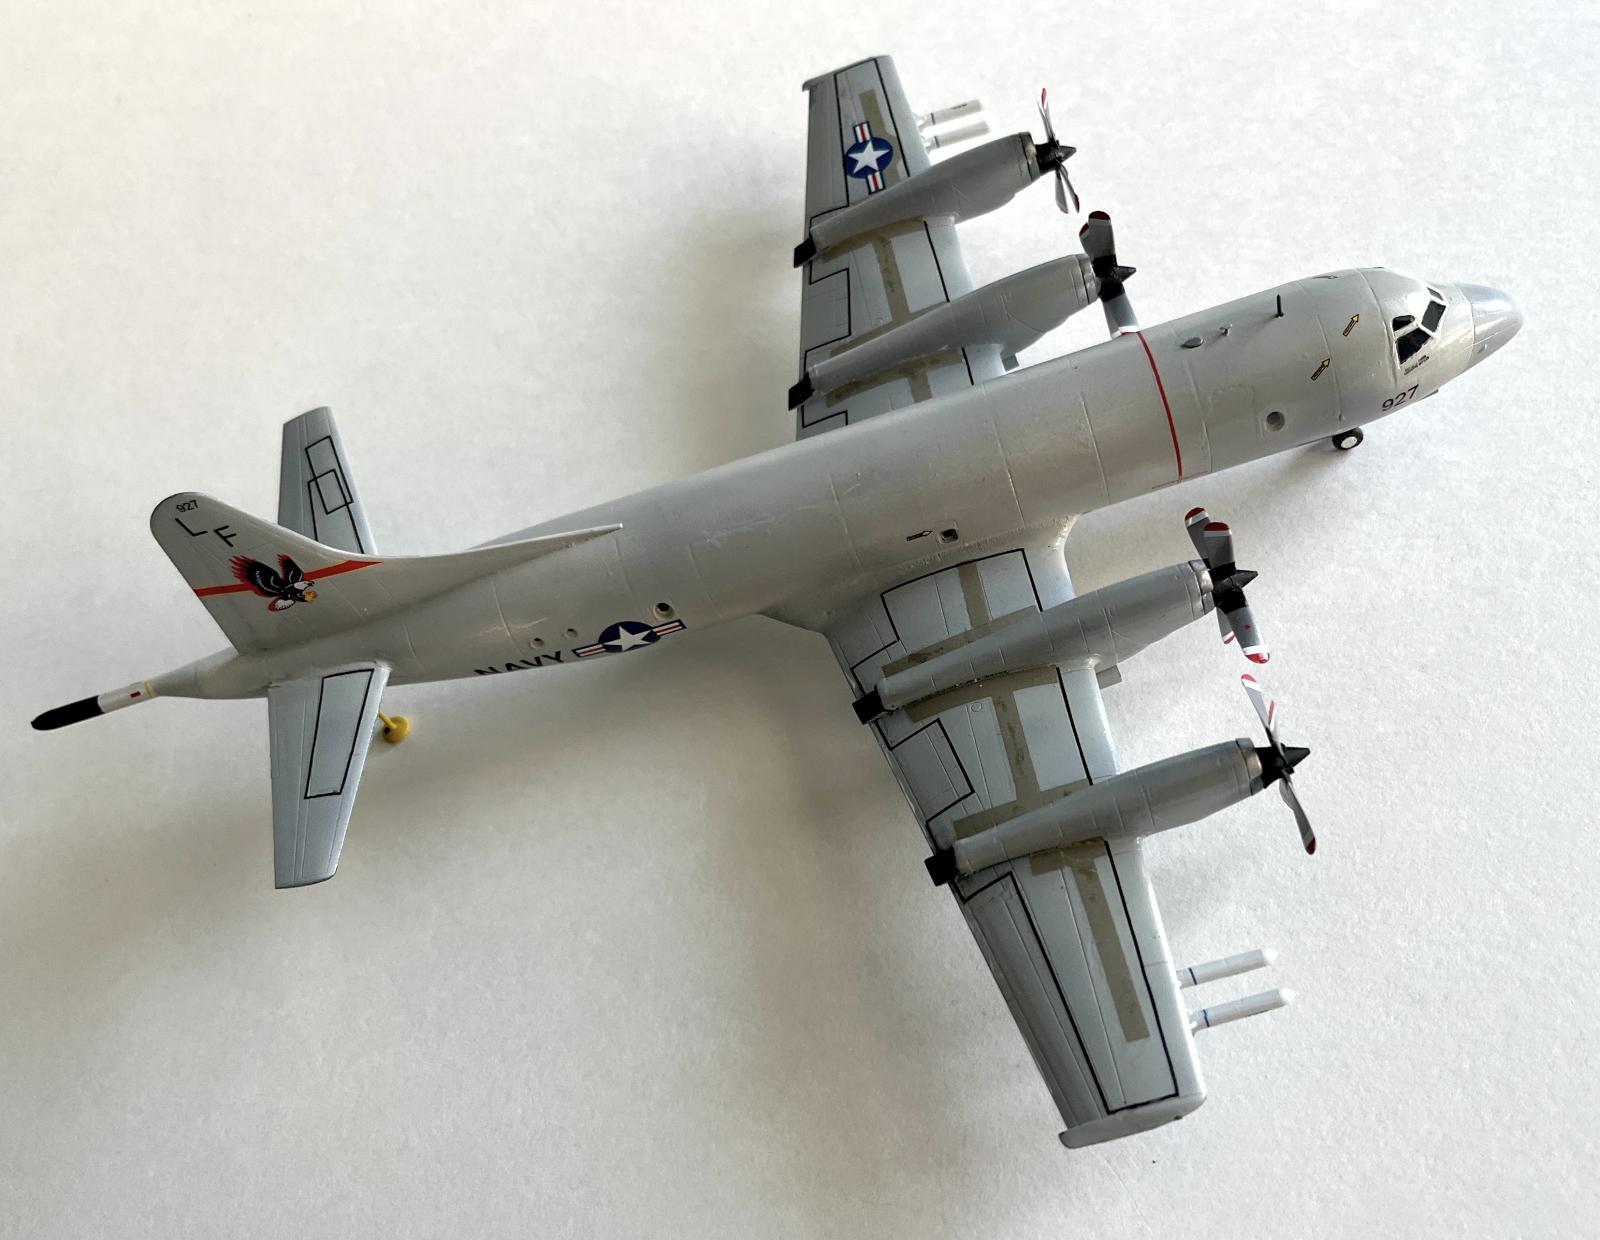
It looks like a P-3 now. I liked the retro scheme of white over engine gray and a swordfish decal on the vertical stabilizer. After priming, I sprayed the entire model with Tamiya Flat White, XF-2. Shortly thereafter, life threw me a big curveball. While taking a short ride on my new bicycle, I was hit broadside by a car. My left hand was on the curved handlebar and was hit directly by the car’s grill. As you might expect, this had a direct impact on my build. I could not do the masking necessary for the retro scheme, so I changed to a single color (Light Ghost Grey) USN scheme. The review was already a month late by this time.
I now concentrated on the props which have six parts apiece. The spinner and the hub provide the base for each blade which have a pin at the end. The pin is wider than the hole in the hub so they must be drilled to the proper size. These attach to the nacelle’s air intake faceplate via another pin. True to form, the pin is too wide for the hole in the back of the prop hub. Get those drills out. The face of the nacelle will need sanding to achieve a smooth fit with the faceplate of each prop assembly.
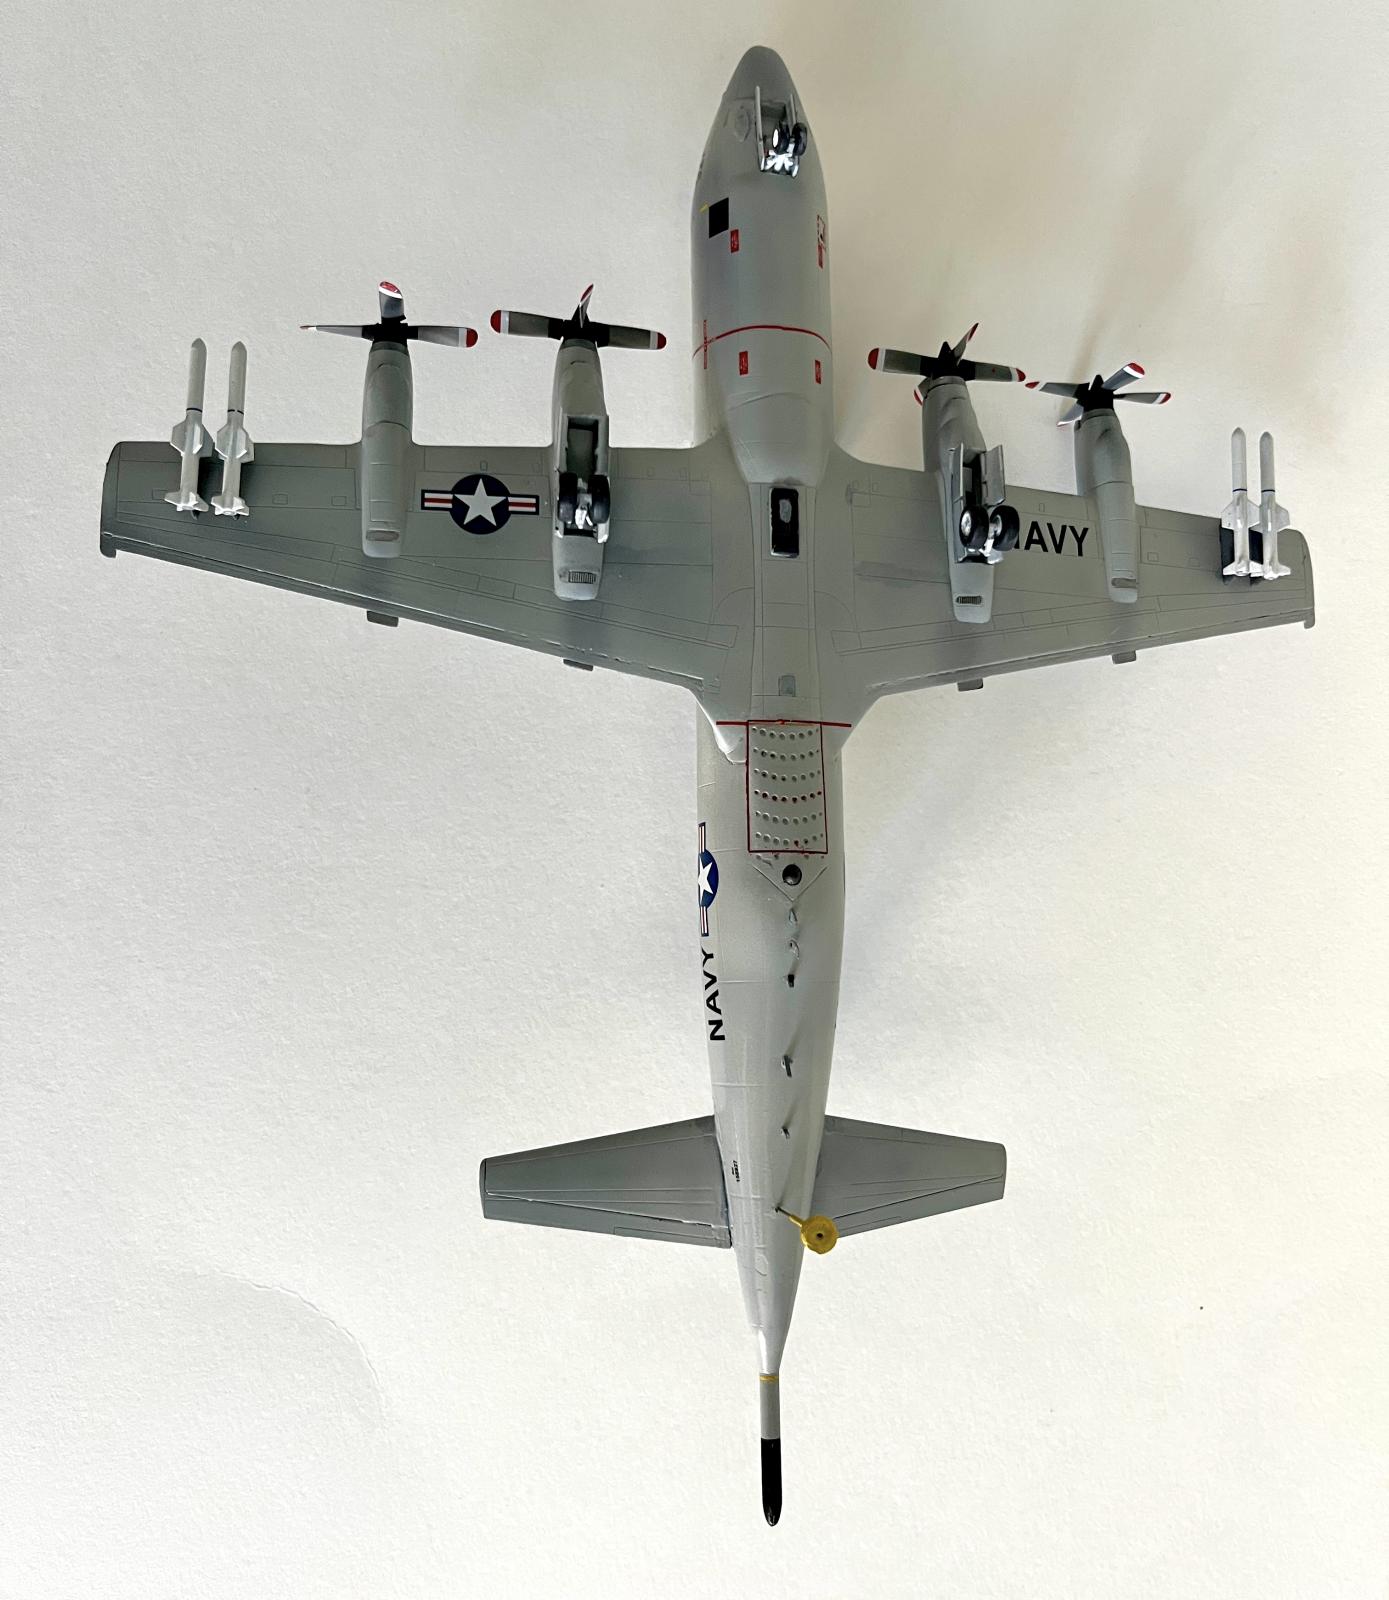
Moving along, I skipped a few steps to finish painting and to apply decals. I did this to avoid knocking off the “fiddly bits” and props. The decals are impressively thin, on register, and have vibrant colors. Larger insignia and tail markings went on perfectly, but I ran into another snag with the wing walkway decals. They are large clear areas outlined with thin black lines. To save space, X-Scale puts some smaller decals within the clear areas. These must be cut out to use the walkways. These walkway decals tended to curl under and twist when I positioned them on the wings. A couple became unusable, so I used black lines from my decal stash. I then noticed the gray walkways inside these lines needed to be painted on. My previous LS and Hasegawa P-3 builds had decals for these walkways and I assumed X-Scale would do the same. My bad. Since some black decal lines were already in place, I modified a set of LS decals to fit. I did make a mistake with the horizontal walkway decals - they should be reversed. The walkway with two boxes belongs on the left stabilizer. I kept weathering to a minimum since these aircraft are washed after each mission to prevent salt-water corrosion. However, I did some fading with different shades of grey to break up the single color.
Now I went back to the gear. They look fragile but are strong enough once in place. One more snag though. The strut attachment points are square while the holes in the wheel wells are round and small. Make these holes larger so the gear can sit firmly in place. Remember the 7 grams of weight I added to the nose cone? Well, it was not enough to prevent a “tail-sitter.” There wasn’t room in the forward fuselage so I had to resort to a tail-stand. Over my flying career, I’ve noticed several different aircraft with tail stands particularly when they were undergoing maintenance. (FYI: I later weighed the model and ten grams is a minimum for keeping the nose gear on the ground) The gear doors, numerous antenna, and missiles fit fine but require care when handling the model to avoid knocking them off.
I completed the P-3 almost three months after I started mostly because of my accident. The “snags” can be rectified with standard modeling skills and a little extra effort. I do, however, wish X-Scale provided decals for the walkways between the engines. They would be a lot easier to put in place rather than trying to mask them.
Overall, the kit builds into a nice looking replica of the P-3C and a welcomed modern addition to your collection of 1/144 models. However, I would only recommend this kit for the more experienced modeler because of the small parts and “snags.”
I suggest more US Navy patrol aircraft X-Scale Models could consider for release in 1/144 scale: the P2V-7 Neptune, the R3Y-2 Tradewind, the P4M-1 Mercator, and the PB4Y-2 Privateer. None have been well represented in 1/144 scale.
My thanks to X-Scale Models for providing this kit for review and to IPMS for the opportunity to build and review it. I also appreciate their patience. One final thought on my accident for your consideration: two ER doctors told me that had I not been wearing a helmet, I probably wouldn’t have been around to do this review. If your ride a bike, one-wheel, motorcycle, etc., I encourage you to wear an approved helmet, and the best one you can afford. It may save your life one day.

Comments
Great build!
Phil,
Great build and glad you were wearing a helmet so I can look forward to more of your reviews.
Sincerely,
Andy
Add new comment
This site is protected by reCAPTCHA and the Google Privacy Policy and Terms of Service apply.
Similar Reviews