
North American Rockwell OV-10 Bronco NOGS
Background and Historical Notes
From The Kit Manufacturer’s Notes:
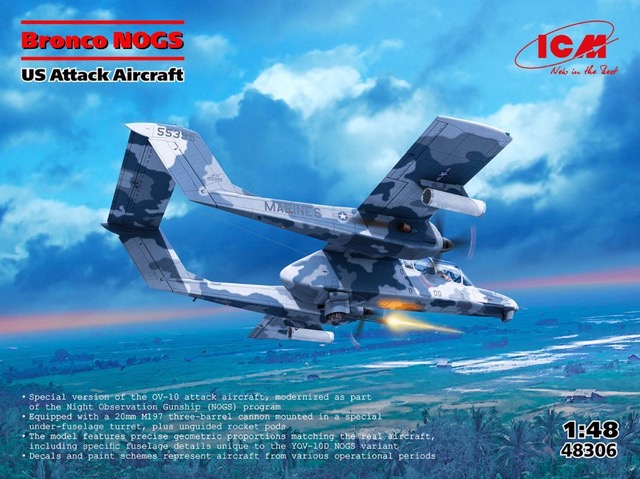
Bronco NOGS US Attack Aircraft
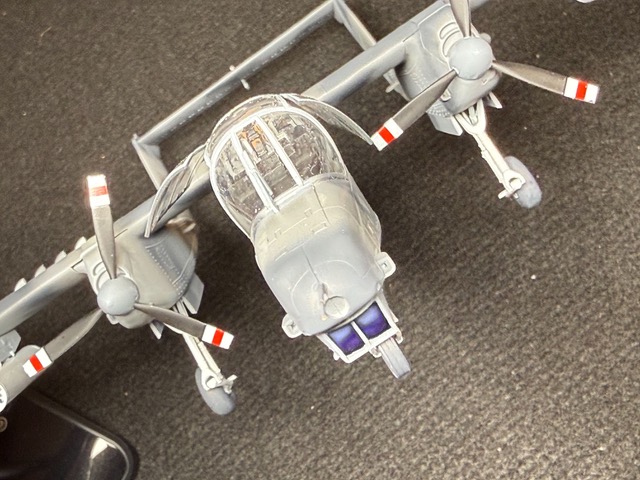
In 1970, two OV-10A Bronco aircraft were modified to evaluate their nighttime combat capabilities. The modification was designated NOGS—Night Observation Gunship System. The aircraft received an extended nose section with a turret housing a forward-looking infrared system and laser rangefinder (FLIR) in its lower half. Under the mid-fuselage, engineers mounted a turret with a 20mm General Electric M197 three-barrel cannon, which was aimed using FLIR.
In late 1970, both aircraft were sent to China Lake Air Base for testing, and by April 1971, they were deployed to Vietnam for combat trials. Operating as part of the light attack squadron VAL-4 “Black Ponies,” the aircraft conducted evening and night missions. The YOV-10D aircraft flew in various configurations: either in pairs, paired with an OV-10A, or with an escort of two OV-10A aircraft.
During their Vietnam deployment, they completed 207 missions and demonstrated exceptional operational effectiveness, earning positive combat performance evaluations. At the end of August 1971, both YOV-10D aircraft returned to the United States to undergo further testing with slightly modified equipment configurations.
Product Description
This review is of the ICM OV-10 NOGS, released on 06-17-25 by ICM. It follows six prior kit releases from ICM of the basic North American OV-10 models. It is molded in a grey ejection plastic, a twenty-page instruction manual, with nine sprue sections and 94 separate assembly details outlined, along with template for masking(1), a decal sheet for both of the two NOGS aircraft and four color depictions of these showing them in both low and high visibility schemes.(2) I chose to use the Eduard TFace OV-10 masking sheet.
Initial Impressions the ICM NOGS Kit
I am initially quite impressed with this kit. The surface detail, which contains a lot of surface rivets, appears to be accurate and true to scale for this a/c. These include several slightly raised sections on the tail booms, very nice seat cushions and backs, cockpit dashes, no noticeable flash anywhere and a great many surface details about the nose structure which have been absent in other a/c of this type in both 1/72nd and 1/32nd scales. This is my second ICM kit in this series I have built and I am still impressed with this offering.
Construction Notes for the ICM NOGS Kit
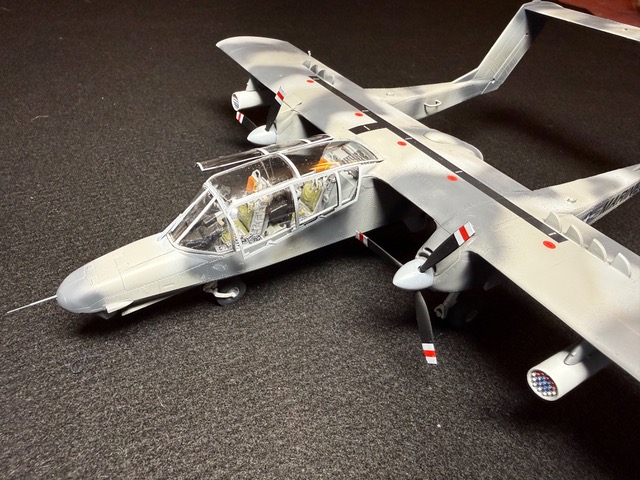
I was impressed with several aspects of this kit, including the overall fit and finish of almost all the kit parts, especially the beautiful clear canopy and surface details.
I used several after-market items, each of which lent some improvements to this build, though the kit items themselves are more than adequate should you go with the kit’s items.
- I used the Eduard Space set (which provides both a PE set and 3D dash items) (#3DL 48058); though this set is intended for the OV-10A, I used it for the OV-10D interior as the dash display is small, and I suspect most won’t notice the very small differences.
- The ResKit Ejection Seats (# RSU48-0366) is designed for the ICM kit and provides a level of details for the two ejection 3D printed seats that I believe is exceptional. Once again, much of this detail is lost when the kit is displayed, but I’ll know it’s there and that’s all that counts…right…?
Fit and Finish
This kit’s overall fit is excellent. There were a few exceptions or ‘flies in the ointment’ as noted below:
- In attempting step #32, I worked for almost an hour trying to interpret the assembly drawing, which seems straightforward. However, for whatever reason, it doesn’t allow for the nose gear doors to go together as the drawing leads you to believe. While not covered in step #30, I believe the only way it will work is to place the nose gear doors into the nose gear opening while the nose sections (#A29 & A24) prior to gluing A28 into its final position.
- Suggestion: I recommend cutting the nose probe off, before it can be broken off during kit assembly (which is what happened in my case….I knew it was bound to happen).
- Some small flash around the canopy sections, easily removed with light sanding. I did run into a big gap around the aft main upper canopy which should have been resolved (though I didn’t) with some plastic putty.
- Another pesky item is that this kit only contains a rather detailed ‘mask template’ from which the builder must cut your own mask (page #16). Even though a detailed pictorial guide shows where each piece of the mask is to be placed, this will be a problem hurdle for the modeler, in my opinion. What a pain. I opted for the Eduard TFace set #EX847, which is set for the OV-10D+ though all the OV-10 canopies are the same patterns and this set for the ICM kits—hurdle cleared.
- I also suggest replacing the main and nose landing gear, which are very fragile, flimsy or spindly at best. While the landing gear is detailed and great looking, I suggest using the Scale Aircraft Conversions metal sets (#48409) to provide a much stronger approach. My approach was to use CA to strengthen all three of the landing gear struts.
- I also recommend adding nose weight before the fuselage halves are glued into position. What I use is the Deluxe Liquid Gravity (# BD38). These are non-toxic, very small pieces of shot, which slide into the smallest areas of your model and can then be fixed into place with epoxy or CA glues. I’ve been using the same 240gm for over a year now and love it.
As an aside, there are also a great many after-market detail items available, including the total front cockpit sections, a cargo bay interior, landing gear and 3D printed exhaust stacks, to name only a few. For the super detailers out there, the skies are the limit.
Painting Outline
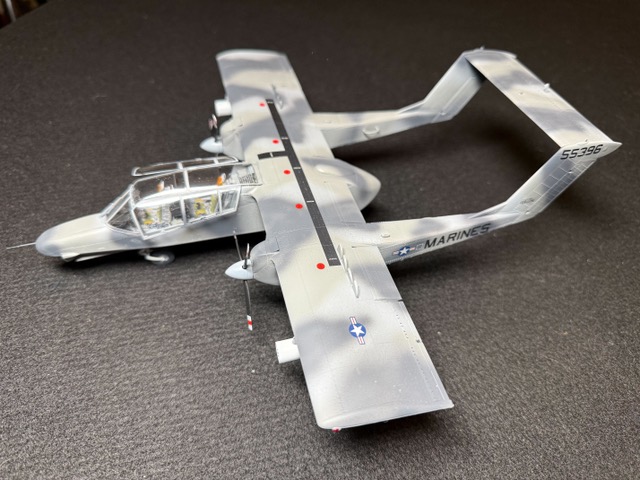
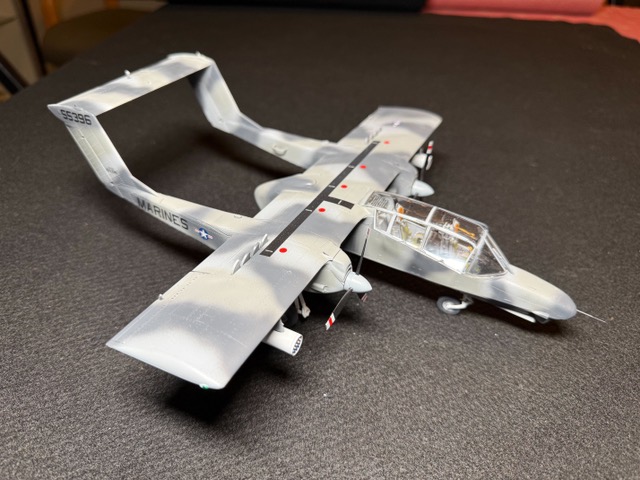
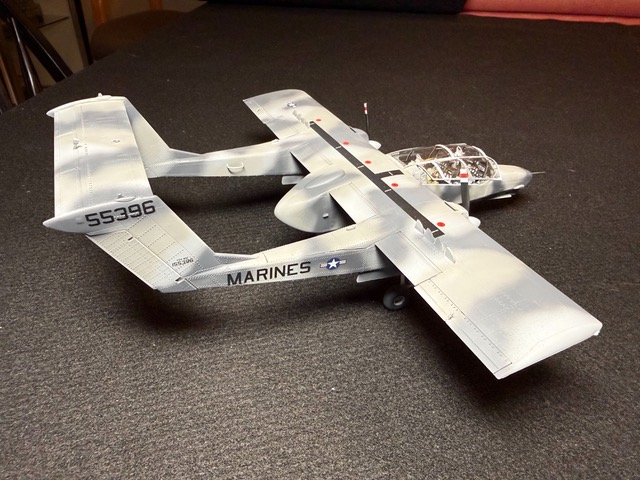
I used my ‘artistic license’ in the overall paint scheme and painted my OV-10 with BuNo #155396 as my objective. As you can see from my several photos, I was heavy in the ‘artistic license’ end. But I was reasonably pleased with the overall finished kit and paint scheme, though I did not follow the colored paint scheme as shown in the instructions.
Primer and Paints Used
- Mr. Surfacer 1200
- B-515 Surface preparation
- Real Colors
- RC 933 Grau (1941) RLM 02
- RC 061 Dunkelgelb Ausgabe 44 RAL 2028
- RC 019 Deck Tan
- RC 006 Red
- RC 007 Yellow
- RC 278 Dark Grey RLM 74
- RC 001 Flat Black
- RC 252 Light Ghost Grey FS 36375
- ATOM Acrylic Colors
- 20073 Yellow Green
- 20004 Wood
- 20045 Rust
- Vallejo Acrylic Metal Colors
- 77.701 Aluminum
- Lifecolor
- LC 02 Matt Black FS 37038
- Mission Models
- MMP-105 Worn Black Grey Tires rubber tires
- AK Acrylic Colors
- AK 11213 Clear Red position lights
- AK 11218 Clear Orange position lights
- AK 11214 Clear Blue FLIR nose glass plates
- A Mig Acrylic Crystal
- A Mig 092 Green position lights
- VMS Varnish HD top coats
- Matt
Followed by an overcoat sprayed coat of Alclad II Lacquer’s Aqua Gloss Clear (#ALC 600) wherever decals are to be positioned. This is my personal favorite which produces a great clear finish (though in the bottle it appears cloudy, not to worry).
I used a small amount of Microscales Micro Set #MI-1 and Walters Solvaset #904-470, which allows the decals to snuggle down and fit tighter when dry. And I sprayed my overall final finish using Testors Dullcoat Lacquer (#1160).
Recommendation
I highly recommend the ICM OV-10 NOGS kit, though it will pose a challenge to less experienced models. It looks and sits like the real aircraft. There are four different painting finishes from which you can build the NOGS kit (remembering there were only two such aircraft built).
I want to thank the IPMS/USA and ICM for the opportunity to review this beautiful kit.
Comments
Add new comment
This site is protected by reCAPTCHA and the Google Privacy Policy and Terms of Service apply.
Similar Reviews