
Messerschmitt Bf109G-6 Late Production
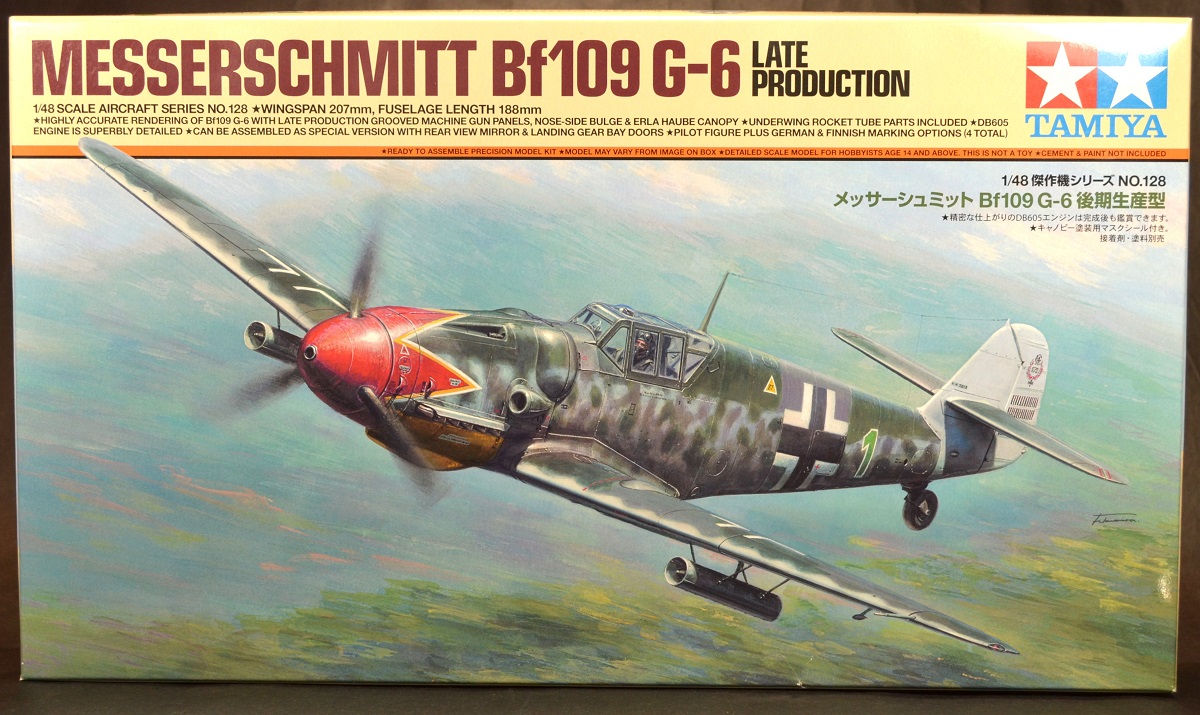
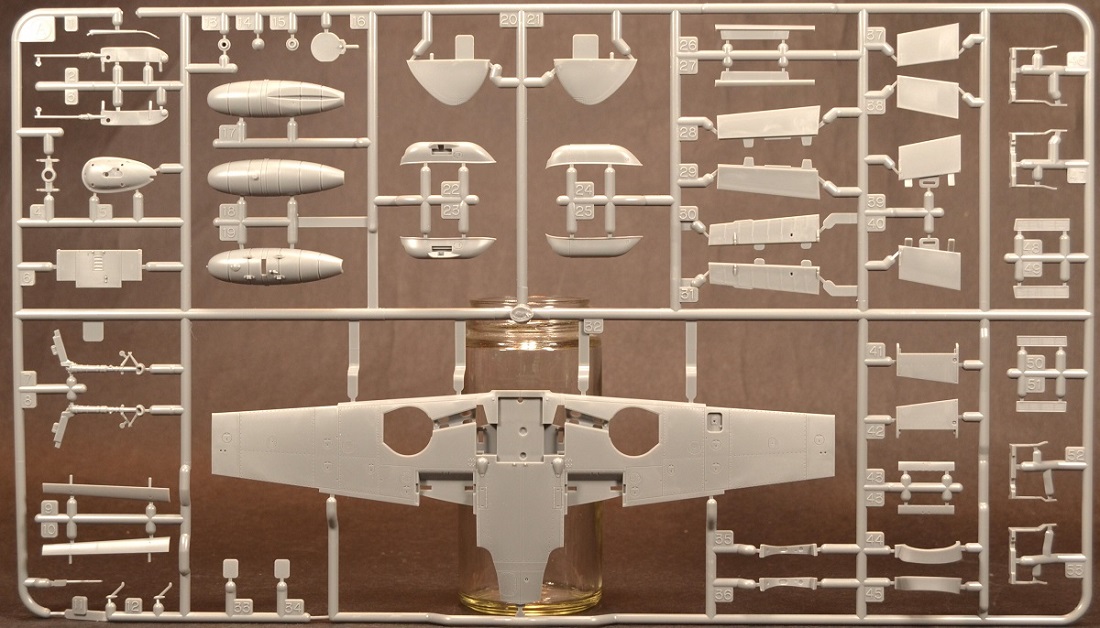
The kit is enclosed in a top‑opening box (typical of Tamiya), with excellent artwork adorning the package. In addition to the regular plastic sprues, there are poly caps, metal washers, two magnets to allow the engine cowling to be displayed open or closed, and a printed masking sheet for the clear parts (note: the builder must cut these out).
The instructions are well illustrated, easy to follow, and contain 40 steps for assembly. There are also two sheets of painting guides (printed in 1/48 scale) covering five marking options.
For painting reference, Tamiya lists their own paint line, but it is easy to cross‑reference other paint brands online.
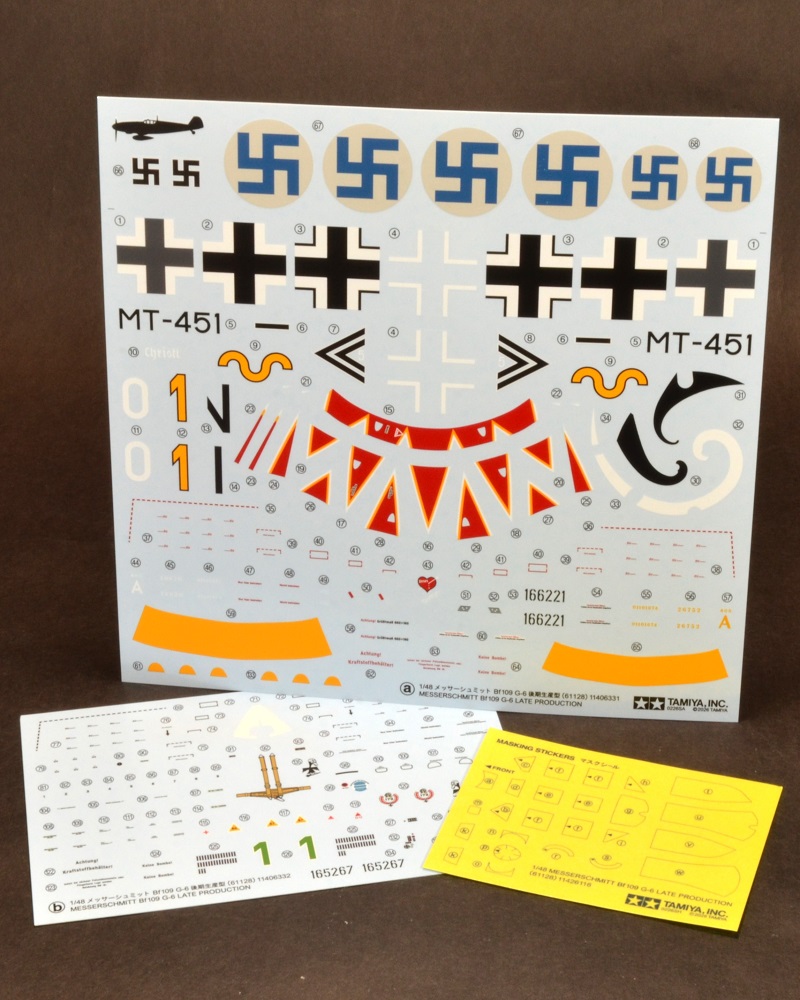
The decals are in perfect registry with vibrant colors. Some builders may consider the clear film to be thick, but this is typical of Tamiya kit decals.
Five sets of markings are provided for the following aircraft:
- Jagdgeschwaderkommodore, JG 50 (Commander’s aircraft), Wiesbaden‑Erbenheim, September 1943
- Gruppenkommandeur, II./JG 52, south of Kharkov, September 1943
- Staffelkapitän, 9./JG 52, Romania, August 1944
- 1/HLeLv 34, Finnish Air Force, Taipalsaari, July 1944 (special tail marking)
- 1/HLeLv 34, Finnish Air Force, Taipalsaari, June 1944
Review Process
This is a box‑stock build. The only deviation I made for this review was taking liberties with the assembly sequence to help the process move faster.
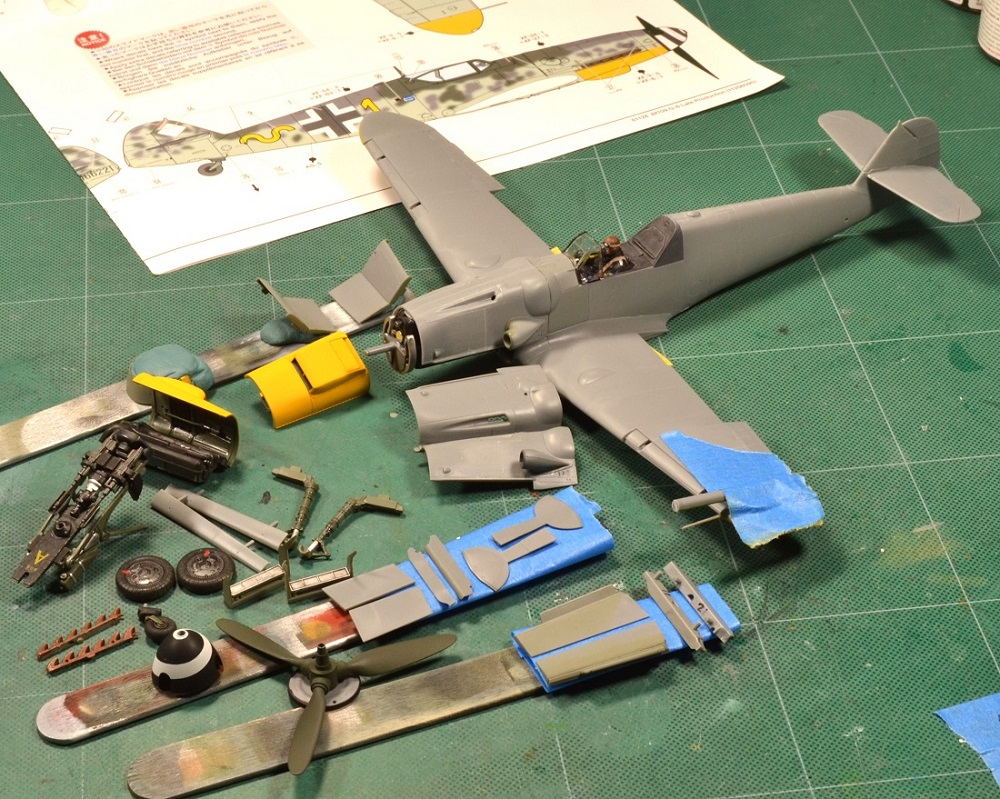
The first step in the build process is to read the instructions and determine which marking option to choose. This decision will affect which detail areas need to be filled or sanded smooth, as well as which specific parts need to be used (or omitted) based on the option selected.
If you decide to go with the “A” marking option (Red Tulip nose), there are additional assembly steps for the under wing rockets, fuel tank, boxed‑in main landing gear bays, and canopy parts.
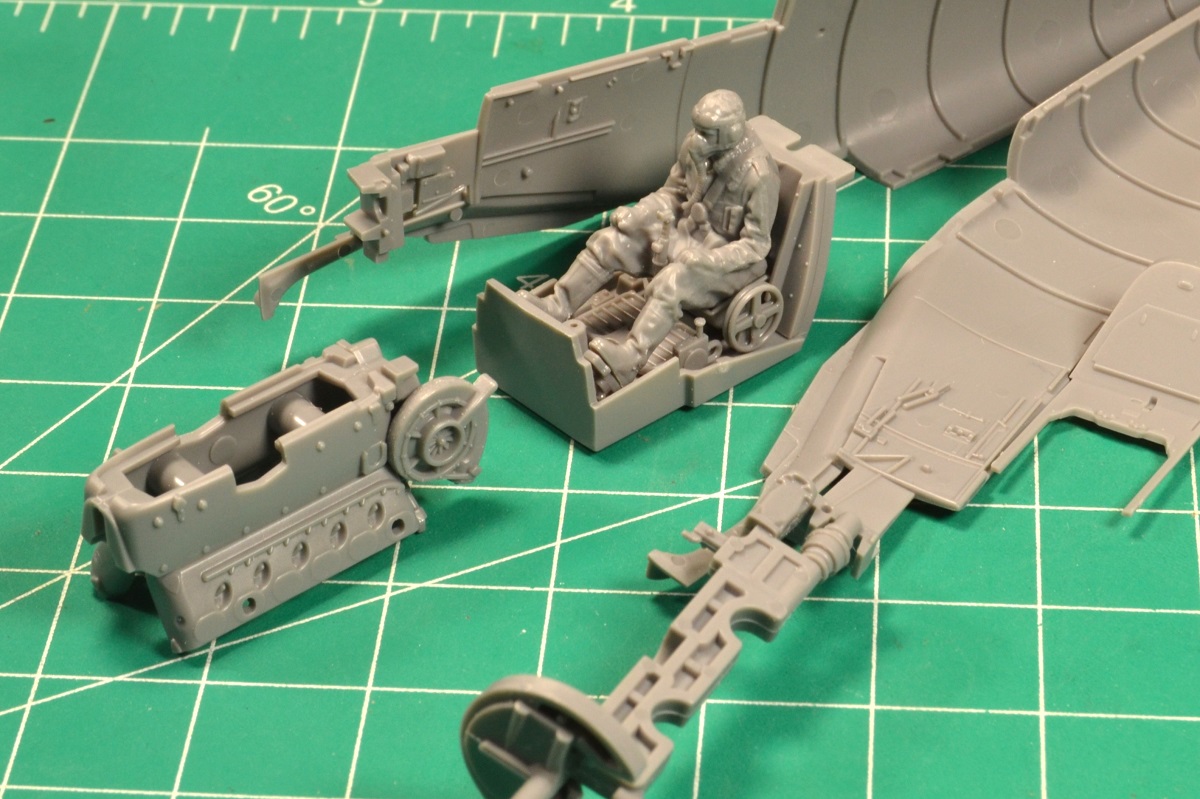
The cockpit assembly begins the build process. The parts are well detailed, and the pilot figure is excellently molded. For this review, I added the pilot and chose to close the canopy.
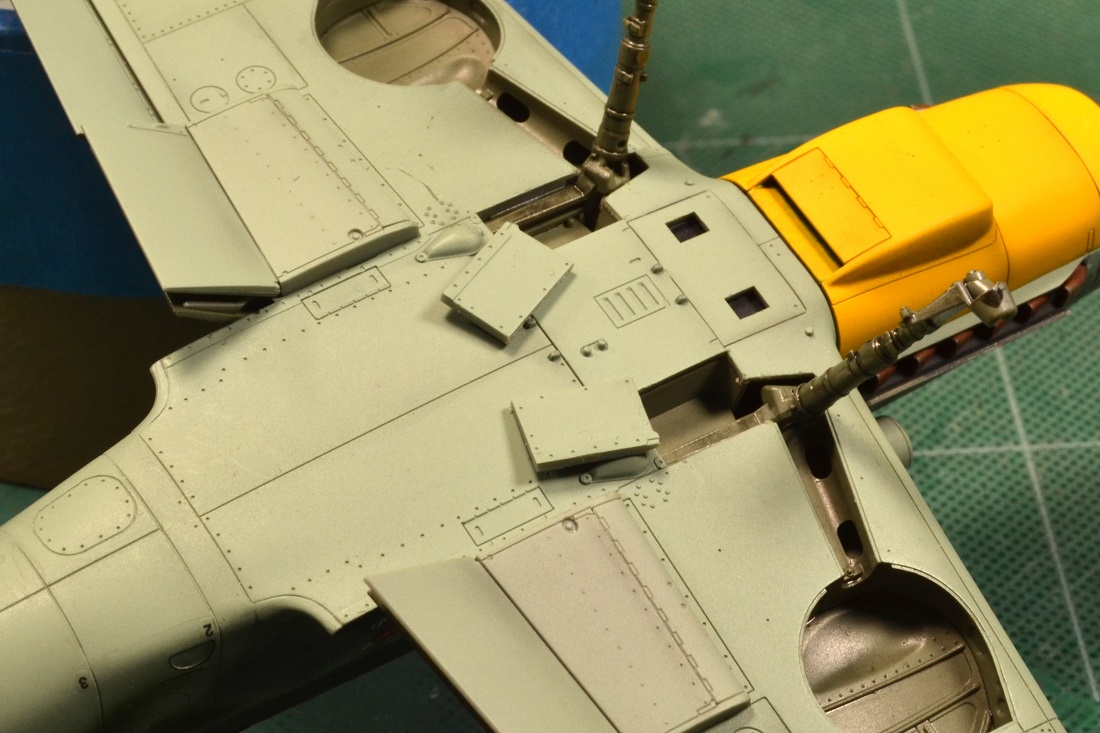
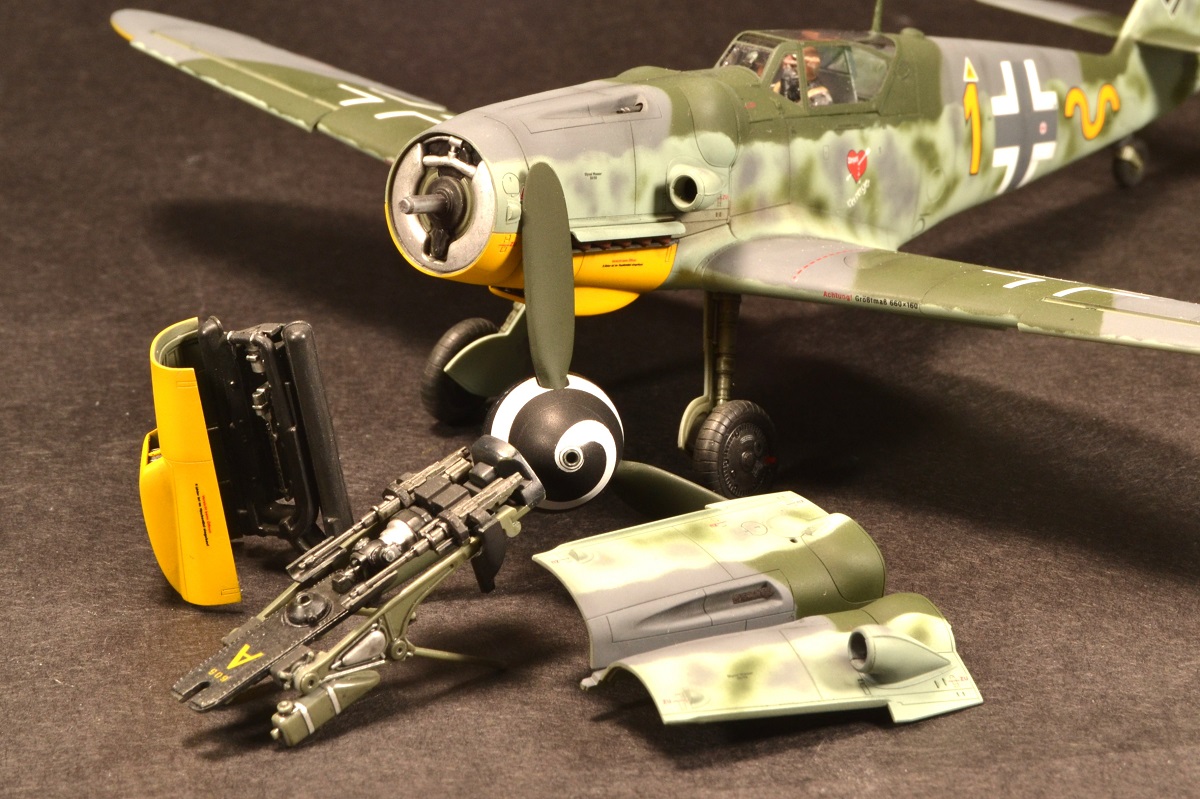
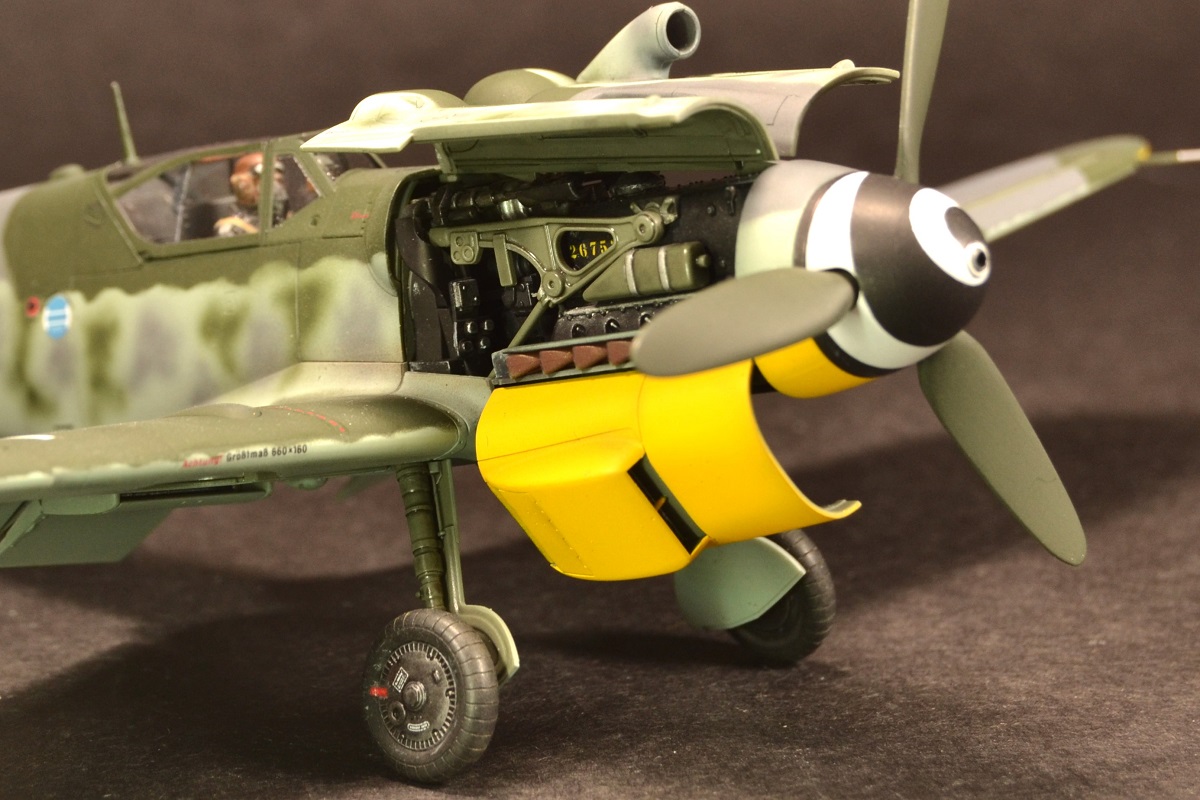
The engine assembly is spread throughout the instructions, and it is important to note that the magnets are installed in Step 9, the washers in Steps 31, 34, and 39, and the poly caps in Steps 23 and 31. This kit offers the excellent feature of allowing the engine cowling panels to be displayed either open or closed without committing to one option.
Wing assembly begins in Step 11. Another decision must be made regarding whether to install the flaps in the up or down position, and whether the leading‑edge slats are flush or deployed.
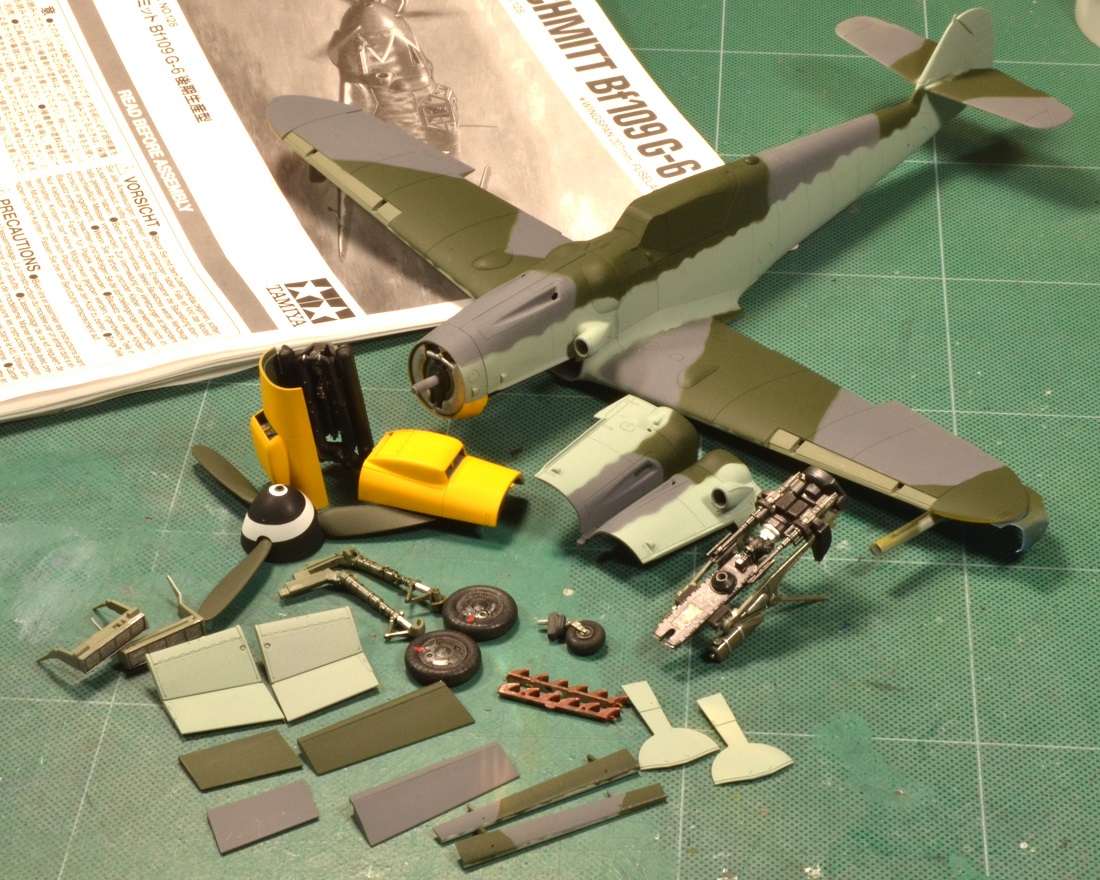
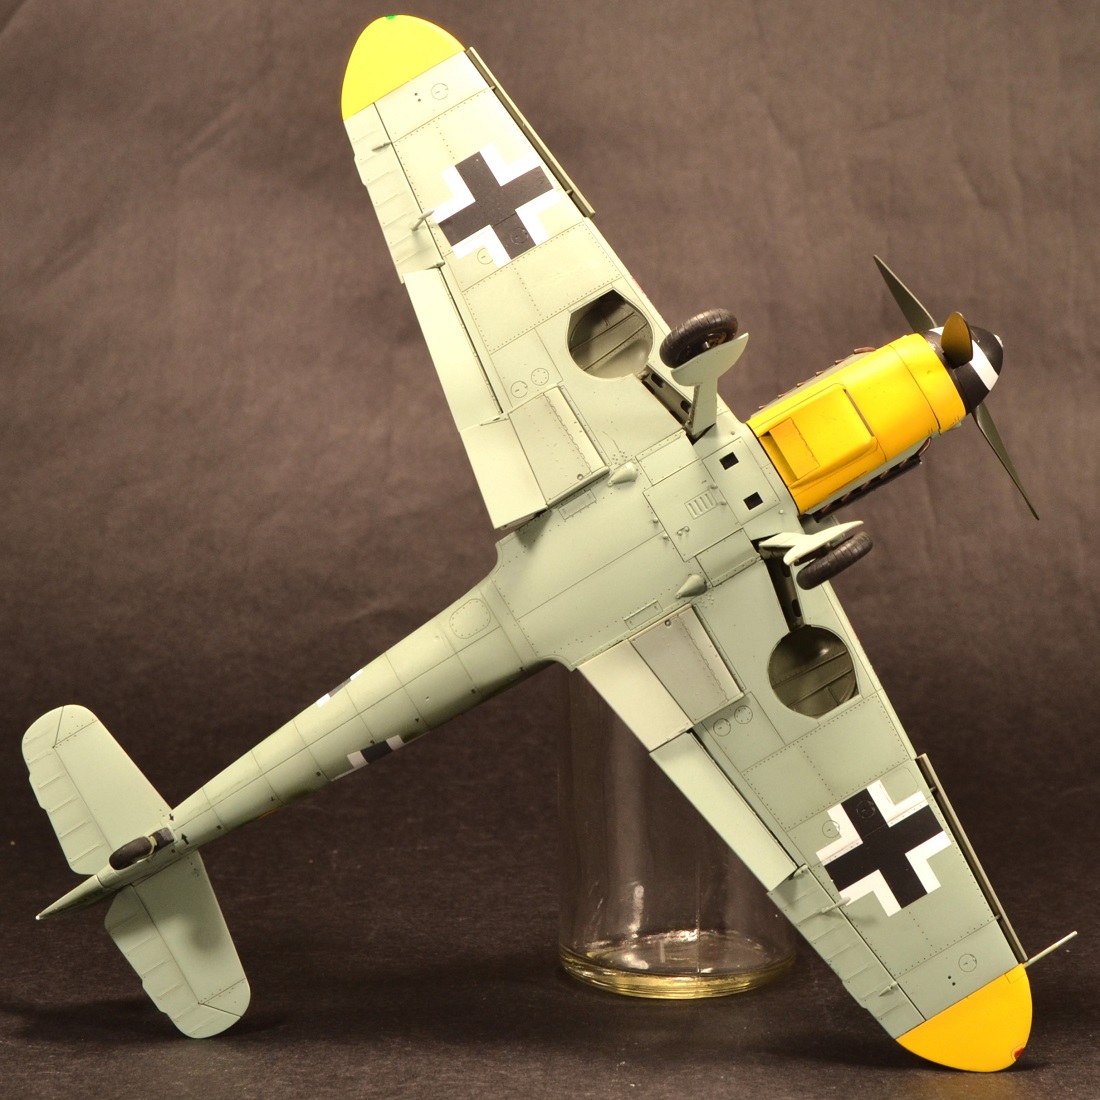
Once all major assembly is completed, exterior painting begins. I first painted the entire model in Luftwaffe light blue by mixing XF‑23 Light Blue and XF‑78 Wooden Deck Tan in a 5:1 ratio. Next, I applied Grauviolett by mixing XF‑24 Dark Grey and XF‑54 Dark Sea Grey, also in a 5:1 ratio. Finally, I painted the green using XF‑58 Olive Green. While these colors may not be perfect RLM matches, they are close enough for this build.
For those who prefer to paint the aircraft with the landing gear left off until the very end, there is a helpful option in Step 23. Part A6 is the center lower wing part, which has panel lines dividing it into three sections. Part A6 covers the main landing gear strut attachment points, but keeping them open until final assembly is easily done. Using a sharp hobby blade, you can cut off the outer panels, install the landing gear struts later, and then attach the outer panels at the end of the build. This can make painting easier and reduce the risk of damaging the landing gear.
At the time of this Part 1 review, the build was approximately 85% complete, with decal application, weathering, and final assembly remaining.
Part 2 Summary
This is Part 2 of Tamiya’s Bf109G‑6 Late Production review.
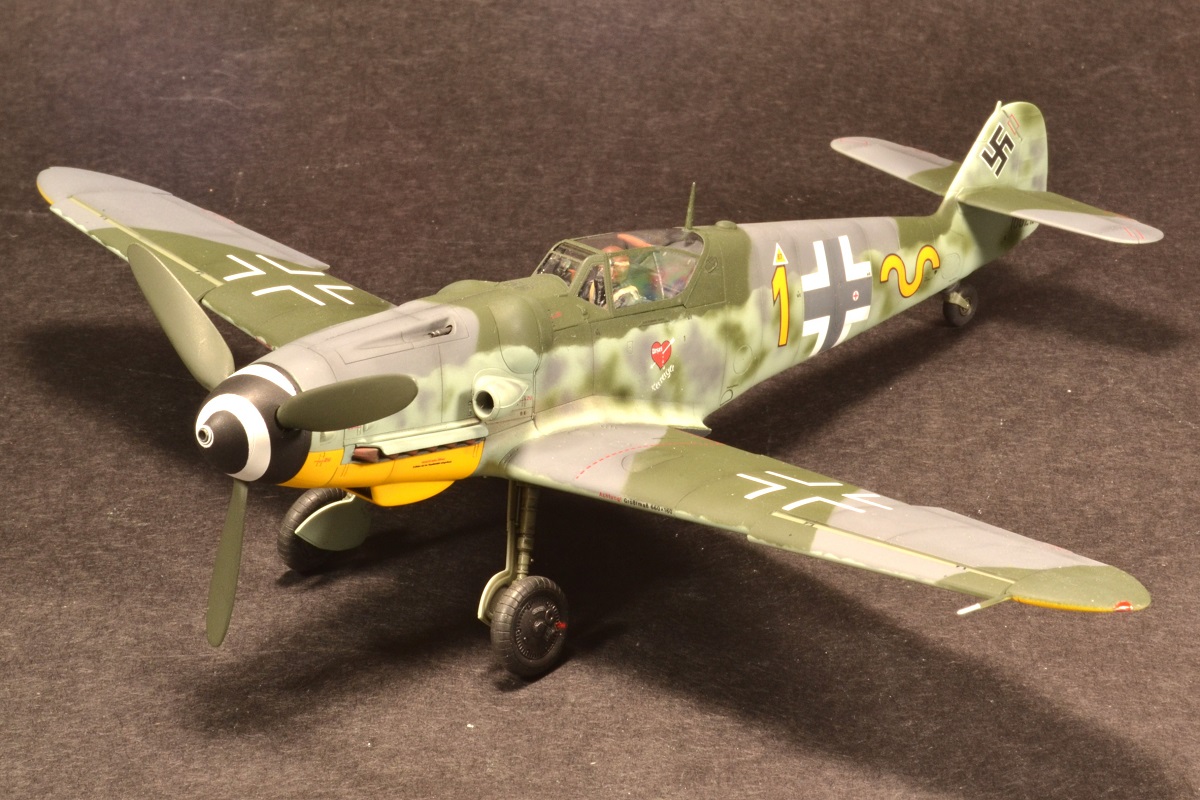
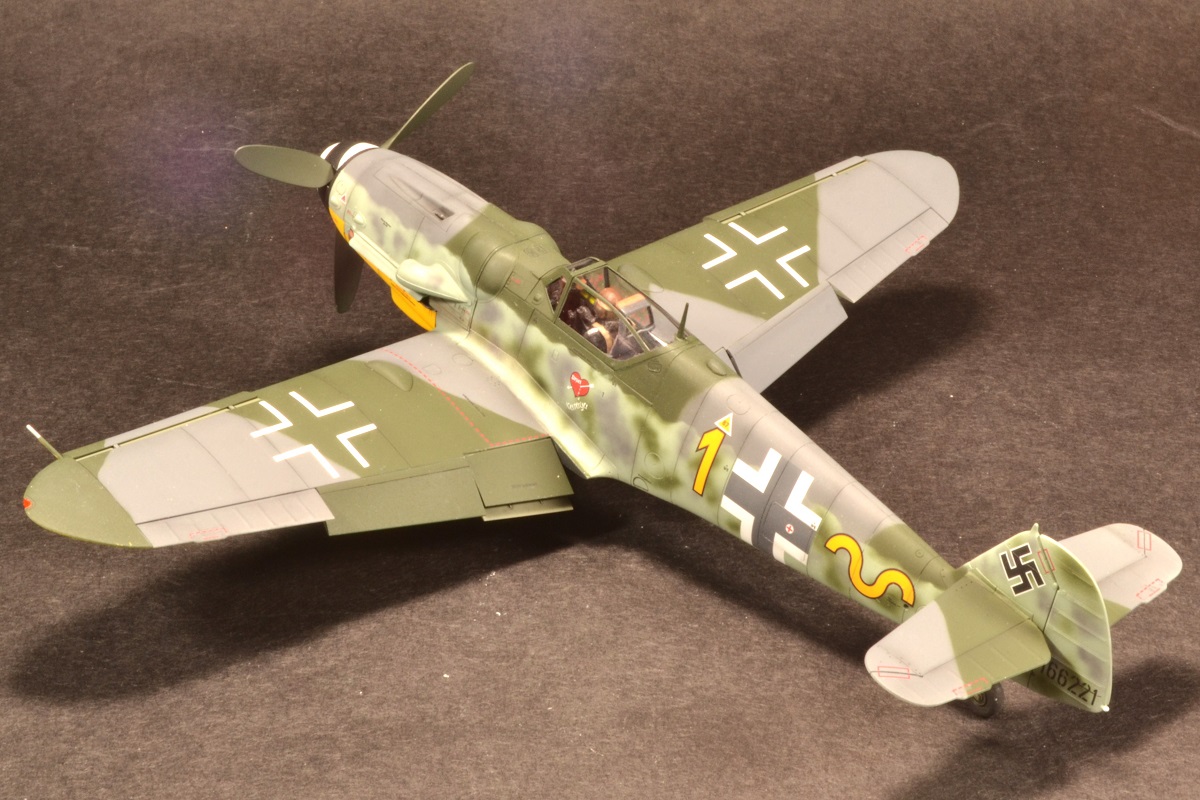
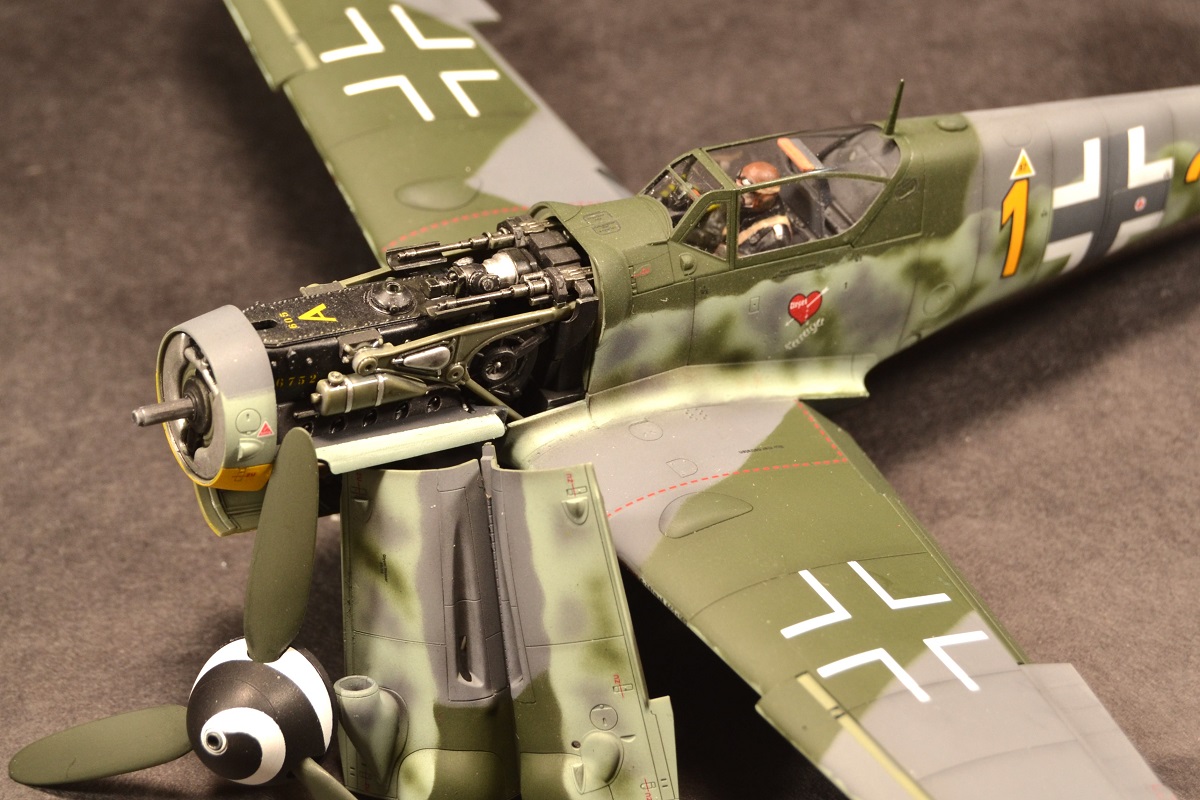
For this review, I chose the “C” marking option: Staffelkapitän, 9./JG 52, Romania, August 1944, with Yellow 1.
Painting references and mixture ratios are noted in Part 1 of this review. Using this information, I applied the mottling scheme and allowed it to dry overnight.
The following day, a coat of Tamiya X‑22 Clear Gloss was airbrushed in preparation for decal application. After allowing a full day to dry, the decals were applied using Tamiya Mark Fit Strong and Solvaset.
The next day, a coat of Vallejo Clear Satin was airbrushed in preparation for light weathering. I used ground charcoal applied with a soft brush. Once satisfied with the appearance, several coats of AK Ultra Matte Varnish were sprayed to seal everything and to build up clear‑coat thickness in an attempt to match the decal film height. Any weathering lost during the final application was subtly reapplied.
One of the standout features of this kit is the ability to swap cowling panels and display the engine detail without using glue, thanks to the included magnets. The fit tolerances are excellent; parts click into place and look as though they are glued. This is impressive engineering combined with high‑quality molding—thank you, Tamiya.
Finally, I installed the propeller, landing gear and doors, aileron balances, antenna mast, and considered the build complete.
Conclusion
This Tamiya Bf109G‑6 is an outstanding kit. It is easy to build, logically engineered, and offers the option to display the engine cowling either open or closed.
This kit is highly recommended for all builders. Assembly is straightforward, fit is excellent, and the engineering is superb. The flexibility of the engine cowling option is an especially nice feature.
I would like to thank Tamiya USA for providing the Messerschmitt Bf109G‑6 Late Production kit, and IPMS/USA for the opportunity to review it.

Comments
Add new comment
This site is protected by reCAPTCHA and the Google Privacy Policy and Terms of Service apply.
Similar Reviews