
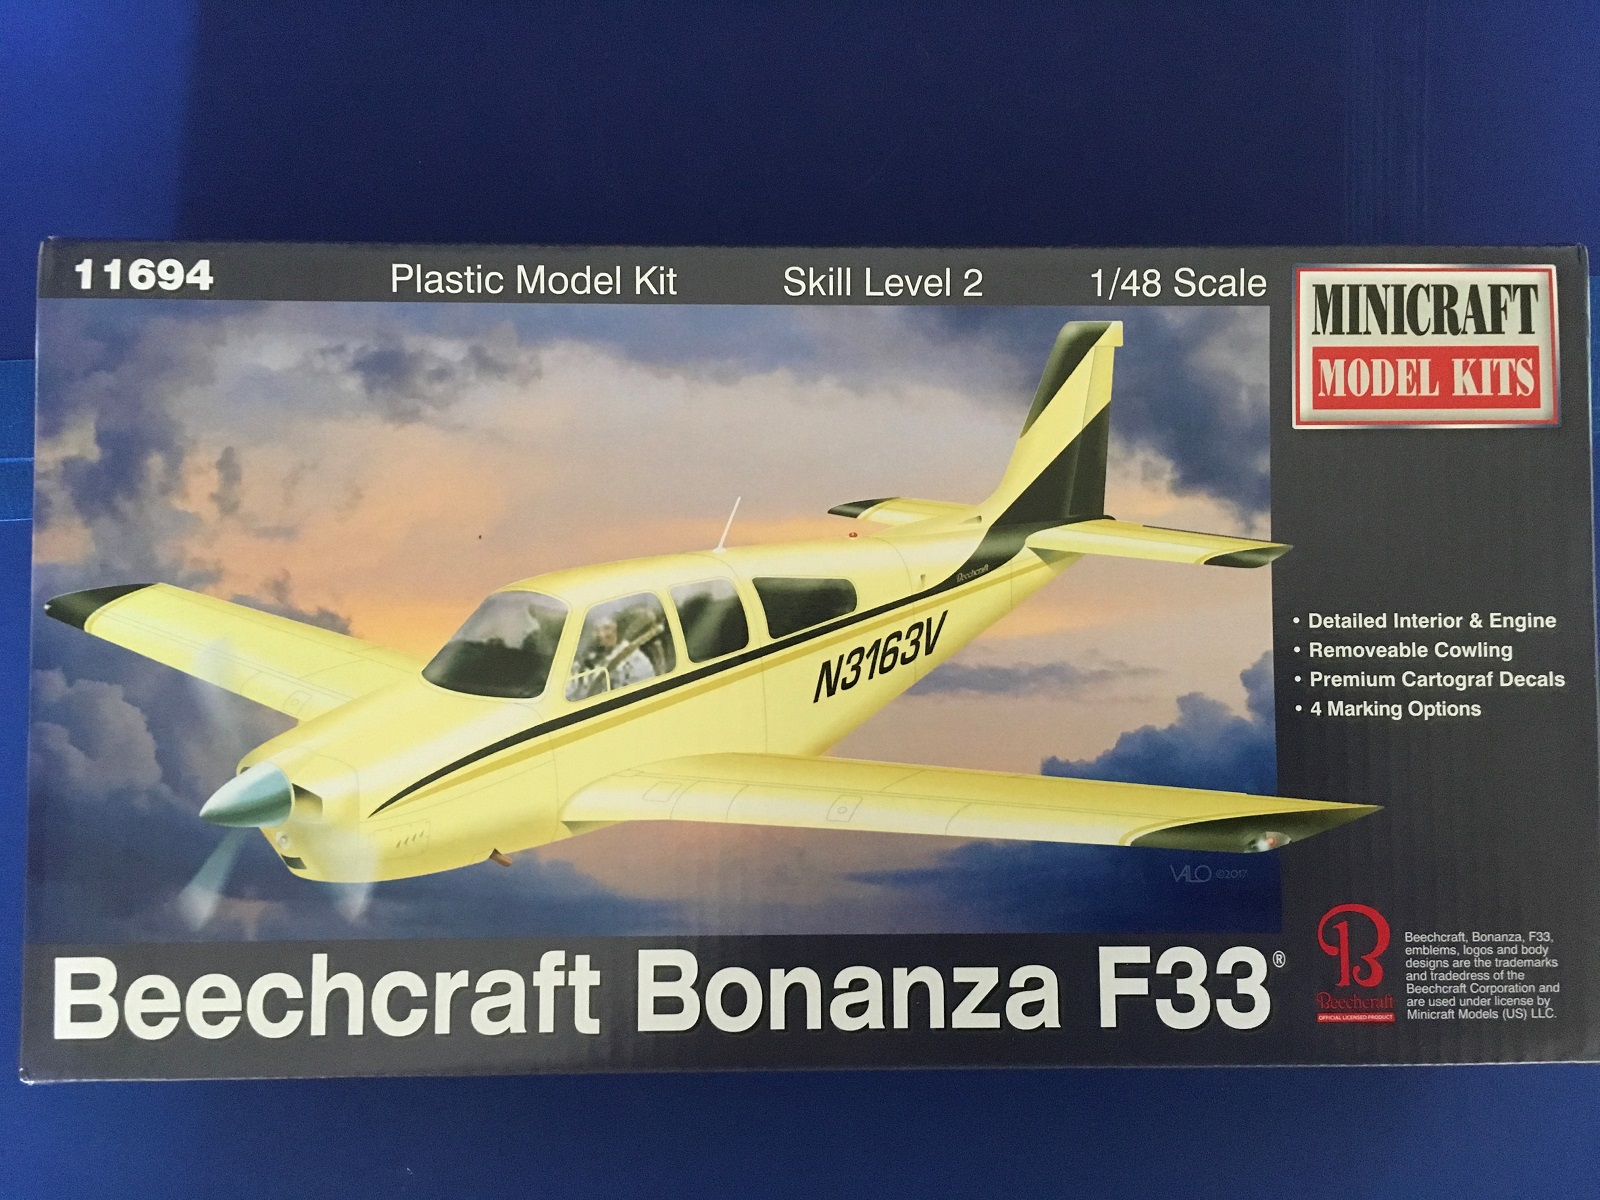
Beechcraft Bonanza F-33
The Beechcraft Bonanza was developed and first flown in 1947 in the “V” tail configuration. In the mid 50’s the design was changed to include a conventional empennage, consisting of vertical tail and horizontal tailplane. This model was called F-33.
This 1/48 scale Bonanza has been around a long time through several different model manufactures, in the “V” tail set up. I remember building it years ago. I think I donated it to my high school that had an aeronautics program.
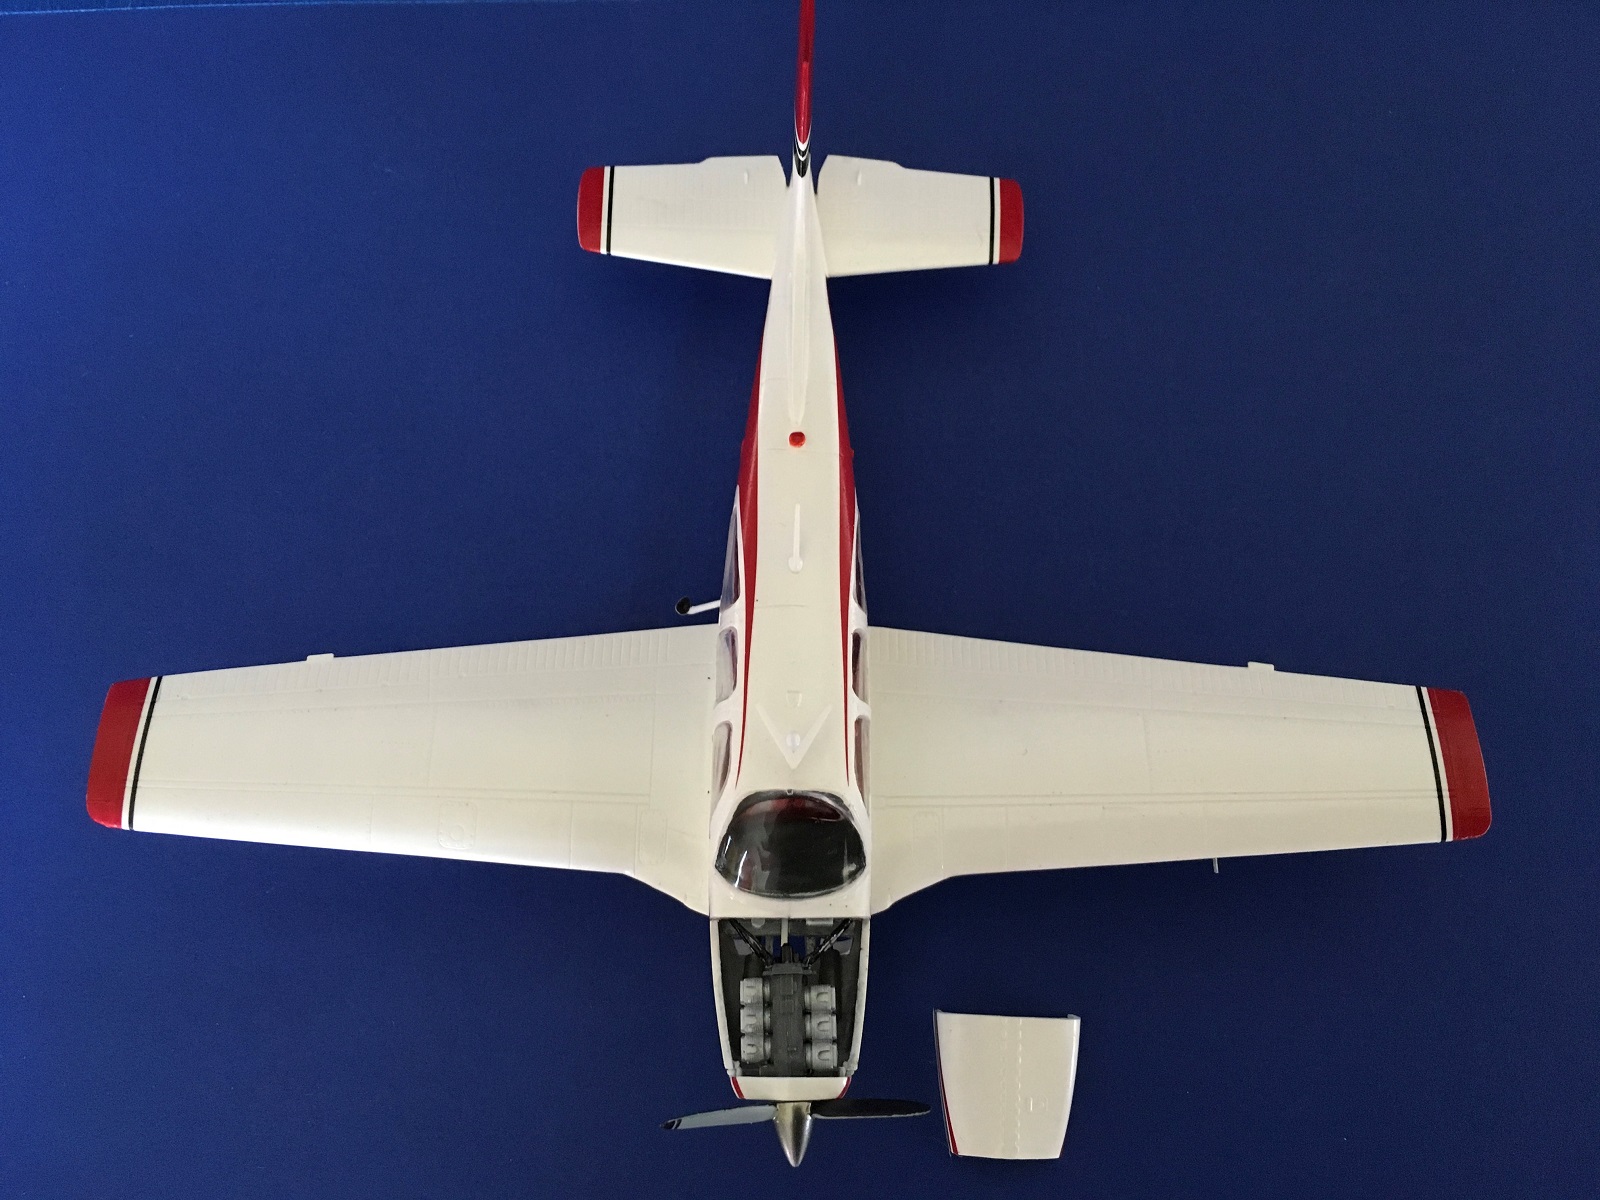
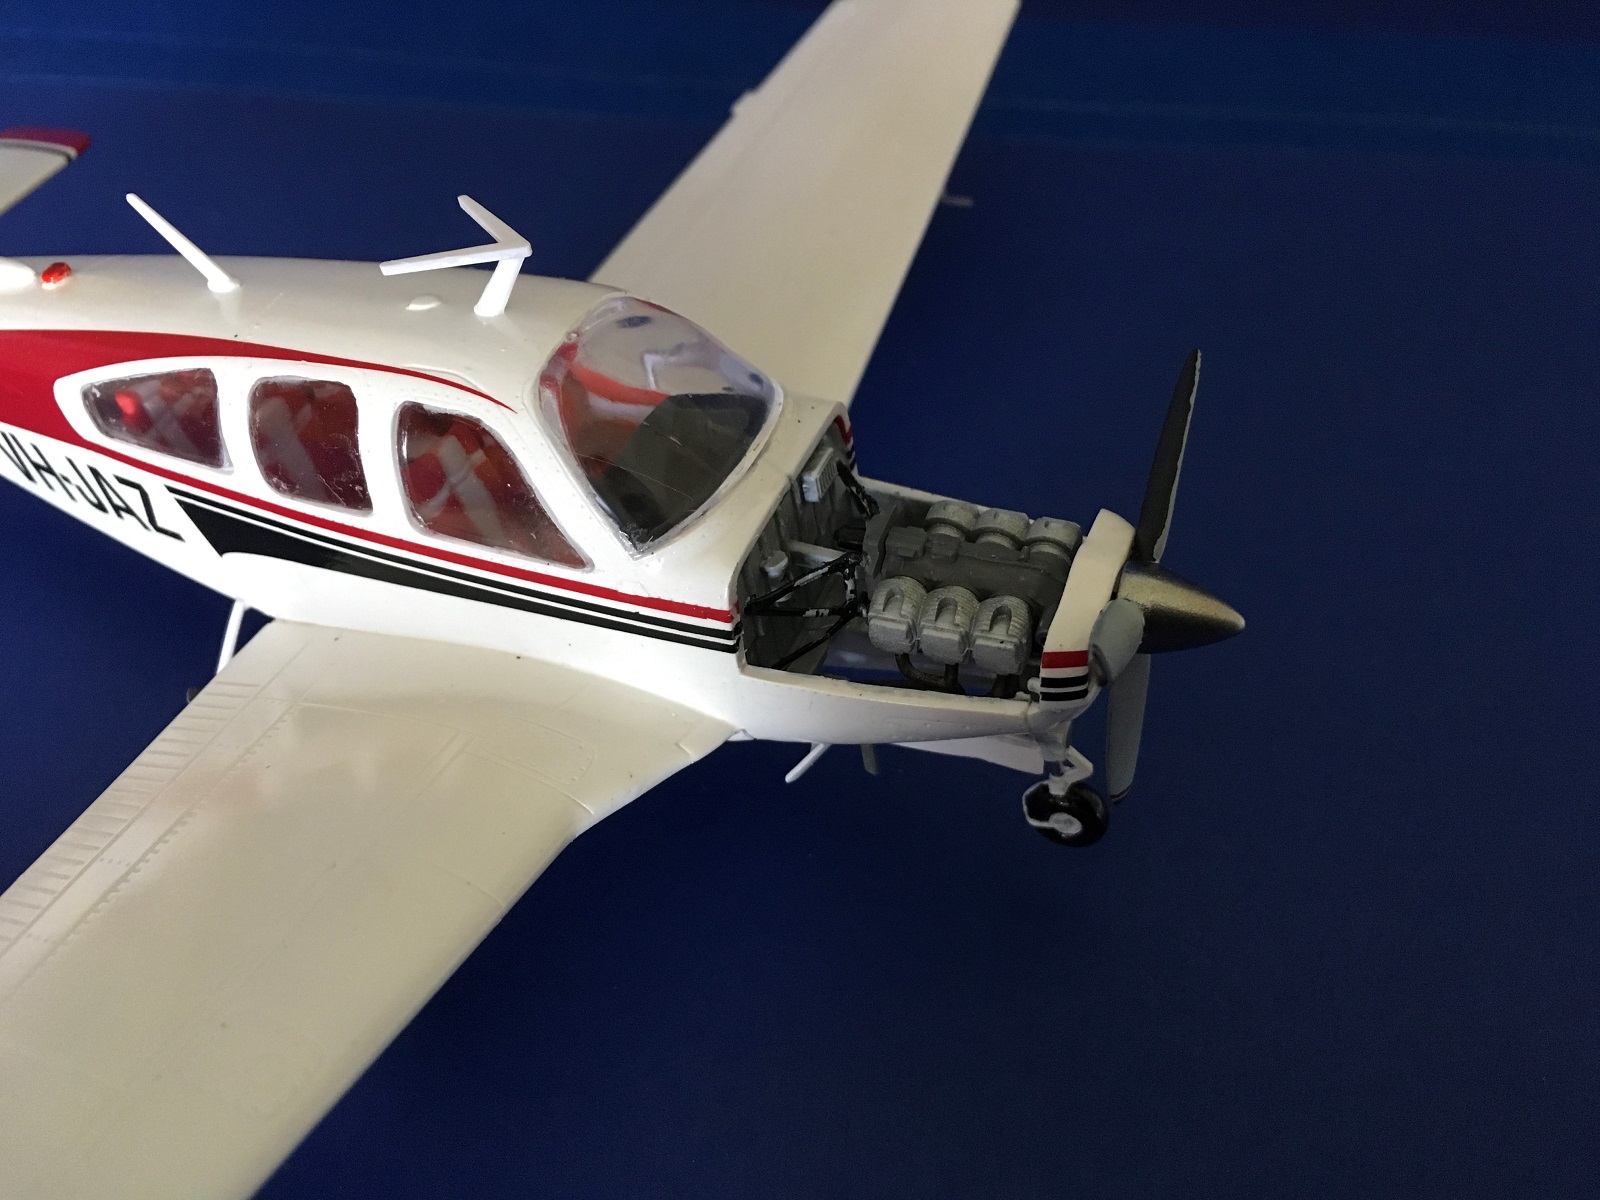
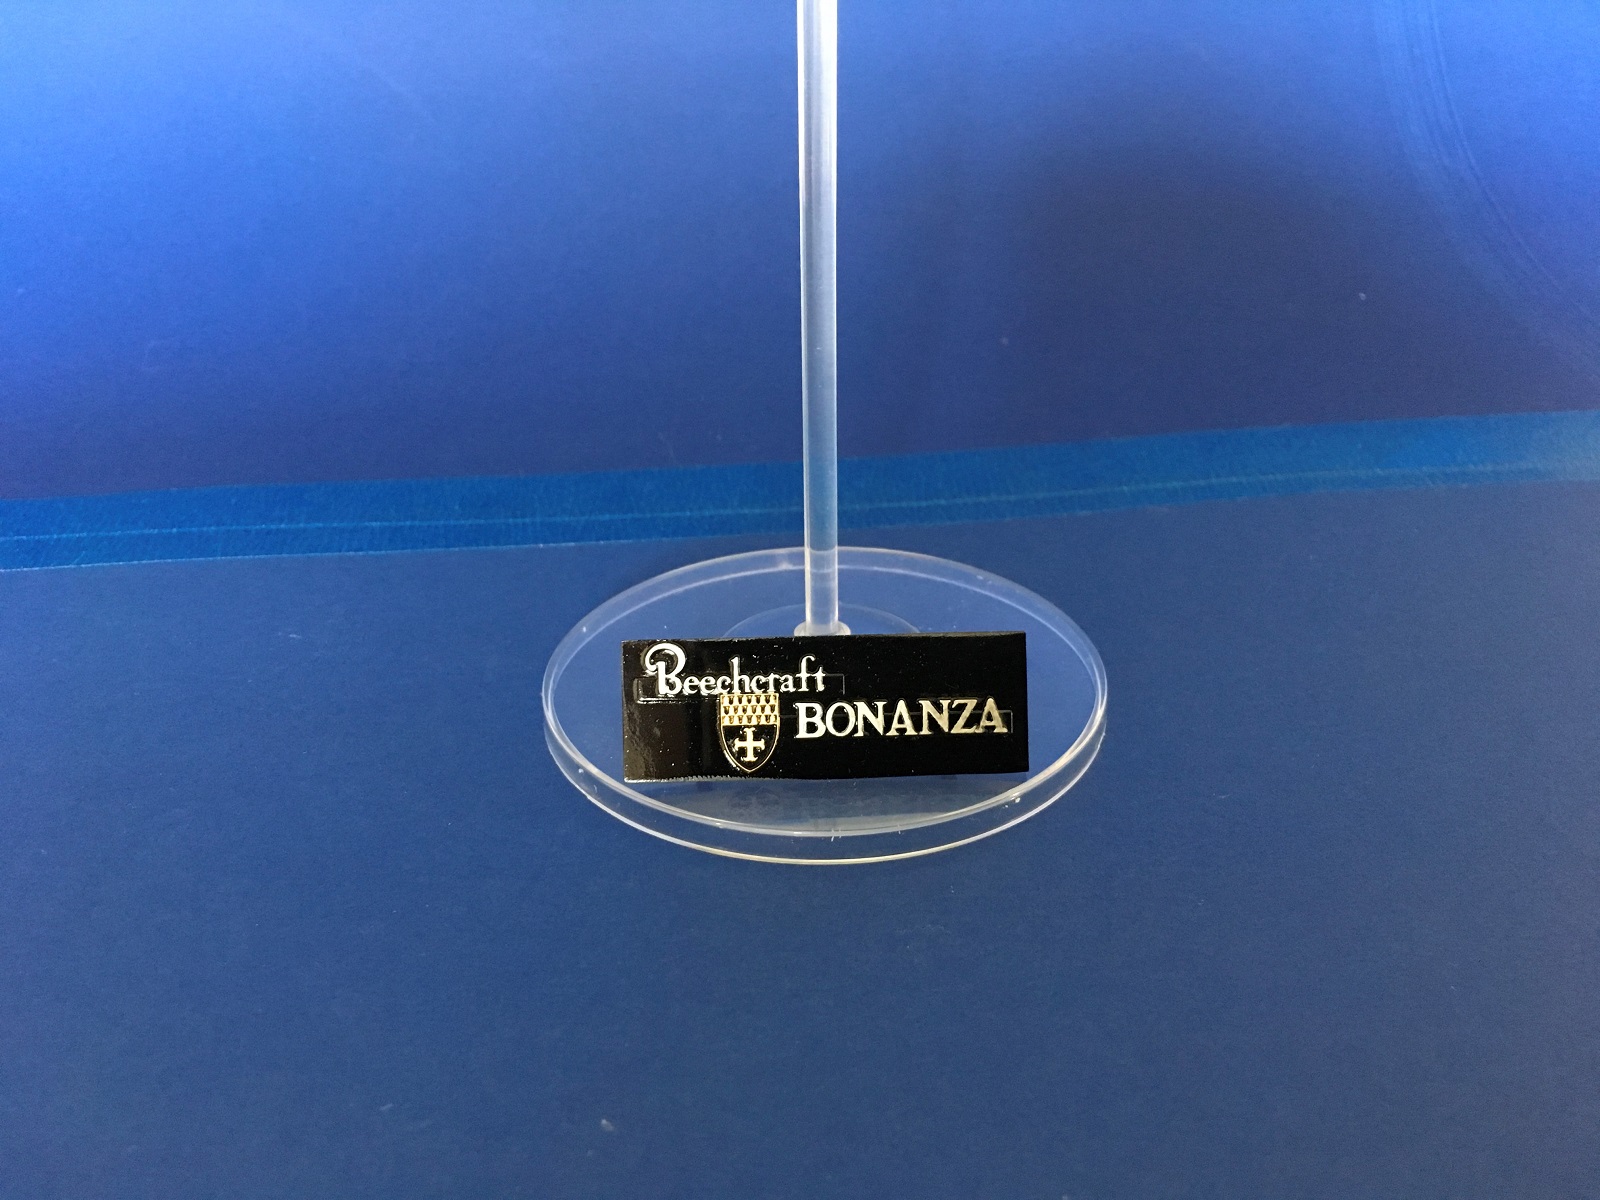
This is Minicraft’s second rendition of the F-33. The molding for the most part is good considering how old these must be, with little flash and very nice engraved panel lines on the wings, tail plane’s and fuselage sides. The interior looks accurate for what will be seen. The instrument panel is nice and just needs some detail painting. No instrument decal is provided and not really needed. The seats and cabin side walls show crisp detail that looks good with whatever color scheme you apply. The 6 cylinder engine is a pretty good representation and includes exhaust pipes, oil sump, mounting frame, and firewall. The cowl is removable to see everything. A stand and a Beechcraft Bonanza name plate are included. I did not use the kit supplied stand, but painted and used the name plate.
The “new” parts to build this model include a new tail, upper rear fuselage section and a three blade propeller. The existing “V” tails are to be modified and mounted horizontally to make the tailplane. Very nice Cartograf decals round out these new additions.
Construction starts on the interior, and you need to determine which of the four paint schemes you want to do first. This will lead into how you paint the interior. I was torn between one of the black/gold and red/black markings, and ended up with the red/black. With that decided, I did a little research online to see different Bonanza interiors, and painted mine red with white stripes – rather racey for the ‘60’s/70’s era. I simply masked off the white plastic seats and side walls and sprayed Tamiya red. I made simple seatbelts out of the over sprayed masking tape I used to mask the white, adding a buckle with a silver Sharpie. The instrument panel was painted similar to what I saw online, and I picked out the instruments, switches and other controls with a black and red fine tipped Sharpie.
The engine assembles quickly, after painting each part separately and cleaning some mold seams lines. When attaching the exhaust stacks make sure the pipes are positioned to be centered through the cowl flap openings in the fuselage belly.
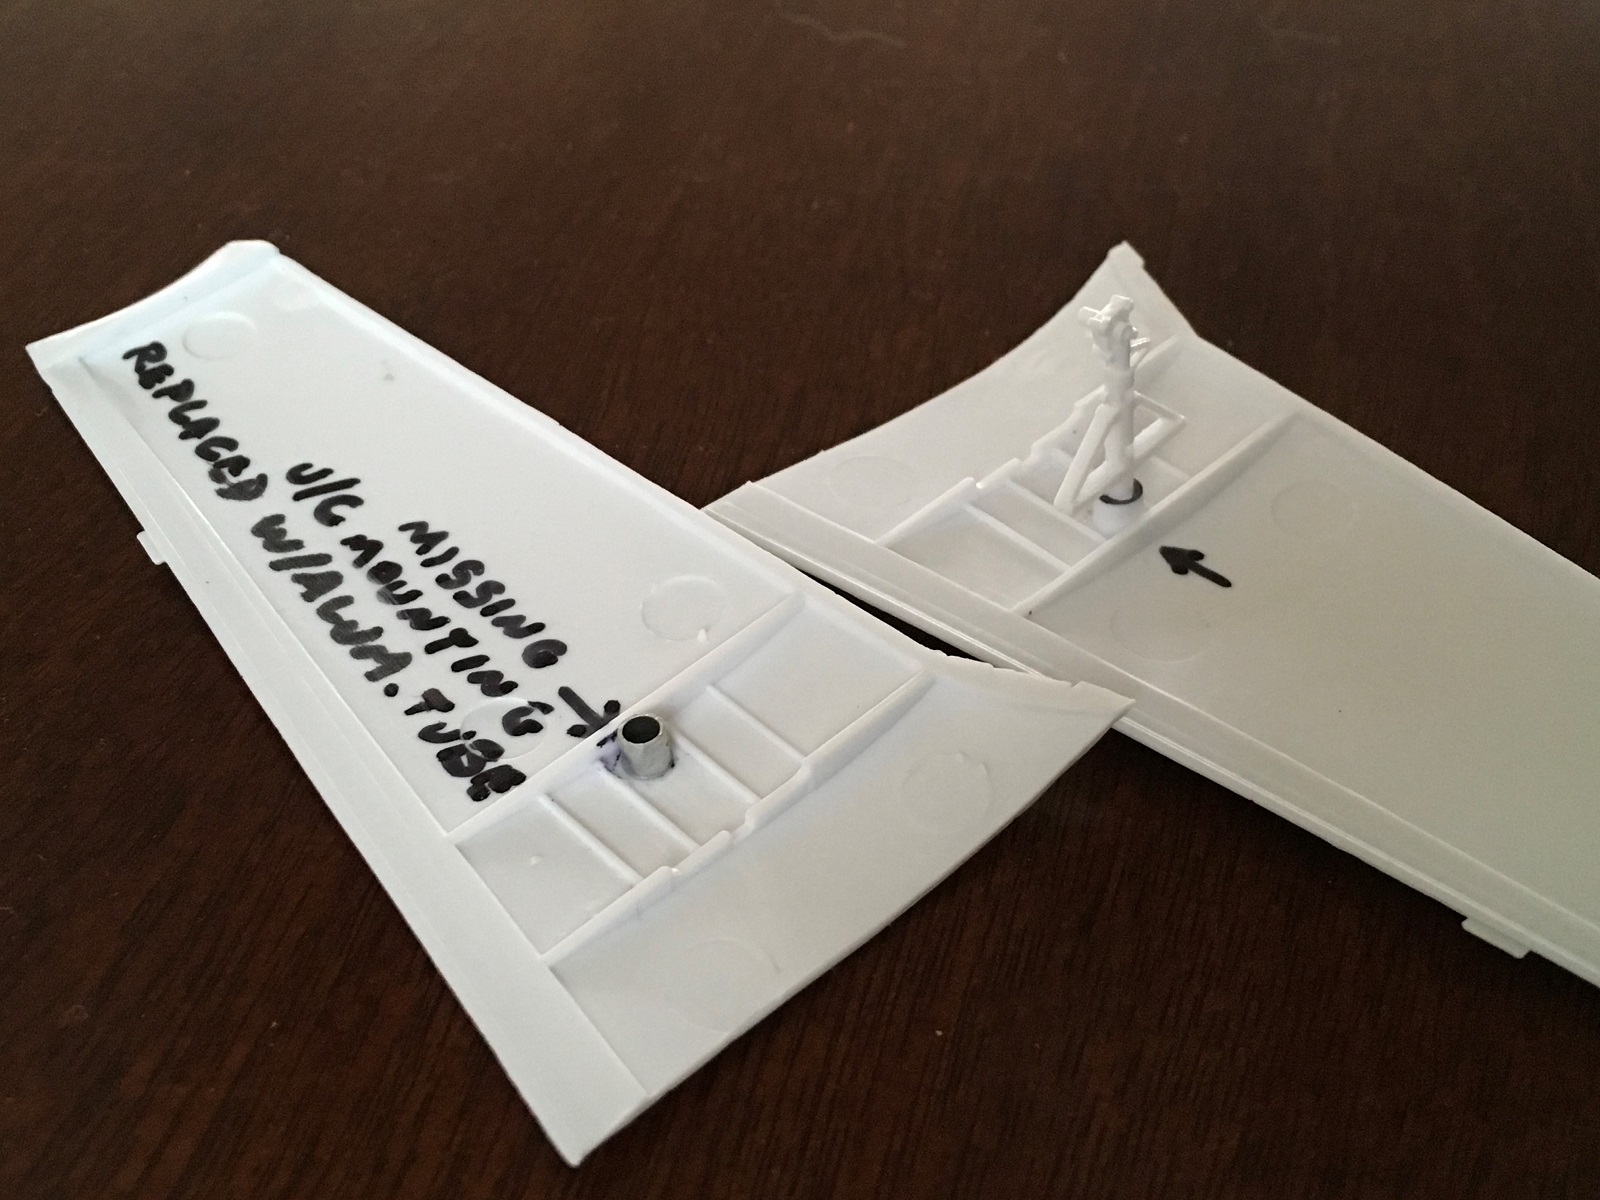
The wings consist of two upper parts and a single lower half that sets the dihedral. A little flash and mold line cleanup was required for a reasonable fit. One of the undercarriage mounting “tubes” was short shot (missing) from the upper right wing part. I replaced it with aluminum tube cut to match the length of the plastic one on the other wing. The inside diameter was almost spot on.
The tailplanes have angled mounting tabs for the “V” tails, and the instructions tell you to carefully sand the top side flat so as to attach them horizontally.
I tackled the side windows next and they were a terrible fit. They also did not quite conform to the curvature of the fuselage. I ended up cutting off the outer mounting lip edges and was then able to get a better, but by no means perfect fit. The pilots’ storm window frame had to be carefully thinned to get a flush fit in the window pane indention. The windows are very thick, so I first treated them to a Future/Pledge floor wax bath. I attached all the side windows with Testors clear glue as best I could to fill in gaps around most edges. The windscreen was the best fitting of all windows. Minicraft would do well to re-do the windows for an easier and far better fit, especially if they intend to keep reissuing this kit.
Before closing the fuselage halves, part of the upper rear fuselage needs removing to enable using the new tail. Take care cutting the pre-molded guide lines as they are quite wide. Better to cut less and sand as required. A rear fuselage insert is then attached. I found it was a little narrow and slightly warped. I used thick super glue and attacked the seams and gaps with various grades of sand paper until I was happy. There is absolutely no detail on either this insert or the tail, bar the rudder outline, which is disappointing when compared to the lovely panel line and rivet detail on the original parts. The tail’s trailing edge was very thick, so I sanded it to be a bit sharper. These new parts remind me of a short run kit of less than good quality.
The engine and mounting frame assembles onto the front of the firewall and the instrument panel and shroud to its rear. This is then placed into its position in the aircraft nose just before gluing the two fuselage halves together. Make sure the engine is lined up correctly so the front cowling sits tight against the side cowling walls.
The cabin floor/seats assembly is glued to the center of the lower wing and then slid into place from underneath the fuselage. The wing to fuselage fit is not too bad, but I used Tamiya white putty around the belly and wing roots to seal some gaps. At this point I also glued the tail and tailplanes on making sure I lined everything up vertically and horizontally. Putty was needed here as well.
Mold seams and some excess plastic had to be trimmed off all three undercarriage (U/C) legs to clean them up, but nothing too bad considering how old these molds are. One main leg was worse than the other around the brake and axel assembly. The legs and wheels are a good representation of the real items. The nose wheel, however, had a large, deep ejector pin mark sunk into one side of the tire that I carefully filled and sanded. The U/C was attached as everything was going to be painted white. I left the wheels and nose gear doors off until later.
I removed mold seams from the new one piece, three blade propeller. I would have likes the spinner and prop to be separate items to ease painting, and also show a little more detail, but masking the blades was not difficult, and the end result is acceptable.
The engine bay and side windows were masked off. Damp tissue paper was stuffed into the front where the windscreen would go on later, and the Bonanza was wheeled down to “Booth’s Deluxe Paint Shop” (my basement). The paint scheme for this is complex – White! I sprayed Model Master flat white Enamel. When dry I applied their Acrylic gloss in several coats.
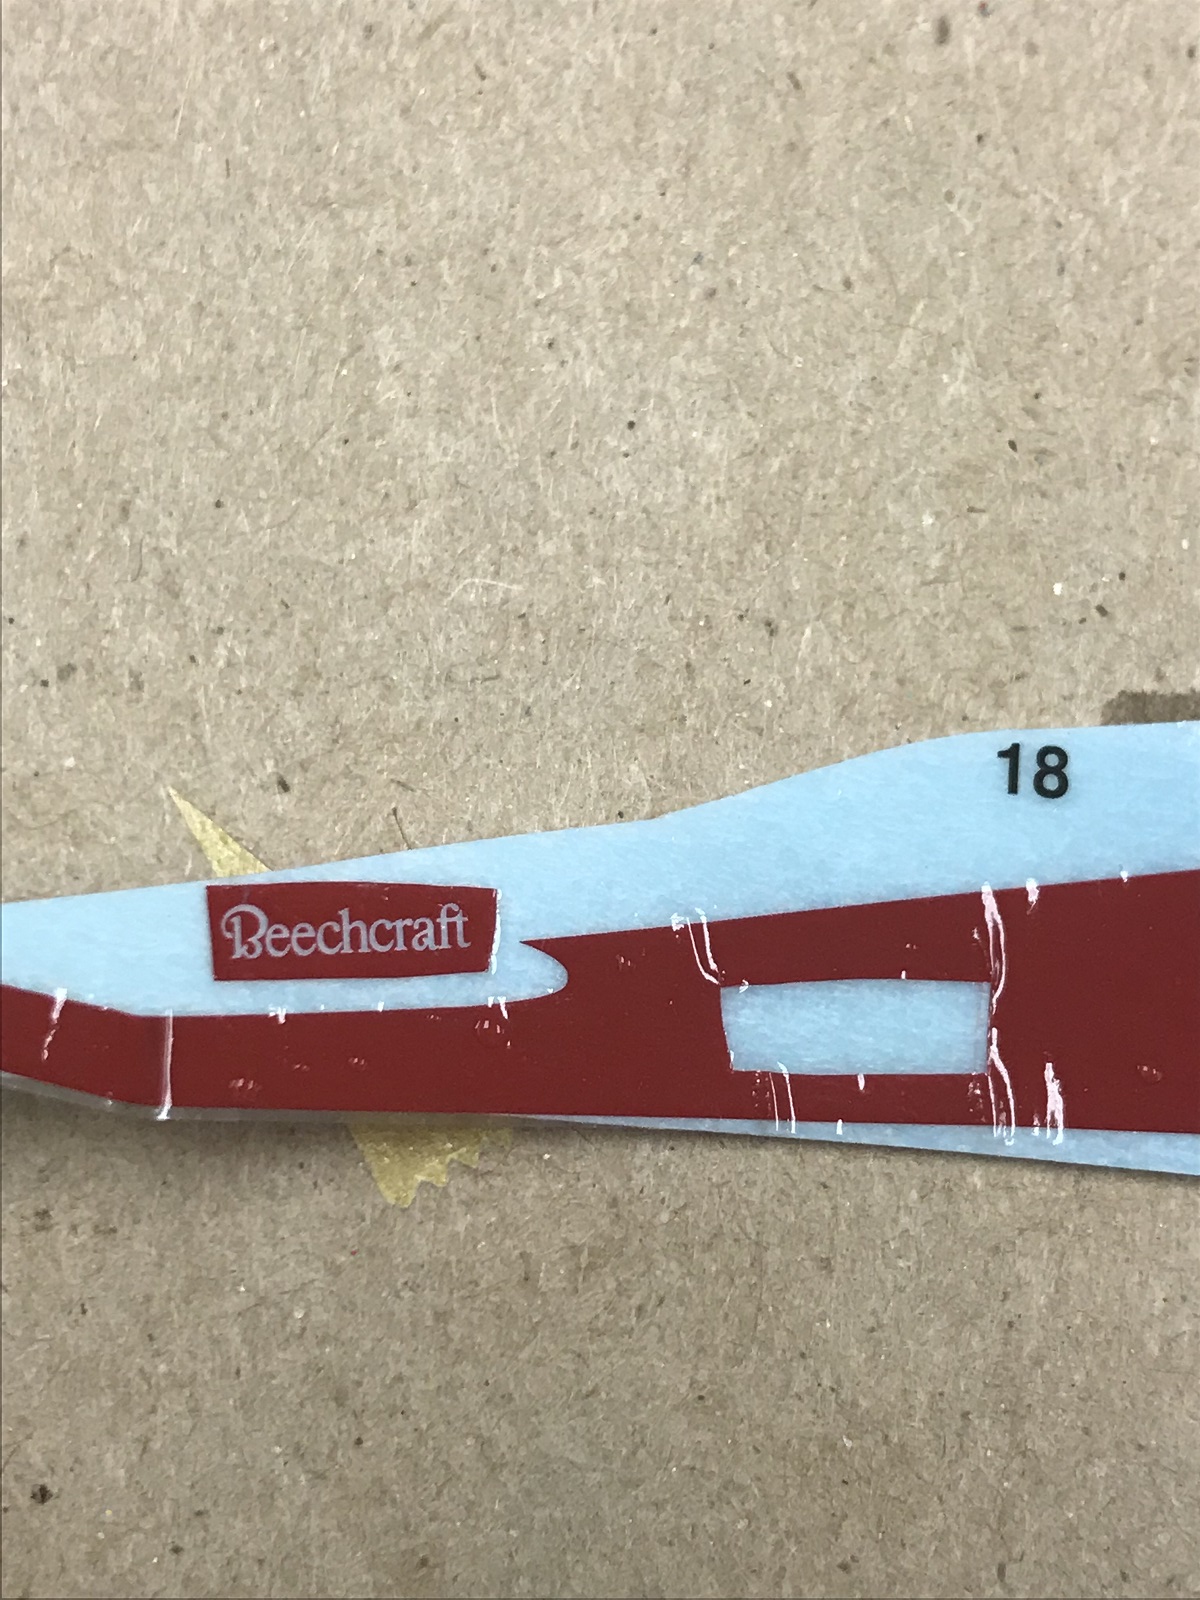
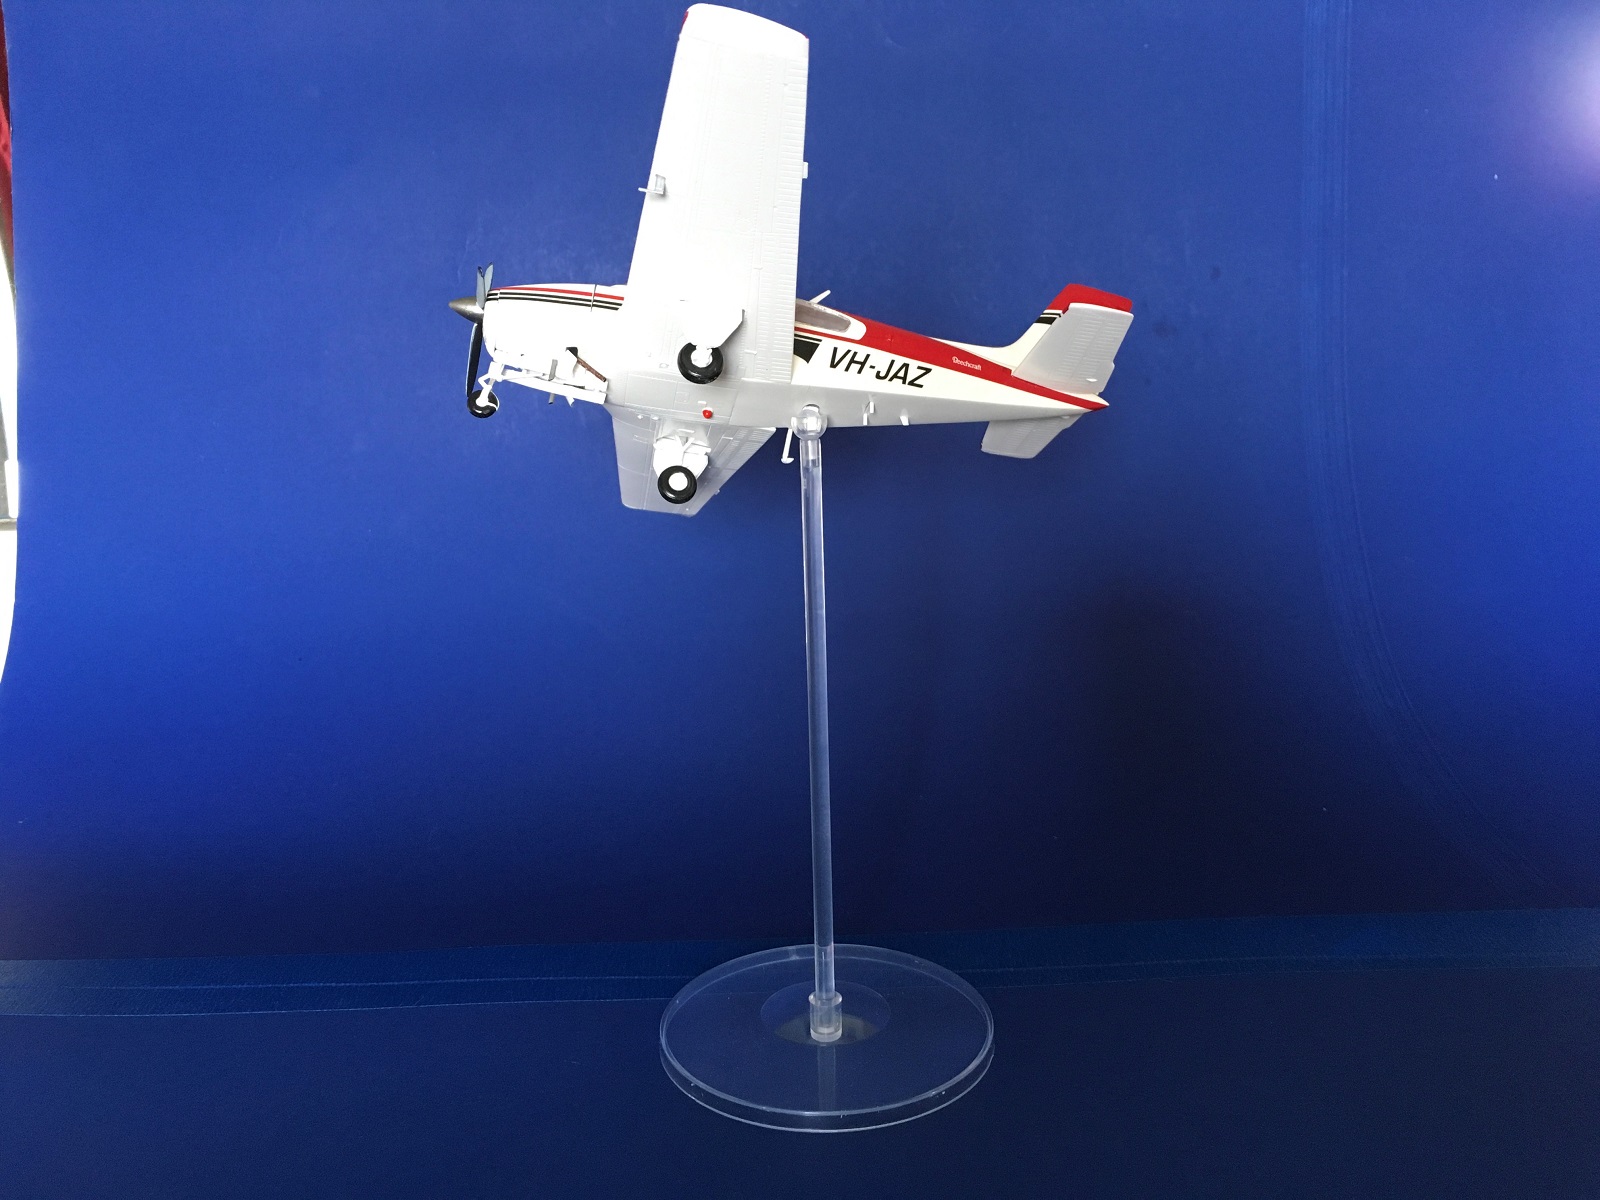
Once I had a nice glossy aircraft, I started applying the decals. From experience Cartograph decals are great to work with and these were no exception. They are strong enough to be worked into position, and allow time to be adjusted where needed. One curious thing they missed however is on the right fuselage side decal that has the name Beechcraft spelt backwards. They must have simply reversed the left decal image for the right side when designing the decal sheet and forgotten to change Beechcraft. I was able to cut out a rectangle around the word and reverse it. There are two schemes that are affected by this mistake. All other decals went on as advertised, and laid down very well with just a little Micro-Sol. You are given a choice of registrations from various countries, and two sets of letters to make your own. Being an Aussie, I made my own featuring the Australian registration “VH-” and my nickname “JAZ”.
The rest of the build was uneventful, attaching the various antennae’s, nose gear doors, propeller and windscreen. The final item to attach was the ball joint for the Minicraft stand I built and reviewed at the same time. See that review for how I mounted the ball joint to the belly.
I enjoyed building this little Bonanza, and would recommend it to people with some experience due to the modifications. For such an old model, it is for the most part, a fairly easy kit that goes together well with some care. Unfortunately, I feel it is let down by the substandard “new” parts, as well as the cabin window fit. My sincere thanks to Minicraft Models and the IPMS for the opportunity to review this pretty aircraft.


Comments
Add new comment
This site is protected by reCAPTCHA and the Google Privacy Policy and Terms of Service apply.
Similar Reviews