
Jeffery Quad Ammunition Truck
Kit Manufacturer
This is a high quality resin kit of the Jeffrey Quad 4 wheel drive truck produced by Lukgraph Models from Krakow, Poland. Lukgraph’s focus is on British and American aviation in the years between WWI and WWII. Lukgraph also produces the Jeffery-Poplavko armored car, and Nash-Quad Artillery truck in 1/35 scale; and the Nash-Quad Truck, and Nash-Quad Ammunition Truck in 1/48 scale. Lukgraph also makes a number of WWI aircraft kits in both 1/48 and 1/32 scales. The kits are available direct from Lukgraph, Victory Models, or KitLinx in the U.S., and several European suppliers.
The review sample was ordered direct from Lukgraph and included a nice personalized photo of a completed kit. The cost of the kit is $84.83 plus $11.31 shipping (85€ total).
Vehicle Background
The Jeffrey Quad assisted in the war efforts of the Allied nations, particularly the French, and became the workhorse of the Allied Expeditionary Force. The vehicles also saw service under Pershing as both armored cars and regular transports during his 1916 expedition through Mexico, and later European campaigns of WWI. The US Marine Corps also adopted the Jeffery Quad for use in Haiti and Dominican Republic conflicts from 1915 through 1917.
The truck was manufactured between 1913 and 1919 with over 11,500 built. The truck was first built by the Thomas B. Jeffrey Company of Kenosha Wisconsin, and later by Nash Motors after 1916. The truck was very successful in muddy, rough, and unpaved conditions during WWI when horse drawn vehicles approved obsolete.
The Quad had four-wheel drive and four-wheel brakes, as well as an innovative four-wheel steering system that allowed the truck to traverse soft and poor conditions with unprecedented effectiveness. The truck has a very high ground clearance allowing it to drive through mud up to its hubcaps.
Lukgraph’s Kit
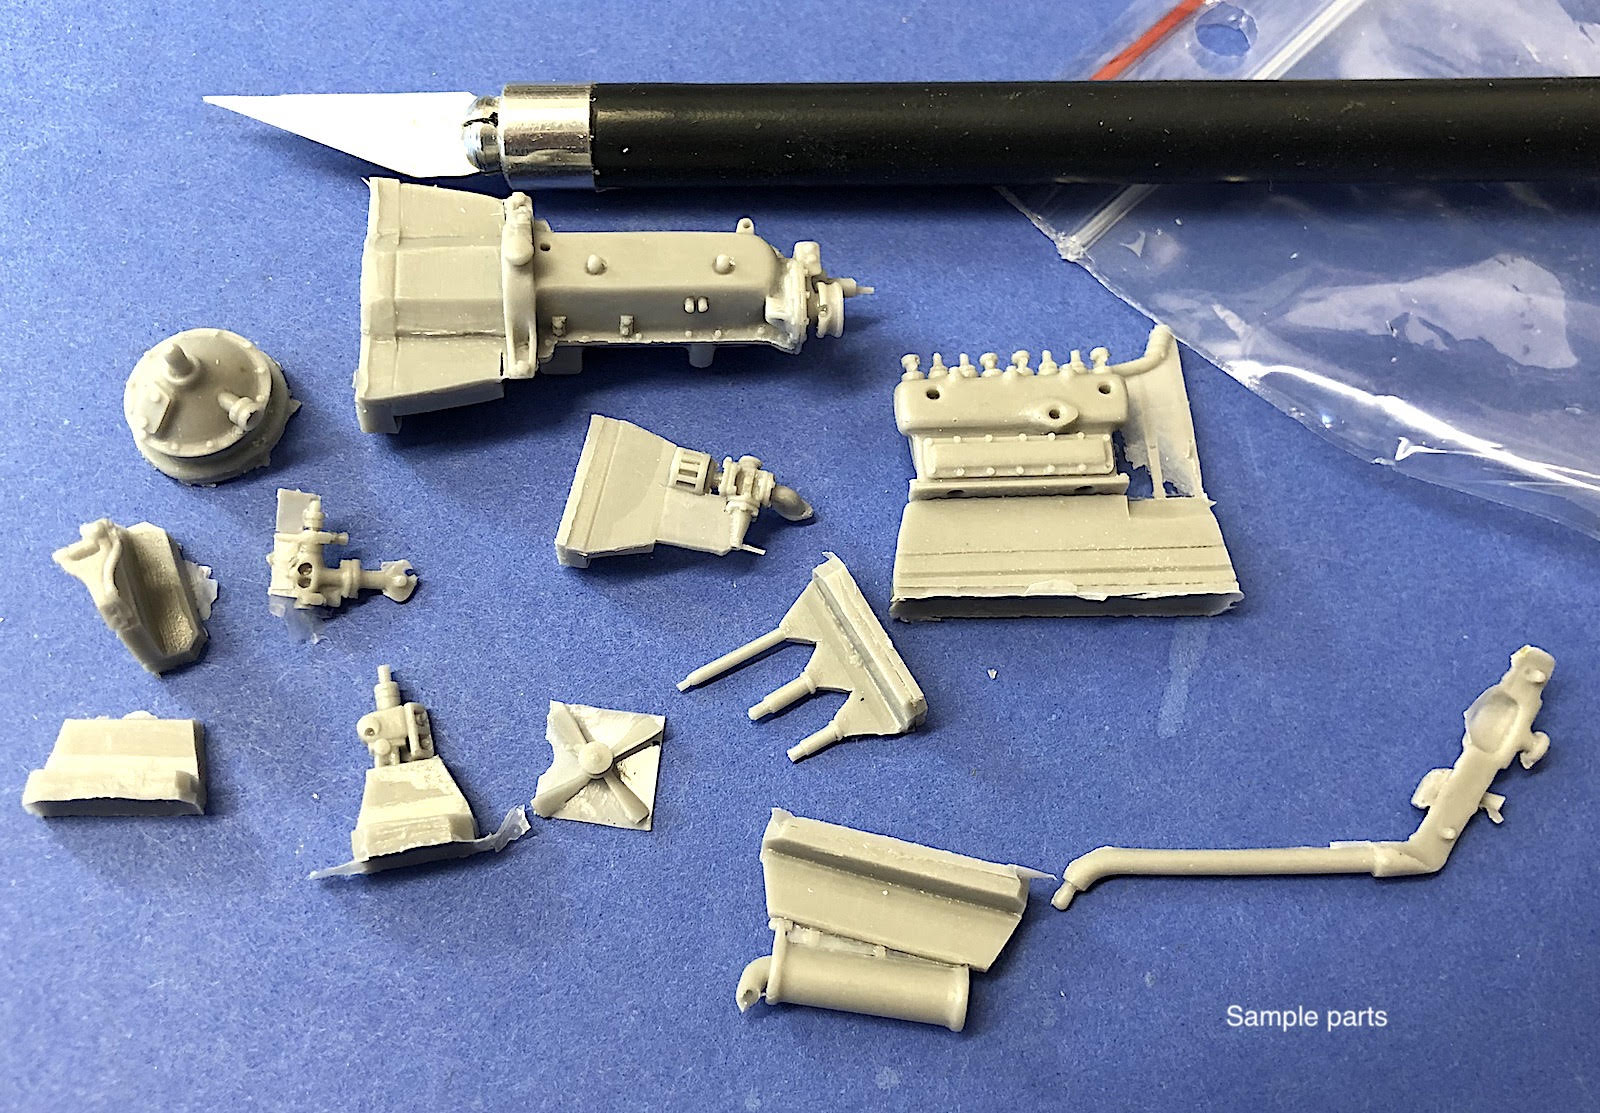
The kit comes packed in a sturdy light cardboard box and includes a nicely rendered personalized dedication when ordered directly from Lukgraph. The parts are packed in four Ziploc bags, each containing smaller bags of parts. A small photoetch fret is also included, mostly for brackets and straps for the tools on the sides of the truck bed. The photoetch does have nice detail for the brackets and buckles. The kit has 150 resin parts and 60 photoetch parts. The parts are molded in a gray resin and have sharp detail. Most of the parts are attached to pour blocks. The photoetch parts are numbered, but the resin parts are not numbered.
The parts require extensive cleanup, comparable to other detailed resin kits. Compare the parts to the illustrations to determine where best to remove them from the pour blocks. Check for bubbles in some of the thinner rods and small parts and repair them before removing from the pour blocks. A fair amount of fitting is required such as drilling out holes, trimming parts, and shaping for best fit.
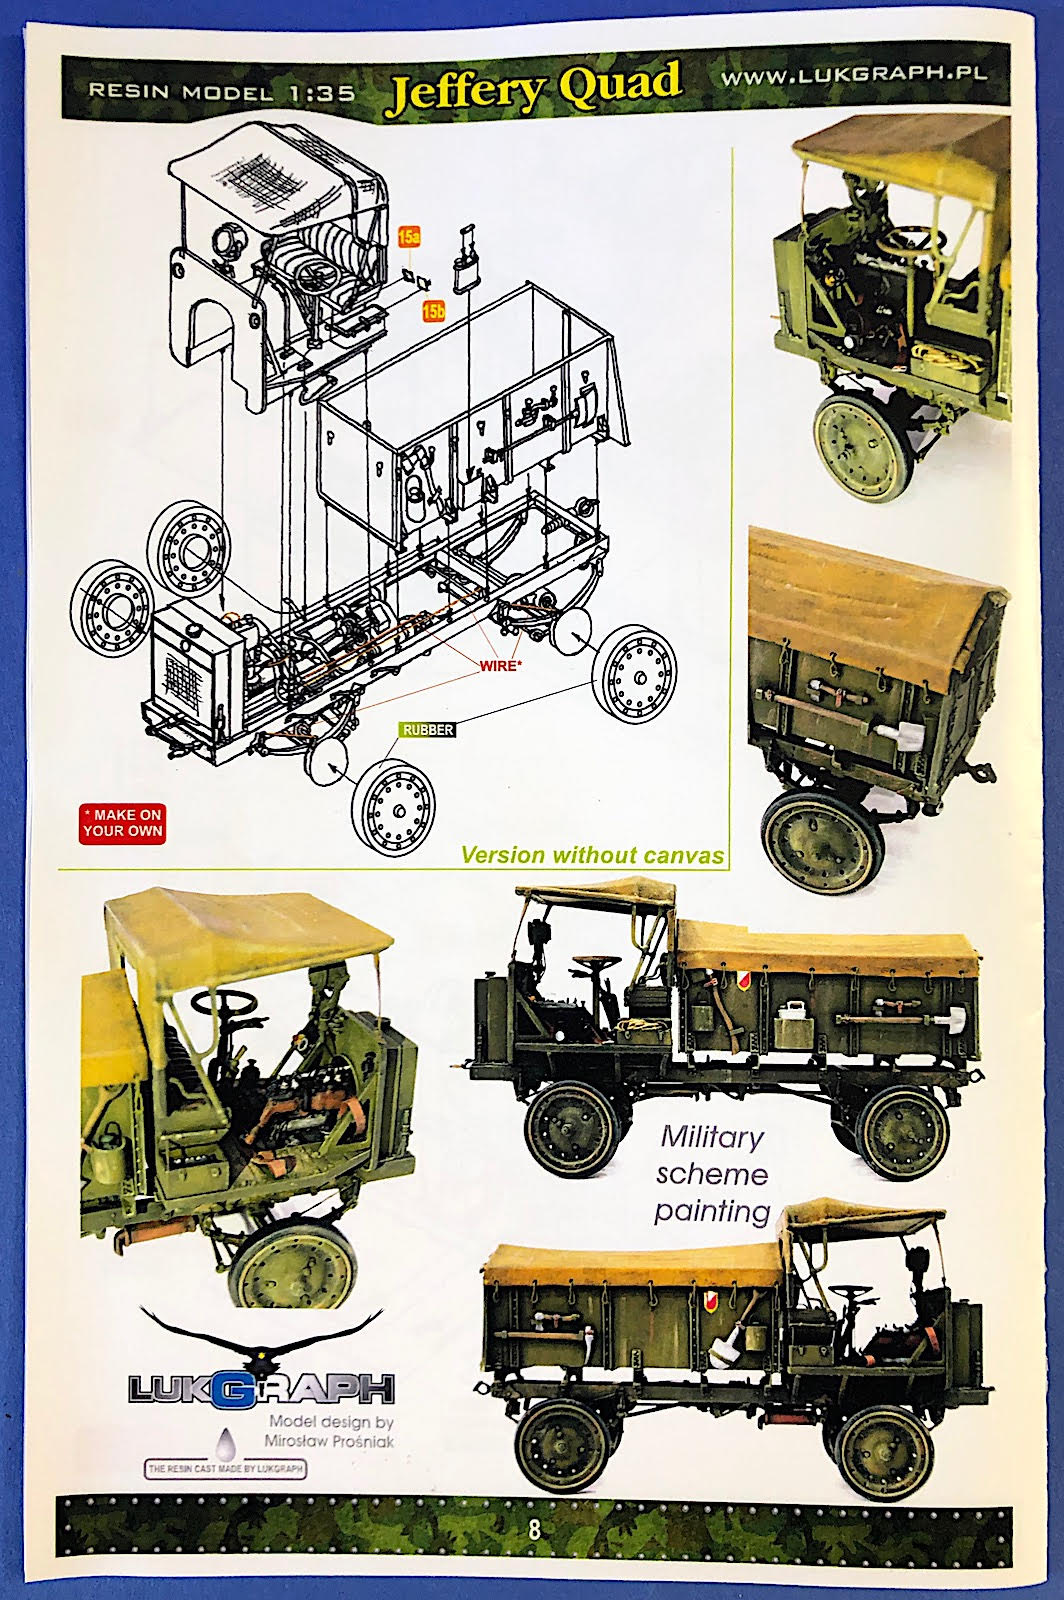
The instructions are a 7 x 11“ stapled pamphlet with eight pages. A brief history of the vehicle is provided. The assembly instructions are in exploded diagrams that appear to be hand drawn. Some of the diagrams are not very clear so test to make sure parts are in the right location. Detail painting instructions are included within each of the assembly steps. Several items such as wire and thread are shown in the assembly steps but not provided with the kit. Sequencing of part assembly is called out in some of the more complicated assembly steps. The last page of the instruction booklet includes color photos of a completed model showing a military painting scheme.
Assembly
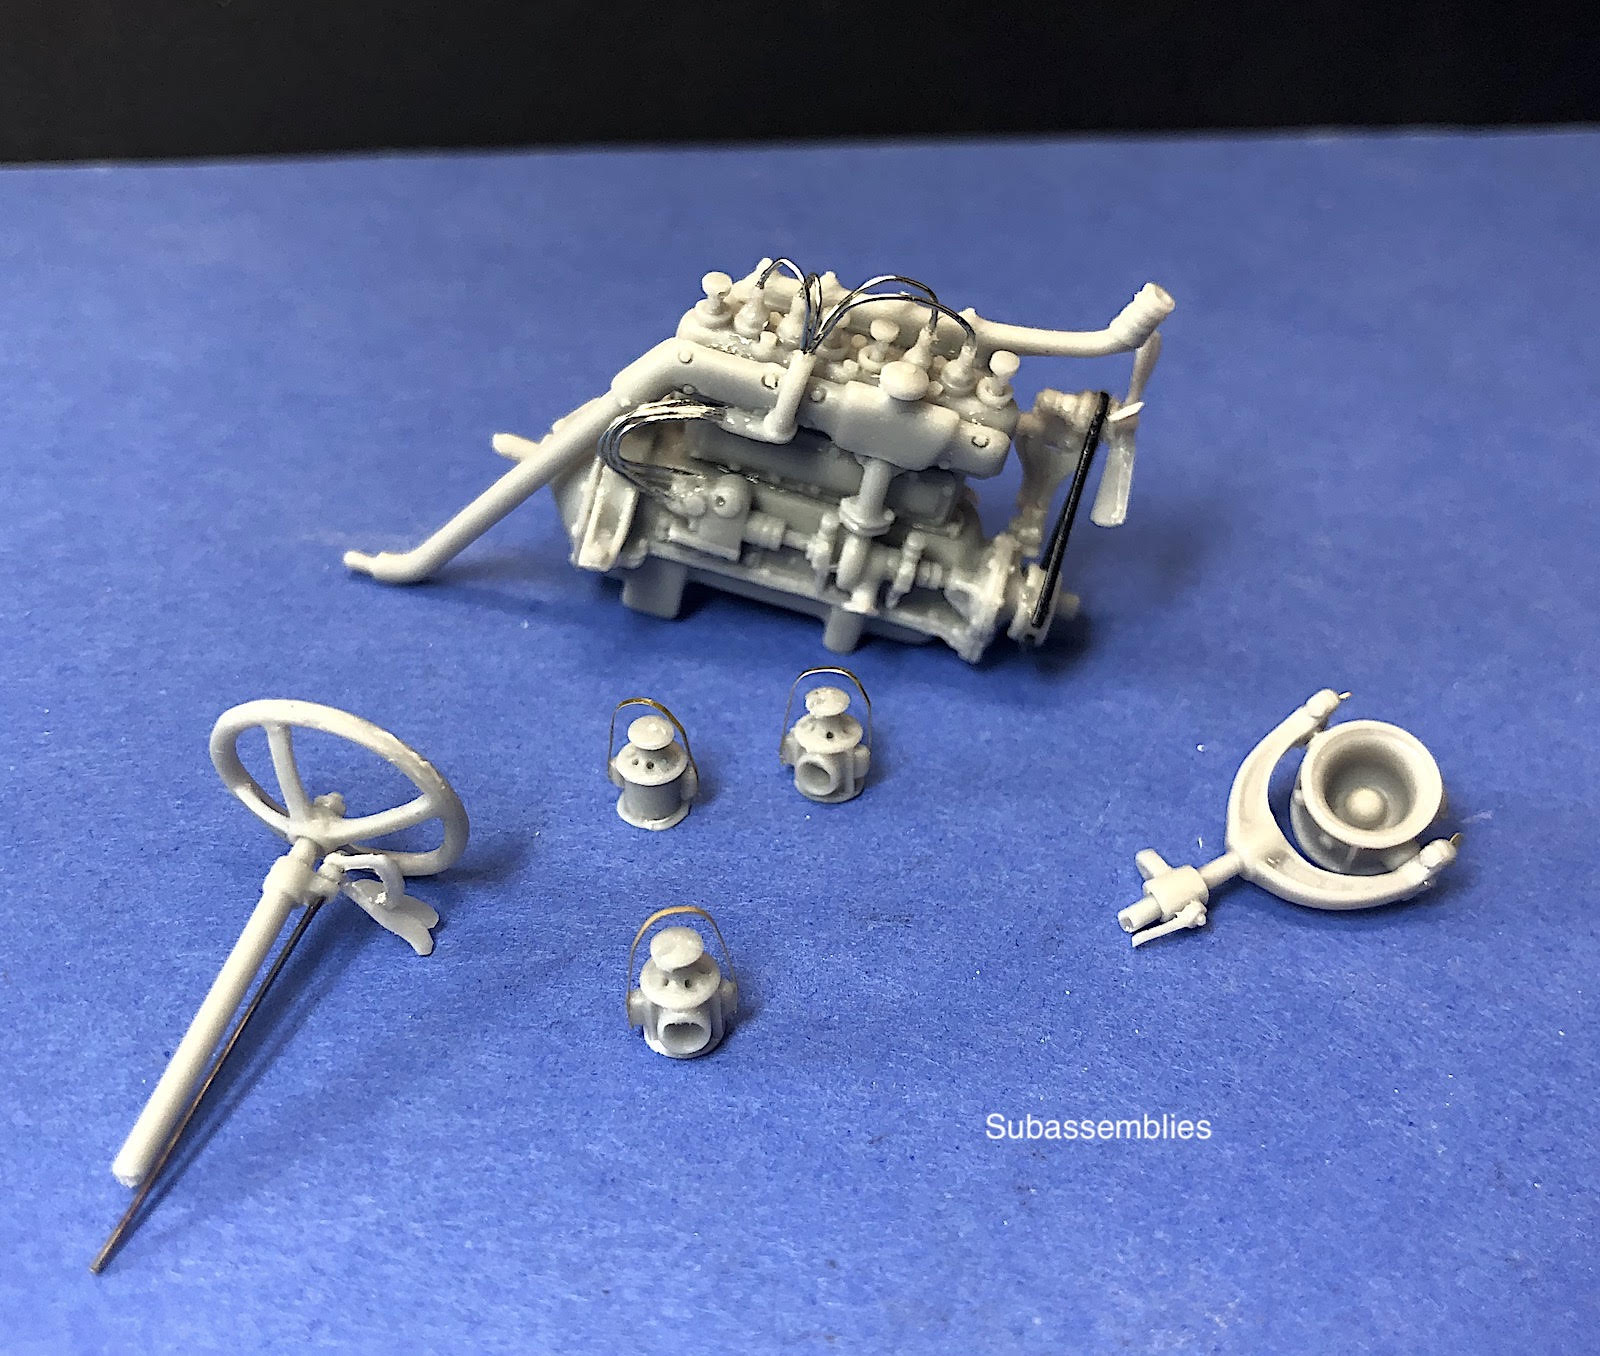
Assembly begins with the engine and transfer case. The parts for each assembly step are generally grouped into one of the Ziploc bags which makes it easier to find the parts. The engine has nice detail and has provisions for adding additional wiring and piping. Wire and thread are not provided with the kit and will need to be provided separately. The wire for a fuel line connecting to the carburetor can be connected to the fuel tank piping under the cab after the engine is installed in the chassis.
For the transfer case, I held off assembling the three rods until later when the case is installed in the chassis to get the correct alignment. The parts fit together nicely and Lukgraph uses pins and holes to help with the location of many other parts.
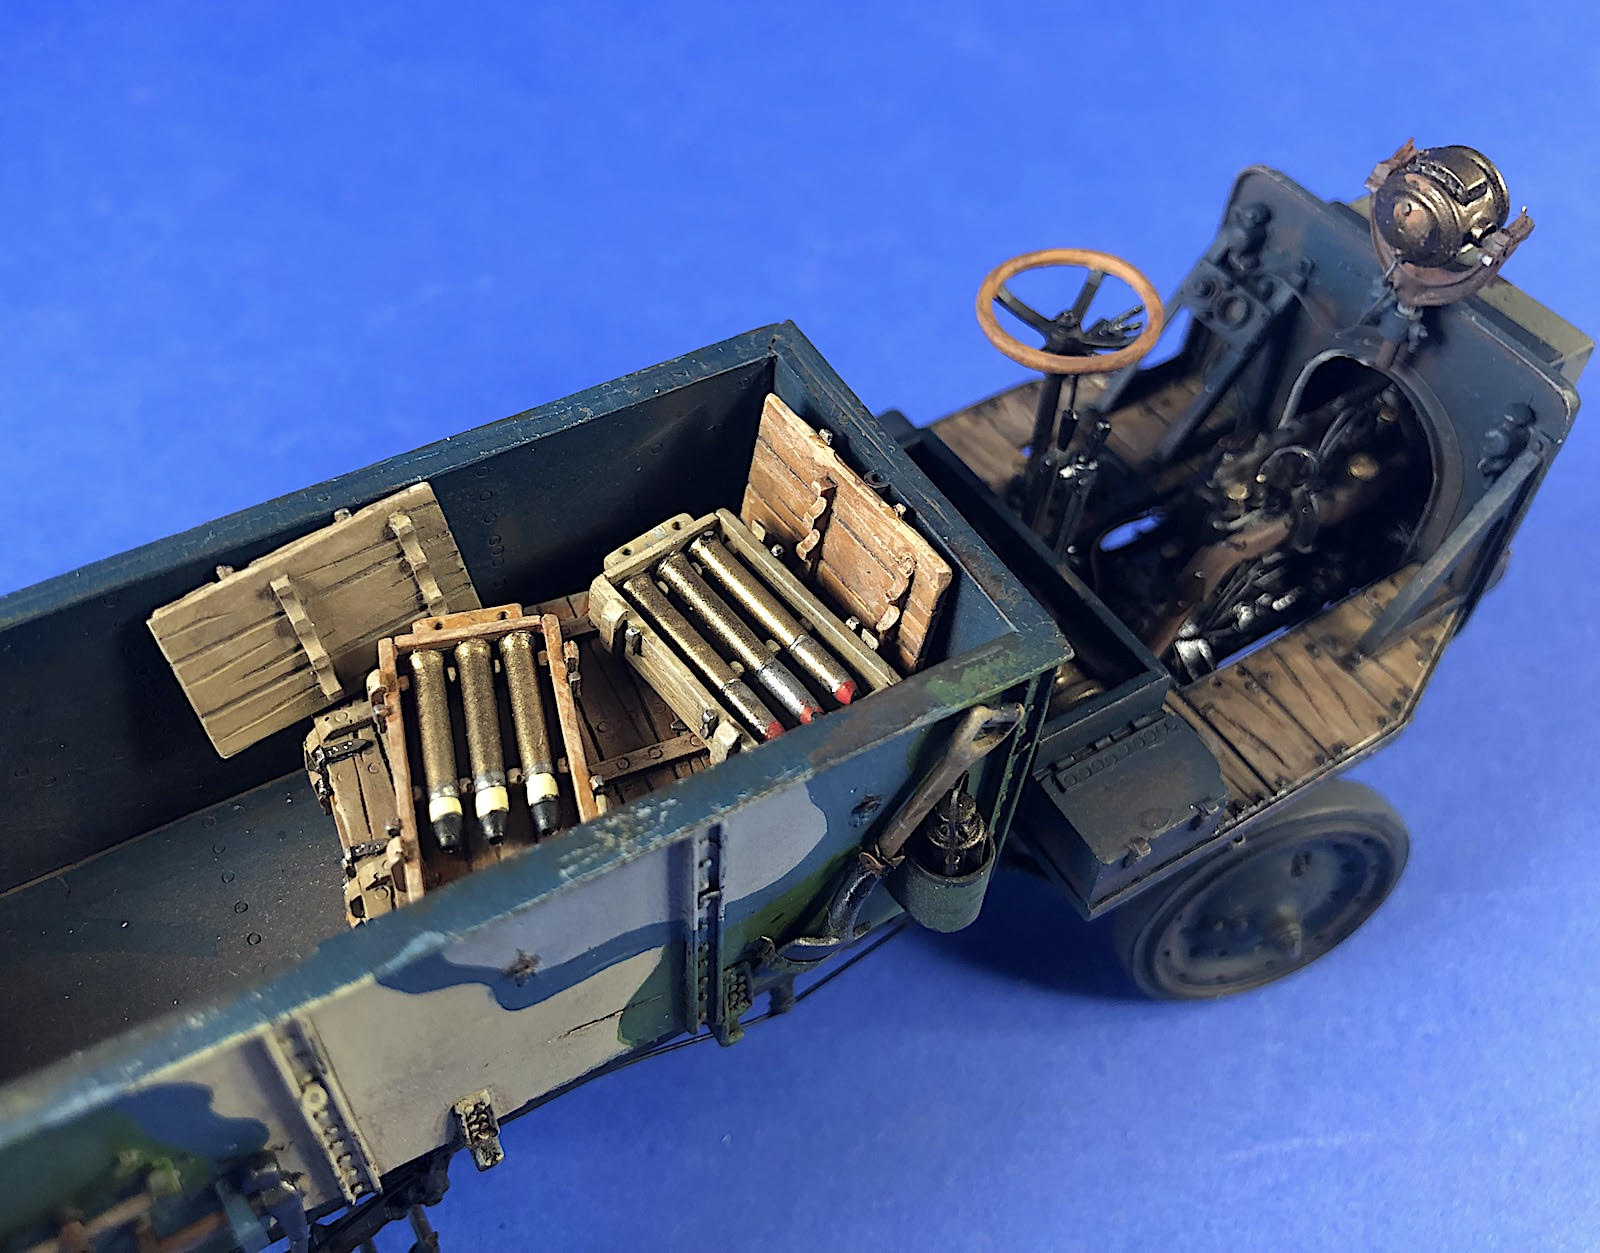
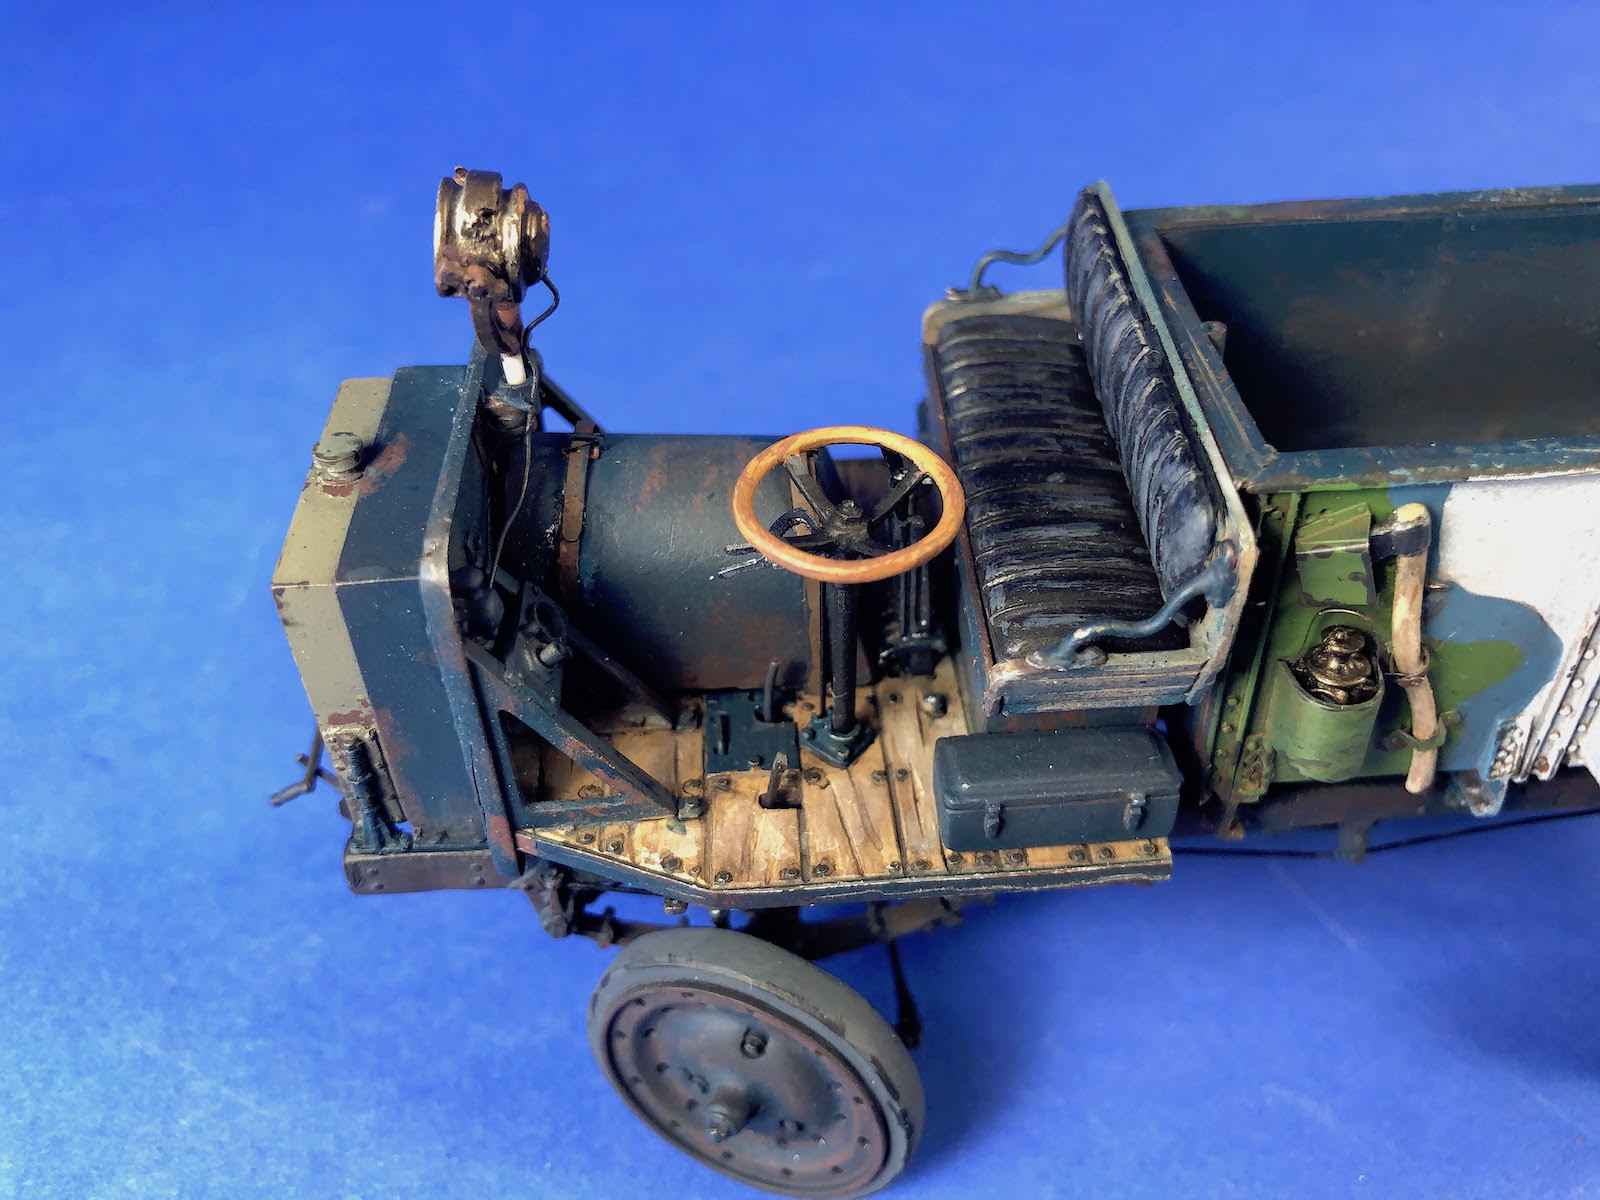
The next series of steps include the steering column, headlamps and lanterns, some ammo crates, and the rear doors on the truck bed. Very nice detail on the headlights and lanterns and the headlight snaps into the yoke to allow it to rotate. The clear lenses for the headlamp and lantern are not provided with the kit. There are two ammo crates that can be posed open, and two types of shells are provided for the crates. The other crates are molded closed as one piece.
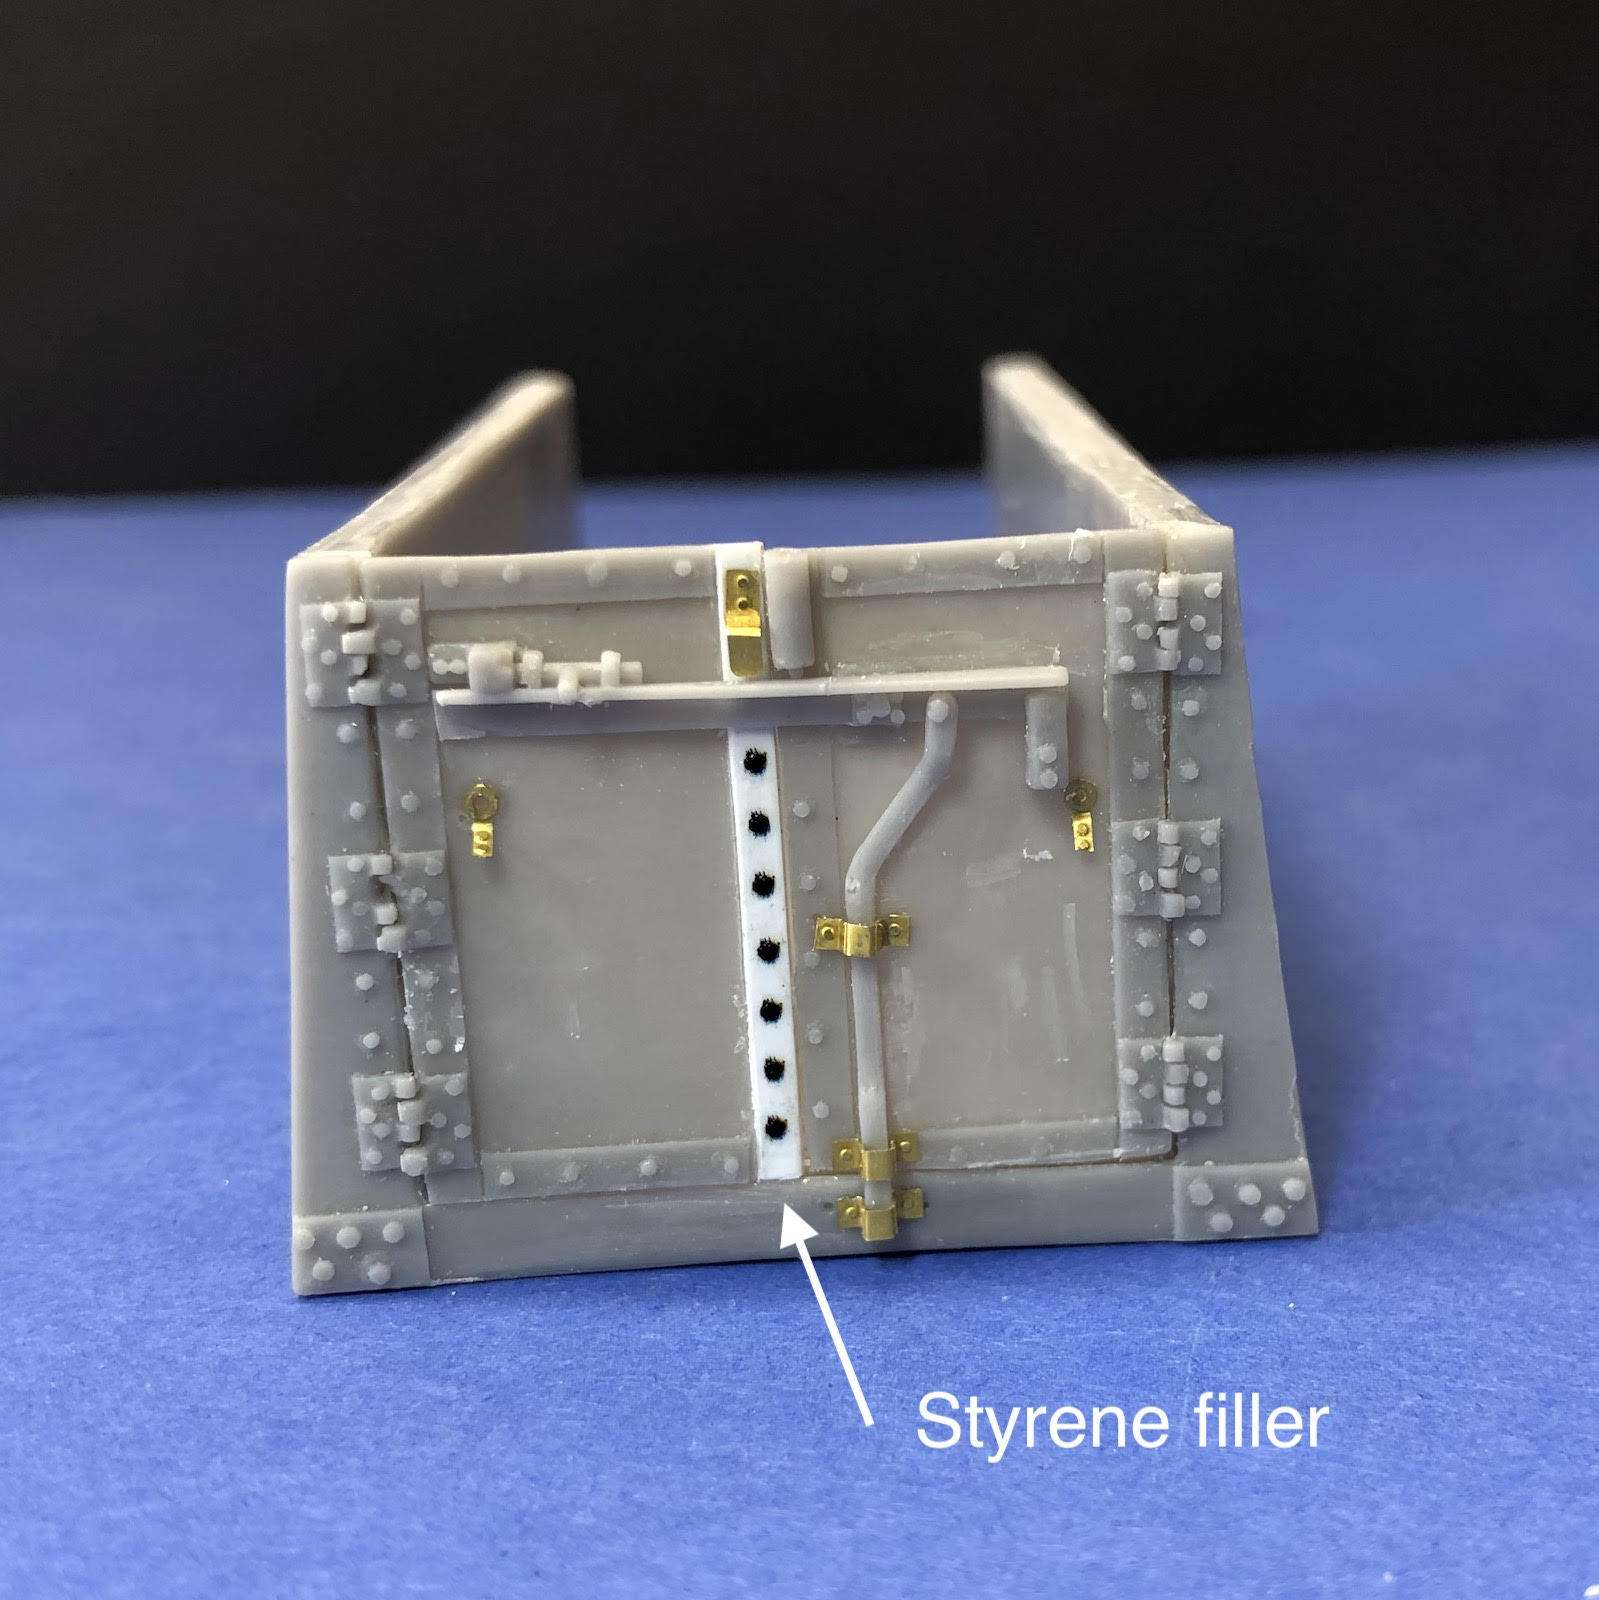
When installing the rear doors on the truck bed, I somehow lost the jamb on one of the door panels. I don’t know if it broke off or was never there but at any rate, I fabricated a replacement with a piece of Styrene.
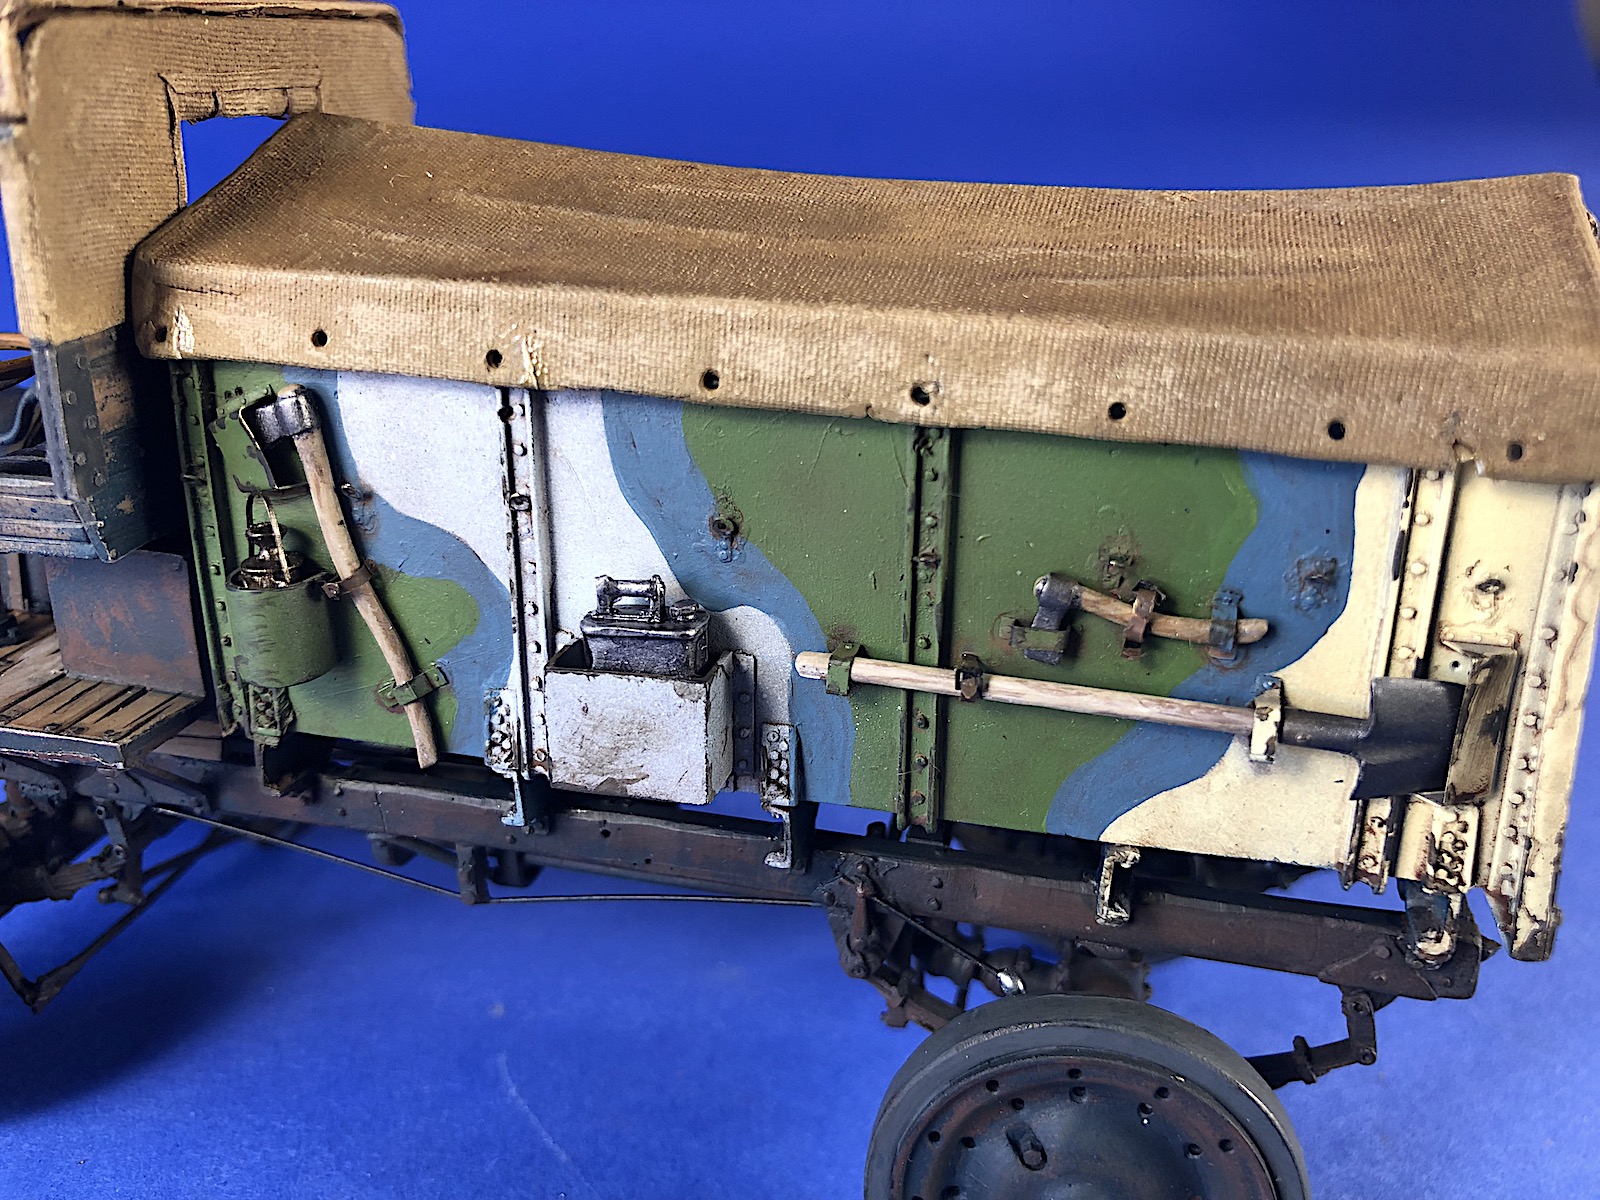
The steps on page 4 of the instructions install the chassis rails on the underside of the truck bed and the photoetch straps and brackets for the tools on the sides of the truck bed. There are many eyelets installed for the tarp tie-downs, but the string for the tie-downs is not provided with the kit. The canvas top has a nice canvas texture, but the edges are fairly thick. I thinned down the edges somewhat. Installation of the tarp is optional. This step also shows the installation of thread for the rope handholds on the ammunition cases.
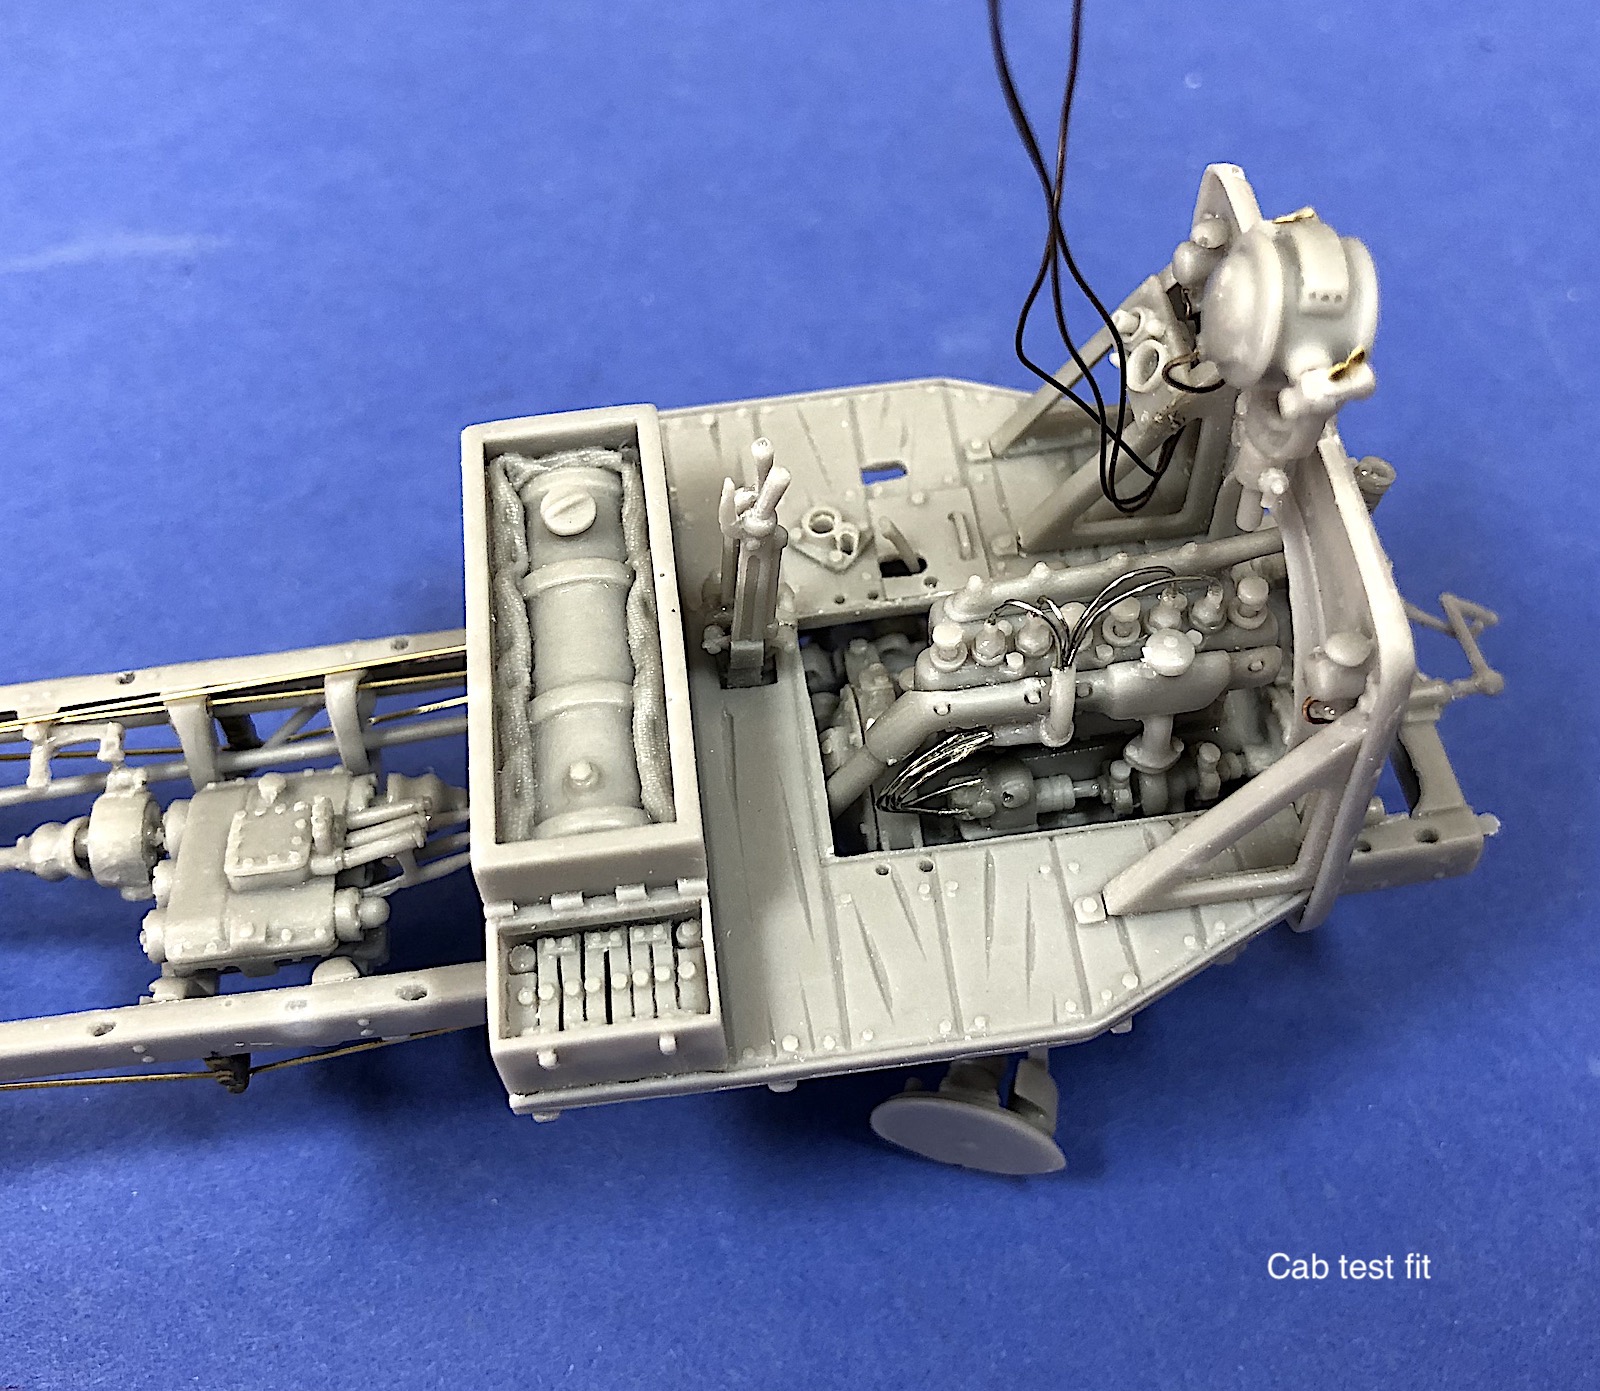
Page 5 of the instructions assembles the interior of the truck, which comes with a canvas back and canvas top. There is some wiring for the small lights on the firewall and for the large headlight that are not noted but should be provided with wire. Openings are provided in the conduits on the firewall for installation of the light wiring. Amazing detail for a resin kit! The engine cover is shown to be assembled here, but I plan to leave it off to display the engine.
The cab floor has a wood texture on it which is over-scaled, so I don’t intend to emphasize it very much in finishing. I used brass rod for the handrails on the side of the bench fearing the small resin ones would get broken. Plastic straps for the front of the canvas tarp are shown but not provided by the kit. It appears these are leather straps on the actual vehicle, so I used some leftover photoetch to make the straps. There are also film pieces to be installed for the lenses on the front lights which are not provided with the kit. Overall the interior fits together nicely and has good detail.
The axles and more of the steering linkage is assembled to the chassis on the top of page 7. Some adjustment of the steering tire rods was necessary, but the parts fit together nicely. Parts number 4 and 5 are shown as part of the brake linkage, but the numbers had broken off in the package so I wasn’t sure which was which. Both of them appeared to be slightly short. The illustration drawings for these steps are fairly confusing and very muddy so study them carefully before proceeding. After installing the axles, all four wheel drums were on the ground. Nice fit!
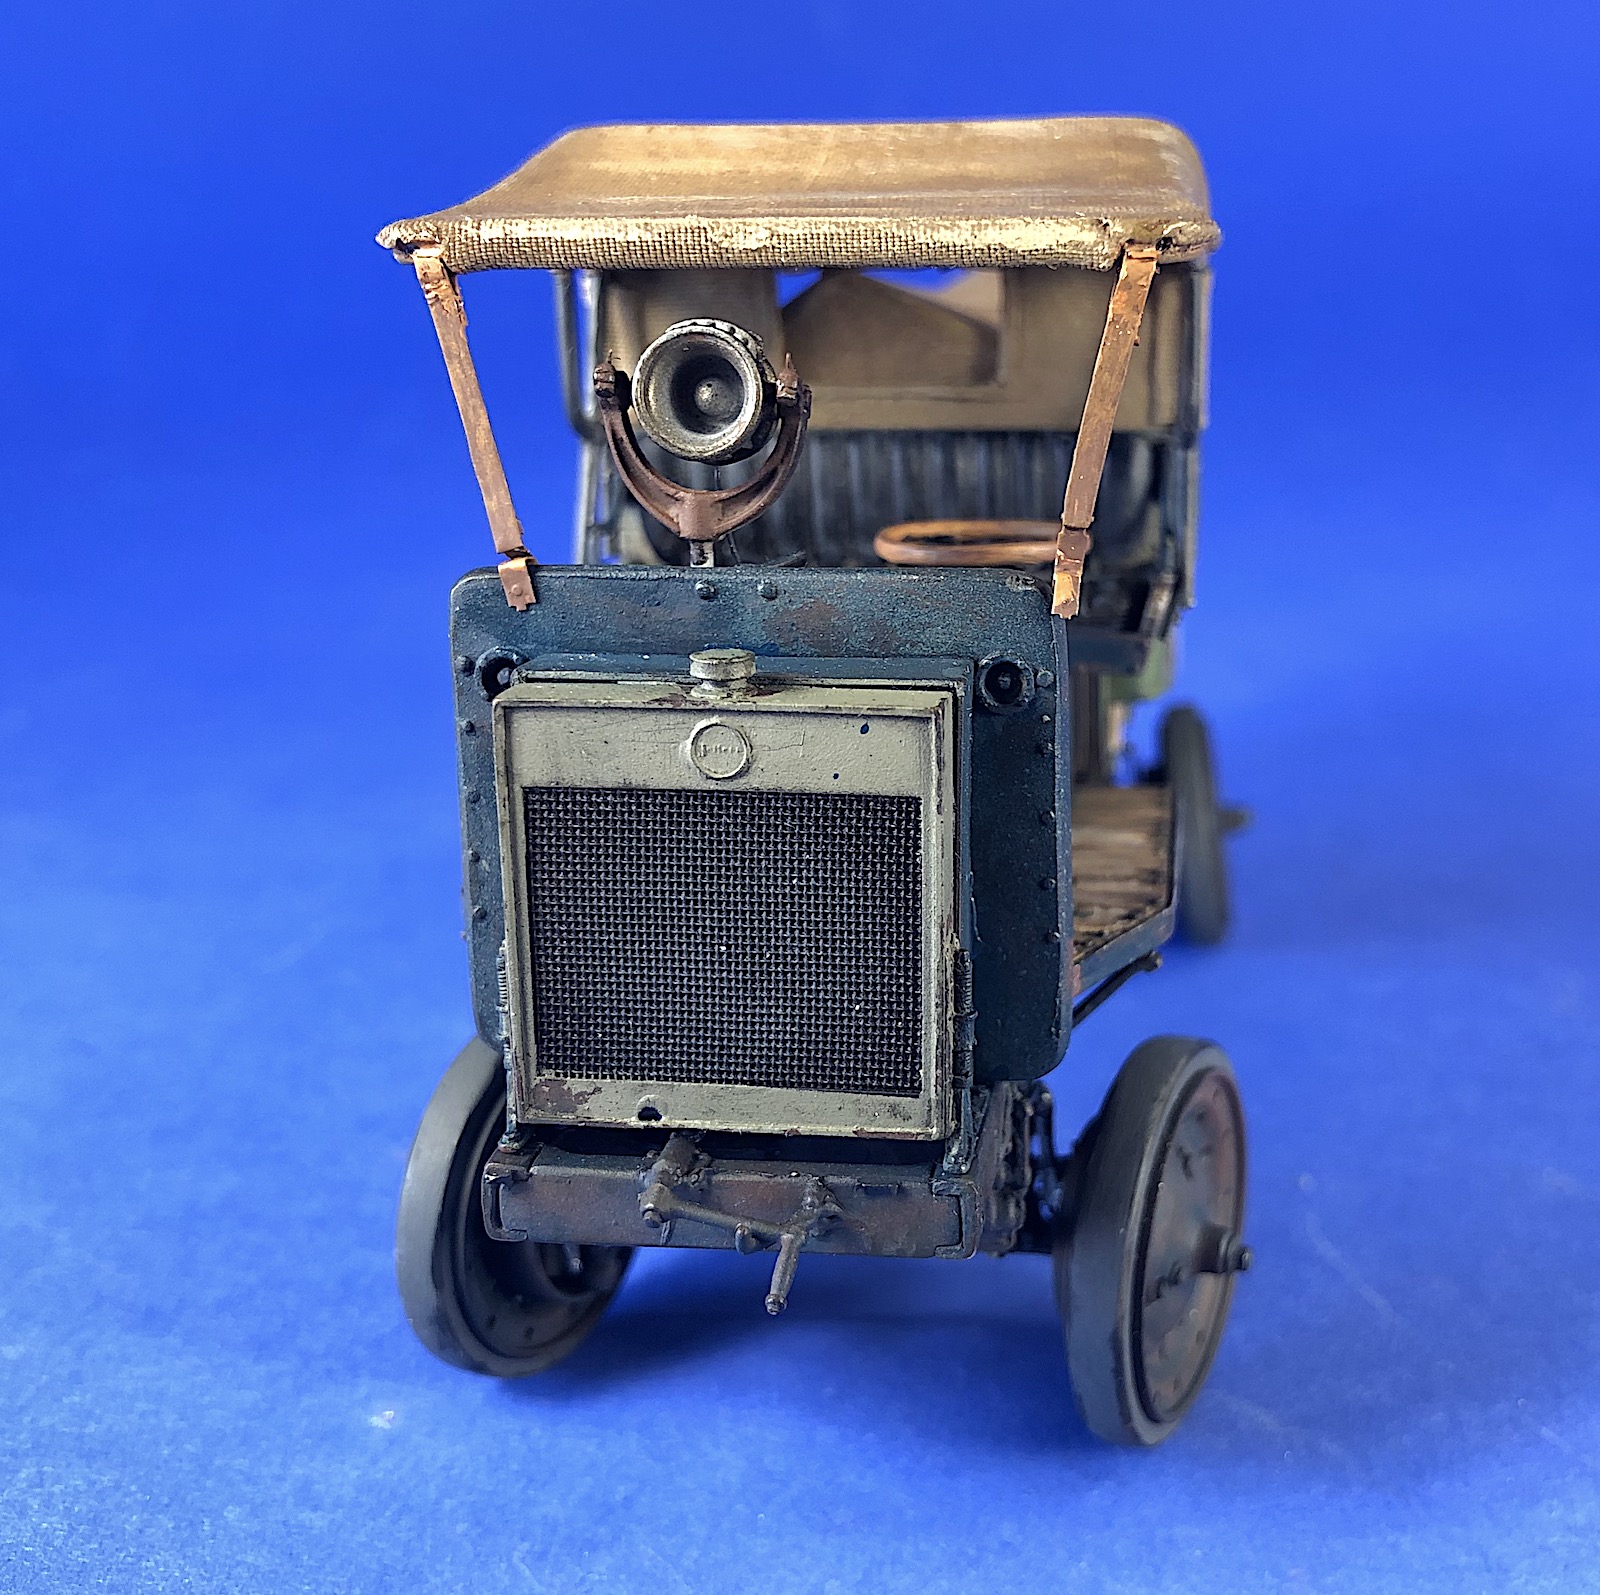
Installation of the engine, transfer case, driveshafts, and radiator are also installed in step 7. Open the holes in the chassis cross-member for installation of the driveshaft. The three rods can now be installed from the transfer case to the recess on the chassis cross member. There are also several pieces of wire to be installed here for the brake linkage. This drawing is also not very clear, but the wires are shown in the last step on page 8 for additional clarification. The longer wire connects to the brake pedal that projects through the cab floor. Three supports for the cabin or installed on each side of the chassis. The parts are not numbered but part number seven is shorter and should be installed towards the front of the cab. The diagram shows installing the radiator and shell to the chassis, but I would mount them to the front wall of the cab to get a good joint. The small photoetch emblem on the radiator is for the Jeffrey Quad version of the vehicle. Other photoetch emblems are provided for the Nash Quad versions of the vehicle.
The last steps on page 8 install the cab and truck bed to the chassis. The wheels, cab, and bed fit well with a bit of persuasion. The wheels fit on to the wheel hubs with a nice, solid connection.
Finishing
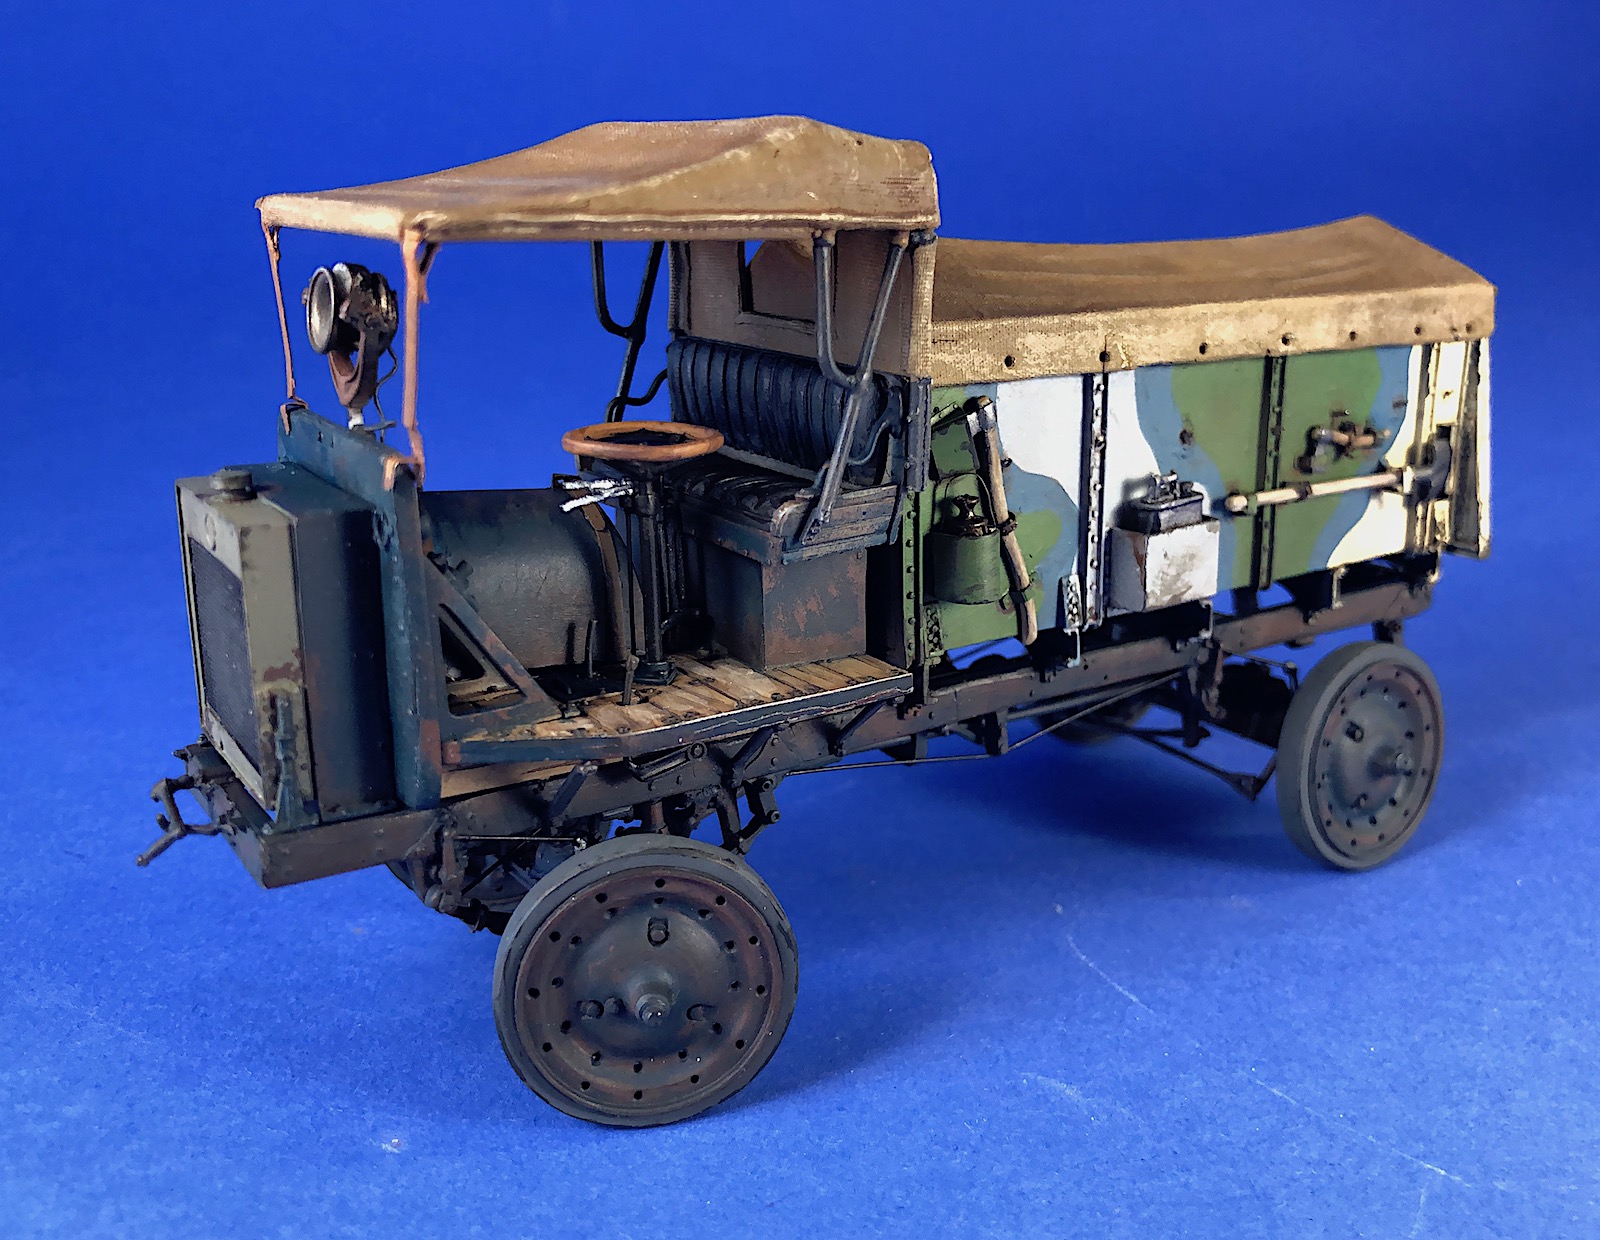
I painted the vehicle in a multicolored scheme as used in French service during WW1. I used Mission Models and Vallejo acrylic paints, and MIG washes and pigments.
Summary
This is a very nice kit, although best suited for skilled modelers experienced with resin model building. Many of the instructions are not clear, there is lots of clean up and fitting of parts, but the kit has good detail, nice part fit, and results in an accurate, nicely detailed kit. This will be an enjoyable build for experienced modelers!
Thanks to Lukgraph for producing this great kit, and to IPMS for the review opportunity.
References


Comments
Add new comment
This site is protected by reCAPTCHA and the Google Privacy Policy and Terms of Service apply.
Similar Reviews