
J2M5/6 Type 33/31 Raiden
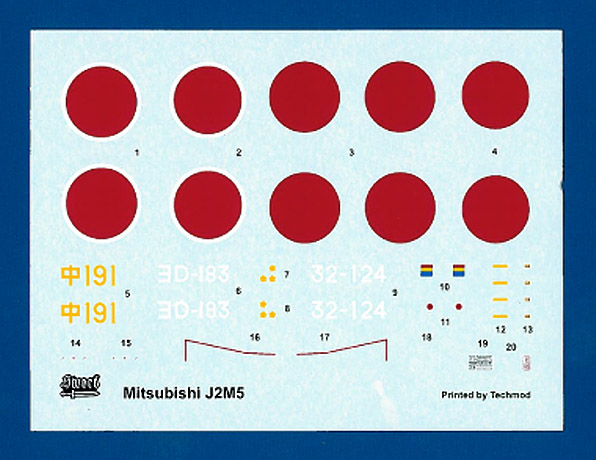
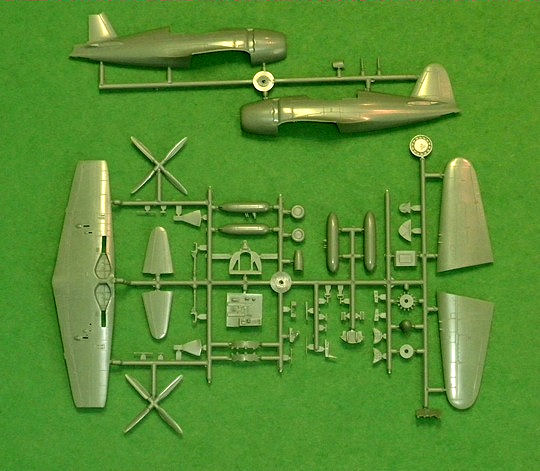
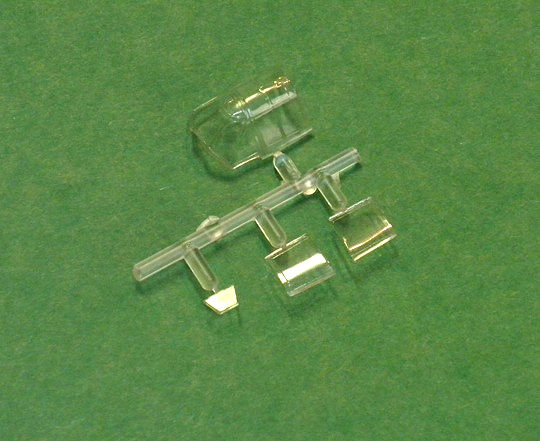
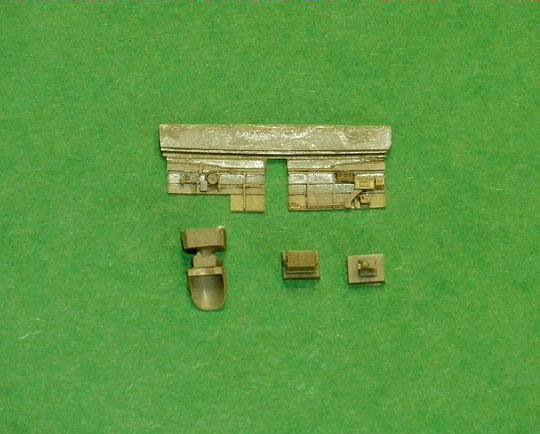
The J2M5/6 Raiden interceptors were introduced into combat in small numbers by the Imperial Japanese Navy in the last year and a half of the war and proved to be good defense against American B-29 missions over the Japanese homeland. There were less than 50 operational J2M5s and only two J2M6s, and they served in units along with J2M3s (since there were only two J2M4 prototypes). Sword’s new kit offers a better way of reproducing these aircraft in 1/72 scale than modifying one of the older Hasegawa J2M3 kits. The J2M5 and J2M6 were similar in appearance, with the same style of bulged top canopy, but they differed in a significant way…the J2M5 had a mechanical driven supercharger that decreased power by approximately 30%. The J2M5 did have a smaller under-cowl air intake scoop than the J2M6 and Sword provides both air intake options, so either version can be built. The kit actually shares many parts found in their earlier J2M3 release, including well-detailed resin sidewalls, seat, radio box, and gun sight, so everything is included to build an accurate J2M5 or 6. There are 56 injection-molded parts on two sprues of medium gray plastic, 4 parts on one clear sprue, 5 resin parts, a well-registered thin-film decal sheet (printed by Techmod), and a folded multi-page instruction booklet. Two propeller options – the standard style and the hi-speed version – are provided, along with two drop tank options.
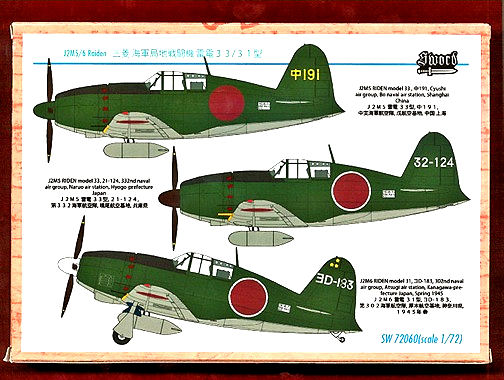
The decals provide markings for three aircraft:
- J2M5 Model 33 – Cyushi Air Group, Bo Naval Air Station, Shanghai
- J2M5 Model 33 – 332nd Naval Group, Naruo Air Station, Hyogo-prefecture, Japan
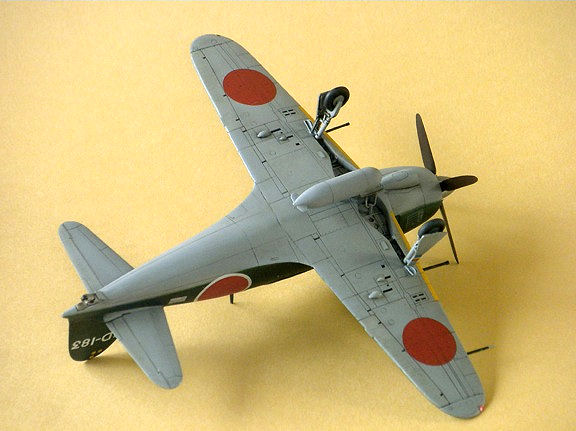
- J2M6 Model 31, 302nd Naval Air Group, Atsugi Air Station, Kanagawa-prefecture, Japan (Spring 1945)
Overall, this limited-run kit is an excellent offering that almost rivals the quality of those marketed by major kit manufacturers. But, because it is a limited run kit, it is necessary to take a little more time preparing parts and dry fitting at the beginning of the project and throughout the build. But these are not burdensome steps and, in my opinion, actually add to the feeling of model building instead of just assembling pieces. Sprue attachment points are reasonably small and the plastic is not all that brittle, so there is less of a chance of marring the parts while removing them from the sprues and cleaning them up. There is very little flash to deal with and any that does exist is thin and easily removed with a #11 blade and sanding stick. The recessed panel lines are very crisp and understated. Because of this and the nature of limited run kits, I found it necessary to rescribe a few panel lines along the cowling on the fuselage halves that seemed to come and go. Some model builders may not be concerned about that detail, but having served on judging teams for years and seeing models moved aside because of disappearing panel lines, I tend to want my models’ panel lines to be consistent and visible. Again, the time taken at the beginning of building a limited run kit to address a few details like these will result in an outstanding finished model.
There were a couple of times during the build that Sword reminded me that they make limited run kits. One time was when I chose which prop to install. I found the detail around the hubs of both propellers to be a little soft, so I decided on the hi-speed version and carefully redefined the edges of the prop blade collars with a #11 blade and rescribed the recessed rings. The edges of the blades and tips were also dressed up with a sanding stick.
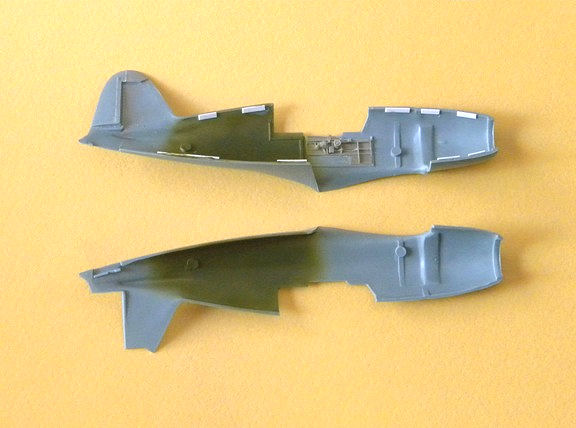
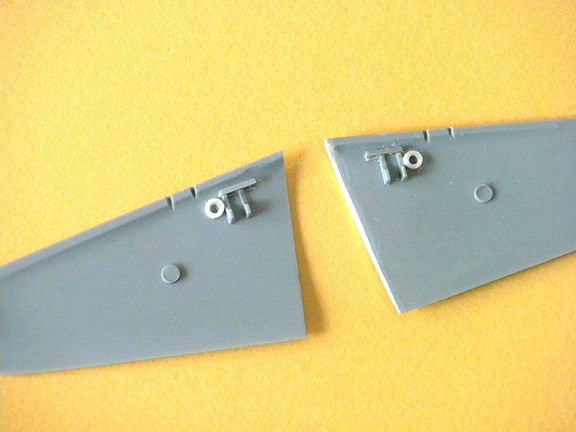
Then, I found it necessary to scrape the edges of the mating edges of the rudder and fin to tighten up the fit. And the rib detail on the starboard side of the rudder was more pronounced than the rather subtle relief on the port side, so I sanded down the detail on the starboard side to match the other side more closely. While doing this, I began chanting, “…this is a limited run kit…a limited run kit…a limited run kit...” And, since the kit does not have any molded alignment pins, I added a number of gluing tabs from .015” styrene along the mating surfaces of one fuselage side to aid alignment and strengthen the joint. See the photo below.
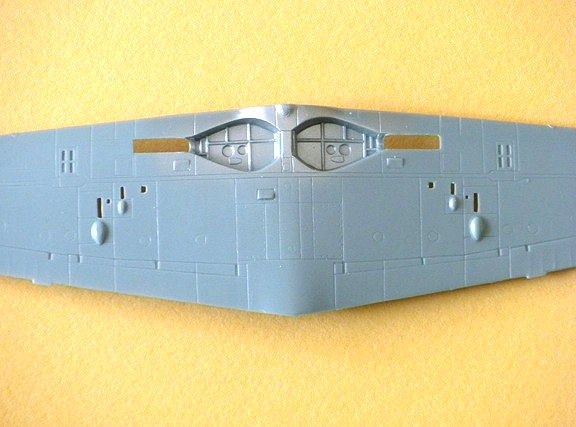
When dry fitting parts, I found a gap along the mating surfaces of the starboard side of the wing root and top wing section, so I added a .005” strip of styrene instead of using putty. The resulting fit was tight. The parts almost clicked in place, so I only had to add a little filler to blend the join. I then found it necessary to open some flashed over edges on a couple of the shell ejector slots and gas vents on the underside of the wing to make them uniform (not an unusual step when building a limited run kit). See the photos below.
The wheel bays include raised rings with dimples to locate the landing gear legs, but the dimples in the raised rings are far too small to fit the landing gear pegs. As a matter of fact, the whole raised ring is not large enough to be drilled out to fit the landing gear so, to avoid a weak butt joint, I added a ring around the raised area made from styrene tube stock and then drilled a suitable hole while again chanting “…this is a limited run kit…a limited run kit...” See the photo below.
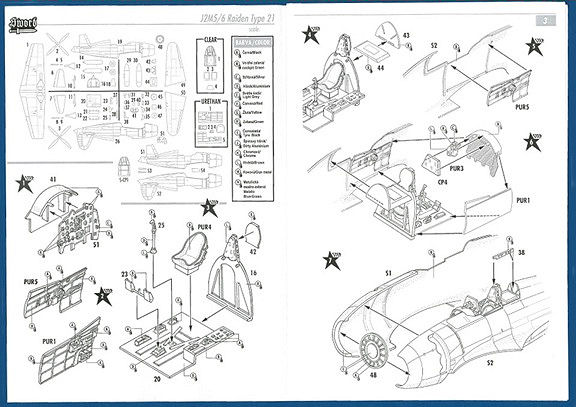
After these adjustments, assembly went pretty smoothly. Cockpit parts were aligned by first fitting the resin sidewall insert into the cavity molded into the port side, and then attaching the floor, back wall and rear deck, radio box, starboard sidewall, seat, instrument panel, rudder pedals, and control column (the resulting cockpit has a substantial amount of detail). It did take a few minutes to fit the instrument panel correctly, but it did fit. When the fuselage halve were closed up, I found a gap where the top of the small vertical back wall fits the inside of the fuselage sides. I added a piece of styrene strip as a shim, blended it with a little brushed-on Mr. Surfacer, sanded it smooth, and touched up the interior paint. The rear deck beam is a separate piece that needs to be aligned carefully when attached so the side windows will fit. And, the separate piece that represents the base of the antenna inside the cockpit may need a little trimming to fit it correctly against the back wall. I dry-fitted the windows a couple of times to be sure of it, but still had to sand the edges of both pieces a bit later to fit the canopy…”…this is a limited run kit…a limited run kit…a limited run kit...”
Before attaching anything more, I polished the clear parts, dipped them in Future, and set them aside to dry thoroughly for a couple of days before handling them again.
The assembled wings were attached and the rest of the exterior parts were added. Everything fit well, with panel lines aligning nicely. The canopy and side glass panels came next and attaching them properly did require some additional dry-fitting. After sanding the edges of the side glass panels a bit, they were attached, anchoring them in place with spots of white glue and then filling the seams with thin super glue. The canopy was fitted with a little filler applied along the edges of the windscreen to smooth out the seam. Because this was intended to be an OOB build, I did not add anything to the cockpit, wheel wells, or landing gear. However, since there was no molded mounting pin on the antenna or fuselage locating hole, I drilled small holes in the base of the post and the top of the fuselage to attach a bit of wire so I could pin the post in place (note that the instruction sheet side-view drawings do not picture the antenna post in the correct position. It should be attached forward of the spot indicated so it aligns with the angled antenna section below it that goes into the back wall inside the cockpit). Sword also did not mold the aircraft’s small antenna post on the tip of the fin, so it is necessary to attach the antenna wire to the top of the fin if the model is intended to remain OOB.
I masked the clear parts, painted everything with Mr. Color per the color call outs in the instruction booklet, and applied the kit decals with a little extra care (remembering that they are from Techmod, very thin, and like to adhere to the first surface they come in contact with). I applied a little Mr. Mark Softer to assure there was no hint of silvering. When the decals were completely dry, I airbrushed a light coat of Future to seal them and followed up with a topcoat of Testors Dullcoat mixed with a few drops of Testors Metalizer Sealer to achieve a uniform satin finish. I decided not to add chipping or wear scuffs to the paint finish or exhaust streaks and cordite stains around the base of the gun barrels. After that, I added the landing gear and found that the small U-shape inside landing gear door closers were very, very, very fragile. I broke the thin arms while removing the parts from their sprues. I suggest builders use only a fresh (read sharp) X-acto blade and support the pieces on a cutting block when attempting to remove them from the sprues…and be prepared to repair the fragile arms when they break. In the end, it might be easier to give up on the OOB build and just replace the fragile plastic arms with a couple of pieces of wire bent in a U-shape.
I then attached the front cooling fan, propeller, pitot tube, and wing guns to finish the model for this review. At a later date, I may add antenna wires between the antenna post and fin and insulators…but for now, what you see is what you get in the box.
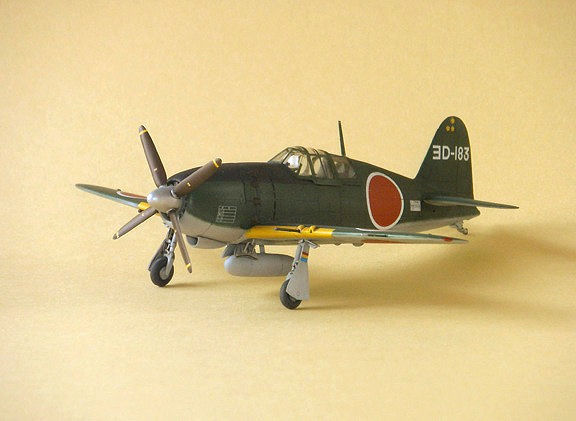
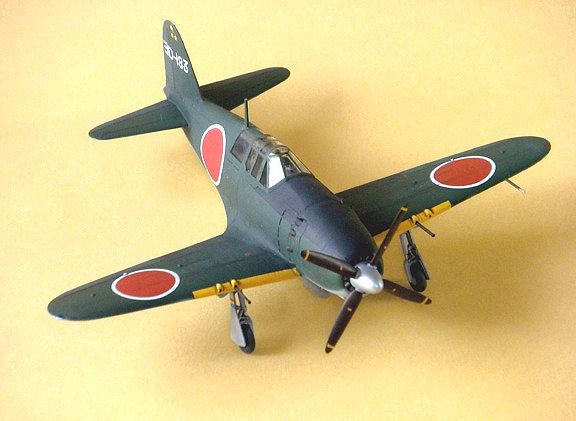
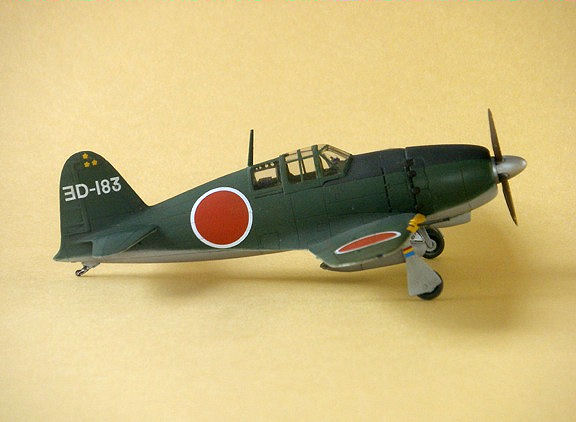
Voilà…another limited run model built with little drama! It did take a little longer to finish than I had originally thought, but not all that long. It was necessary to dry-fit almost everything and make an adjustment here and there as I proceeded, but in the end I was left with the feeling I had done some actual model building. Overall, the build was a pleasant experience and I ended up with a very respectable 1/72 J2M6. See the photos below.
Obviously, I recommend this kit to anyone who knows that a limited run kit requires a few more minutes of prep work and dry fitting than most current mainstream shake-and-bake kits. My thanks to IPMS/USA and MMD Squadron for the opportunity to review this kit.


Comments
Add new comment
This site is protected by reCAPTCHA and the Google Privacy Policy and Terms of Service apply.
Similar Reviews