
If.5 Machinengewehrwagen 36
The Kit
The kit contains four sprues for the wagon, plus sprues for two horses, and three soldiers molded in light grey plastic. The four tires for the wagon are molded in black plastic. Not sure why the separate color for the tires since they are hard plastic and the entire kit would be painted anyway. The kit also contains a metal chain, two frets of photo etch parts, nylon string for the tow cables and a decal sheet which includes markings for the vehicle and uniform patches for the figures. The parts had some minor flash, but not troubles with sink holes or ejector pin marks. The only exception is on the wagon sides above the seat for the drivers and the floor of the machinegun cart. There are some unavoidable ejector pin marks, but they are hidden by the seated figures so I chose not to fill them. The crispness of the detail on the parts could be sharper, but is still pretty good.
The Build
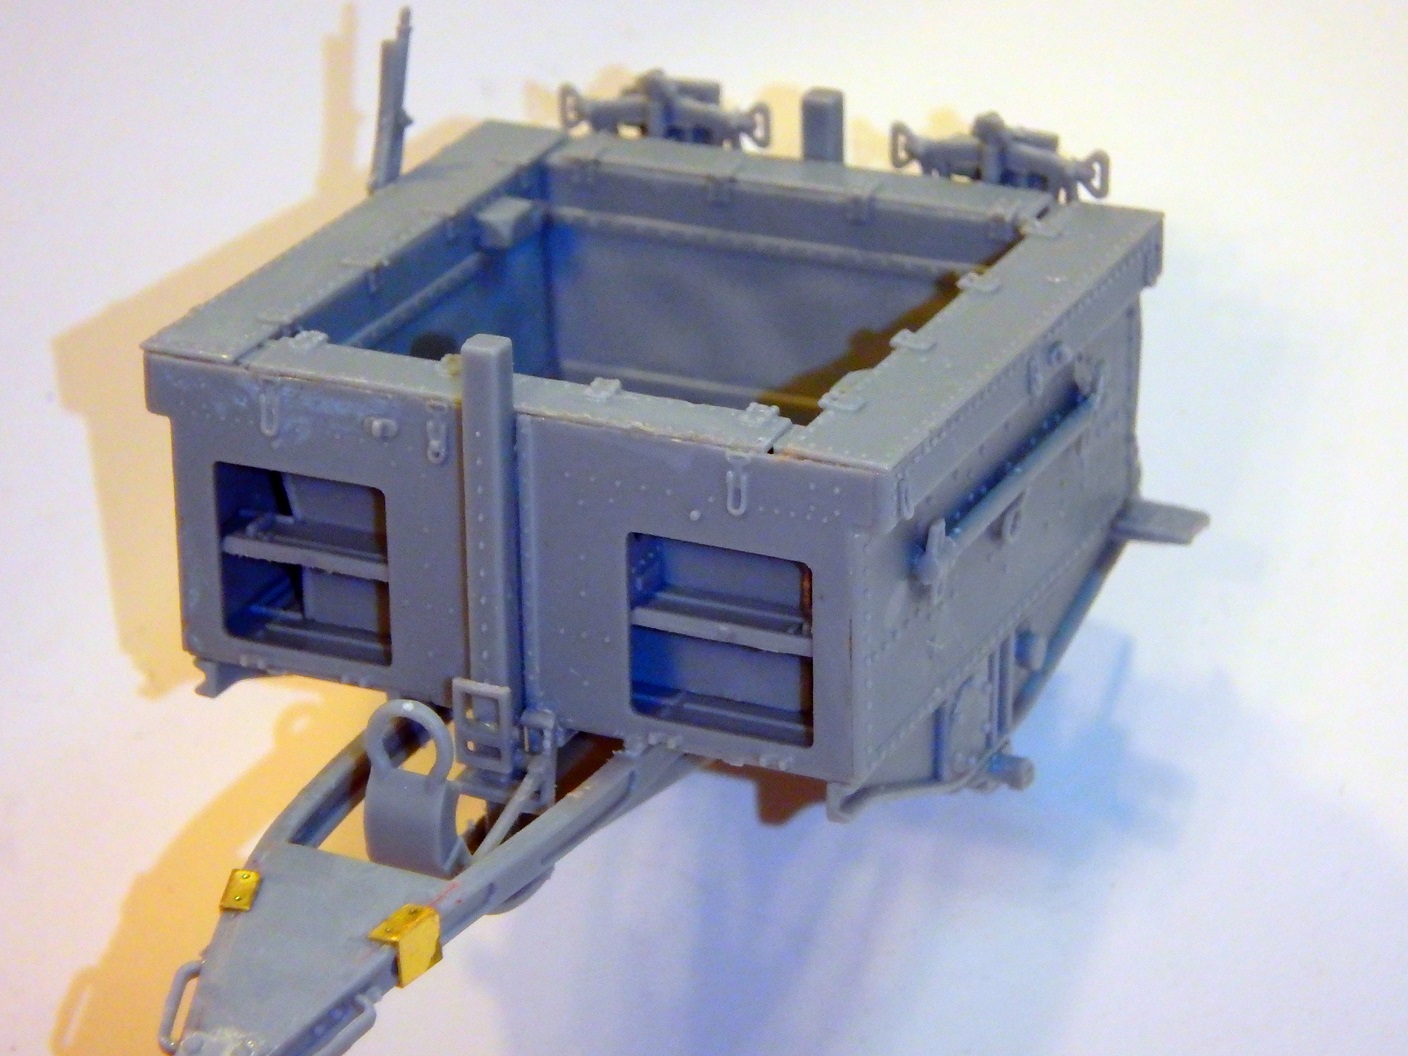
For the most part, the kit went together well. The basic assembly of the wagon was straight-forward, but did require some care to ensure that the parts were aligned and fit with no gaps. The parts to the chassis of the front and trailer sections look similar, but they go together differently. I’d recommend following the instructions closely because the front wagon section has the raised lip around the edge of the chassis frame facing inward, but on the trailer it faces outward. If you get them reversed other parts won’t fit right.
The trailer has doors for the storage compartments that can be positioned open or closed. Given that the horses and figures are sculpted to depict the wagon in a traveling configuration, I chose to build the doors in the closed position. The detail on the inside of the doors and the interior is good, if you want to build them open. There are some tiny plastic parts for latches on the doors etc., so, as always, be careful not to drop them in the carpet.
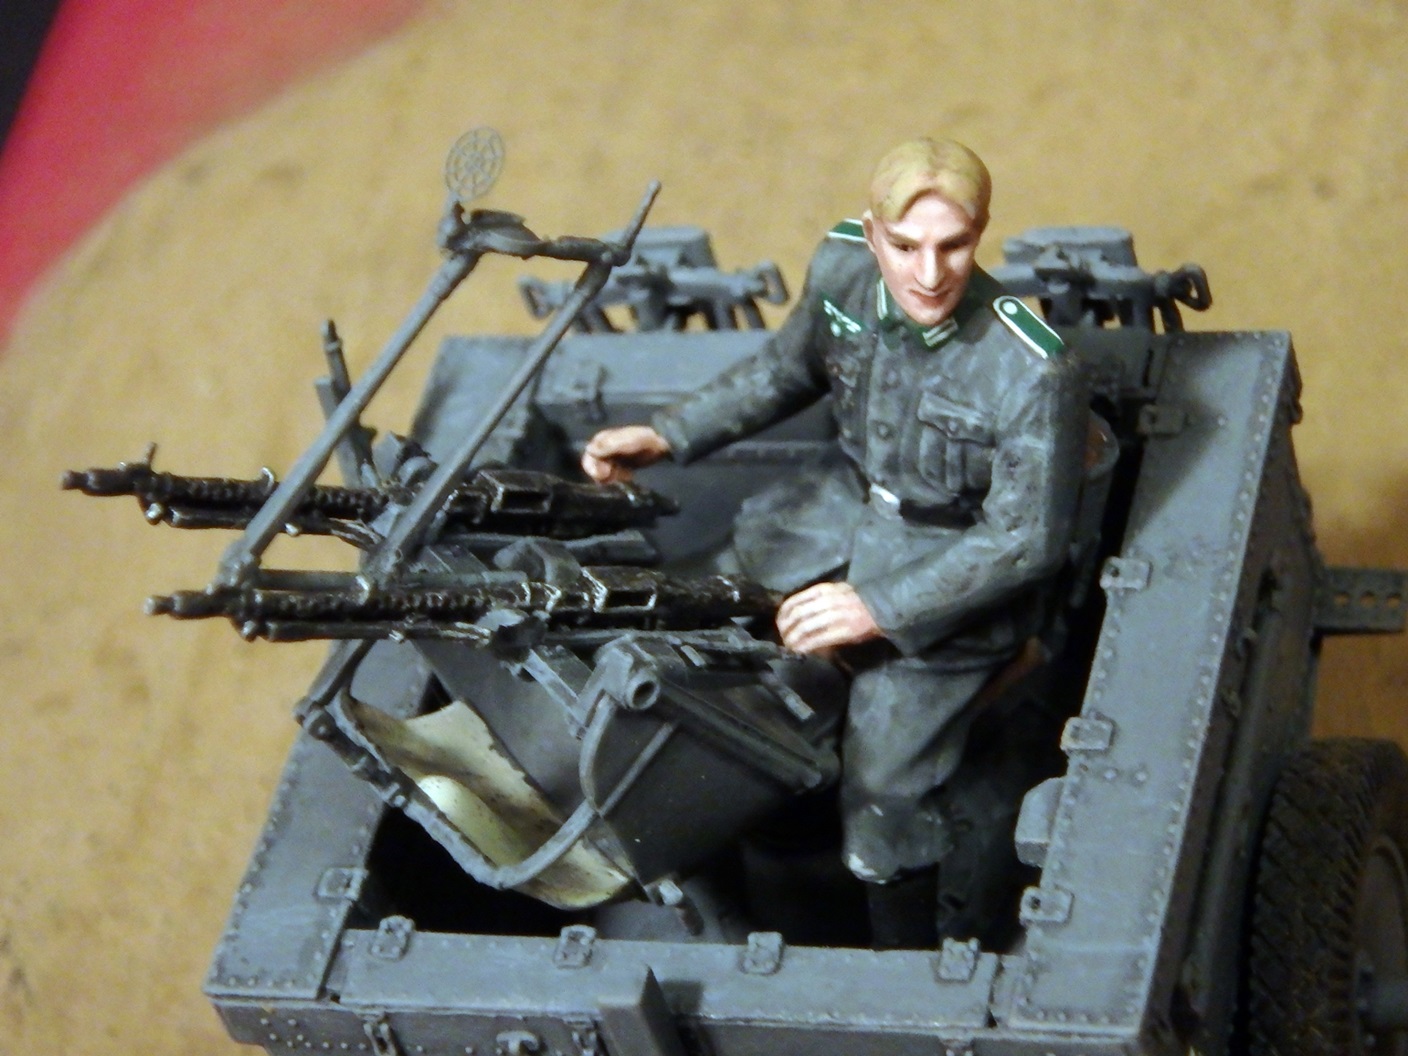
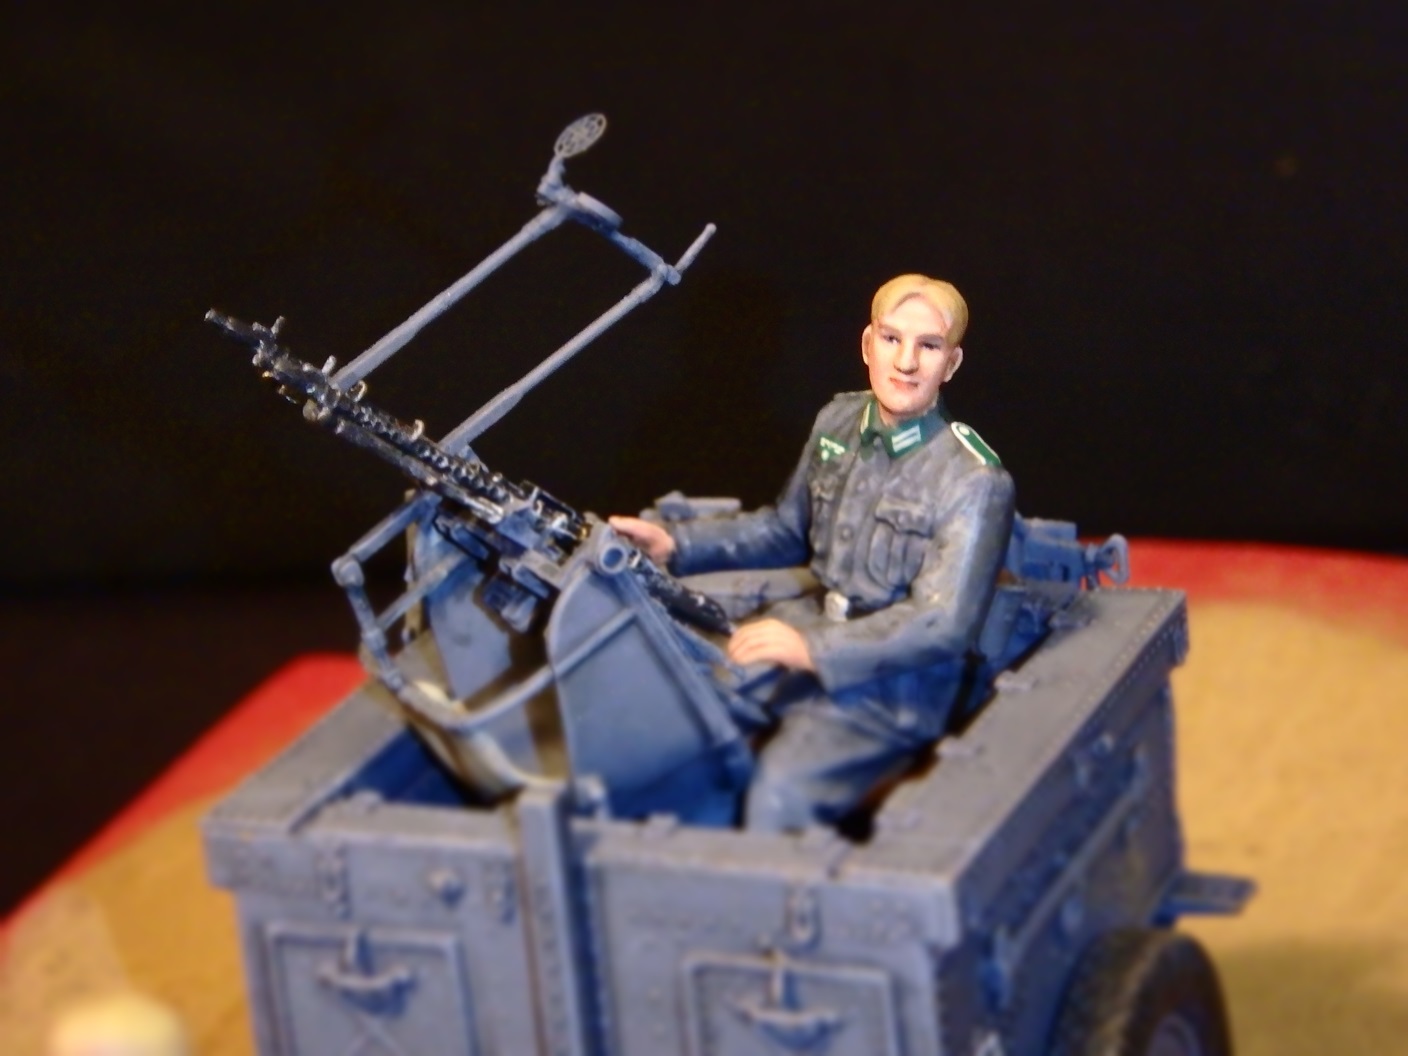
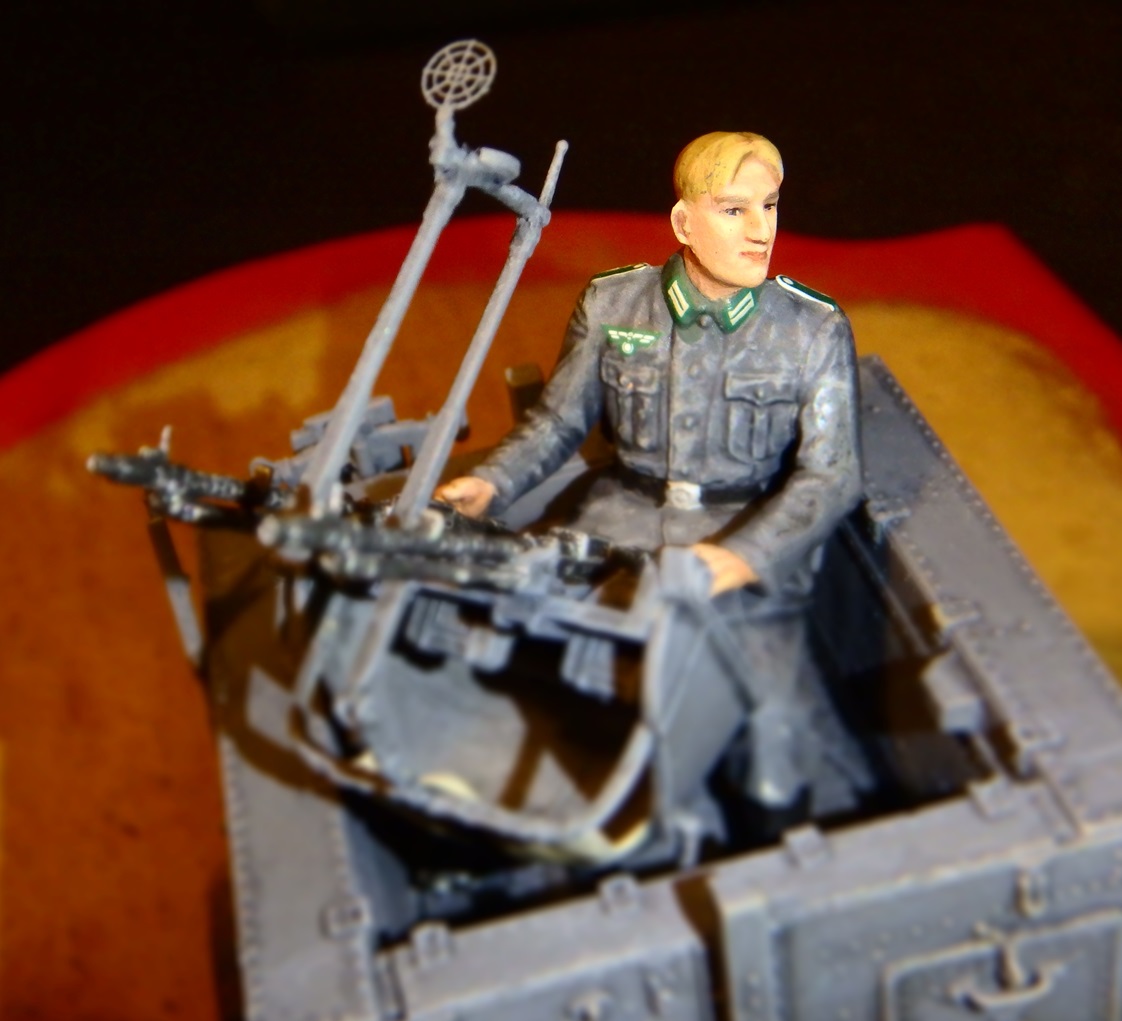
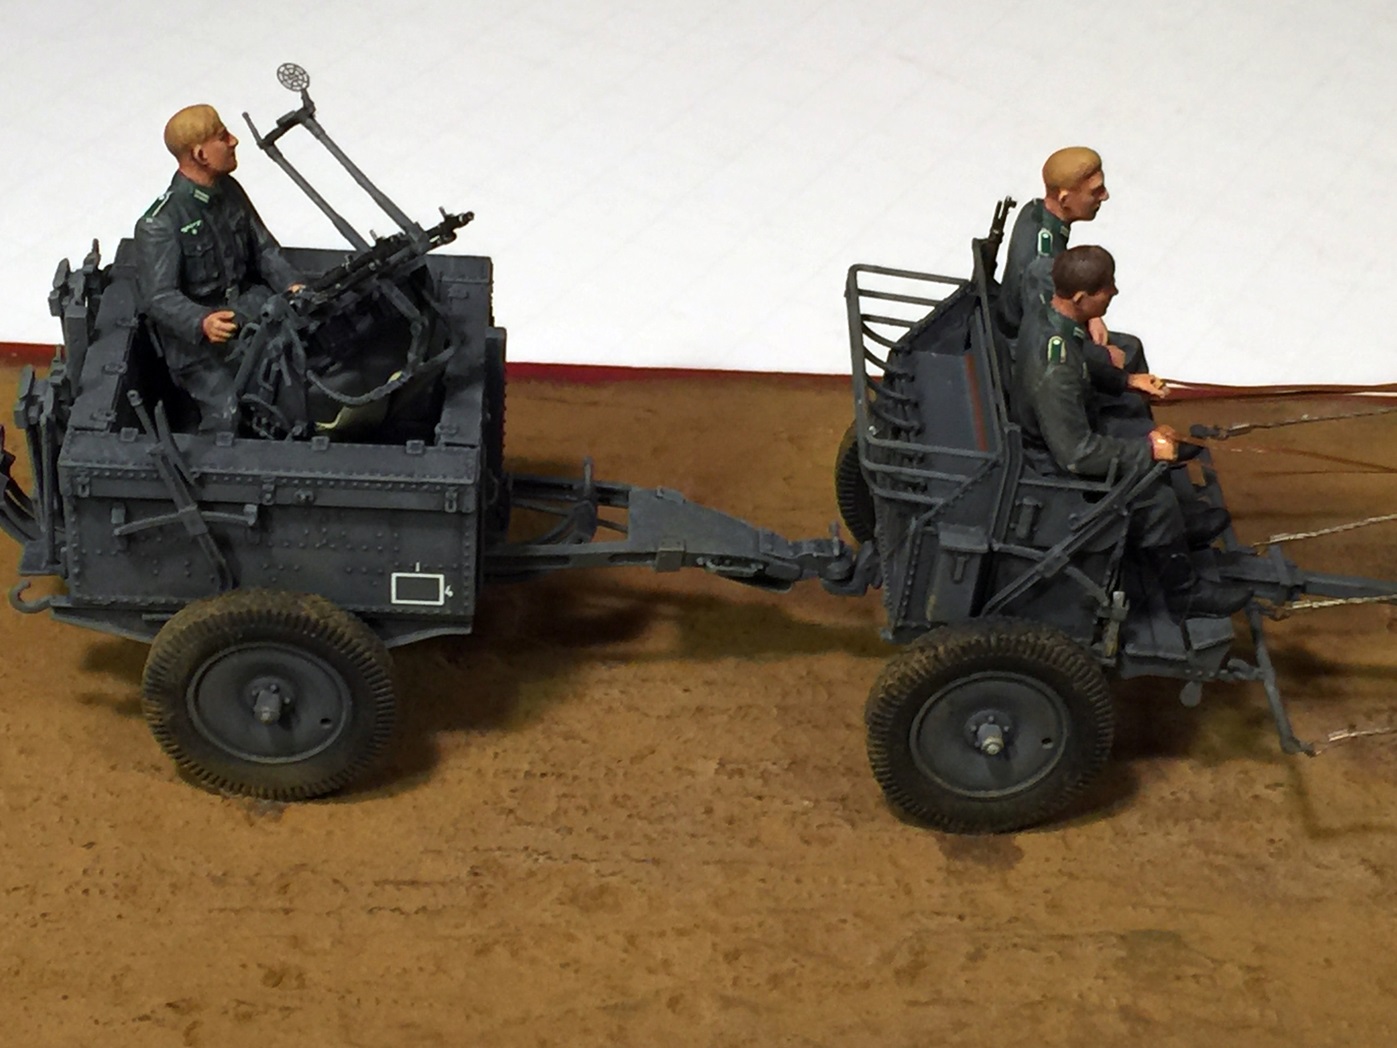
I love the PE gunsight for the dual MG 34’s. The gunsight also has PE guards for the protective holder that the gunsight folds down into when traveling. You have to bend them so they curve around the edge of the gunsight holder, which is a little tricky, but not bad. Gluing them on took some patience, but nothing to be afraid of. There are parts to assemble the gunsight completely folded for traveling, but I chose to build it fully deployed. I think it looks more impressive and I’m sure it could be fired while traveling if needed. I found photographs of this vehicle on the internet, including examples of the gunsight in the firing position while the wagon was in motion.
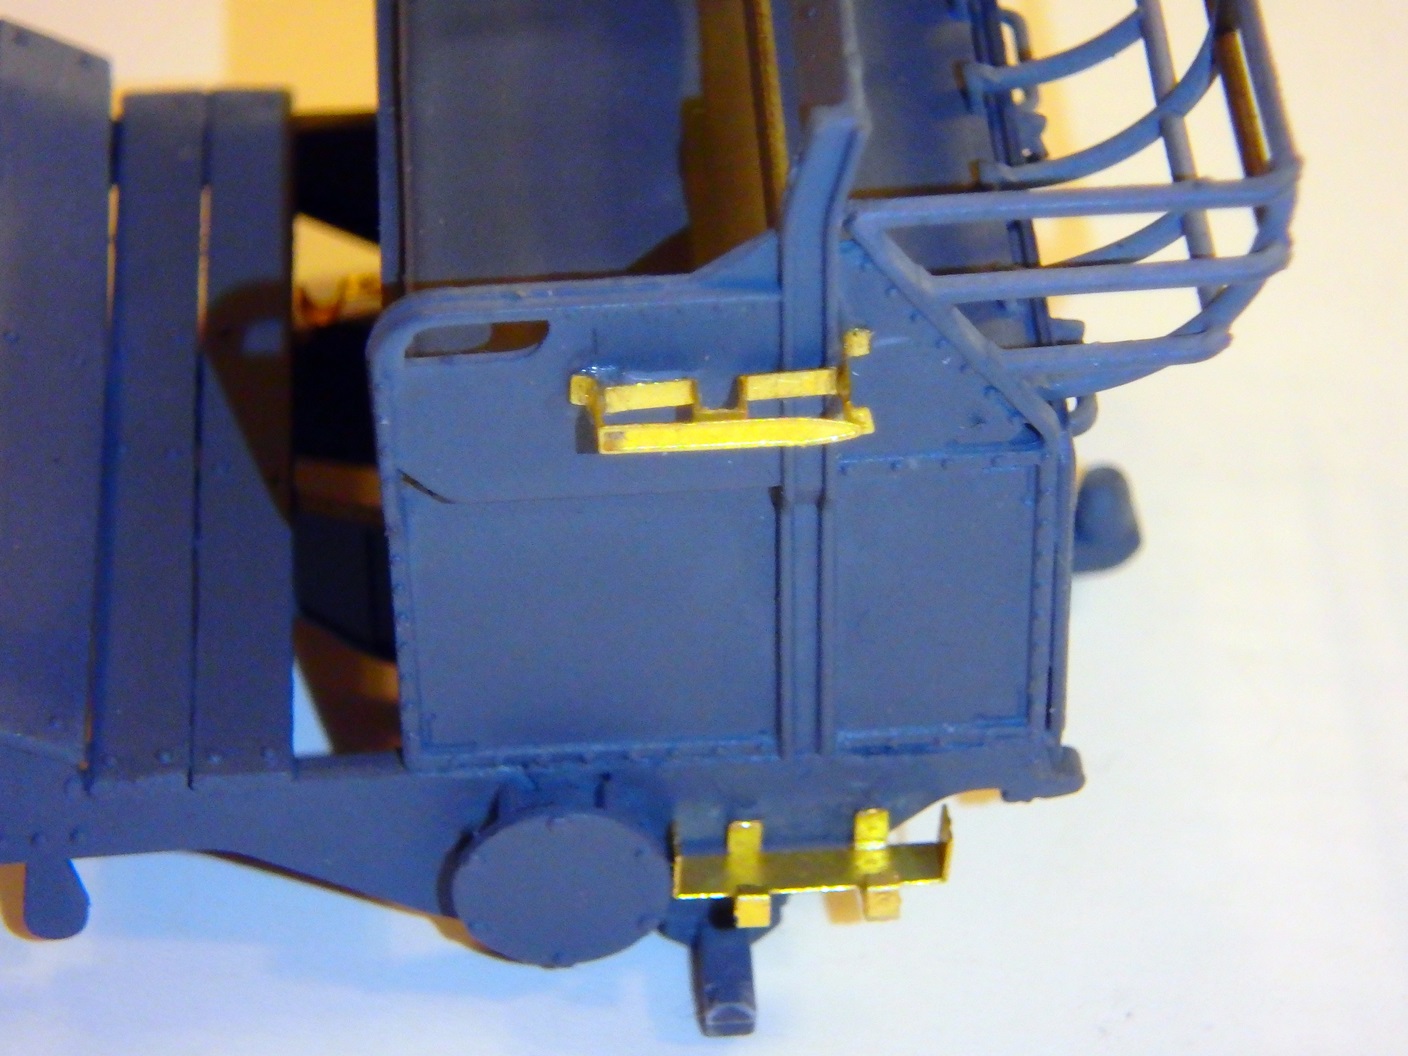
There are PE parts to make brackets for the tools and rifles that are carried on the outside of the wagon. I was impressed that the PE was etched on both sides, making it easier to bend correctly and improving the appearance. You have to bend a partly round part for the pick axe to rest on, which is probably the next most difficult bending task on this model after the guards for the gunsight.
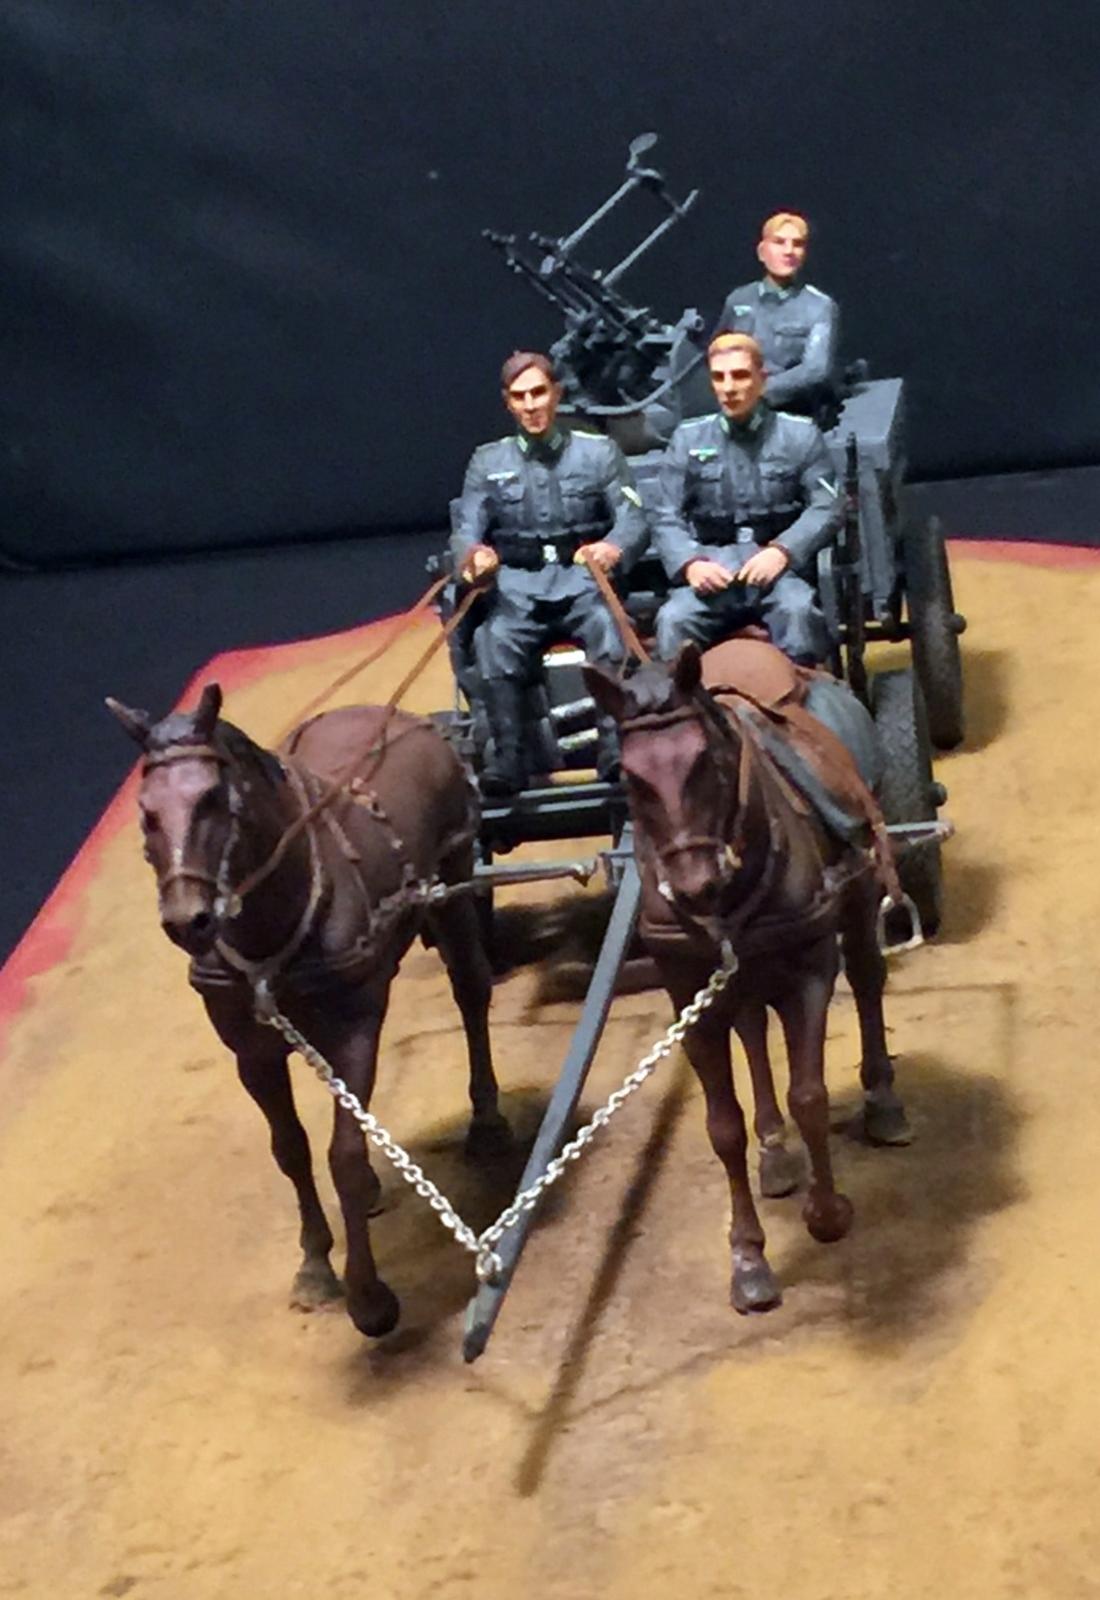
The most difficult parts of this model were the PE on the horses and aligning the chains, reins and tow cable so that everything is tight and correctly positioned. There are twelve small PE rings that are used to connect these parts to the horses’ halters, harnesses and wagon. These rings have a gap in them so that you can put chain links and whatnot through them, which makes them even more fragile and easily misshapen. I closed the gaps after assembly by putting a little drop of superglue on them to close the gap so that chains, reins, and other hardware wouldn’t slip out by accident.
The instructions were somewhat vague on several parts of this process, for example, it is unclear how you are supposed to connect the cables to the horses and there are no close-up drawings or explanations. I found photographs online which showed how the end of the cable attaches to a ring on the harness on the horses’ sides. This appears to be molded onto the harness so I just glued the end of the cable onto the proper spot. The photos also show a small length of chain at the end of the cable, increasing the length of the cable. I would not recommend doing this because the length of the reins is barely adequate. If anything they are a bit too short, so if the horses are any farther away from the wagon than called for in the instructions, the reins may not reach.
The instructions say that the size of the chain which connects the front of the horses harness to the end of the wagon tongue is 45 mm, but it’s not clear if they mean each side is 45 mm, or the total length. It does not say 45 mm X2, but it turns out that 45 mm total is way too short.
I would suggest that you first connect the horses to the wagon with the tow cables, next connect he center of the whole chain to the end of the wagon tongue using a small PE ring, then stretch it out until it reaches the horses collars and attach with more PE rings. I would cut it to fit so that it doesn’t end up to short.
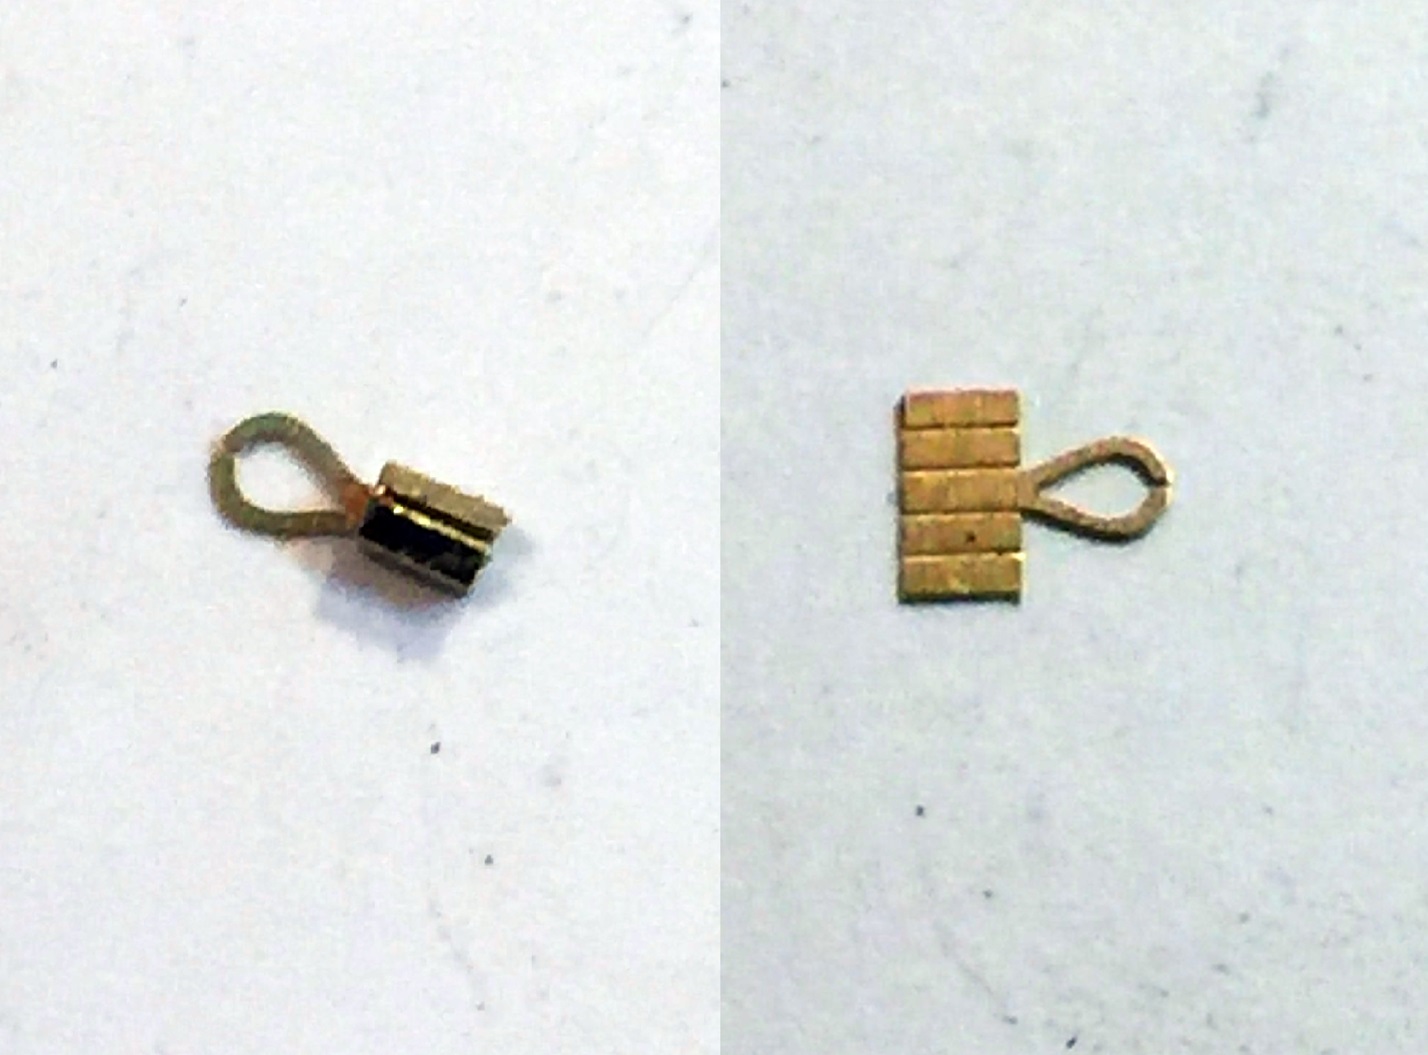
My biggest heartburn with this kit is the PE fittings on the ends of the tow cables. They do not look realistic to me. The collar that goes around the end of the cable is etched so that you bend it into a pentagon shaped tube which has a 2 dimensional PE loop at one end. I was going to cut plastic cable ends from some other tow cables and replace them, but I could not find suitable donors in the parts box. I think that this is an example of 3D parts that just should not have been made from PE. Thankfully they used real metal chains and did not try to foist PE chains onto us.
The Figures
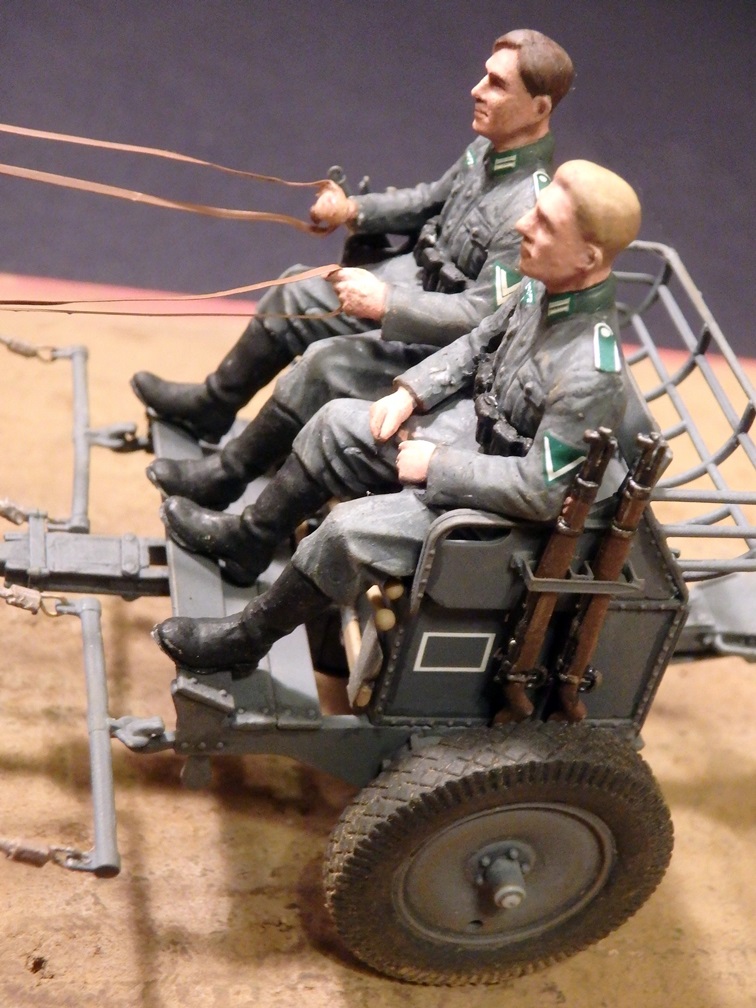
The figures are good, but he detail could have been crisper and I was somewhat underwhelmed by the sculpting of the wrinkles on the soldiers’ clothing. One interesting design feature of the figures is that the soles of the boots are molded separately from the foot. This allows for detail of the tread of the boots without using slide molding technology.
There were some minor difficulties in getting a good fit so that there were no gaps between the parts on the soldiers, but a little filling and sanding corrected those issues easily.
The figure in the trailer manning the machine guns did not fit at first. His legs were too long and I could not get him to fit in the seat with his feet on the ground without shortening his boots, which I did by cutting them off and slicing about 1 mm off the top and gluing them back on. I also left the soles off of his boots.
The figure holding the horses reins has his hands in the appropriate positions for this task, however, his hands are closed fists with nowhere to put the PE reins. I carefully sliced his between his thumbs and fingers, bent the thumbs out of the way, and drilled a small hole for the reins to go through and cut the finger tips free so that I could insert the reins into his hands. This worked out pretty well.
The horses also had some minor gaps between parts, so a little more filling and sanding was needed here.
The horses have little PE horseshoes but you can only see a couple of them because most of the horses feet are on the ground. Its still kind of cute though.
Paint and Decals
I painted the model with Tamiya panzer grey lacquer and painted the figures with combinations of acrylics and enamel. All shading and highlighting on the wagon was done with acrylics.
I was impressed with the decals, especially for the figures. They are very precise and the decals with multiple colors are all perfectly aligned, that is, one color ink is not in the wrong place like I have seen in some other kits. I wish that more model makers would provide decals for insignia on the figures’ uniforms. I find this to be an especially nice feature. The only thing about the decals is that they are a bit thick and do not easily conform to the contours on the soldiers uniforms. The soldiers have the insignia sculpted on the uniforms in 3D as well, so when you put the decals on the figures, they lay on top of these raised and uneven surfaces. The decals are also a bit larger than the insignia sculpted on the uniforms so they don’t fit perfectly. I filed down the raised surfaces, not eliminating them, but making it easier for the decals to conform. It still took a healthy dose of Solvaset to get the decals to settle properly, but once they did they looked great.
Conclusion
This is an excellent kit of an interesting subject with lots of detail and good looking figures. Some measuring and test fitting of the cables and chains before cutting anything would be strongly advised, but all-in-all this was a fun kit to build and a great looking model.
Highly recommended.


Comments
Add new comment
This site is protected by reCAPTCHA and the Google Privacy Policy and Terms of Service apply.
Similar Reviews