
Hurricane Mk.IIC
Italeri has re-released its Hurricane Mk.IIC in 1/48 scale. The original release was from the early 2010’s and included a Hurricane Mk.I, Mk.I/Trop, Sea Hurricane Mk.I and Hurricane Mk.IIC. Inspecting at the parts (the photoetch sheet) you must wonder if at some point there the plan was to include a Mk.IIB in the family but to my knowledge it has never been released. Based on the engineering of the wing, you can probably model a MkIID and, if you get a replacement oil housing probably a Mk.IV as well, assuming you know your way around the Hawker Hurricane (there are plenty of online references).
Upon opening the box you find 5 sprues (two of them are duplicate of the same sprue), while one of the 5 of sprues is clear for the canopy, landing lights and navigation lights. Plus, there is a small photoetch fret with a few parts to help dress up the cockpit and some specific access panels necessary for the different variants of the airframe. You also get a full engine but there is no underwing ordinance (neither bombs nor external fuel tanks). Finally, you get a Volker filter for the Trop version.
The decal sheet is excellent (printed by Cartograph) and you have 6 different camo schemes -all RAF- including night fighters, European Theater, Mediterranean Theater and Far East Theater camouflages. It was hard to choose which version to build, as all of them look good. I almost wished it would have been a dual (or triple) combo boxing with more than one kit. I’m sure those extra markings will find its way into other models in my stash.
At the time of writing the molds are at least 10-year-old and they are showing a bit their age. I found some flash in all the sprues, except the clear one. It was easy to clean up the flash -but it was present- and it made preparing the parts a bit longer than normal.
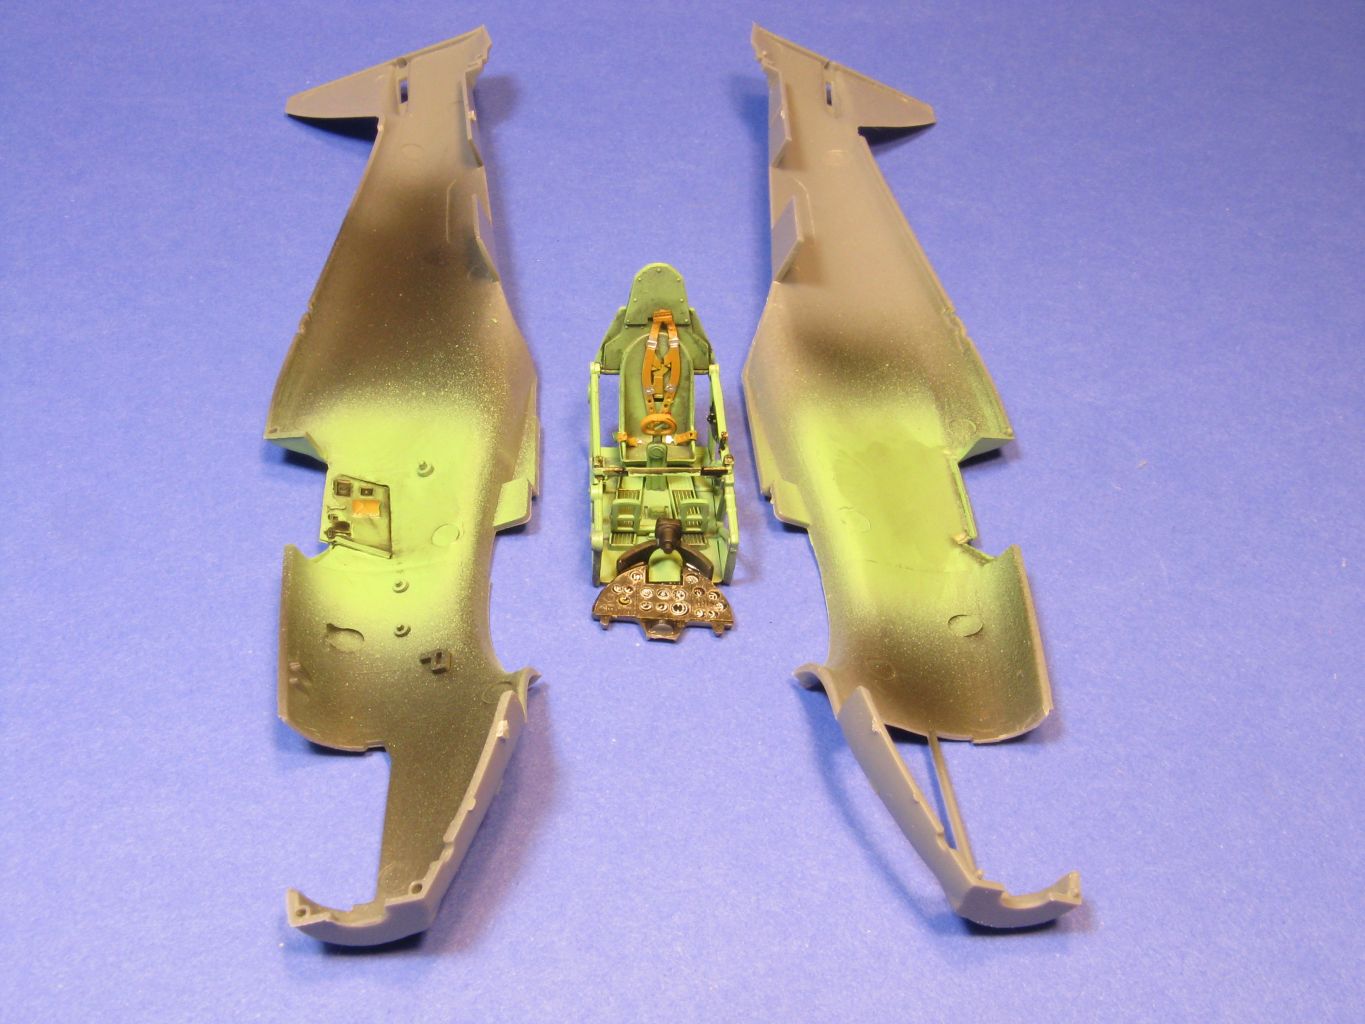
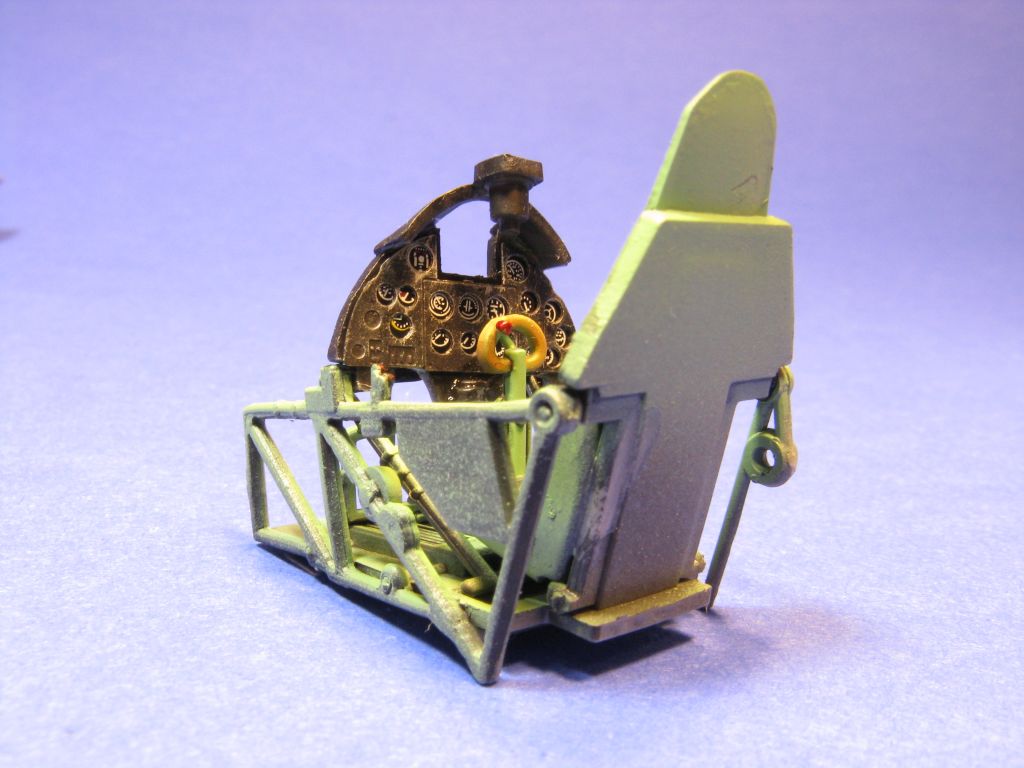
The cockpit detail is reasonable, but the cockpit floor is not correct as the Hurricane didn’t have a cockpit “floor”. Nothing too big of a deal, as you can barely see the floor of the cockpit even with the canopy in the open position. Another thing to consider is that the control column grip has a weird shape. The Hurricane had a control column grip shaped like an “0” but in the kit the shape is more like a “rounded triangle”. This thing is a bit more visible but unless you know about the misshaped grip, nobody would notice a thing.
The last point regarding the cockpit is that the photoetch seat belts are designed a bit too wide for the seat. The idea here is that you must fold the seatbets on itself a bit, making it be narrower that when they are on the fret, to create a more realistic “sagging” of the belts. It would have been nice to be told about that in the instructions, but it wasn’t that hard to figure it out.
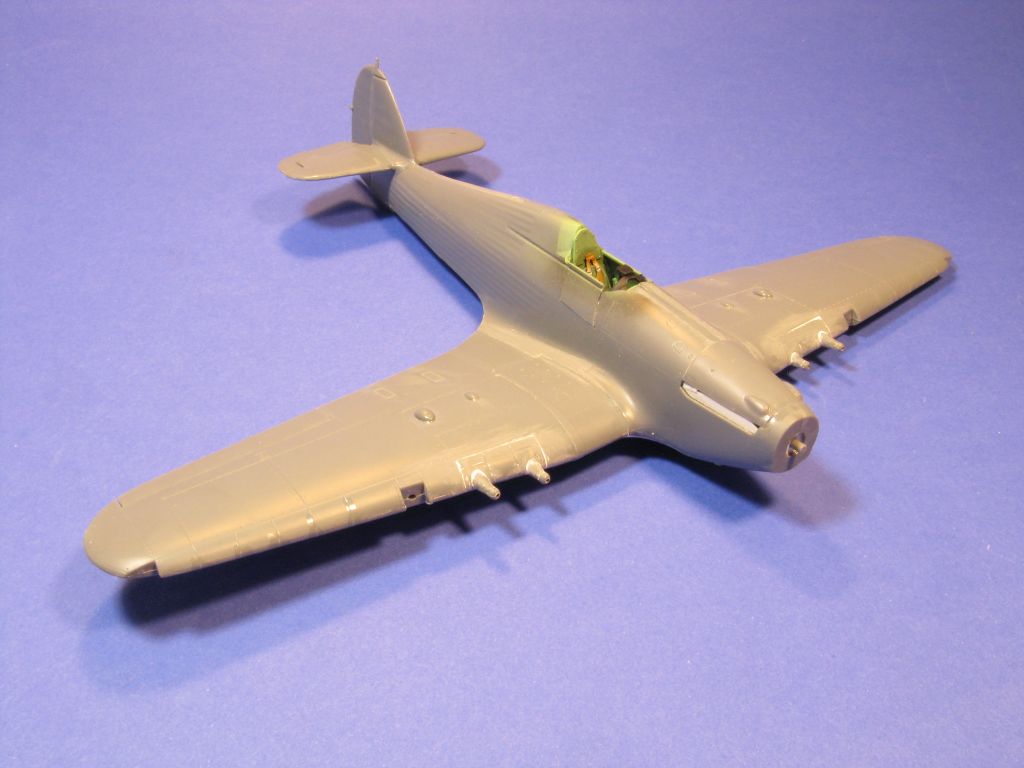
Closing the fuselage and installing the cockpit between the fuselage halves was trivial and the fit was very good. At this point I decided to have the fuselage nose closed up -deviating from the instructions and perhaps triggering a self-inflicted wound. Trying to close all the panels for the nose implied modifying some parts. Not difficult to do but I had to file and shape the panels a bit. One of the panels sat slightly higher than the others and sanding took care of it. The fuselage was molded with the cockpit escape hatch open. I decided to close it as well and once again I had to shape the parts a bit.
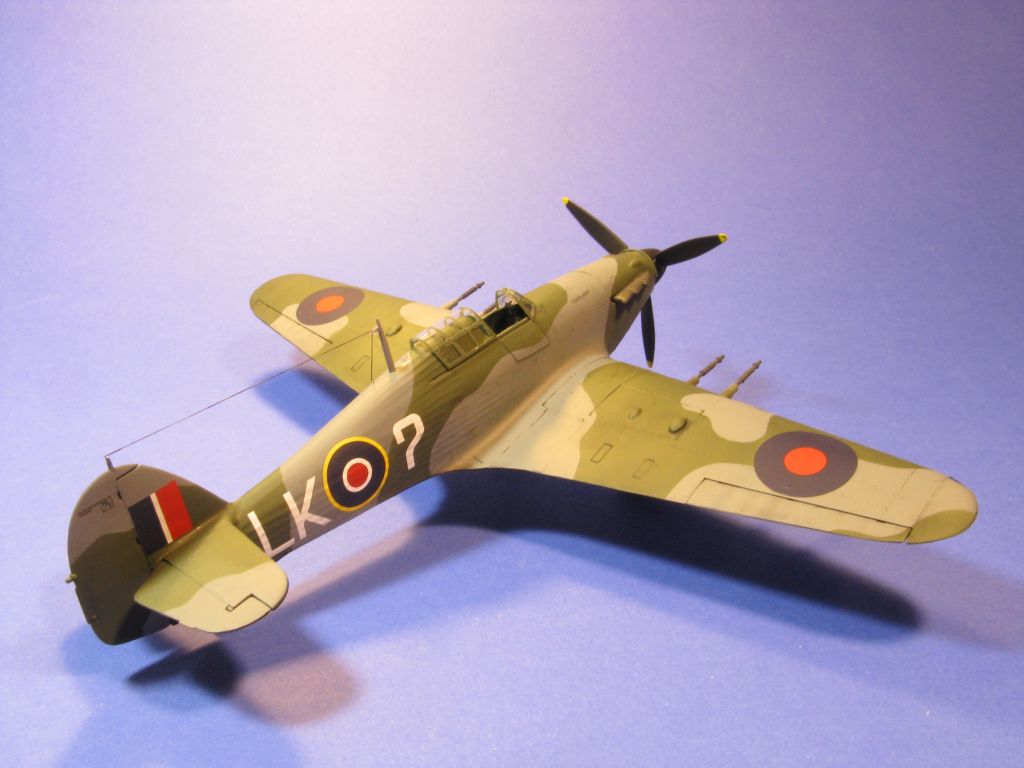
I was making good progress and I started working on the wings. The ailerons are posable -a nice touch- and you must drill a few holes to add the cannon breach fairings on top of the wing (two fairings per wing). The fit of those is great, there was a hair-line gap between the fairing and the wing surface and liquid glue sipped into the gap and took care of it. I presented the wing to the fuselage and the wing root to fuselage fit was good but not perfect. I had to sand a bit the top of the landing gear well (still exposed in the wing top as the fuselage sits on top of it) to allow the fuselage to “sit down” properly on top of the wing and there was no gap nor step at the wing root.
The final step of wing assembly was to add the weapon wing insert. That was where I ran into another issue: they don’t fit well. I had to file the insert on the sides to match the wing opening -easy enough- and then I also had to file the top and bottom of the wing insert to match the curvature of the wing, otherwise there would be a step on both ends (upper and lower wing) of the weapon wing insert.
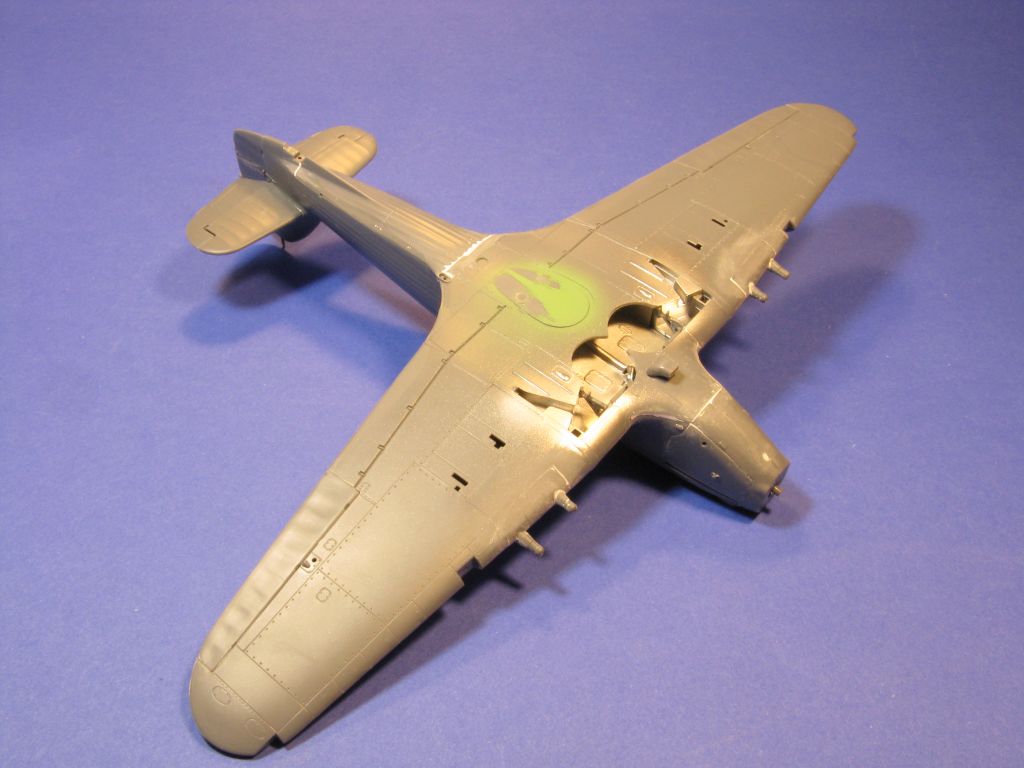
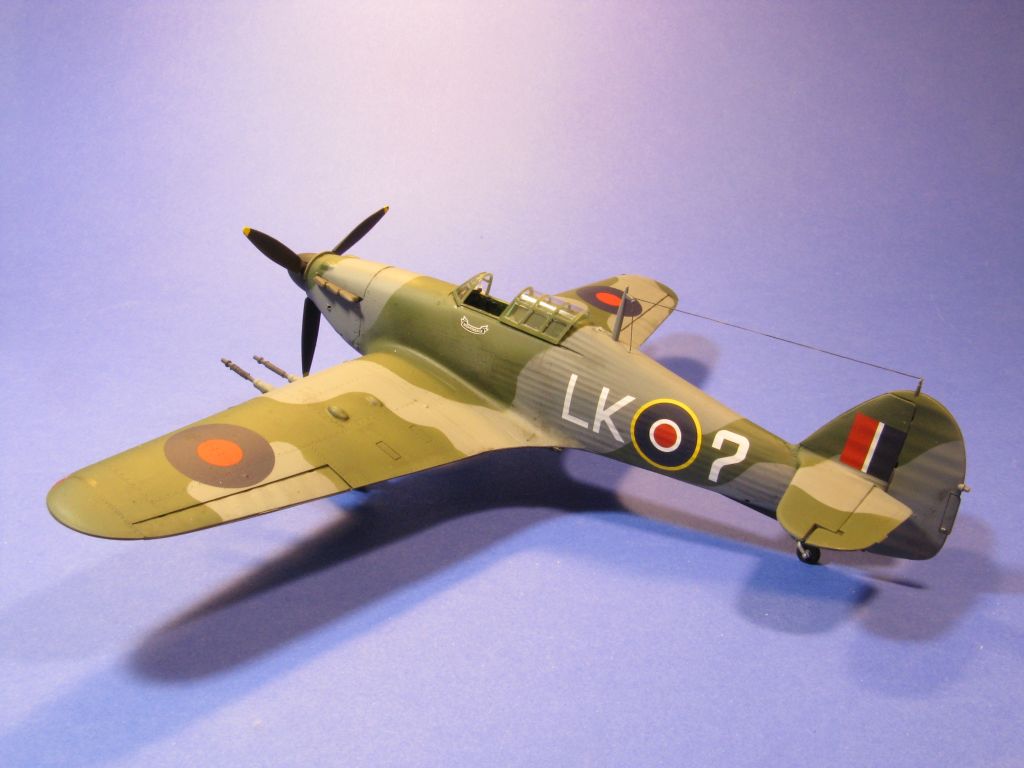
At this point I added the tail surfaces (posable as well) and I basically had a Hawker Hurricane ready to be painted. Or so I thought. Upon detailed surface inspection I’ve found a few gaps and steps, mainly around the modified panel surfaces but also around the wing cannon inserts. After fixing all those details, then the model was ready for priming and painting.
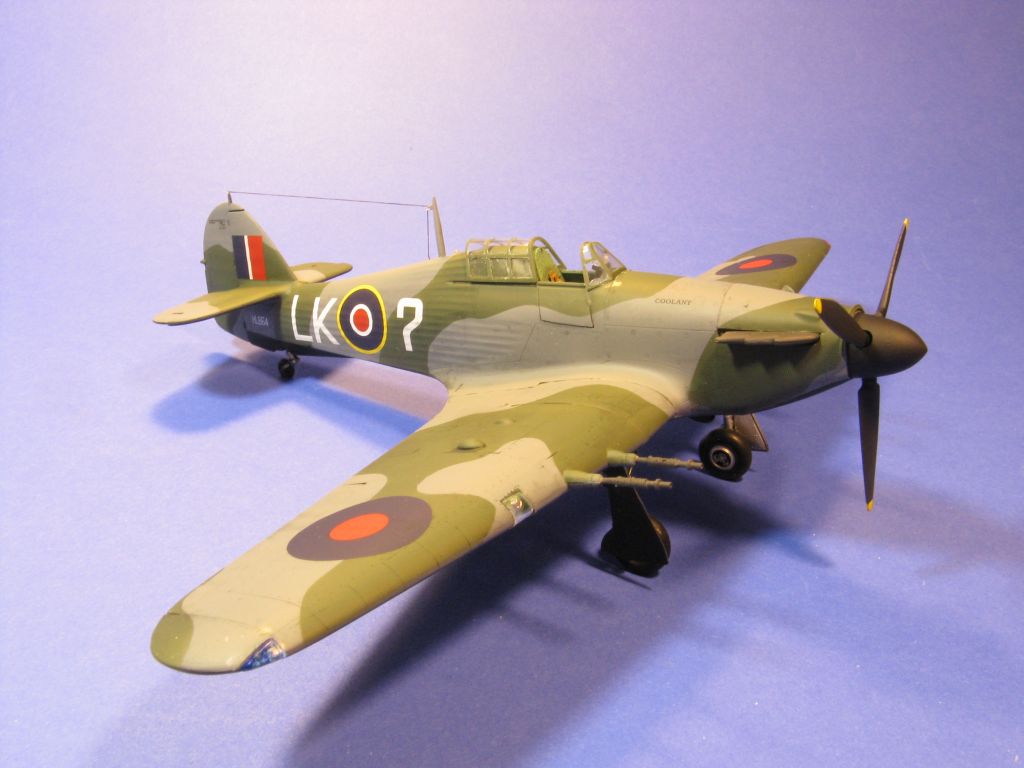
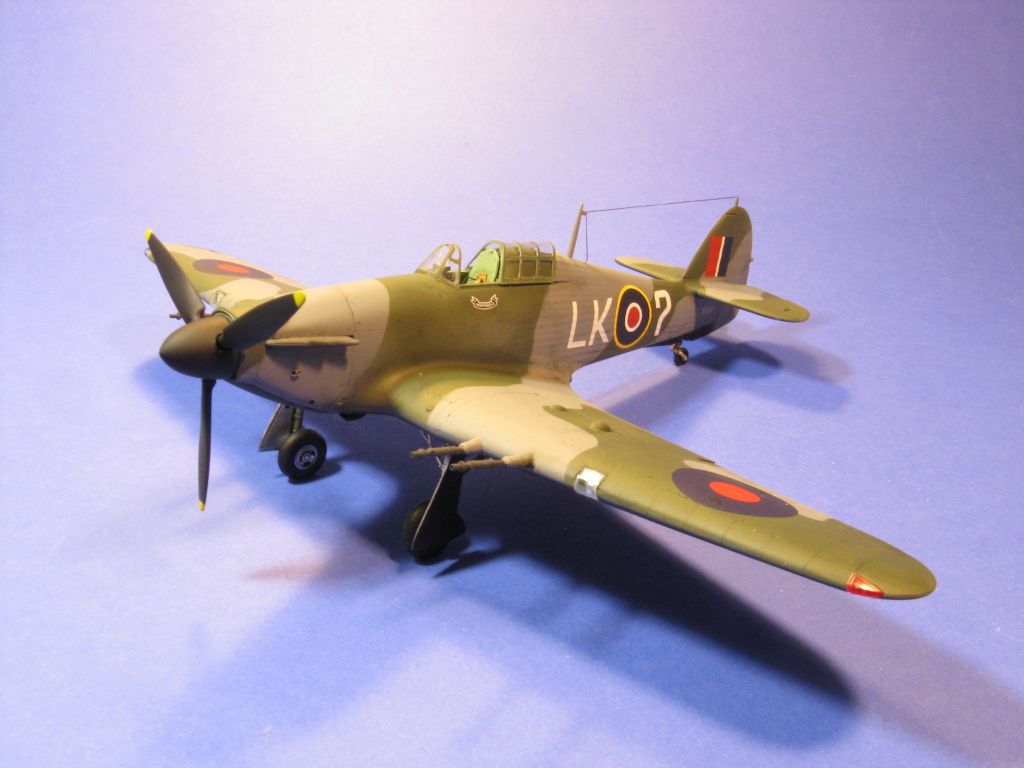
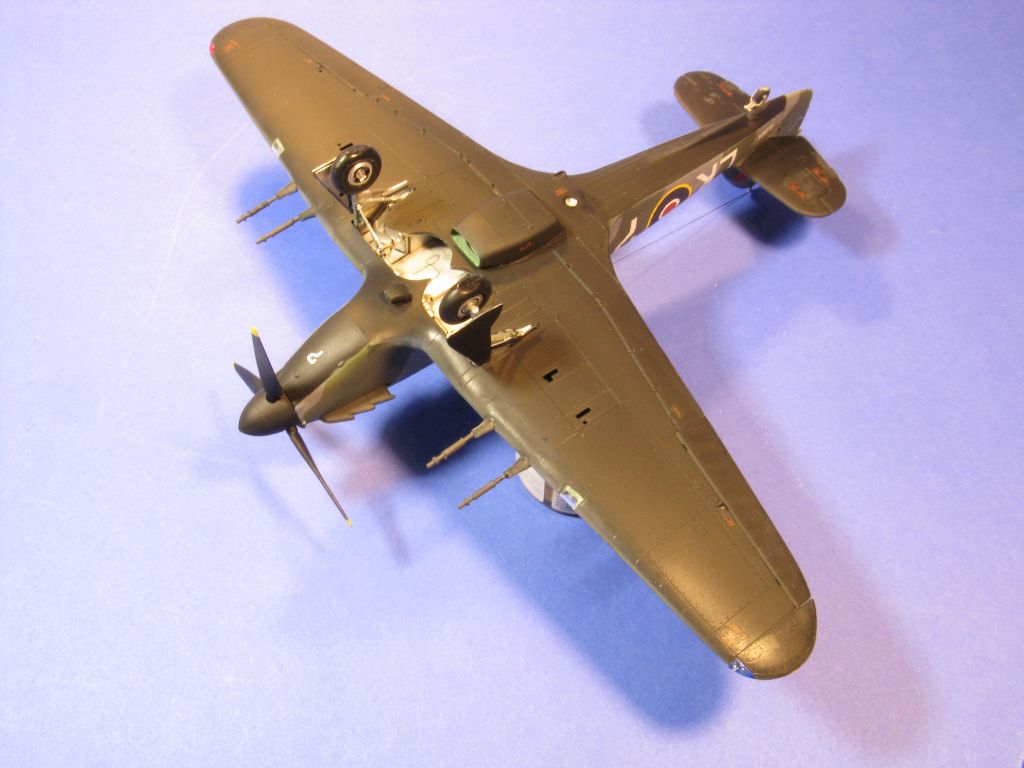
I decided to go with the 87th RAF Squadron markings with lower surfaces in Black and upper surfaces of Dark Green/Sea Grey. I primed the model in black and used Tru-Color paints for the upper surfaces. They are a great paint and they are reviewed elsewhere in this website.
After giving the model two coats of Future I applied the markings. The decals themselves are outstanding. They respond well to the standard Micro Set/Sol combo, conformed to surface without a glitch and didn’t silver anywhere. Now, the instructions for the decals have some mistakes. They list the wrong decal number for the rudder markings and some of the stencils. Common sense -and careful study of the drawings and the decal sheet- guided me through the process.
There was another alteration I decided to do: To replace the plastic molded gun barrels with scratchbuilt ones using printed circuit board connectors. The barrel themselves are made out of turned copper (PCB connectors) and the recoil springs are made out of electric wire strands. There is nothing wrong with plastic molded guns but they cannot compete with turned metal ones.
At this point I was getting extremely close to having a model ready for display. Mounting the main landing gear was easy, as it has some very solid attachment points. Sadly, the tail wheel hook is not as strong, and I lightly damaged it when I was sliding it into place. Opening the hole a bit more with a drill made mounting -the now repaired tail wheel hook much easier.
I also added the aerial antenna between the mast and the tail but I should have check both online references and the instructions, as this particular airframe didn’t have an aerial (Hawker Hurricanes could use two types of radios, VHF and UHF and depending on which one was installed it needed or not to the have aerial antenna installed).
In summary:
- There was some flash in all sprues while the surface detail (panel lines) was sharp and nicely rendered.
- The fuselage, wing roots and tail fit was good, but closing the open panels was tricky (perhaps my own fault as the instructions don’t tell you to build the aircraft with the panels closed).
- The fit of the wing inserts for the weapons was certainly bad. It required a fair amount of sanding and filing, and I was not totally able to blend them into the wing. In addition to that, aligning the wing cannon inserts to the wing is difficult creating the chance of having a misaligned cannon barrel.
- The decals are outstanding and provide many interesting marking choices although the instructions listed the wrong number for some of the decals.
My evaluation of this kit is lukewarm. It has some good points (fuselage and wing fit, good surface detail and great decals) and some not so good (wing inserts for the guns).
Despite some of the challenges of this kit, I’m happy with how my model looks like. If you are willing to spend the extra time, you can get a model that looks great.
Lukewarm recommended.
I would like to thank MRC, Italeri and IPMS/USA for the review sample.


Comments
Add new comment
This site is protected by reCAPTCHA and the Google Privacy Policy and Terms of Service apply.
Similar Reviews