
Fokker D.VII (MAG)
I would like to express my sincere thanks to Eduard for providing this kit to IPMS/USA and to them for allowing me to review it.
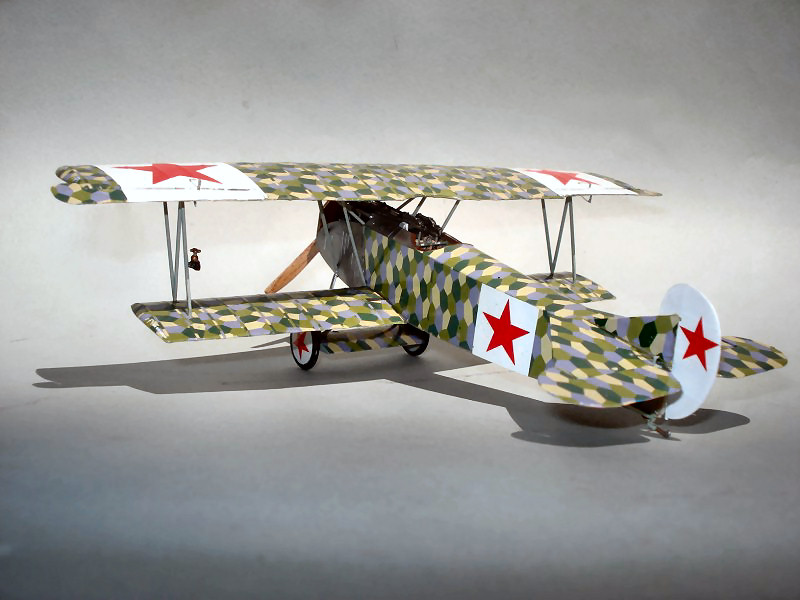
We are all familiar with the Fokker D.VII, but a little historical background may be helpful to explain the markings seen on the subject of this review. The D.VII was such a formidable aircraft that the Armistice ending WWI specifically called for all surviving D.VIIs be delivered to the Allies. The United States pick up a few for testing, but nothing ever came of the effort. However, other countries used them operationally. One country, the Hungarian Soviet Republic, a short-lived Communist regime established in the chaos following WWI, used a number of D.VIIs in the Hungarian/Czechoslovakina/Romanian War of 1919. Some of these aircraft were ex-German aircraft and some were built by MAG, (Magyar Általános Gépgyár - Hungarian General Machine Company) an Austro-Hungarian company licensed to build the D.VII using the Austro-Daimler engines. It was from early 1919 to July 1919 that the Hungarian Soviet Republic used their D.VIIs emblazoned with the red star as seen on this model.
The Kit
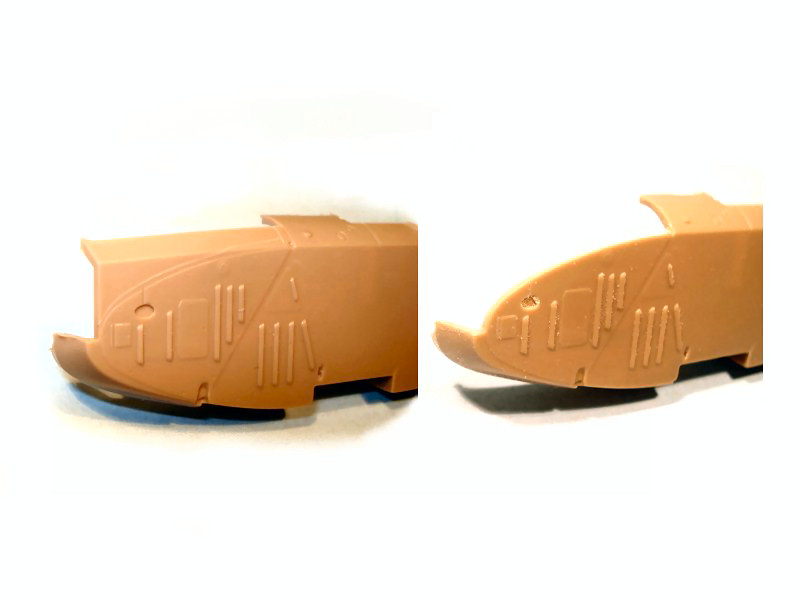
Eduard’s D.VII comes in a cellophane wrapped box, 15” X 9 ” X 2.75”. Inside the box are two complete models. Either one can be built as one of eleven different subjects, three of which are in different camouflage schemes. Each model comes in two cellophane bags containing five light khaki colored sprues. There are over 120 parts per model, but approximately 90 were used in the construction of the review example. A few parts are used on the different versions of the D.VII and some are holdovers from previously issued D.VIIs. The moldings have excellent detail and no flashing or visible ejector pin marks. The surfaces of the parts are blemish free. The parts fit is excellent. The parts go together so well that I used very little filler.
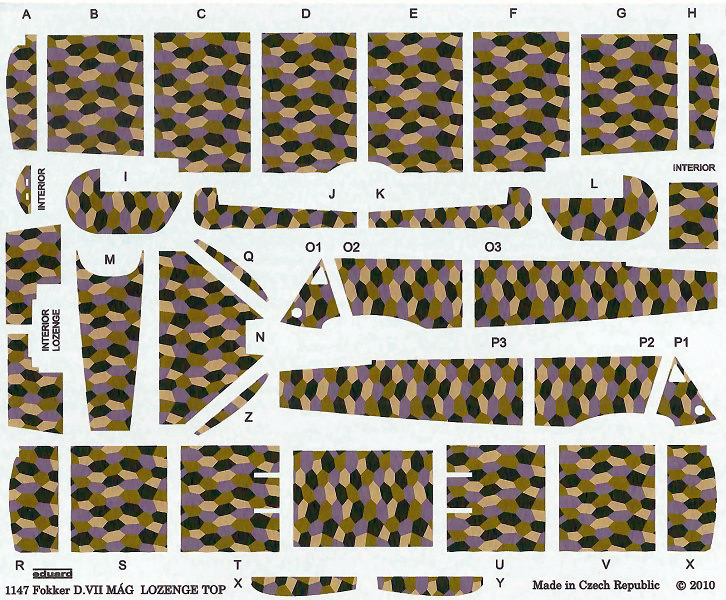
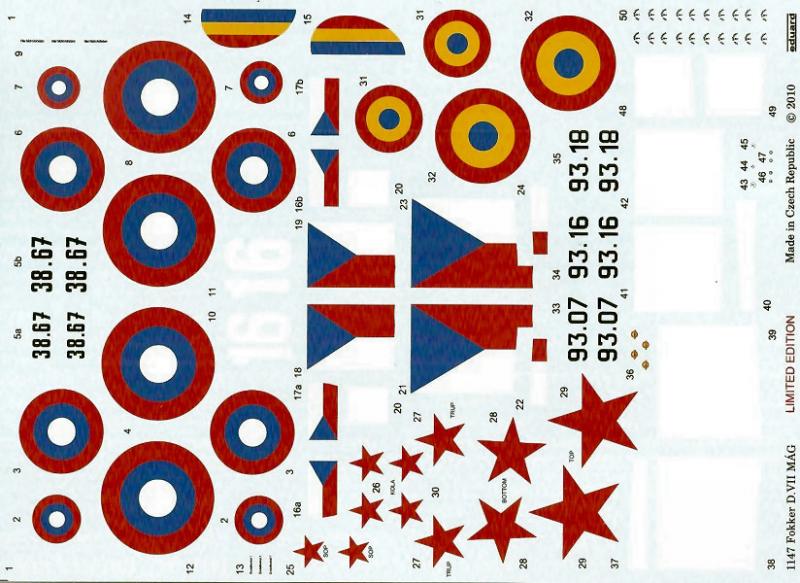
There are plenty of decals – five sheets to be exact. There is one sheet for the national insignias and identification numbers. There are four sheets for the two lozenge camouflage patterns. The decals were easy to handle and released from their backing in seconds. Every decal sheet was in perfect register.
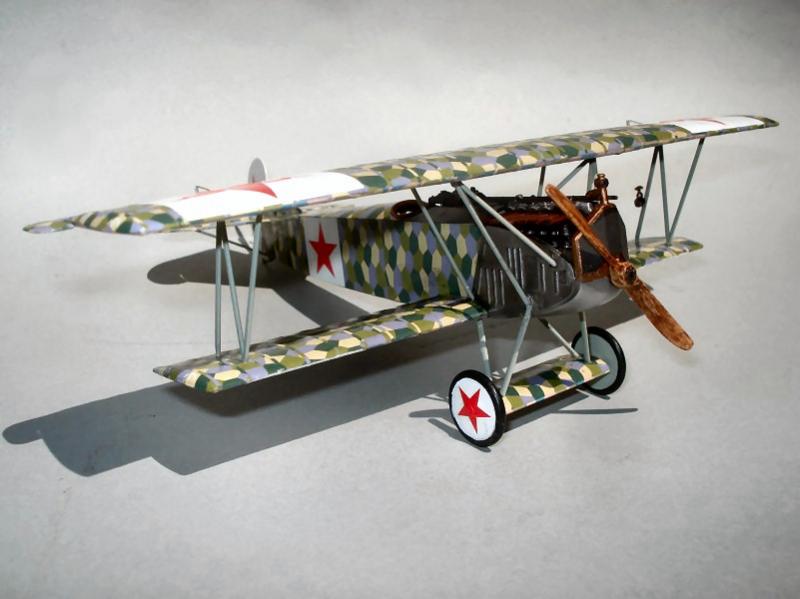
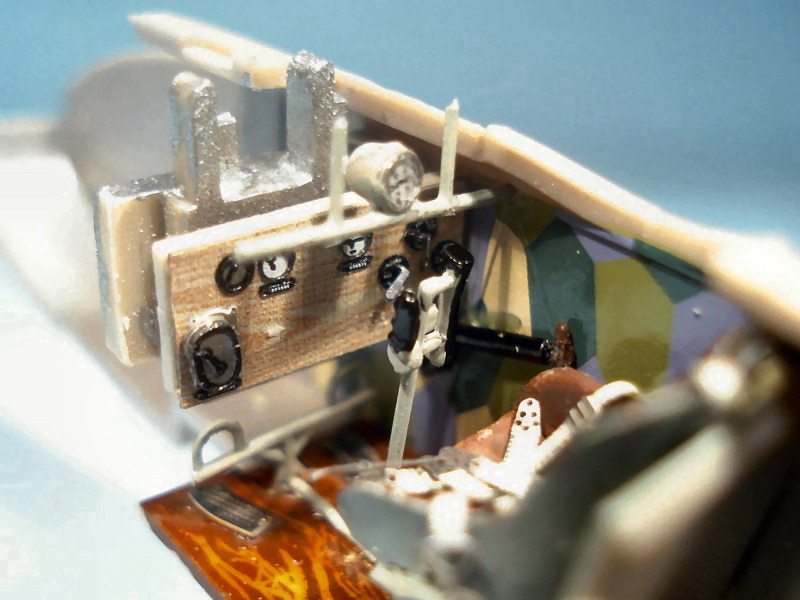
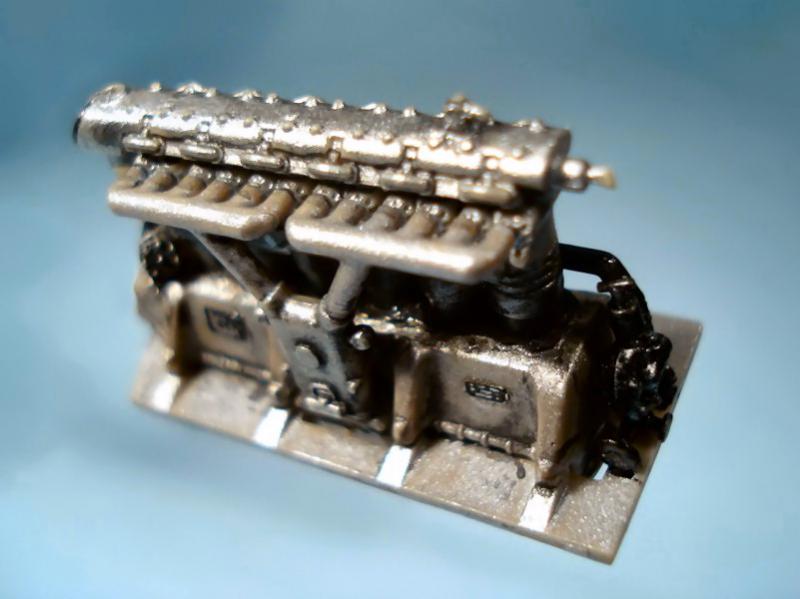
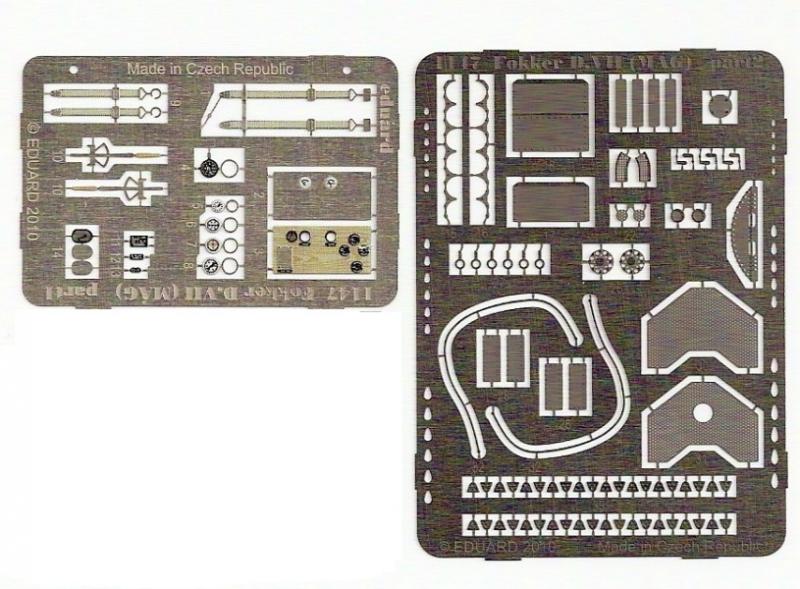
A “plus” for this kit is the Eduard PE, two frets for each model. The PE parts were not over used and added some “pop” to the cockpit, Austro-Daimler engine and radiator. Also included is a set of handy masks for painting the wheels.
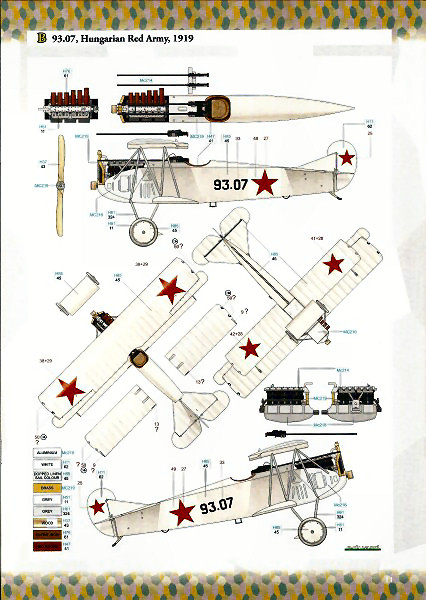
The instructions are in booklet form on eight letter size pages. There is no narrative, but the exploded view drawings are clear and the assembly of the parts is very well illustrated. However, because there are eleven variations of the D.VII available, one must pay careful attention to the specific version callouts. This can become a point of confusion. Color callouts are provided for the small parts and assemblies through out the instructions. The colors refer to Gunze Aqueous, Mr. Color and generic names.
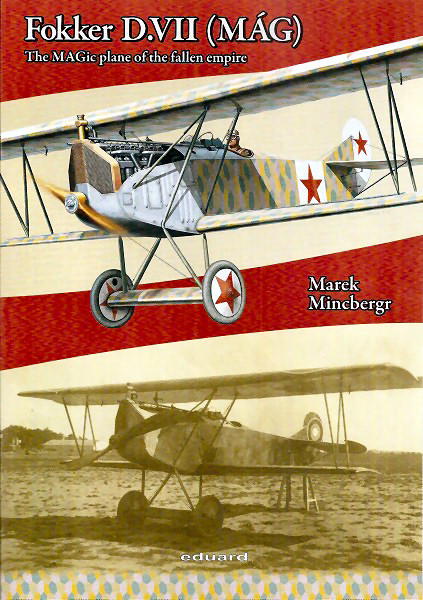
A big “plus” found in this kit is the 16 page full color publication by Marek Mincbergr. It provides a short, but thorough history of the MAG Fokker D.VIIs. He has included a number of period black and white photographs. The color drawings found in the booklet depict two Hungarian Red Army aircraft, seven Czechoslovak Air Force aircraft, and two Romanian Air Force aircraft. Three of the 11 subjects are in camo patterns. These aircraft span a period from 1919 to 1923. The instructions for placing the camo decals are very helpful, particularly the 124 rib decals for the lozenge patterns.
The Build
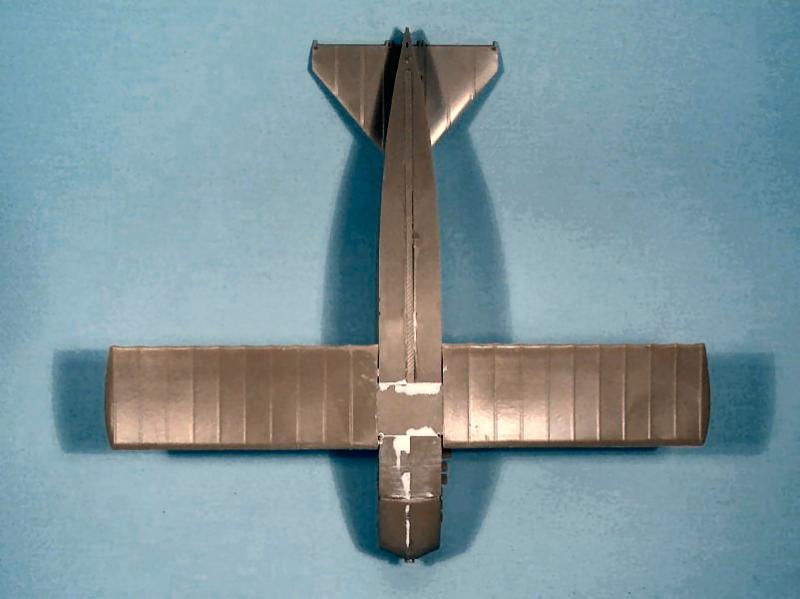
The build is rather simple and straightforward. There is no rigging on the D.VII, but I did add the control cables, which are not part of this kit. As with most models, the cockpit is built and painted first and mounted to the right fuselage half. The finely detailed engine is built and painted next and also added to the right fuselage half. The fuselage is closed and the lower wing and horizontal stabilizer are added. The fit of all these parts is so good that I had to use very little filler.
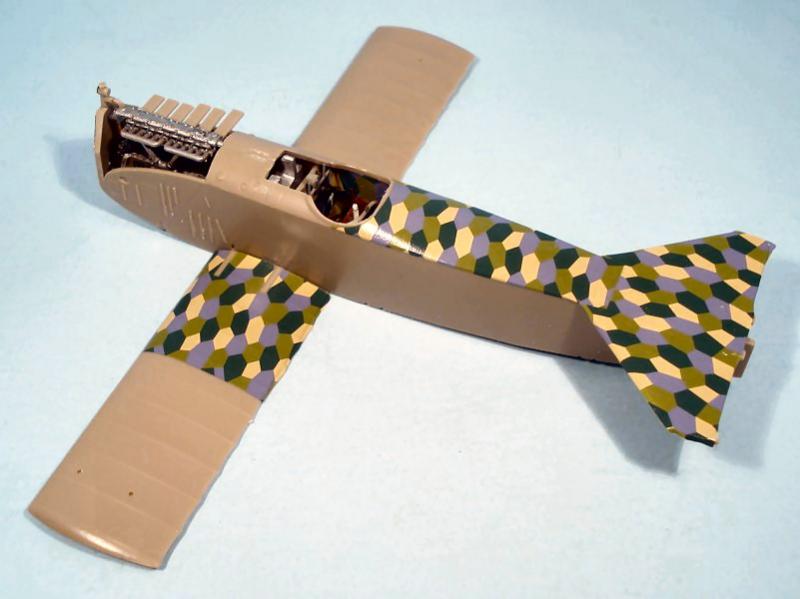
It was at this point that I painted the forward fuselage aluminum and added all the 150+ lozenge decals to the fuselage, wings, tail surfaces and landing gear. From the standpoint of time, I wish I had painted this model as the doped linen subject. The decaling was easy enough – just tedious and time consuming.
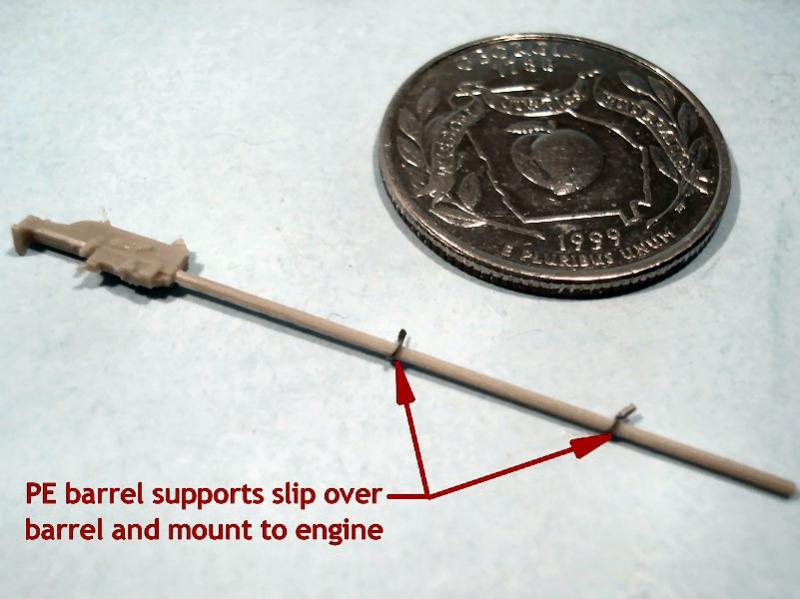
The next step is to add the vertical stabilizer, but I placed it as one of the last steps for fear I would break it off during the remaining construction. The guns are added at this point, as are the struts, upper wings and landing gear. Adding the PE gun supports to the gun barrels for this version was almost microscopic. Placing the struts takes some time and effort to get them aligned correctly.
Depending upon which version is built, some modifications must be made and different parts are used. The modifications are fully addressed in the instructions and on the parts tree. During the entire construction process I did not encounter any problems with the parts’ form, fit or function.
Finishing
Since I used the lozenge decals, there was very little painting to do. The wheels and struts are painted per the instruction booklet for the particular subject. The painting instructions are clear and easy to follow except for the rudder on this subject. There is a lozenge decal for the rudder, but the rudder should be painted white. I place the decal initially, but had to remove it and paint the rudder white.
Finally, the national insignia markings are added. Large blocks of white decals are placed on the upper and lower wings and fuselage sides. Under a strong light, the lozenge pattern shows through very slightly. The communist red star is now placed on top of the white blocks. A star is also added to each side of the rudder and to each wheel.
Assessment
Straight out, I highly recommend this kit to modelers of any skill level. This is an easy kit to build. It has wonderful detail, excellent fit and first-rate decals. The camouflage versions using the lozenge decals will take a little longer to build than the painted versions. In either case, you will have an example of a D.VII that is not well known and will have some visual impact.
Thanks again to Eduard for making this kit available for review.

Comments
Add new comment
This site is protected by reCAPTCHA and the Google Privacy Policy and Terms of Service apply.
Similar Reviews