
F/A-18C
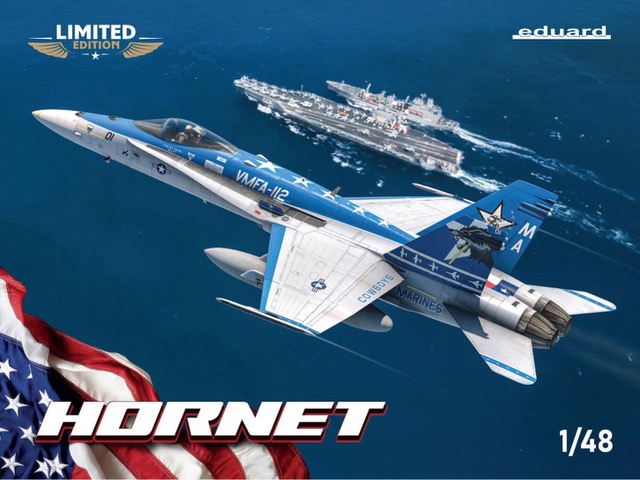
This kit was a ‘Limited Edition’ kit, released at the 2025 IPMS/USA National Convention in Hampton Roads, Virginia. It was quickly sold out on both Eduard ‘s online store and at the 2025 Convention. The instruction booklet contains 23 pages, including some color guides for the weapons, masks and overall aircraft decal markings.
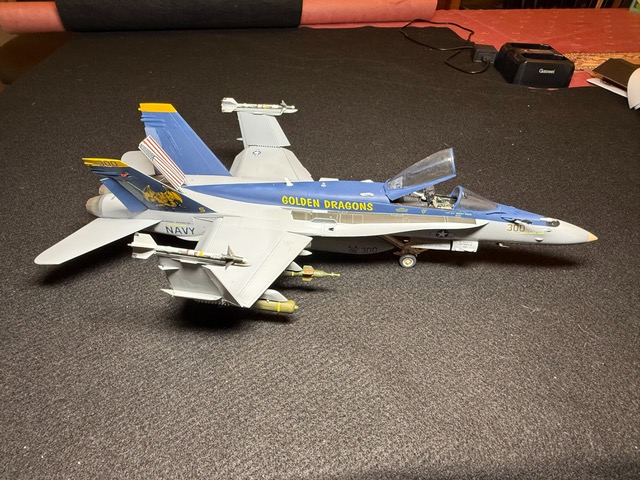
I was initially impressed with several aspects of this Eduard repackaging of the Kinetic F/A-18C, including the surface details (including recessed panel engraving), the placement of panels along the surfaces, the wing fold details, the beautiful box art, and especially the kit decals. As I began to dry fit the various subsections, the novelty wore off. From what I expected to be a beautiful kit, I quickly realized I had purchased a total rehash of the original Kinetic kit, along with what I consider to be numerous major fit and finish issues.
Subject Historical Background
My initial interest in the in this model was piqued because of Seattle’s Museum of Flight has in its collection an F/A-18C BuNo 163106 In Blue Angels #2 marking and the opportunity to photograph the ‘real aircraft’.
I also urge you to review several internet sources as well, to gain a better insight for this important aircraft:
The Build, Fit, and Finish
I initially was impressed with the overall surface details of the Kinetic kit and my dry fitting of most of the kit’s parts. The kit includes fourteen sprue sections as well as the Brassin 3D sets. There are several Eduard Brassin parts in the kit including the four wheels and ejection seat. There is also a well-detailed photo etched parts sheet and masking sheet for the canopy and wheels.
Then, as I moved into the actual modeling with liquid cement, the plot really thickened, and from that point forward, I started to run into both minor and some major hurdles. One of the few differences between the Eduard and Kinetic kits are the instruction and the painting callouts, with the Eduard offering only Gunze colors (either Aqueous or Mr. Color) while the Kinetic kit colors only cite Mig acrylics. The Kinetic instructions are readily available from the Scalemates.com database.
I ran into numerous issues and problems with the Eduard instructions, as outlined in the following paragraphs. As I moved into and through this build, I have become discouraged and underwhelmed due to many fit issues. While Eduard has included several nice 3D printed items (wheels and a beautiful ejection seat), they didn’t approach the general fit issues. They are simply too numerous to ignore, and Eduard needs to be called out for this model's fit and finish issues. While I am hardly a skilled modeler, this kit effort doesn’t help me in the slightest. Sorry about the blunt assessment, but it’s what I have seen throughout this modeling ‘adventure’.
A few examples include:
- The actual location of many of the parts is only hinted at or vague in the instructions, i.e; the location of part # E5; the location of part # H20 , which is wheel housing, which is very difficult to get into its location; the intake tunnels themselves, parts # F1, F5, F6 & F2, again only generally noted and hard to locate in the lower portion of the fuselage, not to mention the putty needed to fill and cover these gaping voids.
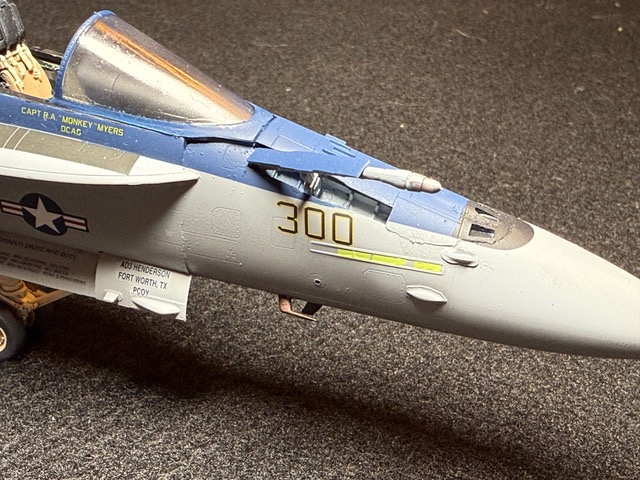
- The canopy is a total mess, with a very pronounced and noticeable seam line down the center of both the front wind screen and main canopy sections. This requires a careful sanding exercise and best helped with DeLuxe Looks Like Glass (which was my first use of this aftermarket product, and it couldn’t completely correct the seam line). When you look at the sides of the main canopy (# G1) you can’t help but notice it’s distorted and much thicker than the rest of the canopy. This process worked to an extent, although I was not pleased with the final finish.
- Both nose sections (# C14 & D8) require .8mm holes to be drilled and only two of the four holes are indicated on the inside of both halves. While complaining about the nose halves, the instructions lead you to drill the .8mm holes, which are round, while both of the very small ECM bulges (at least I think that’s what they are…) part #: E36 & E35 have oblong shaped plugs. This same issue cropped up with the upper fuselage cover (which is where this kit covers the 2nd rear seat area). The indicated 1mm drilled holes don’t match the oblong holes (which I cut out using a sharp #11 blade).
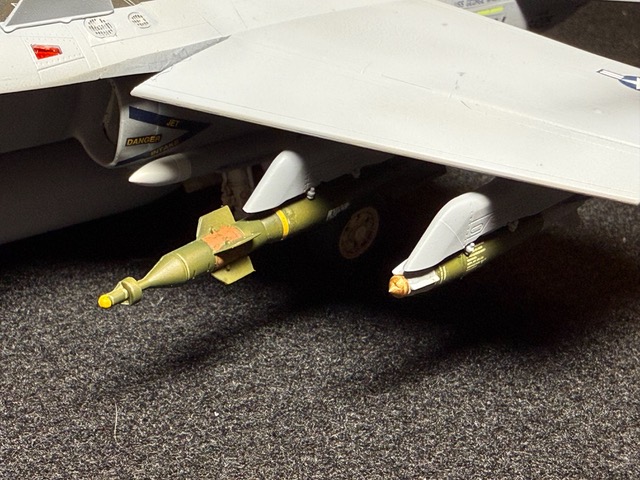
- A lot of sanding is required (I believe this is a by-product of the age of the Kinetic molds); this was especially evident on all the weapons, fuel tanks and along most of the fuselage. I made the decision not to sand the fuselage sections and went with filling most of the voids with Vallejo Plastic Putty #70.410 which allows for reasonably quick setting and filling and can be smoothed with either water or alcohol. This was especially evident in the front under the windscreen, where a major opening can be seen (and has been left open to illustrate the poor engineering for the underlying Kinetic kit). I can see the lumpy finish in some of these areas, but the use of sandpaper would have removed the surface details and the re-scribing to replicate the panel lines.
- If you look closely at the upper right schematic of the nose gear on page 14, you’ll find part #H17 part is missing the fact that it requires #H14 to wrap around the stem of #H27 and needs a much clearer installation definition. As is shown, this is yet another area where kit instructions are vague at the least and very confusing at best.
- Another seemingly small error is when you look at the five different wing tip pylons, there is no information as to which is to be used with the which missiles, aside from external stores chart on page 18. It’s another unmentioned item and another ‘fly in the ointment’ where additional instructions are needed.
- While not a required component to this build, I also compared the Eduard and Kinetic instructions, hoping some of the missing details. These two instructions are virtually identical using the same instruction drawings and illustrations, with the only difference in them being that the former uses the Gunze paints and the later with those from Mig.
I could go on, but I hope by this point you’ll have my drift……
Decals
Unlike several of the original Kinetic boxings (with numerous decal options), this Eduard rebooting has only two decal options: from VMFA-112 Cowboys in CAG markings and VFC-12 Fighting Omars in ersatz WW II overall blue scheme.
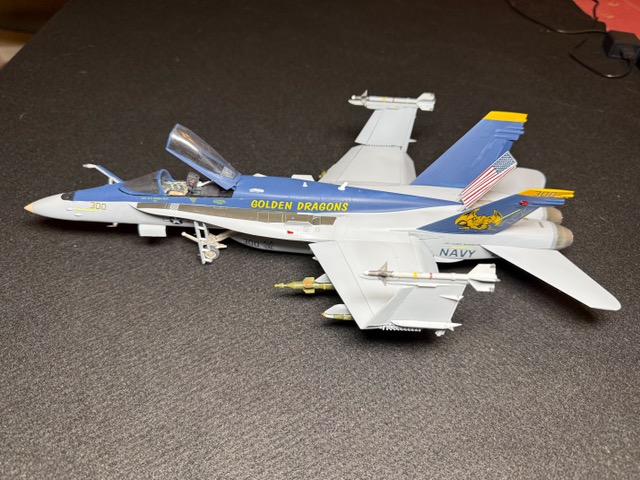
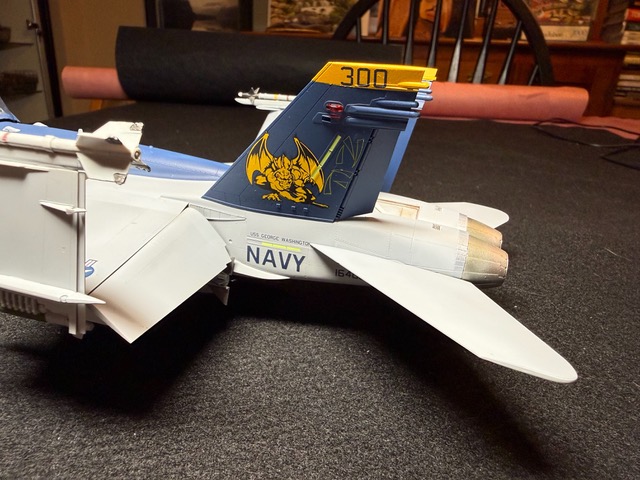
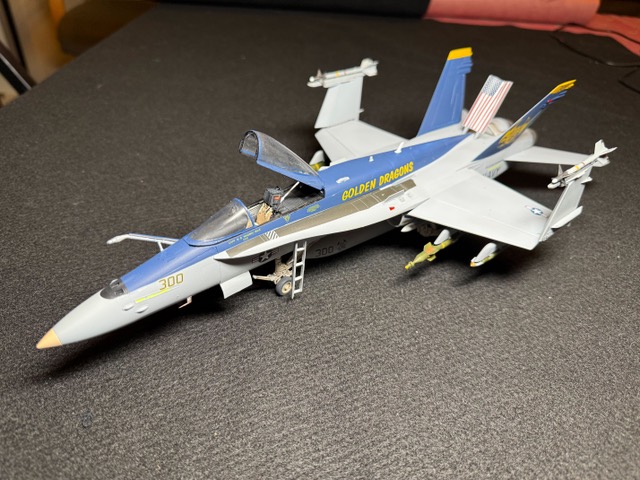
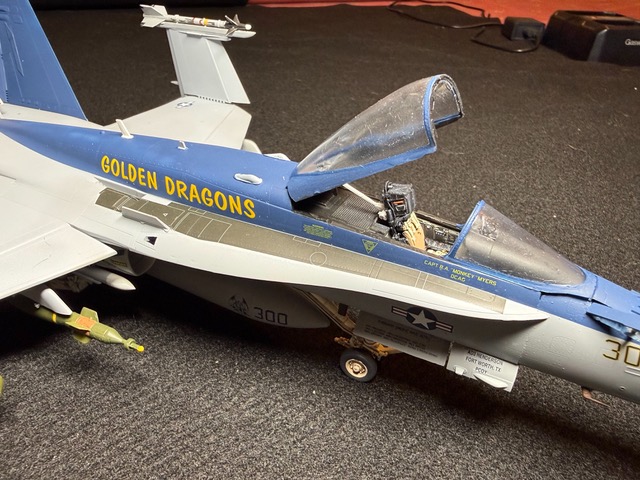
I strayed from either option and chose a Squadron sheet (#SQA 48003) with two F/A-18C featured a/c: VFA-192 CAG bird from the World Famous Golden Dragons or VFMA-122 Werewolves. Where the kit’s decals came into their own was in the huge number of small decals. While I used only a few of these, they were invaluable. An example was the tail hook stripes; without the kit decals it would have required careful masking and spraying the ever-present and prominent black stripes.
Aftermarket Parts Used
After some research, I chose the Kelik F/A-18B for their Interior 3D Decal sheet, which provided quite a nice selection of interior details; I know these were intended for the 2-seat version of the F/A-18B and I only used the parts for the single seat in the ‘C’ aircraft.
Paints Used
In my choice for painting the Hornet, I chose the following paints:
- Mr. Surfacer 1200 B-515 Priming and surface preparation
- Real Color RC 815 Buff : seat pads
- Real Color RC 001 Flat Black
- Real Color RC 222 Insignia White
- Real Color RC 251 Dark Ghost Grey FS 36320
- Real Color RC 252 Light Ghost Grey FS 36375
- Real Color RC 010 Pure Blue
- Real Color RC 006 Red
- Real Color RC 227 Radome Tan FS 33613
- Mr Color C328 Blue Angels Blue FS 15050
- Model Air 71.122 Aged White: shoulder straps
- Model Air 71.088 French Blue
- ATOM 20165 Aluminum
- ATOM 20167 Gun Metal
- ATOM 20500 Cleaner & Thinner
- ATOM 20170 Copper
- ATOM 20173 Brass
- Vallejo 77.712 Acrylic Metal Color - Steel
- Vallejo Model Colors 70664 Natural Steel
- AK 3rd Generation Colors
- Cork 11119
- Clear Red 11213 position lights
- Clear Blue 11214 position lights
- Mission Models Colors MMP-033 Nato Brown
- AK Real Color Markers
- Rotbraun Red Brown RCM 019
- Rubber Black RCM 001
- Flat White RCM 034
- Flat Black RCM 033
Again to Eduard’s credit, they also included a nice single-sided masking sheet (for the canopy areas and wheels).
Followed by an overcoat sprayed coat of Alclad II Lacquer’s Aqua Gloss Clear (#ALC 600) to prepare a glossy base for decal applications. This is my personal favorite, which produces a great clear finish (though in the bottle it appears cloudy, not to worry).
My painting included a small amount of pin washes, using 502 Abteilung Brown Wash #ABT080. I completed my dry brushing, using my old standby Winsor & Newton’s Artist Oil color Naples Yellow Light, No. 426.
I used a small amounts of Microscales Micro Set #MI-1 and Walters Solvaset #904-470, which allows the decals to snuggle down and fit tighter when dry.
And, I sprayed my overall final finish using Testors Dullcoat Lacquer (#1160).
Summary Comments
What can I say about a kit for which I initially had such high expectations? Assigning points on a ten point scale to this kit, my summary opinion is it’s a ‘6’, with the decals at a ‘10’, fit and finish at a ‘5’ and the instructions at a ‘7’. As you can see from my evaluation, this kit is one to be avoided in my judgment and I would not attempt to tackle again.

Reviewer Bio
Bob LaBouy

I started my modeling adventure in 1951 with an Allen kit. As a ‘Navy Brat’ our family was constantly on the move and I rarely had an opportunity experience modeling as we can today. I was a co-chairman for three national conventions in Seattle. I the opportunity to serve as a Society officer for twelve years, as Treasurer, Historian and President. I live with my wife Helen and our cat Mini in Redmond, Washington. My other interests include my 72 years in Scouting, film and digital photography and Apple computers.
Comments
Add new comment
This site is protected by reCAPTCHA and the Google Privacy Policy and Terms of Service apply.
Similar Reviews