
Supermarine Spitfire IA [Mid]
Kotare has released a brand new tooled injection molded kit in 1/32 of the Mid Production Spitfire IA, which hasn’t been done since 1967. This kit was released on March 7, 2023 and is the first from this manufacturer. IT includes a beautifully illustrated color instruction booklet with actual period photographs of wartime Spitfires, which is a nice touch! This is very similar to another New Zealand company that did 1/32 World War One aircraft! This is a brand new company led by model enthusiast and builder Mark Robson , who is a practicing veterinarian, along with Richard Alexander from Wingnut Models who rounds a team of great modelers and enthusiasts that have various skills in model production.
The quality of the moldings and the tooling is some of the best I have seen in any injected molded aircraft scale model period. The combination of a very popular subject in a large scale and the tooling and fit makes this a very appealing kit! Kotare created a nice balance between parts count and detail, so this kit will appeal to a broad spectrum of builders. The packaging is high quality and reminiscent of Wingnut Wing kits with FULL-color instructions and accurate color callouts and a nice history of the type with period photographs!
What is in the Box
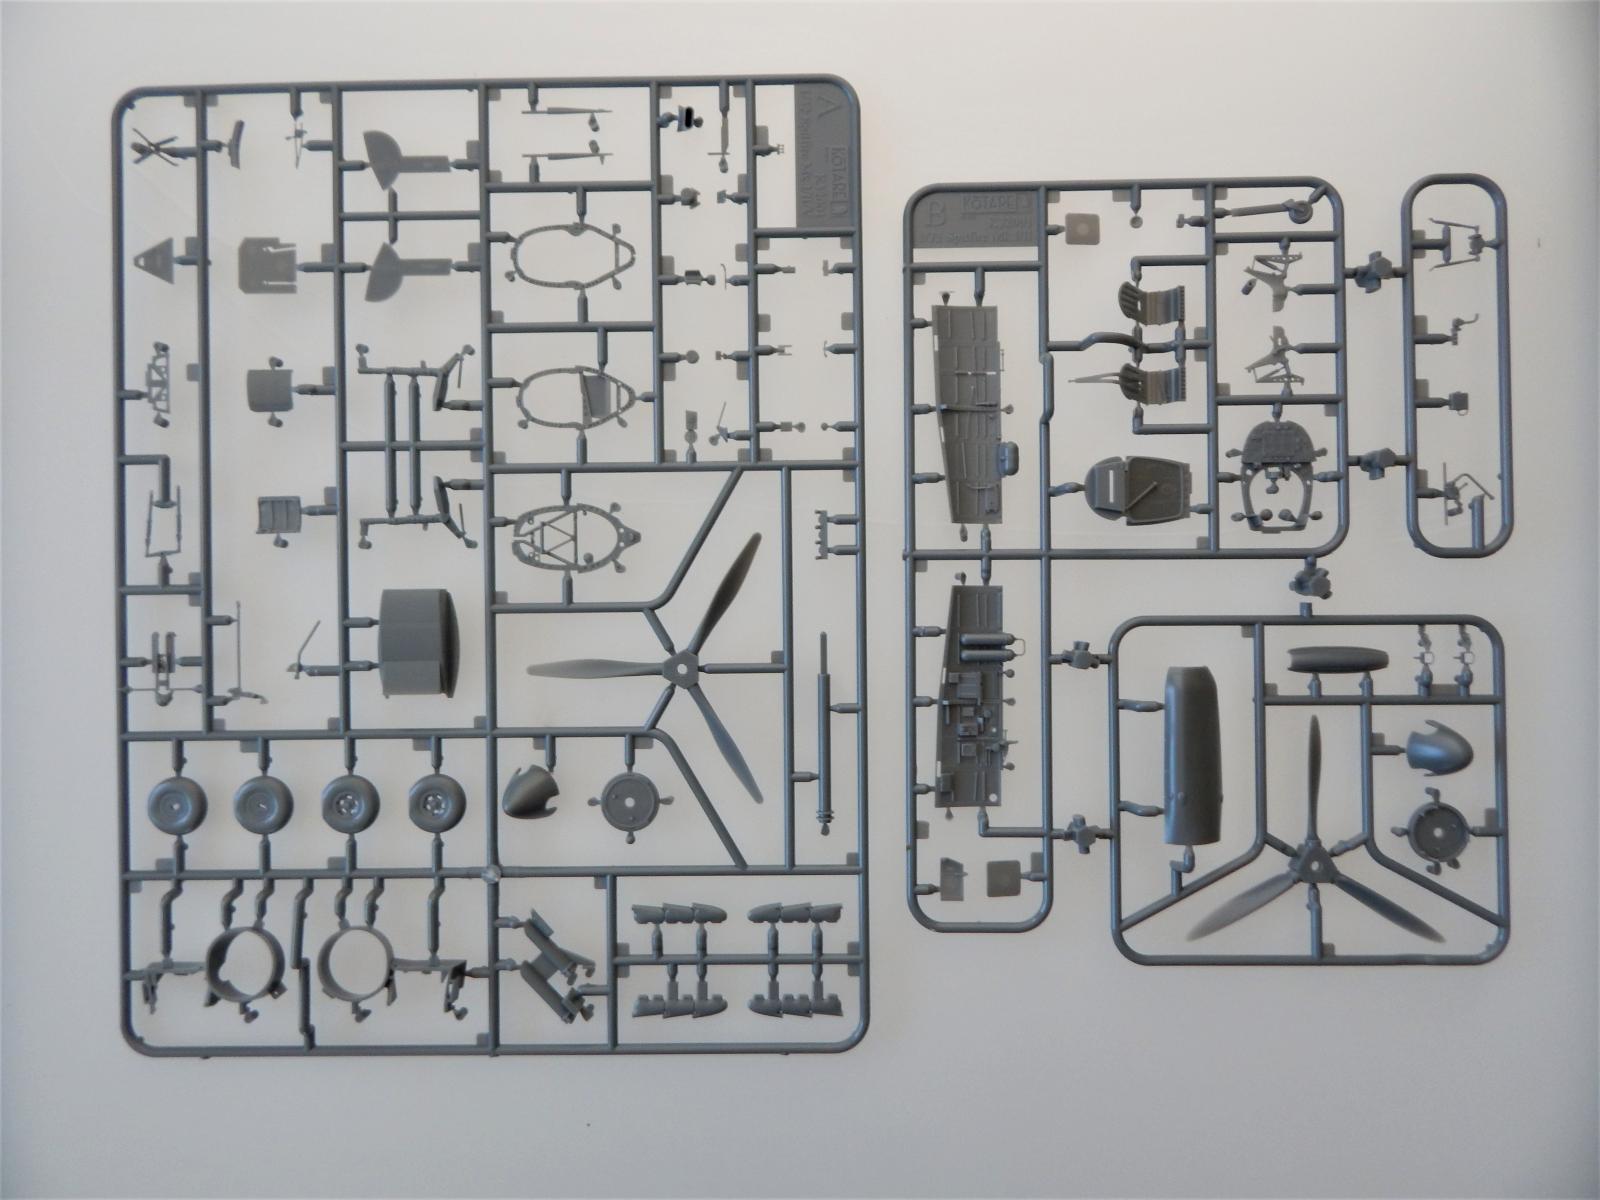
- 4 gray injection molded plastic sprues [117 parts total]
- 1 clear sprue
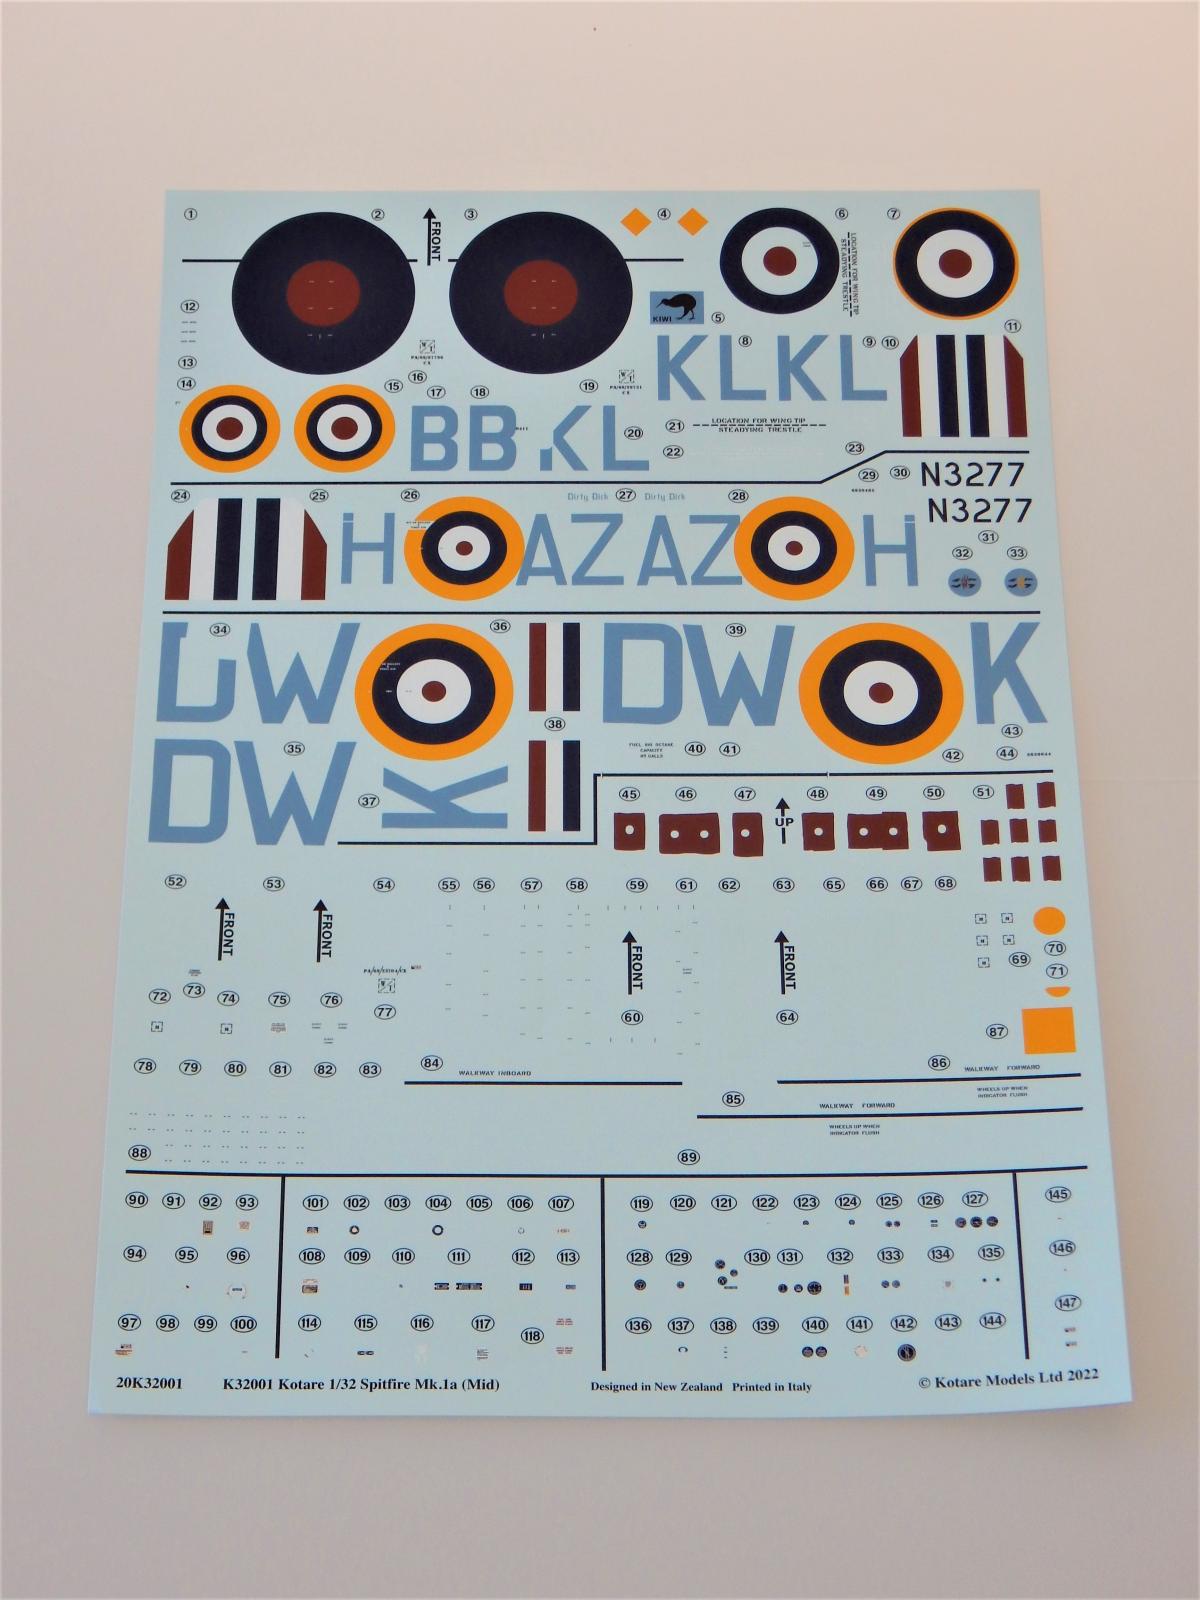
- 1 decal sheet with 3 markings options
- 1 instruction book in FULL colour
Construction
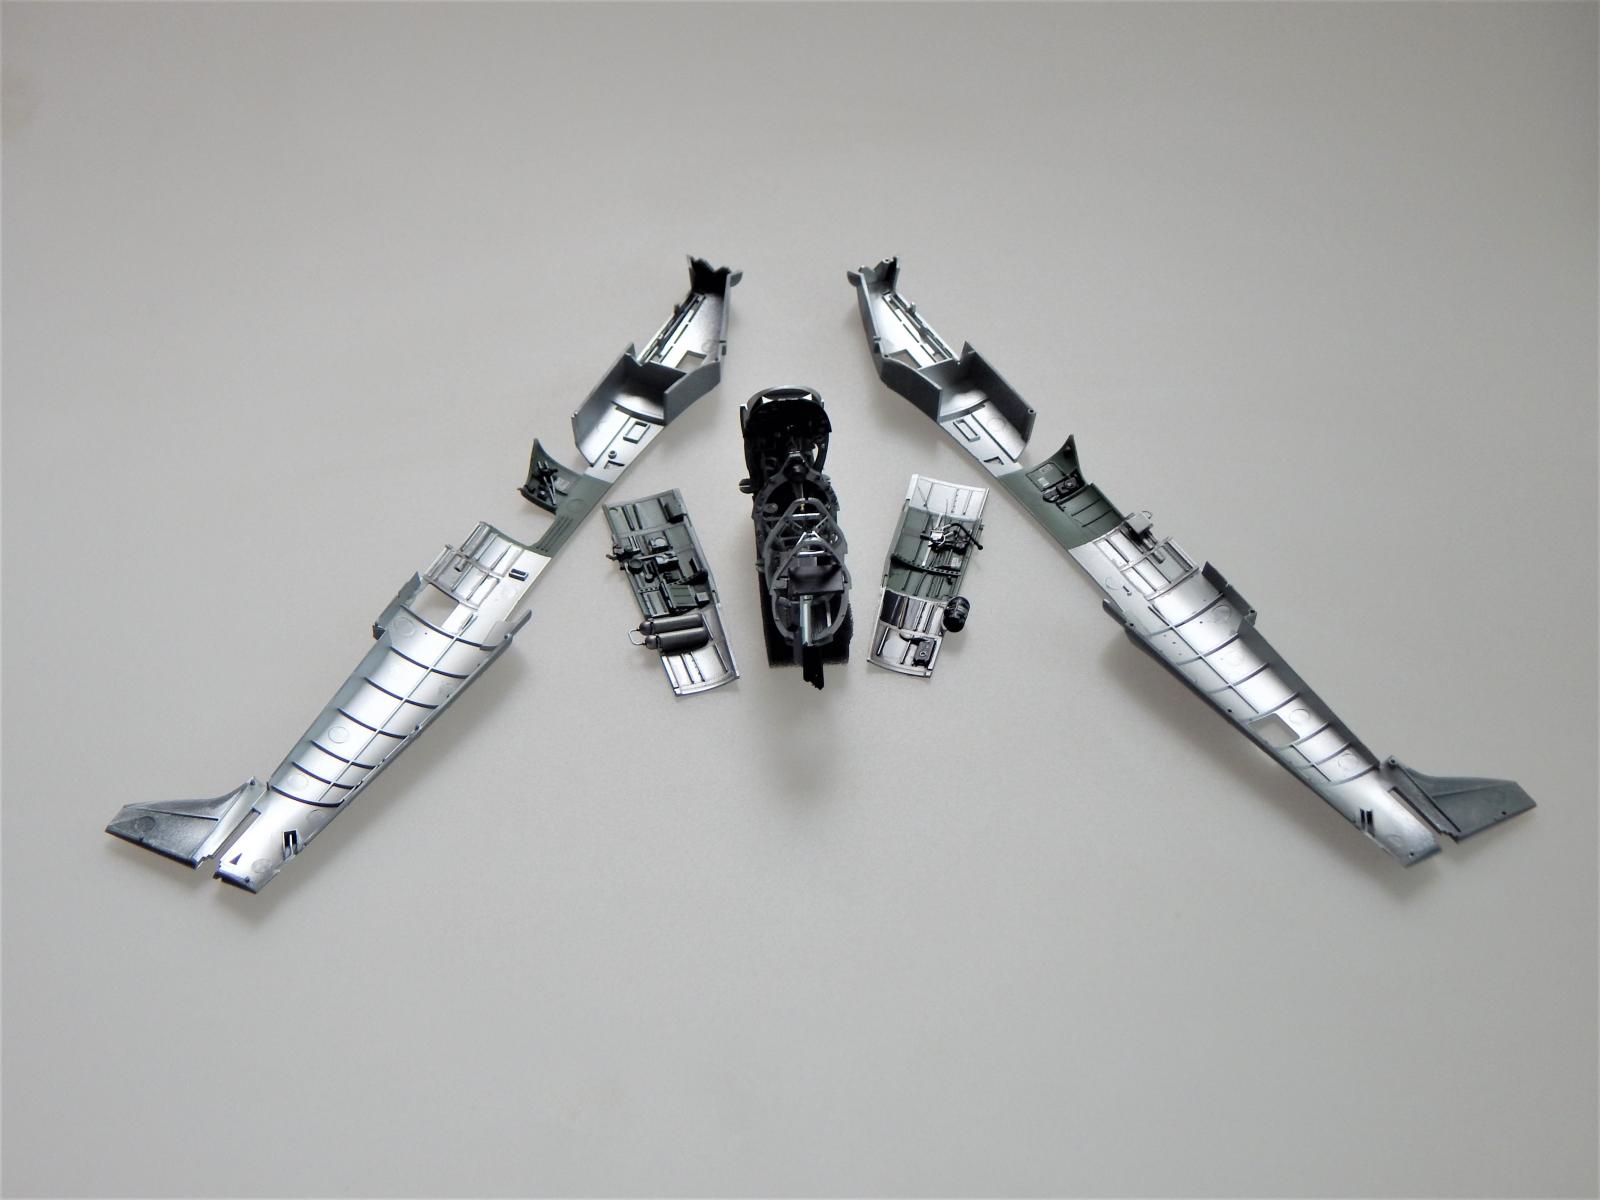
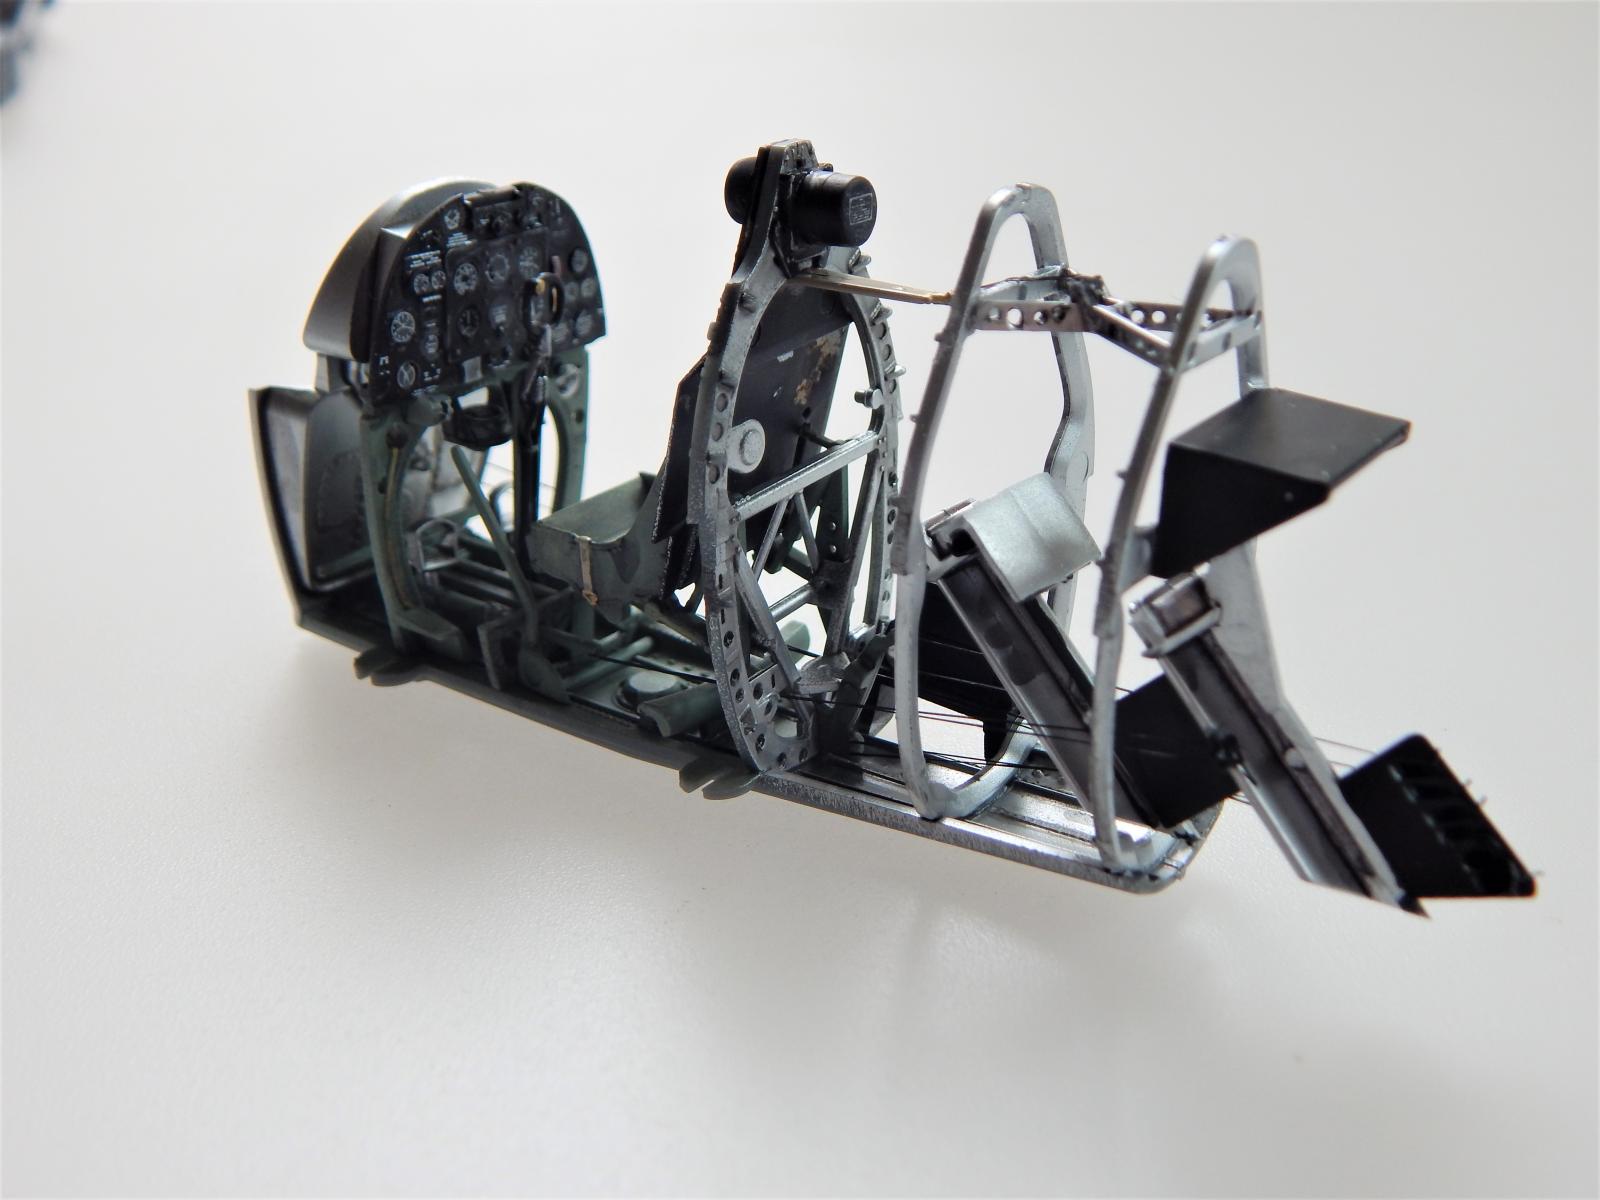
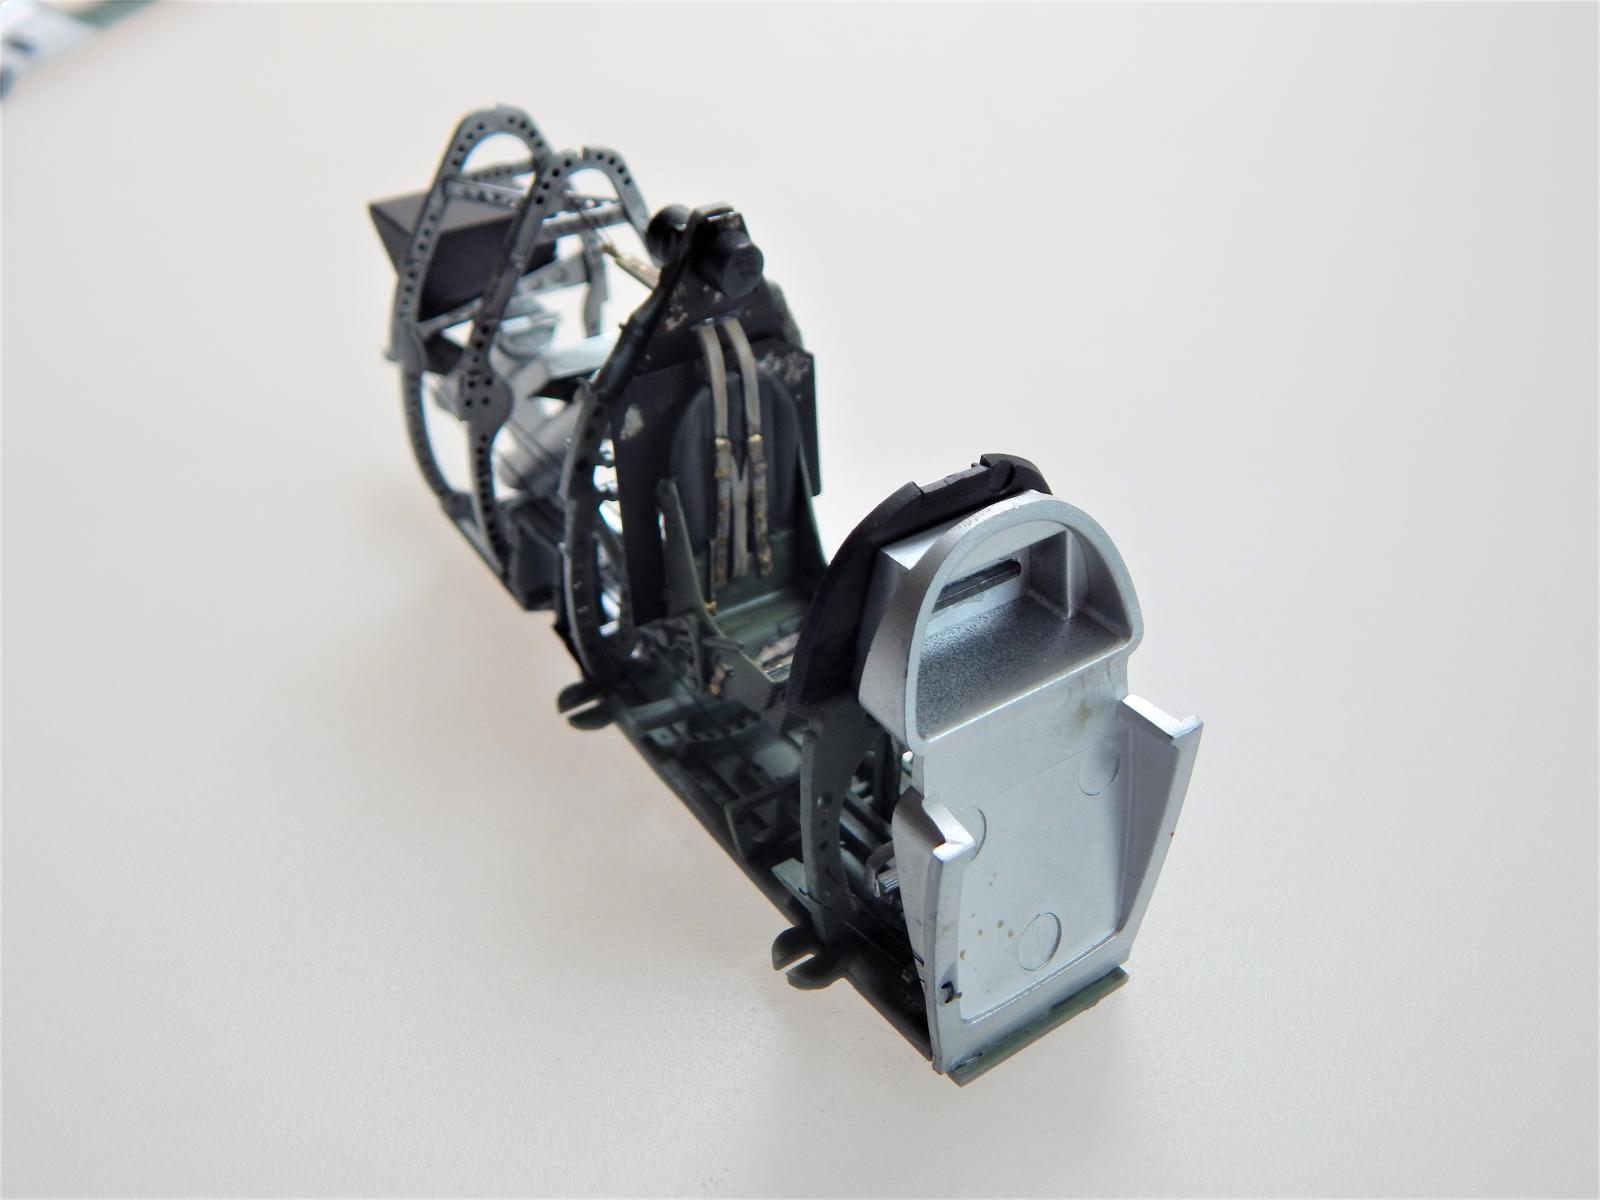
The construction begins with the cockpit and the fuselage interior and this makes up the majority of the construction sequence. Extra time spent here will pay dividends later in the build and I recommend a thorough reading of the instructions since they will alleviate most if not all construction problems. Now an observation is that the tolerances are so tight that some mating surfaces may have to have paint removed to assure a flush and perfect fit. Further, the sprue gates are on the mating surfaces, so it is imperative to cut them from the sprues with care and be sure not to over-sand the sprue gate nubs. Now I have noticed this trend in manufacturers — Tamiya included putting sprue gate attachment points on mating surfaces-WHY? It seems it is the way injection molded technology is heading. But I really miss the older tooled kits where the sprue gate were on the surface and not mating surfaces. Ok, Rant over….on to the build.
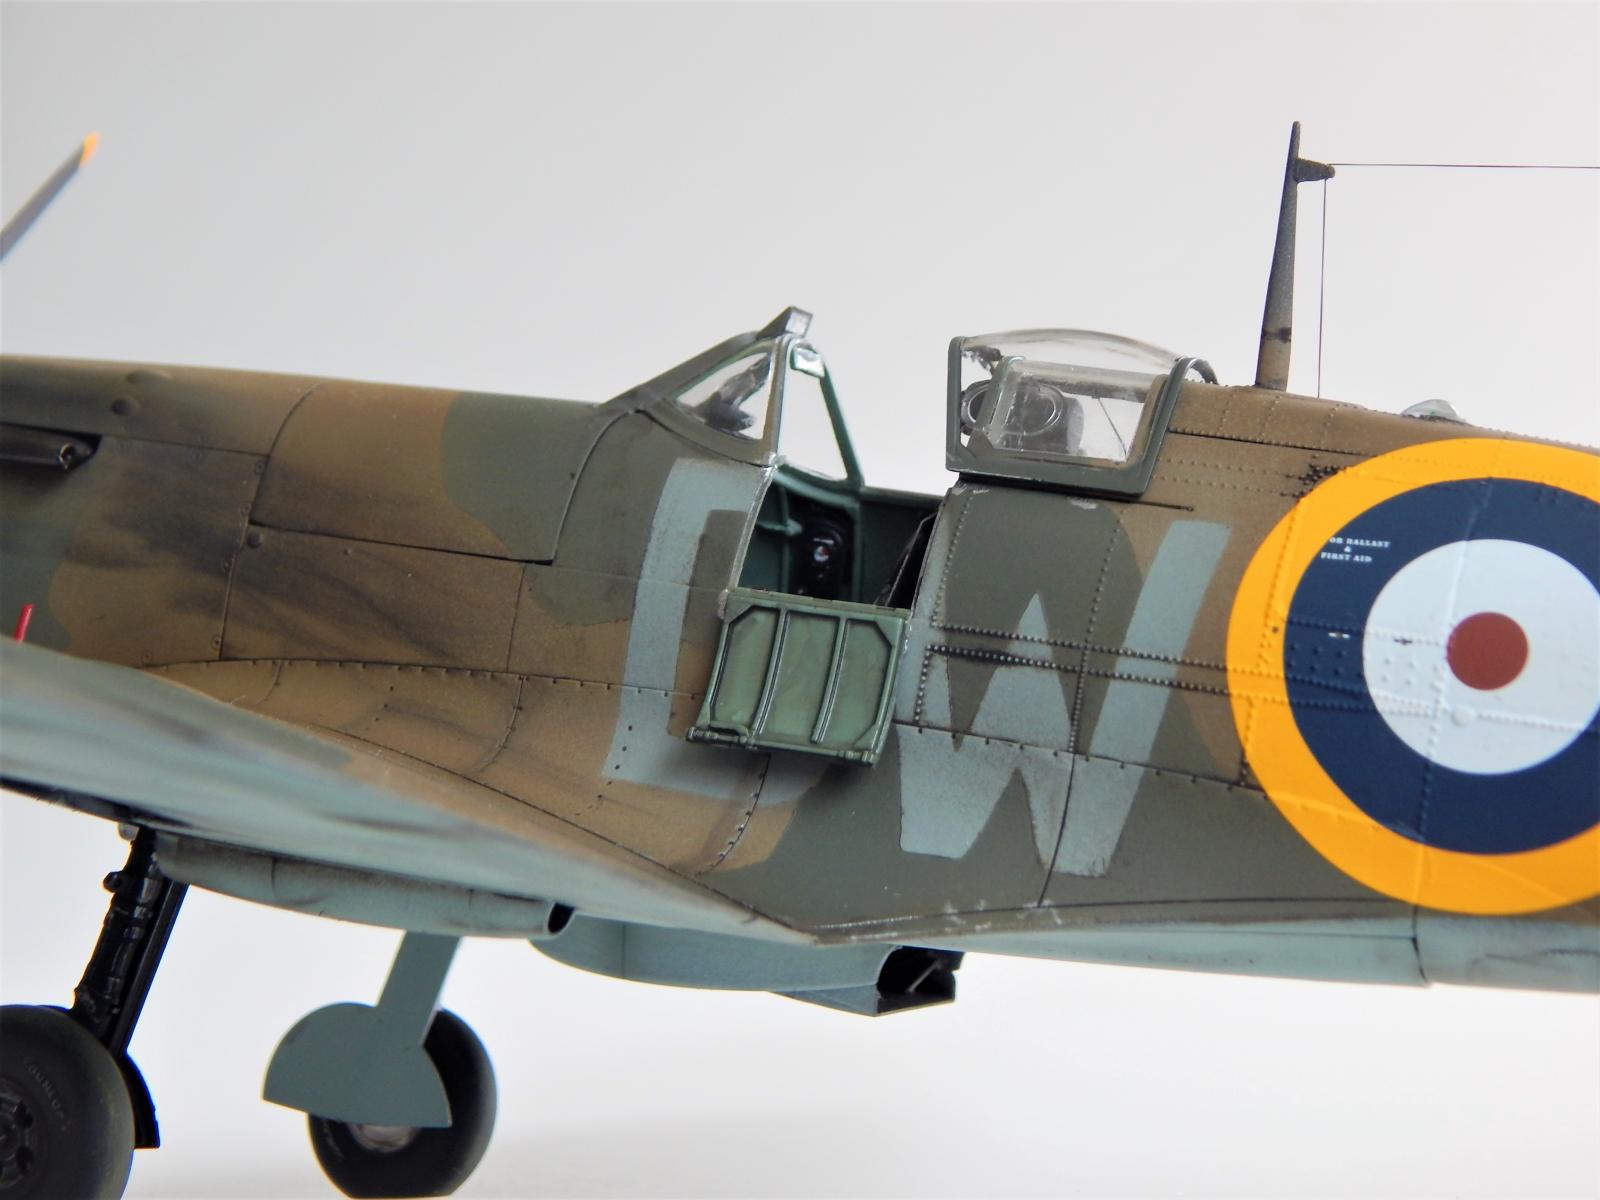
I elected to do some rigging in the cockpit area which the instructions outline nicely but this step is purely optional, most of the detail won't be seen once the fuselage halves are closed up. The interior was painted with Model Master enamels cut with the modeling elixir-Gunze leveling thinner. There are vast opinions over the color matching and what paint is most accurate, BUT I will not enter that debate, suffice to say is I followed the instructions for the paint call outs. The only area I deviated from the kit was the erroneous color of the decals which were closer to PRU blue than the proper Medium Sea Gray which I know all my other period RAF aircraft are. So I used a set of masks from Hawaiian Air Depot to accurately portray the Lettering on the fuselage.
Otherwise, I employed the decals and employed decals solution from Green Stuff.
Once the fuselage was buttoned up the build sequence went rather smoothly with only some building notes I will enumerate here:
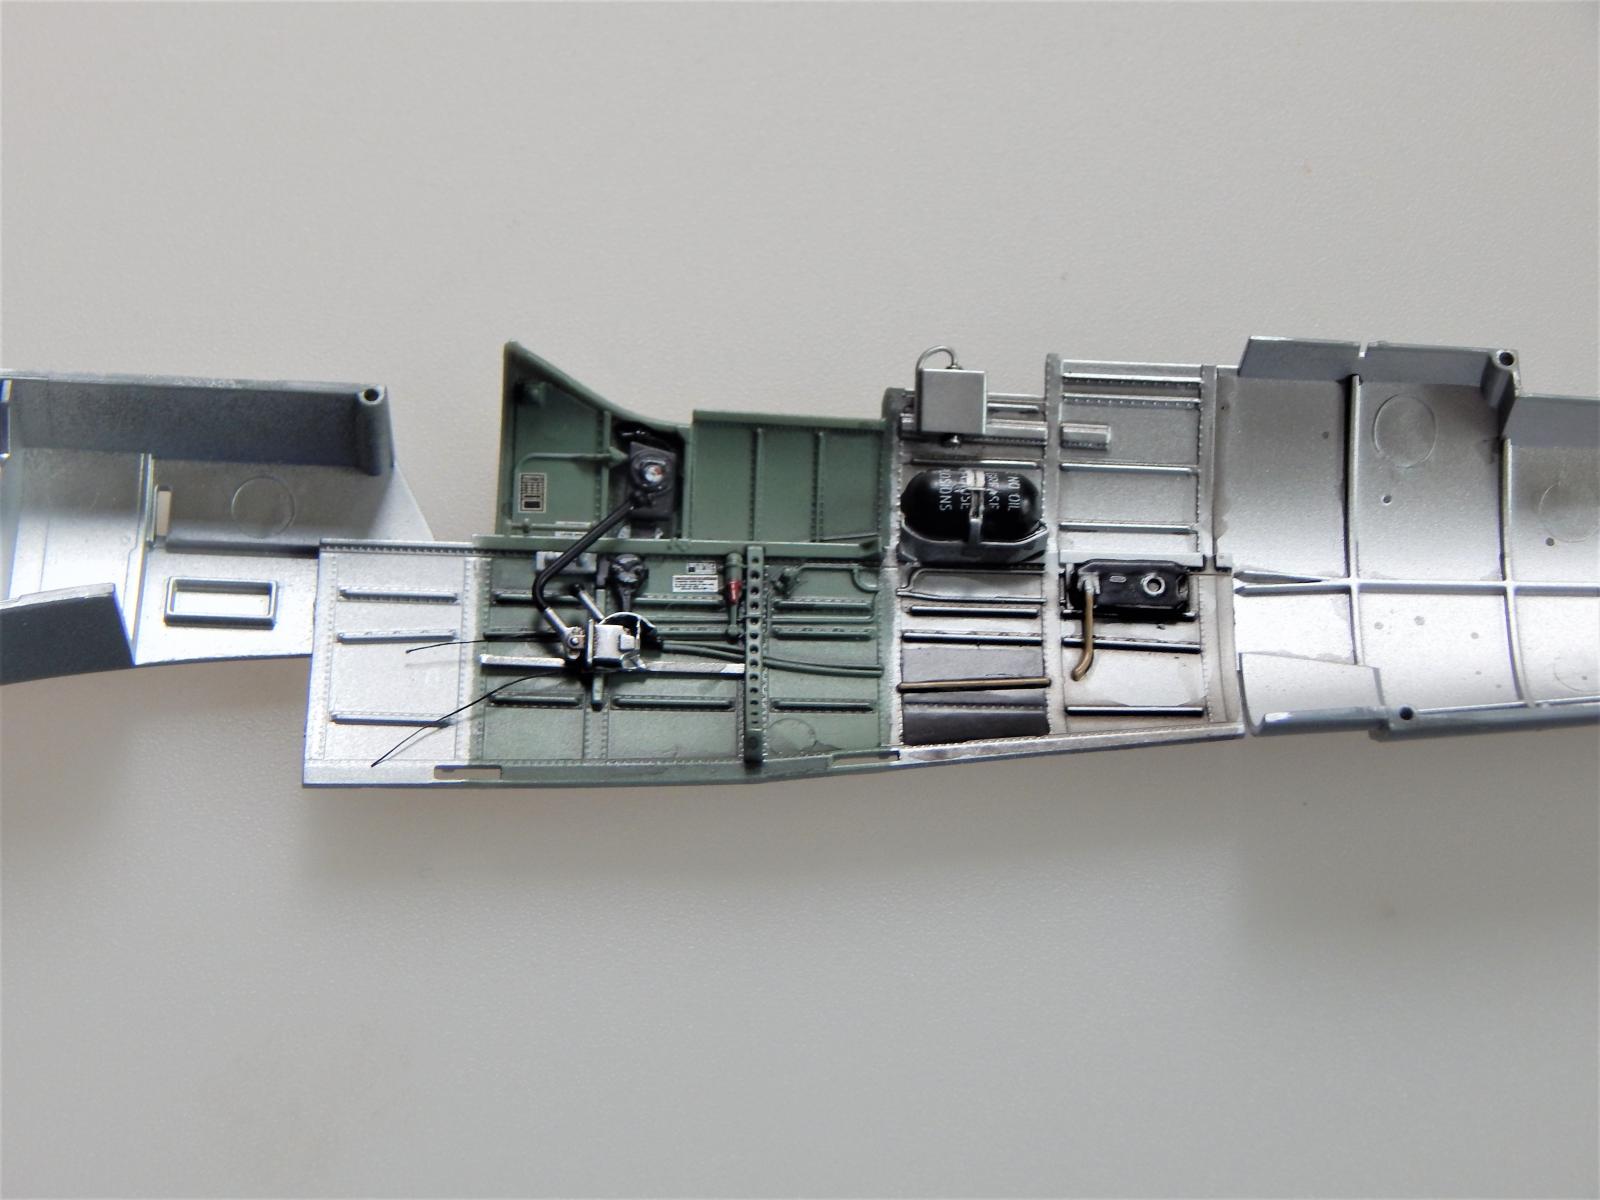
Tolerances are very tight and on has to be aware of even at points scrape and remove paint on mating surfaces to ensure a proper fit.
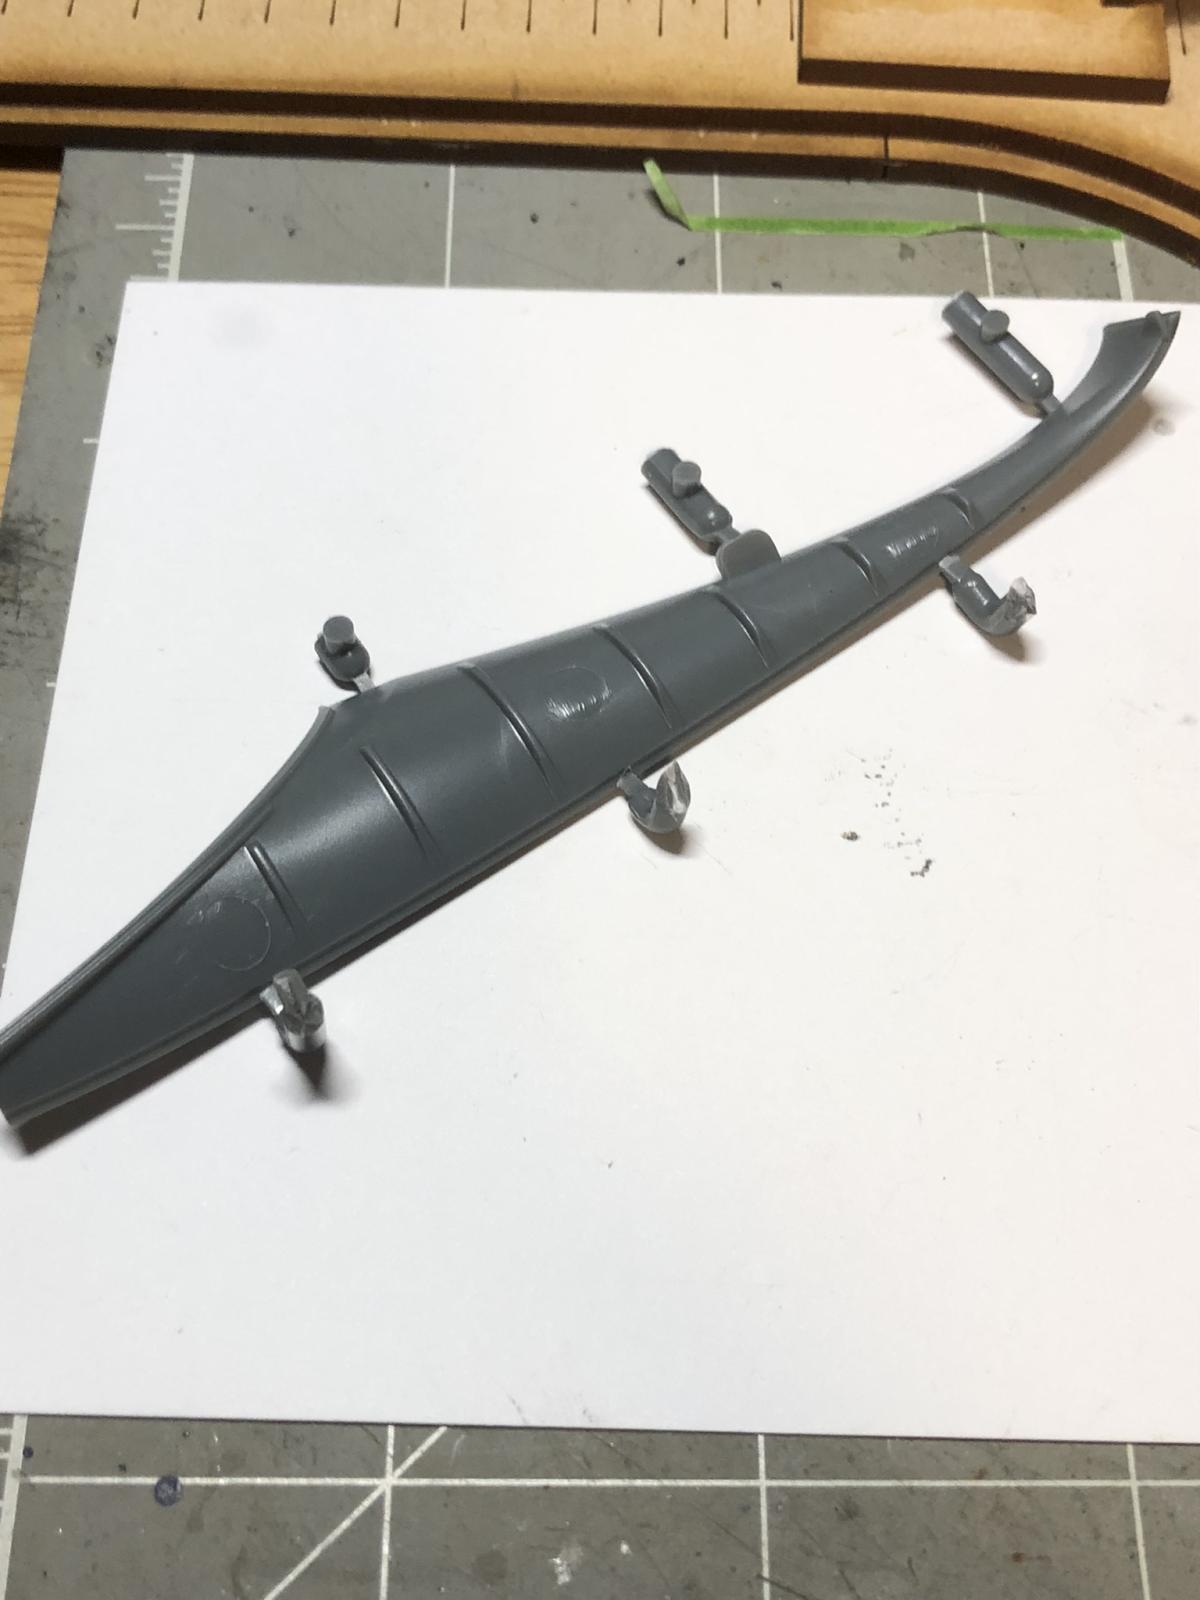
Another point is that the mating surfaces are where the injection stubs are and removal can be problematic at times. It is especially important to remove before assembling and not to Sand TOO Much off as in the leading edge of wings, fuselage insert pieces, etc…
The instructions are in color and well-detailed but the build sequence did not always follow the most logical flow—So I suggest skipping around to ensure your build-one thing I forgot was the running light on the spine. Make sure to put in before closing the fuselage halves.
The decals are beautifully printed but be careful to get the right decals in place as some of the white decals are lost on the carrier film and I just couldn’t see them.
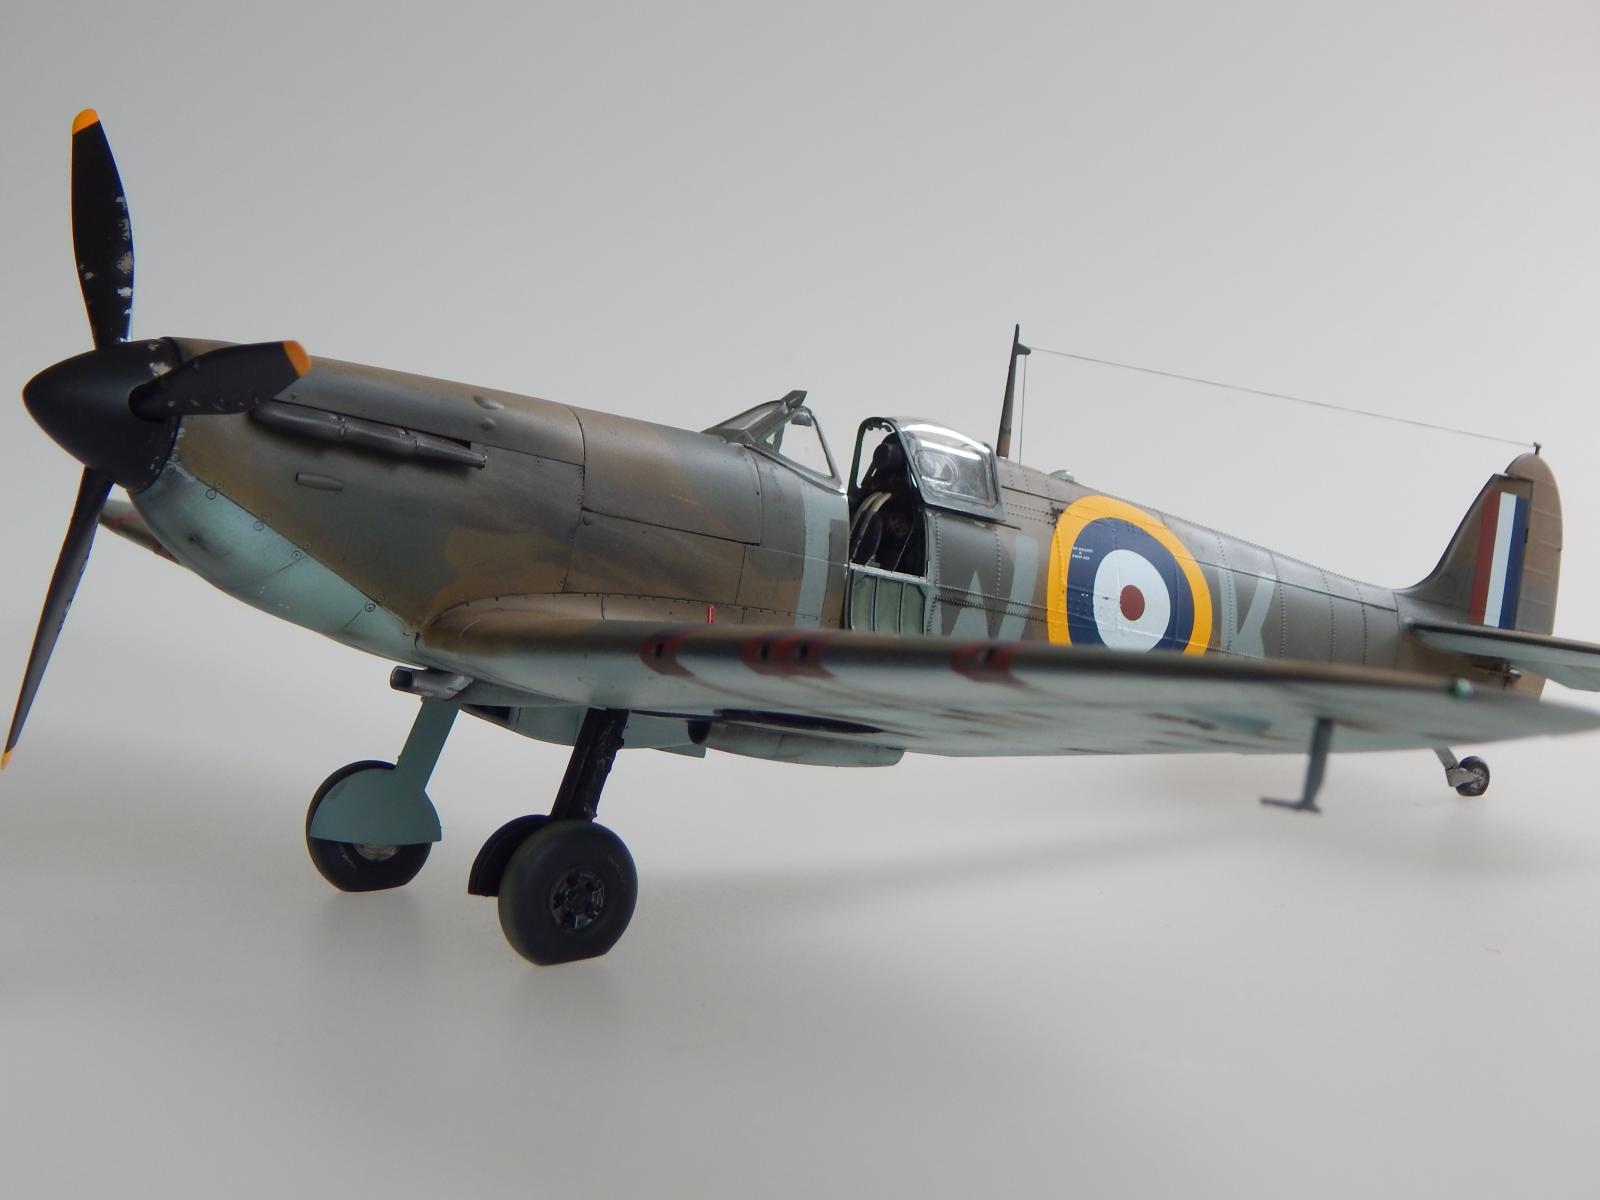
Wing to fuselage is very precise and I suggest you fit them together until they set up. Also try to get the click as they snap into place.
I recommend to test fit the landing gear. They do fit but may require some sanding and trimming as outlined in the instructions. But I got mine painted separately and they even were able to be put in and out with a nice snug fit and proper symmetry-that was impressive!
Funny observation - the prop support is a square shape and what it fits into, which is the base of the prop happens to be round. The fit is good but it is a funny choice—square peg into round hole!?!
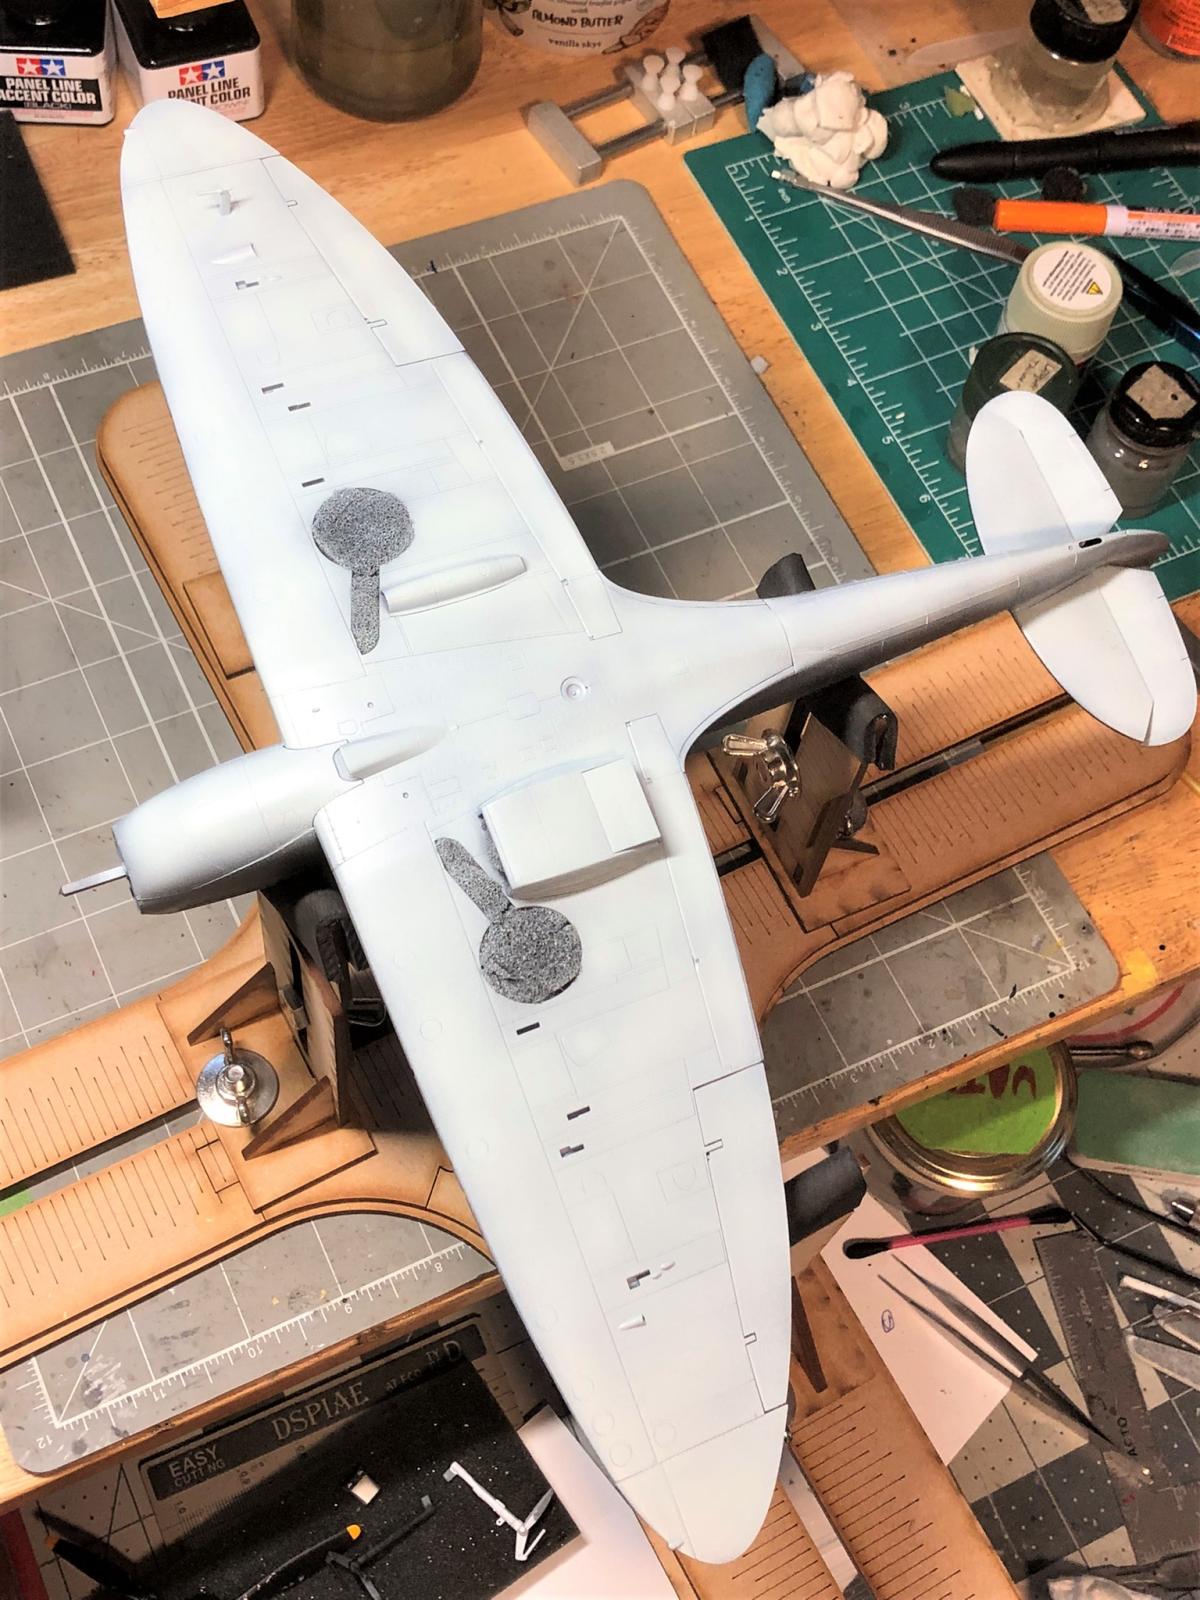
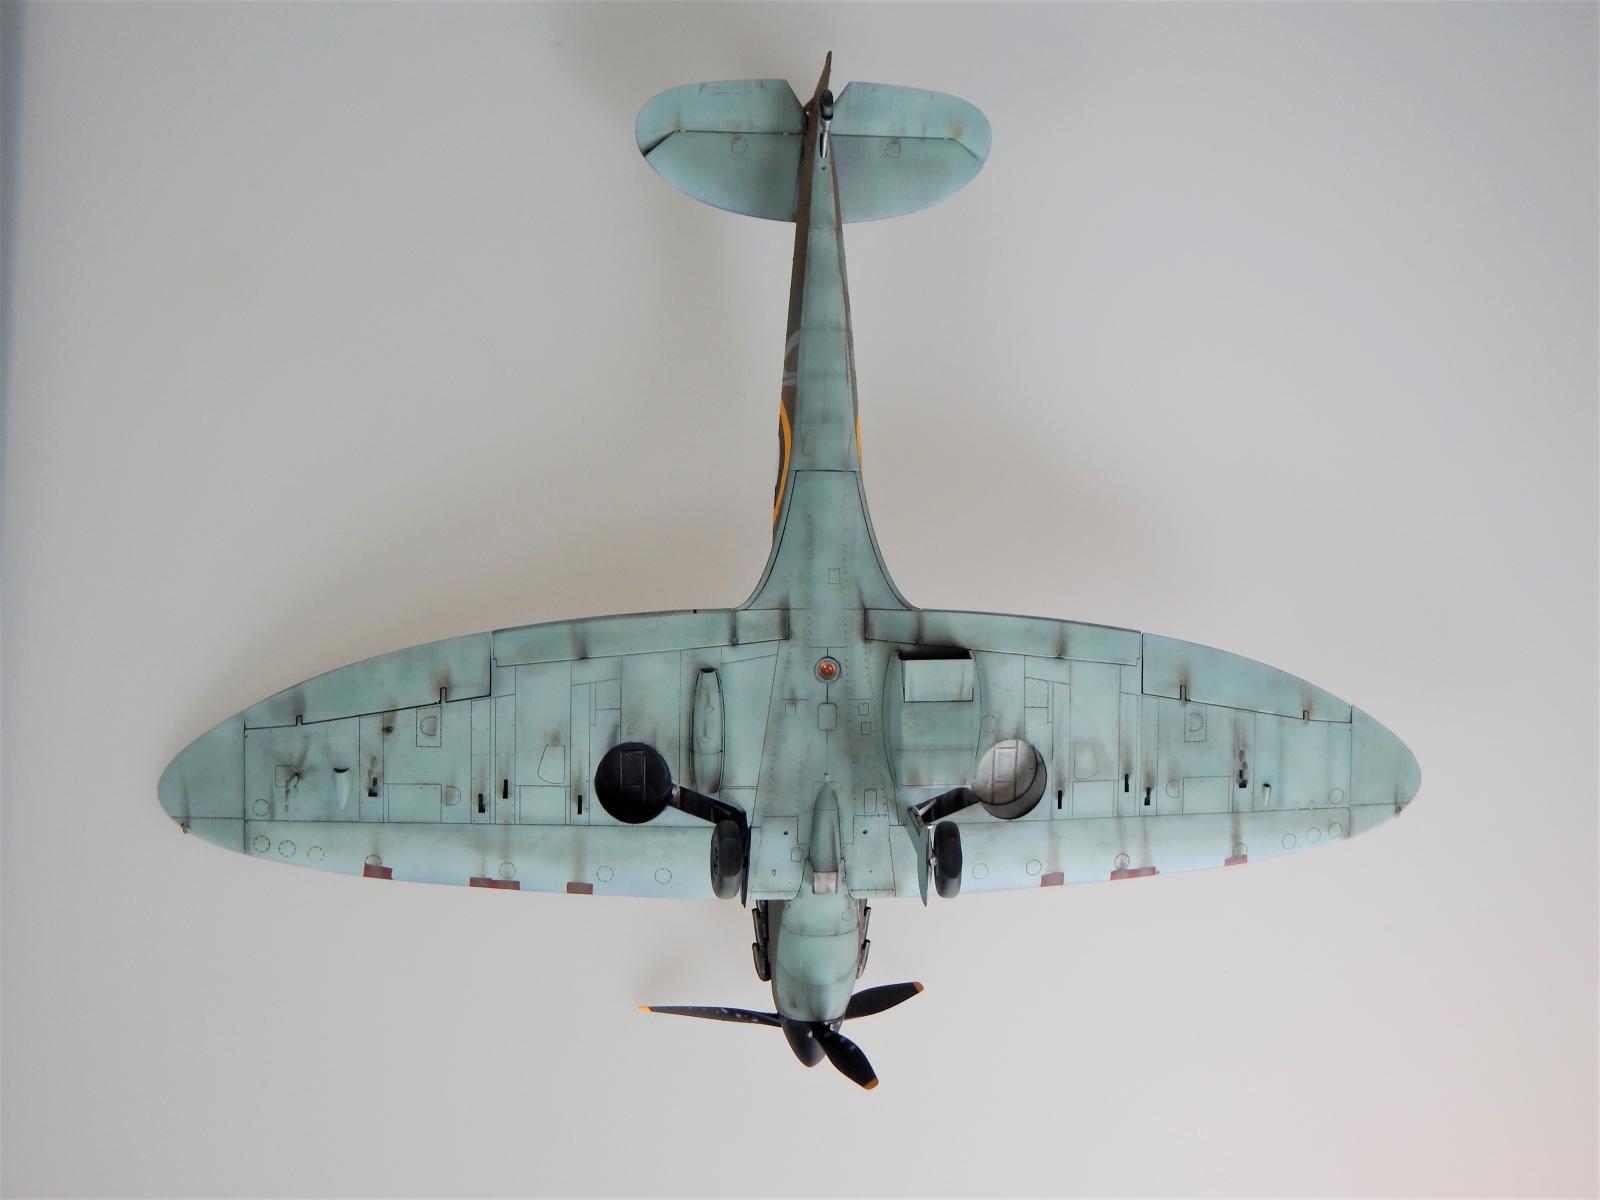
Painting and Weathering
Again I employed Model Master enamels cut with Gunze Leveling thinner which worked well for me. I don’t know in the future if I will still use Model Master since they are no longer produced and mine are getting long in the tooth. I will be transitioning to mostly Tamiya and Gunze acrylics—which happen to be the color call outs in the Kotare instructions.
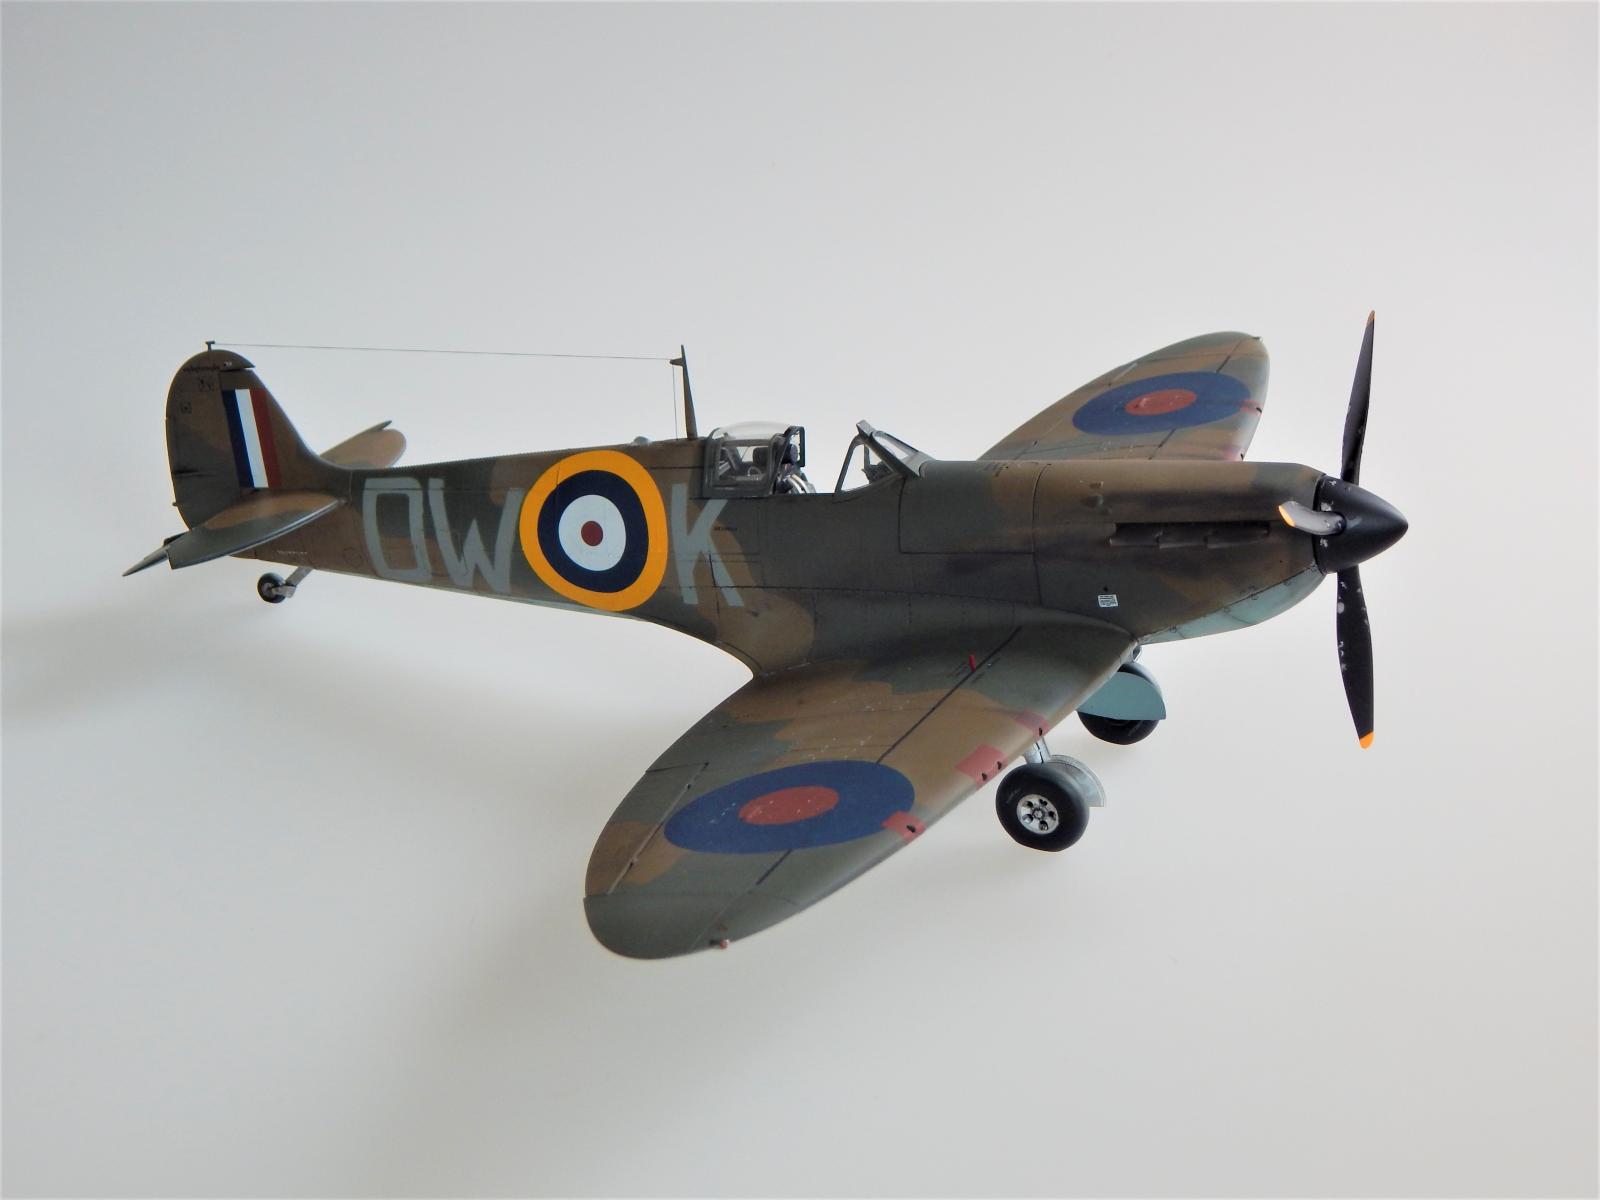
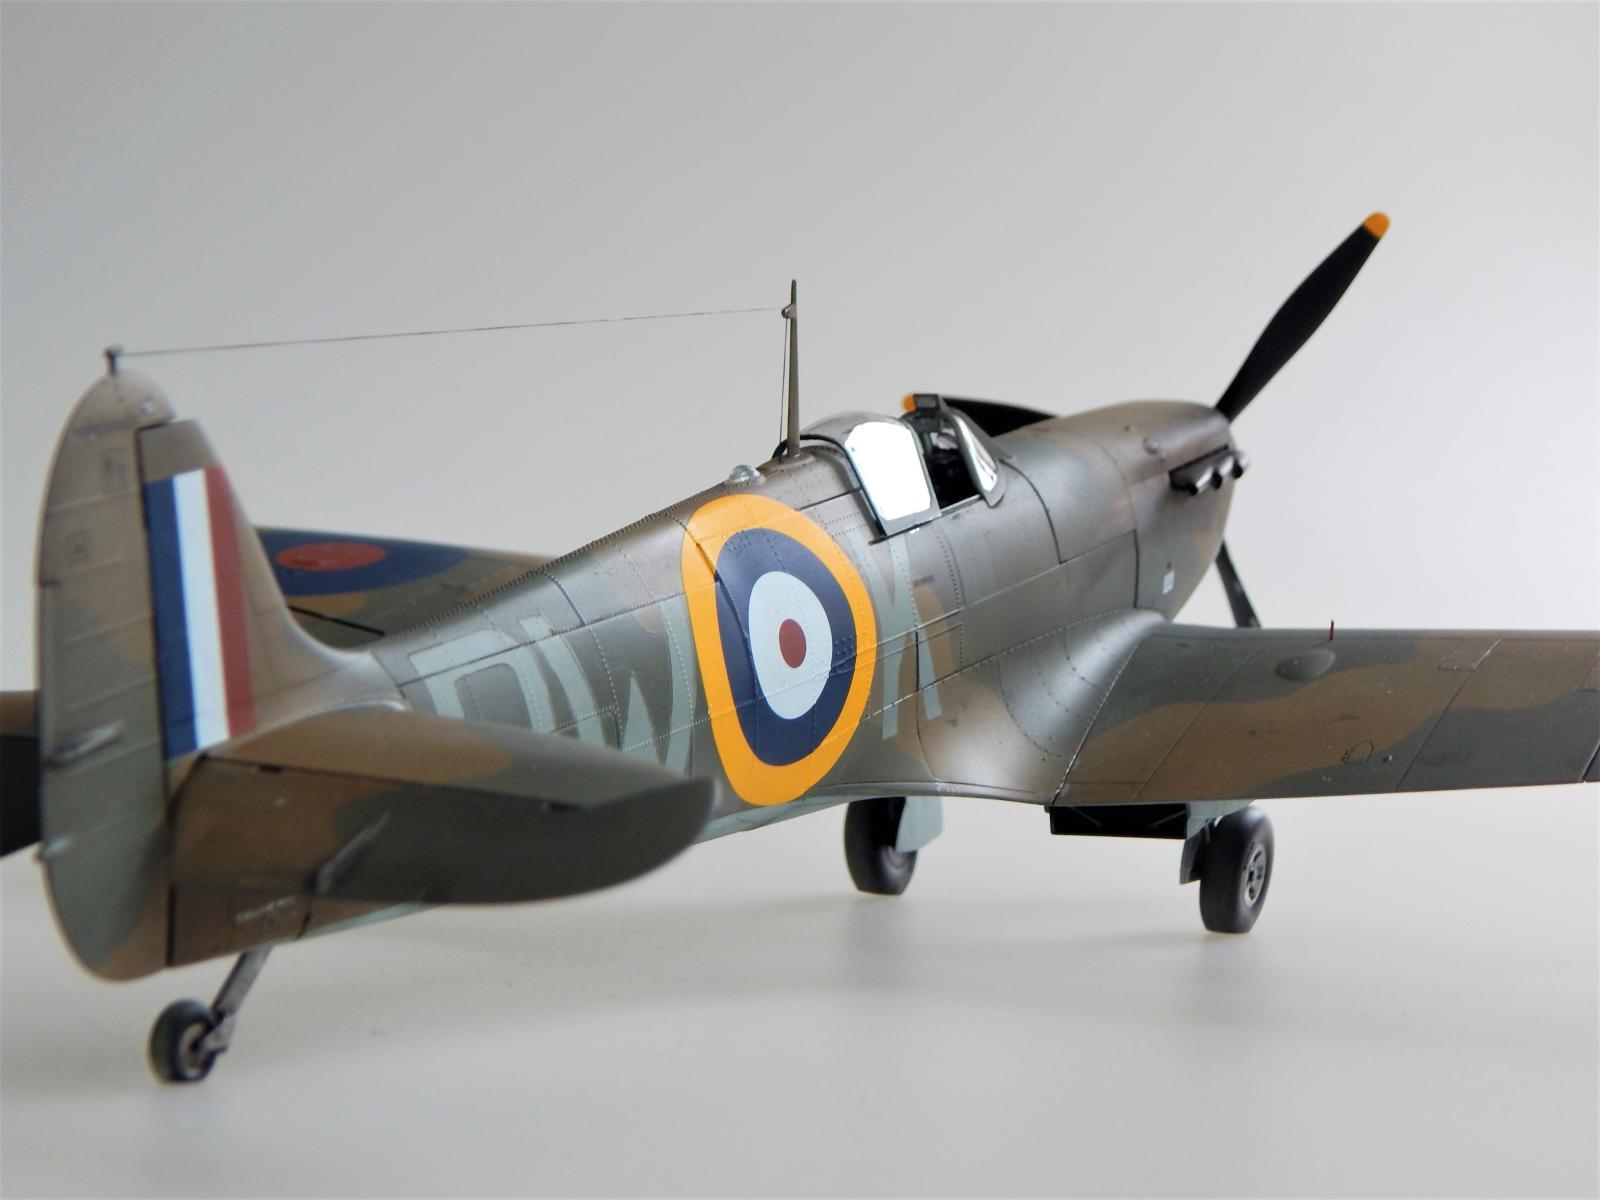
The Spitfire was weathered moderately due to its history and flying during the Battle of Britain which meant this airframe so a lot of action. I elected to do scheme C in the instructions.
Sptifire Mk.Ia P9495 DW-K which was flown by ; SJ Arnfield [2 victories], DF Corfe [1 victory], J Ellis [12 victories] and P Litchfield [3 victories], 610 Squadron June-to July 1940. The photos and the instructions were extremely helpful in getting the right look of this early mark Spitfire. The masks provided by Hawaiian Air Depot were very helpful in masking the cockpit and I even used his frisket set for the camouflage.
The decals were well printed by Cartograf and went down well with the decal fixer and softener by Green Stuff.
I rather enjoyed this build and would recommend it to anyone interested in this period of aircraft and especially this larger scale. I find the price to be very fair for what the modeler is getting in the box, not to mention the buildability of this kit, which gives it a broad appeal to various levels of model hobbyists. I personally have an interest in British aircraft so it was an easy choice for me, but I recommend this kit for ANY World War II 1/32 aircraft collection! I also felt this has been one of the best kits I have built in the last few years for any scale or type!
Highly Recommend!


Comments
DW-K
I liked the kit a lot and think it is worth the money. I did mine on the same day I was seen in the famous picture of the plane. It has been difficult to find a 1/32nd Mk.1 for many years. I'll have it at the National this year.
Dak
Steve Corvi Katari Spitfire review
I found Steve’s review to be quite interesting because his construction advice and warnings fit totally with my first WNW SE5a build. This means to me that WNW is alive and well at Kotare.
Thanks....
I am glad my review was helpful
Thanks for your encouragement & support
Steve,
Add new comment
This site is protected by reCAPTCHA and the Google Privacy Policy and Terms of Service apply.
Similar Reviews