
D9R Doobi Interior
This is one of three photoetch sets provided by Eduard for the Meng 1/35 scale D9R Armored Bulldozer kit. The Meng D9R kit itself has previously been reviewed [Meng D9R Review]. The Eduard Cooling Slats set has also been reviewed [D9R Cooling Slats Review], as well as the Eduard Exterior Photoetch set [D9R Exterior Photoetch Review].
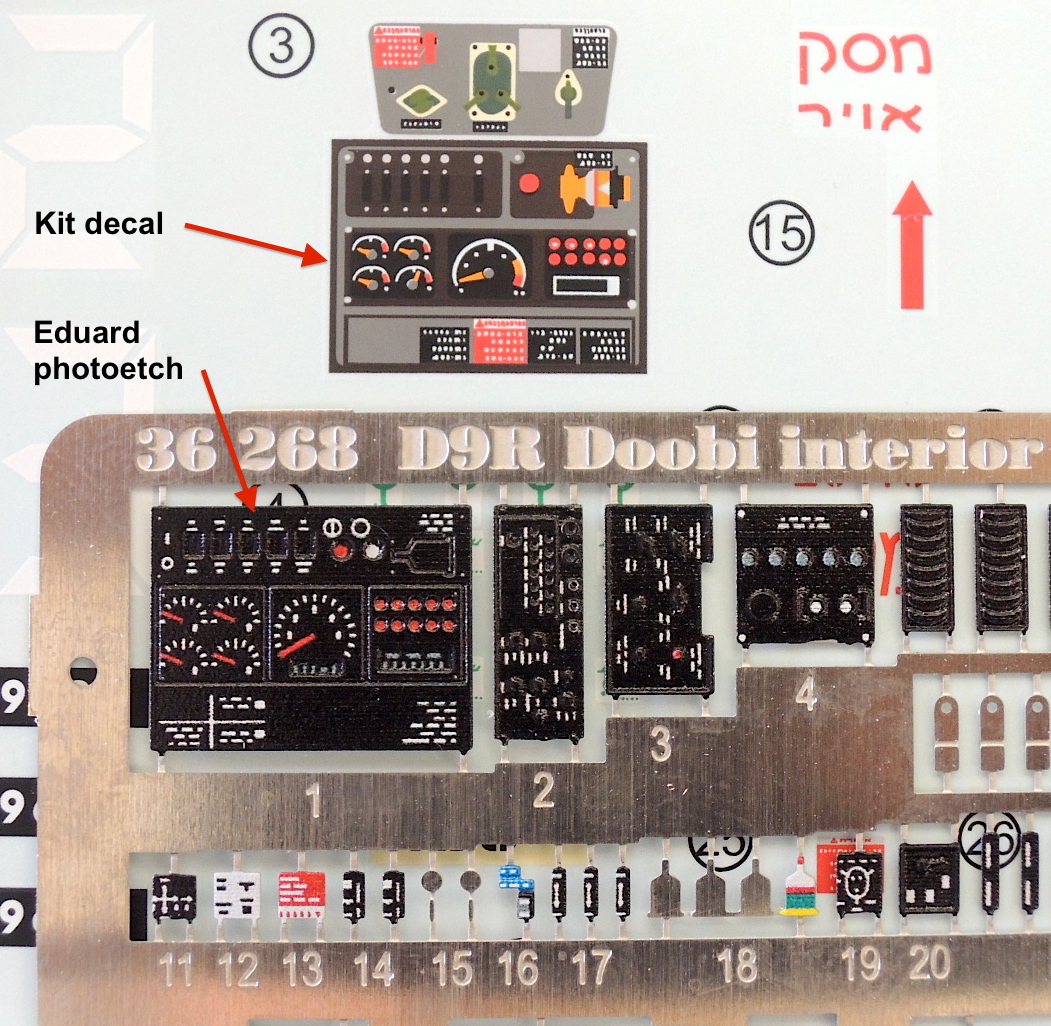
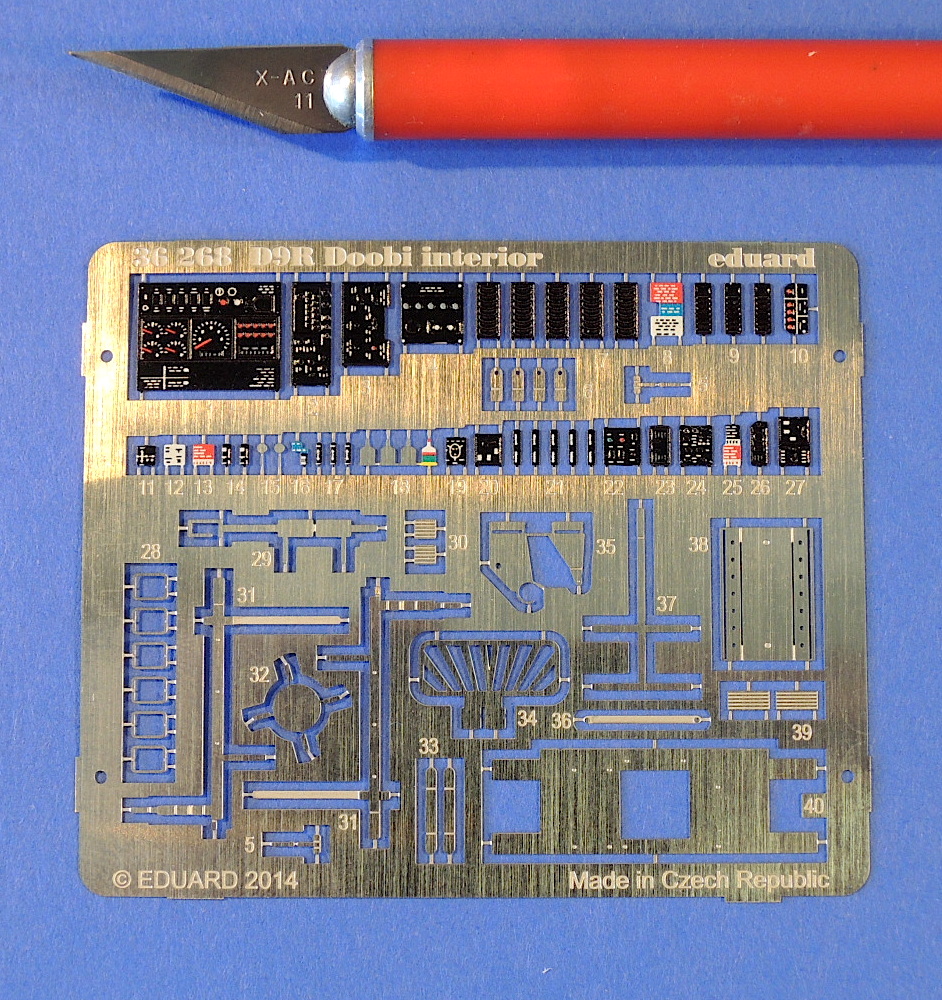
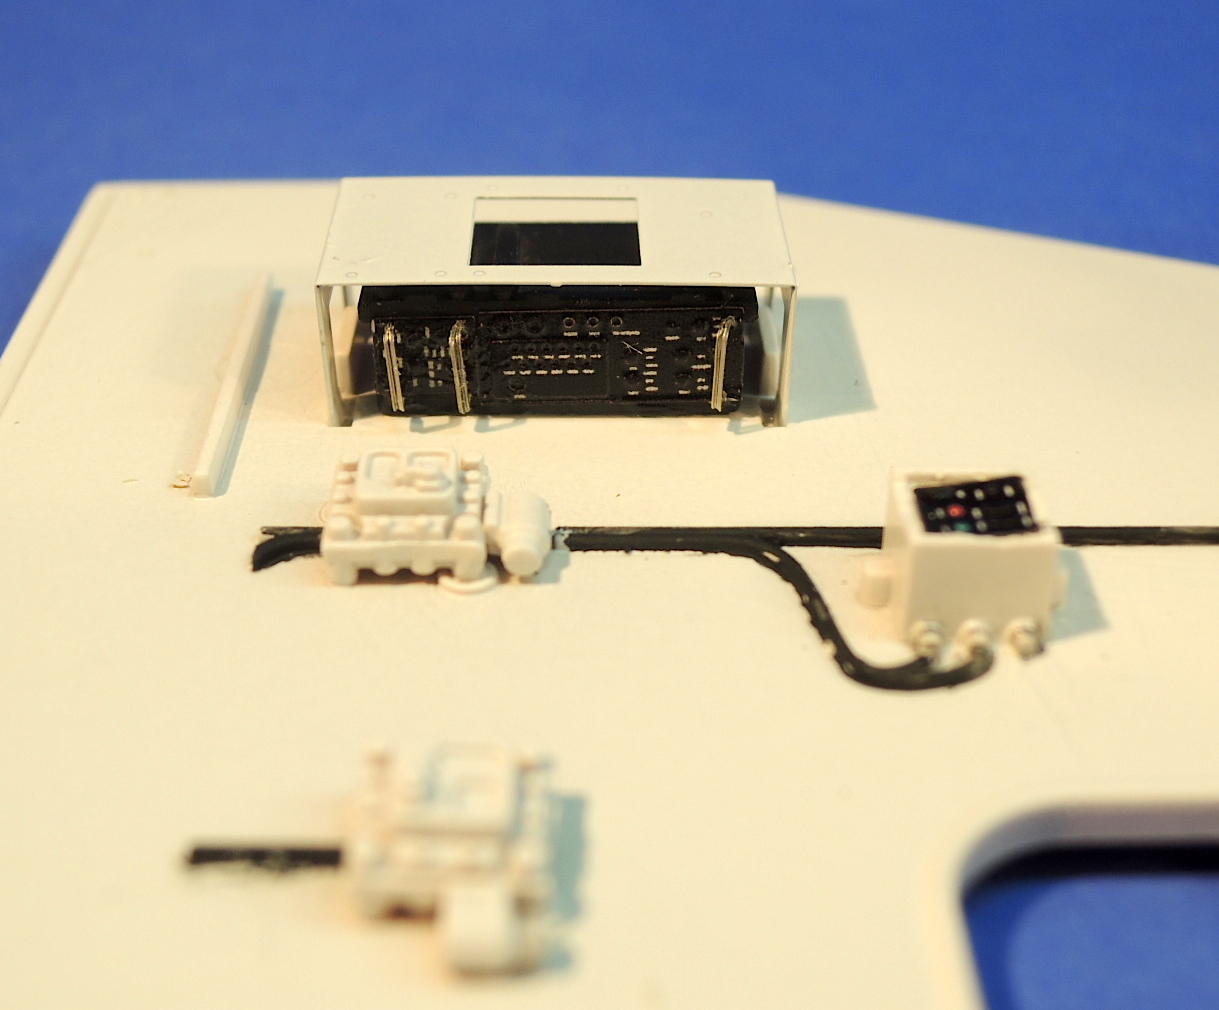
The Interior Photoetch set includes one 2 3/4” by 2 5/16” pre-painted steel fret and instructions. While small, the fret is beautiful, with amazing detail, and sharp colors.
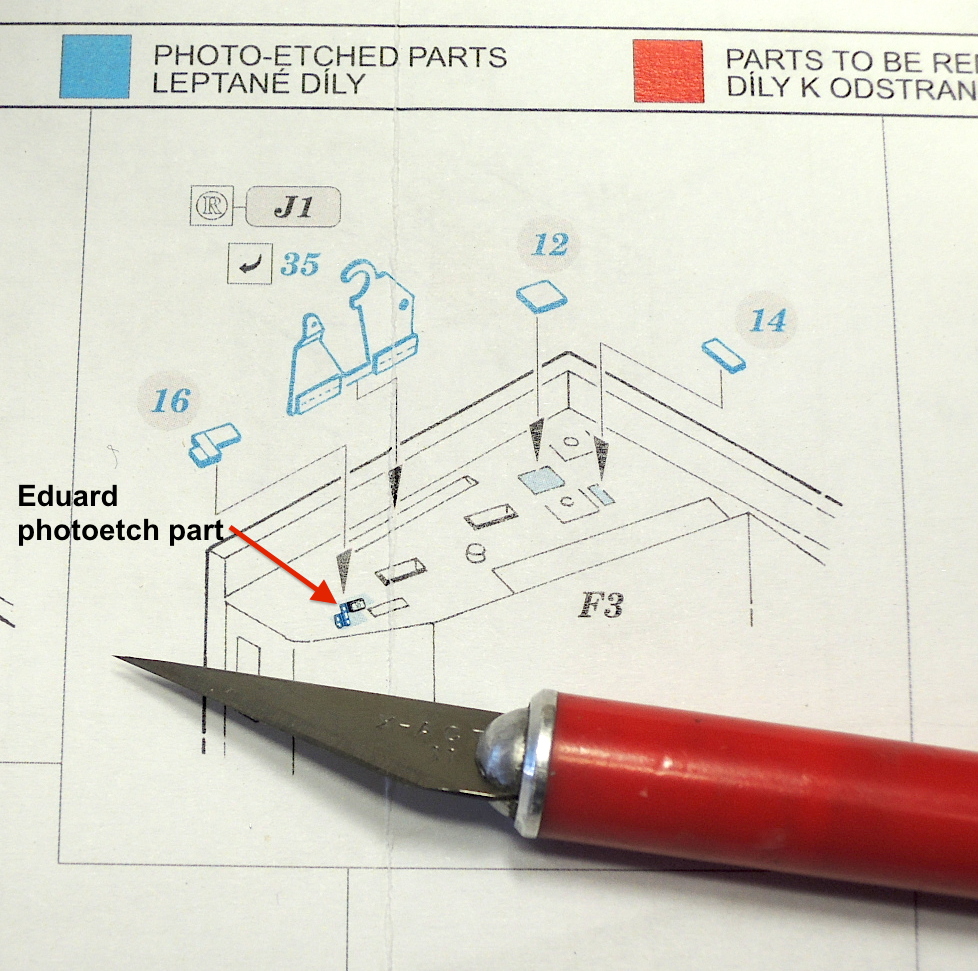
The photoetch is three-dimensional and has very fine detail. The painting is multi-color. The photoetch parts replace the kit decals and molded-on detail of for the instrument panel faces and various labels on the interior of the D9R. The photoetch also includes some of the interior louvers, brackets for the extinguishing system and other miscellaneous pieces. Many of the photoetch pieces, such as the instrument control labels are extremely small and will require great care in removal from the fret and gluing into place. Eduard does provide a few extras for some of the pieces.
Flat photoetch like the instrument panels and labels can be adhered directly to the underlying surface. Many of the photoetch pieces require scraping off detail on the base kit part. I used a sharp woodcarvers chisel to slice them off, followed by scraping with an X-Acto and sanding where necessary. Superglue can be used to adhere the parts, with the slower setting glues allowing a little bit more time for positioning the piece. I also use Gators Grip acrylic glue to adhere small pieces. The acrylic glue allows more time to position the part, and any remaining residue can easily be cleaned up with a water-moistened paintbrush.
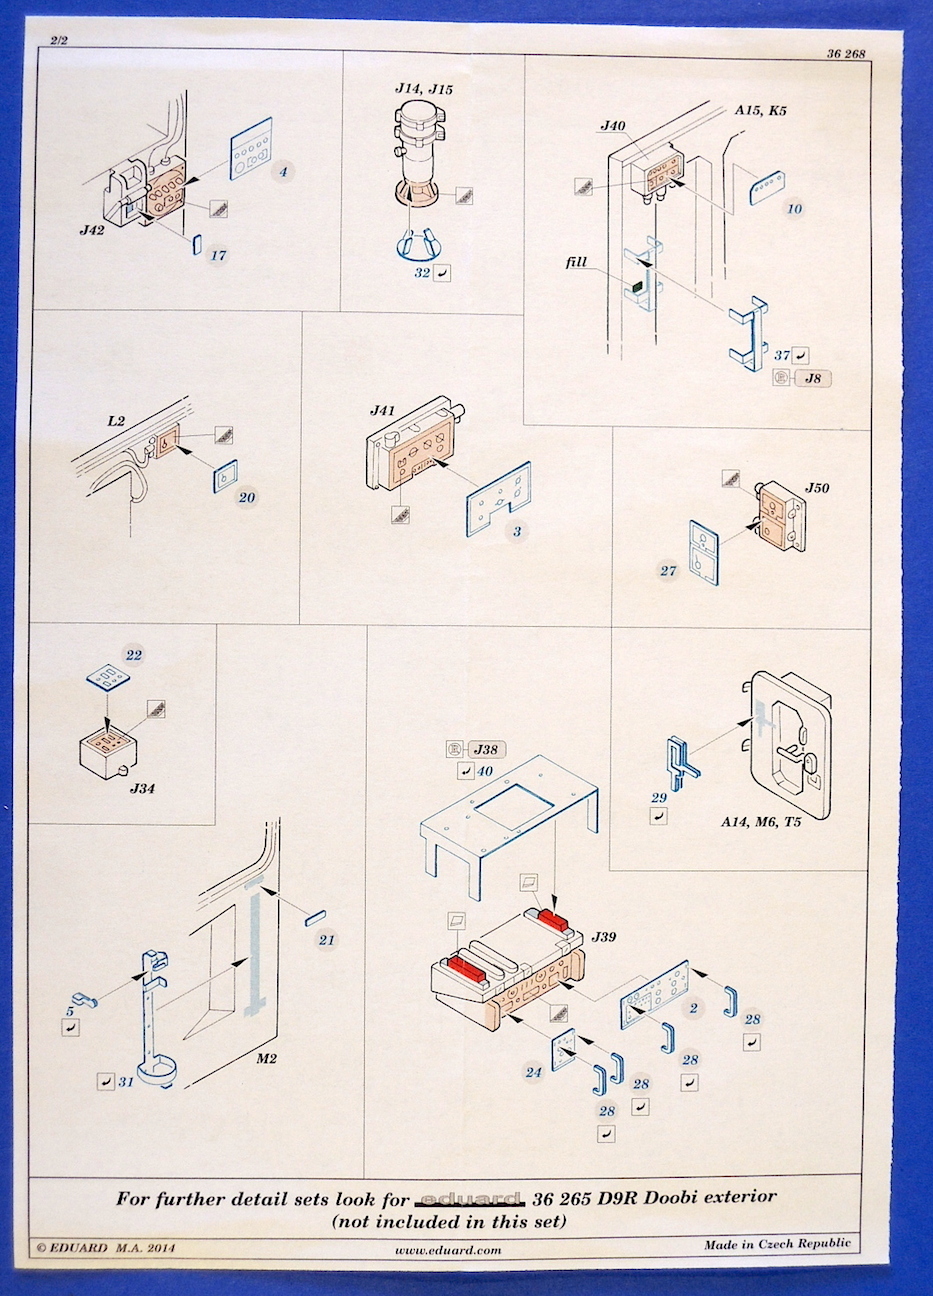
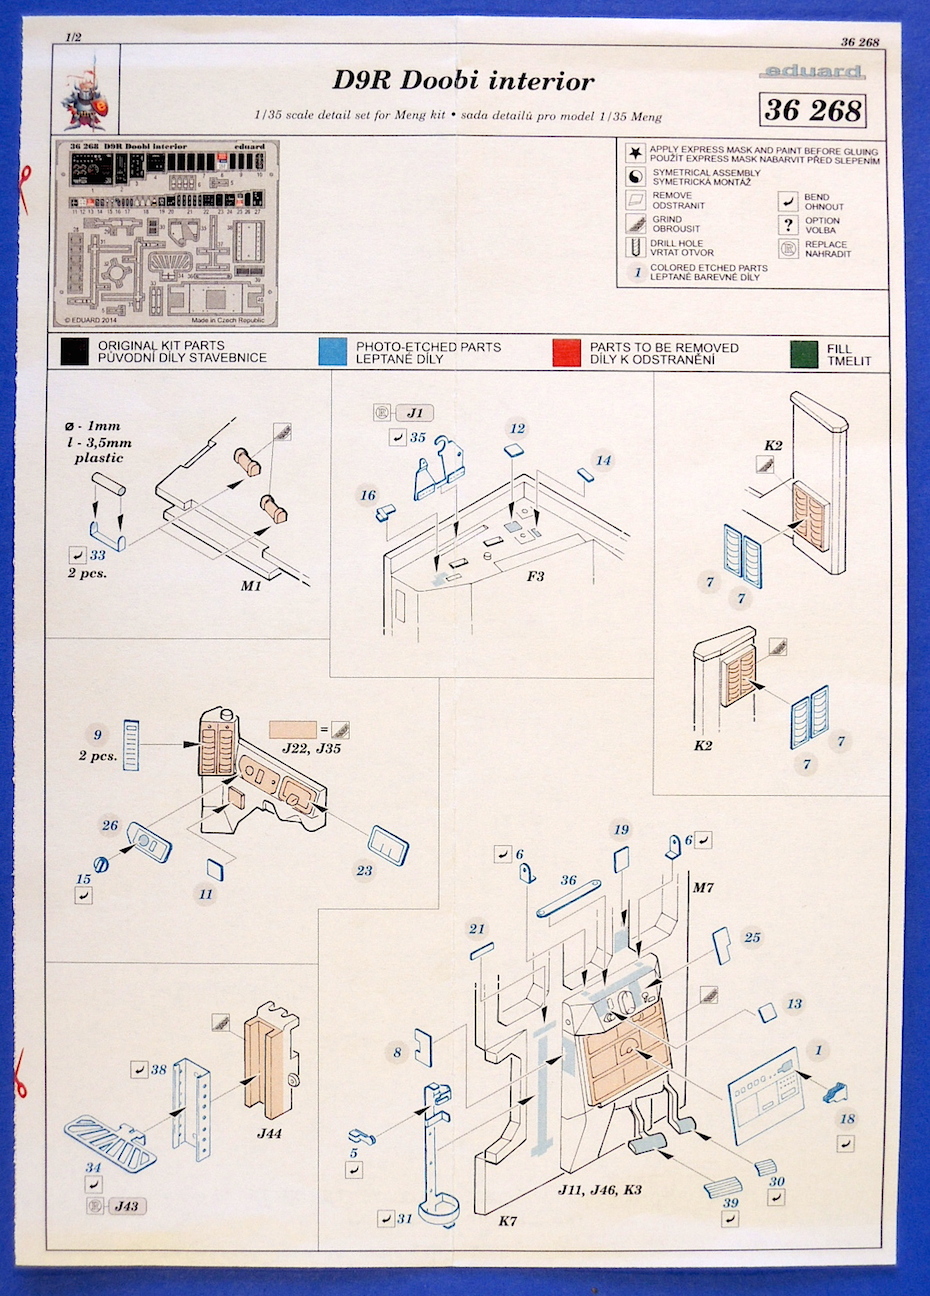
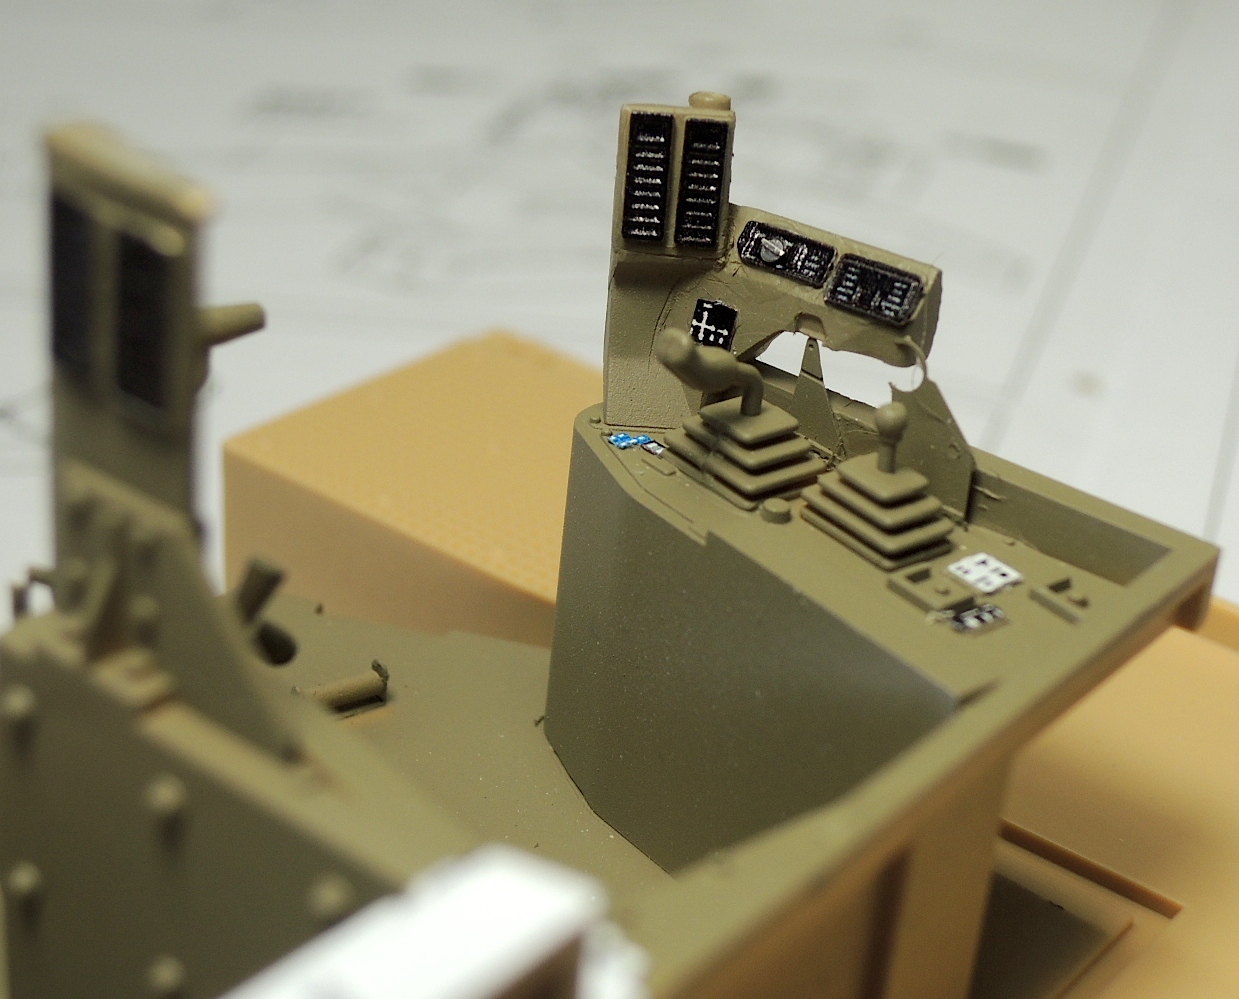
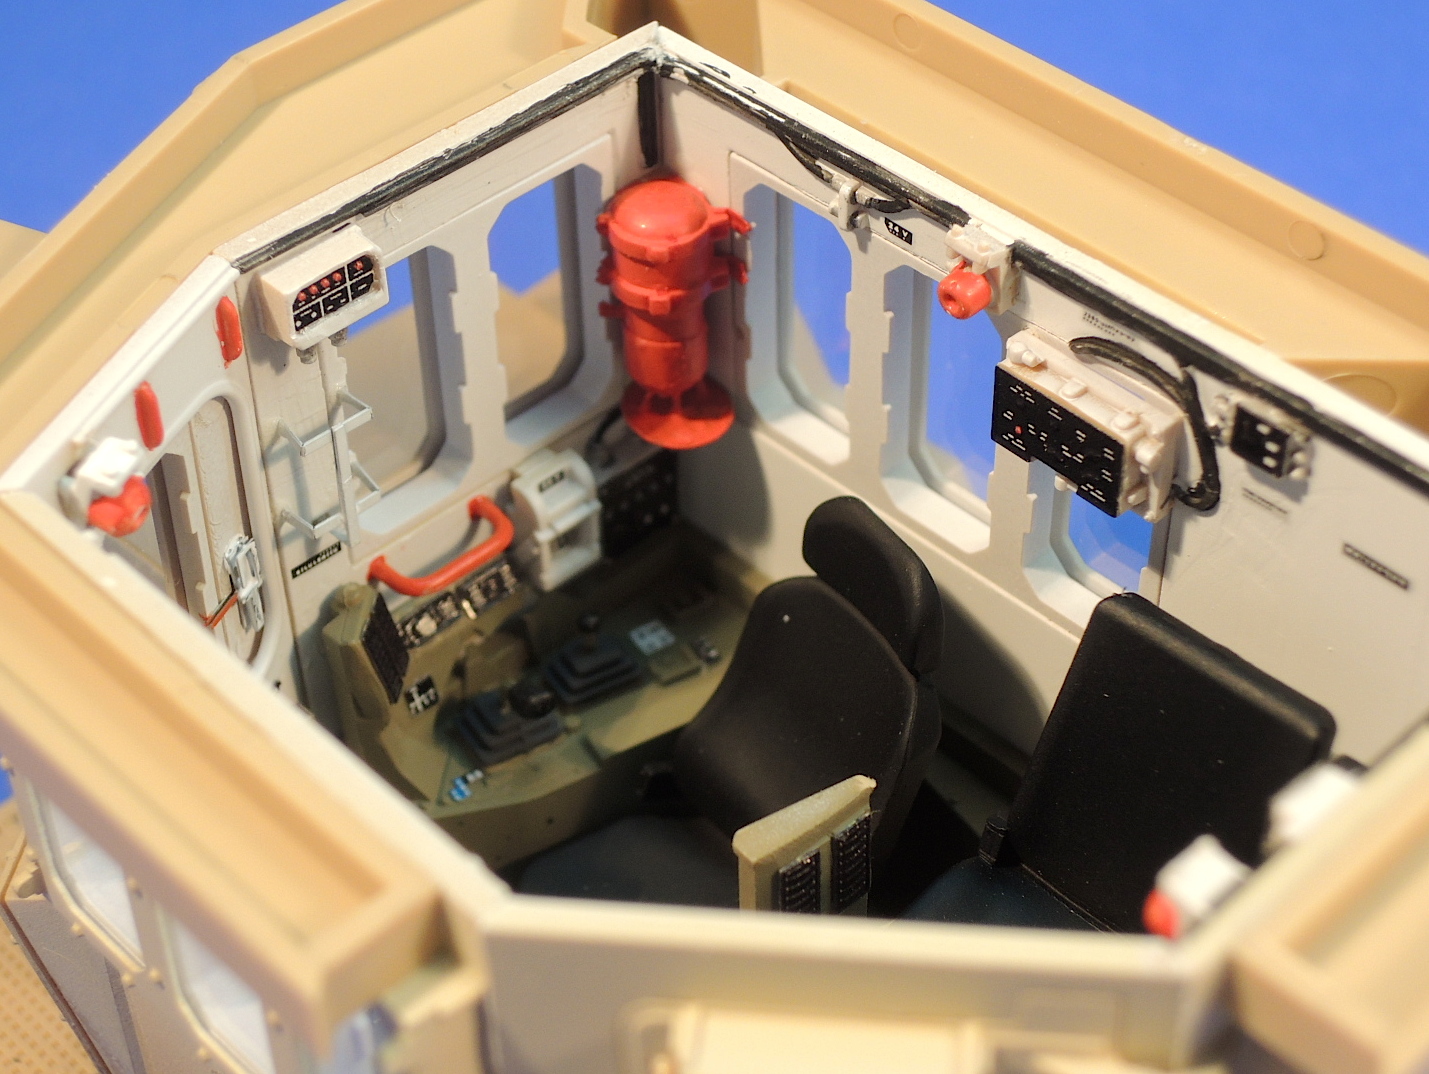
The first few steps are the replacement of the interior foot pegs, brackets and labels on the drivers control counsel, replacement of the louvers on the air conditioning unit, and replacement of the foot rest for the commander’s seat. Installation of the parts is straightforward, easy to assemble, and adds considerable detail to the interior of the Meng D9R.
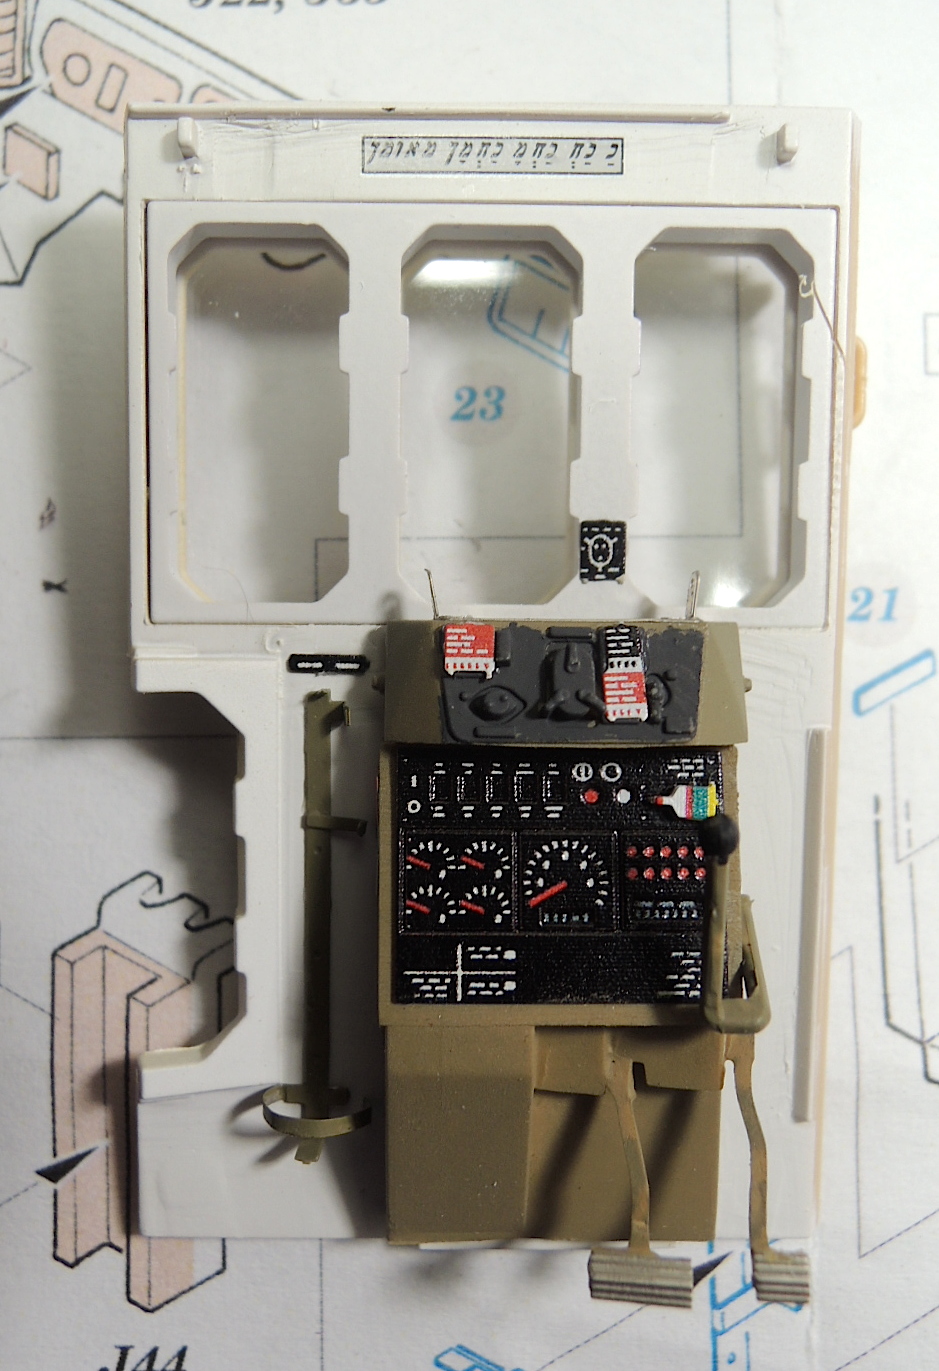
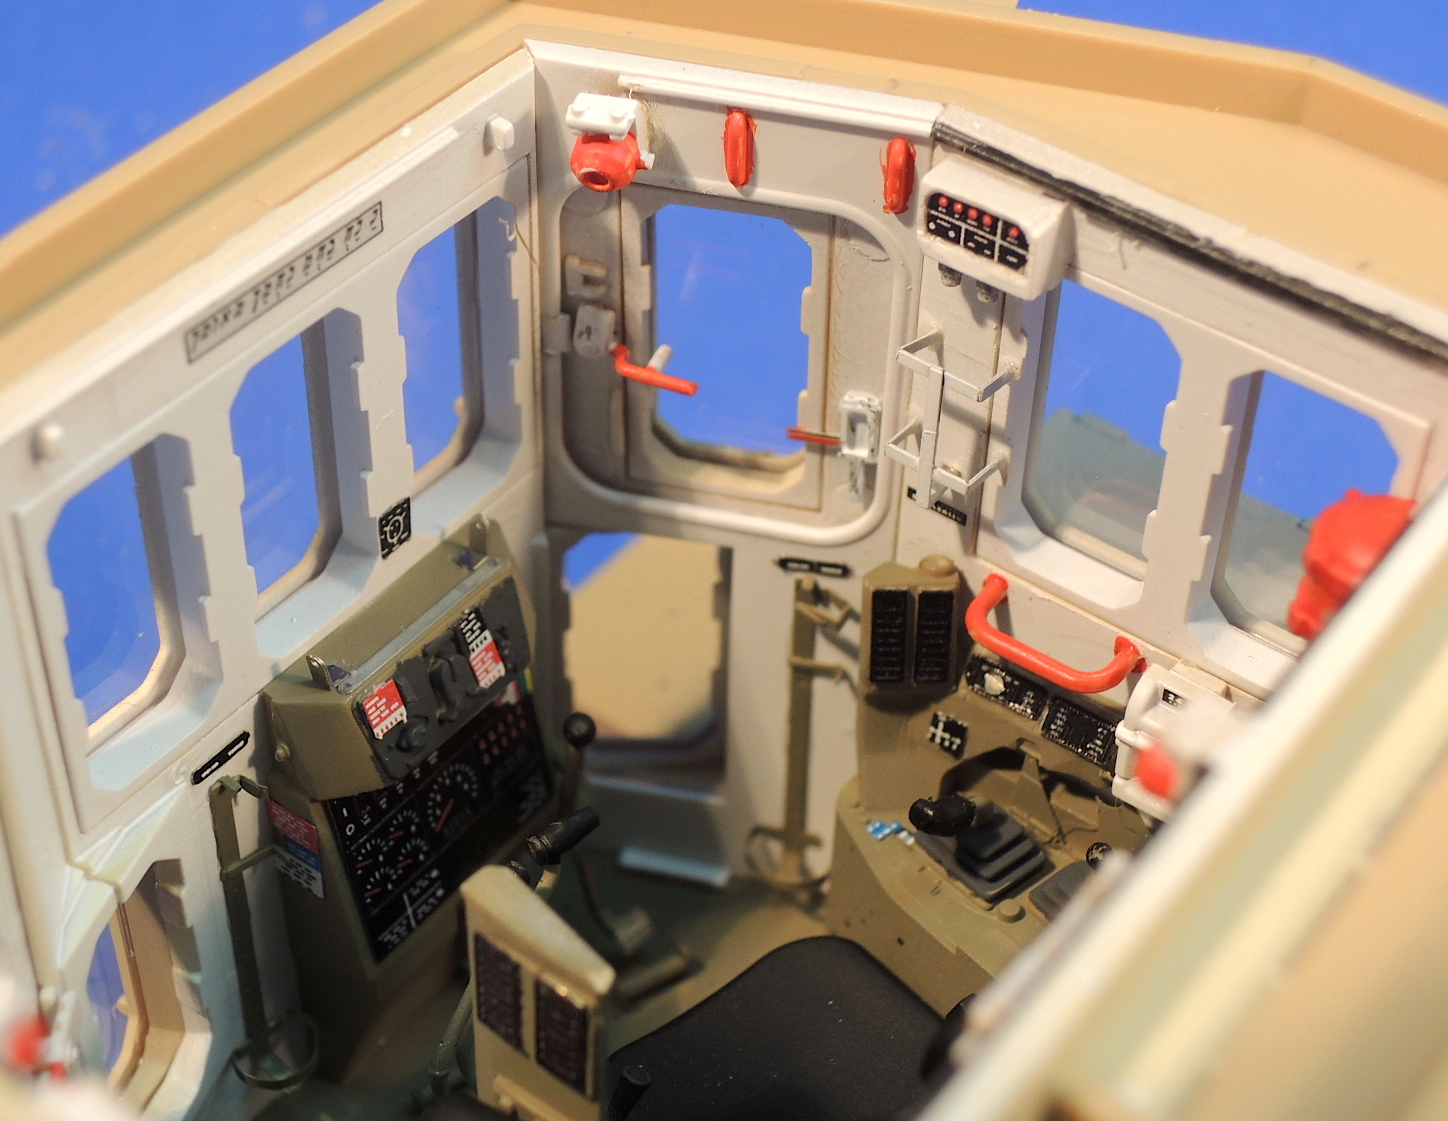
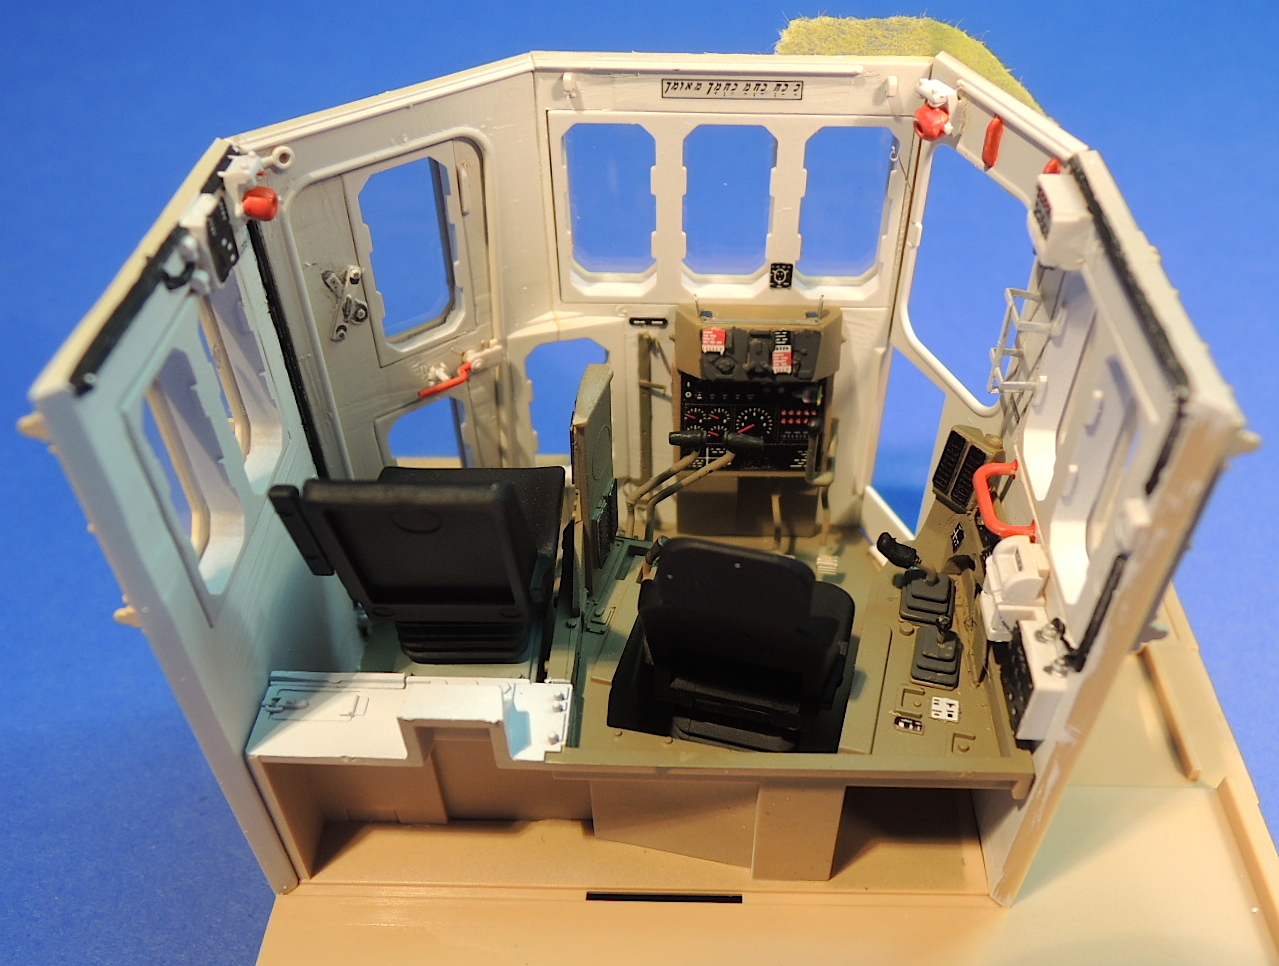
The last step on the first page of instructions details the front face of the D9R cab with photoetch brackets, pedals, and the pre-painted instrument panels & labels. The remaining steps apply the pre-painted faces to various pieces of equipment on the walls and roof of the D9R. The pre-painted photoetch transforms the interior of the D9R cab in a beautiful model!
Part #38, which is the channel for the adjustable footrest on the commander’s seat, does not have the flange shown on the instructions.
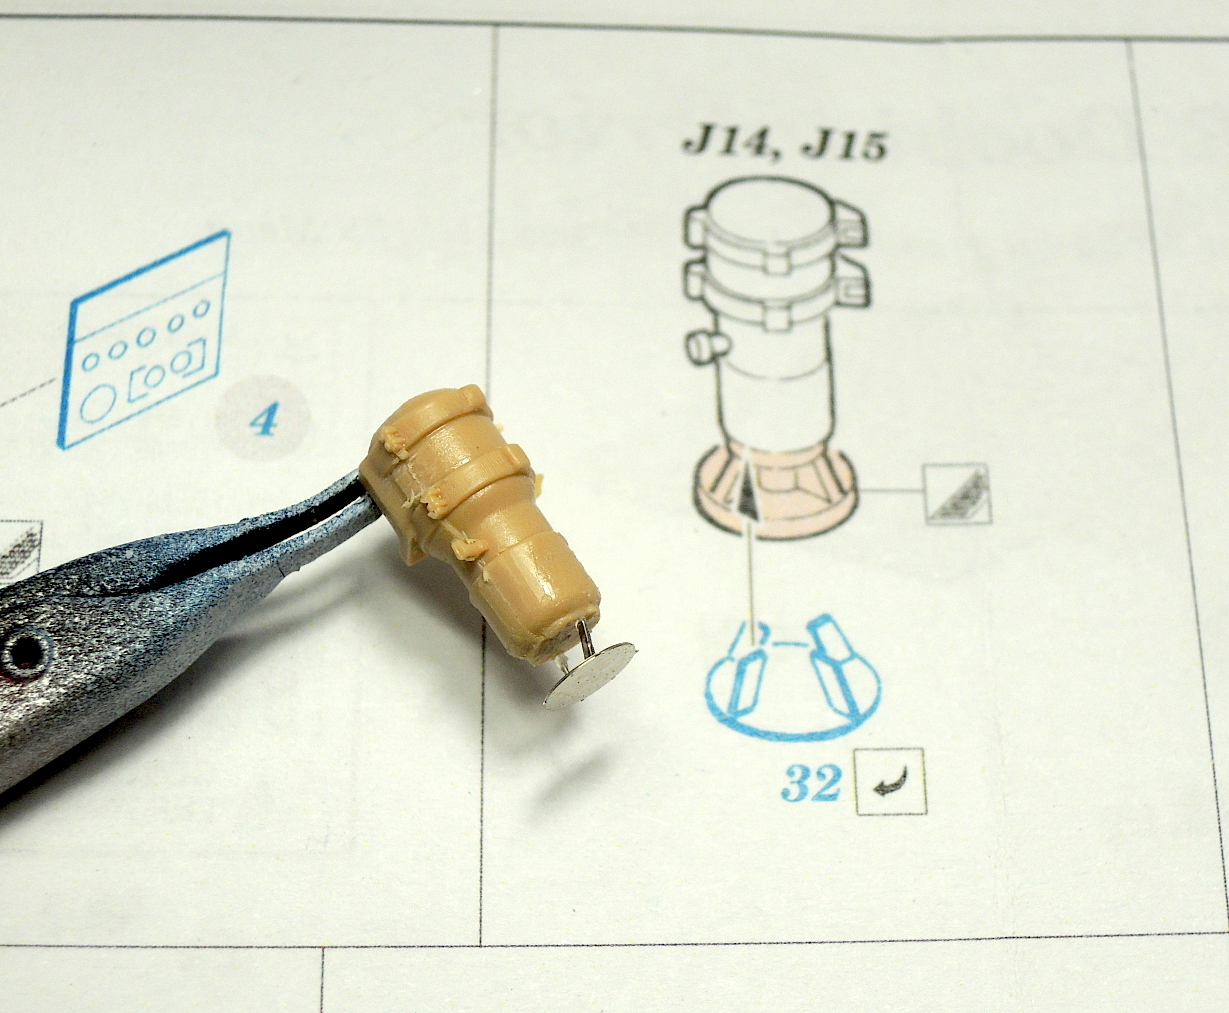
Part #32, the baffle for the fire suppression system, is almost impossible to shape and install. Very small, and each of the legs requires a twist and bend to form the shape. I broke two of the legs trying to get them into place, and another one trying to glue the baffle to the extinguisher tank. Eduard has made this part too delicate for many modelers to deal with.
In summary, this is a beautifully crafted addition to the cab interior of the D9R dozer. The photoetch has much greater detail than the kit parts or decals, and is painted much more accurately than most modelers are able to do. Many parts are very small but are just beautiful when added to the cab interior.
Thanks to Eduard for continuing to produce amazingly detailed photoetch like this wonderful set and supplying review samples to IPMS. Many thanks to the great IPMS review program for letting me review this set.

Comments
Add new comment
This site is protected by reCAPTCHA and the Google Privacy Policy and Terms of Service apply.
Similar Reviews