
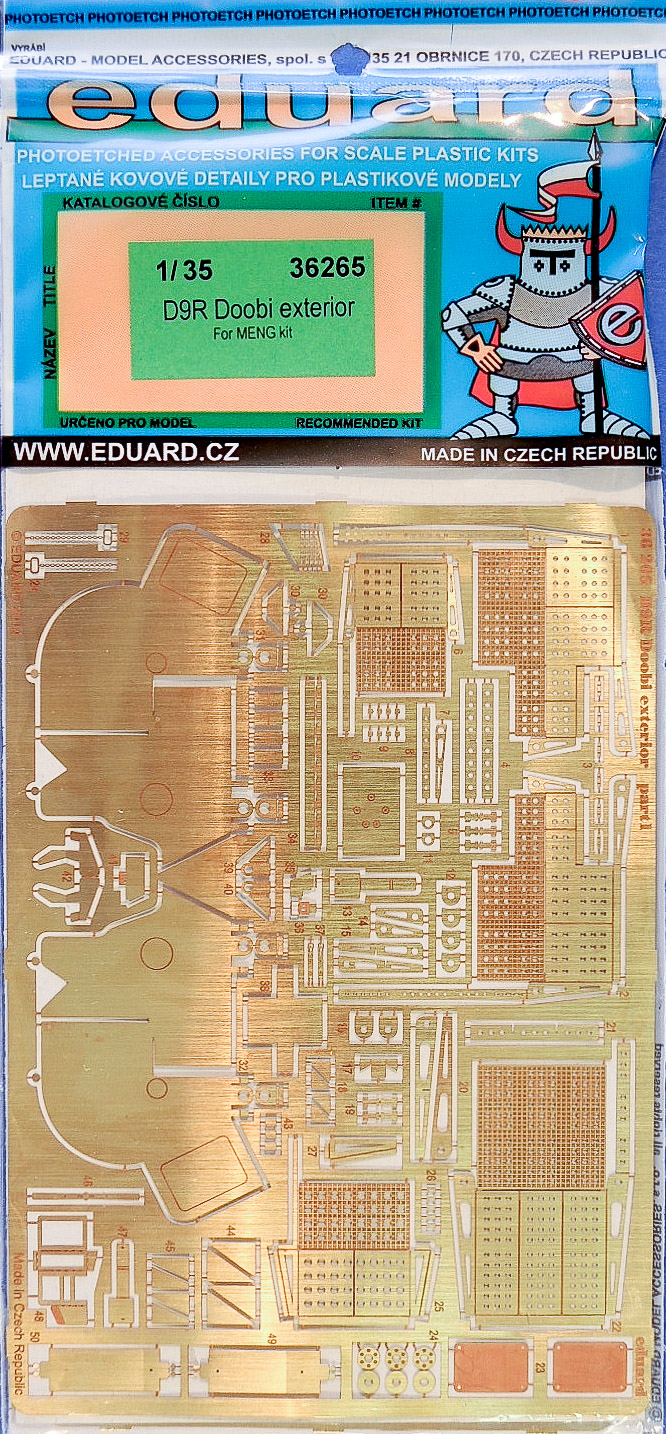
D9R Doobi Bulldozer Exterior Set
This is one of three photoetch sets provided by Eduard for the Meng 1/35 scale D9R Armored Bulldozer kit. The Meng D9R kit itself has previously been reviewed [Meng D9R Review]. The Eduard Cooling Slats set has also previously been reviewed [D9R Cooling Slats Review], as well as the Eduard Interior Photoetch set [D9R Interior Photoetch Review].
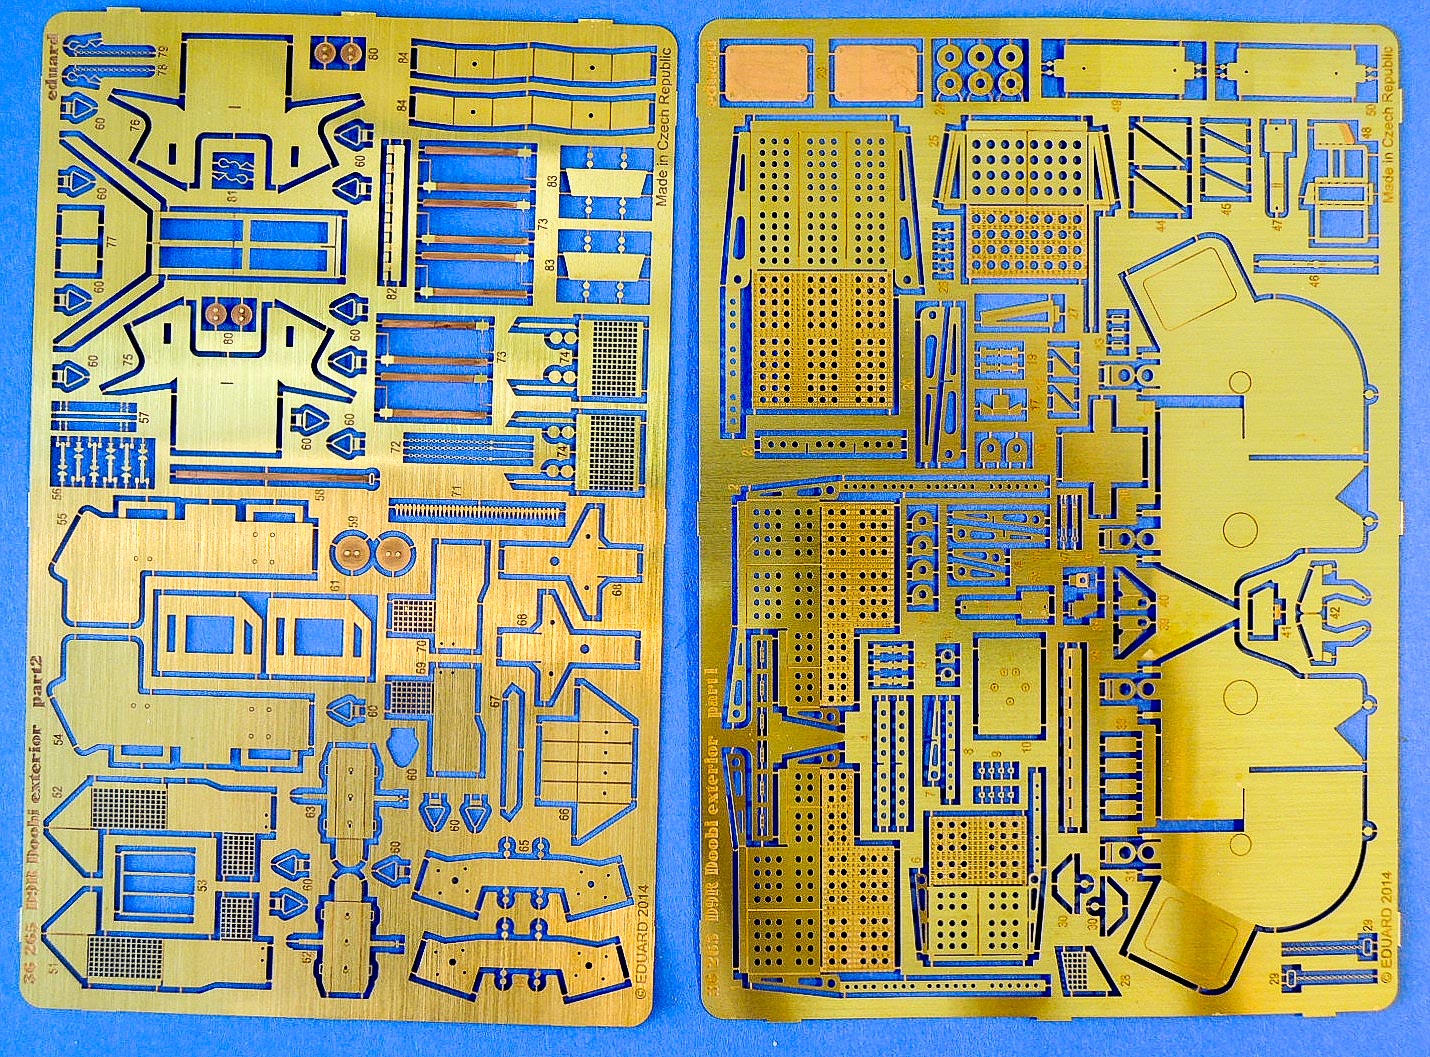
The Eduard Exterior Photoetch Set for the D9R comes on two frets, one 5 3/4 x 3 3/4 in and another 5 3/4 x 4 in. Although the larger fret feels slightly thicker, the frets are quite close to each other. The connections between the parts and the fret are very small, which makes cleanup easier. Some of the parts have been etched to provide a different thickness and color, such as some of the straps for the water cans, etc. The parts have very fine detail. This is especially noticeable on the screens, step platforms on the fold-down platforms, and cartridge belt for the machine gun.
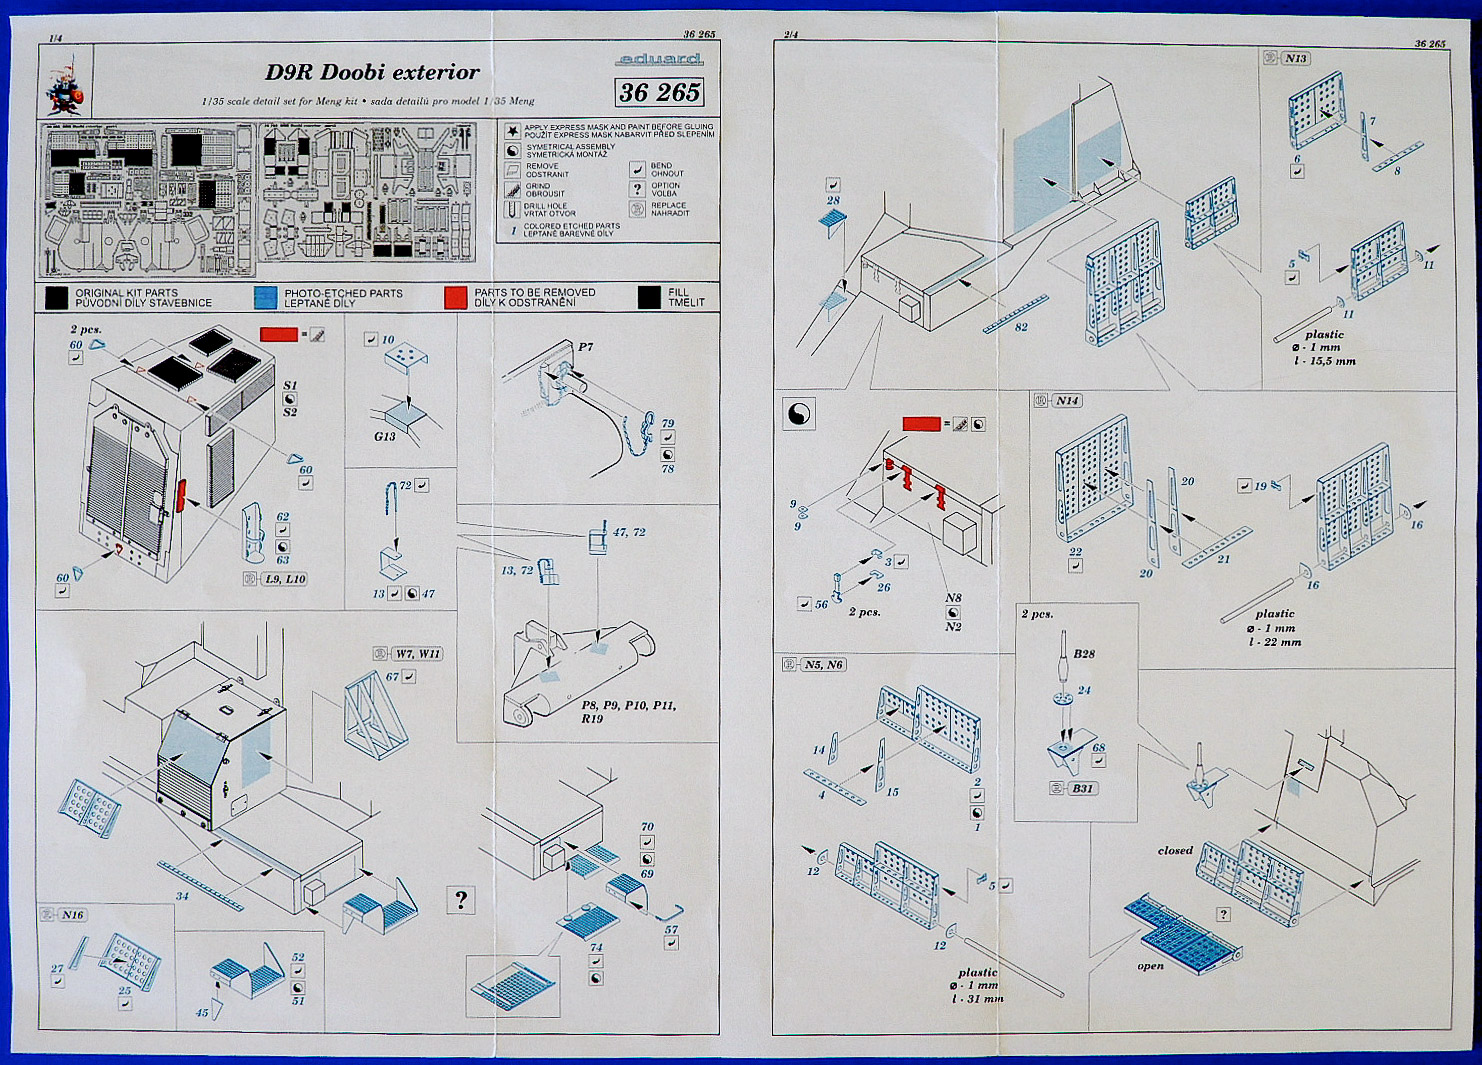
The instructions come on an 8 x 11 1/2 in paper printed on both sides. The instructions include a small reproduction of the entire frets. Colors are used to differentiate the original kit parts, photoetch parts, and parts to be removed. The instructions are perspective illustrations and quite clear. The instructions do not include the base-kit step numbers for reference. It would be nice to have the base-kit step numbers referenced with each of the Eduard steps to know when to install the PE parts. I went through the base-kit instructions and circled all of the kit parts that would be replaced or modified by the photoetch set. This allowed me to install the photoetch in the appropriate sequence while assembling the kit
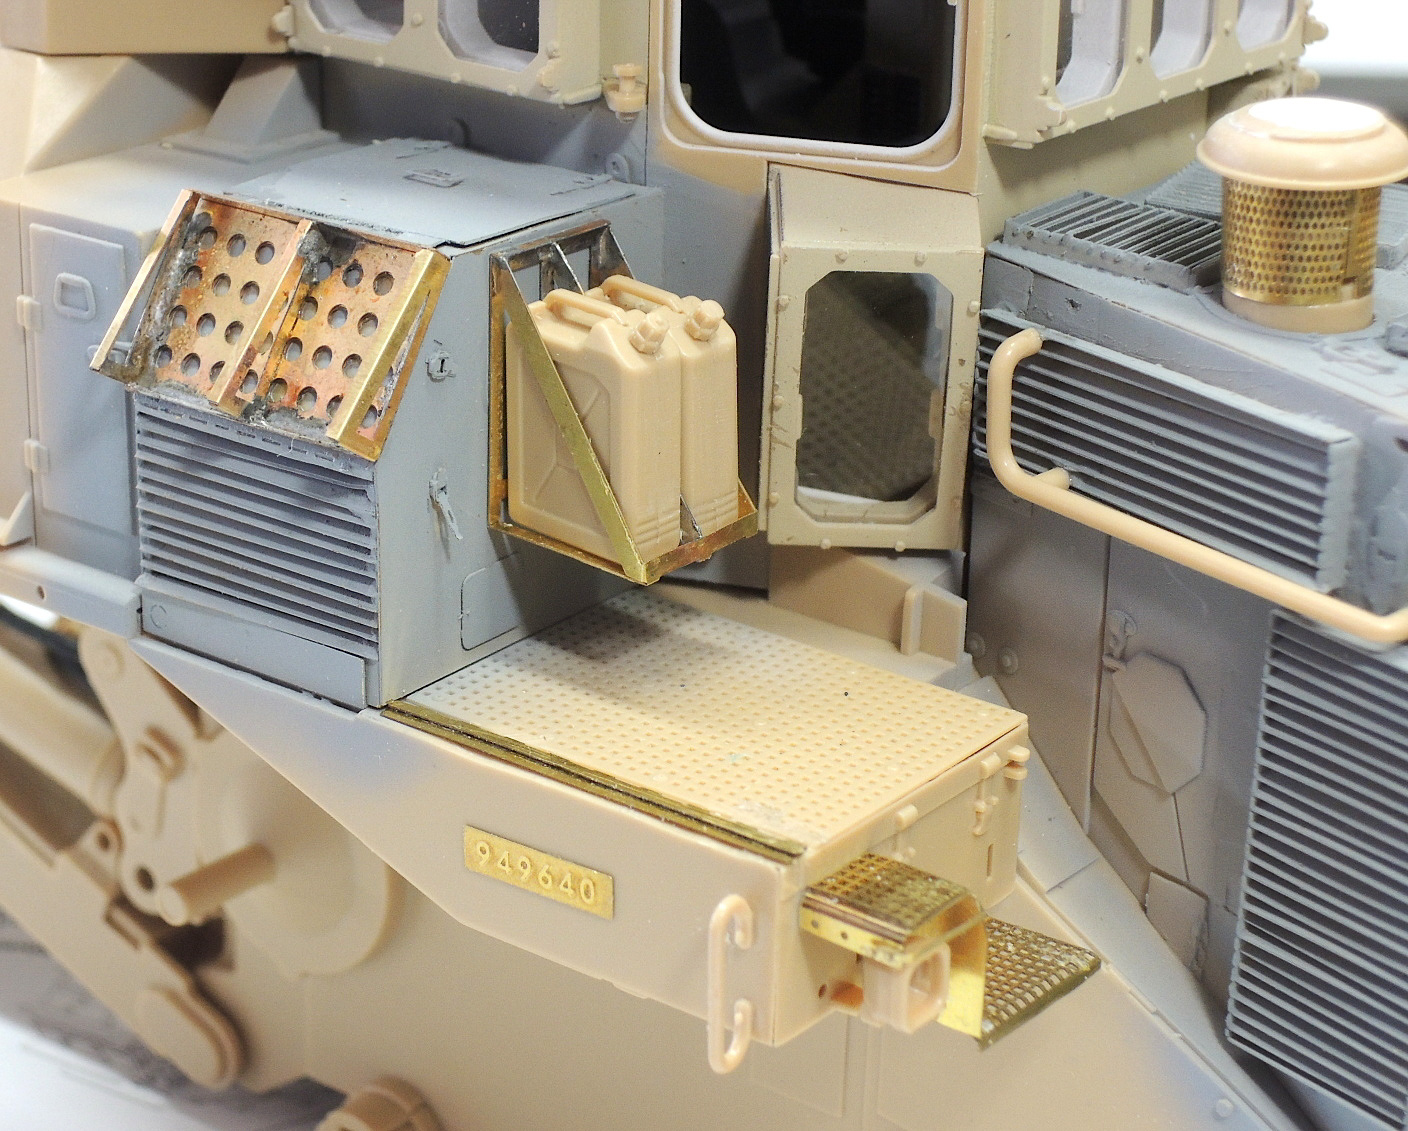
Much of the photoetch replaces the fold-down platforms used in maintaining the D9R. The photoetch set also includes fire extinguisher brackets, water can racks, various steps, replacement of piano hinges, additional detail for the roof mounted machine gun, ammunition can rack, and nicely detailed replacements of the light fixtures on top of the hydraulic cylinders.
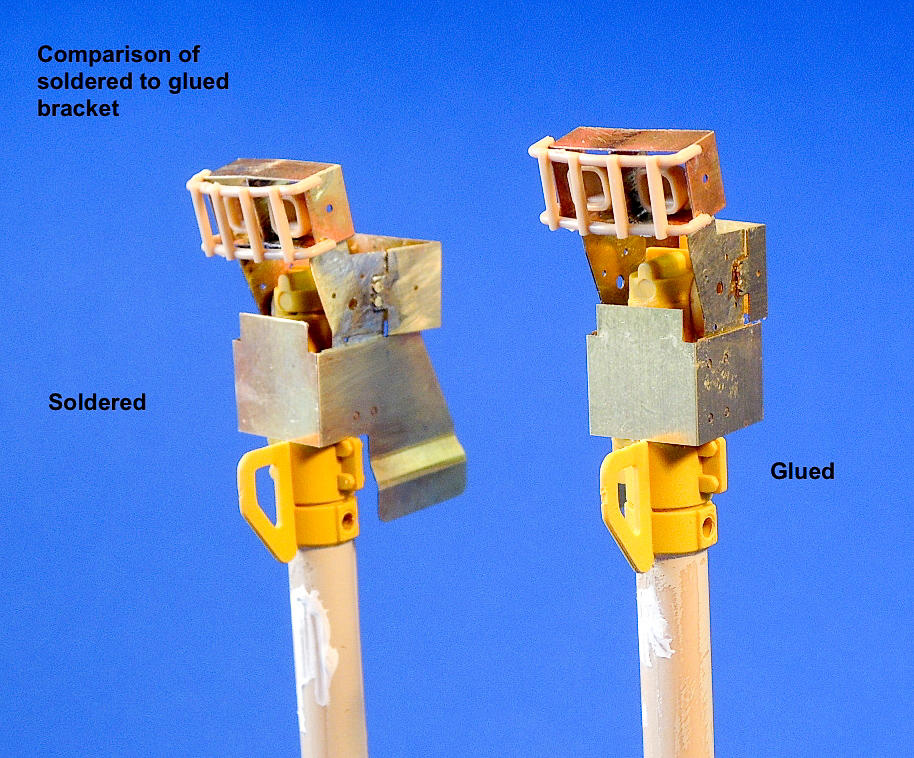
Superglue can be used to adhere the parts; slower setting glues will allow a little bit more time for positioning the pieces. I also use Gator’s Grip acrylic glue to adhere small pieces. The acrylic glue allows more time to position the part, and any remaining residue can easily be cleaned up with a water-moistened paintbrush. Many of the assemblies in this set rely on butt joints between parts, which suggest the need for soldering to provide enough strength. Parts such as the fold-down maintenance racks, ammo can rack, water can rack, and the complex shields and brackets for the lights on top of the hydraulic cylinders are enhanced with the added strength soldering provides. Modelers that have experience with soldering will be able to make much stronger joints than those possible with super glue. My soldering ability is limited, but Eduard seems to have designed the parts to facilitate soldering. Some of my soldering efforts were clumsy, but they did help with assembly. I soldered one of the cylinder head light brackets, and superglued the other for comparison.
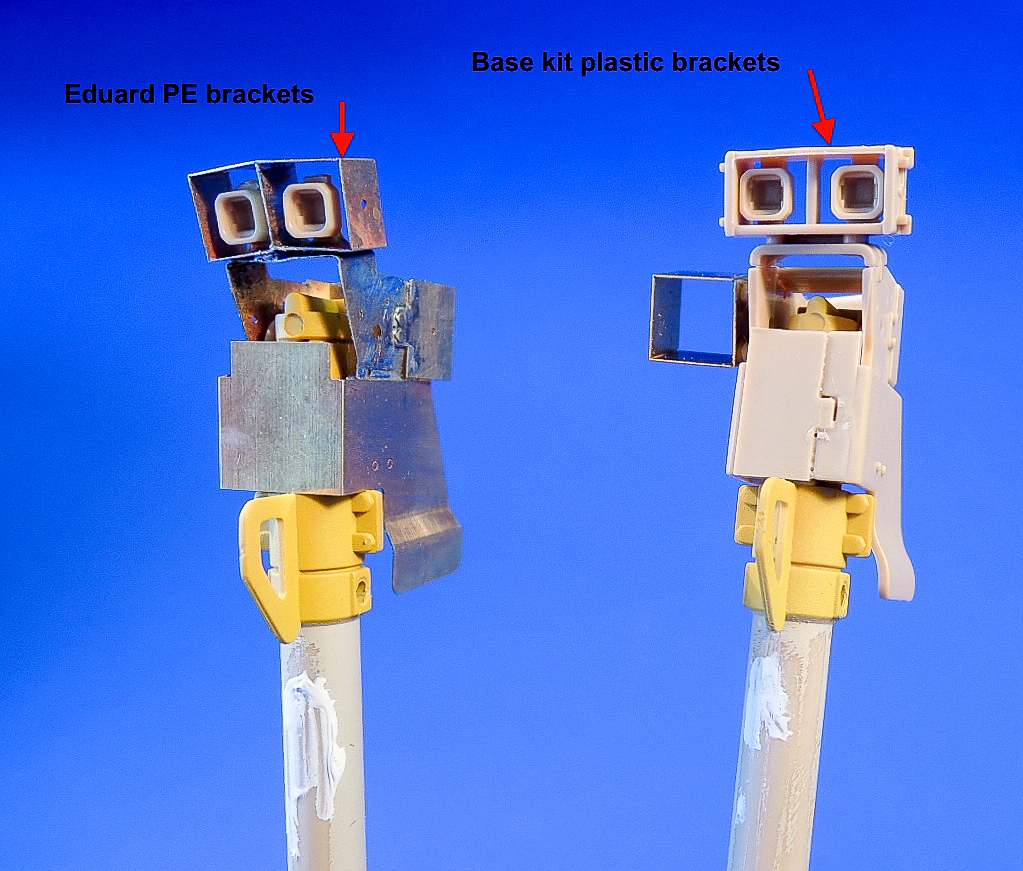
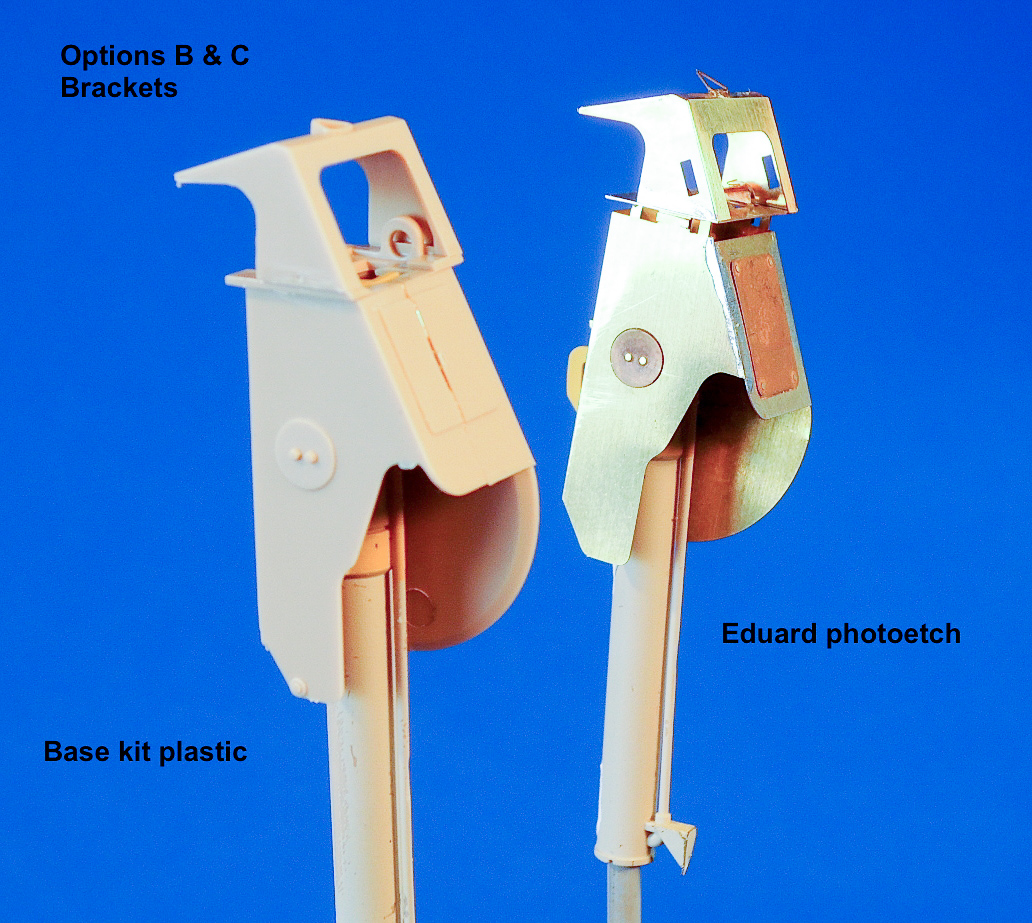
Installation of the piano hinges, parts 34 and 82, require the removal of the cast-on individual hinges. Likewise, installation of the photoetch step, part 28, requires the removal of the molded-on part. The last step on page one of the instructions shows options for the step and guard to be installed over the light fixture. The choice is based on which of the kit options (A, B, or C) you’re building. Eduard photoetch parts 69 and 74 are for kit Option A, as shown on the box art. The step and guard parts 51 and 52 are for kit Options B and C.
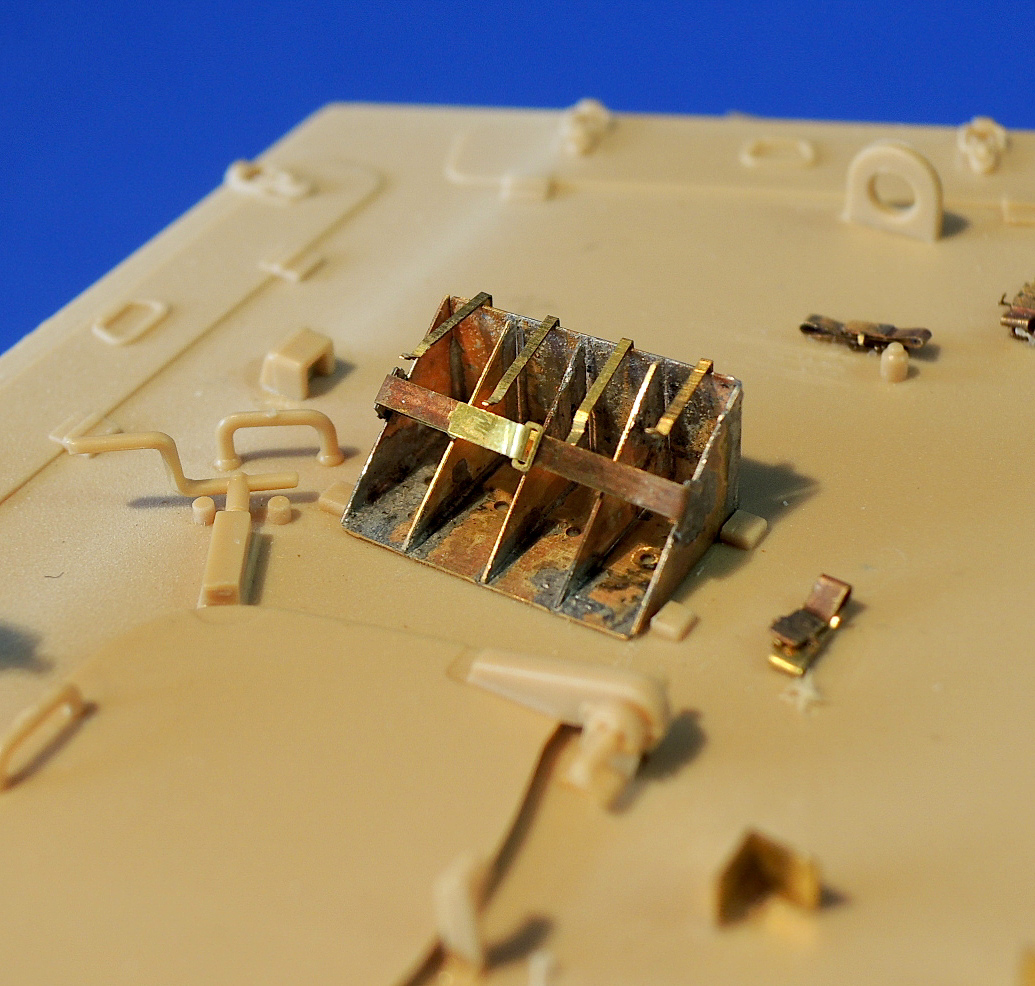
In the last step on page one, the rack for the water cans, labeled part 67, is actually built from two parts on the fret. Part 67 is the interior diagonal support, and an unnumbered piece, adjacent to part 81 on the fret, is the main part of the water can rack. Eduard has provided photoetch parts even though the base kit also has photoetch parts for the rack. In comparing the two, the Eduard rack is slightly narrower than the Meng rack. The Meng photoetch includes a radius bend on the bottom of the rack and the two rounded tabs on the top of the rack as seen on reference photos of the actual vehicles. The Meng photoetch set appears to be closer to photos of the actual rack, but the Eduard rack appears to be the correct width.
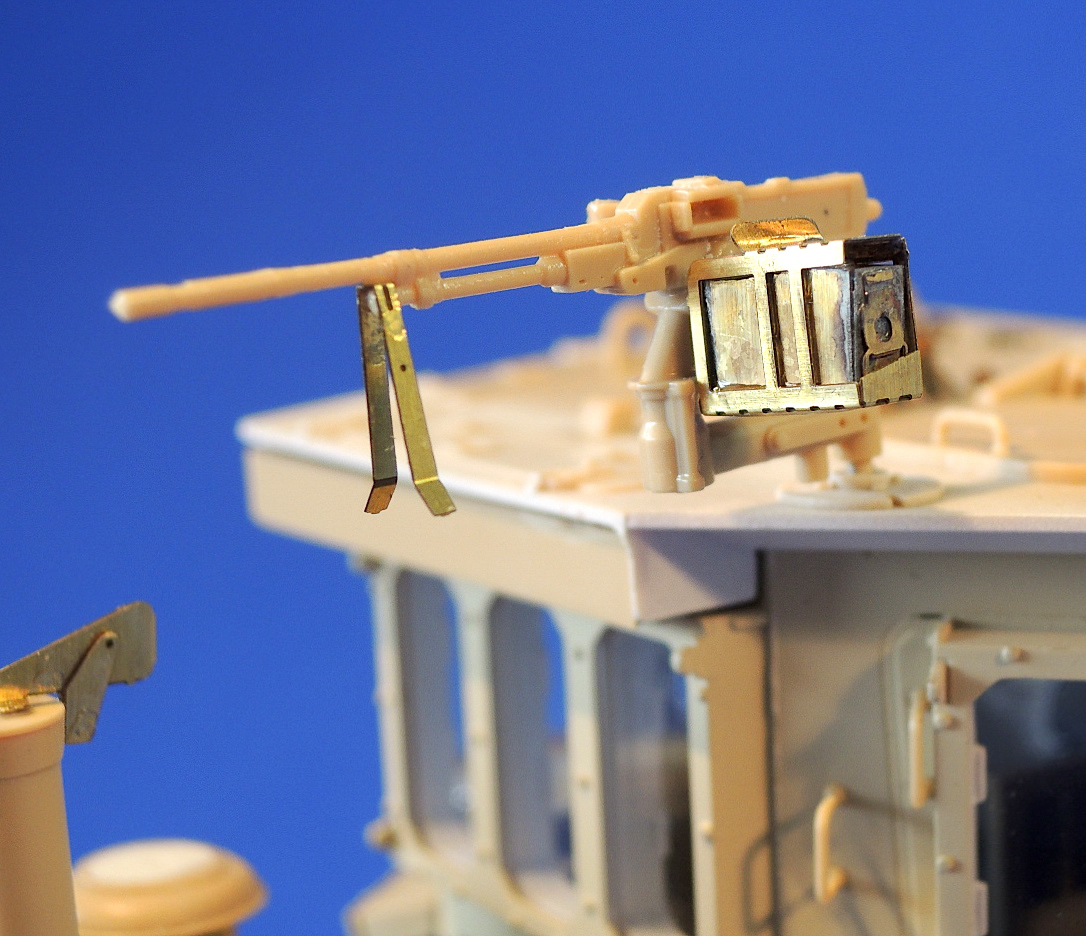
Eduard provides some nice detail for the machine gun. The attached ammo can is complex but results in a very nice assembly. The ammo can rack on the roof solders well and is nicely done.
In the last series of steps, you will fabricate the shields and brackets for the light fixtures on top of the hydraulic cylinders. There are two options for the brackets and shields depending upon which version of the D9R is being built. These assemblies are complex and require a fair amount of strength due to the large size of some of the pieces. These assemblies obviously provide a much more realistic and thinner look than the plastic part. The brackets and guard assemblies are complex and require great care in assembling. However, you end up adding very nice detail to the model for the effort.
Both of the light fixture brackets, parts 64 and 83, are difficult to bend due to the small bolts that need to be doubled up. I broke several of them off while trying to bend them into shape. It's also difficult to fasten them in place without ending up with a glob of glue or solder. The brackets and shields for kit Option A are nicely fabricated by Eduard and allow either gluing or soldering.
In summary, this is a very nice set that provides a lot of realistic detail for the Meng D9R. Some of the assemblies are complex and soldering skills will be helpful. Experience with photoetch is necessary; less-experience modelers will find this set to be difficult. This set is very well engineered, goes together well, and is a great addition to the Meng D9R kit.
Thanks to Eduard for continuing to produce amazingly detailed photoetch products, like this wonderful set, and supplying review samples to IPMS/USA. Many thanks to the great IPMS/USA Reviewers’ Corps program for letting me review this set.
Frets
Instructions
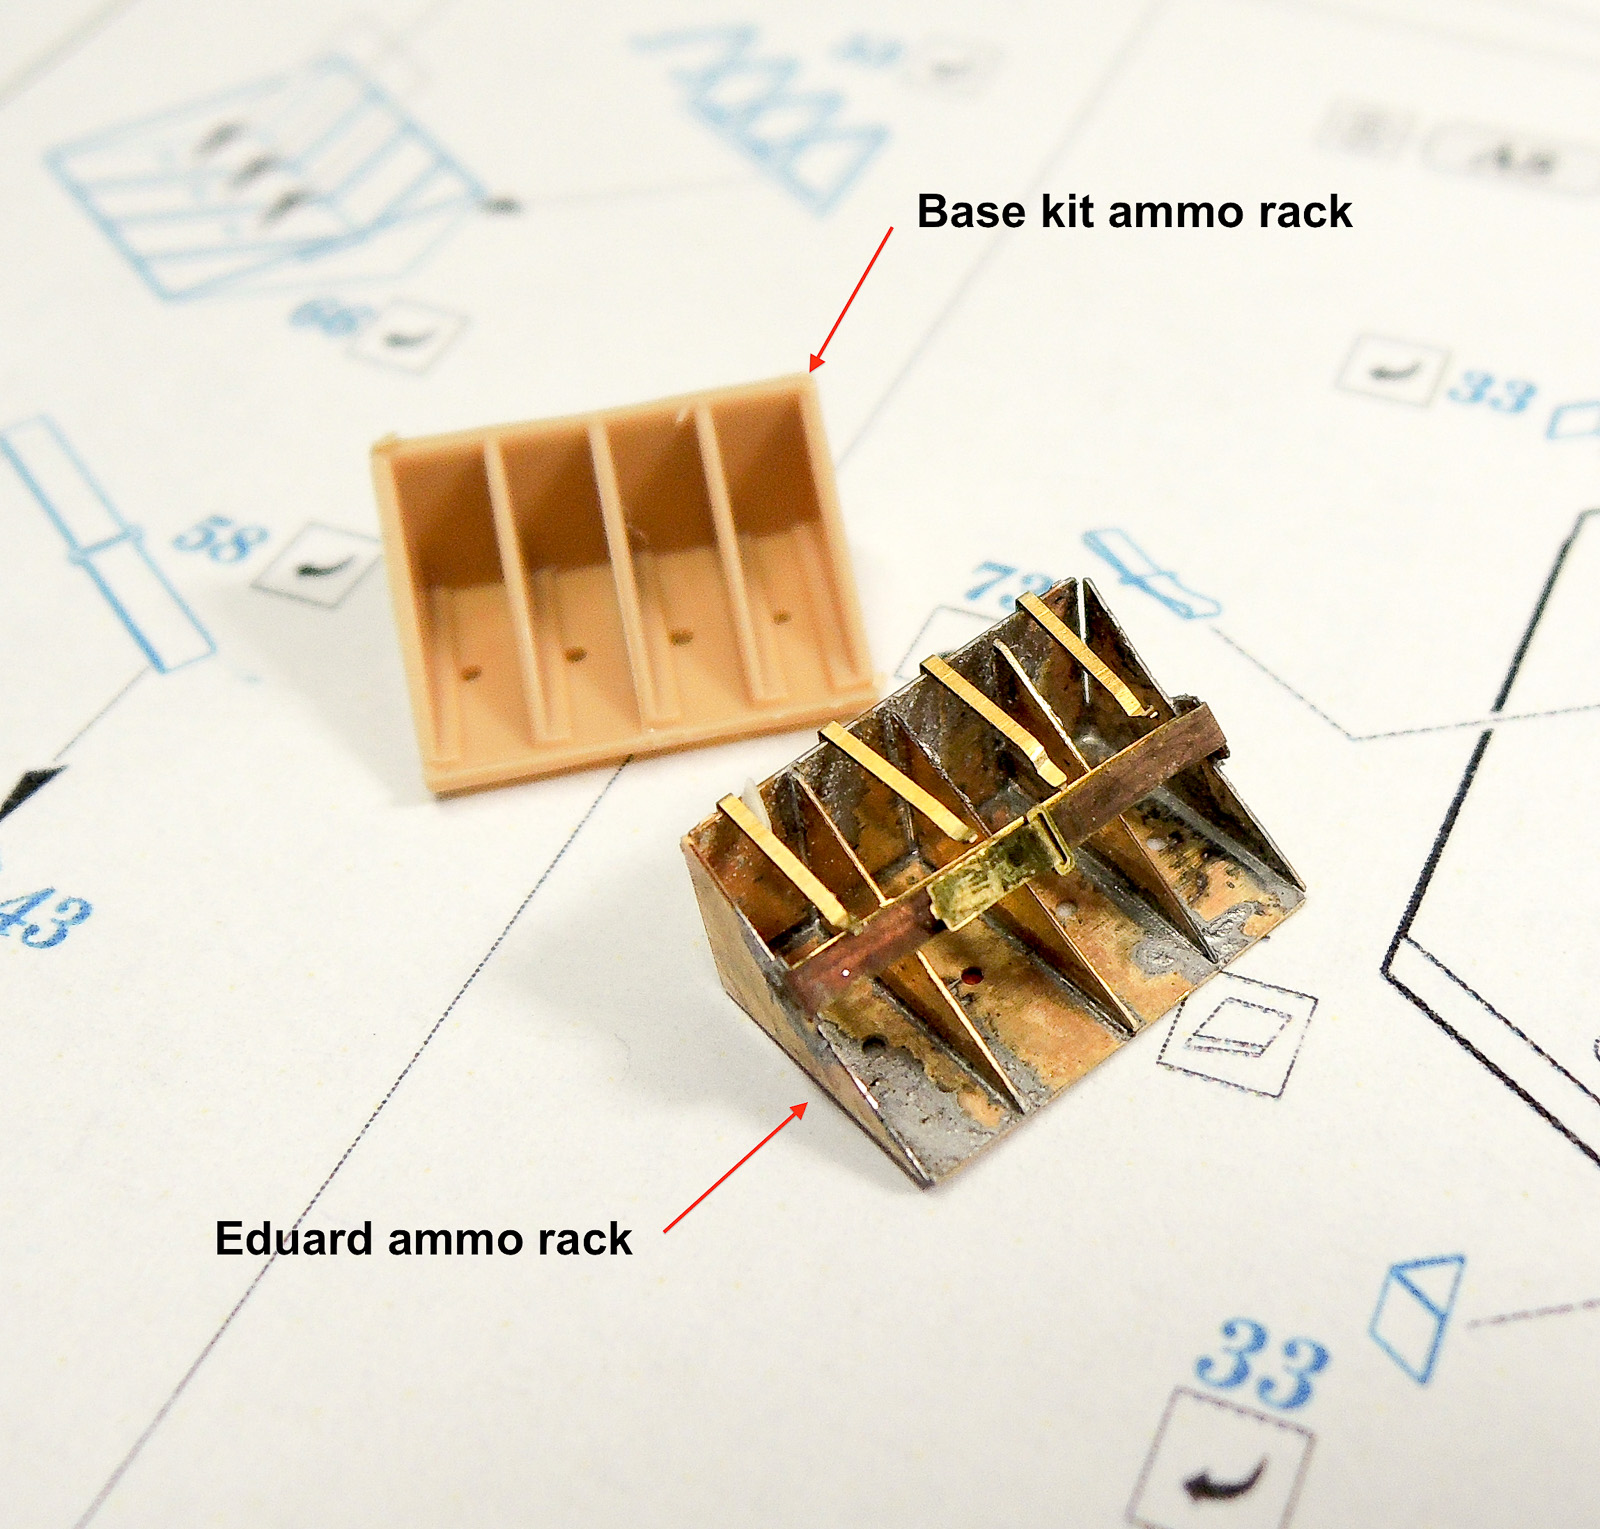
Kit and Photoetch Ammo Racks Compared
Ammo Rack Installed
Machine Gun Installed
Kit and Photoetch Light Cover and Bracket Compared

Option A Light Cover and Bracket Installed
Option B and C Kit and Photoetch Bracket Compared
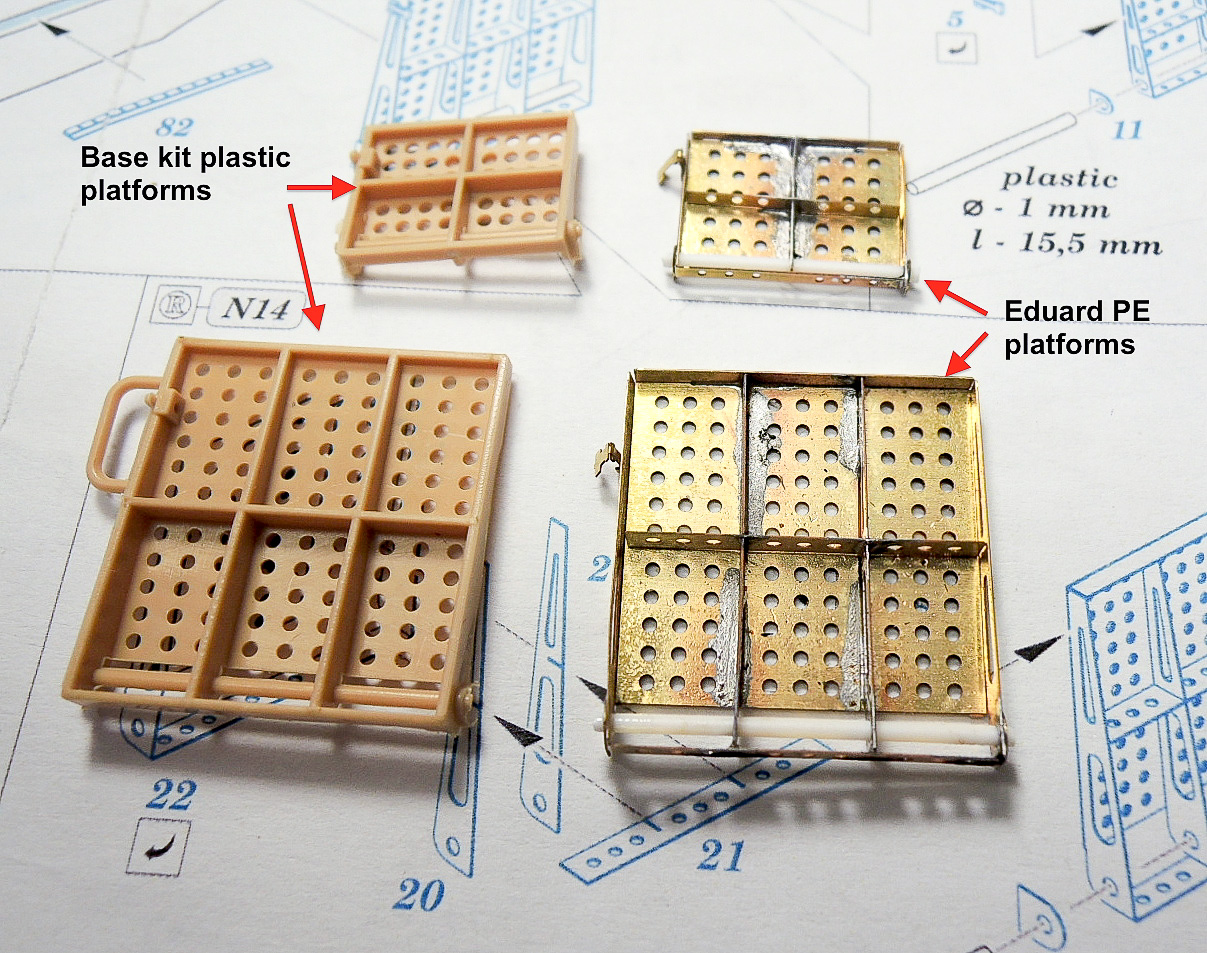
Kit and Photoetch Maintenance Platforms Compared
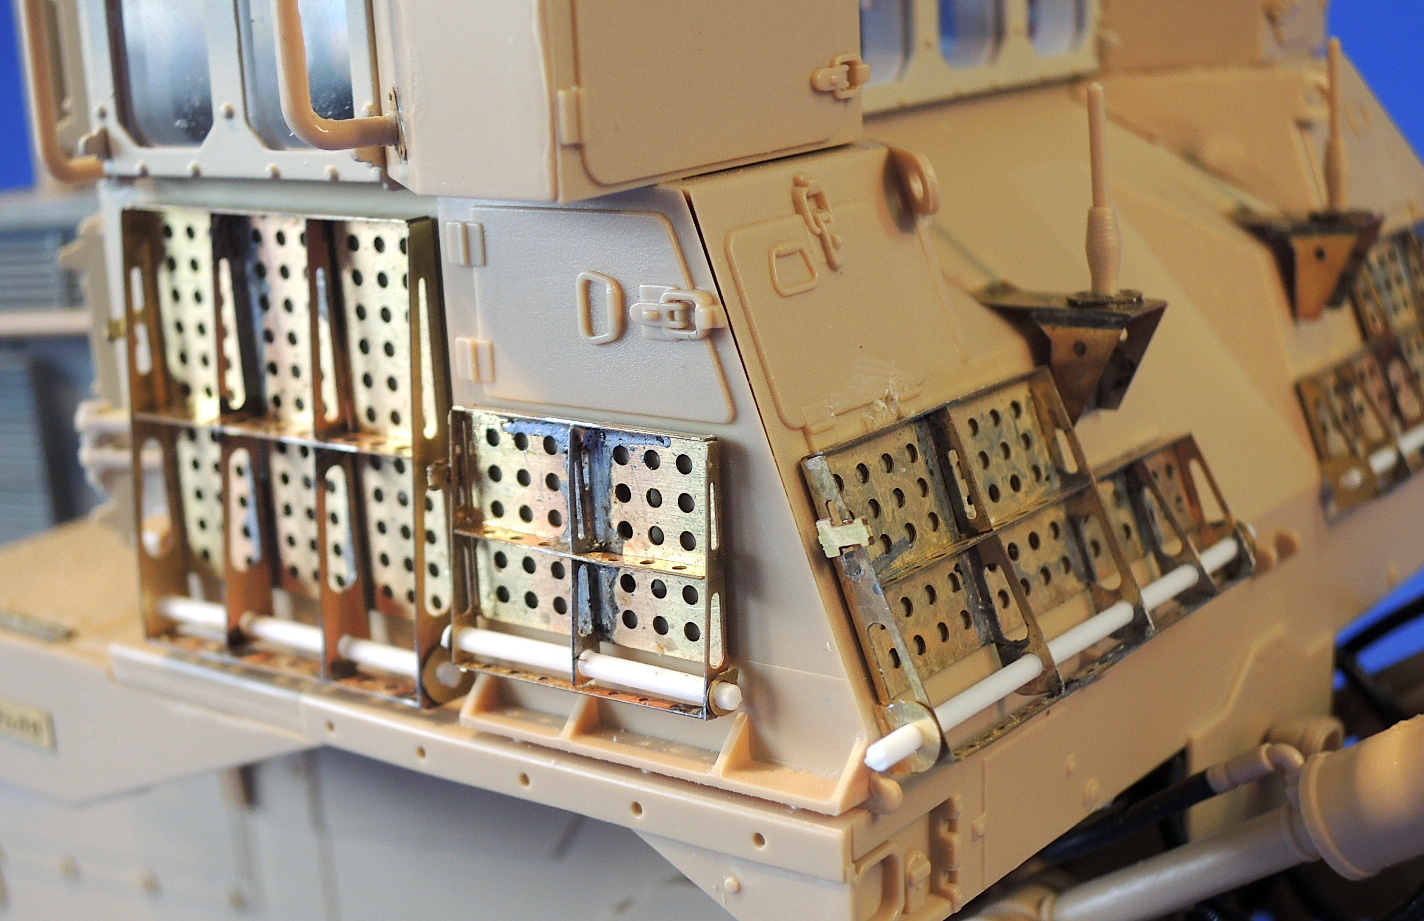
Maintenance Platforms Installed 1
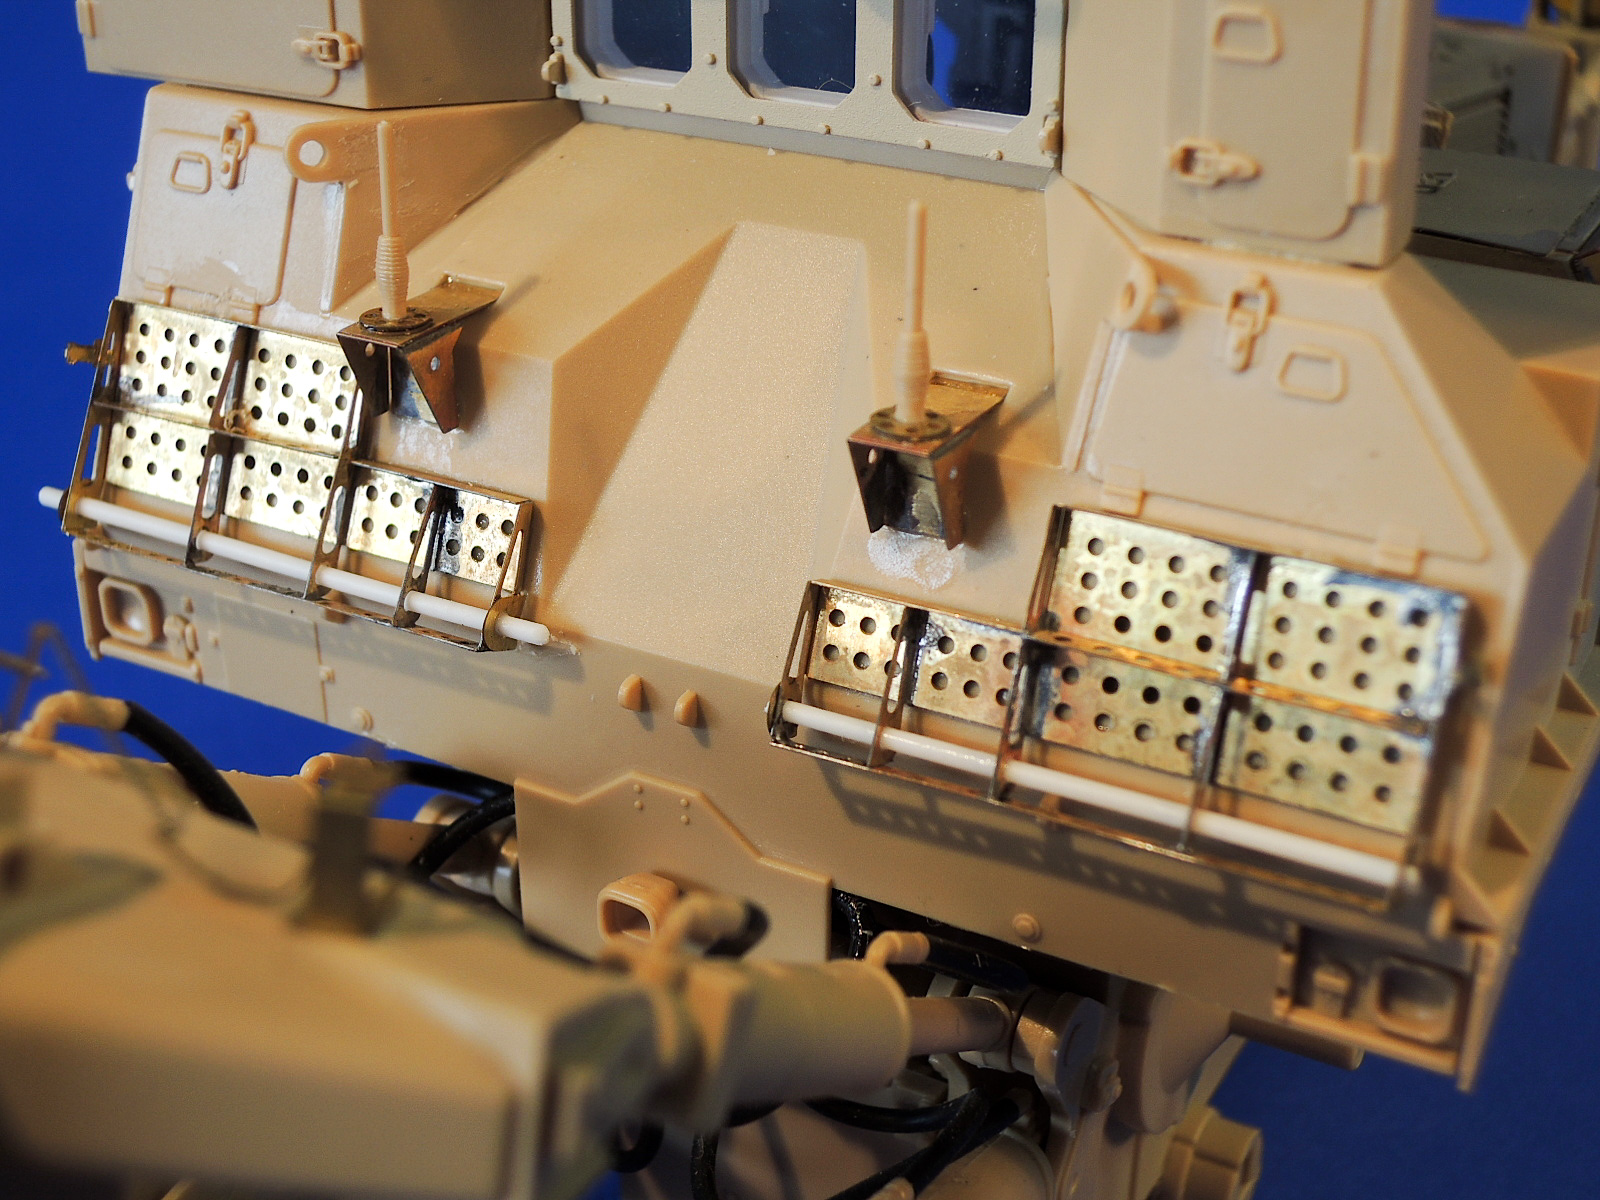
Maintenance Platforms Installed 2
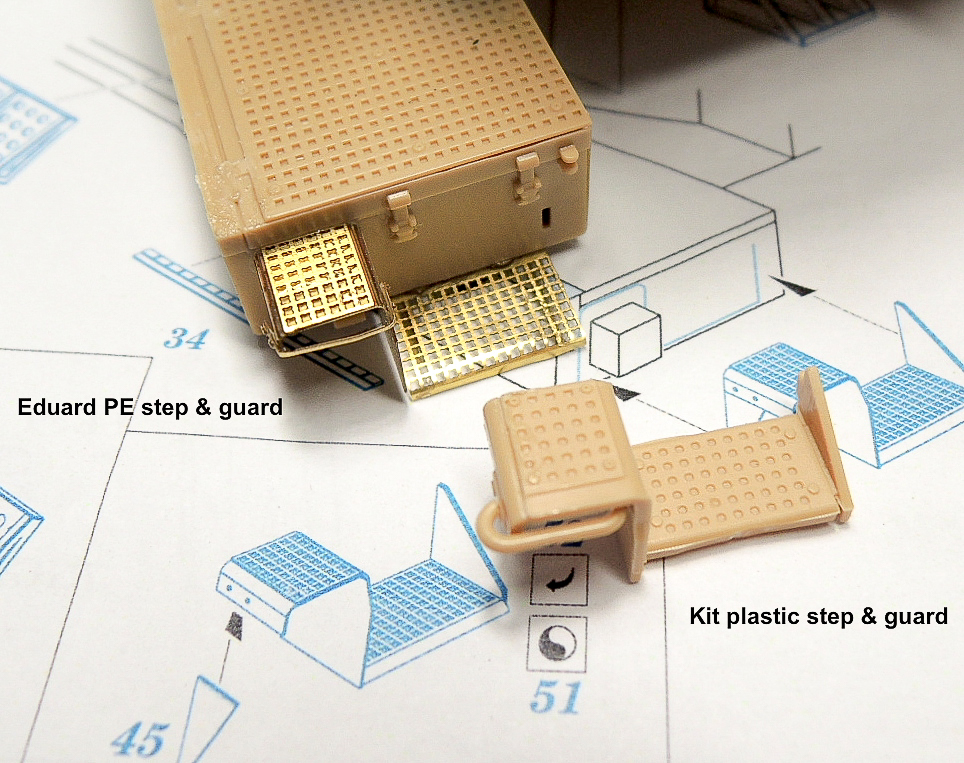
Kit and Photoetch Step and Guard Compared
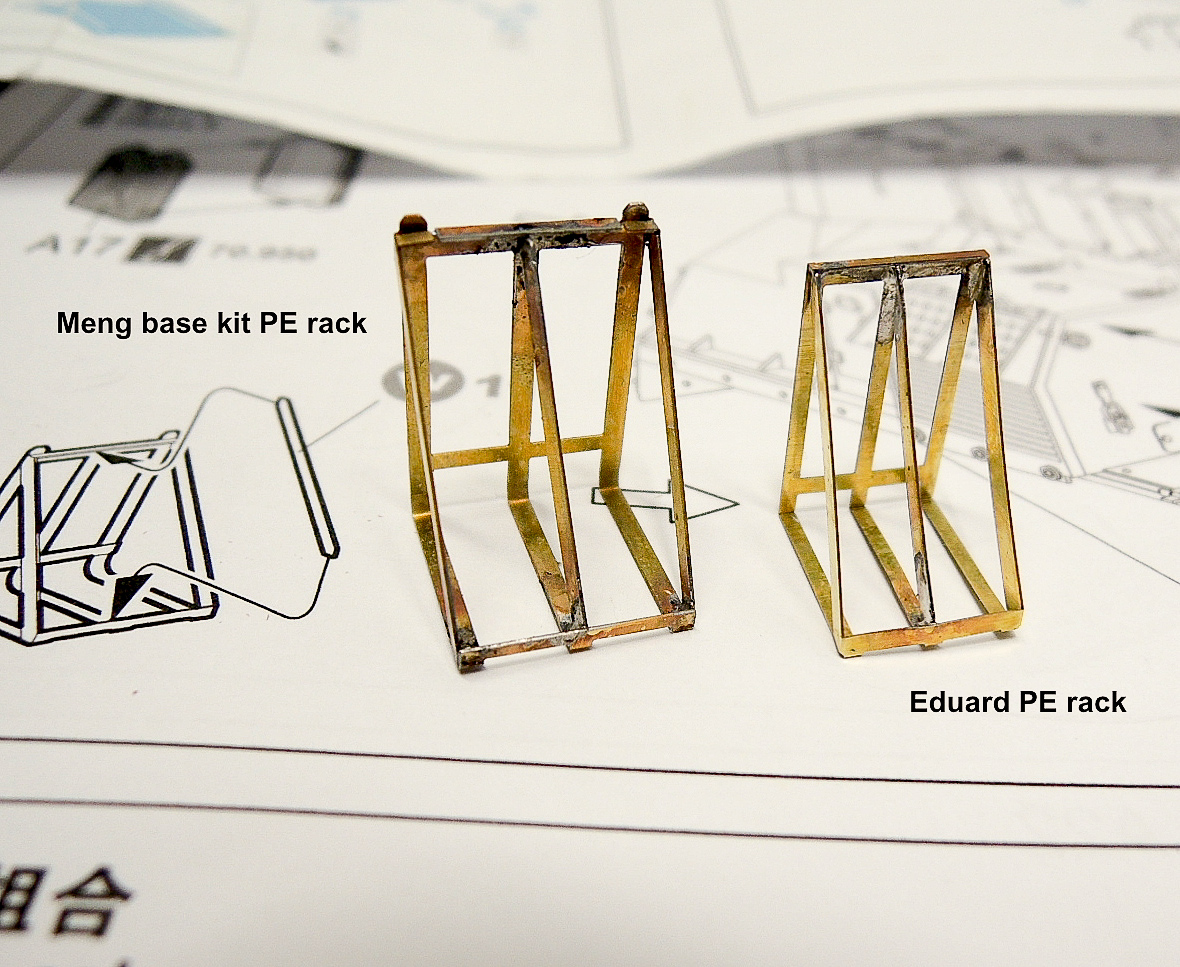
Kit Photoetch Water Rack and Eduard Photoetch Rack Compared
Water Rack Installed
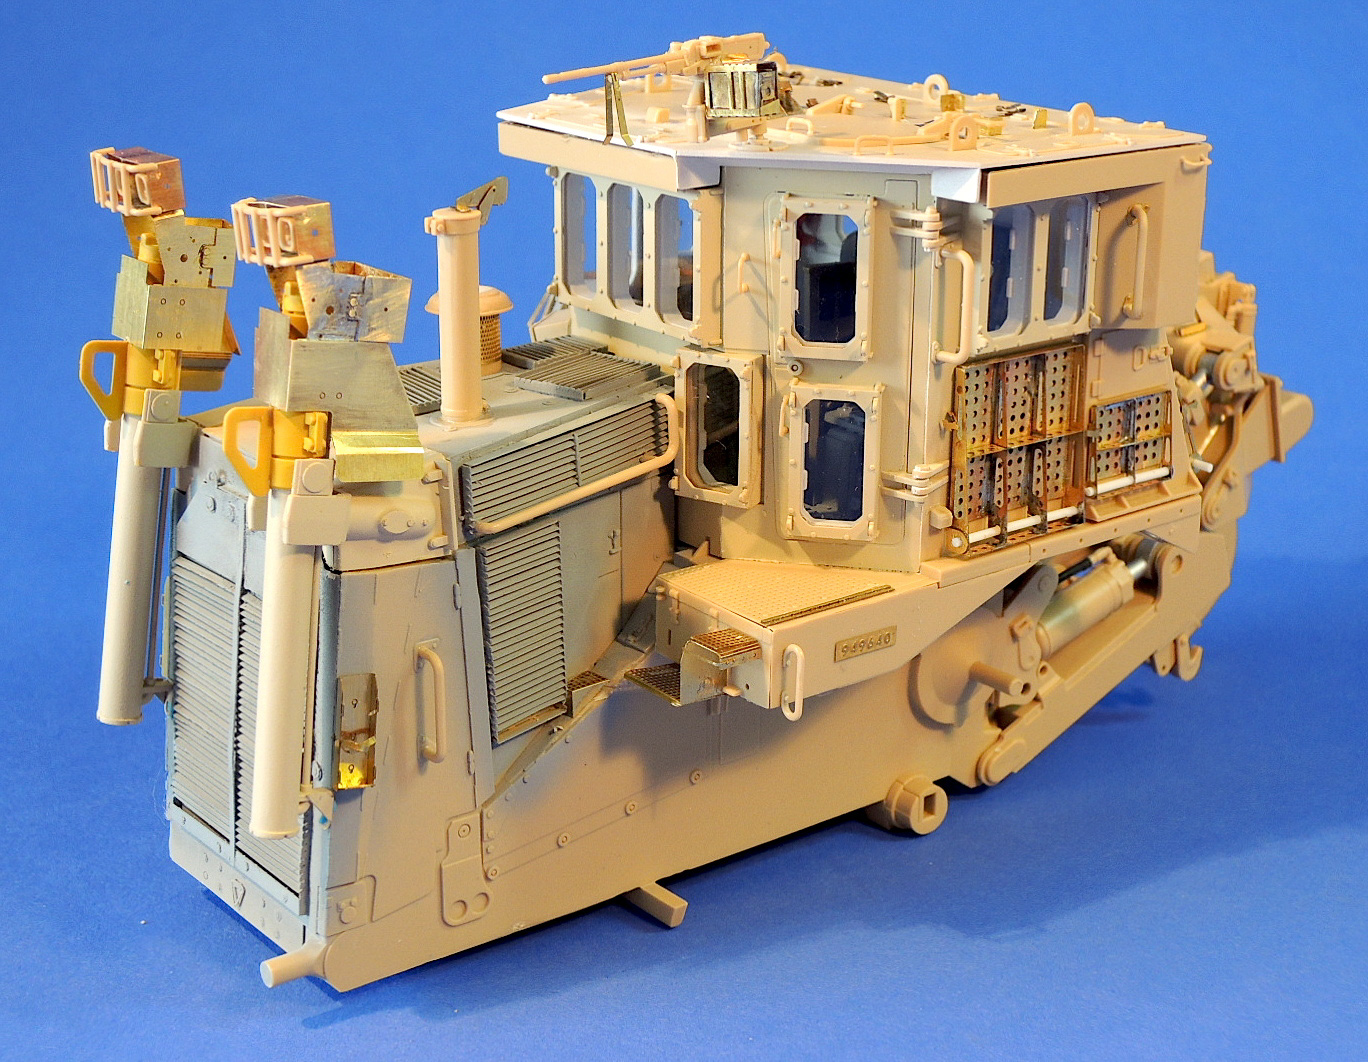
Completed Photoetch Installation
Comments
Add new comment
This site is protected by reCAPTCHA and the Google Privacy Policy and Terms of Service apply.
Similar Reviews