
CH-37 Mojave
From Wikipedia
The Sikorsky CH-37 Mojave (company designation S-56) is an American large heavy-lift military helicopter of the 1950s. It entered service as the HR2S-1 Deuce with the USMC in 1956, and as the H-37A Mojave with the U.S. Army that same year. In the early 1960s, the designation was standardized to CH-37 for both services, with the HR2S-1 redesignated as CH-37C specifically.
Developed in the early 1950s, with its first flight in 1953, it filled a 1950 Navy requirement for an assault helicopter that could carry up to 20 Marines and haul combat equipment. The design includes a front-loading ramp with side opening clamshell doors on the nose. It was powered by two radial piston engines. It served in active military service well into the 1960s, including in Indochina, before being replaced.
Special Hobby has re-released a 1/72 scale multimedia kit of this unique helicopter. I am drawn to unusual rotorcraft and I have a faint memory of receiving a vinyl version of this bird for my 6th or 7th birthday (see embarrassing photo evidence). When the folks at Special Hobby gave us a bunch of review kits in Fort Wayne, I jumped at this one. The kit was originally released in 2007 but has been issued several times since then with various upgrades. This version contains the basic styrene structural parts but adds a sheet of photo etched brass and a bag of nicely molded resin detail parts. Rounding things out is a sheet of printed instrument details and decals for several aircraft.
On to assembly. This is NOT a kit for beginners. While fit overall is pretty good, here are some specific pitfalls to be aware of:
Part locations and assembly details are vague. The instruction manual points to where various parts go but the actual, installed location is not shown. This created a stumbling block in several areas for me, specifically when installing the horizontal stabilizer, which does not actually attach to the tail fin – you have to orient three separate sets of struts in space and mate one pin on the stabilizer to them. I built several jigs to accomplish this and printed reference photos I found online to show where things go. The two eggshell-shaped engine nacelles each consist of 6 separate pieces plus a resin wheel well, and at times, I felt like I was putting a broken eggshell back together. The instructions don’t show completed assemblies; rather, an exploded view of the parts with leader lines showing their intended location. This makes assembly challenging in areas like the landing gear and horizontal stabilizer, as noted earlier.
On a more positive note, the cockpit is very nicely detailed with a combination of styrene, resin, and photo etched parts. Be careful installing the PE parts that hold the shoulder harnesses; I discovered that they interfere with the large clear canopy bubble unless shifted slightly out of position.
The clear plastic parts are of excellent clarity but very thin, almost vac-form thickness. I had some mismatches between the assembled fuselage and the canopy, and the two cargo doors (molded clear) and the fuselage. Careful test fitting may reduce these gaps; I used Perfect Plastic Putty and a few small pieces of Evergreen shim stock to fill the gaps. I masked with Tamiya tape, but I would suggest buying the aftermarket masking set as some of the canopy transparencies are small and complex (more on that later).
There is also a PE aftermarket set to replace the large multiple cooling screens that make up a good percentage of the engine nacelle structure. These are very obvious in reference photos as are the two radial engines that powered this beast. Advanced modelers may want to upgrade their build by adding powerplants and opening up the ventilation panels; I used a black wash to simulate the cooling screens, but I’m not thrilled with the final result. I had sanded away a lot of the screen frame detail and resorted to cutting thin strips of painted decal film to recreate them with very mixed results. That one is on me.
I managed to sacrifice one of the engine nacelle screens to the carpet gods. In an effort to replicate the open mesh of the PE part, I resorted to using one of my punches to create appropriately sized screens out of aluminum window screen material (see photo). Not exactly to scale but better than the alternative. Similarly, after launching a number of the many grab handles that festoon this bird, I made replacement ones out of thin craft wire (see photo) and installed them. You have to drill holes for these handles in various locations; I used a pair of dividers to mark drill locations and a very small bit to drill them out.
I decided to try some pre- and post-shading effects during the build. After priming with Tamiya white primer, I used an acrylic black marker on all the panel lines (see photo). I then painted the Mojave with Acrylics Vallejo Olive Drab cut 50% with flow enhancer. I did not like the pre-shading results, so I went back and post-shaded with the base color darkened for panel lines and lightened for the center of each skin panel. I applied Testor’s Clear Gloss Lacquer from a rattle can and commenced applying decals. The numbers on the decal sheet don’t appear to correspond with the kit instructions, so I went with best guesses on the numerous small yellow stencils (too small to read in any case). The main rotor blades show a series of small yellow lines at various points along the span of each blade; these markings are not included in the kit and I didn’t have any appropriate stock, so these are missing on my build.
After a clear coat of flat lacquer, I started removing the many small canopy masks. Disaster. The white primer had found its way under my masking efforts and was all over the perimeter of each transparency. To make matters worse, I discovered that I had FORGOTTEN to mask the transparencies on the large clamshell doors! I used a homemade plastic chisel and a sharpened toothpick to remove as much of the unwanted paint as possible and went back with a brush to touch up any remaining edges, but you can still see the results of my inadequate masking on the final build (see photos). Some sanding debris had also found its way into the aircraft and of course it migrated onto the transparent parts. Ouch, ouch, ouch – I need to get better at this.
Final assembly consisted of replacing the various bits of PE that were knocked off the model during handling and attaching the main and tail rotor blade assemblies.
So – bottom line – in the hands of a good modeler willing to take the time to address fit issues (and more competent at canopy masking than me) you can build a really nice representation of this unique bird. Maybe I should have stuck with my vinyl toy and birthday hat (again, see photo).
Thanks to Special Hobby and IPMS/USA for the opportunity to build this subject


First Attempt At Pre-Shading With a Marker

Grab Handle Replacements

Replacement Inlet Screens Made From Aluminum Screen

Canopy Area After Touchup - Note White Primer Remnants

Above-Starboard View

Port Rear Quarter View

Port Side Front Closeup

Starboard Low Front Quarter View

John With a Vinyl CH-37 Circa 1961
Reviewer Bio
John Noack
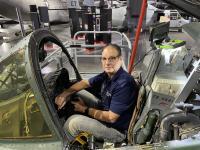
Modeler since my Dad and I built Aurora biplane box scale kits at the kitchen table. Joined IPMS in the early 1980's and I've held a variety of leadership positions on the Board. I'm a retired VP of Aerospace Engineering, living in the Centerville (Dayton) OH area. I am a Docent at the USAF Museum, a musician in several bands, member of IPMS/WFSM, and a widower.
My tastes are eclectic. When I build aircraft it's usually in 1/72, but I also dabble in submarines, autos, and scratchbuilt Steampunk vehicles.
Comments
Add new comment
This site is protected by reCAPTCHA and the Google Privacy Policy and Terms of Service apply.
Similar Reviews