
Mitsubishi F-1
Retired from active service in 2006, The F-1 was the JASDF’s first Japanese-designed and -manufactured supersonic fighter, and was essentially the same airframe as the two-seat Mitsubishi T-2 trainer, but had a solid “hood” in place of the second canopy, along with assorted weapons capabilities and internal differences. The similarity in appearance to the SEPECAT Jaguar has some merit, though Mitsubishi’s official position states that the only items it has in common with the Jag are its engines.
Platz continues its line of JASDF and JMSDF subjects with this new release. I’ve never built a Platz kit which hasn’t been excellent with beautiful engraved detail and great fit, and this one’s recessed panel lines and thorough detailing throughout was no exception.
The instructions are complete but are a little busy, particularly where optional configurations are possible, so the builder needs to study them before making holes or gluing parts in place. External stores consist of four external fuel tanks, two air-to-surface missiles, a practice bomb dispenser with bomblets, and two Sidewinders.
The gray plastic parts are molded on seven sprues and construction began with the cockpit tub. The instructions don’t specify it, but there are instrument panel and side console decals provided. The instrument panel glare shield gave me my sole bad-fit problem---no matter which way it was positioned, it didn’t look right or fit right. When the cockpit tub was dry-fit inside the fuselage halves, they wouldn’t meet and there was no way the windshield would’ve fit over the glare shield either. I tried several ways to attach this part and finally just left it off, preferring to find my own solution later in the build.
The intakes each consist of five parts, and the fuselage itself is made up of five main parts as well. Everything fit nicely except for the junction of the nose wheel well, left fuselage half, and the gun port panel. I shimmed the fuselage half outward with a scrap of plastic sheet, then filled and sanded the area to get smooth joints.
This area and the aforementioned glare shield were the only fit problems throughout the entire kit---everything else pretty much clicked into place. The Sidewinders had a couple of sink marks which needed to be filled
There are several small parts like air scoops which are delicate and difficult to handle and clean up. I recommend leaving the sprue gate on one side of these parts because it gives the builder something to hold with a good pair of tweezers. Once the part’s in position, it’s simple to snip that off and sand it smooth.
Each main landing gear is comprised of five parts, and because the lower member is a somewhat u-shaped “walking beam” bogie, any fore-and-aft misalignment of the main strut results in a vertical movement of the axle, which is out at the aft end of the bogie. I found out it doesn’t take much to cause one side of the aircraft sit lower than the other.
The fit of all these small parts is excellent, and the build was pretty uneventful and straightforward. The finishing stages were somewhat involved, however, since the four camouflage colors have hard-edged masking which took awhile to accomplish. Color callouts in the instructions reference only Gunze Sangyo paints, but also have FS equivalent numbers for modelers who use other mediums. I used Gunze acrylics which I still had on my shelf because the three colors specified on the bottles’ labels were---lo and behold---for the F-1, and I’d never even opened them before. (See? Never throw anything out). The intake trunks have to be sprayed white before they’re assembled to the fuselage, so needed to be masked before the camouflaging as well. There are five colors of paint and Testors Metalizer on the horizontal stabilizers alone, and lastly, the burner cans and exhaust area are treated with a couple shades of Metalizer. Be prepared to do a lot of masking and painting.
The kit gives markings for five different aircraft from three squadrons, plus four colors and markings options for the air-to-surface missiles alone, to go along with the various armament choices available. Needless to say, the Cartograf decal sheet is extensive and should be studied and compared with the instructions to make sure the markings are applied to the correct aircraft and in the correct places. The nomenclature on the decal sheet takes some deciphering because the decals aren’t all simply numbered. Some have designators like “FT3”, “AS12”, “GC”, “FC6” and so on. I may have broken the code a little bit in that FT means fuel tank, and FC means fuselage centerline, and so on. I think.
There’s an incredible amount of clear carrier film---among the most I’ve seen on any kit’s decal sheet. The reasoning here is that all those myriad itty-bitty stencils would take the builder a long time to apply individually, so Platz has supplied several big decals made up of clear film, with all the applicable lines and stencils on them. I was worried I’d get a lot of silvering but the only place where that occurred was on the external racks. Gunze Sangyo’s Mr. Mark Softer took care of those offenders, and when the model was dullcoated, all that film disappeared. There are several decals on the instruction sheet not specified for use, as well as lots of extras like “remove before flight” flags.
The canopy is molded separately and I think there’s a part to attach to the seat in order to pose it open, but following the instructions, this part wasn’t even listed, so I made my own “hold-open hinge” after the fact from thin aluminum shim stock…just a small T-shaped piece.
I curved the crossbar of the T and glued it to the inside of the canopy, while the stem of the T got glued to the aft cockpit bulkhead I used Gator Grip acrylic glue to secure everything.
The attachment pins for all the external stores are really small, and I was worried they’d be fragile assemblies, but so far so good. I did perform the requisite snapping-off of the nose pitot boom during the build, of course, so to prevent a re-enactment, I put it aside for safekeeping and made it the last part I glued to the model.
In summary---this is what I’d consider a craftsman’s kit. The excellent fit of the parts will allow even a fledgling builder to assemble it, but with the proliferation of small parts plus extensive painting and decal work, it’d be more suited to an experienced modeler.
Kind and respectful thanks to Platz and to IPMS/USA for the opportunity to review this new offering.

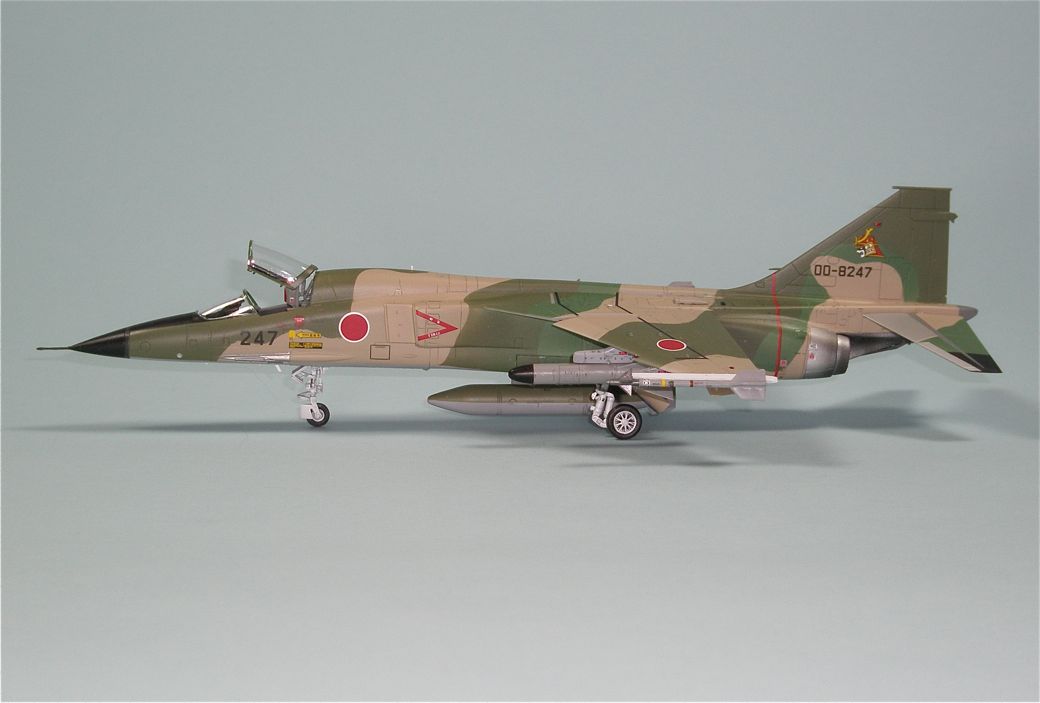
Finished model, left side.

Finished model, left front view.
Finished model, left rear view.

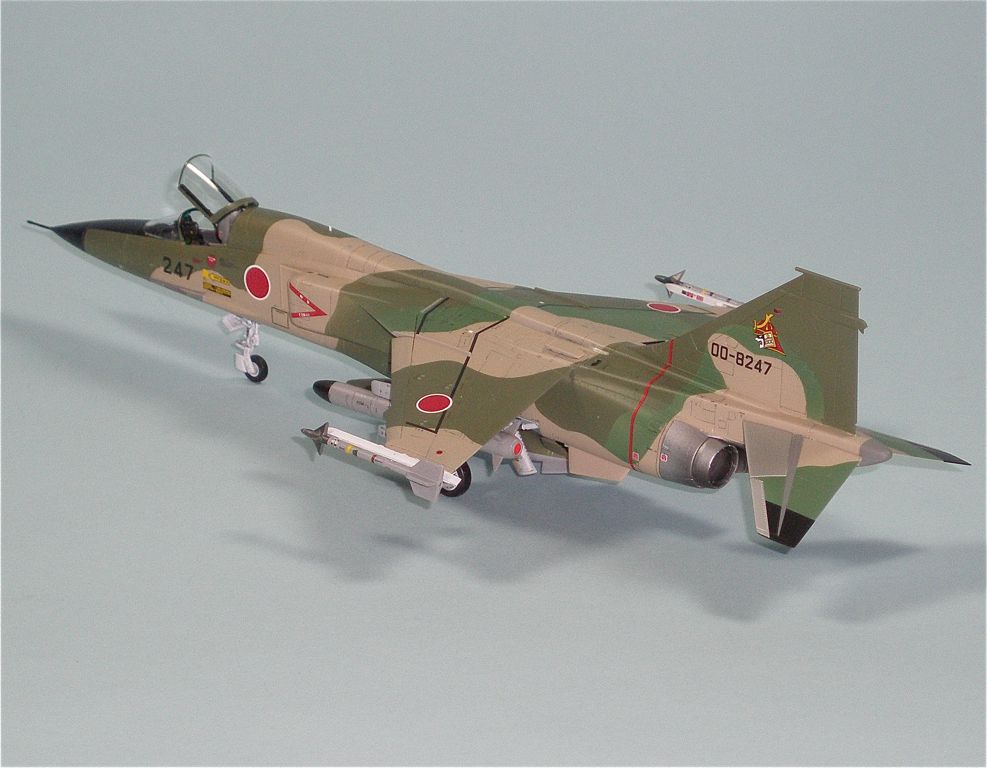
Finished model, right front view.

The Sidewinders had minor sink marks in them.

Placing small scoops and bits is easier if a sprue gate is retained.

A small “T” cut from aluminum shim stock. The top of the T was curved and glued to the inside of the canopy’s rear frame.

The T-bracket installed on the aft cockpit bulkhead ready to have the canopy glued in place.

The busy and extensive Cartograf decal sheet.

The area beneath the nose needed filling and sanding.

Comments
Add new comment
This site is protected by reCAPTCHA and the Google Privacy Policy and Terms of Service apply.
Similar Reviews