
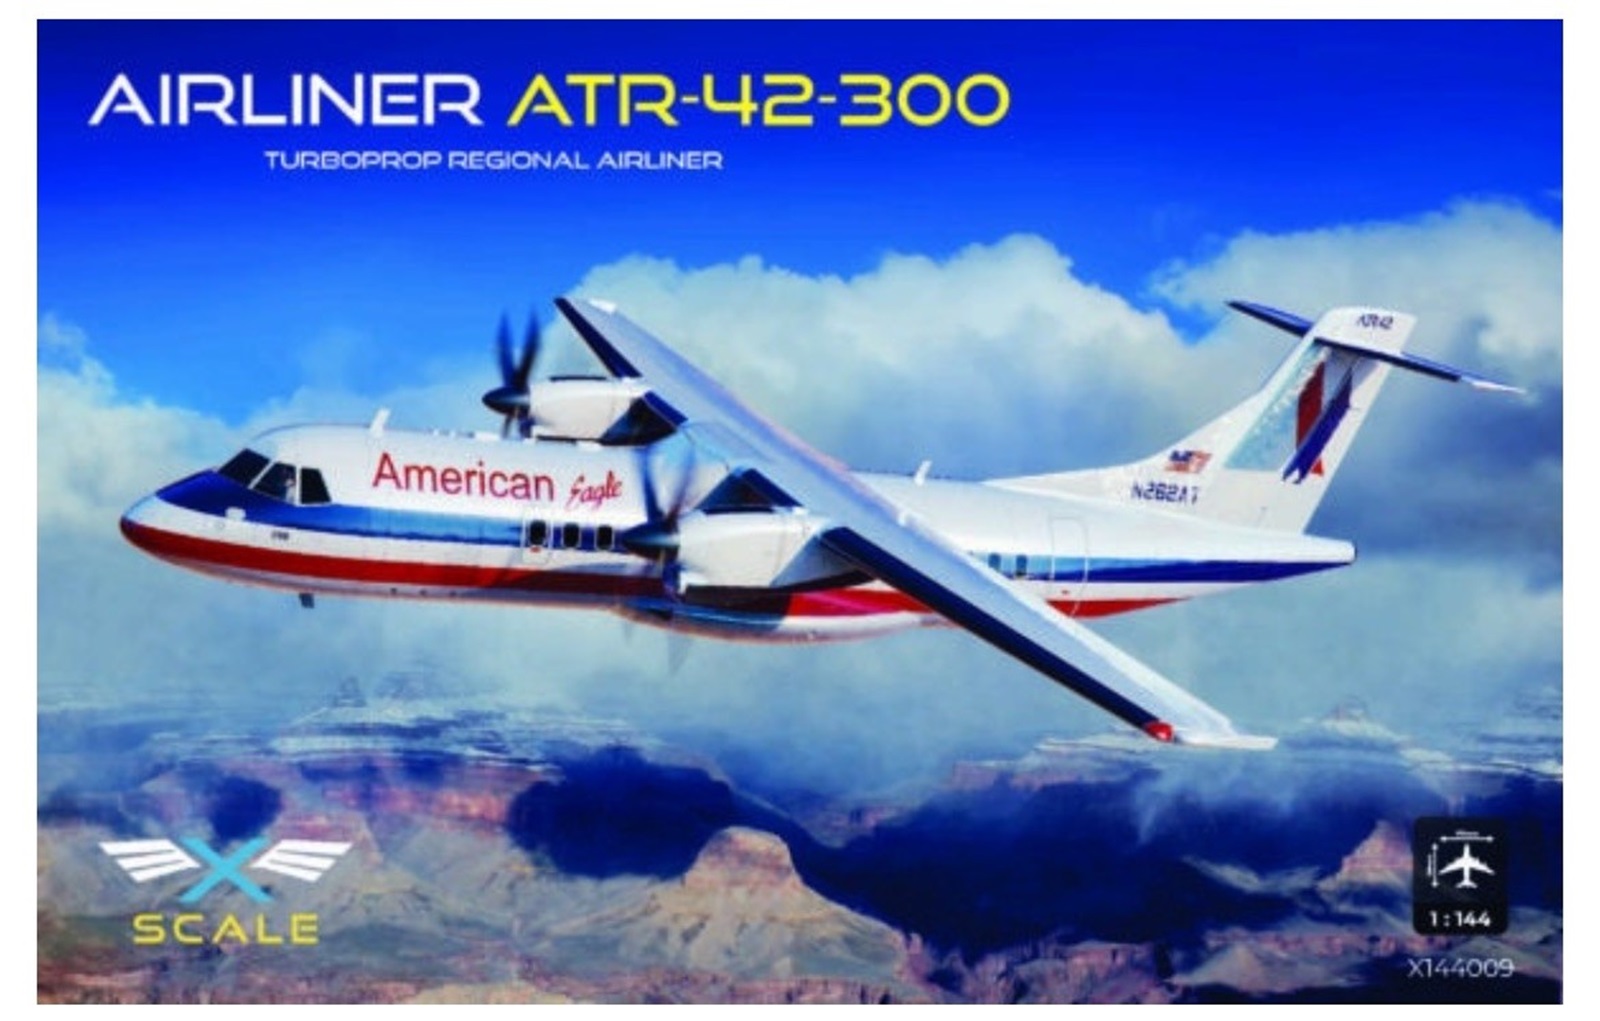
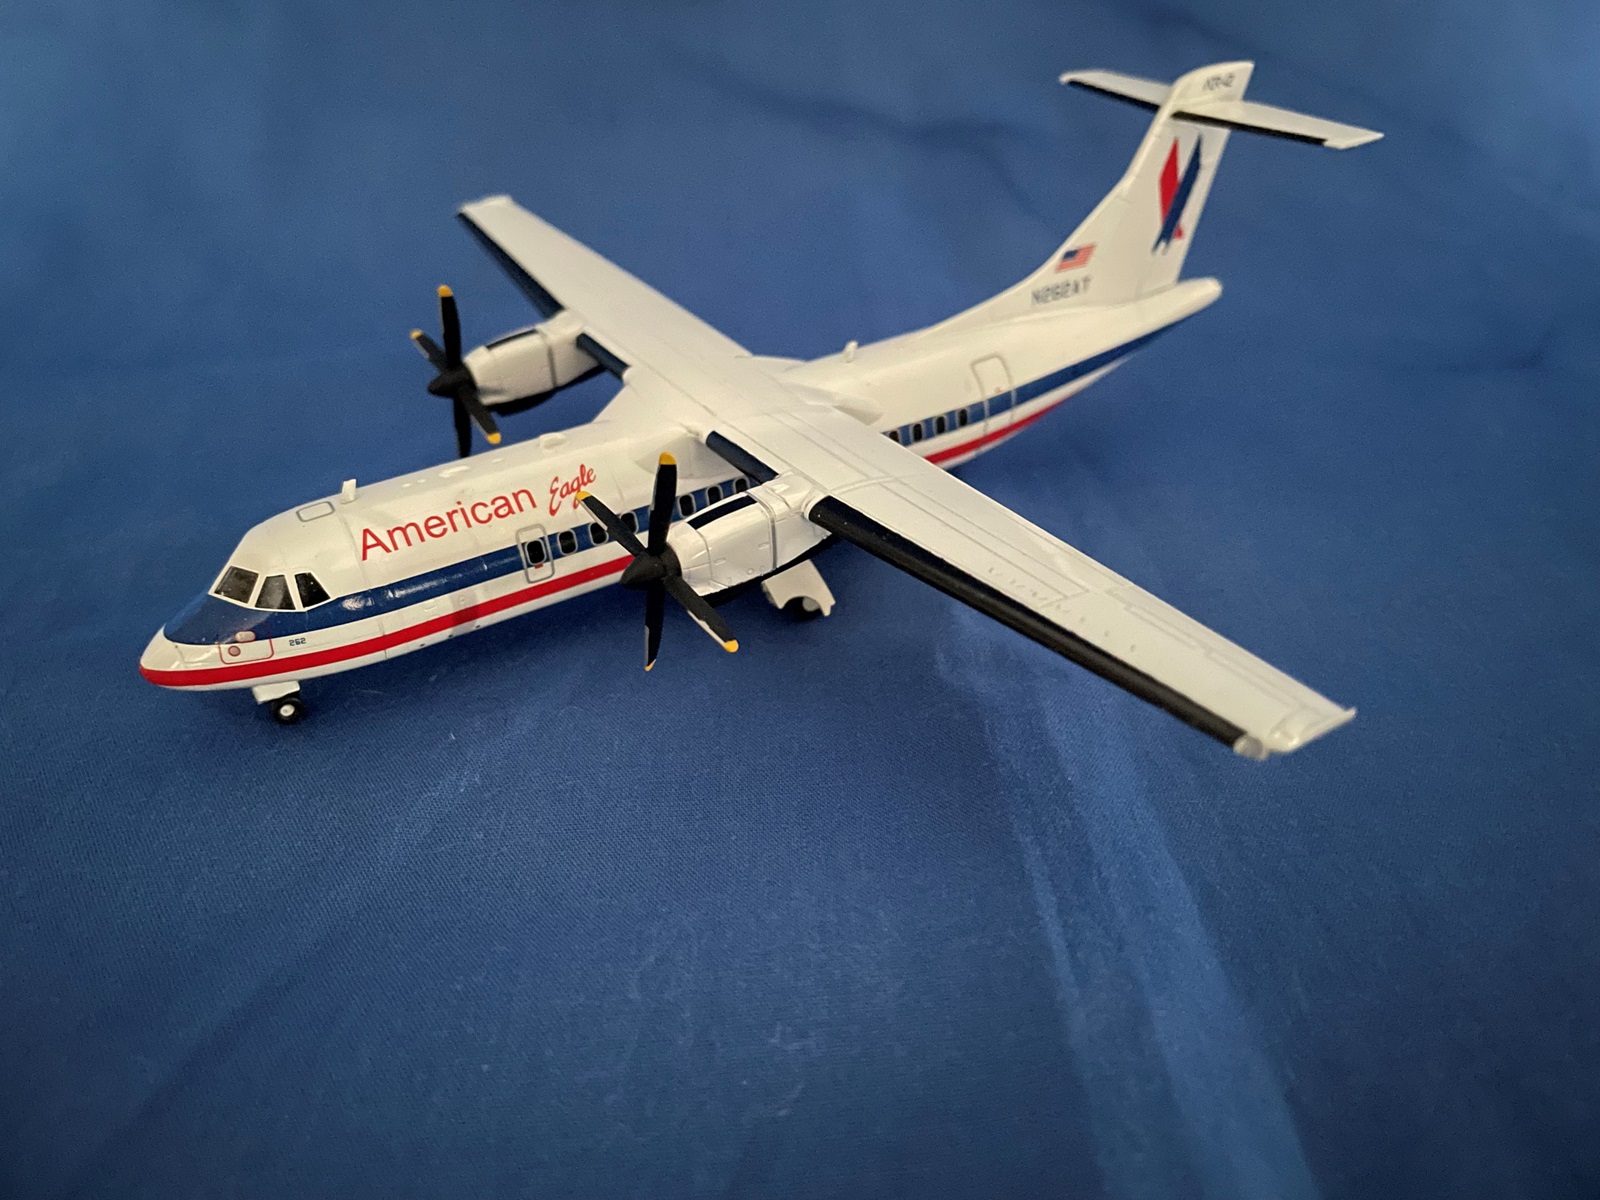
ATR-42-300 American Eagle Airlines
The ATR was a joint venture by French (Aerospatiale) and Italian (Aeritalia) to design a short-to-medium haul feeder airliner. The “42” designated that it had 42 seats. It has been a successful and reliable airliner in many countries around the world.
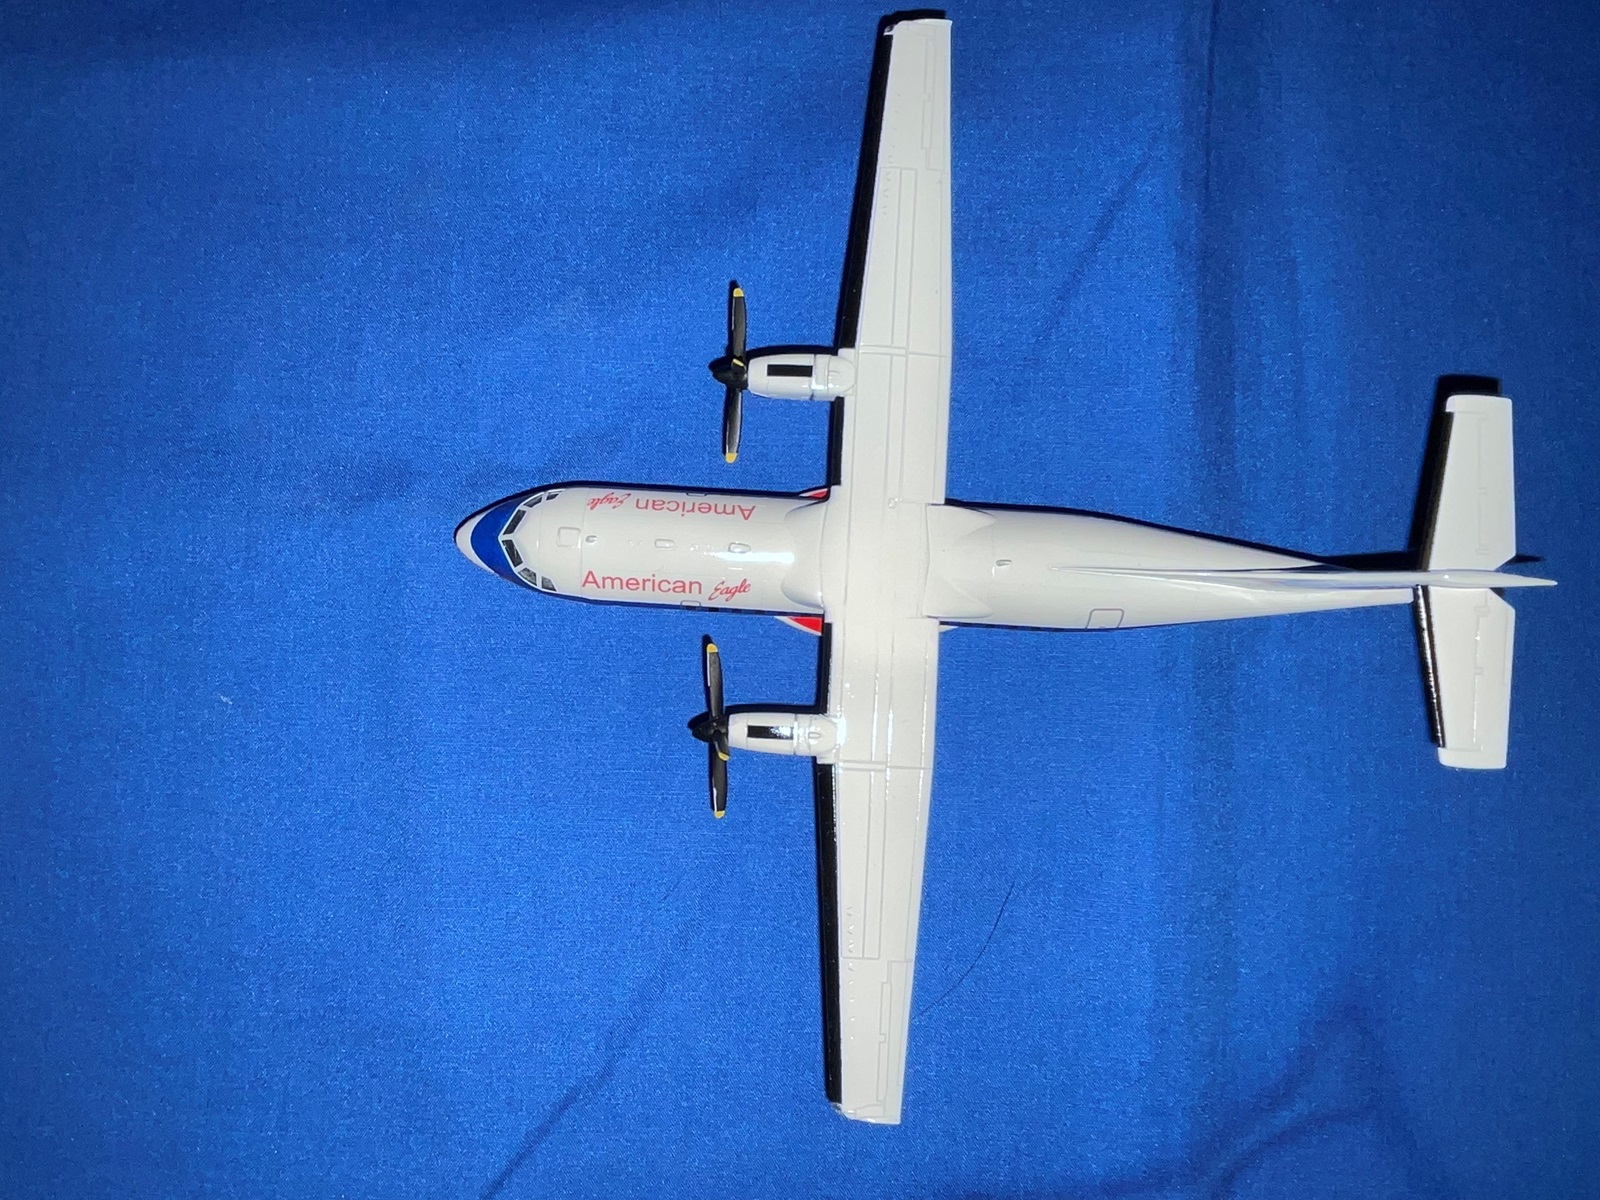
X-Scale Models, from Ukraine, has now released its latest model kit in 1/144 scale with an American Eagle ATR-42-300 that served out of Chicago’s O’Hare airport. X-Scale also included a date of 1996. The subject aircraft in this box, currently flies for Fed Ex.
The model arrived in a small top opening box with the colorful painting of the aircraft flying over what looked like the Grand Canyon. All the dark grey plastic parts, clear parts sprue, instruction manual, canopy and wheel masks, and decals were neatly contained within a single plastic bag. There was just a little scuffing on a couple of parts from two sprues rubbing together. The clear pars were also within their own bag.
Examining the individual parts showed some very nice surface detail and recessed panel lines. I also noted a lot of very small but scale accurate parts, especially to build the landing gear. The decals were sharp and in register on the small sheet. The cockpit canopy/windscreen was very clear.
The model, when completed, only measured about 15cm x 17cm. It’s even tiny against a Boeing 737.
A theme that was to repeat itself throughout the build were mold lines that ran through mating surfaces on most parts. While none were large, they did affect the fit of most parts if not removed. There were no locating pins or holes to assist in lining up parts such as the fuselage, wings, engines, ect. None of this presented a build issue.
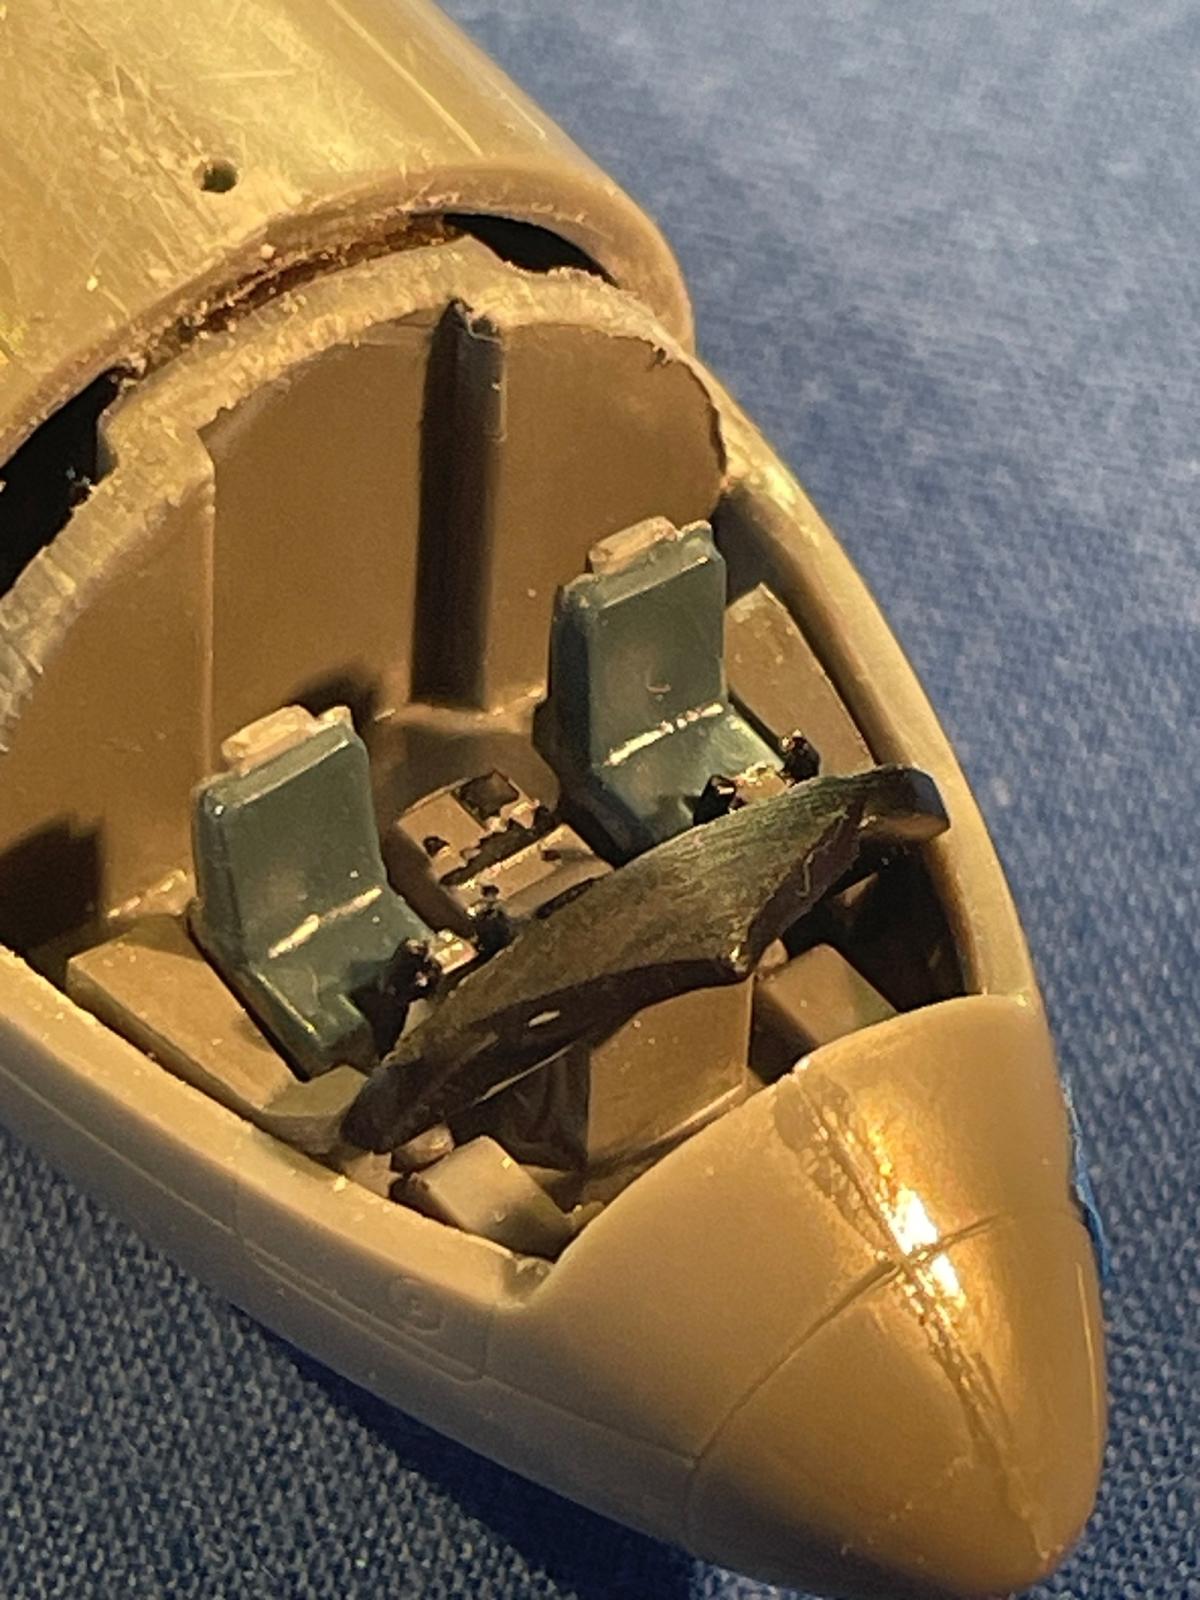
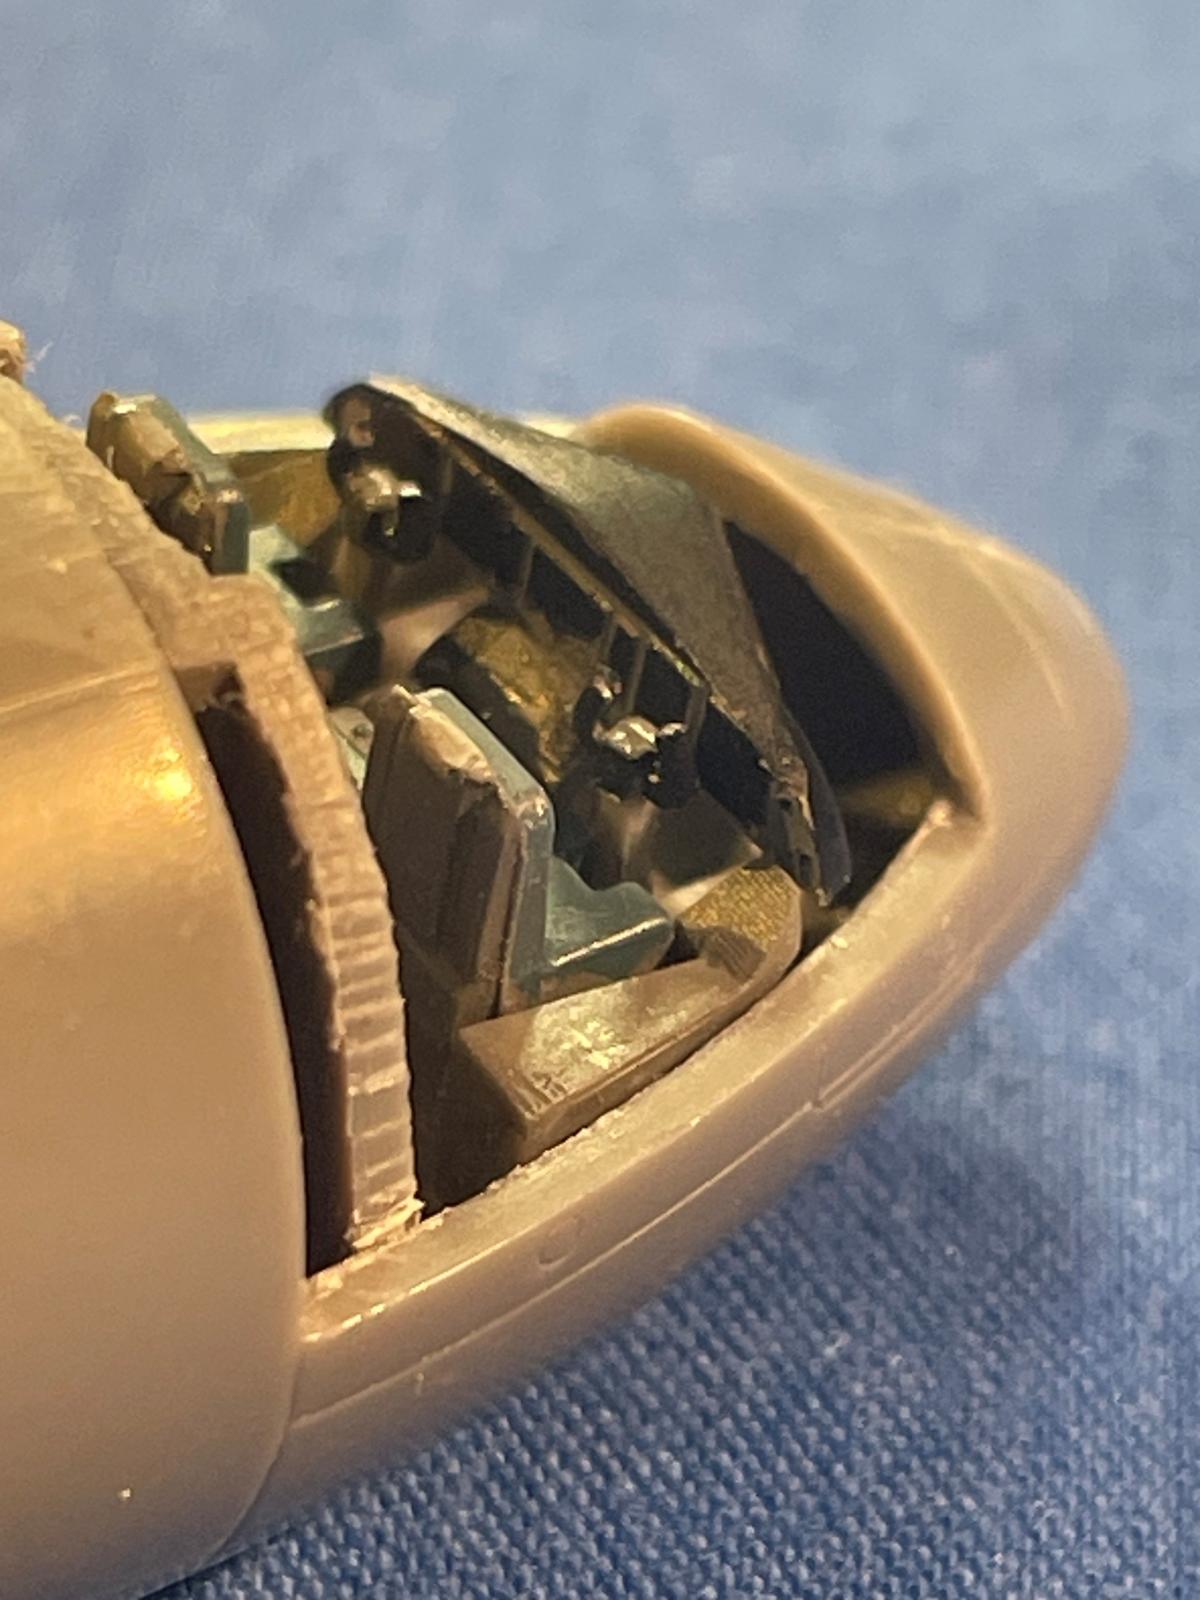
After looking over the instruction manual and the clear and logical way it was presented, I dove right in and started building the cockpit. It included almost everything from two-part, pilot seats, control yolks, instrument panel, side and center consoles, rear cockpit bulkhead and even rudder pedals. All but the pedals could be seen after the fuselage was closed and windscreen attached.
I assembled the two identical engine nacelles. Two-piece exhaust nozzles fit fine together, and I found with a little trimming they could be slid through their opening after the aircraft was built and painted. I left out an oval part that looked like either a blanking plate or a screen for the engine air intake. I couldn’t get it to fit well anyway, and the intake is so small you can’t see much through it anyway, but it did give the impression of depth. The two nacelle halves fit fine on the wing.
The wings included a complete upper part and two lower wing parts. Each part is glued together with no issues.
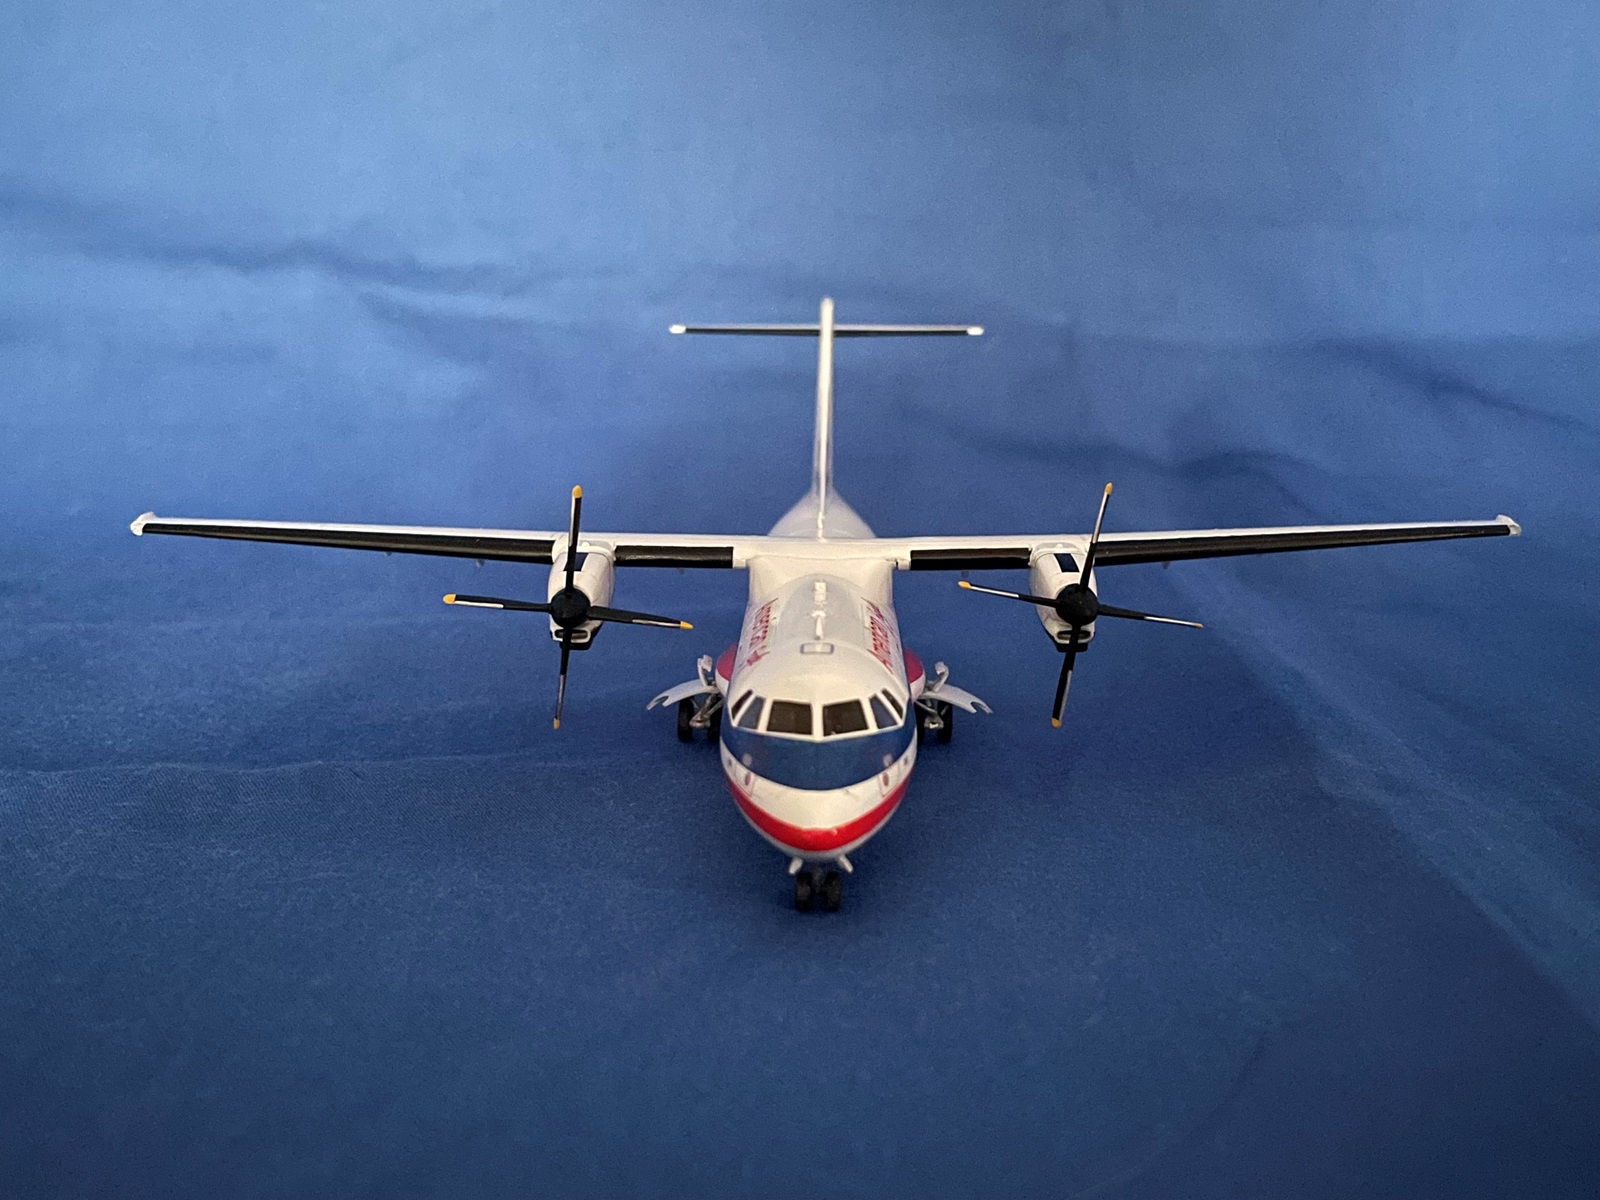
X-Scale offered the propellers as either a single piece with four un-feathered blades or a two-piece with feathered blades. I chose the feathered ones and had to do quite a lot of trimming to get them to fit together. The spinner and baseplate were in two parts also, and I had trouble sandwiching the propellor between them. In the process of trying to get the prop/spinner assembly to an acceptable standard, I destroyed the short stub propellor shafts and replaced these with brass wire. I also added short sections of brass tube in the front of the nacelles to accommodate the propellor shafts.
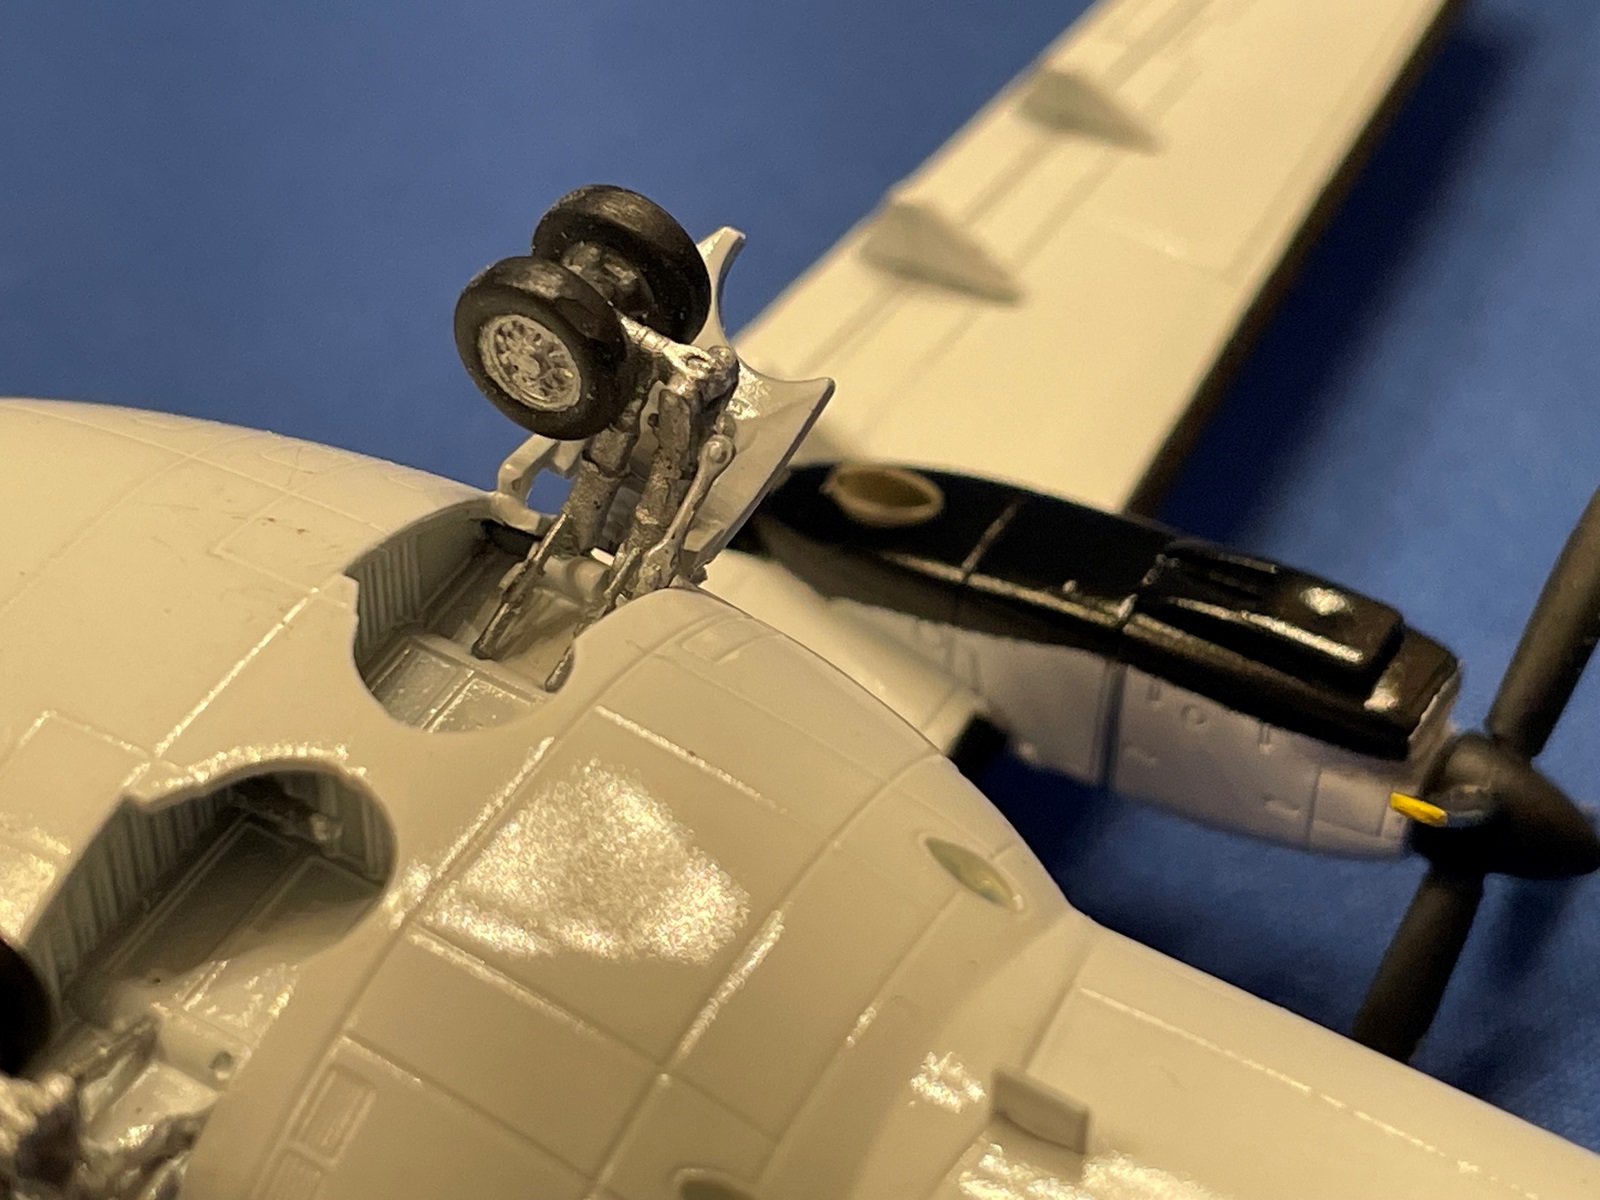
The main landing gear bay consisted of four parts. They assembled easily, after scraping away tiny mold lines, and slotted into a recess in a separate, lower belly sponson part. I determined that it would be impossible to attach the front landing gear leg and retraction strut into the nose gear bay after that was attached inside the fuselage, so I reluctantly glued it all together and through subsequent handling, broke the end of the delicate leg off! I glued it back on at the end of the build.
The model was at the stage where the fuselage could be brought together. With no locating pins, I taped the belly together and glued the top surface, and when I was happy with how it lined up, removed the tape and glued the belly. The cockpit and nose gear bay fit quite nicely inside. The main landing gear bay and belly sponson also fit OK, and I used rubber bands to help close gaps between the two parts while the glue dried. The ATR only had a small fuselage, so it was really not an issue not having locating pins.
After re-scribing lost panel lines from sanding, I attempted to install the wing and found that the lower wing mating surfaces on the fuselage sides stood too proud and produced way too much dihedral. I carefully sanded these down until I achieved the look, I considered correct. After this work, the wing fit very nicely.
The separate tail and tail planes all fit well into their respective recesses. The aircraft was beginning to look like an ATR! The last item to attach, at this point, was the clear windscreen/canopy. The fit was tight over the rear cockpit bulkhead, but it snuggled down after I trimmed down the circumference of the bulkhead.
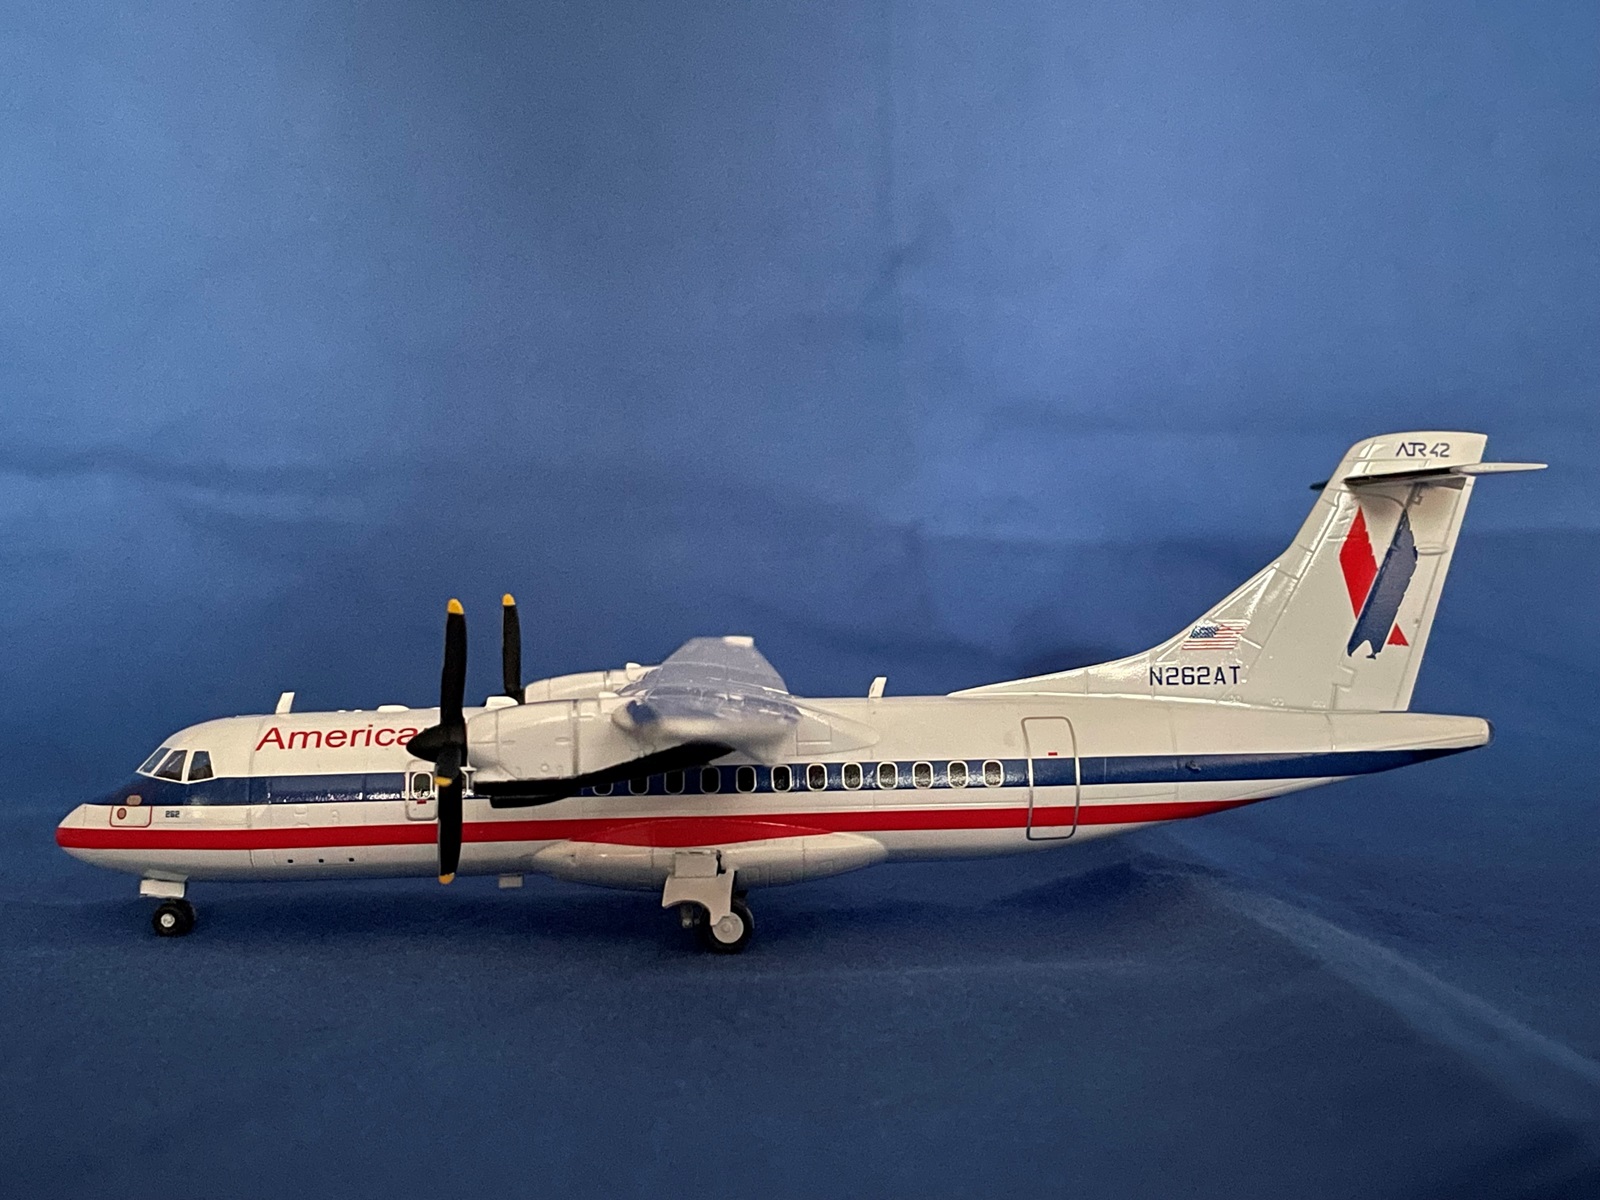
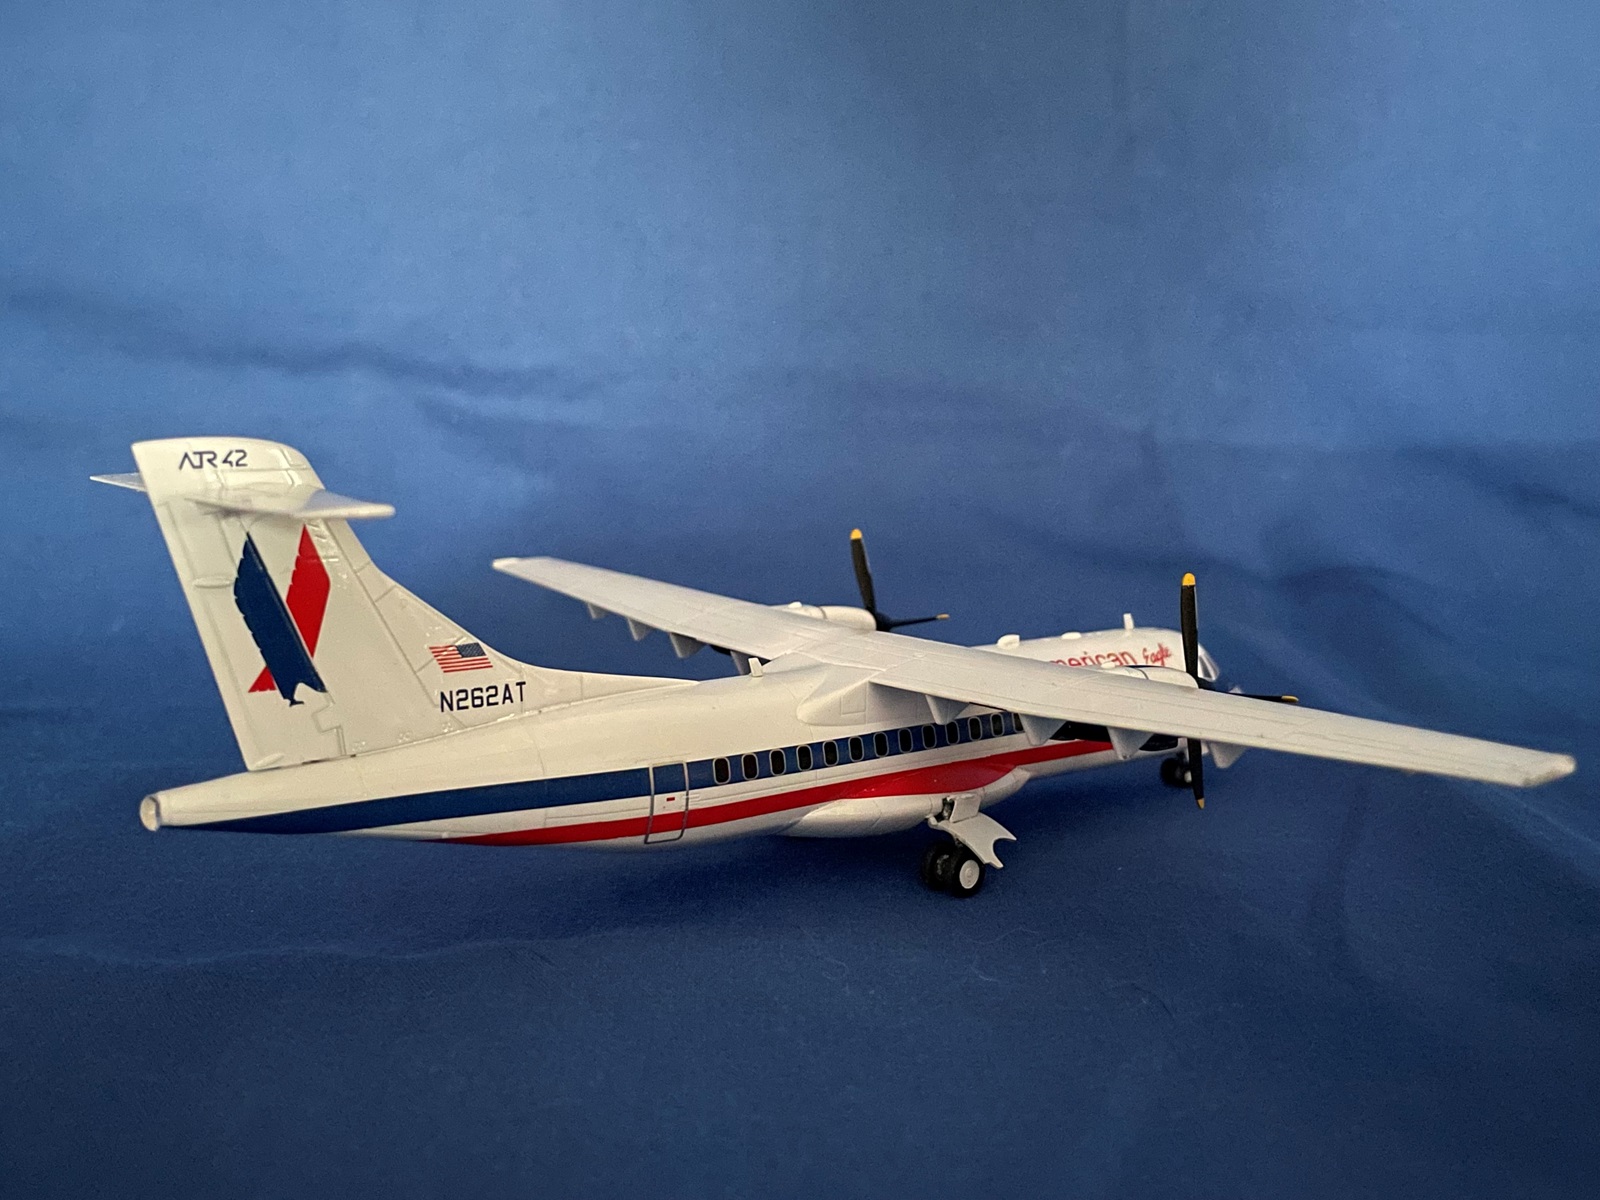
The little ATR was ready for paint, and the center page of the X-Scale instruction manual showed colors and decal placement. I questioned the call for the belly to be painted silver. Every picture I saw online of American Eagle ATR’s showed a white belly. In some pictures it was deceptive at first as the shadow cast underneath the aircraft did make me initially think it should be grey! After masking the cockpit windows with the kit supplied masks, I painted the entire aircraft gloss white. This was followed by masking off the wing and tail plane leading edge de-icing boots and the underneath of each engine nacelle and painted those flat black. I painted the propellors black also. The prop tips were masked off, and I shot the ends of each blade with yellow paint.
The decals followed, and I found the X Scale decals to be very nice. They were a little brittle, so try to minimize too much handling. Their color density was good, and they laid down nicely and snuggled into recessed panel lines after a brush of Micro-Sol decal softener. I did have to use stronger Walters Decal Setting Solution to get the red stripe to conform around the nose. I did trim the clear excess decal film around the red decals that laid over the main wheel sponsons and the red fuselage stripes where they butted up against this part.
I tackled the tiny and delicate main landing gear legs next, and they were a bit of a challenge. There were three parts to the trailing link legs, plus three separate retraction struts, just like the real thing. Correctly positioning all three parts was a little vague. I glued the parts together with Tamiya Extra Thin cement and gently positioned the unit against its slots in the bay and adjusted the assembly before the glue dried. All wheels fit onto each respective leg nicely.
One longer and two shorter gear retraction struts were then glued to the bay and legs. Take note of the short struts as one end was angled to fit flush against the side to the gear legs. Take it slow and test fit often. Oh, and don’t forget the Opti visor so you can see what you’re doing!!
The nose and man gear bay doors finish the undercarriage assembly. The nose doors were simply two parts glued to each side of the open bay. The main gear doors were in four parts. Three door parts and one tiny strut that was attached between the gear leg and main door. The fit was fine, but I had to remove paint from the door hinges and the recesses in the gear bay walls.
To complete the model, several antennas were added, as well as landing and navigation lights in the belly and wing tips.
This was my first experience with an X- Scale Model. I found it to be a very enjoyable, but a challenging model to build, but I would absolutely build other airliner models from this company. I would only recommend this ATR to experienced builders, or those with the dexterity to handle the very small parts.
Thank you very much to X Scale and IPMS USA for the opportunity to build and review this awesome little model.
Comments
Add new comment
This site is protected by reCAPTCHA and the Google Privacy Policy and Terms of Service apply.
Similar Reviews