
FIAT G.50 bis/AS "Freccia"
History
The Fiat G.50 came about as a result of the Italian Air force’s need to replace the biplane fighters that had served them well during the nineteen thirties. The Fiat CR.42 biplane had been an especially successful fighter, and in fact continued in use through most of World War II, but a higher performing monoplane was needed, and Fiat started work on a prototype in 1936 and flew the first prototype in 1937. Although the aircraft had excellent flying qualities, its bulky Fiat A74 RC38 radial engine produced only 840 hp., resulting in disappointing performance, and the twin 12.7 mm. Breda SAFAT machine guns were thought to be inadequate. In fact, the Air Force considered the Macchi C.200 radial engine fighter to be superior in most respects, but both aircraft were put into production, with most pilots preferring the Macchi.
The first G.50’s entered service in 1939, and although some of the early versions were sent to Spain in January, 1939, they were too late to see any action in the Spanish Civil War, and none was lost to enemy action. Later, they were used in various war games and exercises at home. When Italy entered World War II, the Italians had just over 100 G.50’s in service. They were used briefly against the French, usually escorting bombers in raids on French targets.
In 1940, it was decided to send a G.50 unit, the 51st Stormo, to Belgium to participate in the Battle of Britain. A few escort missions were flown, but they spent most of their time flying surveillance missions along the French coast. Bad weather conditions limited their usefulness, and there is no record of them ever encountering enemy fighters.
In late 1939, the Finnish government ordered 35 G.50’s, although delivery was delayed by the Germans until 1940. They were used by the Finns until 1944, when they were finally taken out of service. They were eventually replaced by American-built Brewster B-239’s. A two seat trainer was developed from the G.50, and some of these soldiered on until 1948 in RA flying schools.
The G.50 was used in subsequent actions of the Italian Air Force, including Greece and North Africa, and they were gradually phased out in favor of more modern aircraft. Fiat developed a G.52 prototype, designated G.50V, powered by a Daimler Benz DB601 engine, but from this the more promising G.55 fighter was developed.
Reference Material
There is quite a bit of material available on the Fiat G.50 series. An early source is the Profile series Number 188 on the aircraft. Squadron-Signal’s Italian Aircraft of World War II, by Nico Sgariato is also very useful, as are most of the “Fighters of World War II” books that are available in most bookstores. By the way, the kit instructions offer no information on the aircraft, except for the identification of the aircraft for which decals are provided.
Instructions
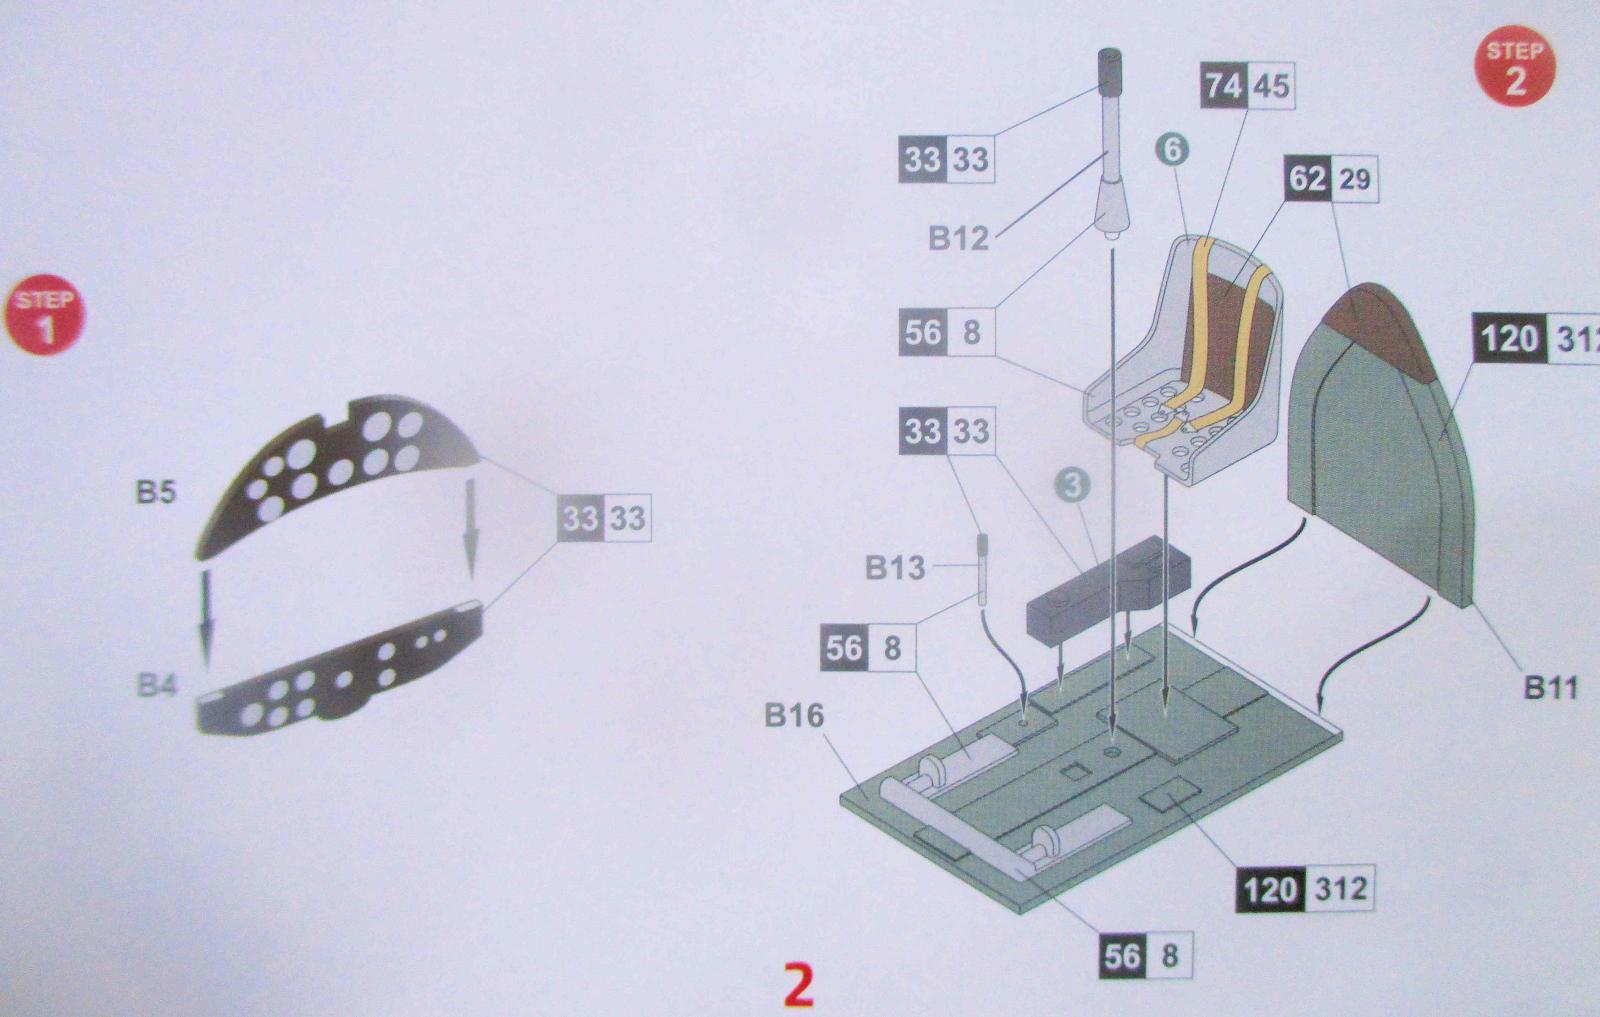
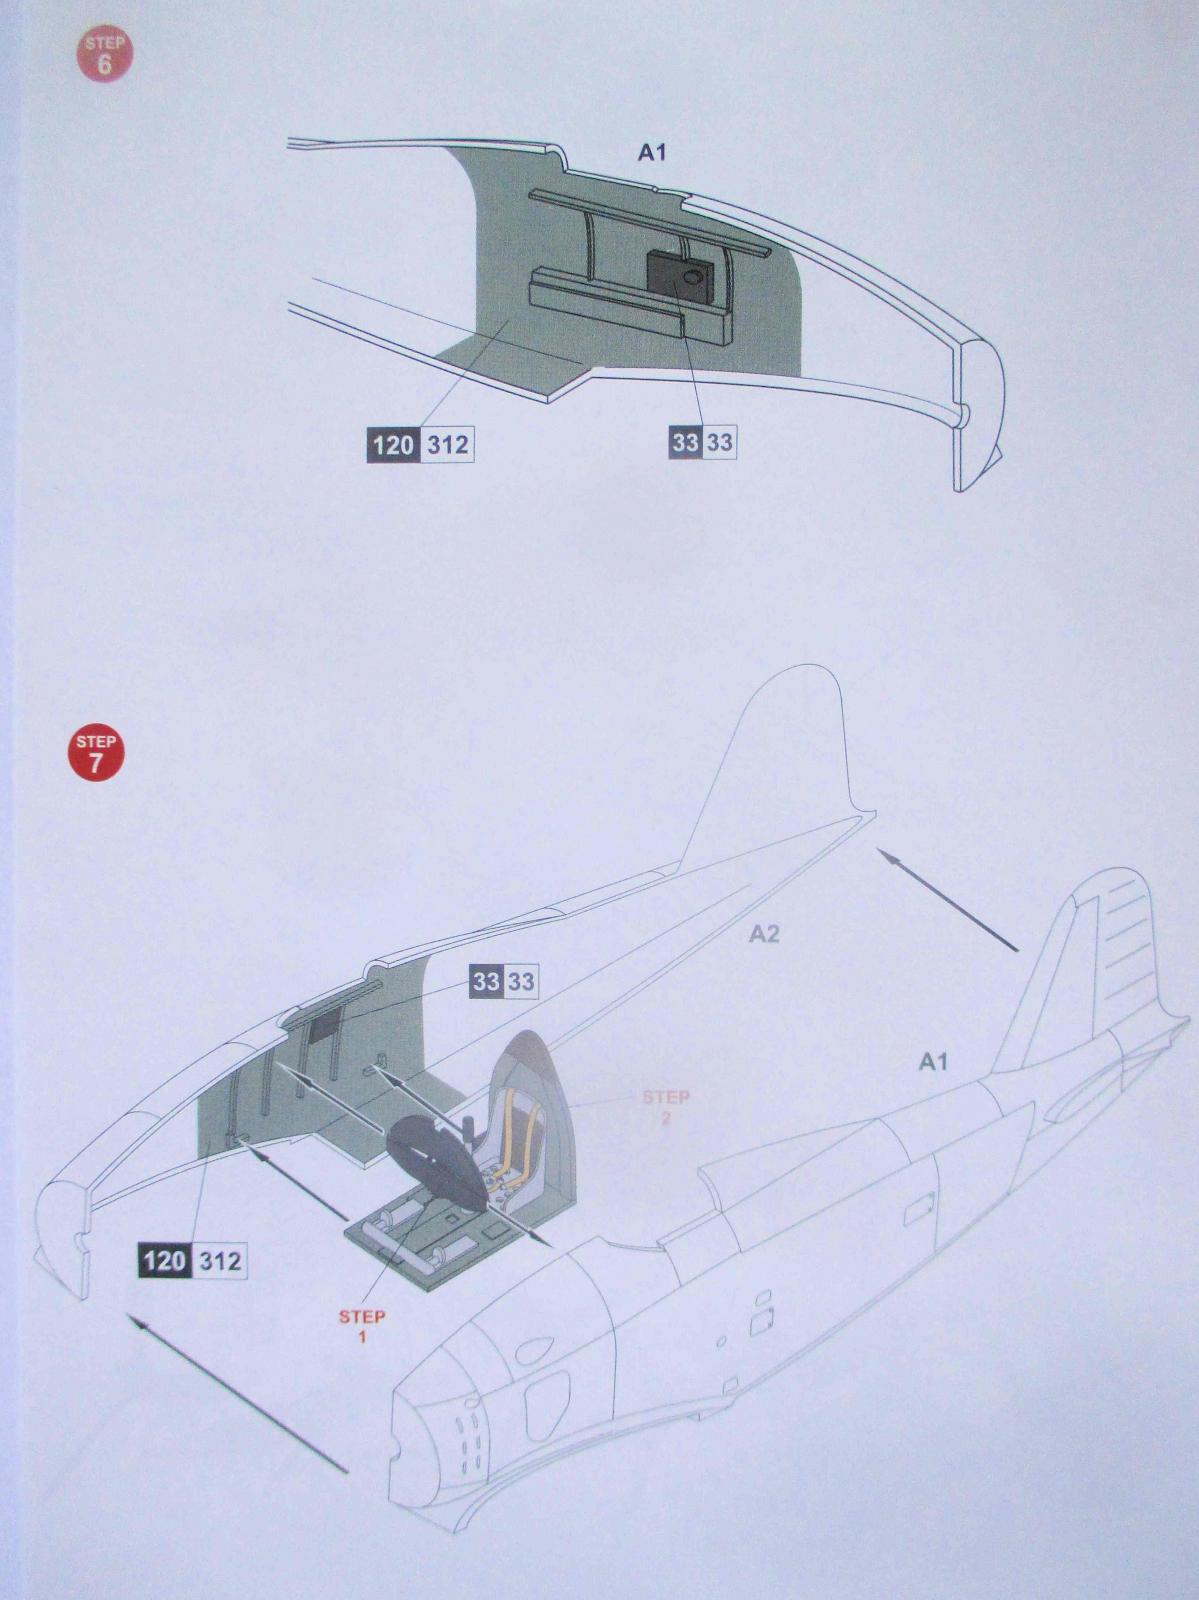
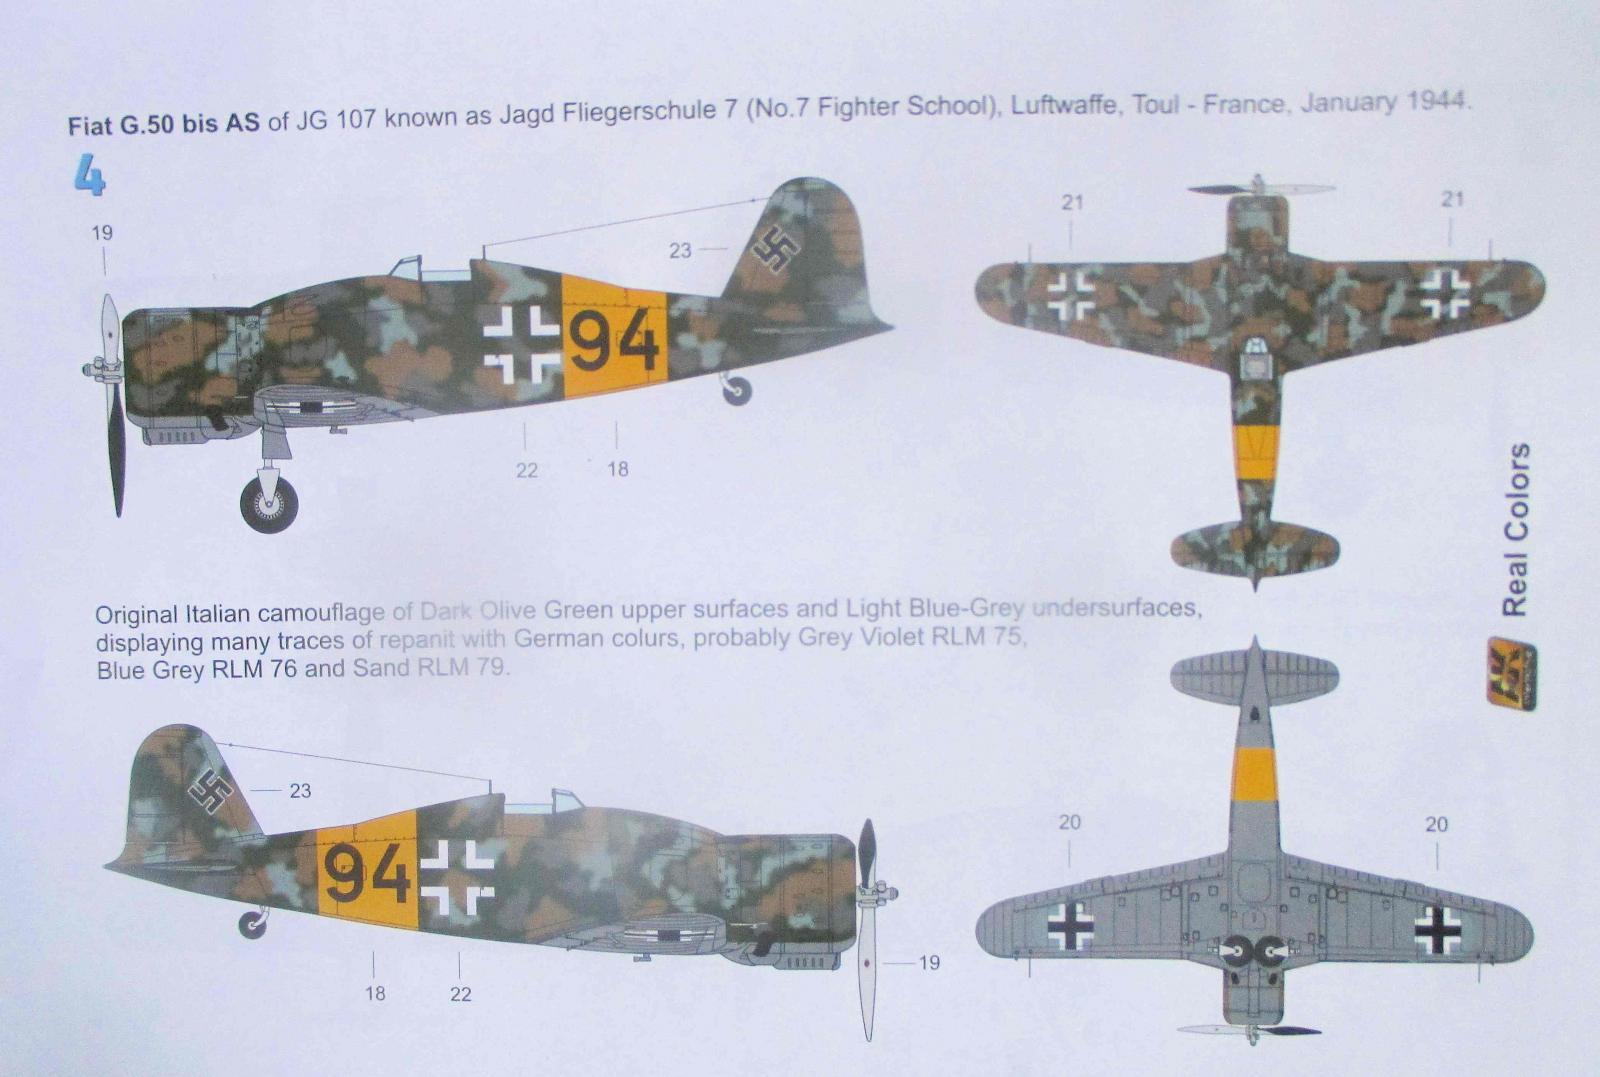
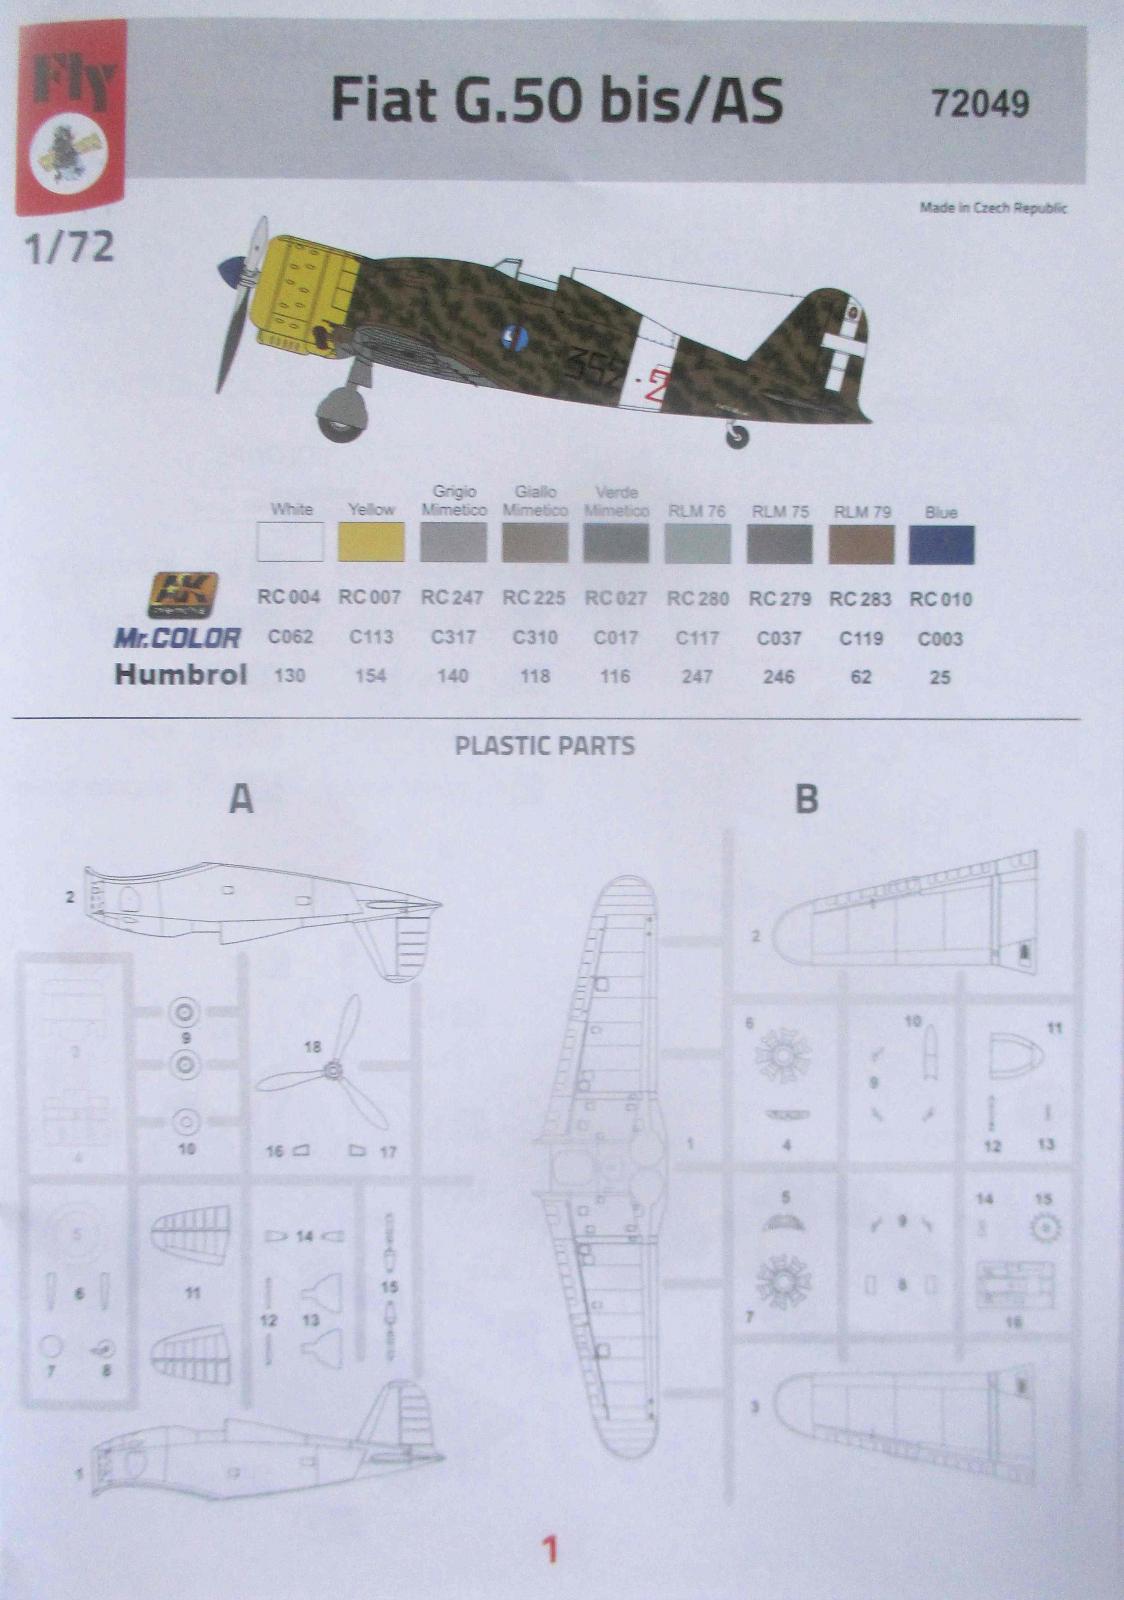
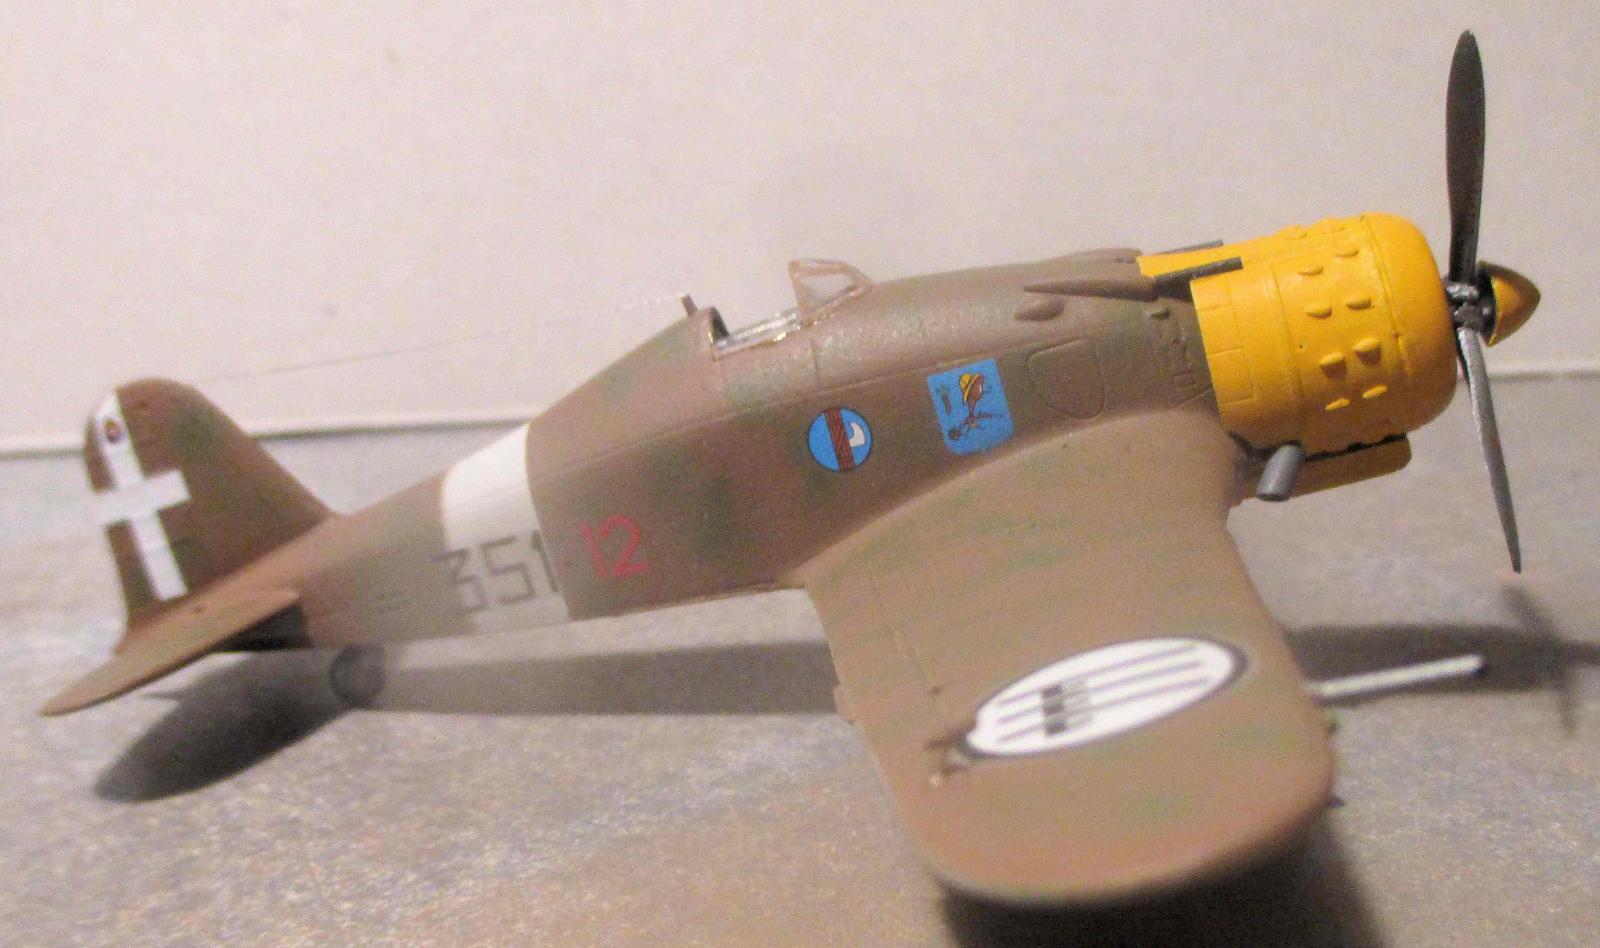
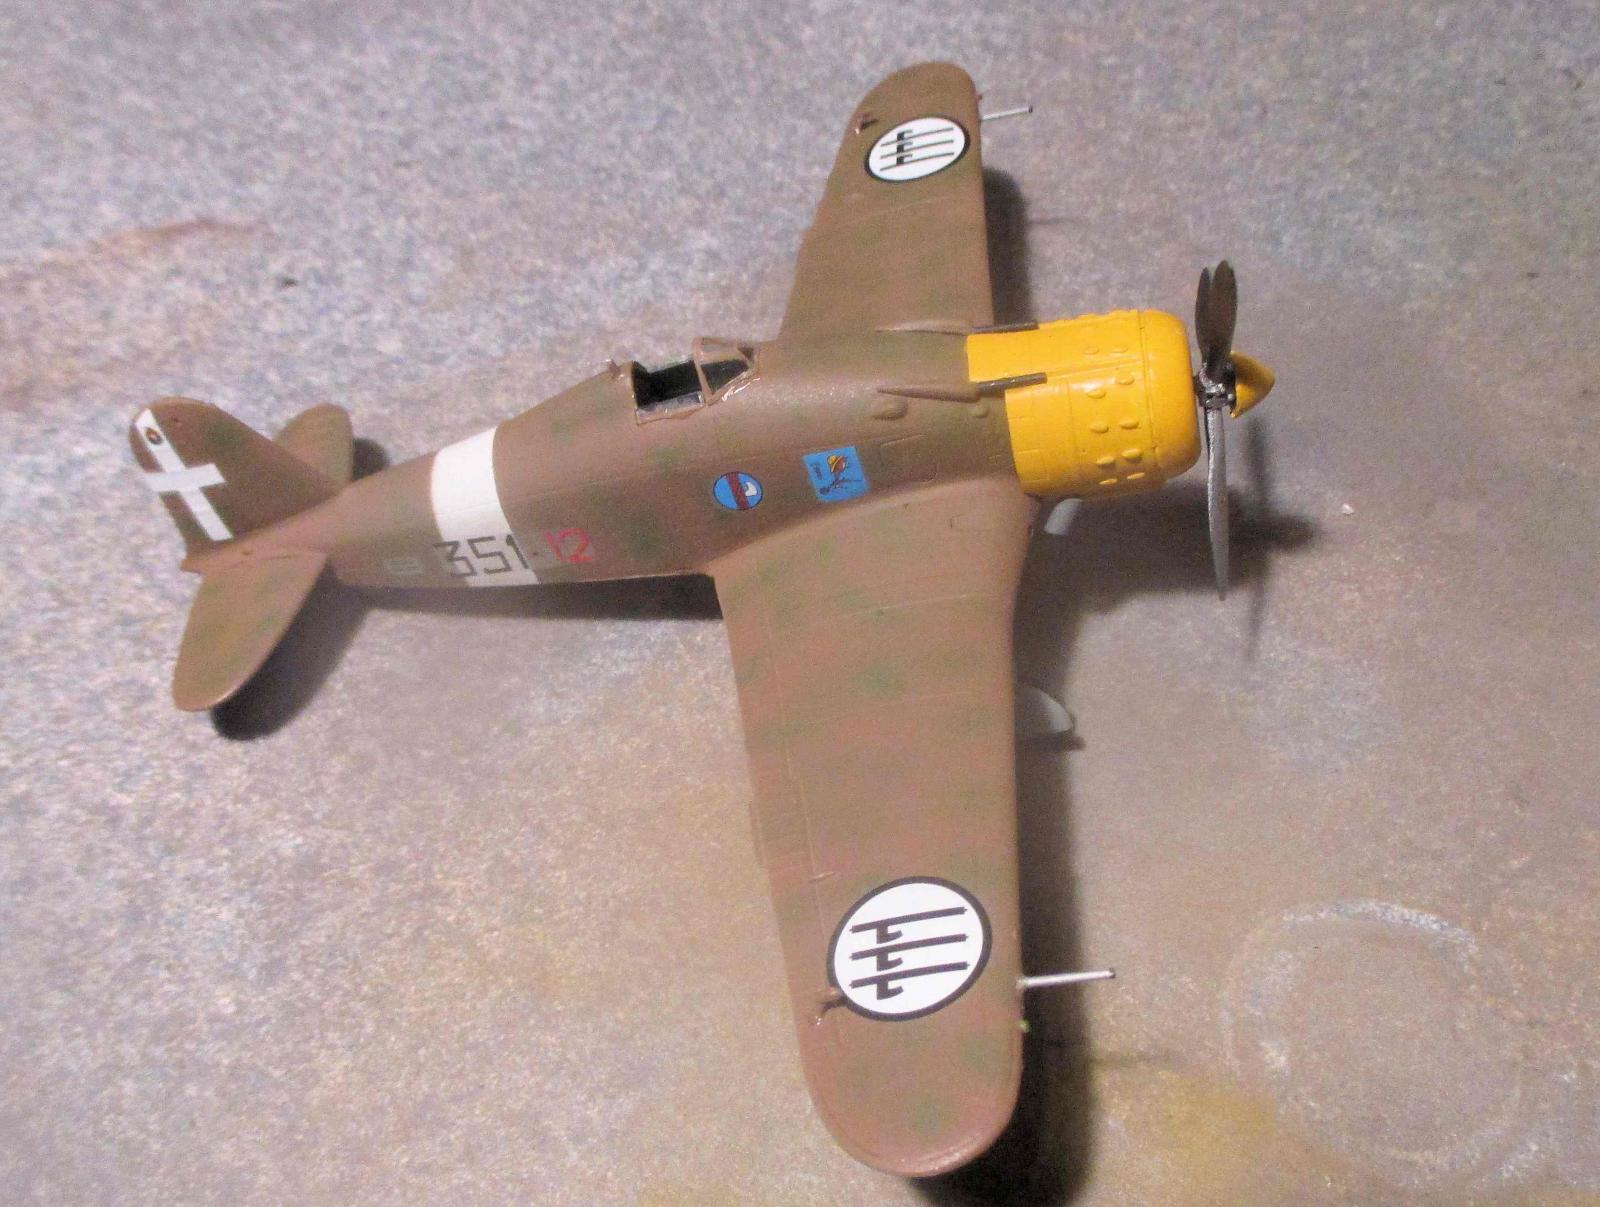
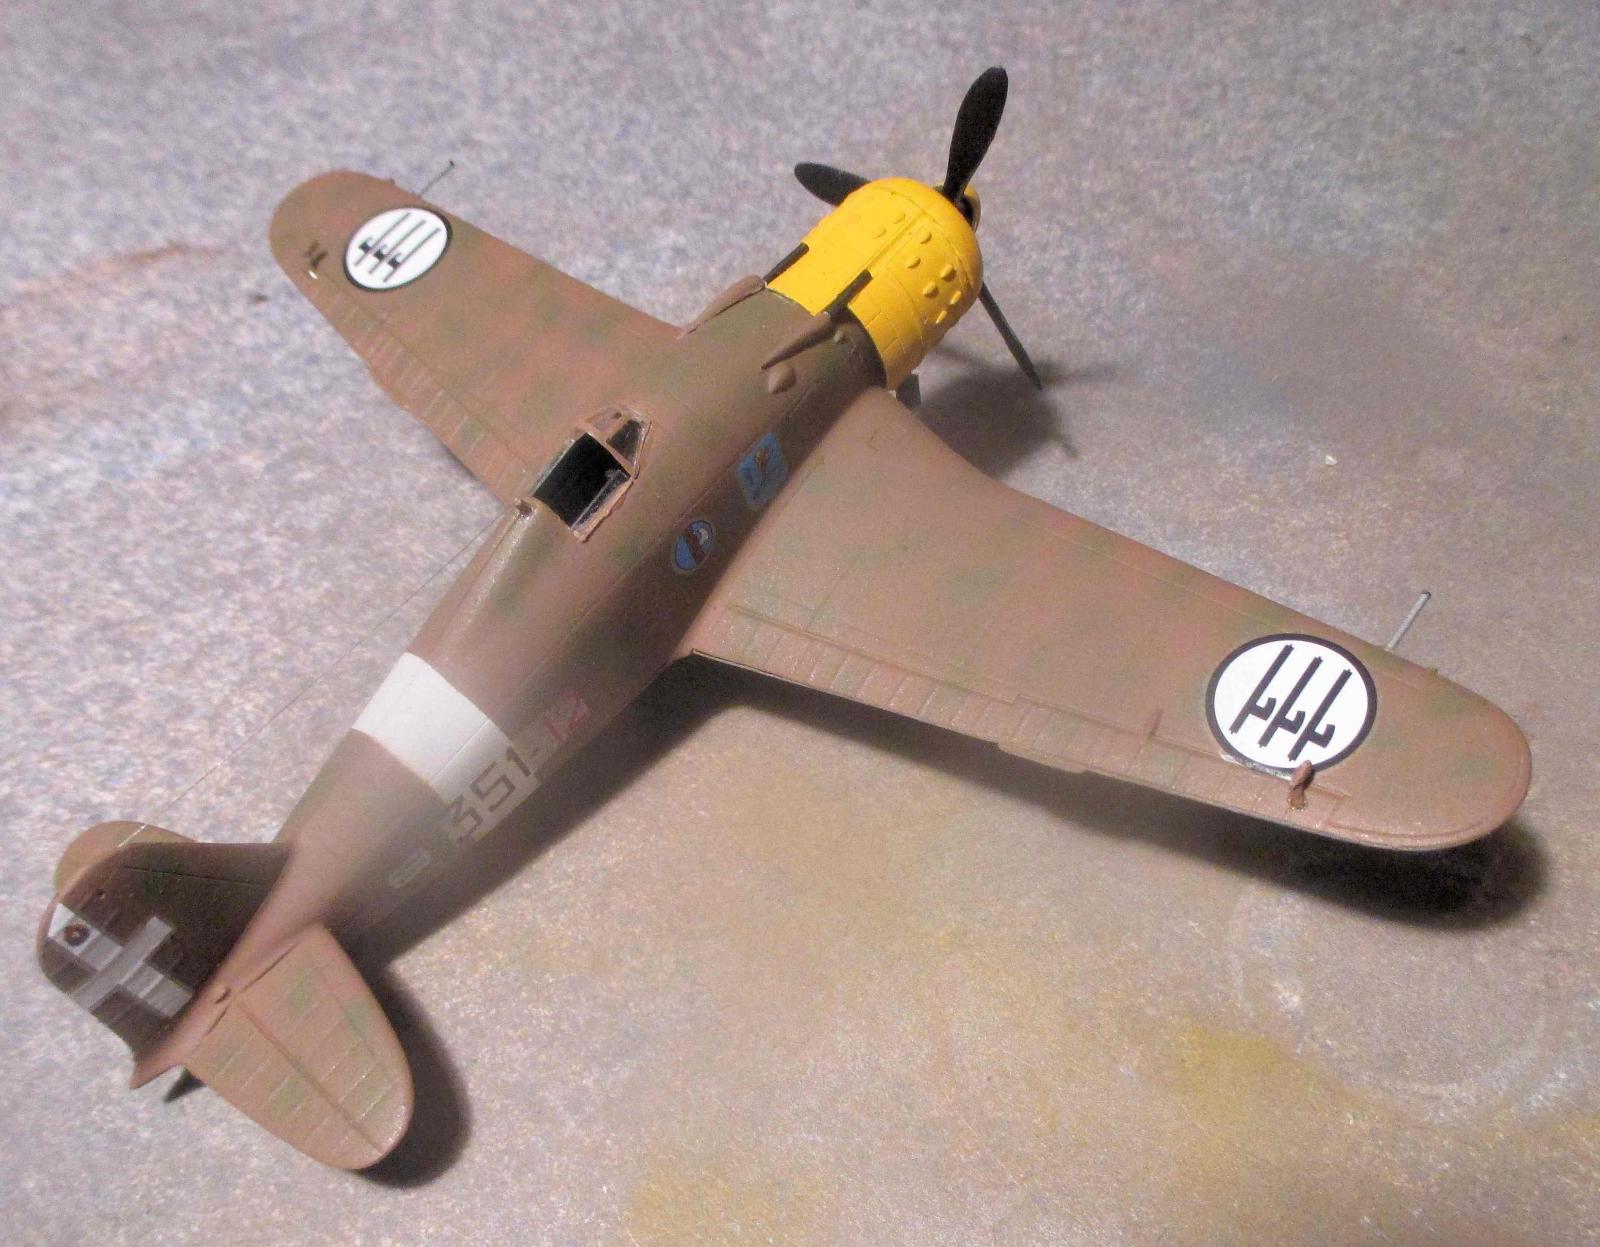
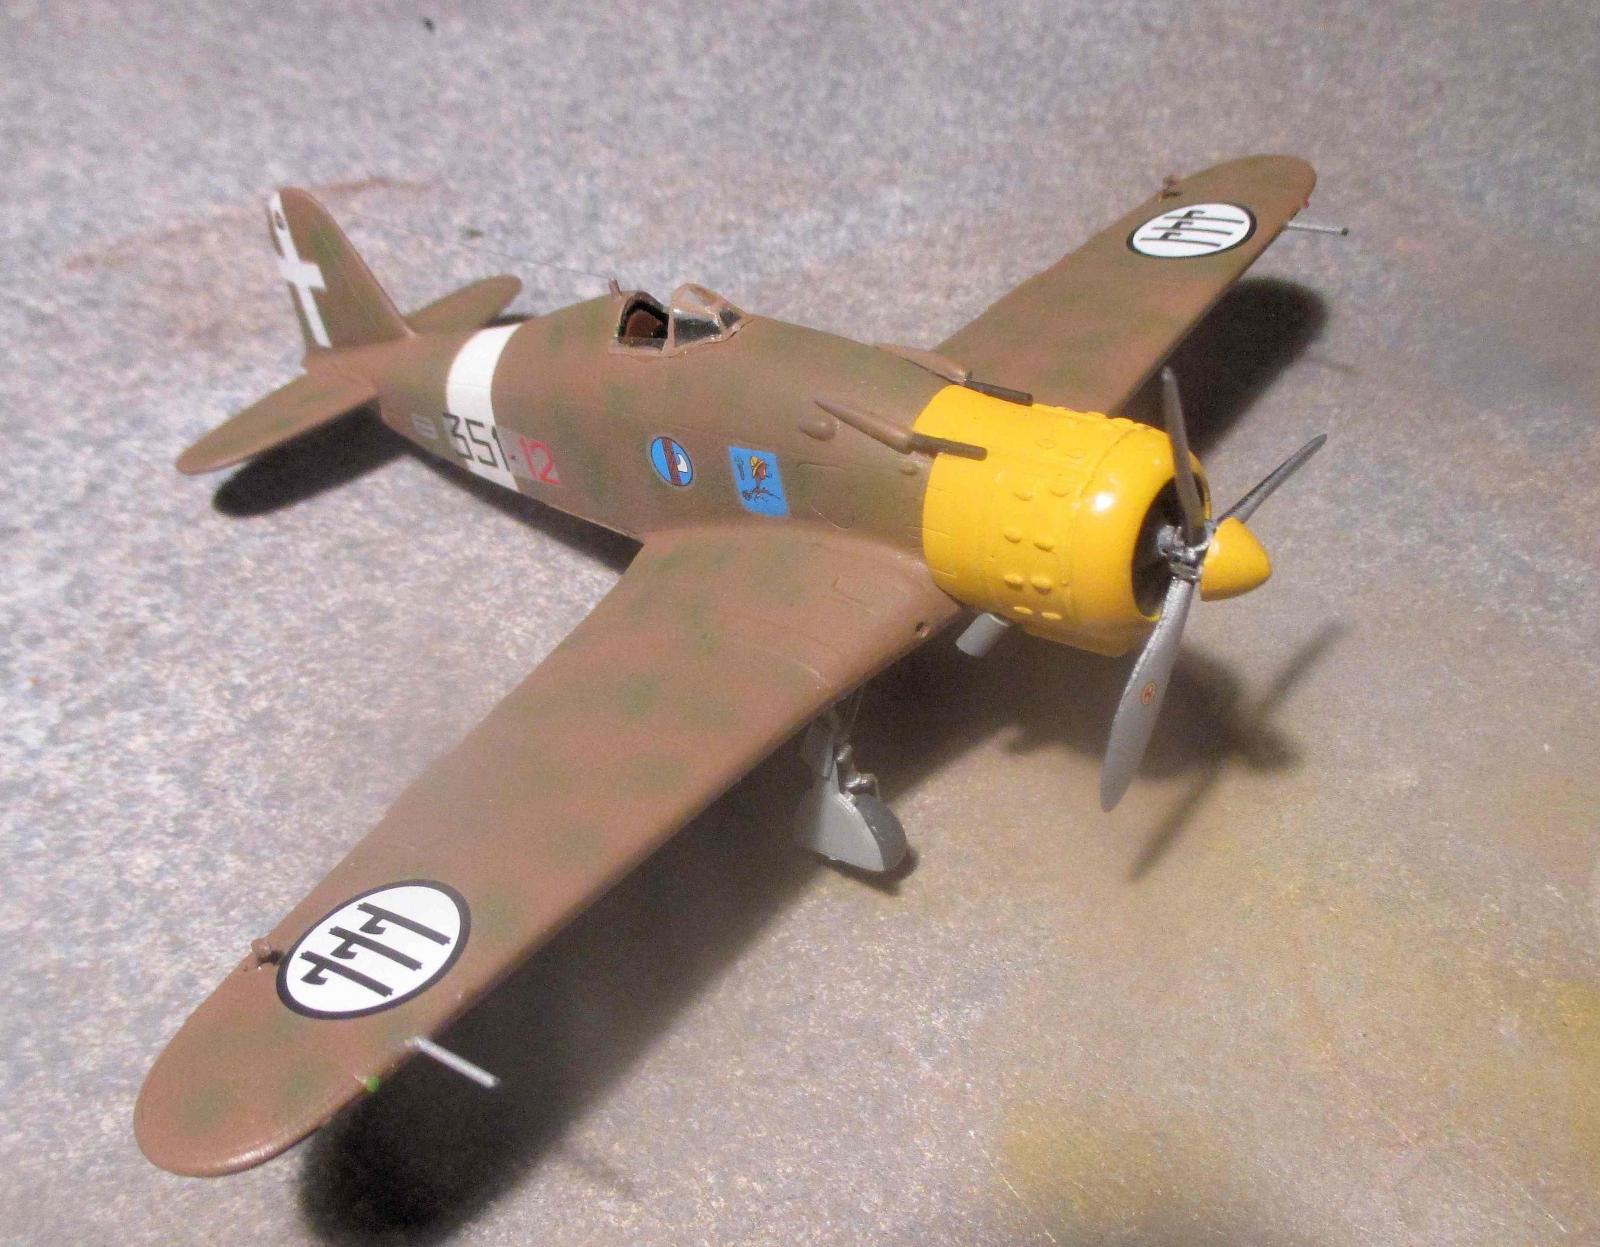
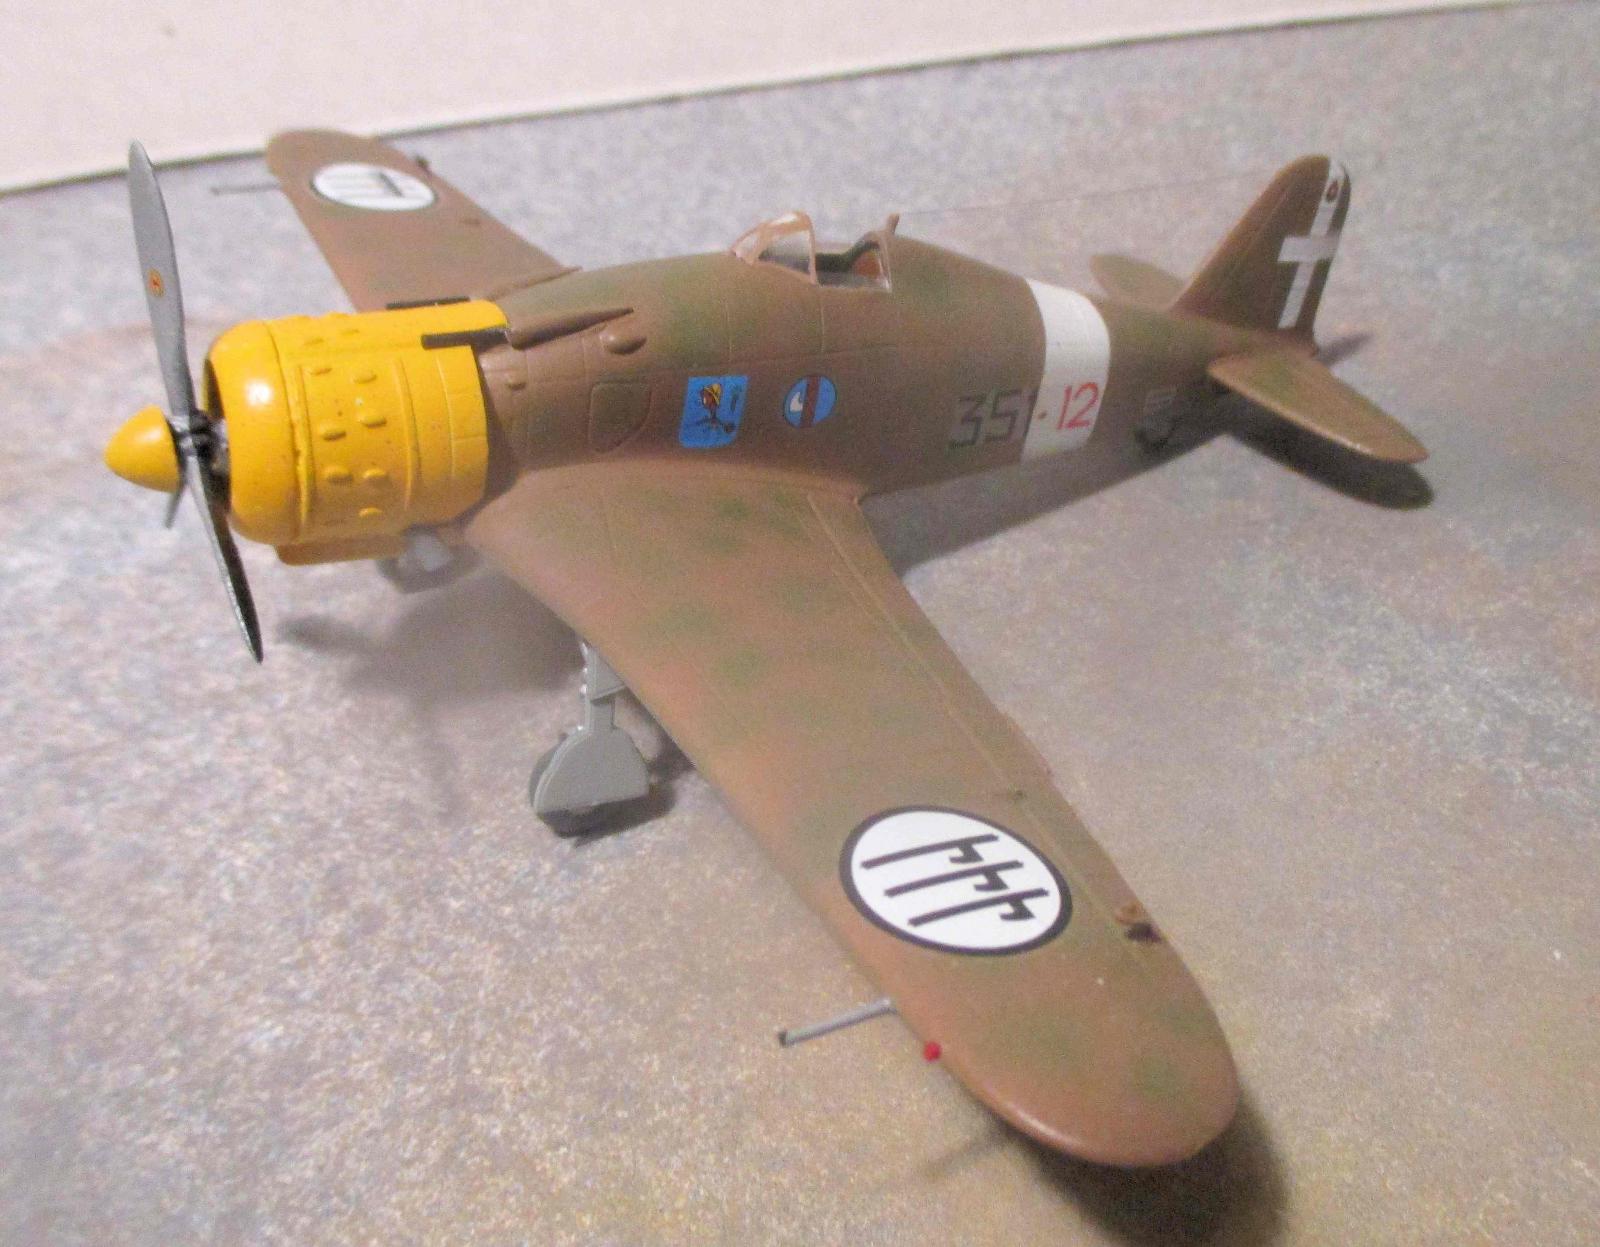
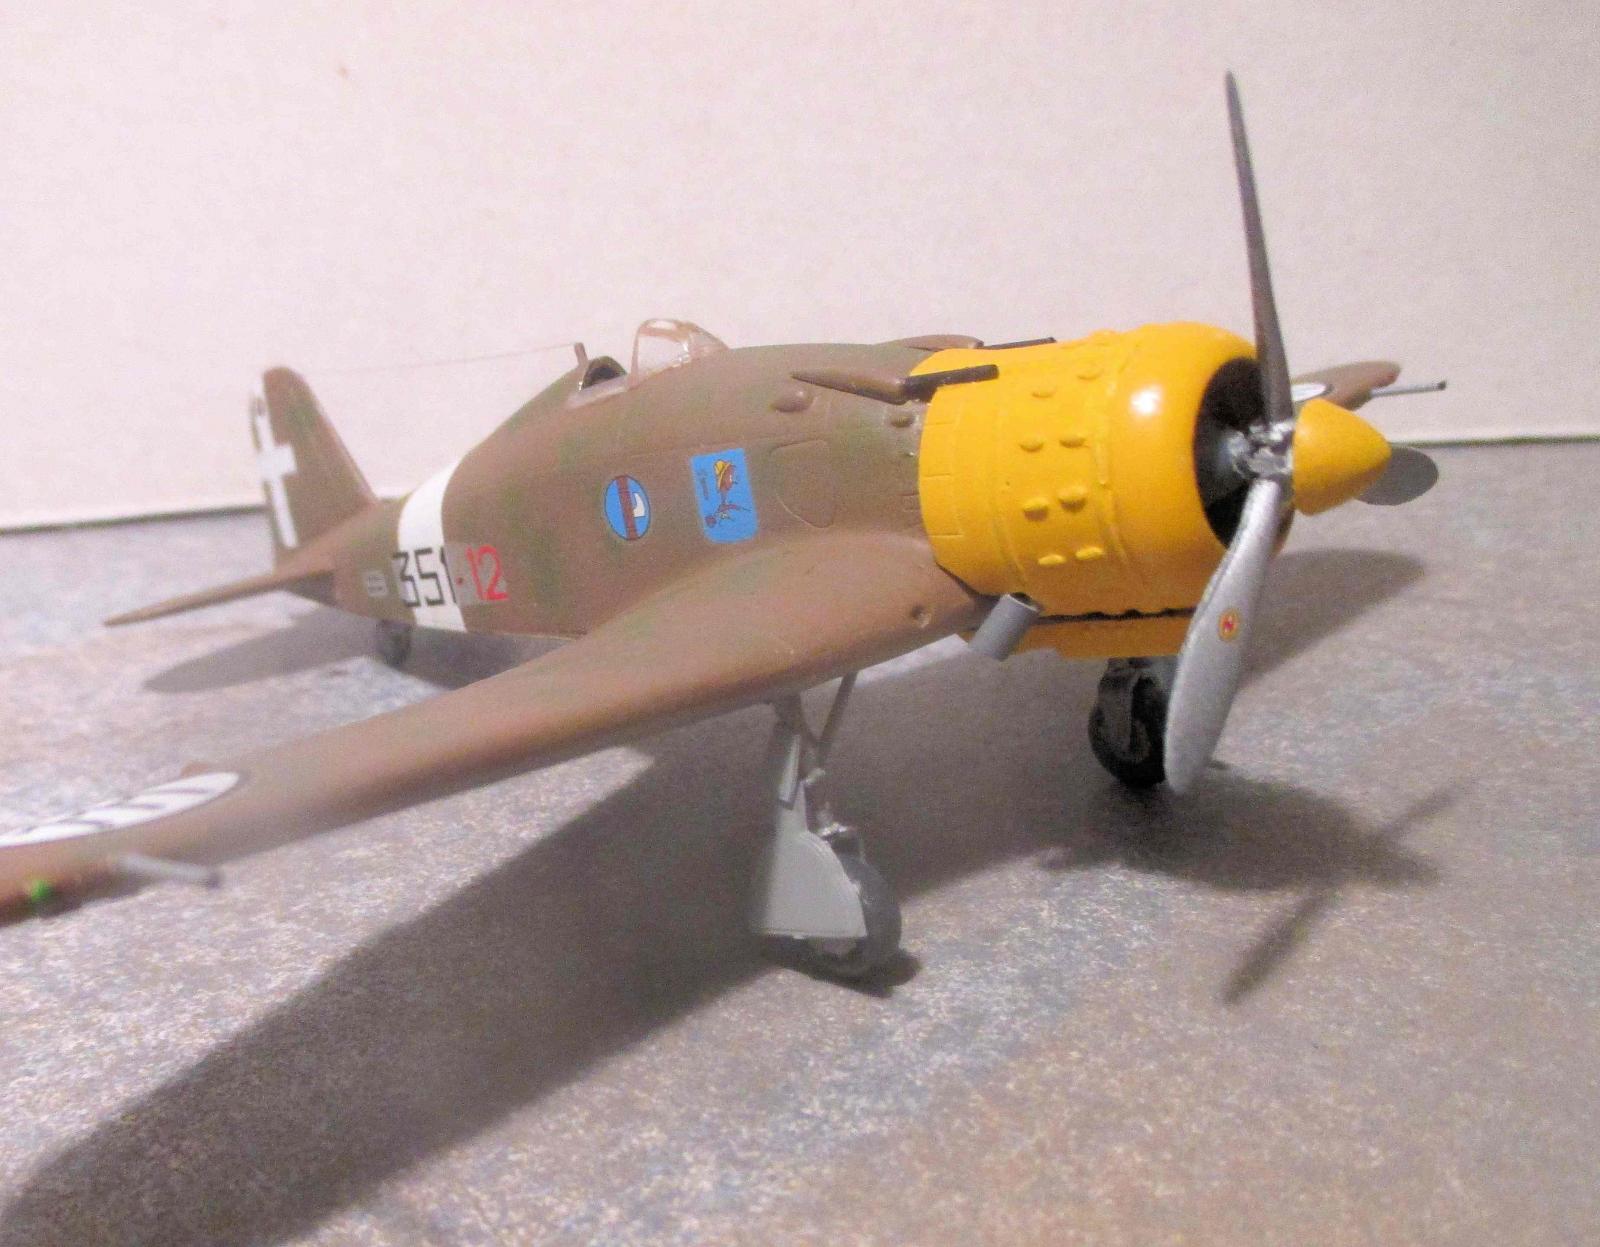
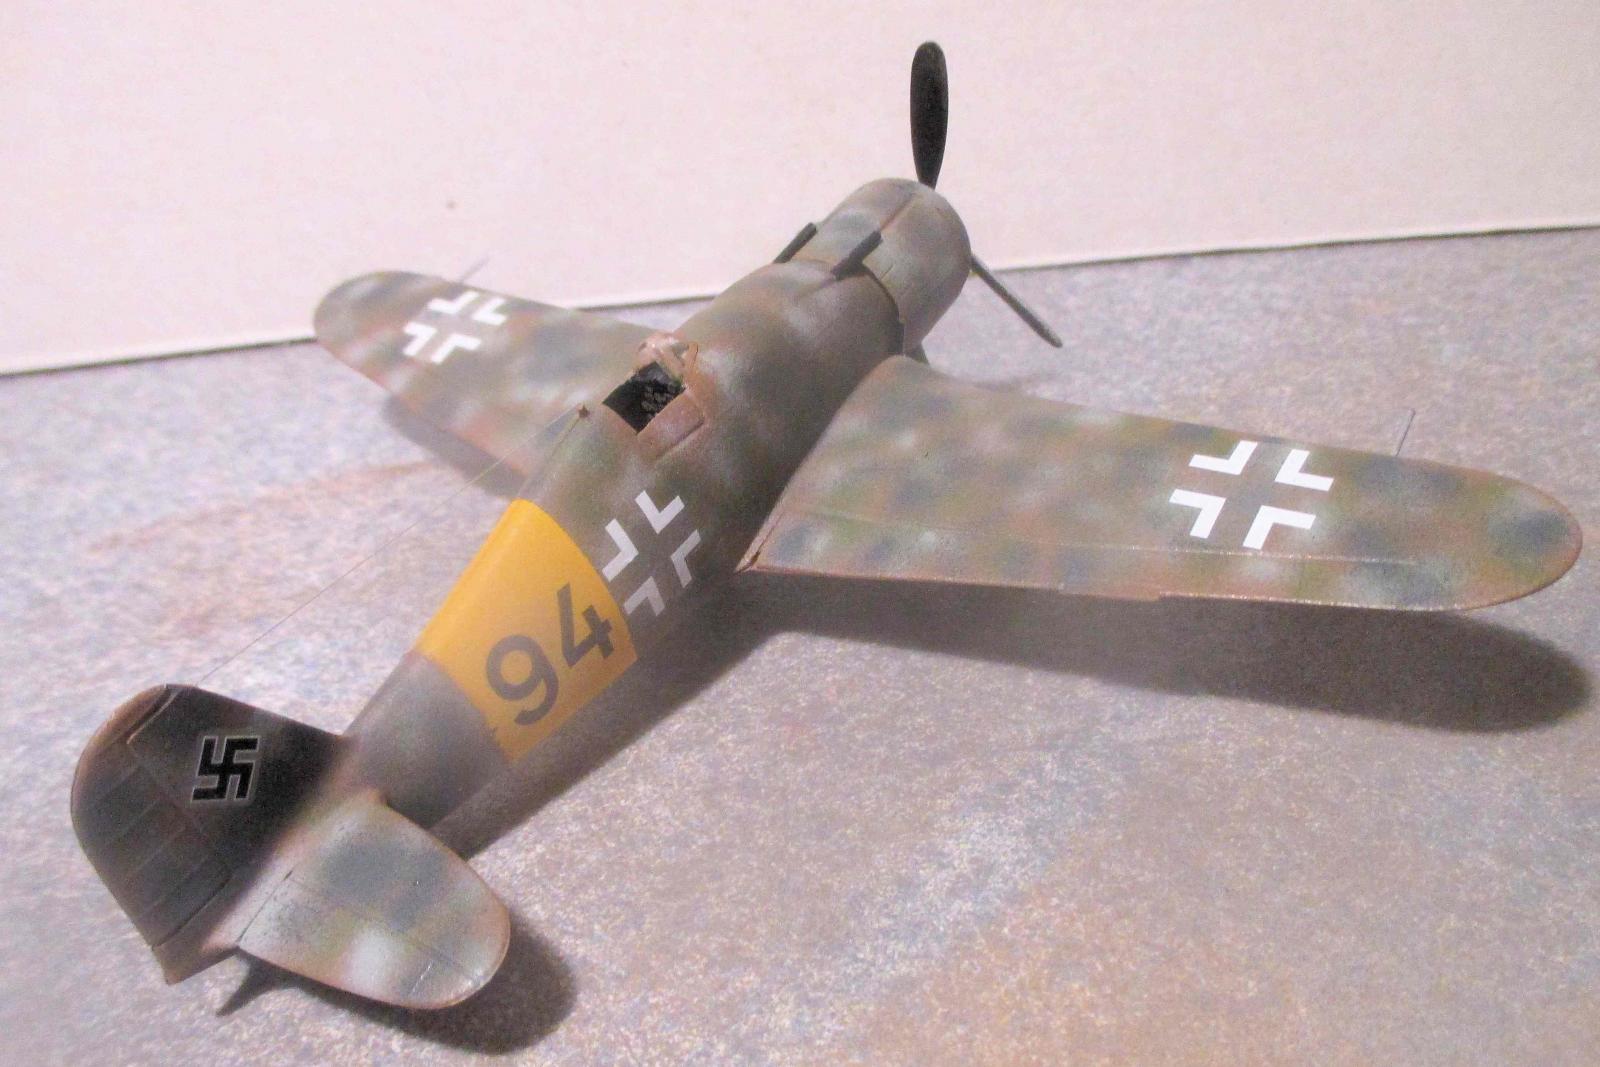
The instructions are nicely printed on 2 sheets of 8 ½ x 11 inch paper, folded in half to make a total of 8 pages. Page 1 gives a color guide with identification by name, AK colors, Mr. Color, and Humbrol. The main sprue diagram is also on this page. Page 2 lists the resin and clear parts, and gives a color guide for painting. It also includes assembly drawings for the instrument panel and the cockpit interior. Page 3 shows the engine assembly, cowling, and propeller configurations for the several variants available. Page 4 shows the cockpit interior walls, and page 4 shows the fuselage assembled, with the wings and horizontal tail surfaces attached. Page 6 shows the final assembly, with an upper and lower view showing the engine, engine and cowling, propeller, and landing gear positions. Page 7 provides a four view color drawing of a Fiat G.50 bis AS used in North Africa, in April, 1941, while Page 8 shows a similar drawing of a G.50 bis SAS used by the Luftwaffe as a fighter trainer in Toul, France, in January, 1944. Decals are provided for both of these aircraft, along with two more which are illustrated on the box art. There are a couple of typographical errors in the instruction sheet, but you’ll figure those out without any trouble.
Decals
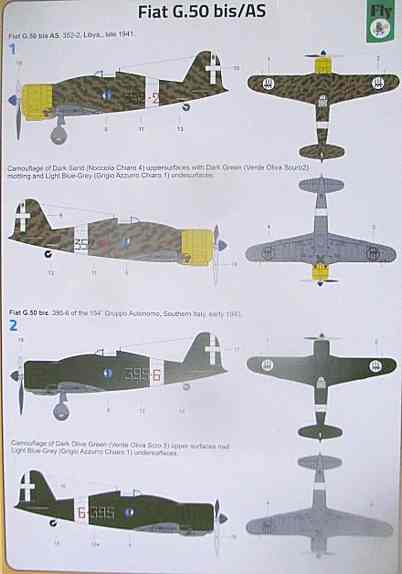
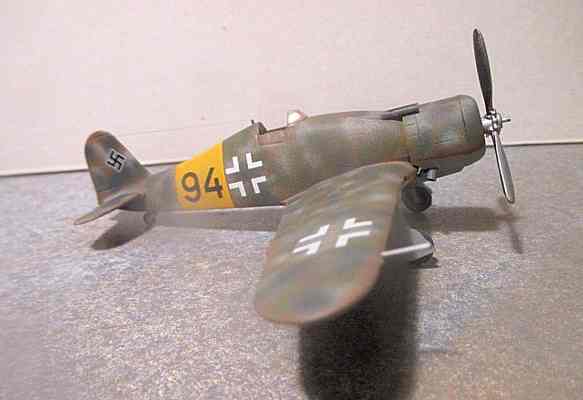
Decals are provided for four aircraft, the two above described types and two more Italian versions, 352-2 in Libya, late 1941, and 395-6 in dark green paint used in Southern Italy early in 1943. The decals are done by Cartograf, and are completely accurate, on register, and easy to apply. I did the Fly kit in Italian markings and a companion kit (I like to build a competitor’s kit at the same time for comparison purposes) in the Luftwaffe scheme, using kit decals.
The Kit
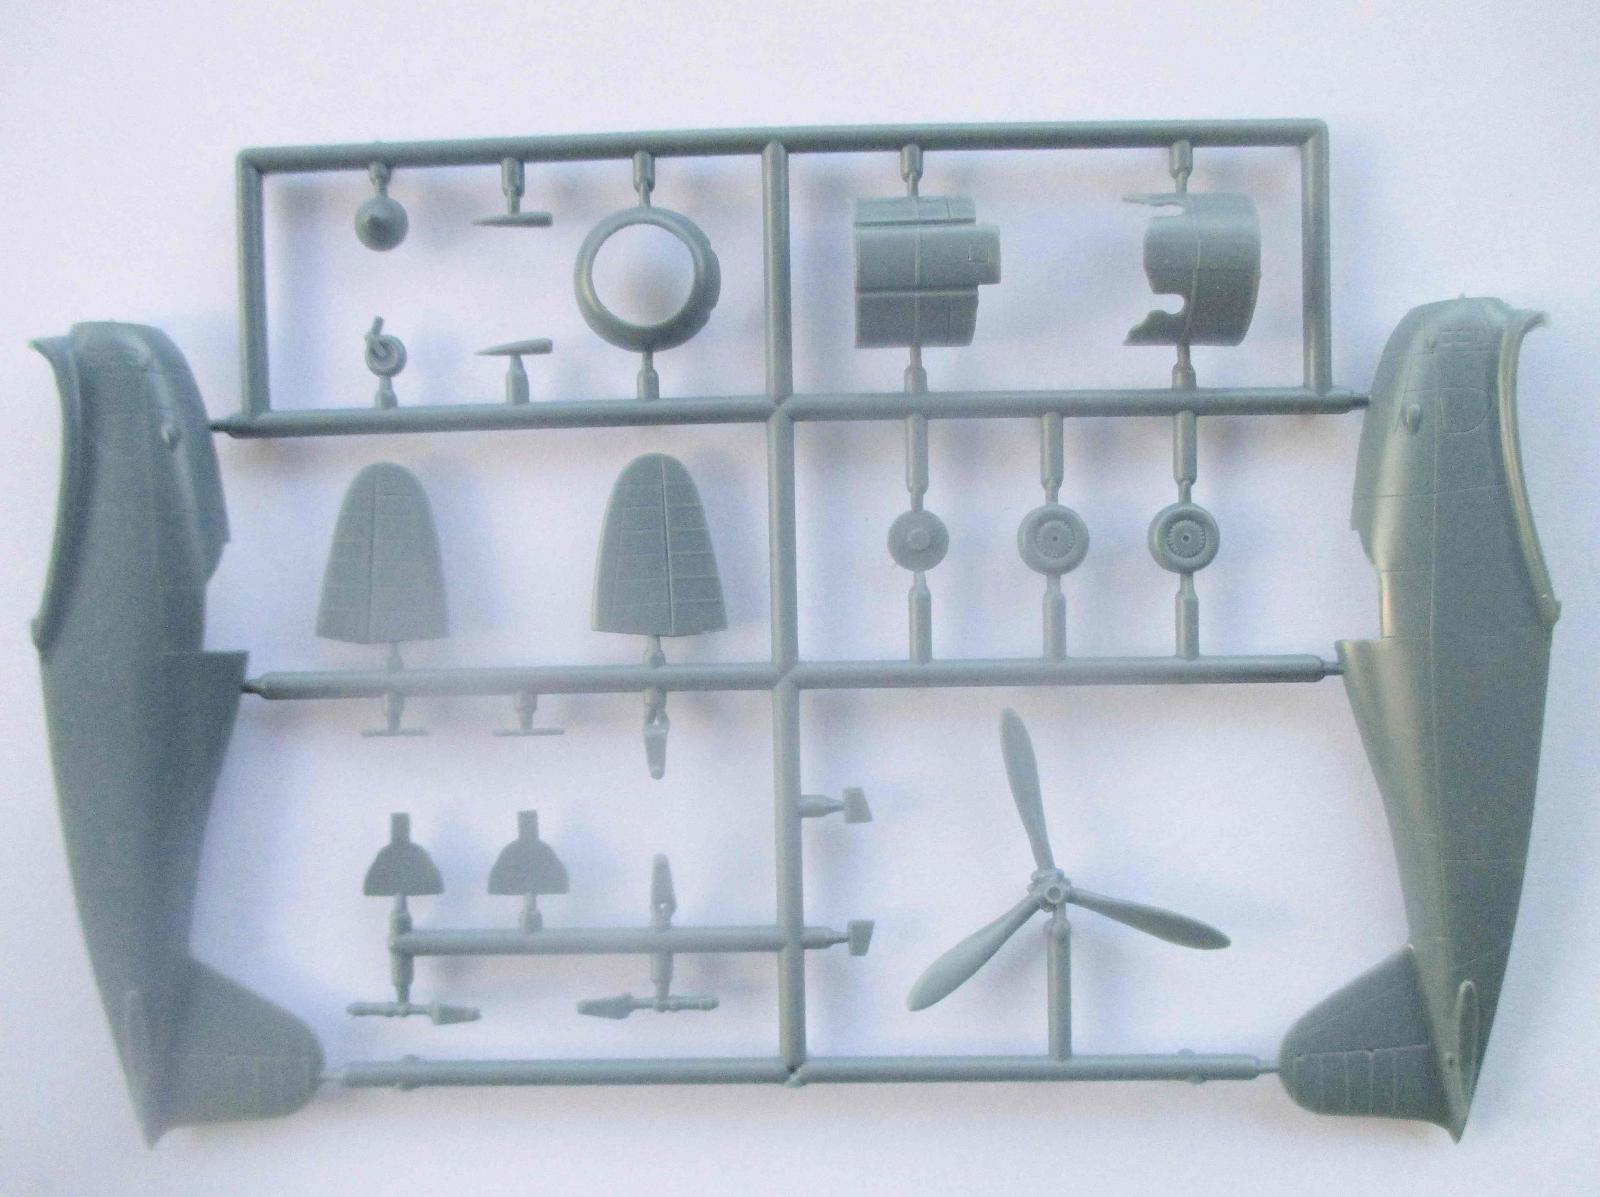
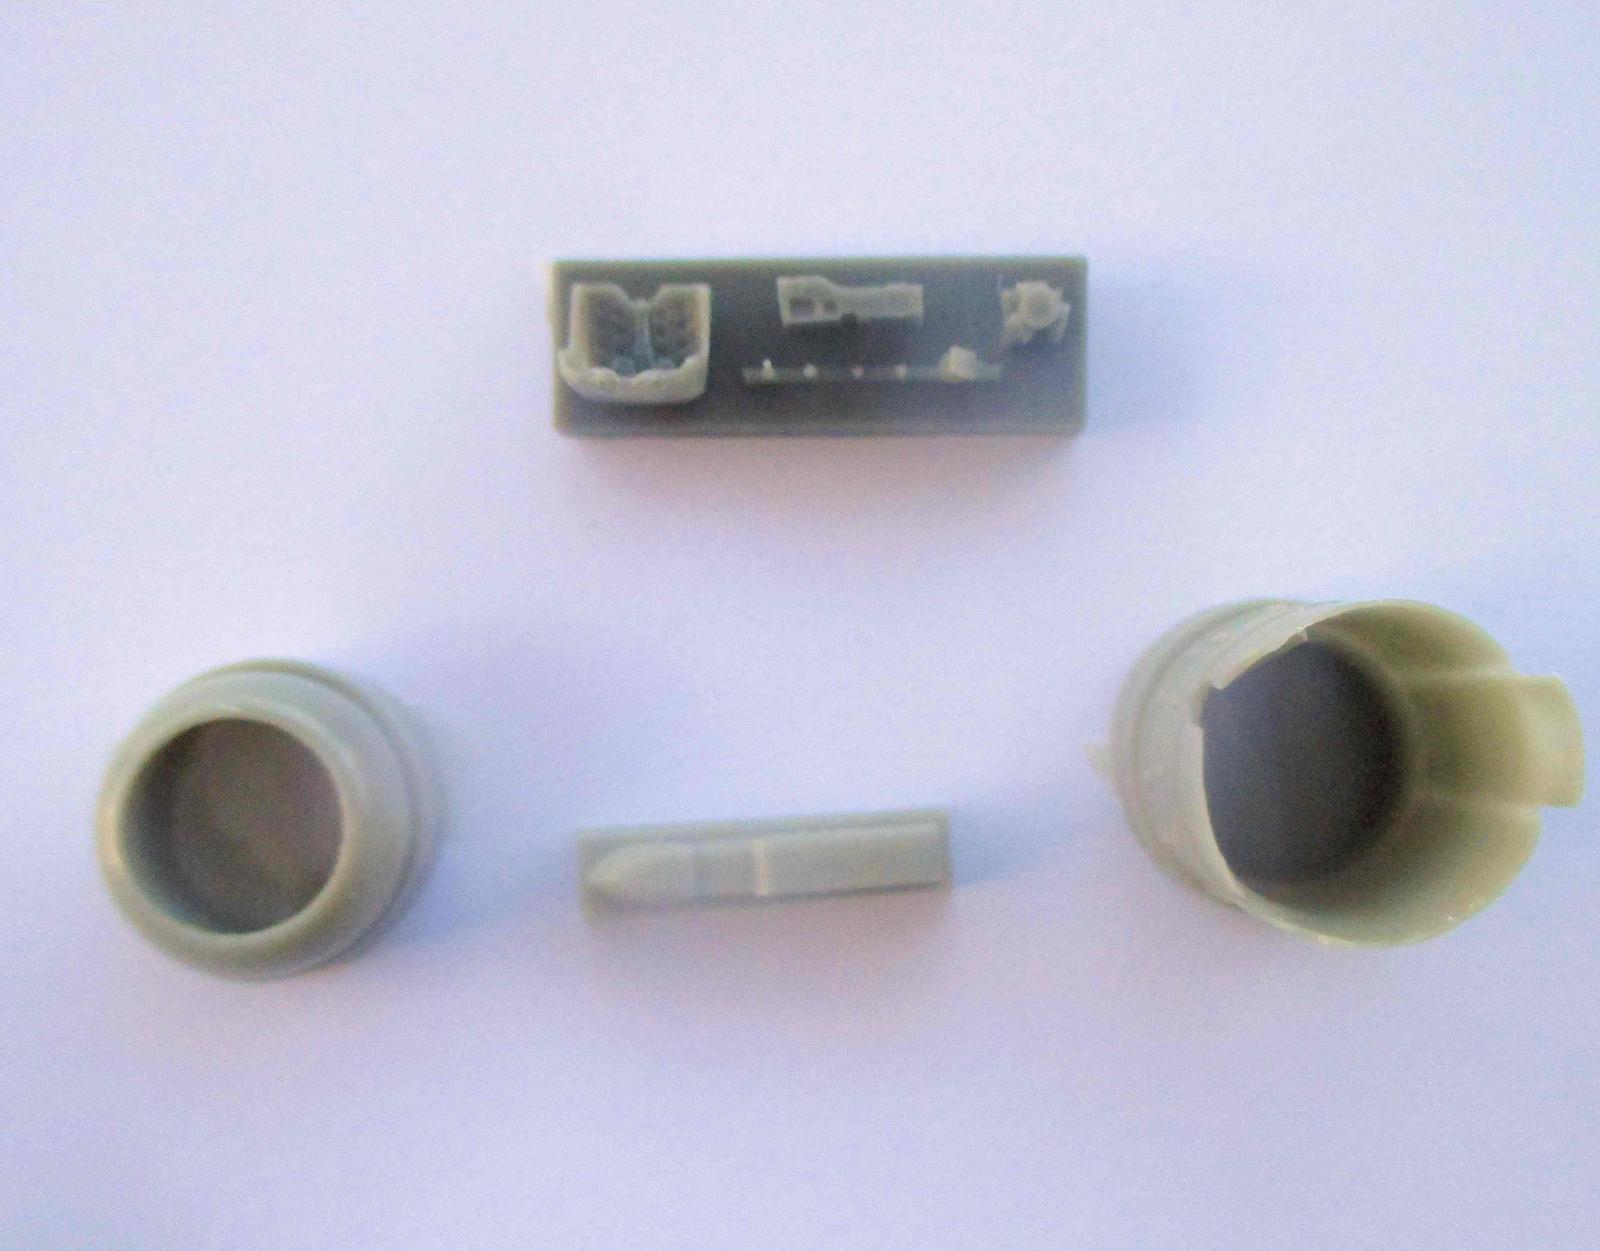
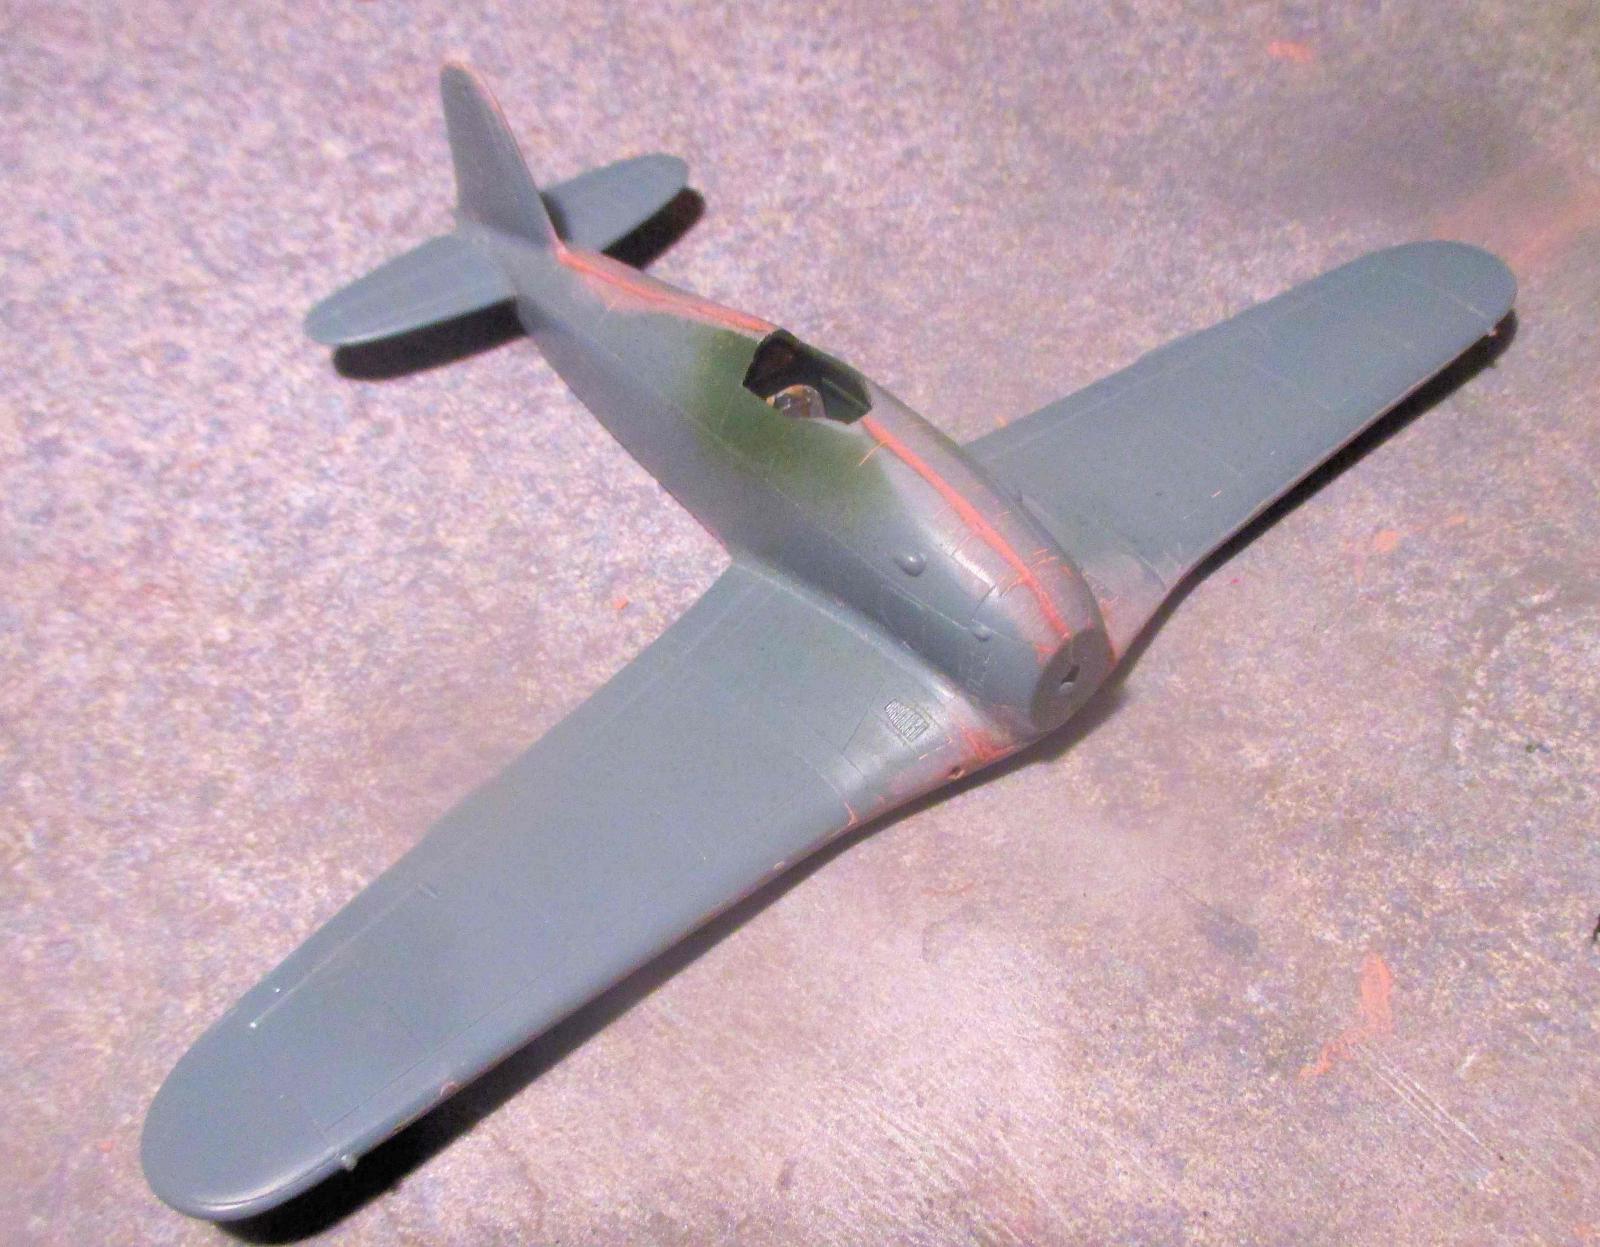
Most serious 1/72 scale modelers are familiar with the old Airfix issue of the kit, dating back into the sixties. It has some problems, especially in the engine cowling area, but Burns’s Plastic Aircraft of the Twentieth Century, lists no less than seven 1/72 scale kits, none of which I have heard of. The Airfix kit is somewhat useful, and I have built a number of them, usually replacing the engine cowling and propeller with parts from a Hasegawa A6M2 Zero fighter. But this kit is a little more up to date, It consists of 37 grey plastic parts, 9 resin parts (including a second engine cowling), and five clear parts. The exterior detail is good, the aircraft interior is better detailed, and the resin seat is exceptional. And the parts actually fit. Wow!
Assembly
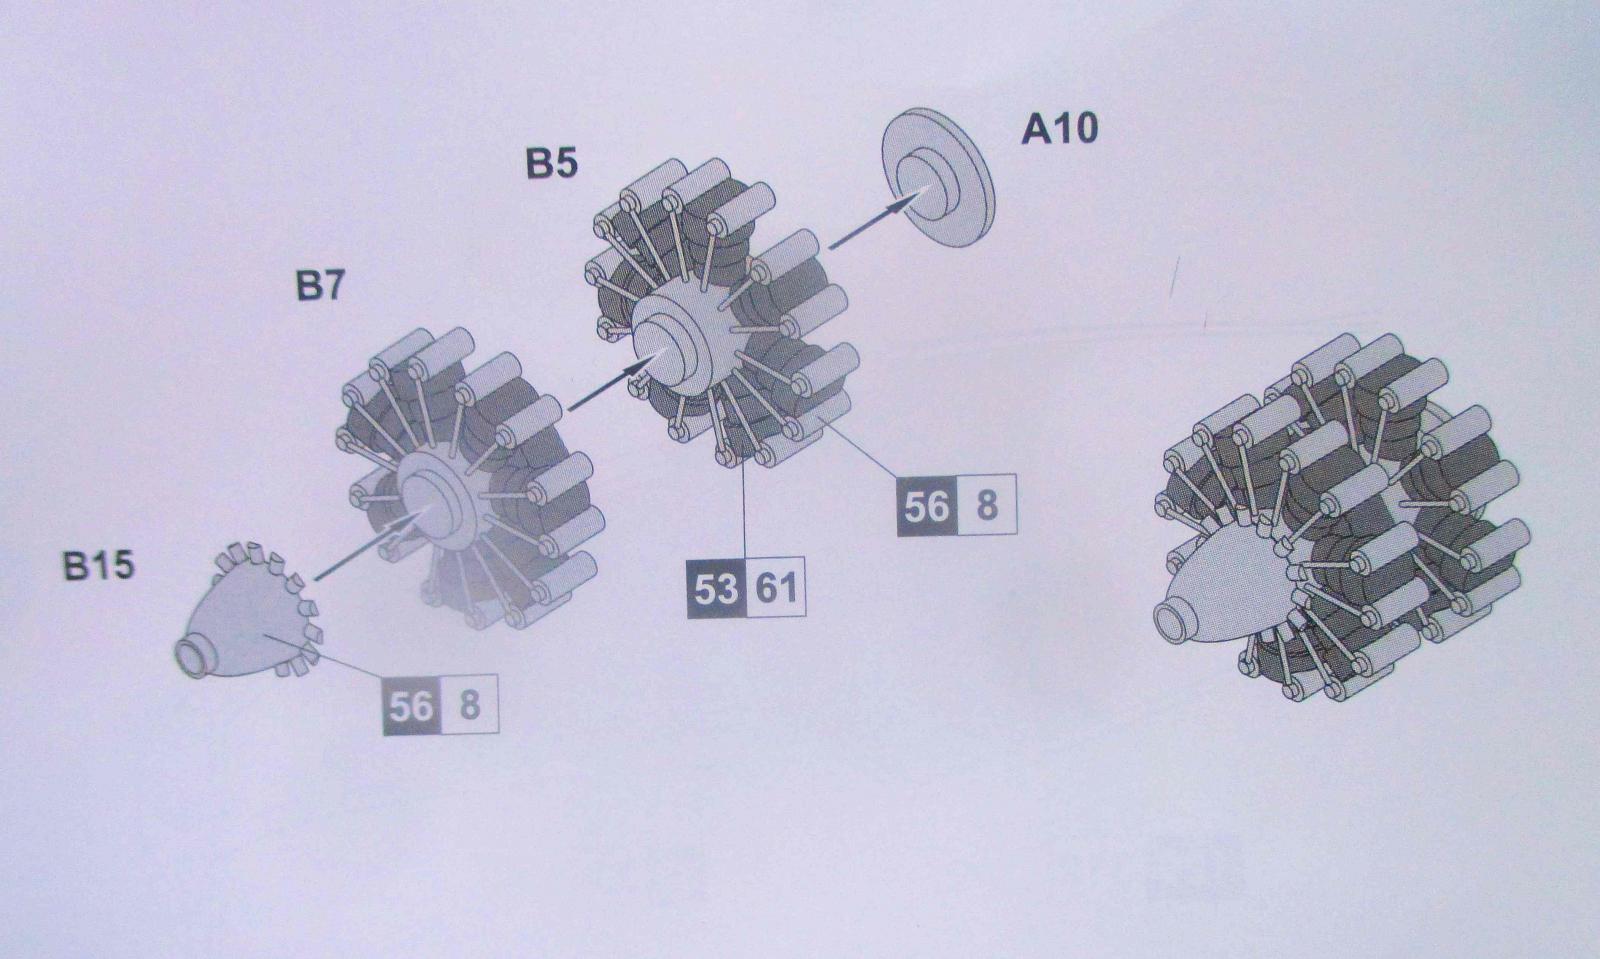
The kit goes together smoothly, and most parts fit together perfectly. The cockpit is easy, and the fuselage halves, while not having any mounting pegs, fit together easily. The wings, which are molded in three sections, also are easy to assemble, but I needed to file off the ends of the wing roots slightly to get them to fit. The horizontal tail surfaces butt fit to the rear fuselage, which worked out OK but I would have preferred some kind of tab mounting. The engine is cast in three parts, front , rear, and a front crankcase cover, but the cowling give you a choice. There is a plastic unit made up of two side units and a front ring, and also a resin unit consisting of the complete cowling, along with a nose ring. Both fit, and have considerable detail. I used the resin unit on the Fly kit. The exhaust stacks protrude out of the bottom of the cowling, and one of these escaped during assembly, so I replaced them with round plastic rod cut to size. The propeller fits into the front section of the engine.
The landing gear units were a bit tricky to assemble, being cast in two pieces, with the wheels being glued in before the smaller sections were attached. Airfix’s gear legs were in one piece, and the wheels just popped in easily, one area where the old Airfix kit was still superior. The gear doors were installed after the struts were attached to the landing gear wells, and went on easily enough. The tail wheel just pops into place, after, of course, a hole was drilled for it. There is a small venturi tube under the center section, but again, all that is needed is a drill and it snaps into place easily.
A few details will finish the job. The airplane had TWO airspeed indicators, so there is a pitot tube on each wingtip. I made these from very small plastic rod. The fuselage mounted 12.7 mm machine gun barrels fit into place easily, and the final detail is the cockpit windshield and side windows. Not included in the kit is the small low frequency radio antenna, which runs from behind the pilot’s headrest to the forward section of the vertical fin. A short strip of wire then finishes the job.
Painting and Finishing
Obviously, the model has to be painted. I used a medium brown base color above and Italian pale grey below. I painted the white fuselage band and then masked it off for the camouflage colors. I did not assemble the engine cowling until after the whole airframe was painted. Small details, such as the landing gear and propeller, were painted in advance. After a coat of Testor’s Glosscote, I applied the decals as per instructions. I must say I was impressed with the results.
Recommendations
Having built an Airfix Fiat G.50 alongside this model, I must say that the new Fly kit is a superior model, partially, of course, because of the age of the Airfix kit, which dates back to the sixties. Although the basic airframes are very similar, the Fly kit has the better interior, engine cowling, propellers, and other details. The decals are especially good, and I think that anyone wanting to model this aircraft should certainly get as many as you need. There are quite a few interesting color schemes for this airplane. I enjoyed the build, and plan to get several more in the next few years. Highly recommended.
Thanks to Phil Peterson, John Noack, and Jiri Valek, of Fly, cz., for the review sample.


Comments
Add new comment
This site is protected by reCAPTCHA and the Google Privacy Policy and Terms of Service apply.
Similar Reviews