
RQ-4B Global Hawk
Northrop Grumman’s RQ-4B Global Hawk was conceived in the early 1990’s as part of the Defense Advanced Research Project Agency’s initiative to develop and field advanced concept technology demonstrator (ACTD) unmanned aerospace vehicles (UAVs). By the late 1990’s ACTD versions of the Global Hawk were demonstrating the viability of the concept of High Altitude Endurance (HAE) UAVs in some reconnaissance roles similar to those held by the legendary but venerable U-2. As the United States found itself fully engaged in the War on Terror in 2001, the need for additional HAE reccee assets became acute, and the ACTD design was rapidly advanced into the operational RQ-4A embodiment. As the merits of the RQ-4 crystallized in combat operations, a larger and more capable RQ-4B version was developed to assume even more of the roles traditionally shouldered by the U-2.
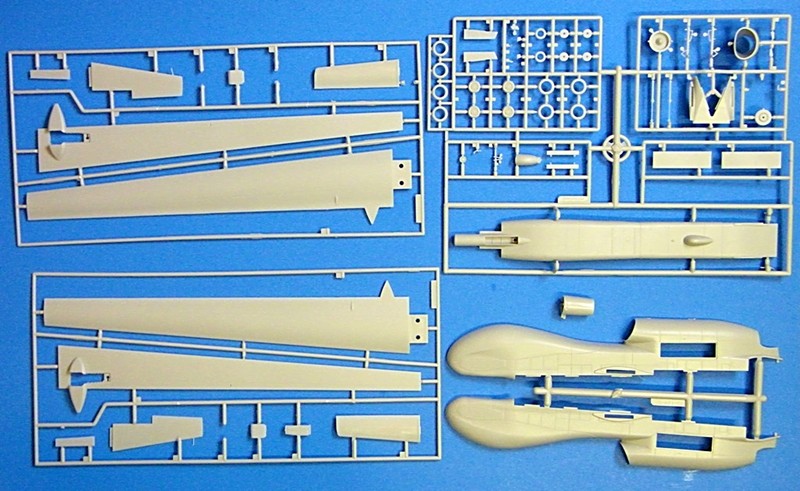
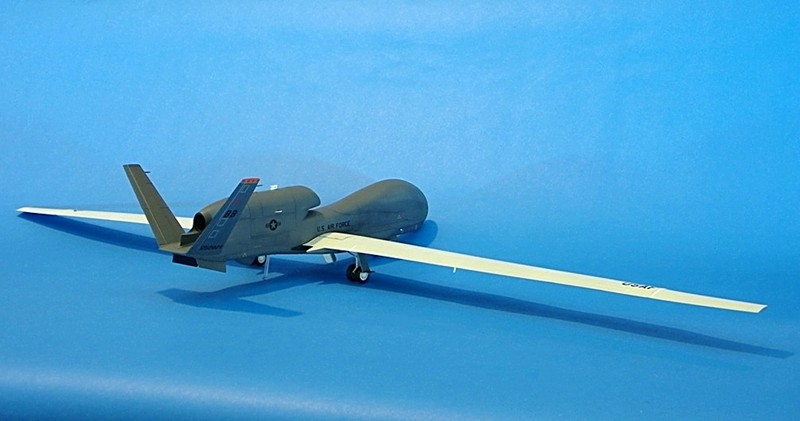
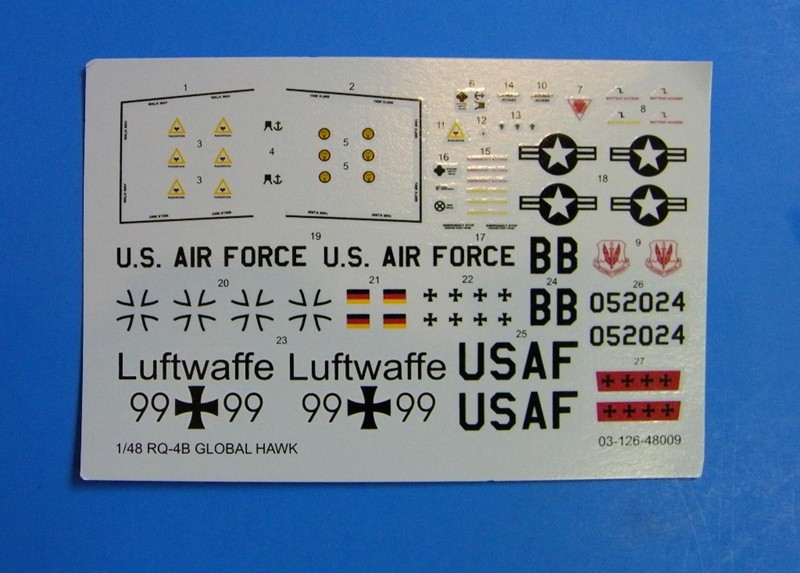
Skunkmodels Workshop presents a beautiful rendition of the Block 20 RQ-4B, and the first injection-molded offering of the Global Hawk in 1/48 scale. The deceivingly diminutive box contains 62 parts crisply molded in soft gray plastic. Recessed detail is crisp, although perhaps a tad heavy, and accurate when compared against reference photos. Decals for the US Air Force’s 12th Reconnaissance Squadron, of the 99th Recon Wing, and a German Luftwaffe “Euro Hawk” are included. No clear parts for this one, since there’s no cockpit, but it would’ve been nice to have a couple for landing and navigation lights.
After doing a bit of research, however, it appears that although provided with Luftwaffe “Euro Hawk” markings, the kit lacks the supplemental mission equipment wing pods seen in on-line videos and photos of the German version.
With only 62 parts and no cockpit, assembly was blindingly quick and relatively incident-free. The most time was spent pre-painting the intake blades and exhaust can pieces prior to cementing the fuselage halves together. A bit of putty was needed to fill the centerline seam in the exhaust deflector between the exhaust nozzle and the empennage, as well as around the edges of the empennage base where it attached to the fuselage. A couple dabs of putty were also needed to remedy a couple of small sink marks in the empennage base. Landing gear and wheel well detail is crisp and adequate for an out-of-box build, but was lacking the tie rods between the main gear doors and the struts.
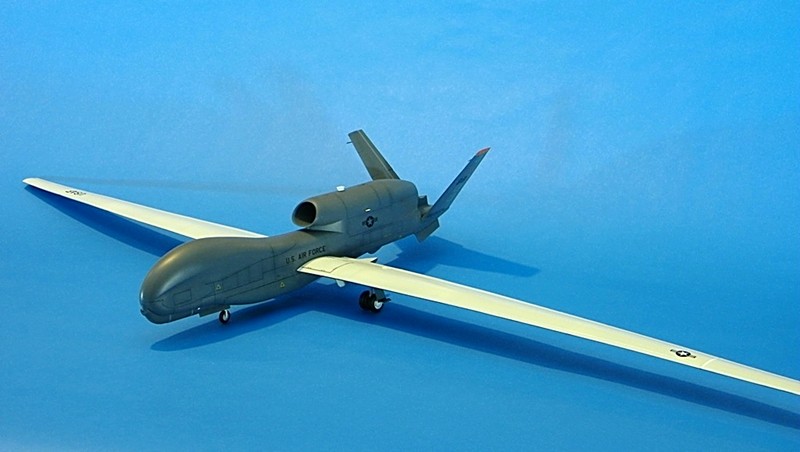
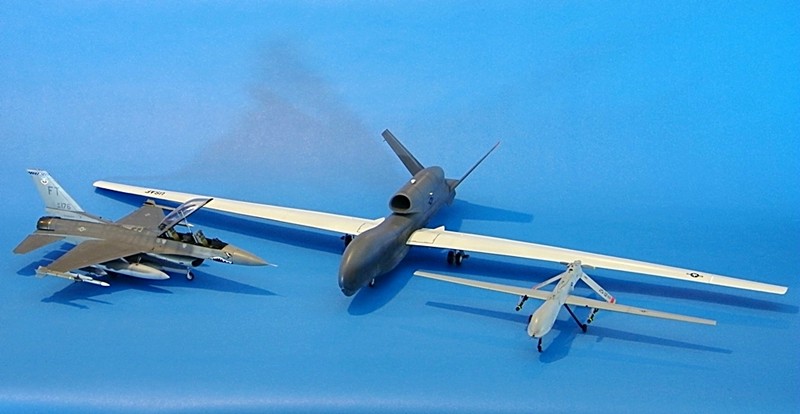
My biggest challenge was handling the beast once wings were attached. We’re talking about a wingspan of roughly 3 feet on a workbench about 5 feet wide – with lots of clutter with no other home!
One little surprise I should’ve picked up on after priming was a raised ridge on the SATCOM radome on the top of the forward fuselage. It appears the manufacturer added a little extra material along the fuselage seam to allow for some sanding of the seam without “flat-spotting” the convex contour. I apparently exercised too much care to avoid flat-spotting, and ended up with a ridge that screamed at me once the Gunship Gray was applied. Needless to say, a “redo” of seam sanding was in order, but was quick and painless.
Another little surprise came after attaching the landing gear and flipping the model upright – “kerplop” went the Hawk on its tail! Obviously, my crude “weight and balance” check prior to cementing the fuselage parts together was a dismal failure. A couple dozen BB’s or some other type of weight in the nose would have been sufficient to avoid this embarrassing situation.
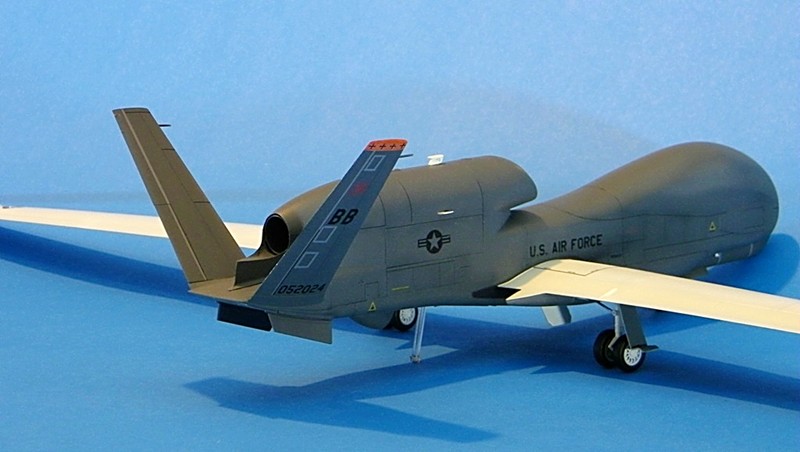
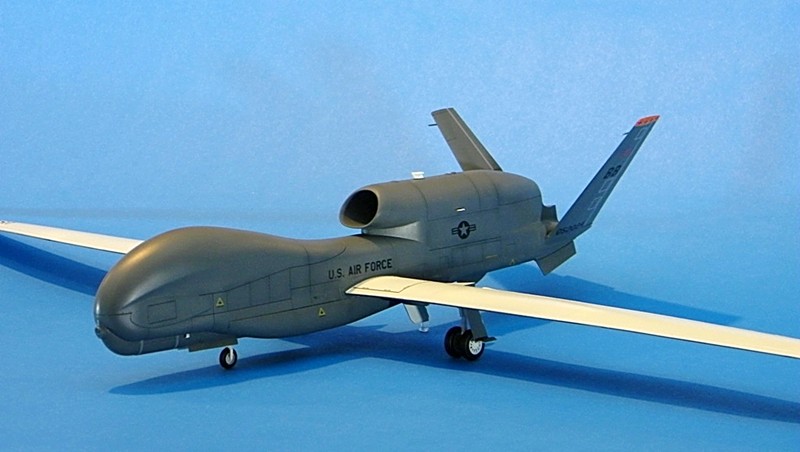
Color scheme is simple and uninspiring – white wing uppers and landing gear, and everything else Gunship Gray. I put down a Testors enamel primer, overcoated with their Acryl Gloss White and Gunship Gray, and used Future for the decal base.
Decals are crisply printed in register and respond well to the Microscale System. The only disappointment was some inaccuracy in the markings for the 12RS. The “BB” tail codes are too narrow, and the tail flashes are printed in red, and not in the 12RS’ signature orange (as alumni, I’m particularly sensitive to this subtlety). I chose to scan the decals, recolor, and reprint to get the 12th’s signature orange.
All said, though, Skunkmodels has winner in their portfolio. I can easily recommend this kit to modelers of all skill levels, especially those looking to add to their recce and present-day military aircraft collections. Looking forward to many more unique offerings from Skunkmodels!
Thanks to Hobbylink Japan for the sample kit.

Comments
Add new comment
This site is protected by reCAPTCHA and the Google Privacy Policy and Terms of Service apply.
Similar Reviews