
Mr. Speed Funny Car
AMT’s Mr. Speed Funny Car includes parts to build a 1953 Studebaker funny car rear-engined dragster. This is not the same kit as the 2014 AMT Studebaker kit with “Mr. Speed” box-art. That earlier kit had a stock chassis included but no funny-car chassis. This new kit has only a funny-car chassis and can’t be built as a stock Studebaker. The box-art for the kit has no text over the image, so you could cut it out and display it as artwork. All the parts and decals are bagged to prevent loss or damage. The clear and chrome parts are bagged separately. The chrome parts have tissue paper between the trees to prevent scratching. There are a lot of optional and unused parts that you can save for use on other projects. The clear parts are provided in both clear and red versions and are sized for a stock roof or chopped roof. For tires, the builder has the option of assembling hard plastic parts or single-piece soft vinyl tires. The hard plastic tires have “Goodyear” branding molded on the sidewalls. The vinyl tires have pad-printed “Racemaster” logos and data. Decals are well printed and in good register and offer optional markings if you don’t want to match the box-art. There are a lot of sponsor decals that you can save for other builds.
Be aware that this is a “vintage” kit. AMT first issued this kit in 1967. The design and precision of this kit reflect the standards of that time. There are no part numbers listed in the instructions. Sprue gates are often large, even on small parts. Although the body molding of this kit is in excellent shape, some of the other parts show signs of almost 60 years of wear and tear of the molds. Expect to do a fair amount of test-fitting and parts clean-up.
Assembly 1: The Motor
The instructions begin with the assembly of the motor. There are many chrome parts used on the motor. Scrape the mating surfaces of the chrome parts even if you are using super-glue for assembly. The chrome plating and underlying varnish are thick enough to affect the fit. The air scoop had some flash and mold-parting lines that couldn’t be cleaned up without removing a lot of the chrome plating. I primed and painted this part. The locating hole for the magneto was too far forward. I moved the magneto back a little, so it didn’t press against the blower. The headers are shown in step one during engine assembly. It is easy to miss the note that you should not install them until after the engine is installed in the chassis. The instructions indicate that you should cut the headers to a length of 1”. I recommend waiting until the engine is installed before deciding how long your headers should be. The instructions indicate that the fuel lines should be on the chrome tree, but they are actually molded in white plastic.
Assembly 2: Wheels and Tires
If you decide to use the hard plastic “Goodyear” tires, The rear wheel inners are a tight fit. You’ll need to remove the chrome and smooth the rough spots. If you use the soft vinyl tires you can use the wheel parts as-is.
Assembly 3: Chassis Initial Assembly
The chassis parts require a lot of clean-up of mold-parting lines and surface defects. The chassis lower sections and sides are an area of this kit where the age of the molds is apparent. Pits and scratches in the molds create many raised imperfections on the surface of the parts. When attaching the chassis sides to the chassis lower section there are gaps along the lower edges. I trimmed the sockets for the locating pins flush with the surface of the lower chassis for a better fit. I could not find the part for the throttle pedal. I don’t know if it was missing from the kit or if I lost it. I made a replacement from styrene strip and a short piece of wire.
Assembly 4: Chassis Completion
When installing the motor, I found that the valve covers interfered with top of the frame just behind driver’s seat. I removed a little material from the inner surface of the frame for a better fit. The bottom bracket for the motor has a locating pin that fits into a hole in the oil pan. I found that after installing the motor the bracket was bent forward. In retrospect it would have been better to cut the pin off, fill the hole in the oil pan, and just let the motor rest on top of the bracket. The chrome plating on the front wheels makes the center holes too small to fit over the spindles. I enlarged the holes with a 1.5mm drill bit (1/16” is the closest English size). The locating pins for the fuel tank brackets did not line up with the locating holes on the chassis. This defect will be difficult to see on the finished model. The fuel tank parts are plated with chrome but cleaning up the parts and filling the seam will destroy most of the plating. I primed and painted my fuel tank. After test fitting the body to the chassis, I found that the rear tires are too far apart to fit in the body (even after enlarging the rear wheel wells). I cut the enlarged ends off the rear axle and then deepened the holes with a 2.1mm drill bit to accept the pins on the rear hubs.
Assembly 5: Body and Final Assembly
The kit comes with a stock 1953 Studebaker body with all the stock badging and trim molded in place and a separate hood. The stock body is well molded and straight with no sink marks. There is a minor mold-parting line to clean up in the area of the rear roof pillars. Since I wanted a sleek look for my funny car, I shaved off the molded-on badging and windshield wipers and filled in the grooves around the hood, trunk, and doors. A custom front pan and grille-plugging Inserts are provided for smoothing the front end. The fit of these parts is not precise, expect to do some filling and sanding to get the front-end smooth.
The stock body includes a firewall and inner fender surfaces. If you leave the inner fenders in place, the inner fenders will sit on the tie rod when the body is in place. At this height, the hood would be above the eye-level of the driver. I cut out the inner fenders and firewall as these parts aren’t needed for a funny car. The kit includes an extra roof to make building the “chopped” roof option easier. The inside of the stock body has faint lines molded on the inner surfaces of the roof pillars to indicate where to cut to lower the roof. An advantage of having duplicates of the clear parts is that you can use one of the window parts as a brace to help support the pillars and roof as you test fit and assemble the new roof. I covered the spare window part with bare-metal foil to prevent accidentally gluing it to the body. Cleaning up the join at the rear roof pillar and restoring the window trim there will require careful work.
The instructions include paper templates to enlarge the rear wheel wells to fit the big drag slicks. The parachute packs have nice surface detail but have flat backsides. I rounded over the back edges and carved a curve to match the surface of the trunk. The mating surfaces of the upward projections of the custom rear bumper are not parallel. This results in a gap where the bumper meets the sides of the body. I removed material from the lower end of the inner surface until it was parallel to the outer edge. The lower part of the rear fenders curves inward a little too far so that the body is narrower than the bottom of the bumper. I temporarily installed a plastic rod to spread the bottom of the rear fenders while gluing the bumper on.
The body is attached to the chassis with hinges at the back so that the front can be lifted. The body pivots are a loose fit on the hinge pins. The instructions recommend holding them in place temporarily with tape while attaching the body. Instead, I glued an 18.5mm length of plastic rod between the pivots to hold them in place. No parts are provided to hold the body in the raised position. To get the stance I wanted, I glued blocks of plastic inside the fenders to rest on top of the front tires when the body is lowered. Once this kit is finished, the body doesn’t pivot high enough to get a good look at the motor. The body-chassis hinges seem fragile, picking the finished car up by the body would likely break the hinges. I recommend picking the car up by the wheels. If you take this model to a show, I’d recommend putting it on a base.
Conclusion
When finished, this kit makes a good-looking dragster. This is an old kit and provides a “vintage” building experience. While not up to modern standards of fit, many people enjoyed building kits like this back in the 1900s and many still do. One of the good things about Round 2 re-popping old kits like this is that it provides the modeler with a wide variety of subject matter from an interesting era of car culture. I wouldn’t wait for Tamiya to issue a Studebaker funny car anytime soon. I’d like to thank Round 2 and IPMS/USA for providing this kit to me for review.
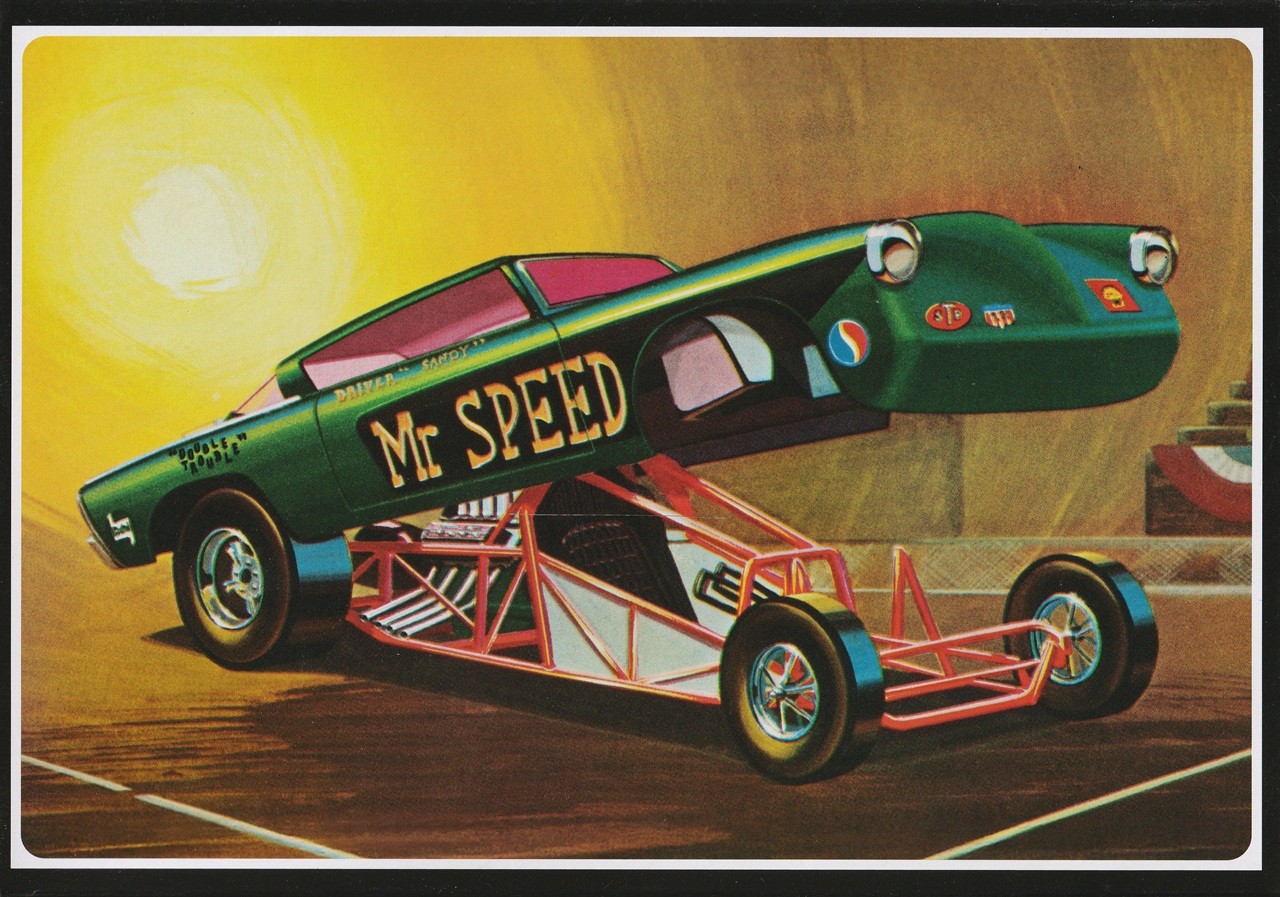
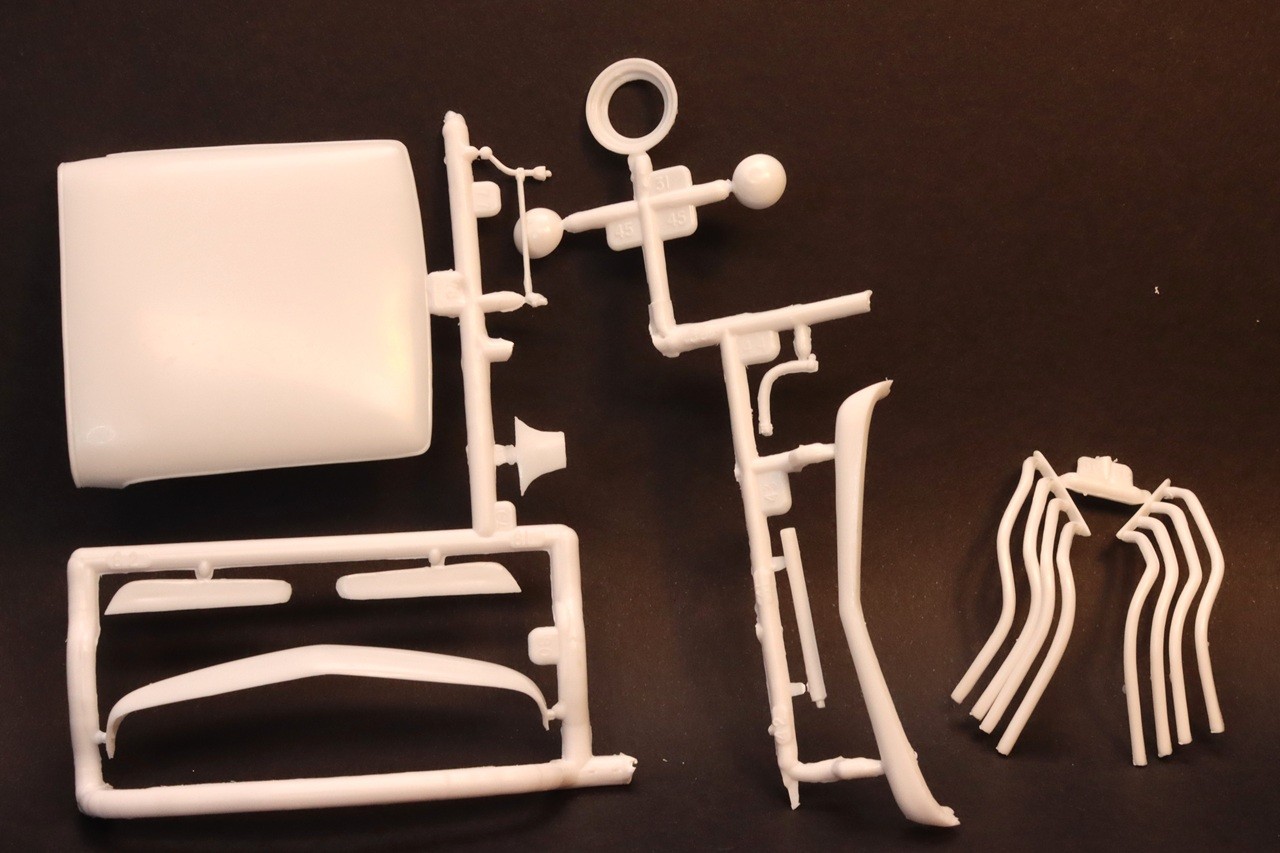
Parts Image 1
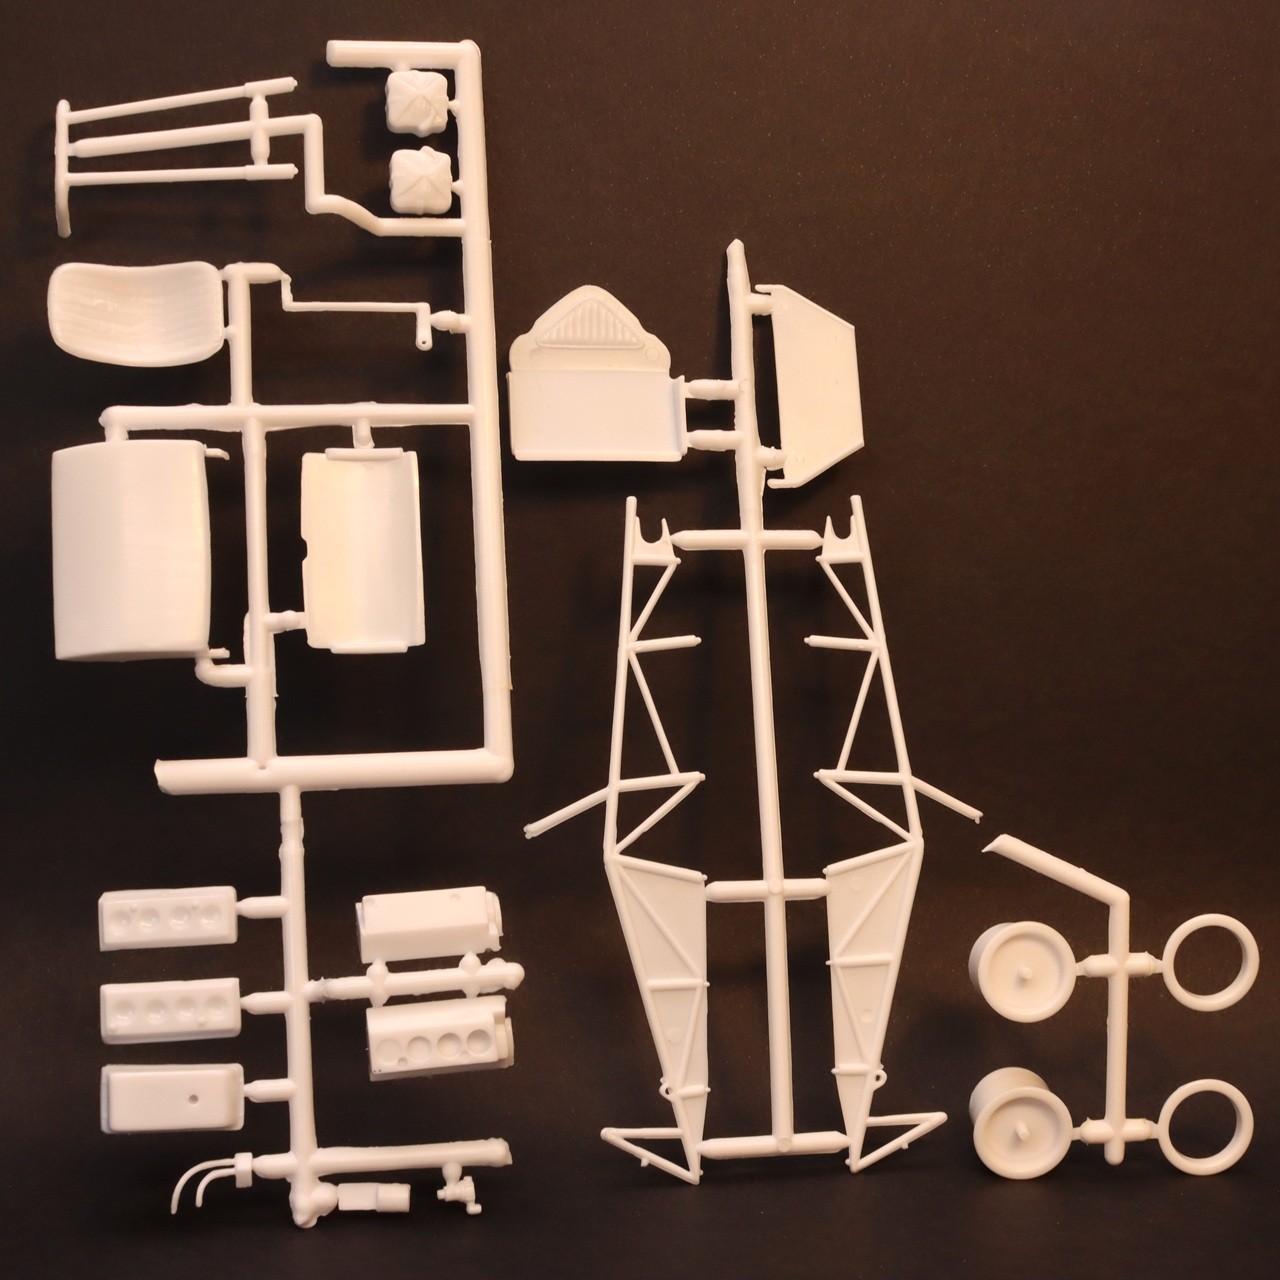
Parts Image 2
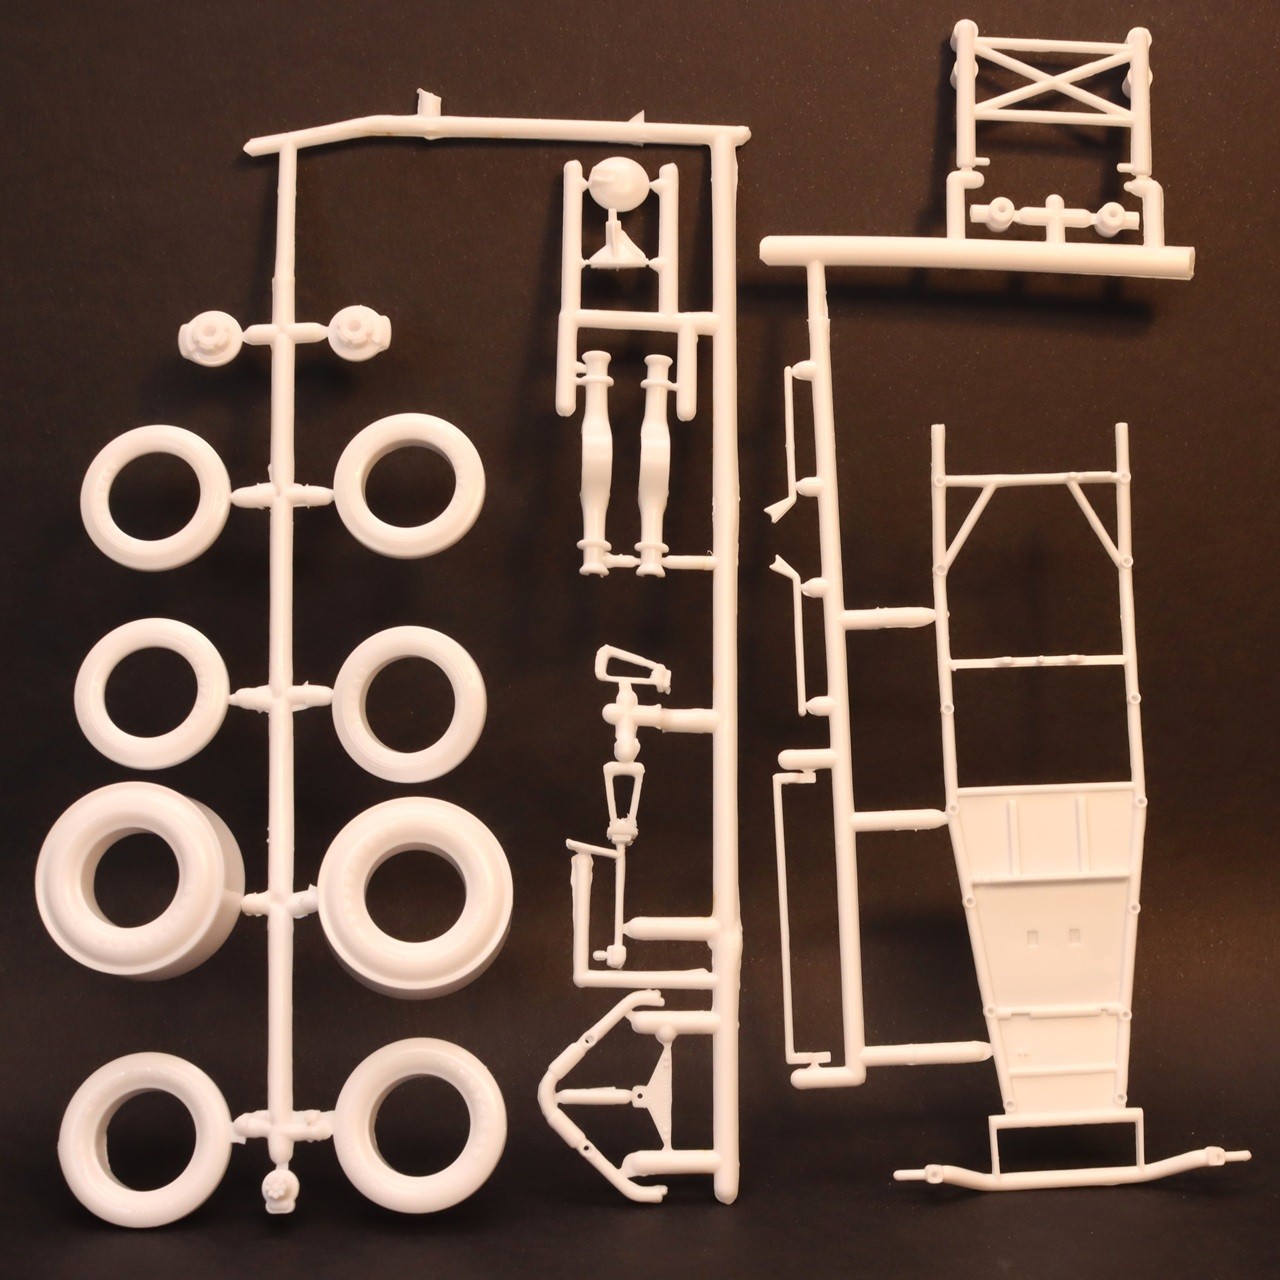
Parts Image 3
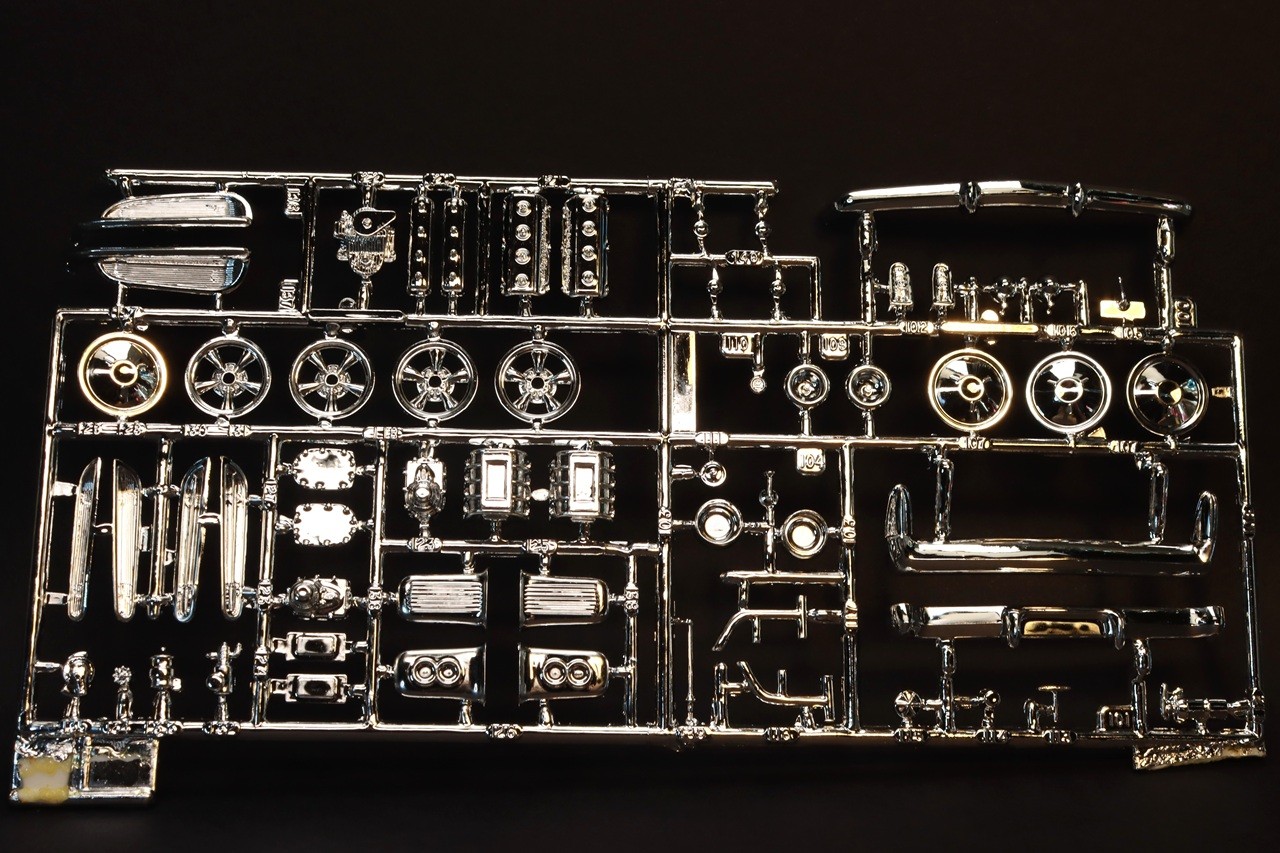
Chrome Parts Image 1
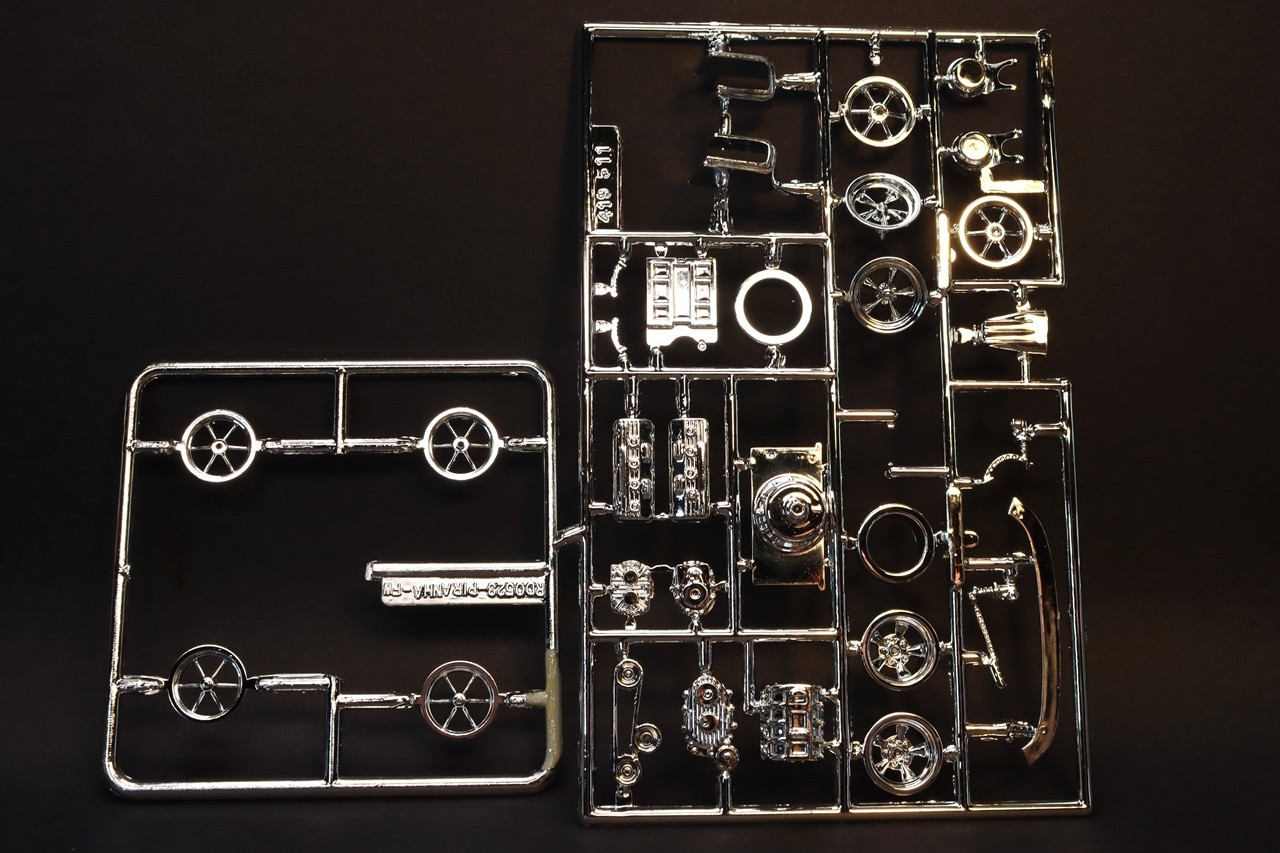
Chrome Parts Image 2
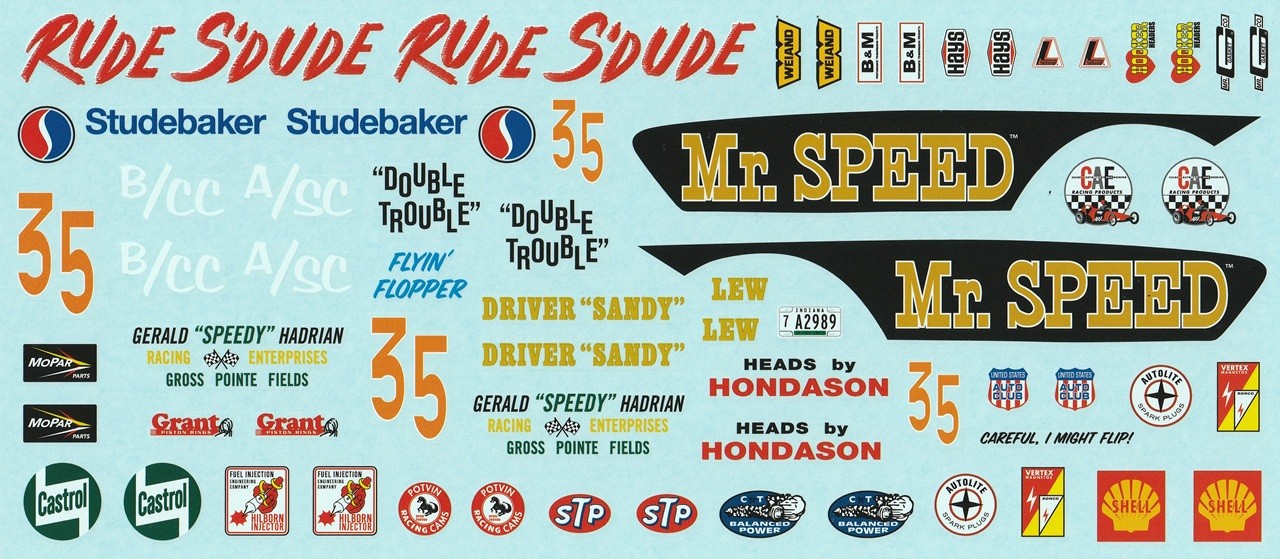
Decals
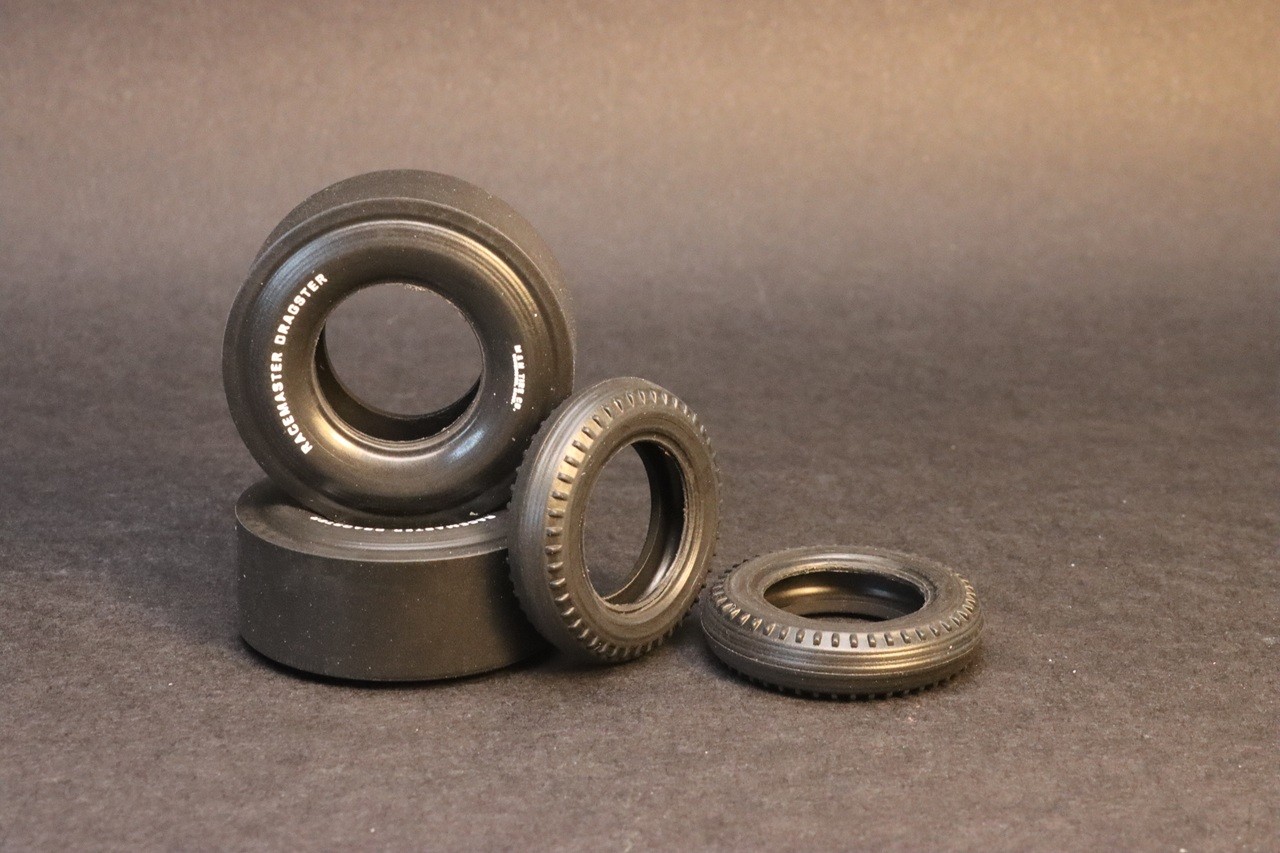
Vinyl Tires
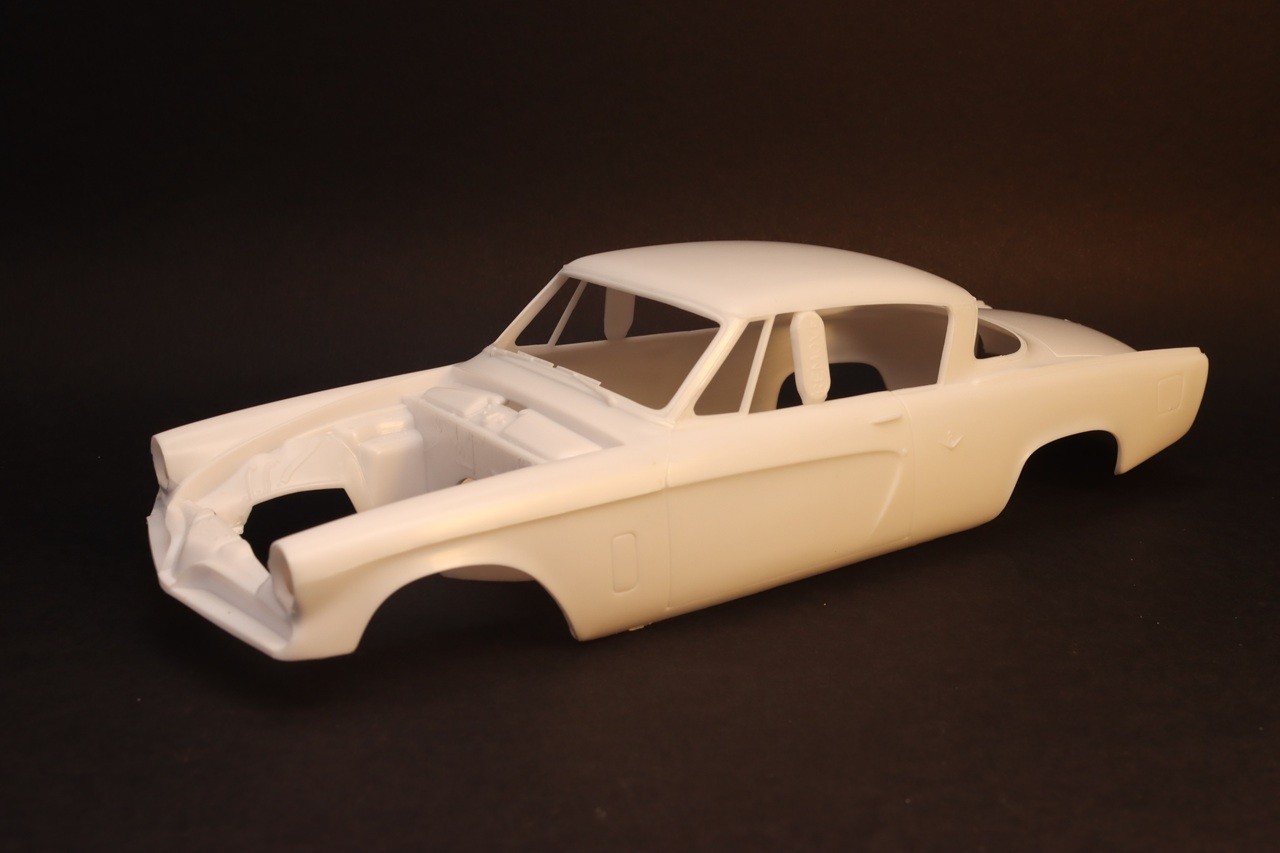
Stock Body
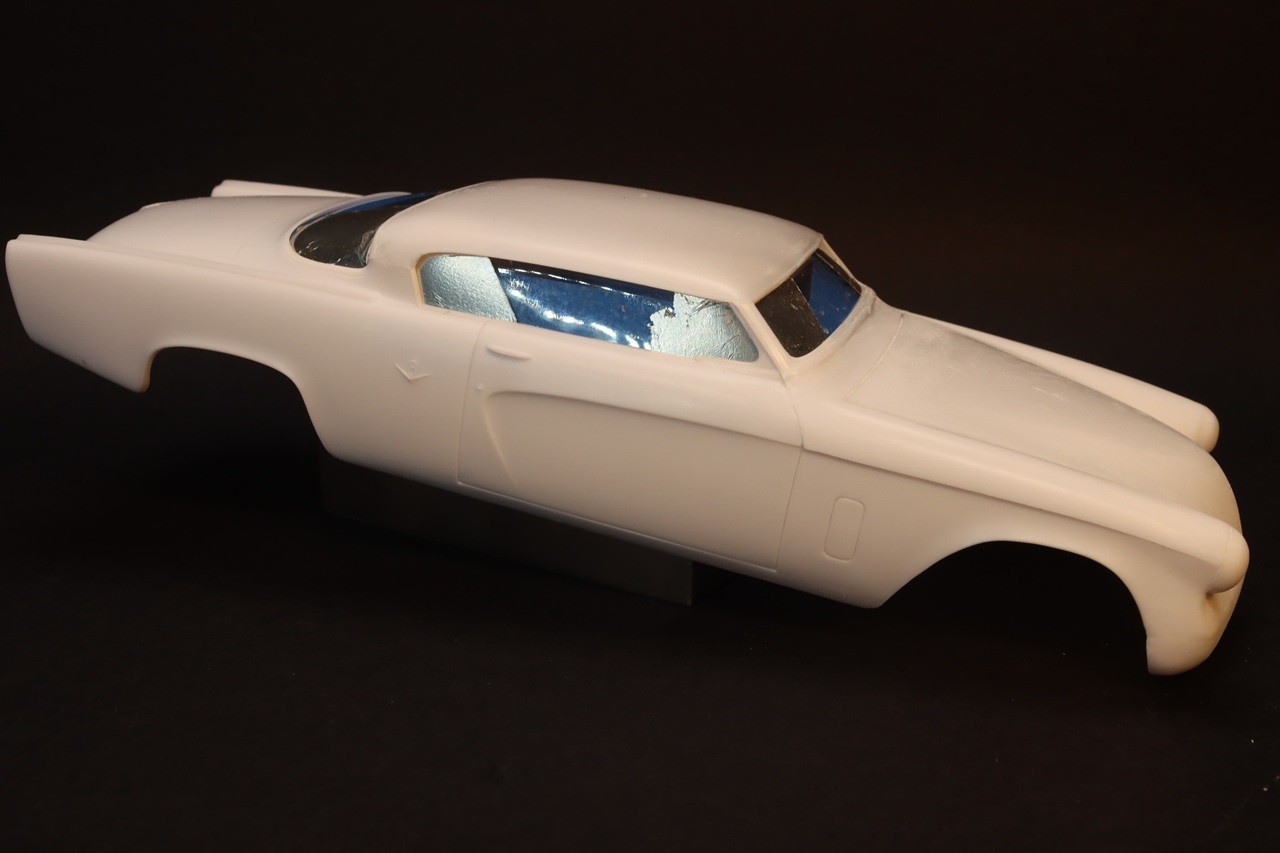
Roof Chopped
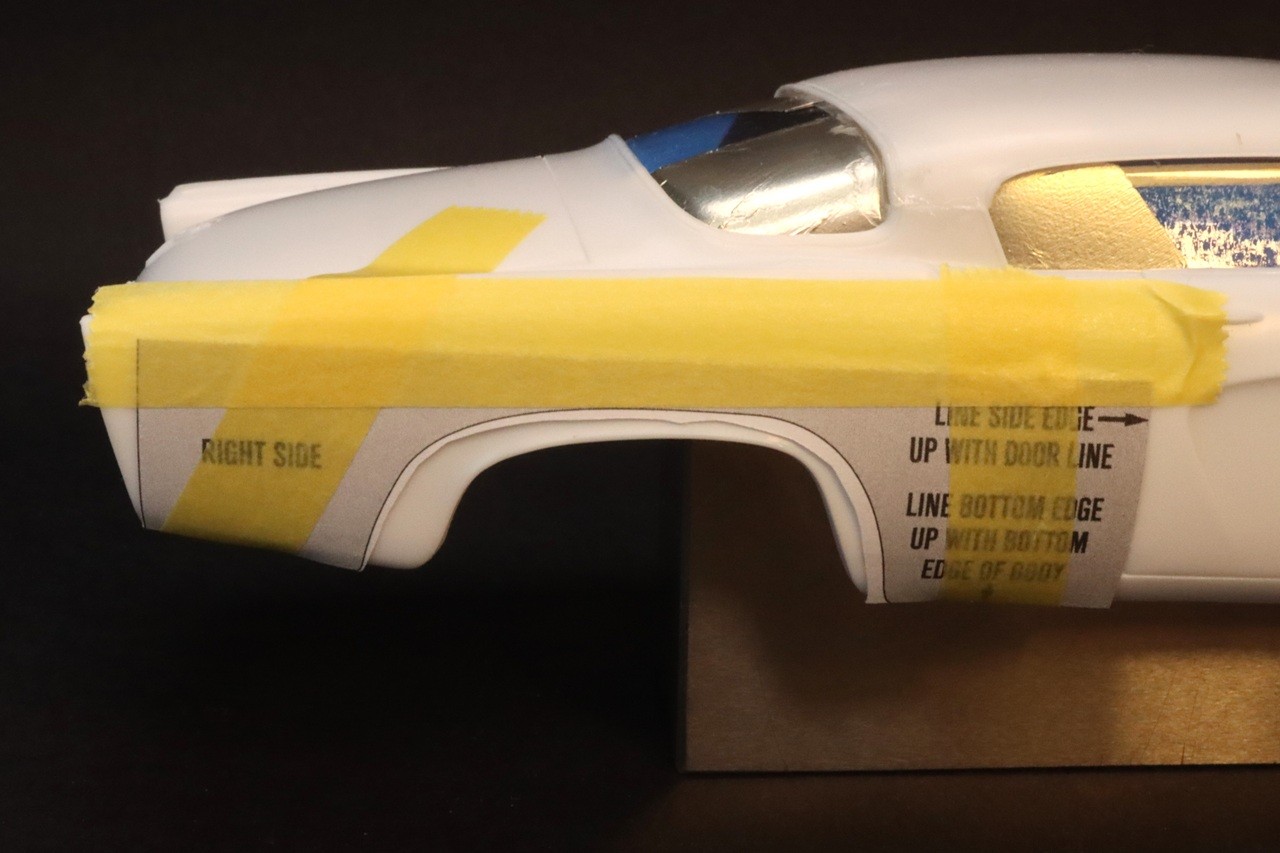
Fender Template
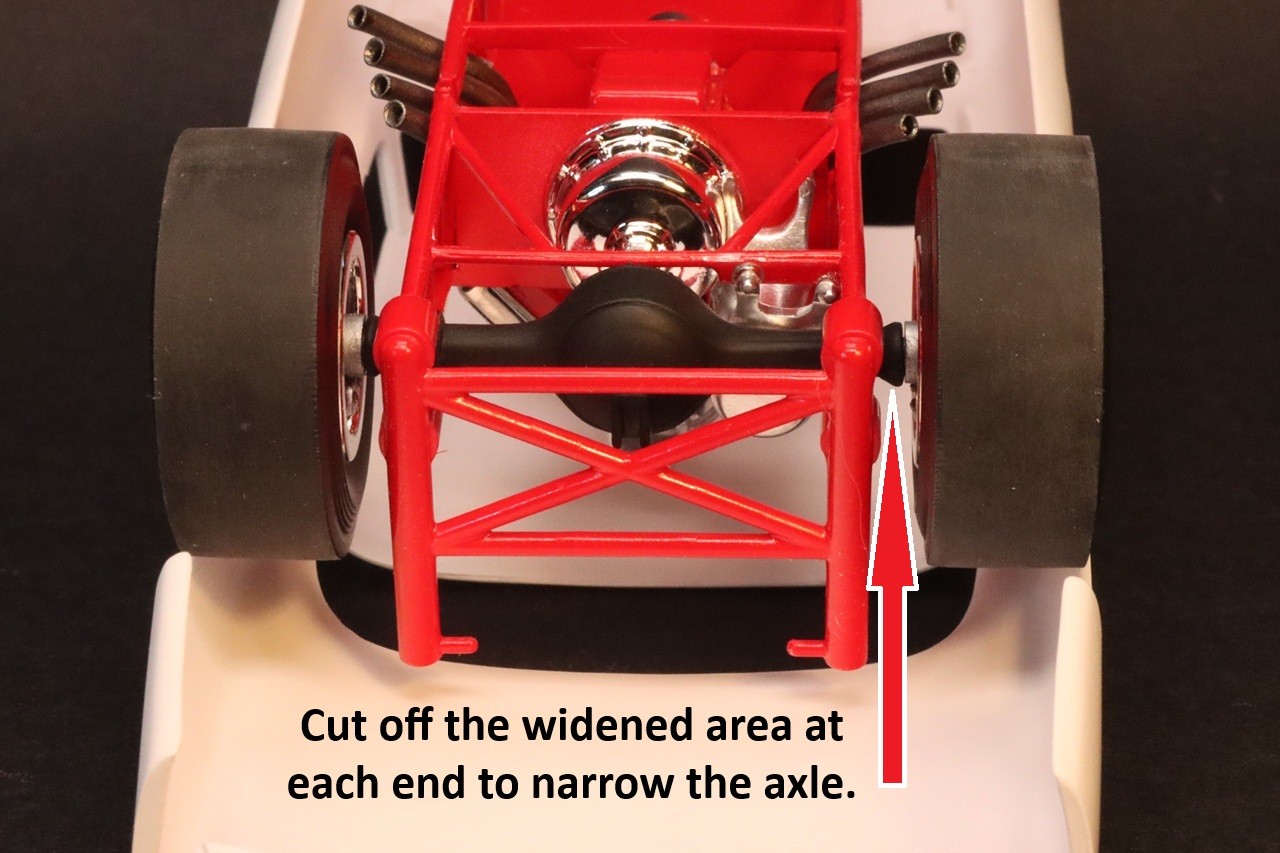
Rear Axle Too Wide
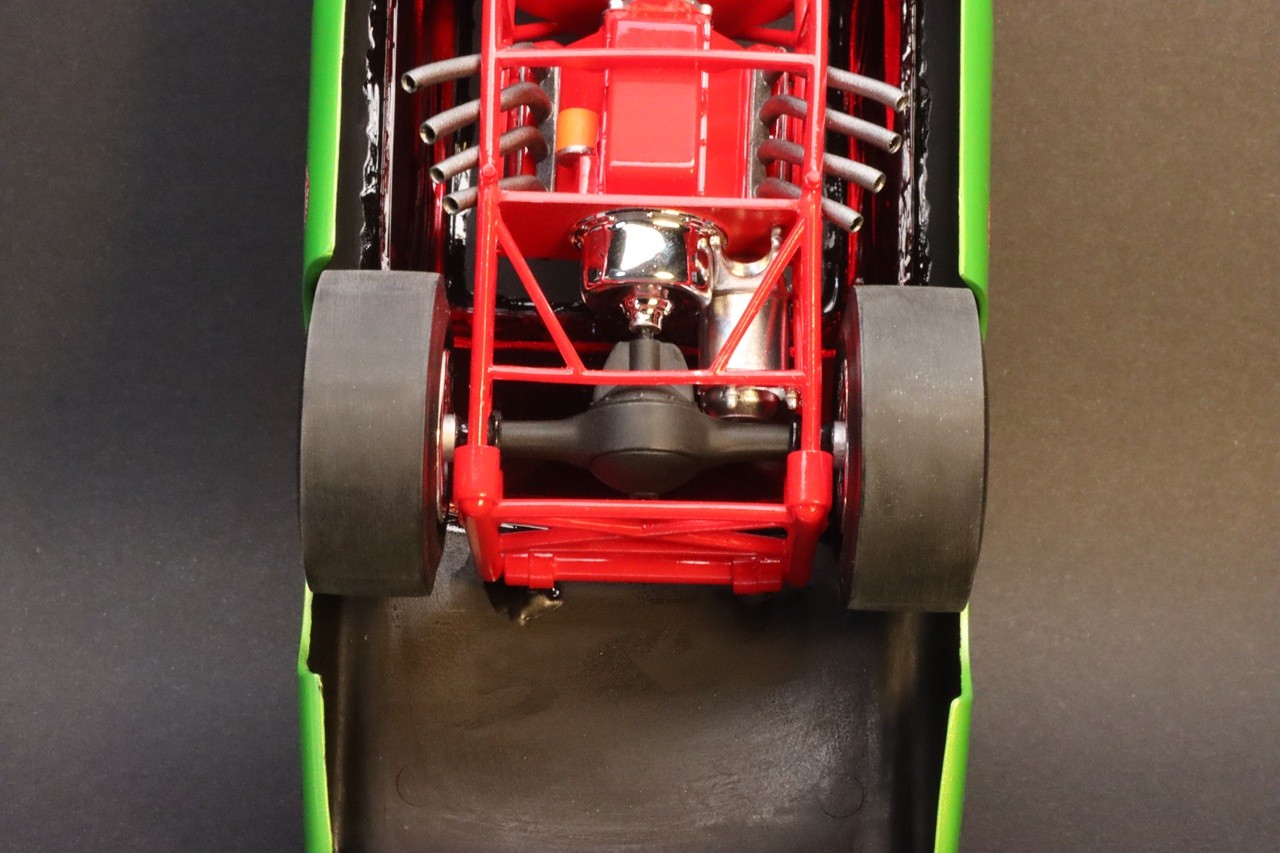
Axle Narrowed
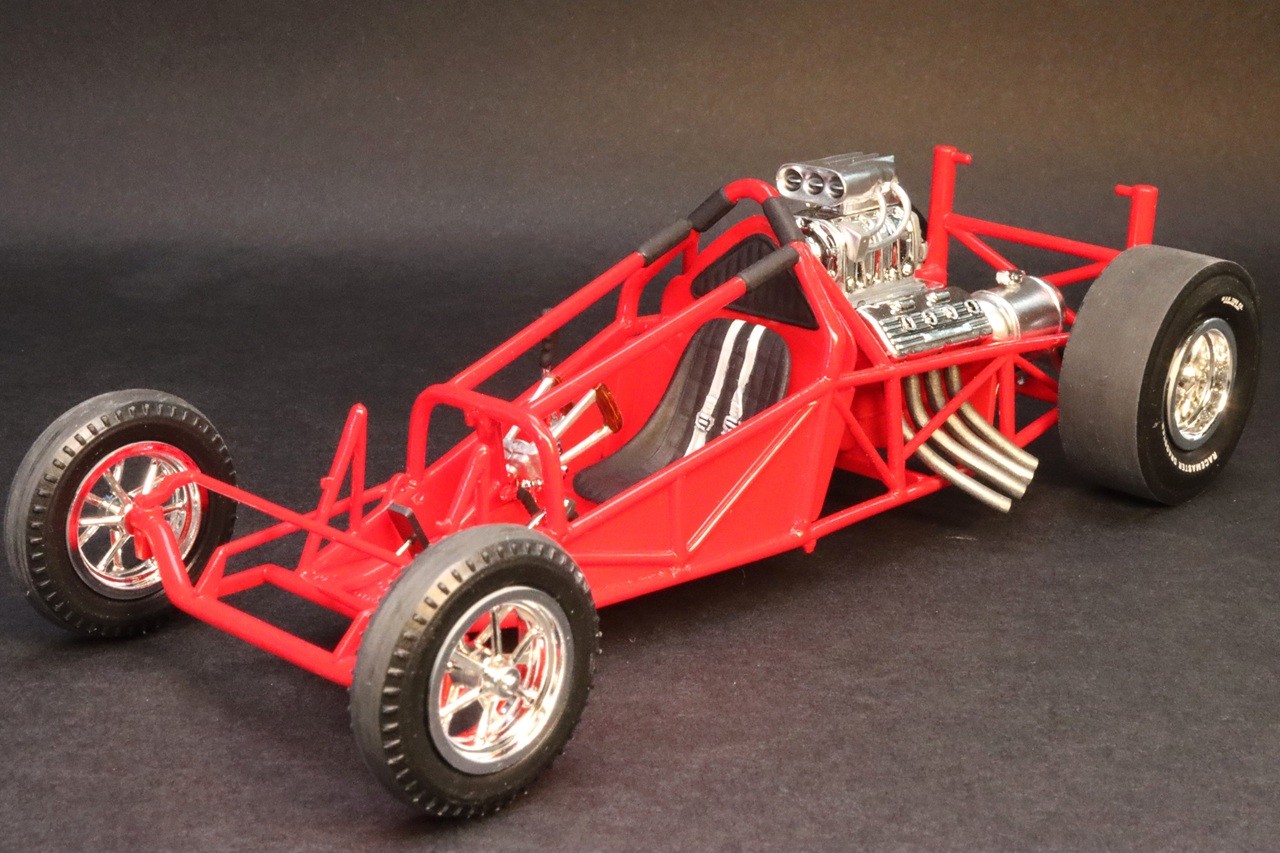
Finished Chassis
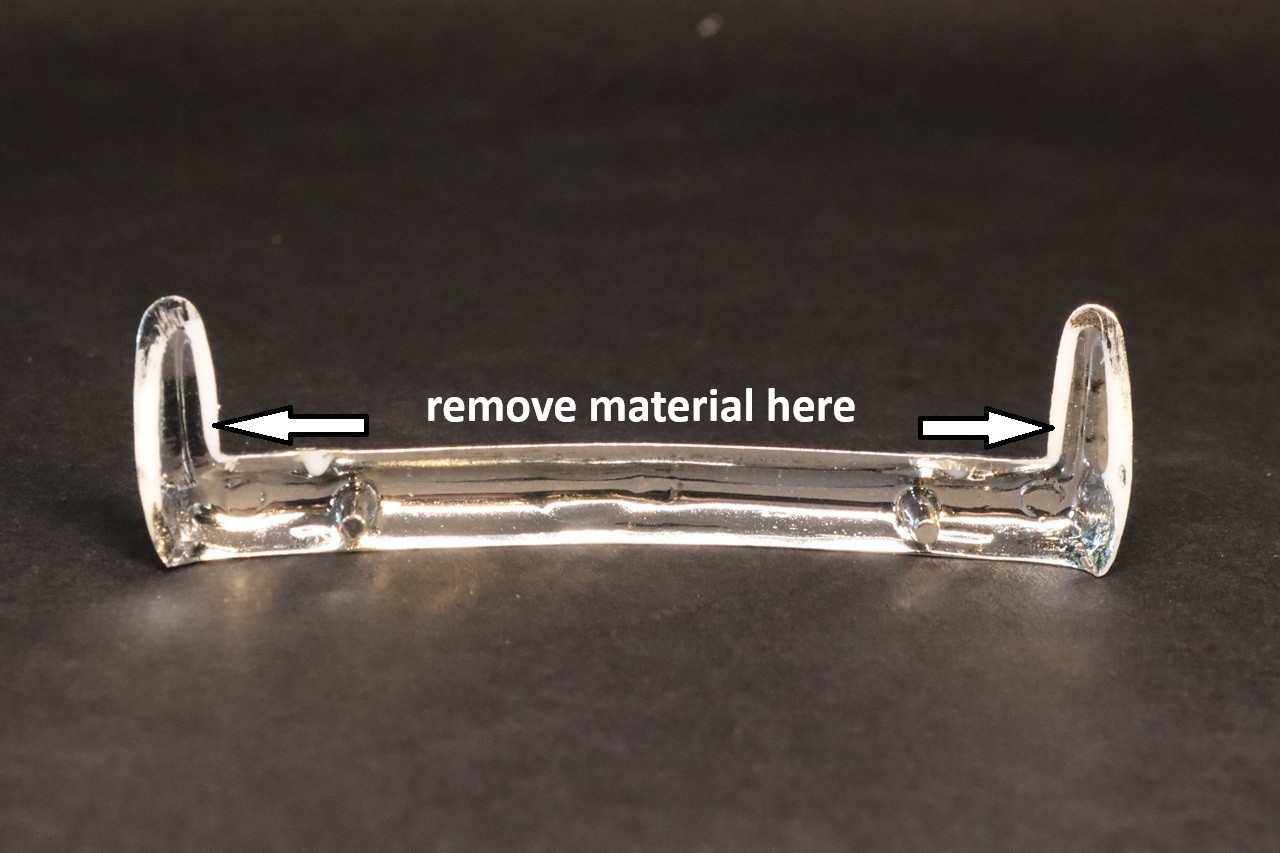
Modified Bumper
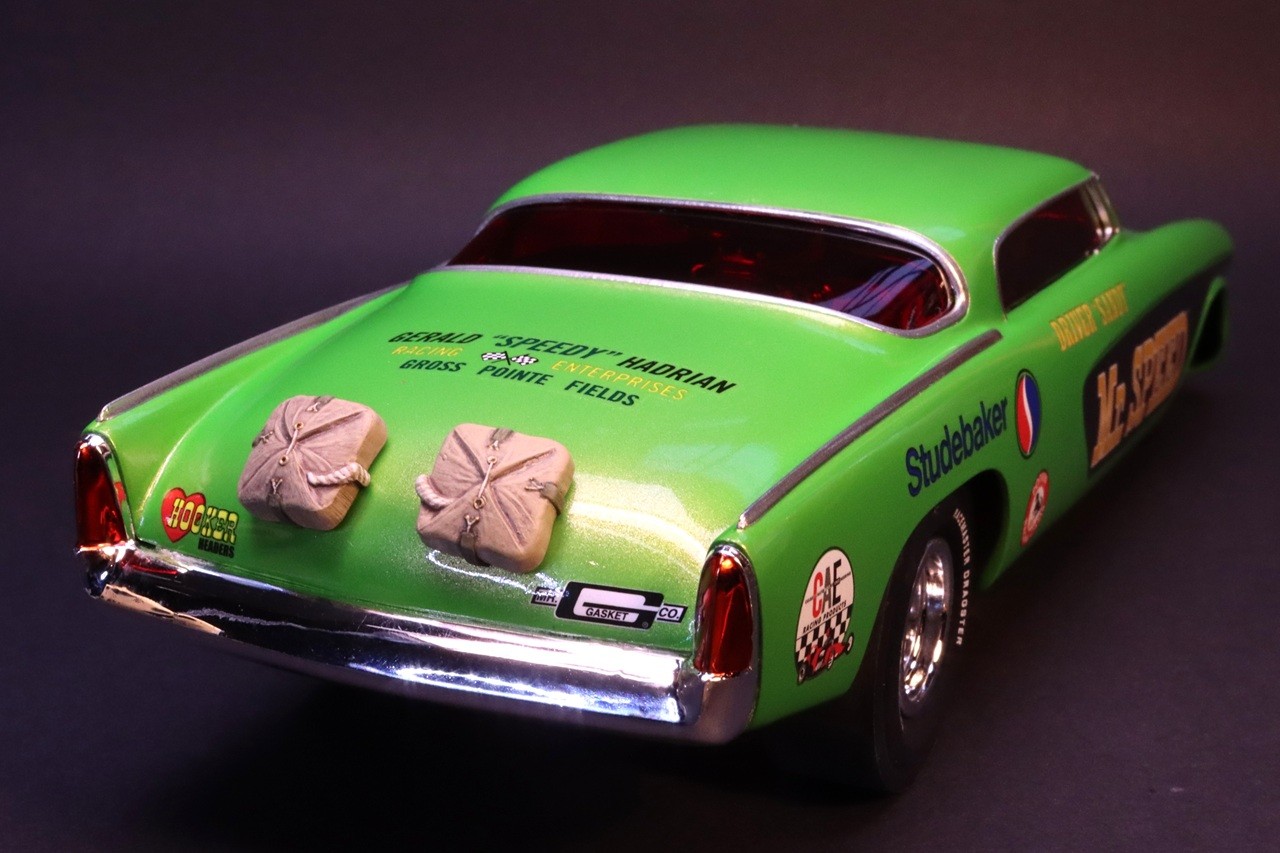
Drag Chutes Fitted To Body
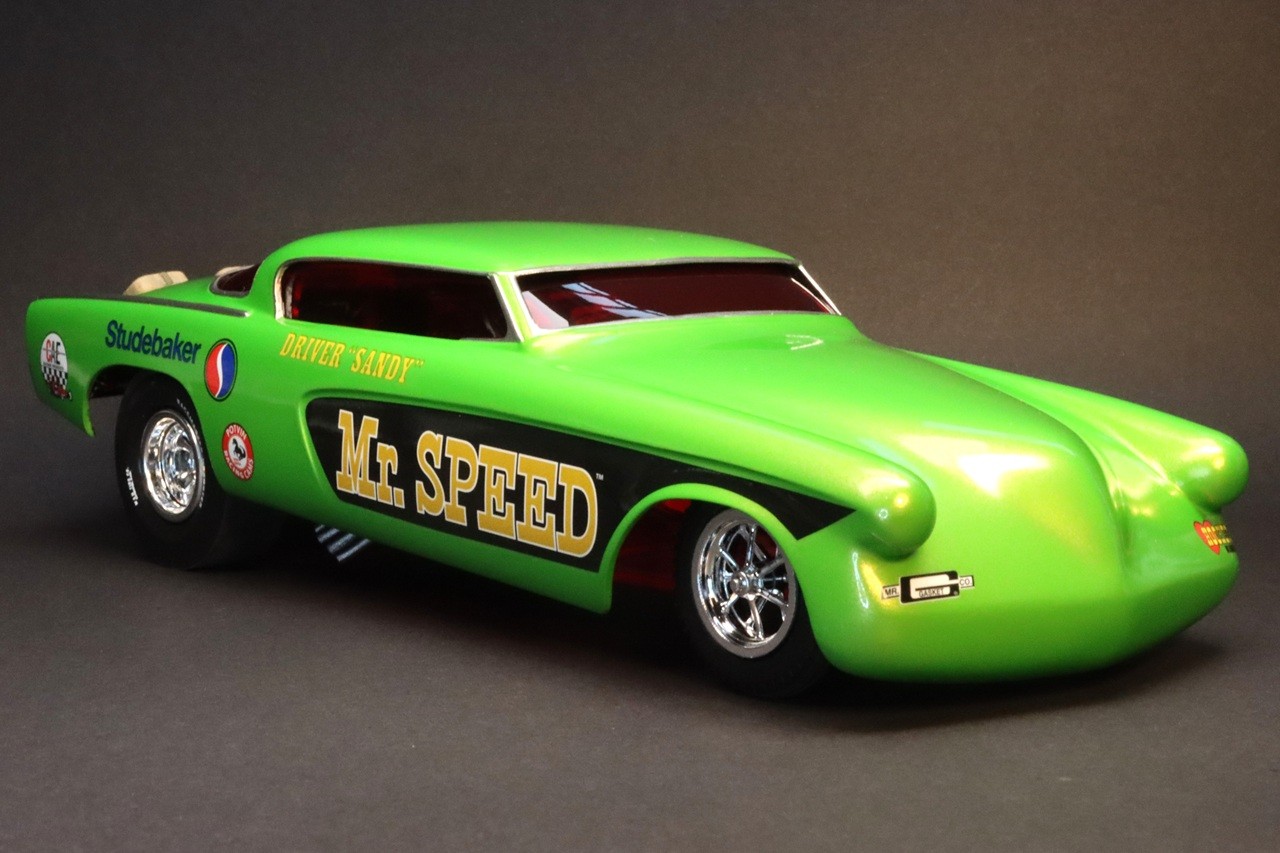
Finished - Front-Right View
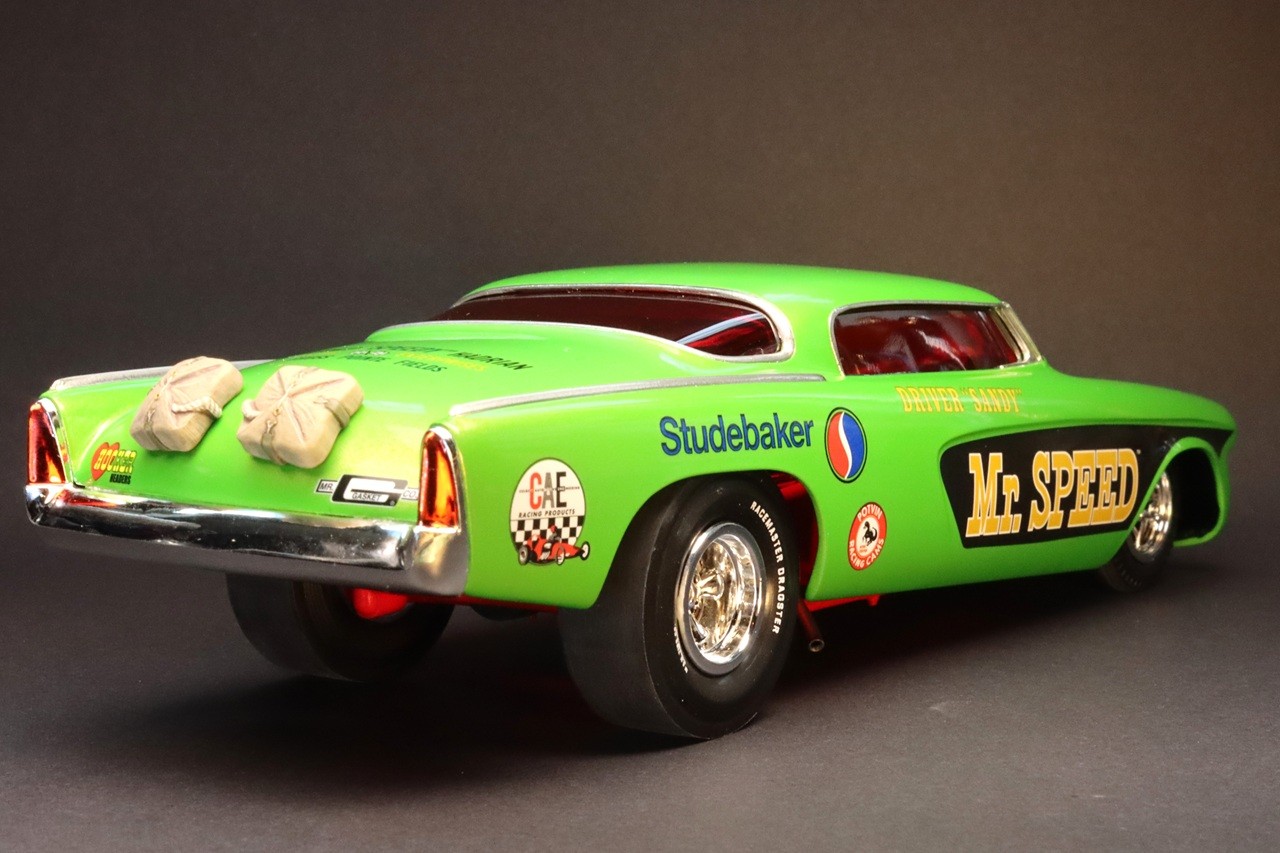
Finished - Rear-Right View
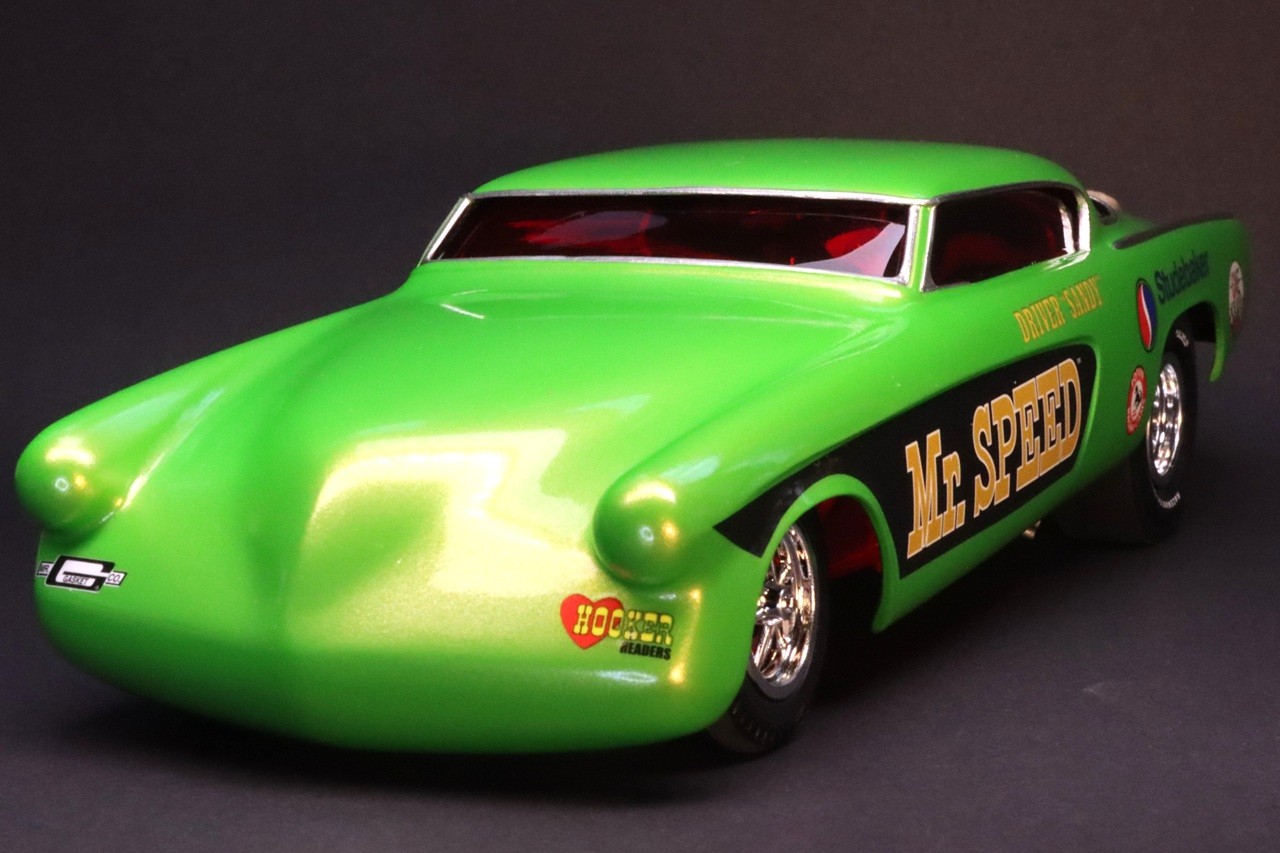
Finished - Smoothed Nose
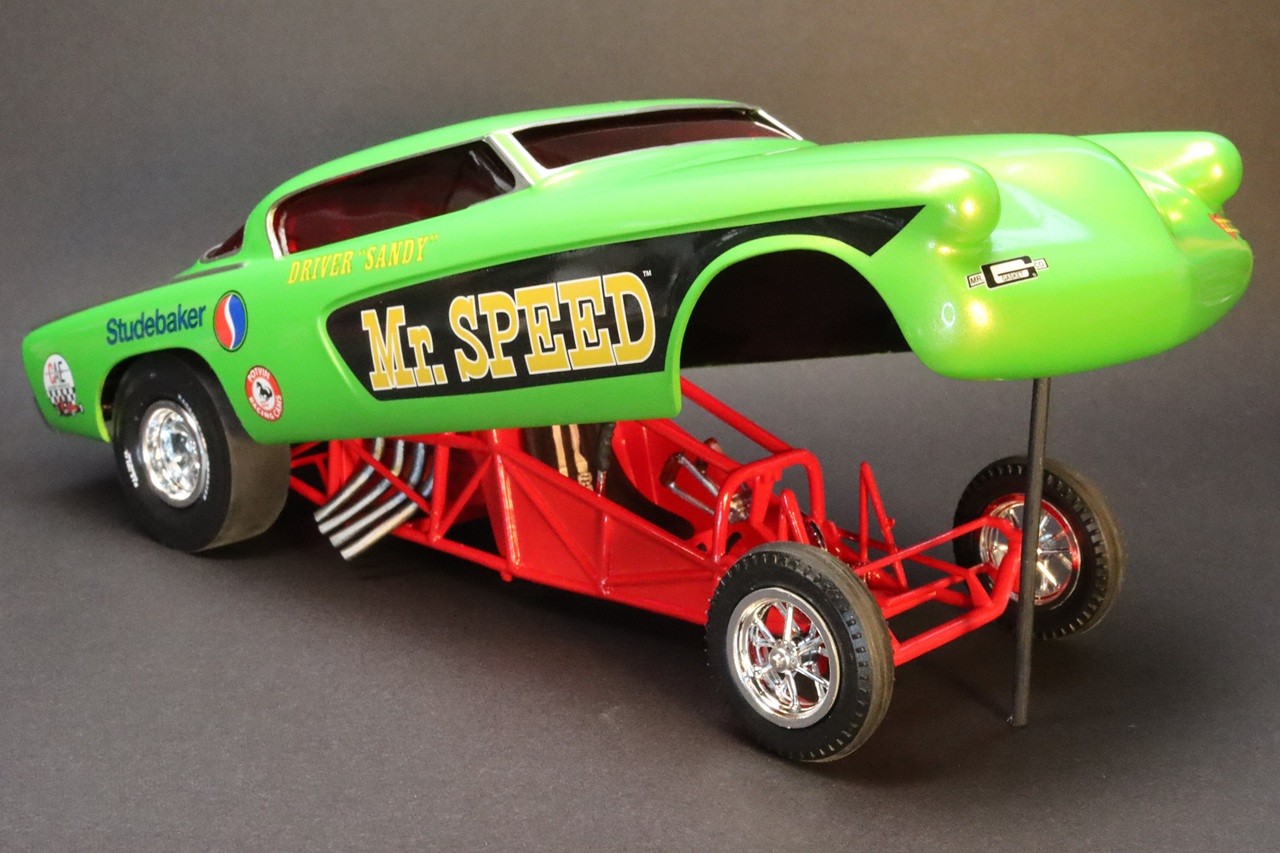
Comments
Kit Review
Paul, That's fine review! -Doug
Add new comment
This site is protected by reCAPTCHA and the Google Privacy Policy and Terms of Service apply.
Similar Reviews