
Davinci Rolling Ball Timer
The Kit
This is the latest in Academy’s “DaVinci Series”. They are models based on sketches of some of the inventions of this amazing man. All are molded in a vinyl-like soft plastic that facilitates the press fit of the components as no glue nor paint is required. All are ingeniously engineered to go together easily and to function smoothly.
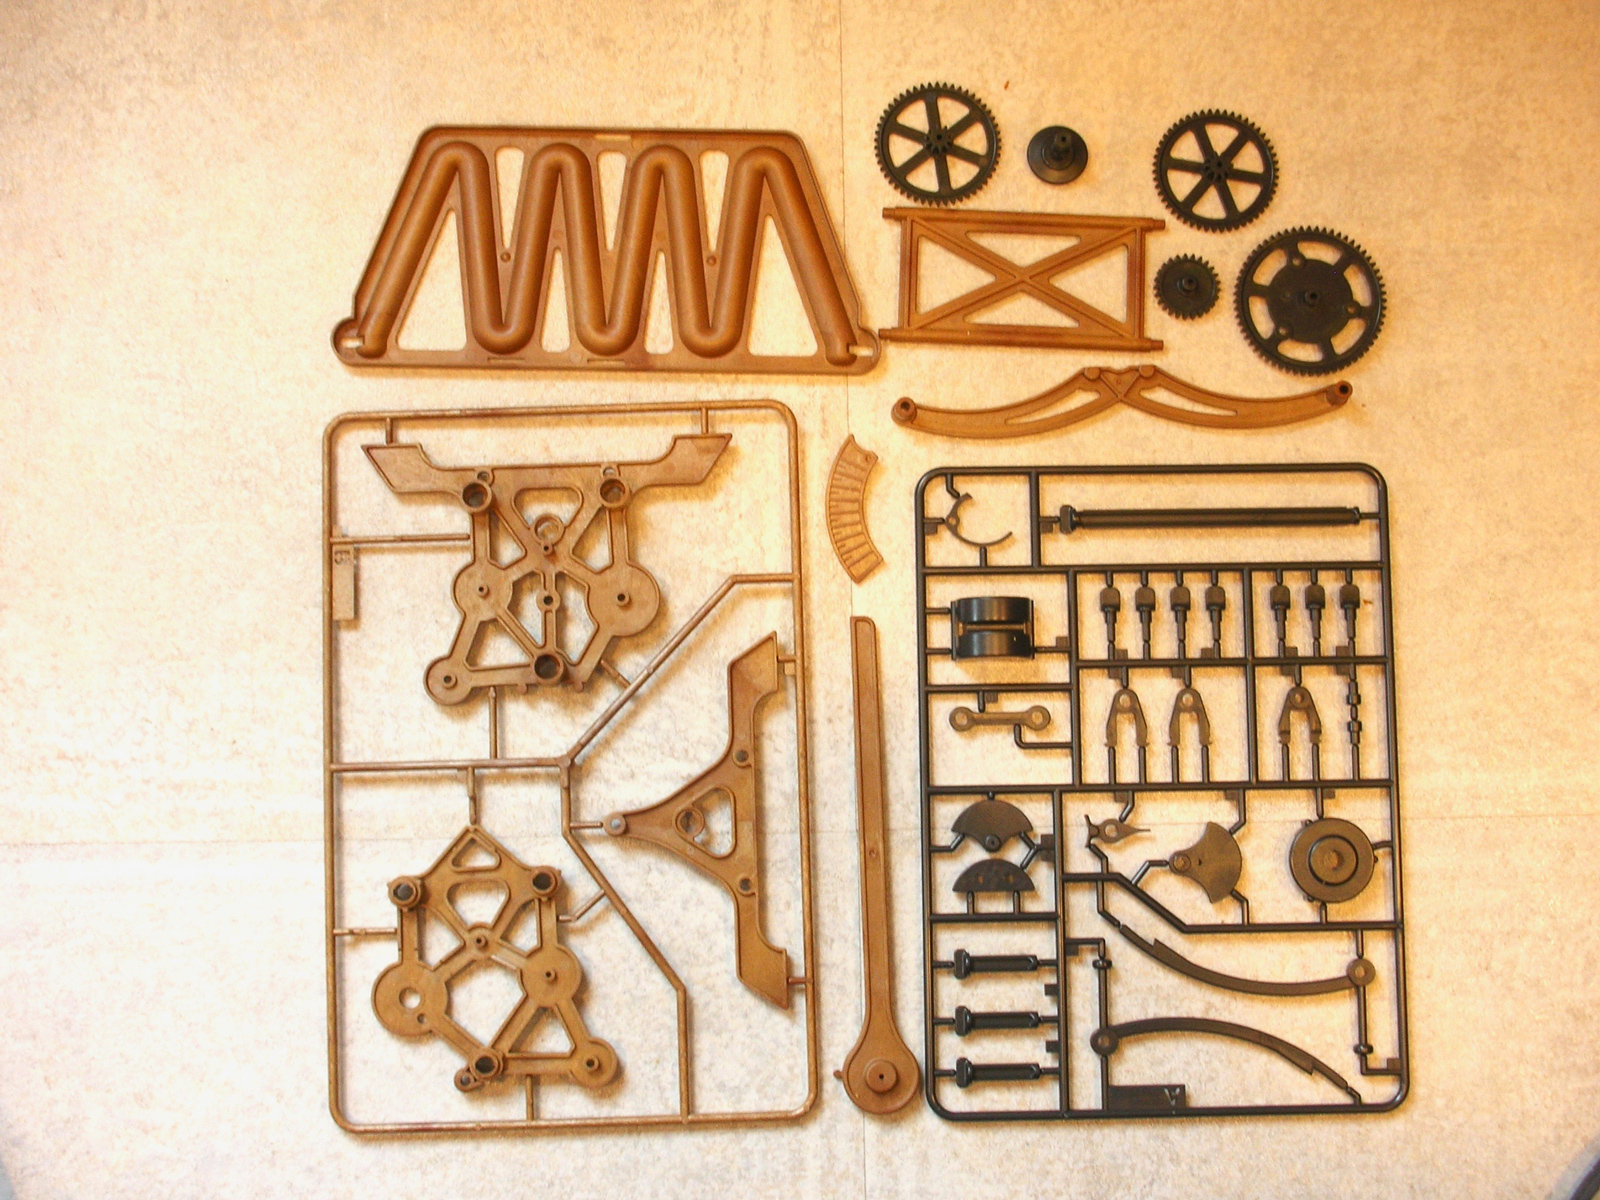
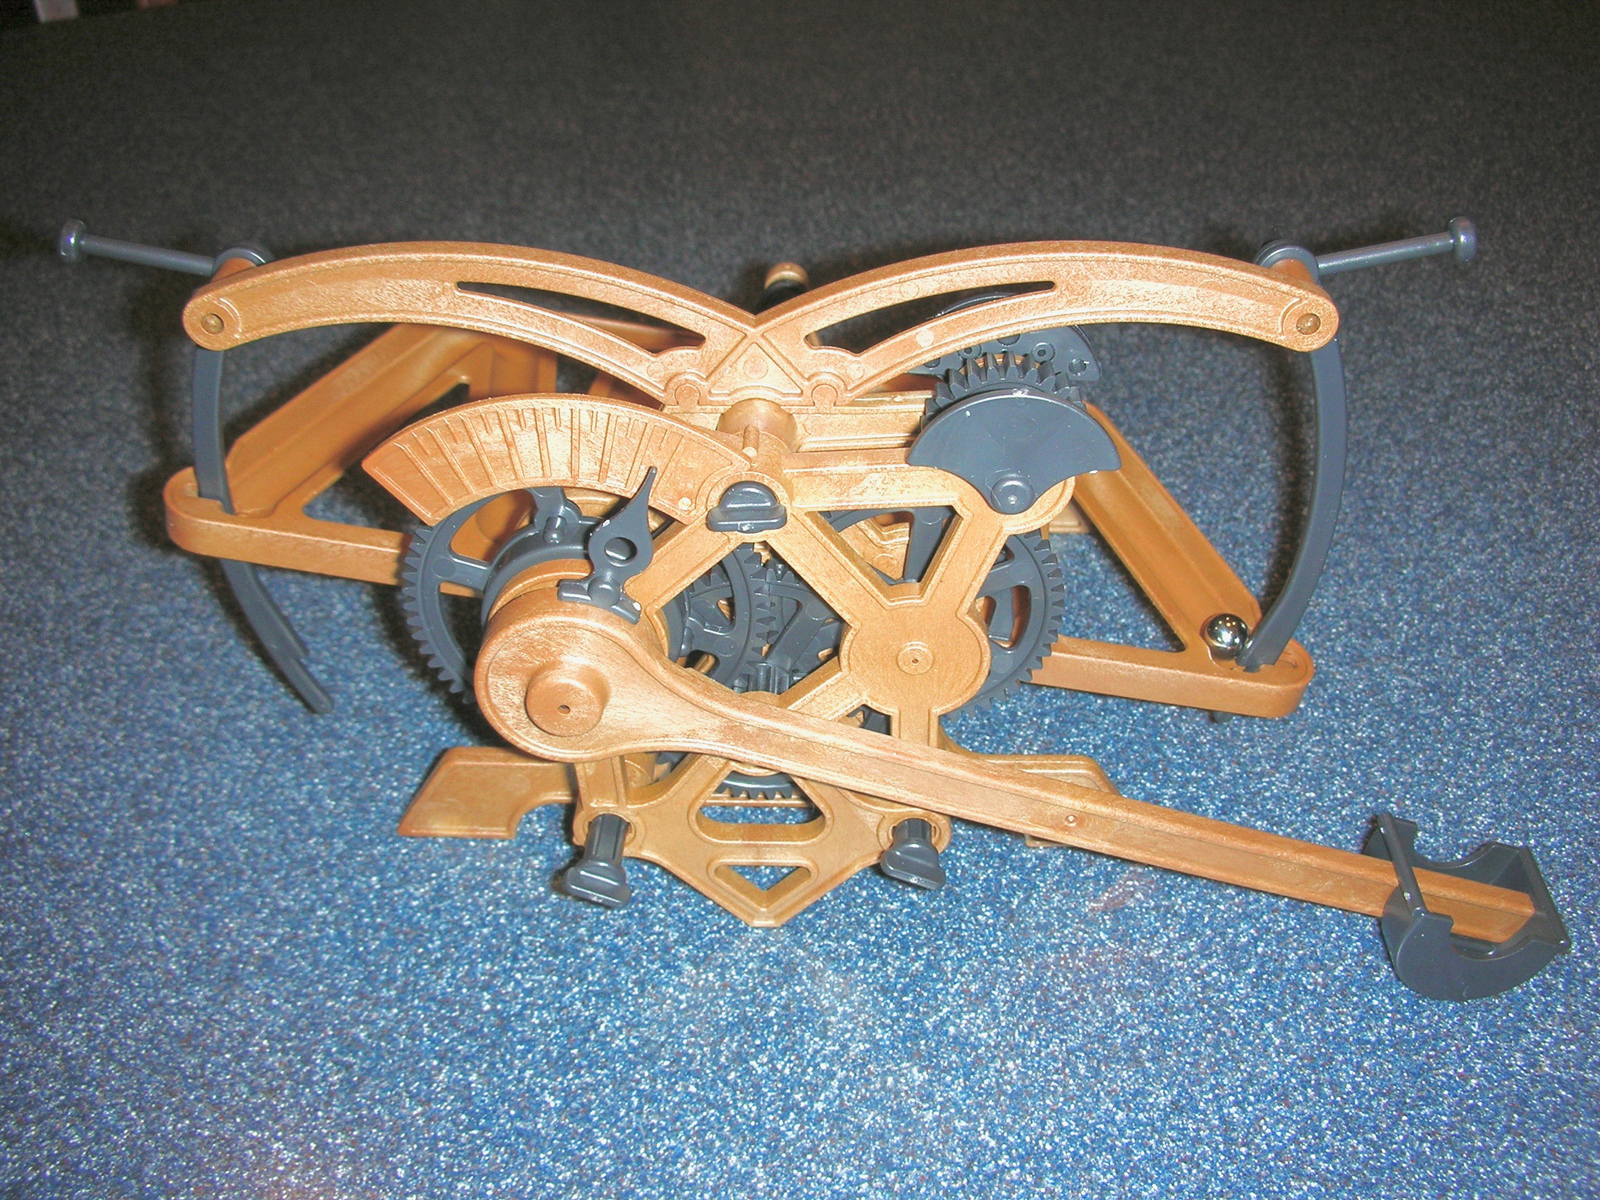
The subject of this review is a rolling ball timer. It doesn’t time the rolling ball, rather the rolling ball serves as a sort of escapement mechanism for the machinery. You may think that this is a bit “Rube Goldberg” just for a timer, but remember there were no readily available clocks at the time and those that were, were not particularly accurate and were insanely expensive as well. There are forty-one parts, four of which are metal axels. The plastic parts are molded in two different colors, one a brown that simulate wood and black to simulate iron. The final effect is nicely convincing.
One point to pay attention to is that Inside the box is a piece of paper that tells you to inventory the parts before you open the bags as once the bags are open there is no guarantee that any missing parts will be replaced by the manufacturer. It’s a bit tricky to do this as parts can sit upon one another or overlap making identification iffy, but in this instance, since there are not that many parts, with a little attention it can be done.
Assembly
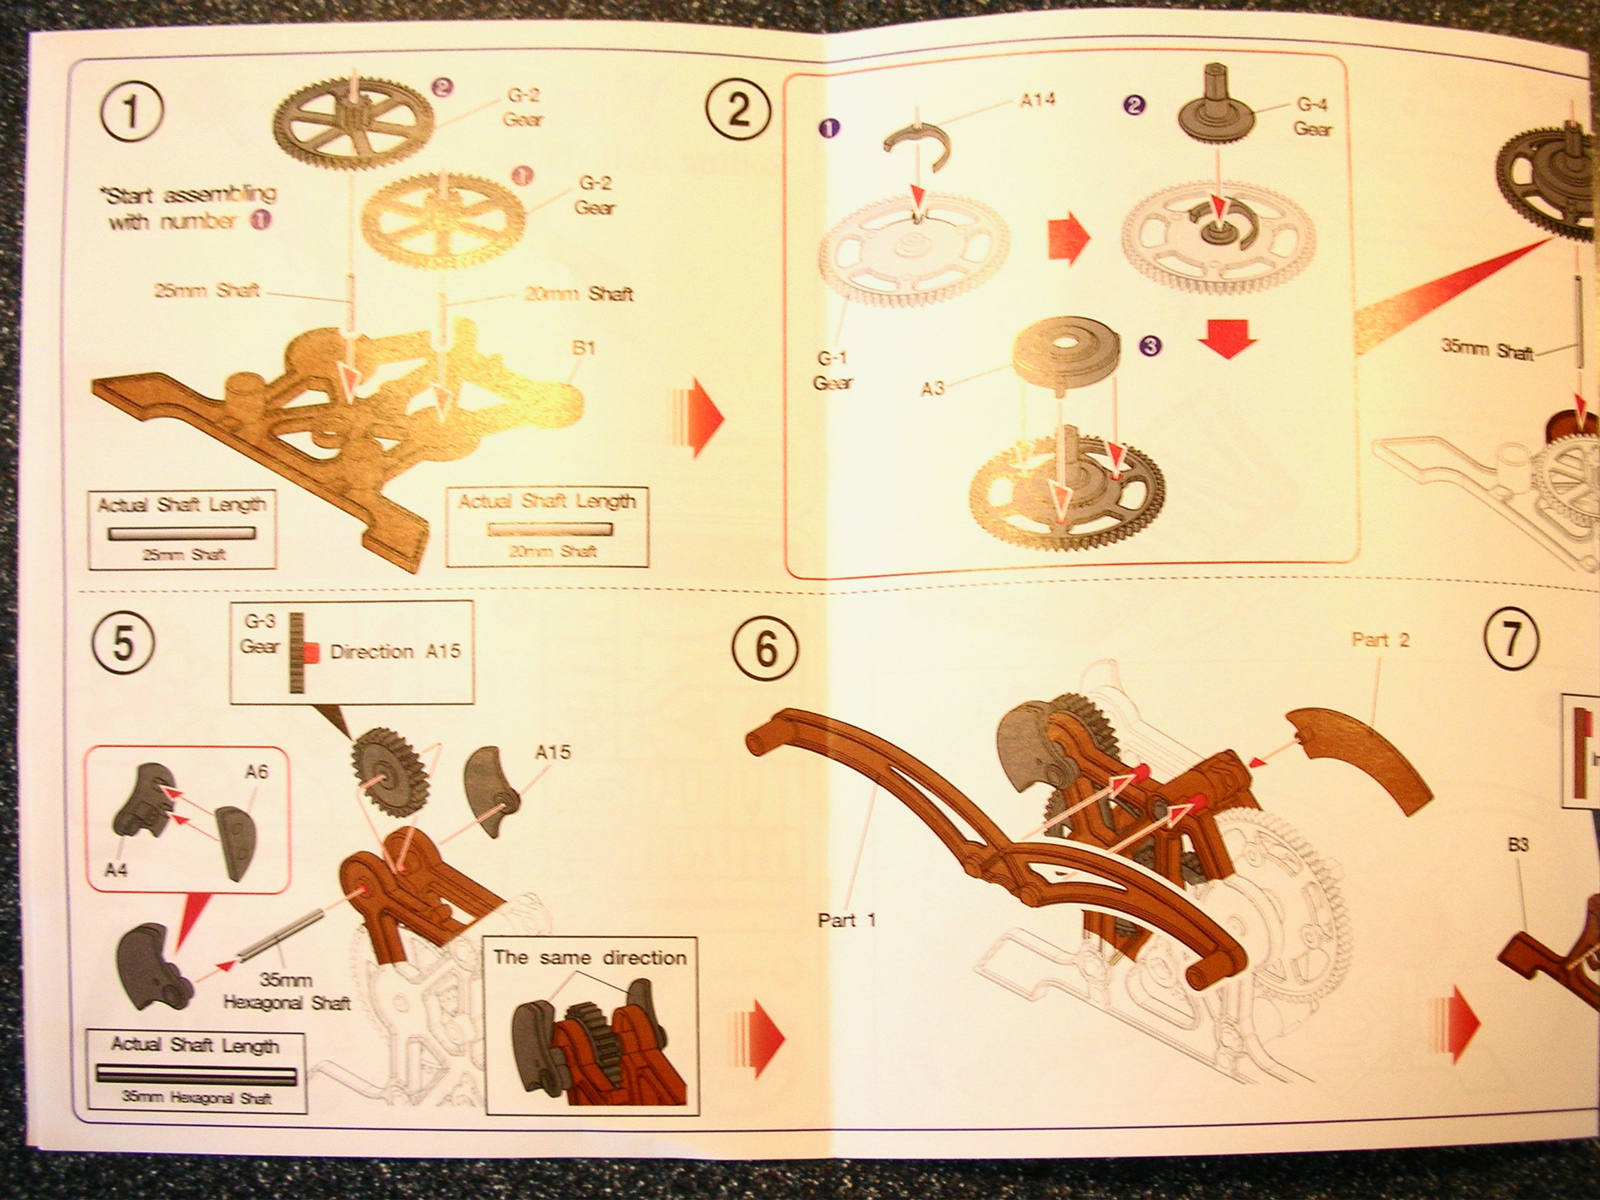
The instructions are pretty clear, but must be followed in the correct order as you will find you can’t insert parts after the fact. If you do make a mistake, there’s no problem as the entire model can be disassembled easily as no glue is used and none of the connections permanently lock. All proceeded smoothly until I got to putting part G-1 into place. The first 35mm rod axel I picked up was too thick to fit. The second went in easily. The real problem came in step 5 where you use the other 35mm rod. It would not fit here either. I knew that many parts were press fit, but this was really tight and I didn’t want to break anything by pressing too hard. I thought perhaps there was some flash or mold seam that was in the way, so I cleaned out the three parts it held together. It then slid into place easily. Unfortunately, it wasn’t supposed to fit easily. It is supposed to fit snuggly and these three pieces are critical to the drive mechanism. When I finished the kit and tried to activate it, the gears just spun around and nothing else moved. Since the plastic is vinyl like, glue was not an option as it would not hold, so I wound up with an interesting but non-functional display piece. A note in the instructions as to the firmness of the fit of these three parts would have prevented me “fixing” the problem, but there is no such note. No other parts fit this closely, making such a notice even more important.
Conclusion
All told, even with my screw up, it only took 45 minutes to put the model together. I imagine if you painted it, it could look very nice on a shelf and would make a good conversation piece as it whirred and rocked about. Could be useful in a class as well to illustrate several principles of science. As is, mine demonstrates what hubris can do to a project if you make too many assumptions.
Thanks to Academy for providing the review sample and IPMS/USA for the chance to review it.


Comments
No Hexagonal Rod
My instructions said that the rod for step 5 was supposed to be a hexagonal rod, but the one in the kit was round and fitting a round rod in a hexagonal hole has prooved to be a bit of a problem.
Add new comment
This site is protected by reCAPTCHA and the Google Privacy Policy and Terms of Service apply.
Similar Reviews