As previous reviews have indicated, this bimonthly magazine continues to achieve its claim of “Showcasing the very best in scale aircraft modeling.” Actually, I think it might better be said that each issue “showcases the very best photography of scale aircraft models.” Whatever the claim, this publication provides eye candy for those in the hobby who can afford the price of admission. At $14.95 a copy, it should be a cut above the rest of the crowd…and, by most measures, it is. The photography is nothing short of spectacular, the layout is professionally handled, and, in contrast to previous issues, #41 is printed on a slightly thinner, glossy paper that greatly enhances the sharpness of the 185 photos used to illustrate the six model building features (and the remainder of photos that illustrate the product reviews). In common with previous issues, #41 offers a variety of subjects that should satisfy the tastes of many model builders. In this issue, articles cover building:
The Parts
This product contains 9 pieces cast in white metal which replace the struts and gear for the Bronco kit. Please note that I did not use the Bronco kit for this review. I used, instead, the Hobby Boss Me-509 kit, # 02849. The Bronco kit was not “in my stash” but the Hobby Boss kit was readily available.
The molding is clean, with no “step” along mold release points. One of the support arms had a small amount of “flash” on it. This small piece of metal was removed with an Xacto and sanded very gently with a nail file.
Assembly
Even though the Bronco kit is the recommended “mate” for this SAC product, I found that the parts would also fit into the Hobby Boss kit without any problems. Some caution is wise when handling the retracting struts….the change in diameter between extending rod and the main strut reveals a potential weak point on this part.
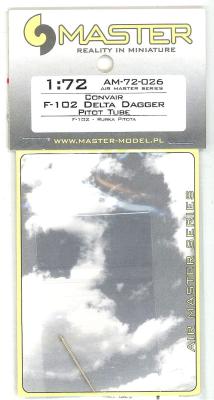
Model-Master’s line of aftermarket detail parts now includes a 1/48 scale turned brass pitot tube designed to enhance any 1/48 Hawker Hunter (currently, that means an Academy or recently released Italeri kit). It is one of those small items that will dramatically improve the appearance of the finished model, something that becomes quite obvious when the metal part is compared to the injection molded kit part. Placing it next to the kit part clearly illustrates how much the injection molded plastic part is bulked up for manufacturing…resulting in something that is thicker than it should be. The photo below of the nicely tapered Master-Model metal part next to the kit part on the sprue demonstrates how much thicker (and shorter) the kit part really is.
This book is a collection of flying stories and not about paratroops, as some may infer from the title. The author has an impressive resume, to say the least! He has served as a test pilot, RAF pilot, movie and demonstration pilot, air show pilot and won the British Aerobatic Championship 13 times, so he knows what he is talking about.
Bombshell Decals came on the decal scene with …well, a bang. Their latest release is based on the Monogram A-26B Invader. The glass nose version was used in Korea and was quite colorful with its overall gloss black paint scheme. The subjects of this sheet are two aircraft which sported Esquire girl nose art.
The decals are printed by Cartograf, so you know they are in perfect register and will respond well with setting solutions. In my opinion, Cartograf decals are the best in the world. The decals are on a single sheet of 5.5” x 8”. You can see the quality in the decals by looking over the Esquire girls. They are perfectly rendered and are some of the best looking pin-ups available in decal form. They have perfect shading and blending to make them exactly like the real thing. Beautiful work by Bombshell and Cartograf. This is the new standard for nose art.
This elegant looking jet trainer has been in service with numerous air forces for many years and has even become a common sight at “warbird” fly-ins. Several years ago, Eduard released an exquisite little model of this trainer. Their latest version is the “Weekend Edition,” a more basic boxing of their “Original,” “Dual Combo,” or “Profipak” releases. To meet the “weekend” criteria, this kit has no photo-etched frets, resin pieces, masks, or decals for multiple marking options. What you get instead is the all-plastic, basic kit with decals for one scheme: the Libyan Air Force Academy circa 1985. Included in the box are 56 pieces molded in tan plastic, six pieces of clear parts, a decal sheet with lots of stencil/data markings, and a six page instruction booklet. All the pieces are crisply molded with excellent surface detail. The decals are on register with the instrument panel renditions among the best I’ve seen in this scale.
First flown in December of 1944, the Heinkel He 162 Volksjager (people’s fighter) was known as the “ninety day wonder” as it went from an Air Ministry requirement to prototype in a mere three months. Like the other jet fighters of the day, it relied upon the BMW 003 turbojet engine, which was highly demanded as the Second World War drew to a close. The plane was 29 feet 8 inches in length, had a wingspan of 23 feet 7 inches, and stood 8 feet 6 inches tall. The A-2 variant carried a pair of 20mm MG 151 cannons with 120 rounds per gun. Depending on the source, between 238 and 320 of these aircraft were built. Something that I found unique is that the Volksjager, which is often referred to as the Salamander, was built under the code name “Sparrow”, which is what the Heinkel company called the plane during construction.
Being that this detail set is denoting the gun bay of an F-5E Tiger II, I will begin with a little history of the M39A2 cannon, which is represented in this set. This weapon was developed by the Springfield Armory in the late 1940’s, and was based upon the German Mauser MG 213. The design was a five-shot revolver firing 20mm by 102mm projectiles at a rate of 1500 rounds per minute at a velocity of 3300 feet per second. The M39A2 was first released in 1964, but the M39 guns themselves entered service in 1952, and were mounted within the F-86H, F-100, F-101A and C, as well as the F-5 variants. Ford and Pontiac are among the companies who manufactured the M39 cannons, and some 35,500 have been produced. The M39A2 itself weighs 178.5 pounds and is just over six feet in length.
The Parts:
This product contains four pieces cast in white metal which replace the struts and gear for the Bronco kit. The molding is clean, with no “step” along mold release points. The details match kit parts, rivet for rivet, but with no flash (kit parts have a little flash).
The SAC main landing gear struts are molded as “one” piece whereas the kit main gear struts require two pieces to be glued together to form one strut.
Assembly:
We’ve all seen the notice, “no assembly required”, but other than attaching the SAC parts to the Bronco kit, there isn’t any assembly required to prepare the SAC parts. The SAC parts fit nicely. They are snug and tight and fit into the Bronco kit just as the original parts fit.
Painting:
I prime metal parts with an inexpensive primer found at Wal-Mart and Target. Use a primer of your choice.
Conclusion:
The Parts:
SAC provides 10 individual parts, replacing the gear and struts included in the J-8B kit from Trumpeter. The detail on the original kit parts is faithfully reproduced on the SAC parts.
Assembly:
Most of the SAC gear that I’ve used are free of “step” flash, that small line marking the point at which the molds join up. One of the main gear struts in this set required a swipe or two with an Xacto blade to eliminate the step and the parts were ready for priming.
Attaching the SAC parts to the kit is straightforward and easy. The fit is always nice and tight, alignment is good, and I’ve never experienced any problem with a SAC part fitting into the kit as well or better that the original part.
Painting:
It is advisable to prime the parts with a primer of your choice. I use gray automotive primer from Wal-Mart or Target.
Conclusion: