Yet again: Sincere thanks to Neil at HK models for providing IPMS USA this pre-release kit for review; your contributions are of great value and we look forward to more releases from your company…
… Part 3; final details!
Yet again: Sincere thanks to Neil at HK models for providing IPMS USA this pre-release kit for review; your contributions are of great value and we look forward to more releases from your company…
… Part 3; final details!
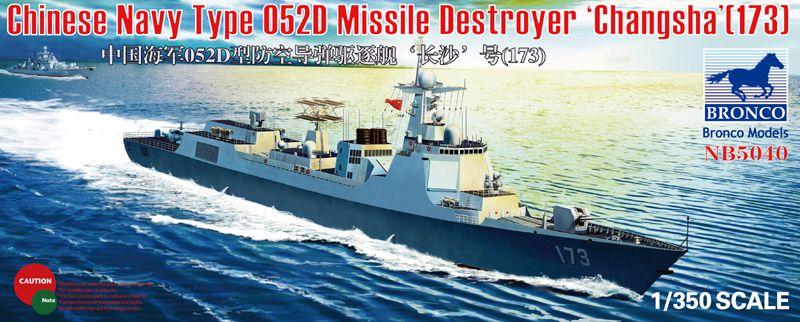
The Type 052D is a Chinese designed and built missile destroyer. It features an active electronically scanned array radar system and it is refer by the Chinese media as the “Chinese Aegis”. There are two ships in the class completed and several more under construction. This kit represents the second ship of the class, “Changsha”.
Upon opening the box you find 13 sprues, 2 photo-etch frets (one of them for the nameplate), one clear sprue for the helicopter and a small decal sheet. The superstructure is packed on its individual box –inside the main box-. Despite the precautions my sample got slightly warped during transit (see photo).
This is a nice sized kit, with the hull being almost 18.5 inches long. There is no option for waterline hull, however there is an flat internal piece –that provides strength to the hull assembly- and some modeler might feel courageous enough to convert the full hull into a waterline model.
The 1st Marine Division landed on Guadalcanal on August 7, 1942 to stop further Japanese expansion. On August 17–18, 1942, the US Marine Corps’ 2nd Raider Battalion conducted an amphibious raid on the Japanese-occupied Makin Island in the South Pacific. This operation was intended to divert Japanese reinforcements bound for Guadalcanal, over 1,000 miles to the southwest. The Raiders were to destroy the seaplane base and radio station, take prisoners, and collect intelligence. The Raiders suffered heavy causalities and even left some Marines behind, but the raid was an invaluable test of the innovative training and tactics employed by the Raiders, and a crucial boost to national morale at this difficult stage in the war.
Osprey Publications is well known for their books on military history and vehicles. This book is a follow up to the earlier Osprey release "General Dynamics F-111 Aardvark", which has also been reviewed.
Both German and Soviet military theorists in the years leading up to WW2 incorporated tanks into their battle plans to exploit breakthroughs in the enemy’s lines. These tanks incorporated turrets capable of rotating 360 degrees, thus making them expensive and time consuming to produce and maintain. Little thought on either side was put into providing the slower moving foot soldiers with self propelled artillery or anti tank capabilities. The Germans were the first to see the utility of providing their troops with SPGs, with the introduction of the Sturmgeschutz (StuG) and Sturmartillerie, self propelled tracked vehicles with limited traverse guns protruding out the front end of the vehicle, and capable of knocking out enemy hard points and limited anti tank duties. Such vehicles were cheaper to manufacture than tanks.
If you are looking to add some “life” to your next 1/200 scale US Navy ship, allow me to direct your attention to Eduard release 53109. This set contains 1/200 scale figures that are pre-painted, and require simple bending in order to create more of a three-dimensional effect. Although labeled as WWII, the U.S. Navy, being all about tradition, kept the denim work uniform in use past my discharge in 1991. The only challenge would be with the dress white uniform as the one depicted in the kit was discontinued sometime after the 1940’s. The figures are easy enough for anyone who is experienced with photo etched parts to use, and will make a nice addition to your next Ship, Submarine, or Boat of this scale.
For those readers not familiar with this series of publications, they are published by Ampersand Publishing, the firm responsible for the excellent Military Models in Review (MMiR) armor modeling magazine edited by Pat Stansell, one of my favorite magazines. As the title suggests, each issue of Allied-Axis contains a number of photo journal articles covering various aspects of the Second World War. The issue under review today contains three separate articles. For the most part, each page of any given issue is devoted to a single photograph, with an appropriate written caption. Thus the detail contained in each photograph is extremely good, due to its size. For the most part, the clarity of each photograph varies from good to superb, depending on the quality of the original print used. The Journal paper quality utilized is also very good.
The 1/35 scale CMP F15A Van Lorry by Mirror Models is a challenging build due to lack of clarity in part locations, but experienced modelers can build it into a nicely detailed model.
The kit comes nicely packed in a cardboard box, and each of the gray plastic sprues are individually bagged. On first glance there are many very small parts, and the detail of the molding is good. The parts have very large gateways, or sprue connections, for attaching the part to the sprue. The instructions noted that some of the gates are larger to avoid ejector pin marks, and suggests using a razor saw or scalpel instead of a sprue cutter to remove the parts. The sprue connections are wide but thin, and I didn’t break any of the parts removing when removing them from the sprue.
Set 3 of the Eduard Photo etch set for the Revell U-505 submarine in 1/72 scale consists of detail for the hull. I’m not a “PE guy” but as with Part 2 of the Eduard sets, when asked, I accepted the challenge since I had the opportunity to build the sub.
This set consists of one sheet of brass. Although the instructions do not show any removal of kit parts needed to install this set, I found that they adhere much better is you carefully remove the detail of the kit before gluing on the PE. It mostly consists of removing rivet detail.
I cut the parts from the fret with a sharp #11 blade and sanded them smooth with a sanding stick. The instructions are clear and the parts fit perfectly. This would be a great “first try” at using photo etch if you haven’t done so before.
My thanks to IPMS/USA and to Eduard for the opportunity to review this subject.
This is the Scale Aircraft Conversion (SAC) replacement landing gear set for the new tool Airfix EE Lightning kits and I must say that it is a very nice set. I took pictures of the kit parts and SAC parts side by side and as you can see they are pretty well detailed. You do have a little cleaning up to do because of mold seams but this is true with the kit parts also. Having built one of these already, it will be nice to have the metal nose gear for a little extra strength (due to the weight in the nose) on my next one.
The detail on the parts is pretty good and should look very nice after painting. One thing to watch out for is that one of my pieces was a bent a little and had to be straightened out but really was not difficult to do. I highly recommend this set for anyone that is building those kits.
Thanks go to Scale Aircraft Conversions for supplying this for review, IPMS for letting me do the review and all of you for reading it.