
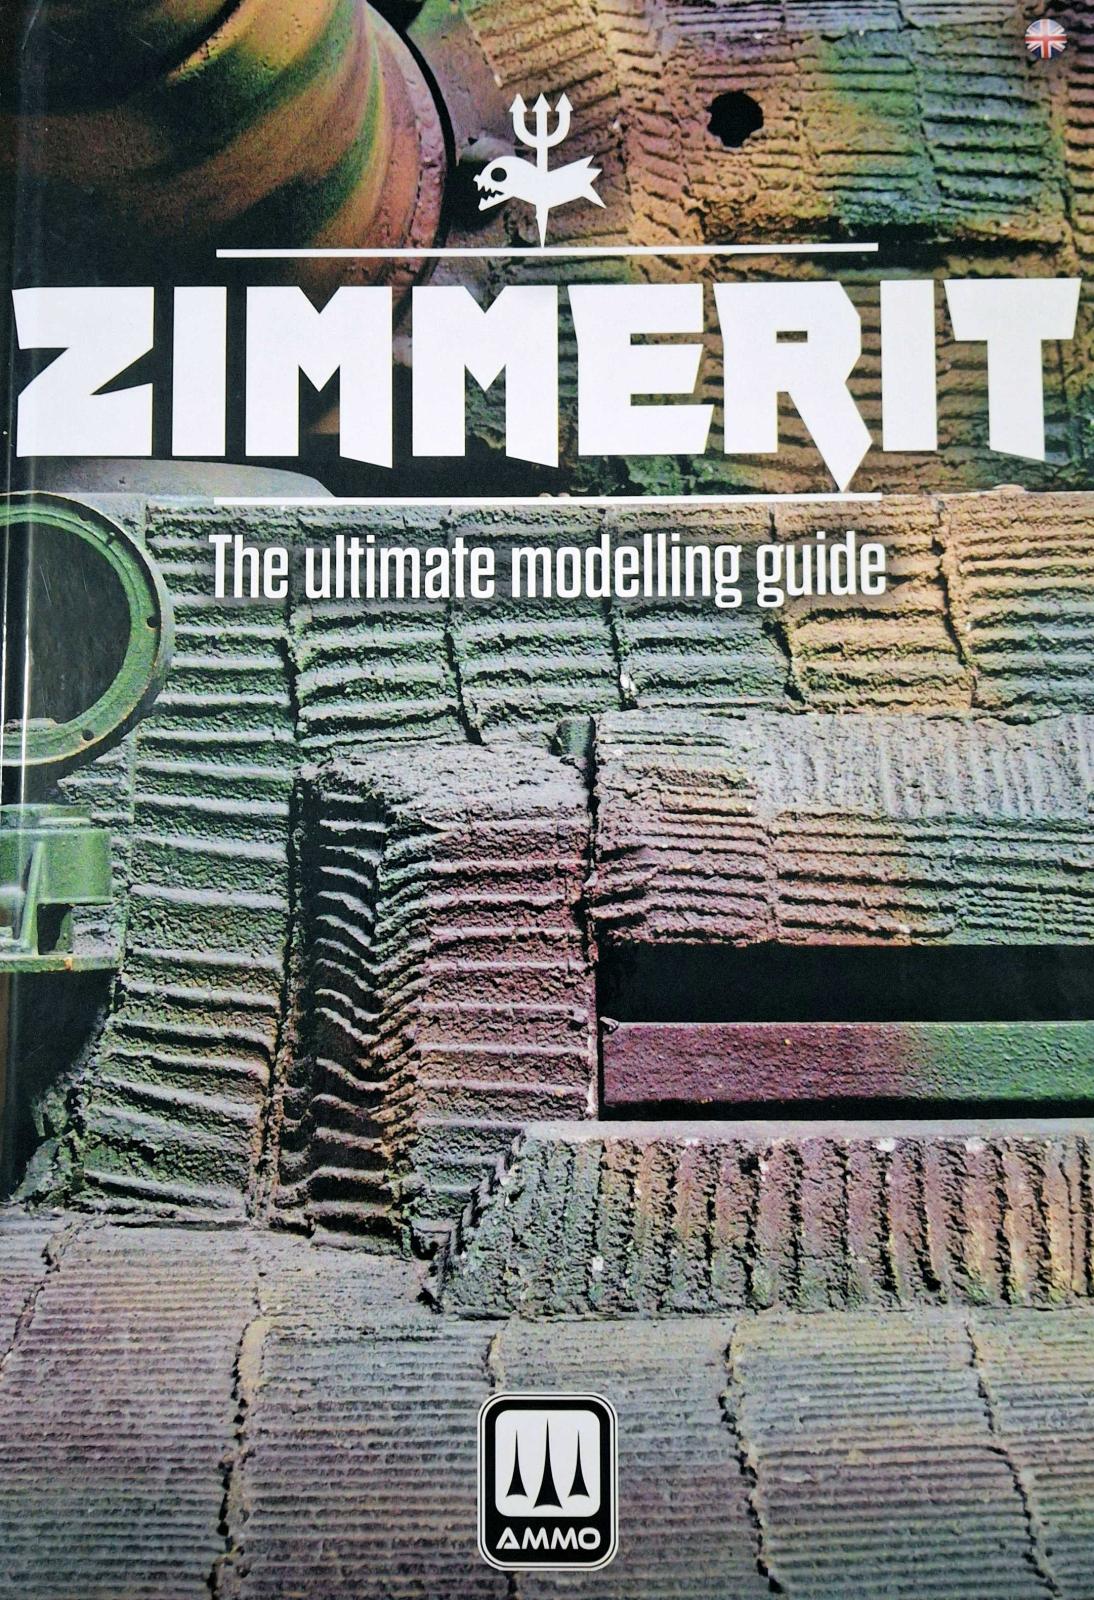
Zimmerit, The Ultimate Modelling Guide
- Book; $74.99
- Paste; $7.49
- Applicator Tools; $9.96
- Panzer Kote Tools, $28.99
A hard-bound, 205 pages, 8½ x 12 inch volume containing six chapters. Chapters 1 and 2 provide historic context, while chapters 3 through 6 are for the modeler.
Chapter 1: Zimmerit: History and Riddles
One word best sums up this chapter ... Wow!
The introduction points out that the interest zimmerit is inversely proportional to its real use. As modelers we all “know” what zimmerit is. An anti-magnetic paste applied to defeat magnetic anti-tank mines. Furthermore we are all familiar with the typical parallel line and waffle patterns. But did you know there were 18 different patterns? And that certain patterns were used exclusively by a single manufacturer?
Chapter 1 is written in an unusual “question-and-answer” format that will answer most any what, where, when, how question a modeler may have. While some may feel it is bit “thin” on text, each question is supported by period photographs.
Other interesting tidbits to be found in this chapter are that, while the Panther, Tiger, and Sturmgeshutz families were the primary examples of zimmerit, it was also applied to PzIII and PzIV tanks as well. Also of interest is that the material was applied for only about year, from September 1943 to October 1944. This chapter also presents the “recipe” for zimmerit. As sometimes thought, it is not cement based, but more of an epoxy resin. It was applied in both factories and in the field. Factory applications were much more durable.
Chapter 2: Reference Photos of Real Zimmerit
Chapter 2 is a series of color reference photos of real zimmerit applied to tanks in museums. The first vehicle is a Tiger I Ausf E (late) on display at the Musée des Blindés Saumur, while the second example is a Tiger II Ausf B with photos from The Tank Museum at Bovington, England and the Musée des Blindés, in Saumur, France.
Chapter 3: How to Apply Zimmerit: Zimmerit Types, Tools, and Application Methods
This chapter is divided into four sections covering the different types of zimmerit available, how to attach them, and tips on improving their appearance. Each section contains a series of step-by-step instructions for the topic discussed. Section 3.1 covers adhesive backed zimmerit and zimmerit decals. Section 3.2 addresses photoetch zimmerit, while section 3.3. covers resin zimmerit. Section 3.4 is the most extensive covering zimmerit applied by hand. This section starts with tools for engraving the zimmerit pattern. The final three sub-sections cover epoxy putty, Tamiya polyester putty, and finally AMMO zimmerit paste.
Chapter 4: Painting Zimmerit in Scale
This chapter is divided into six sections covering painting, lightening and modulation, winter camouflage, dry brushing, and decals. Like Chapter 3 each section is a series of step-by-step instructions on how applying the topic discussed is different on a zimmerit covered subject than on an un-textured surface.
Chapter 5: Weathering and Dirt Effect on Zimmerit
This chapter is similar to Chapter 3 and 4 in each section giving step-by-step instructions. This chapter has nine sections; Filters, Shading, Washes, Chipping, Discoloration, Streaking, Dust and earth, Mud and splashes, and Oil and fuel. A nice touch is that the sections are in the order of their application to a model. So the first effect to apply is a filter, while the last effect would be oil and fuel spills.
Chapter 6: Gallery
This chapter is a photo gallery of 12 models in different scales with zimmerit finishes. Each example highlights the methods discussed in Chapters 4 and 5. The only downside of this gallery is there are no captions on what method(s) were used on the model.
Final Thoughts
All in all this book is a great reference. As noted in the introduction, information on the internet is not always accurate, and in some cases is contradictory. This book goes to great lengths to use only factual information. Where there may be a lack of such information reasonable hypotheses are used.
One nice touch in Chapters 4 and 5 is the inclusion of QR codes by some of the topics. Scanning the code takes one to the AMMO webpage with a description of for the product followed by individual options for purchasing.
This brings me to another point that I’m not sure how I feel about. Being that the book is published by AMMO it is not surprising that AMMO products are used throughout. However, some sections come across more as extended advertisements for the product than actual how-to’s.
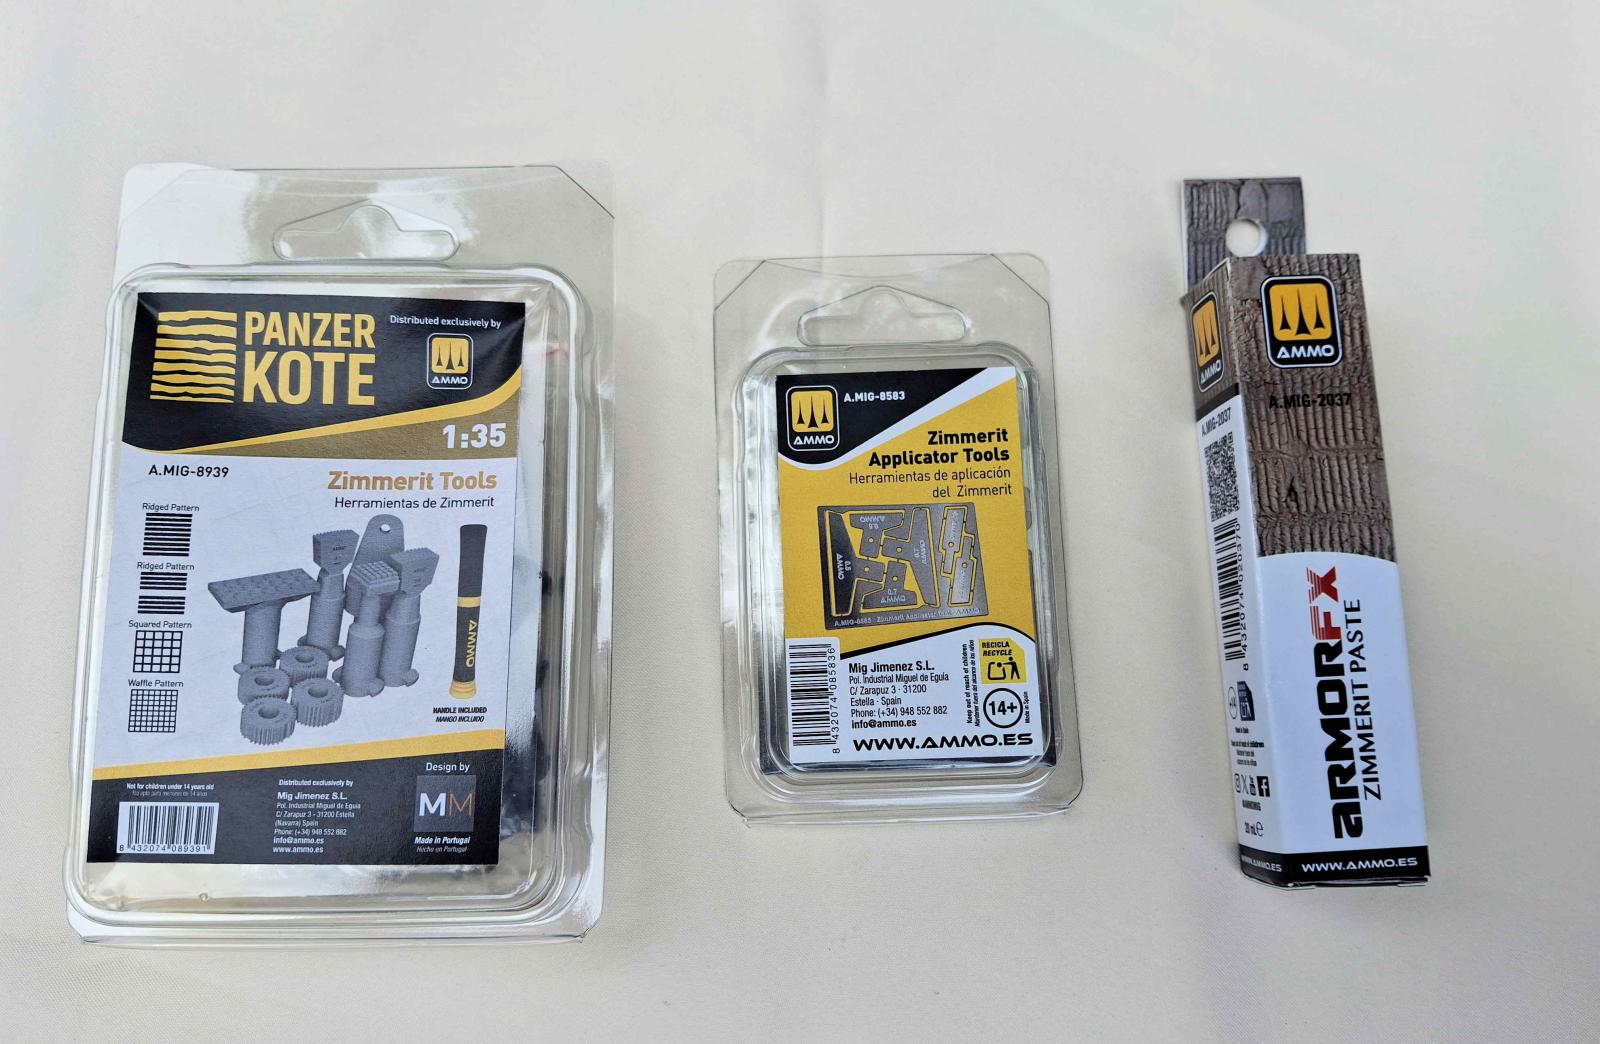
The Tools
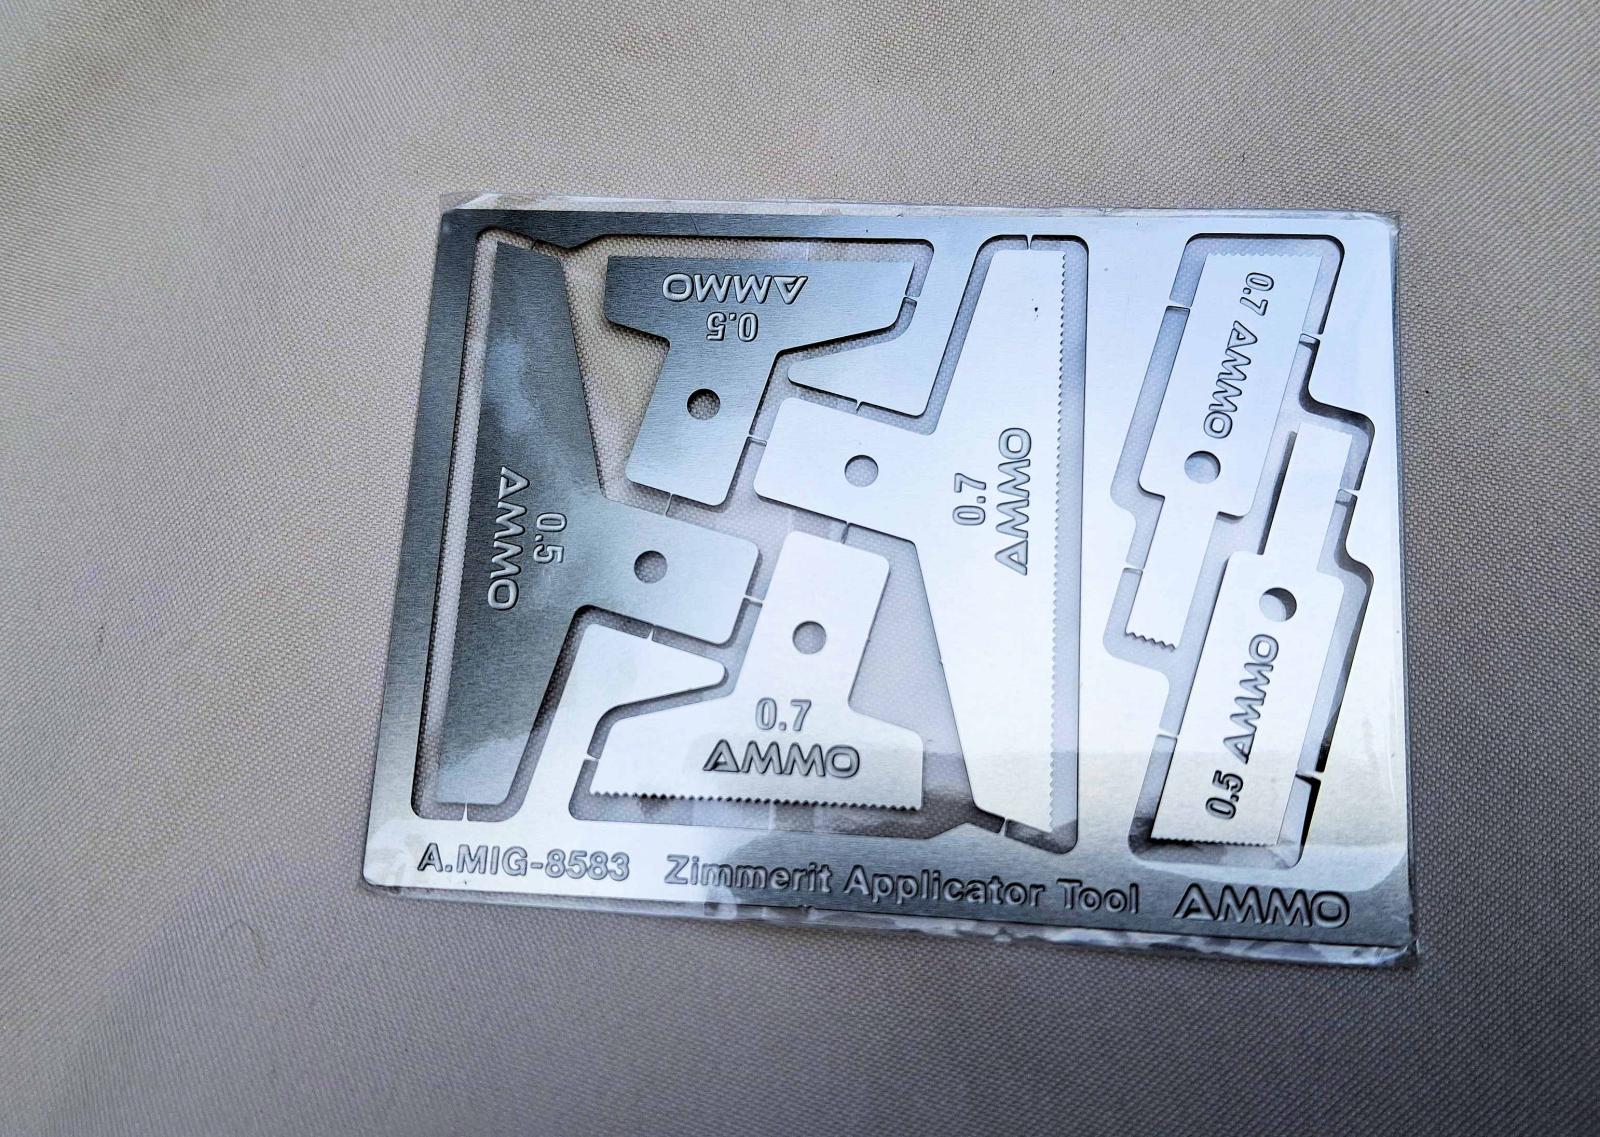
Two sets of zimmerit tools were supplied for evaluation. One set, A.Mig-8583 Zimmerit Applicator Tools, includes six photoetch stainless steel “combs.”There are two of each size comb, one with 0.5 mm spacing and one with 0.7 mm spacing. There are three comb sizes of each spacing, a large comb 1¾-inch (4.5 cm) long, a medium sized comb 15/16 (2.4 cm) long, and a small comb 5/16 (0.9 cm) long.
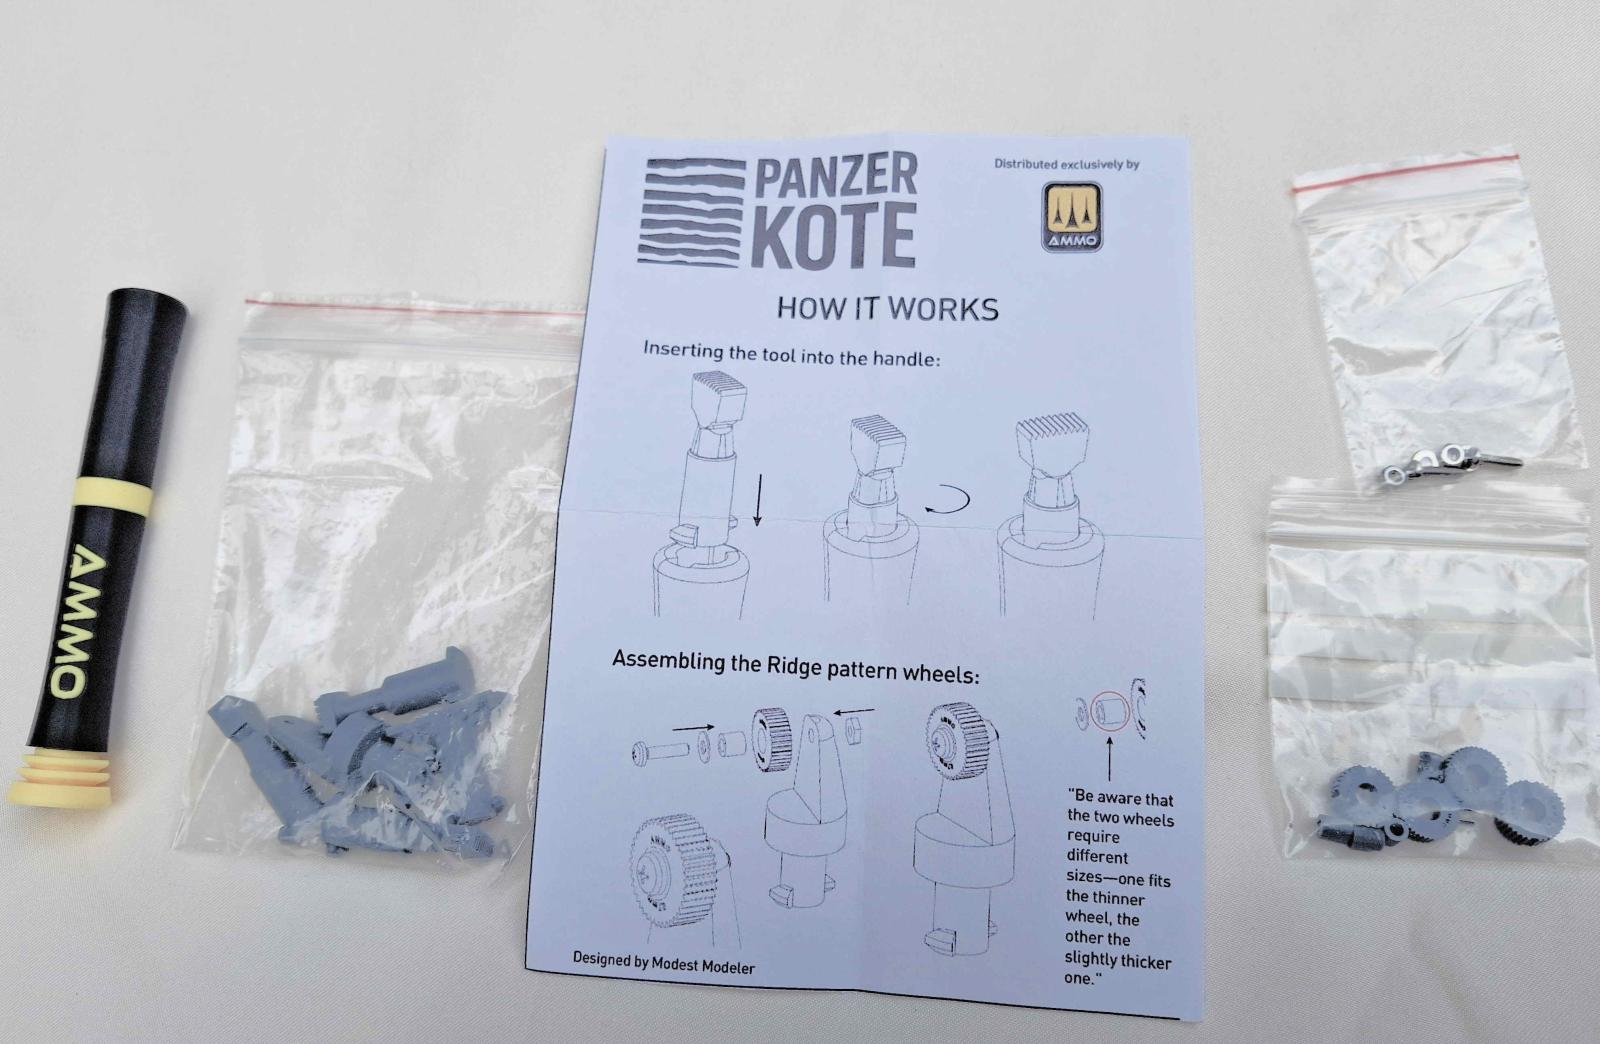
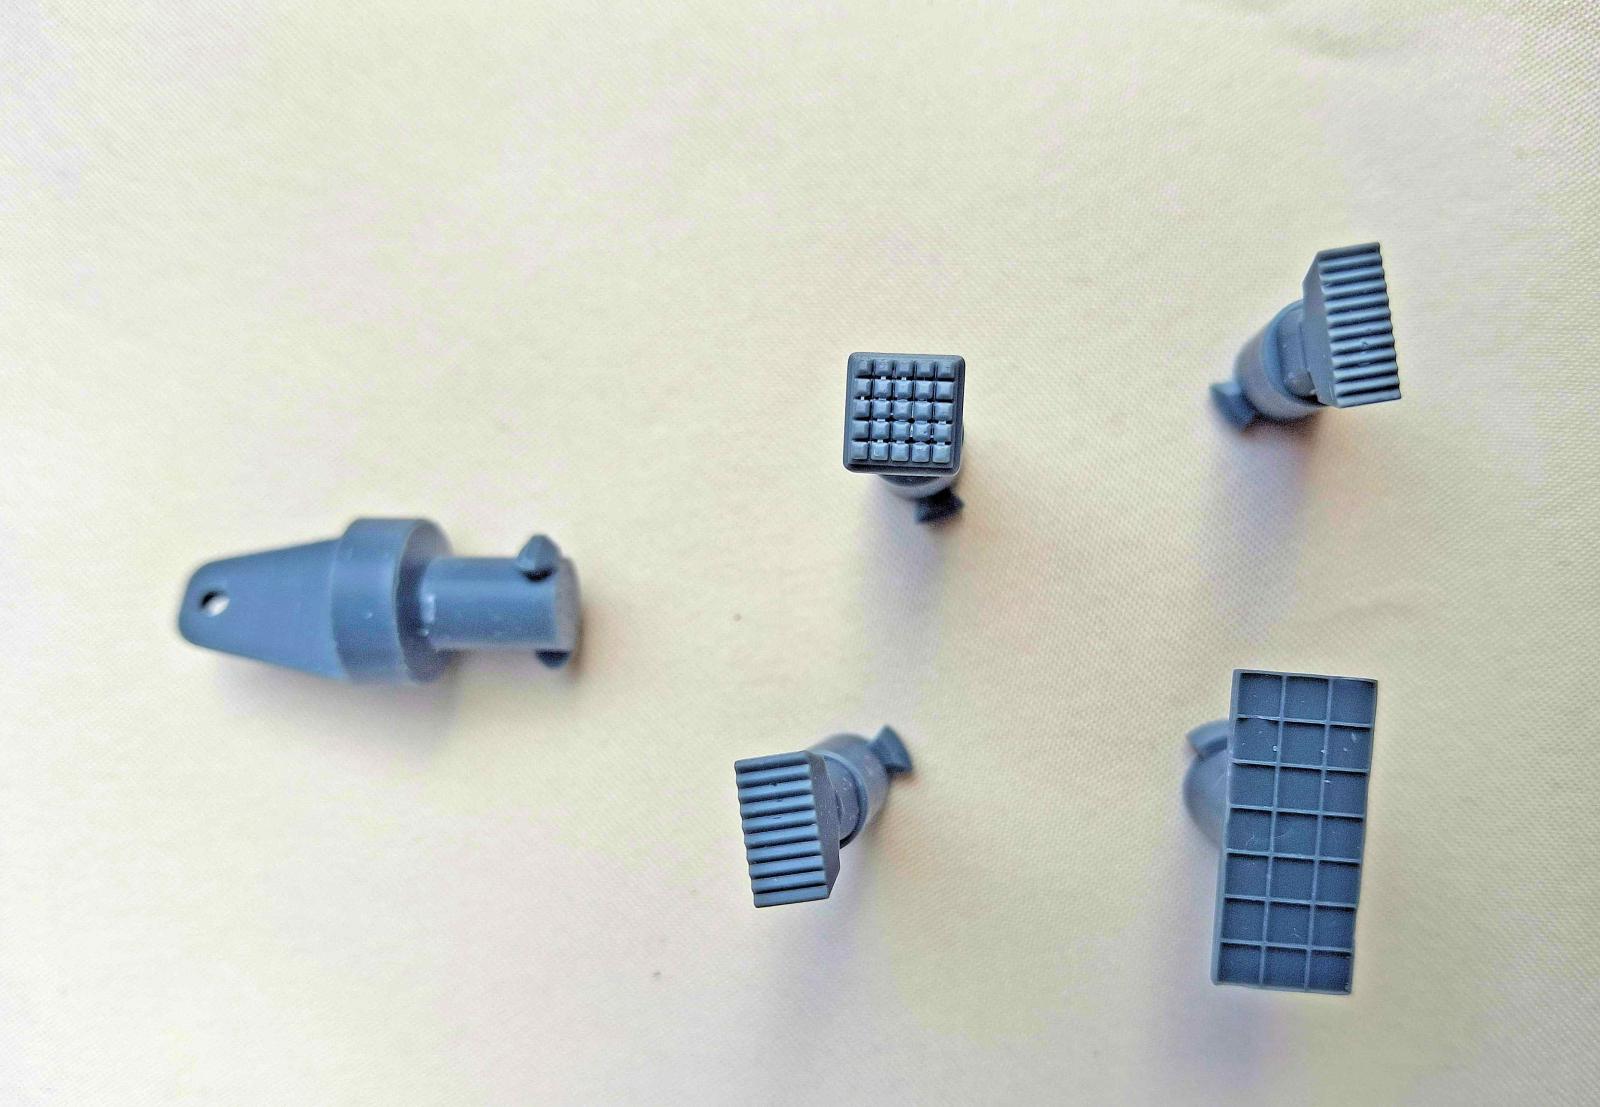
The second set of tools is the Panzer Kote Zimmerit Tools. This set contains a bag with 3‑D printed resin stamps, a bag with ridge pattern rollers, a bag of attachment hardware, a stamping handle, and a small instruction sheet. A nice feature is that this set of tools is available in the popular armor scales of 1:72, 1:48, 1:35, and 1:16. For this assessment the 1:35 scale tools were used (A.Mig 8939).
Details of the items in this set follow. There are two ridge pattern stamps, one with 0.7 mm spacing and one with 0.8 mm spacing. There is a ¼ x ¼ (0.6 x 0.6 cm) waffle pattern stamp, and an 11/32 x 27/32 (2 x 0.8 cm) grid pattern stamp. The set also includes two types of ridge pattern rollers, a roller holder, and attachment hardware. Again the roller patterns are in 0.7 mm and 0.8 mm spacing. The 0.7 mm rollers are 5/32-inch (0.45 cm) wide, the 0.8 mm rollers are ⅛-inch (0.3 mm) wide. Each spacing has two types of patterns, one gives a continuous ridge pattern the other has a gapped ridge pattern.
A small Philips head screw, washer, and nut attach the rollers to the holder. As called out on the instruction sheet there are two thicknesses of roller bushings. The smaller one fits the narrow 0.7 mm roller, the longer one fits the 0.8 mm roller. The stamps and roller holder insert into the handle and lock in place with a simple twist.
CAUTION: the grid divisions on the grid pattern stamp are extremely fragile. I broke off a couple while cleaning the tool with an old toothbrush. (Apparently I got overly enthusiastic with my scrubbing.)
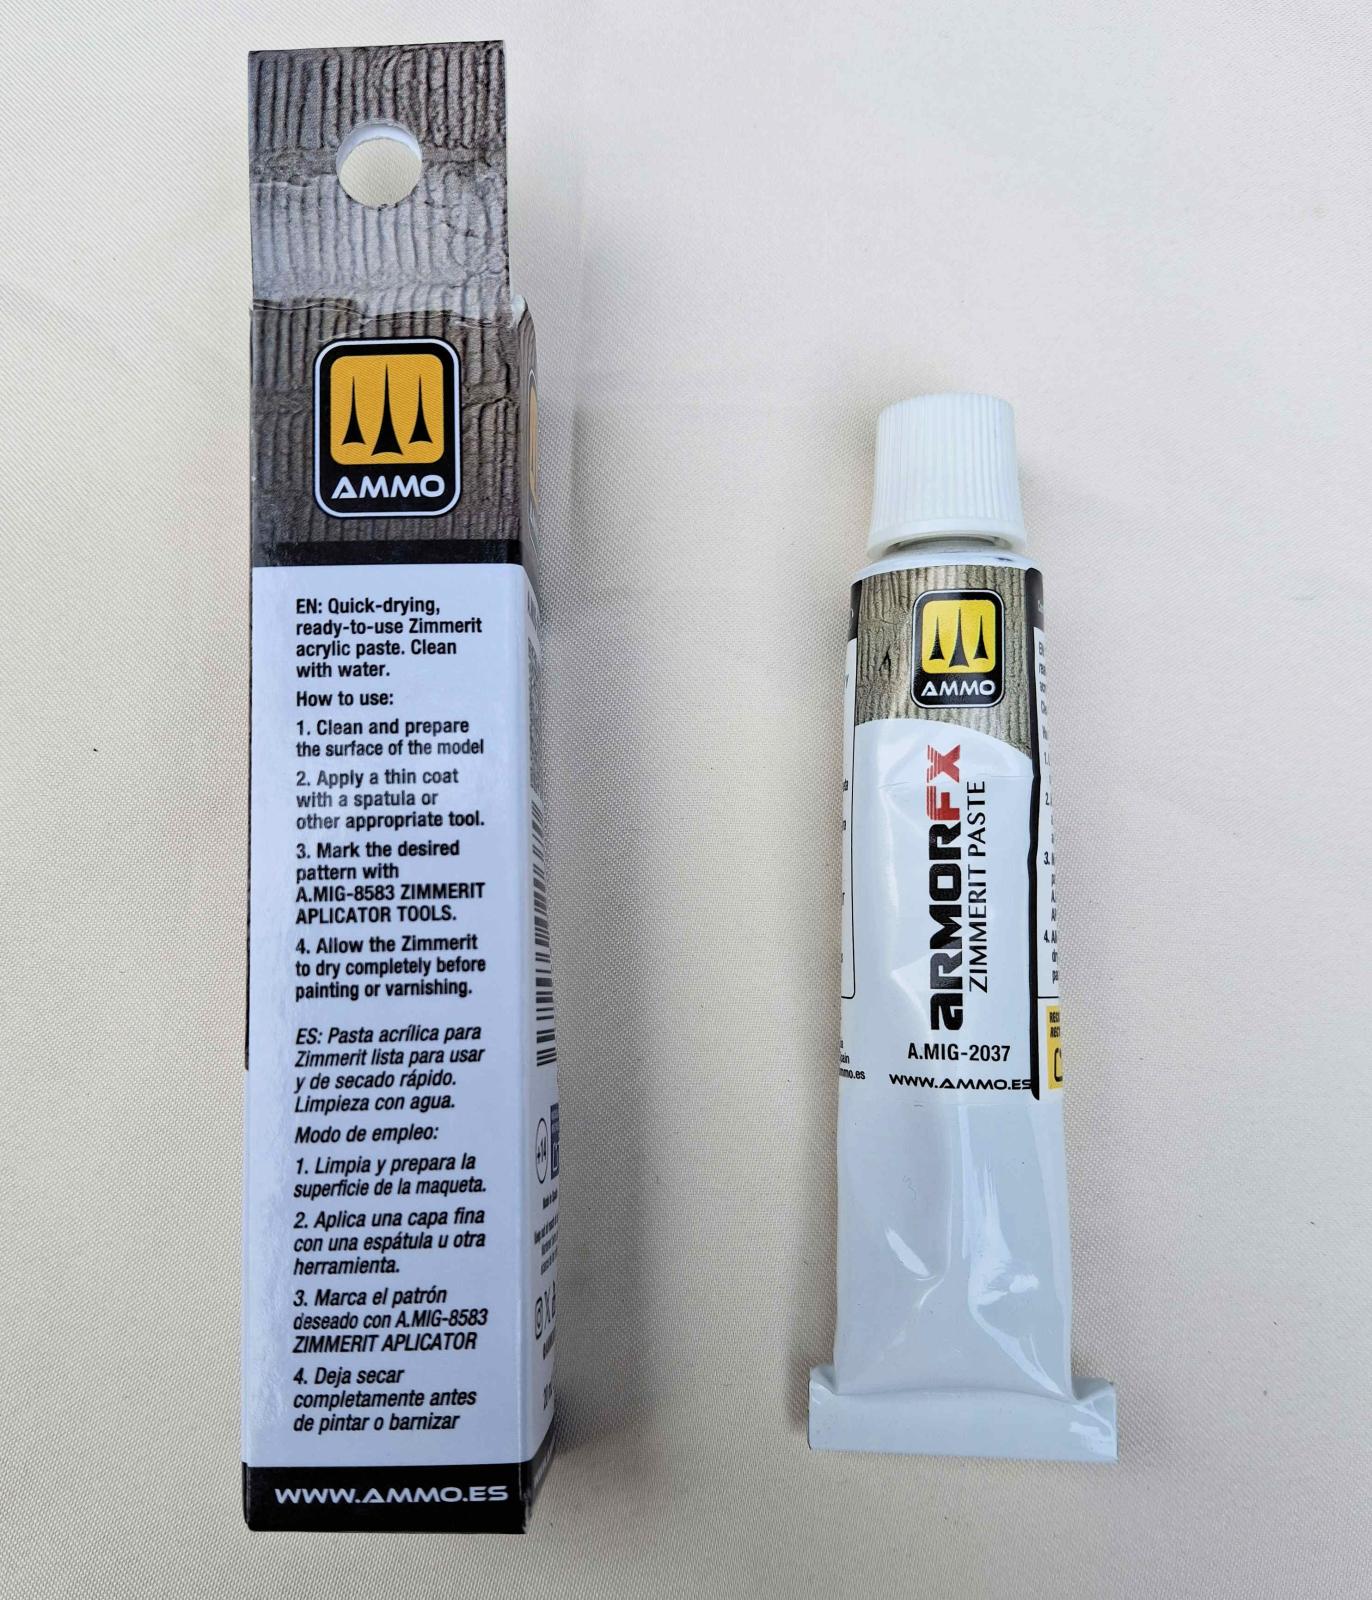
The Zimmerit Paste
The Zimmerit paste is a quick-drying acrylic paste used to represent Zimmerit coatings on models. This paste has the same color as the original paste, providing an extremely authentic finish to models.
The zimmerit paste is applied to a clean, dry surface. The four step instructions on the box and tube are far removed from the detailed instructions included in Section 3.4.4 of the book Zimmerit, The Ultimate Modelling Guide. The box/tube instructions state 1) clean and prepare the model surface, 2) Apply a thin coat with a spatula, 3) Mark the desired pattern, and 4) Allow the zimmerit to dry completely before painting or varnishing.
Section 3.4.4. provides much more detailed (and valuable) information. Information in the book states that “a thin coat” should actually be a thickness of 0.7 mm (~0.030 in). The box does not include the important information that the paste needs to set for at least 5 minutes before attempting to mark a pattern. The box/tube further neglects to mention that the paste is “dry” after about an hour and completely cured after 24 hours.
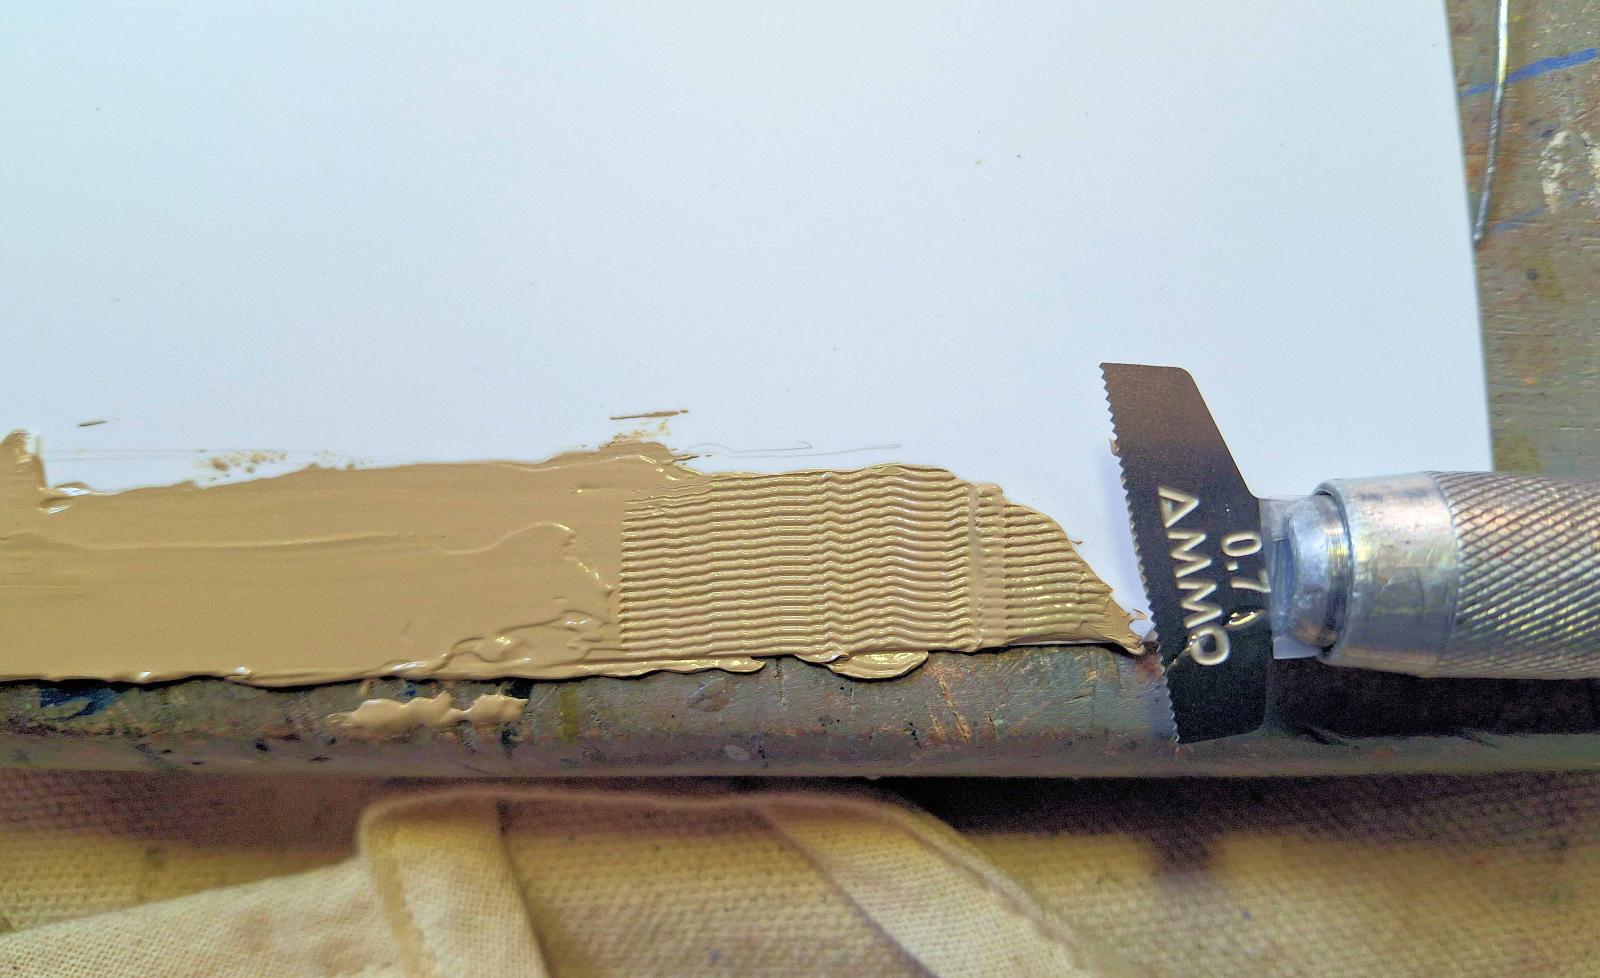
The following are details from my use of this product. The first thing I learned is that it is all about the thickness. While the photo-etch “combs” worked fine on a “thin layer,” the stamps and rollers did not. Rather than trying to estimate what 0.7 mm thick looked like I attached small pieces of 0.030 x 0.080 styrene strip (what I had on hand) with white glue (Elmer’s) vertically on the surface to be coated. I then squeezed out some paste between my strips.
NOTE: Before applying the paste mask any areas that will not be patterned (horizontal surfaces or locations where brackets and equipment attach to vehicle). I tried masking with a couple of strips of 0.2 mm Tamiya tape and with some random pieces of 0.030 x 0.080 styrene strip.
This brings me to the second lesson. It is noted in the book that the surface of the paste can be moistened with odorless thinner so it does not stick to tools. While the book notes this in a “passing” manner, if the surface (or tool) is not moistened, the paste WILL stick to the tool. After squeezing out the paste I dipped a plastic painter’s spatula in odorless Turpenoid and smoothed the paste flush with the plastic strips. I unintentionally ended up with the right side being about half the necessary thickness.
The book recommends waiting at least 5 minutes before attempting to create a pattern. After 5 minutes I started with the 0.5 mm medium comb. I dipped the tool in my Turpenoid, blotted off the excess, and then scribed the pattern into the paste. This worked very well and gave a wonderful ridged pattern. I next tried the 0.7 mm ridge stamp. This didn’t work at all. Nor did the grid, waffle, or roller patterns. I eventually had to let the thicker paste (0.030 in.) dry for about 20-minutes before it would take and hold an acceptable pattern. Each tool was dipped in Turpenoid, the excess blotted off, and then the tool applied to the pattern the paste. The ridged pattern stamps and rollers worked quite well. As did the grid pattern stamp. Although not visible in the photos the waffle pattern also came out well. The one drawback to use of the stamps and rollers is that they require constant cleaning to remove paste that sticks in the stamp/roller patterns. For the waffle pattern this was about every third stamping. The grid and ridge patterns could go for a half dozen or more before needing cleaning.
Painting
I allowed the paste to dry overnight before priming. The dry paste took Rust-Oleum 2x Ultra Cover Flat Gray Primer without problem. It also accepted Tamiya dark yellow paint over both primed and unprimed surfaces with even coverage.
Final Thoughts
For the most part the zimmerit paste and tools worked as advertised. Getting the paste to an appropriate thickness takes some practice. As does feeling out the correct drying time. I also get the feeling that drying time is affected by temperature and humidity. I found that the “combs” worked quite well, even on a slightly too thin layer of paste. The stamps and rollers really need that 0.030 in. thick layer of paste to get the best impressions possible. A minor drawback when using the stamps and rollers is that they require frequent cleaning to keep paste build up in the grooves to a minimum.
All together, the book, tools, and paste will be a much welcomed addition to modelers of World War II German armor. While I’m sure that the other forms of zimmerit already out there will not be going away any time soon, the ability to create your own has just gotten a major boost in simplicity.
I would highly recommend all these items to modelers at any stage.


Comments
Add new comment
This site is protected by reCAPTCHA and the Google Privacy Policy and Terms of Service apply.
Similar Reviews