
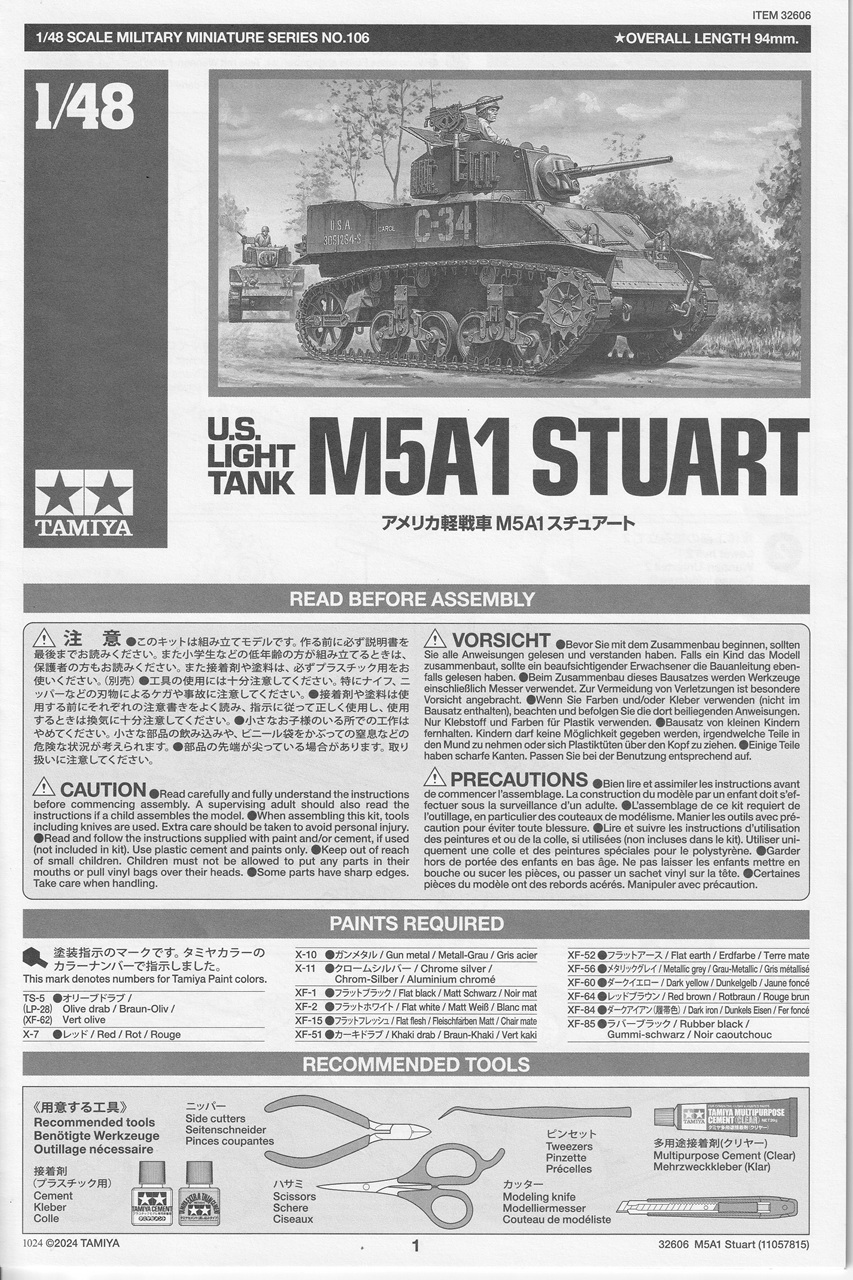
U.S. Light Tank M5A1 Stuart
I’ve built a few Tamiya armor kits over the years but never one of their new 1/48th scale kits. I thought that I would dip my toes into Tamiya’s quarter scale pond with their new U.S. Light Tank M5A1 Stuart. By the time the M5A1 entered service it’s 37mm gun was no longer effective against German armor. However, the M5 still saw extensive service in all theaters of the war until its end. The Stuart had the advantages of having speed, reliability, mobility, and transportability, and were available in large numbers. The Stuart was used effectively for scouting and infantry fire support.
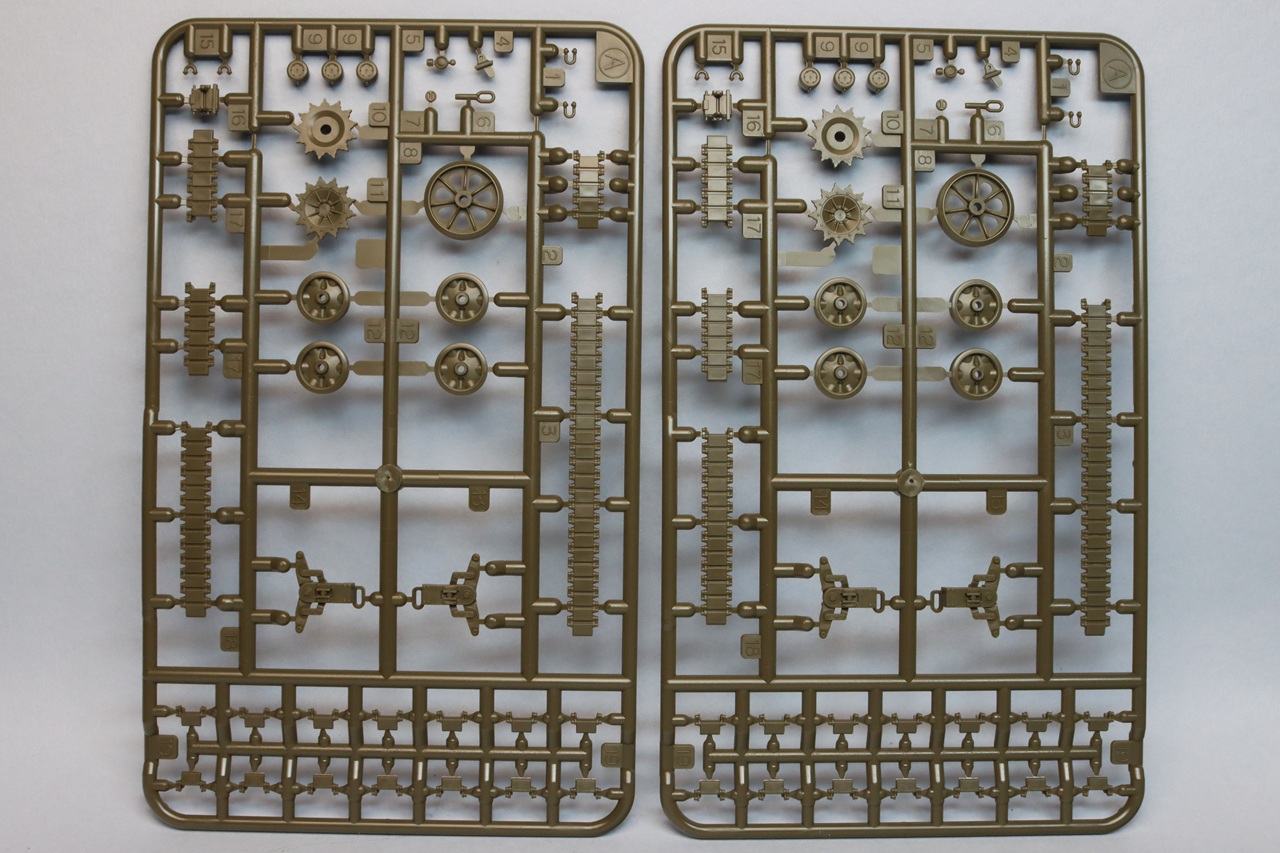
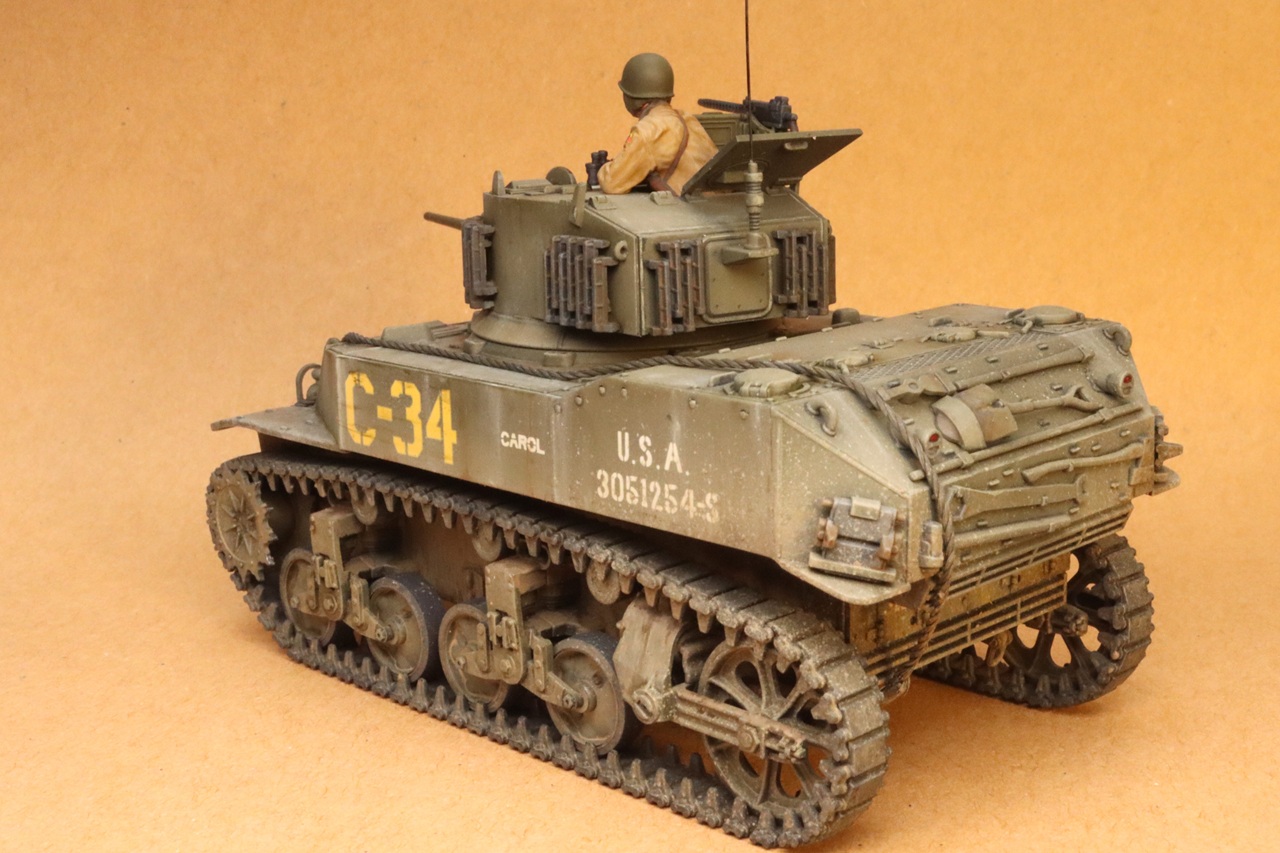
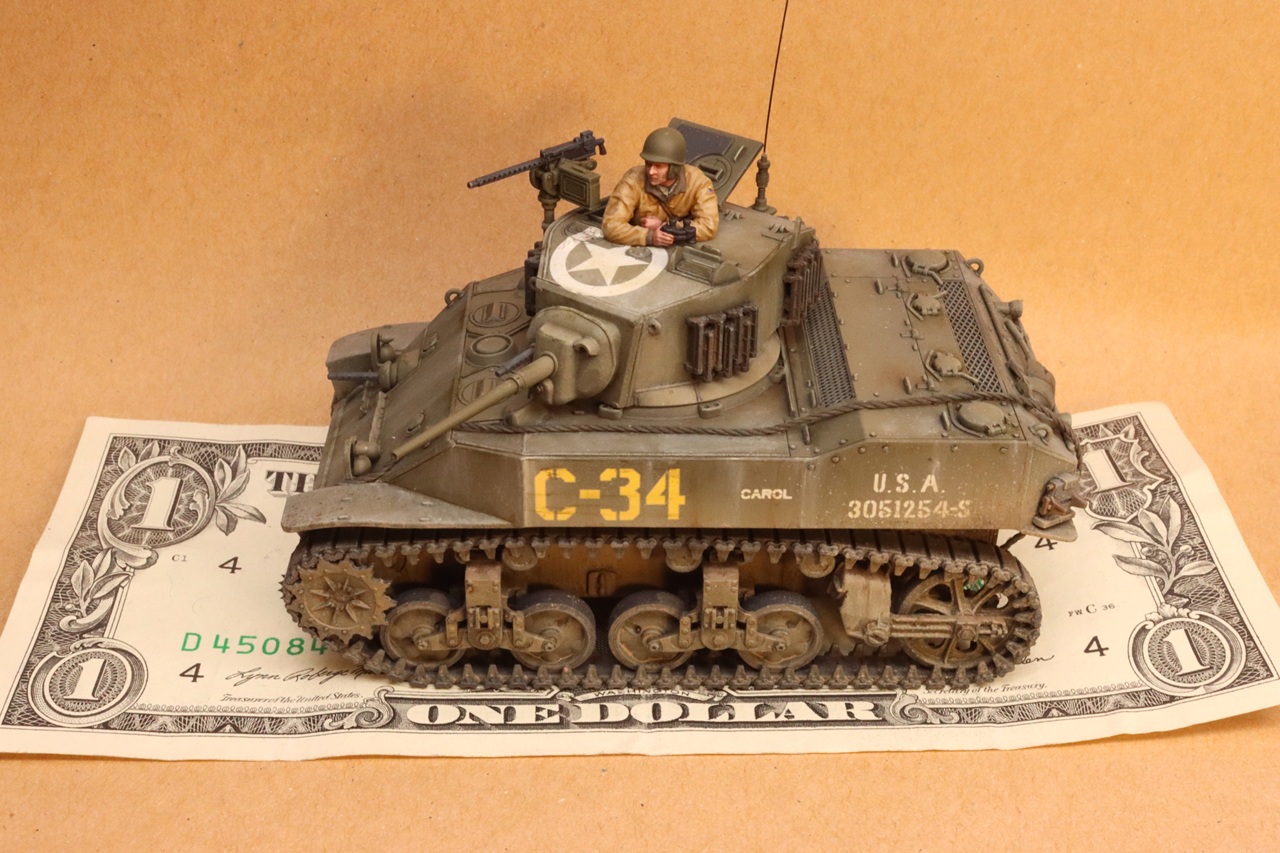
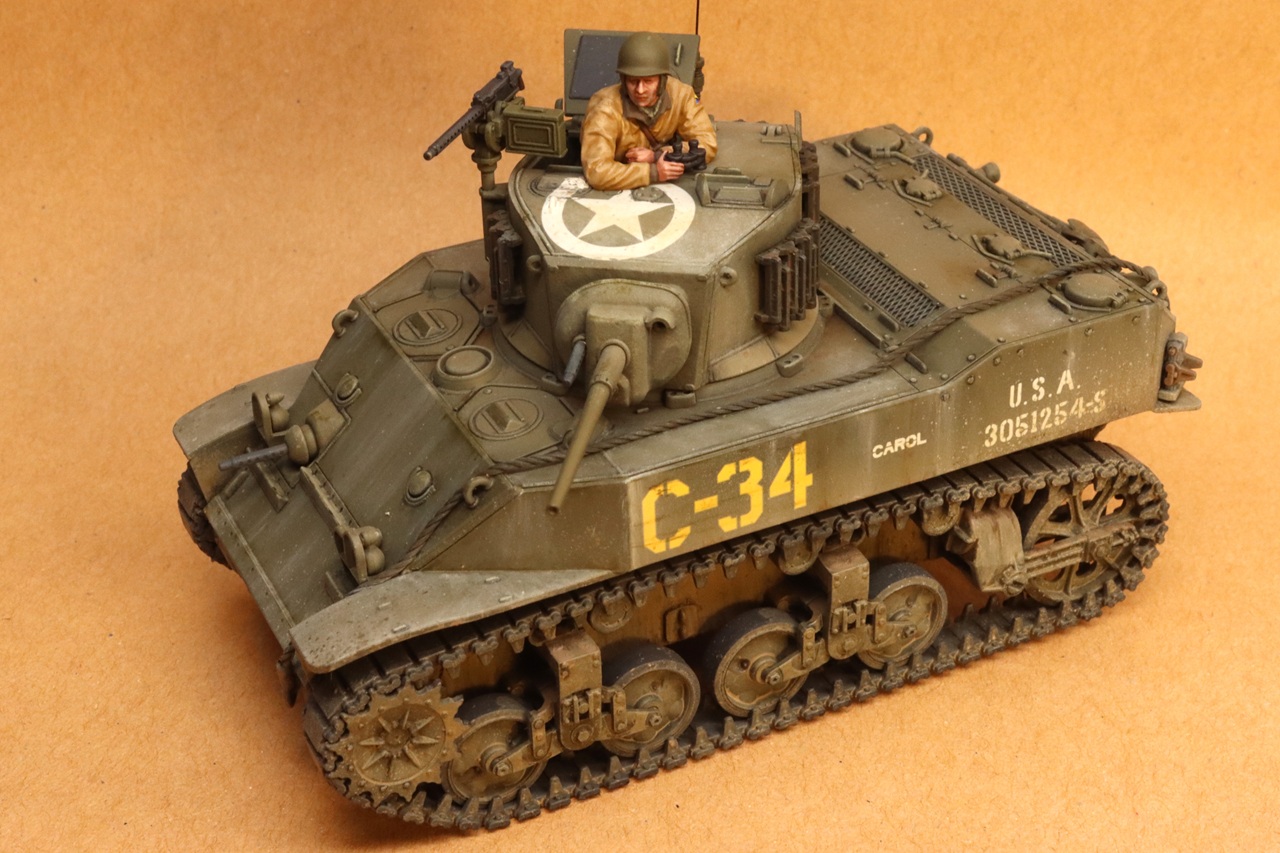
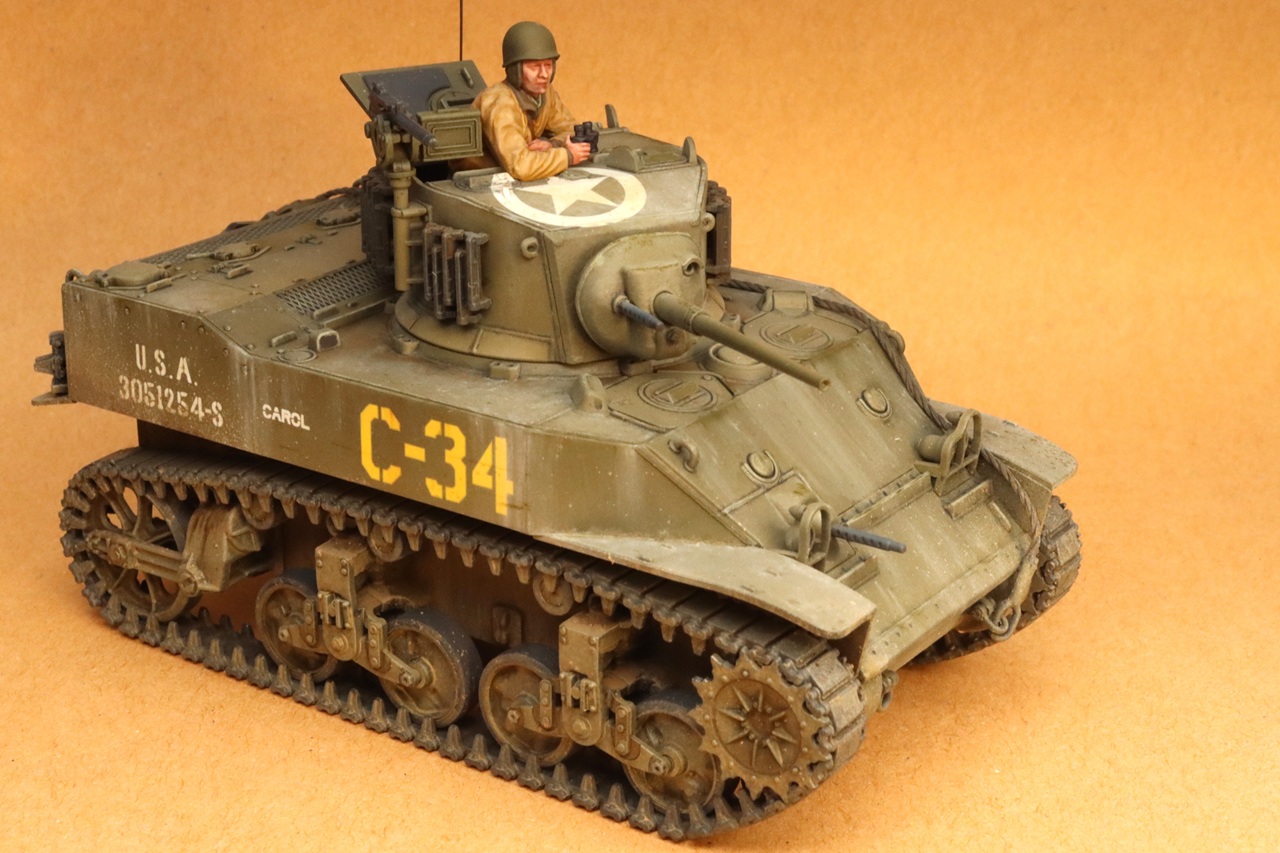
The kit includes four trees of olive-drab plastic, instructions, decals, polycaps, thread for simulating the tow cable, and two steel weights. The kit depicts a relatively early version of the M5A1 with disk road wheels, without the turret machine gun shield, no sand shields, and no rear stowage bin.
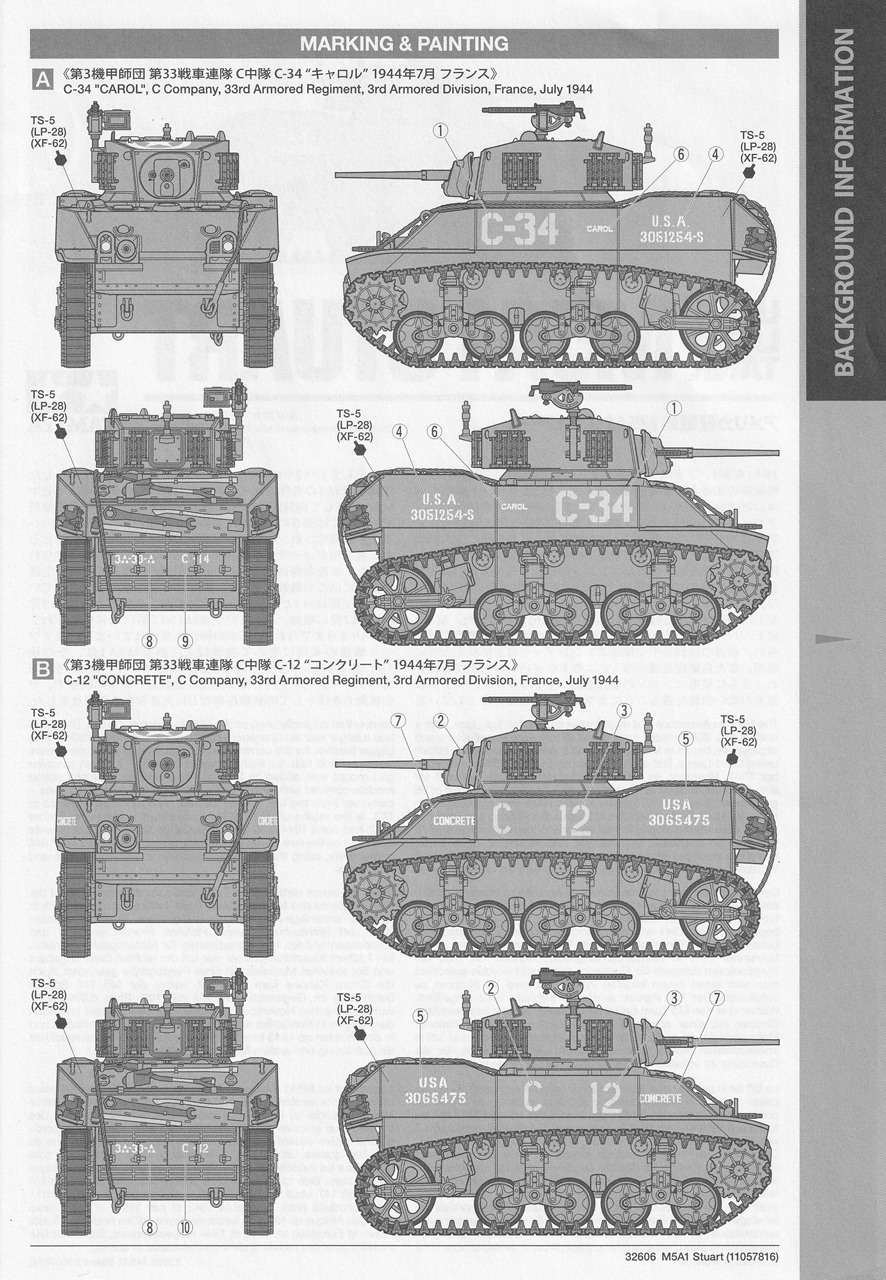
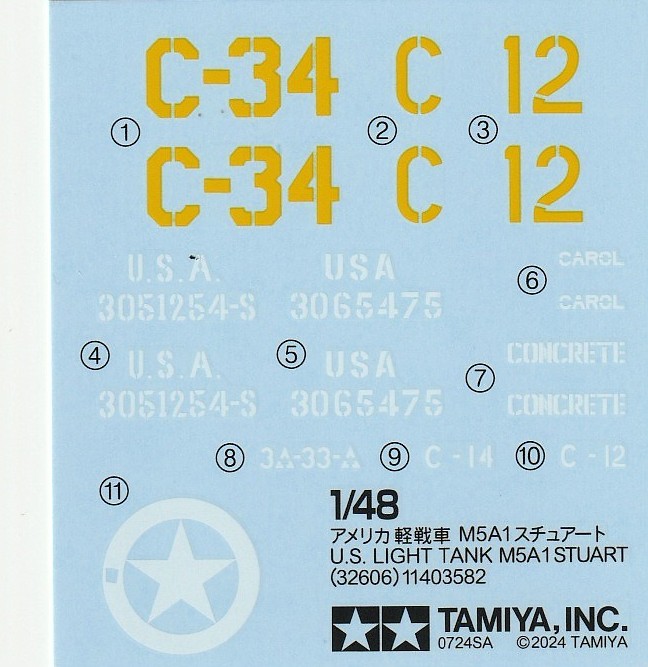
The instructions are clearly illustrated and easy to follow. Color call-outs are keyed to Tamiya paints. Two marking options are provided, both are vehicles of C company, 33rd armored regiment, 3rd armored division in France in 1944. If you happen to have a copy of David Doyle’s “Stuart Tank, Vol. 2“, photographs of these tanks are on pages 78 and 80. The decals are sharply printed and in good register.
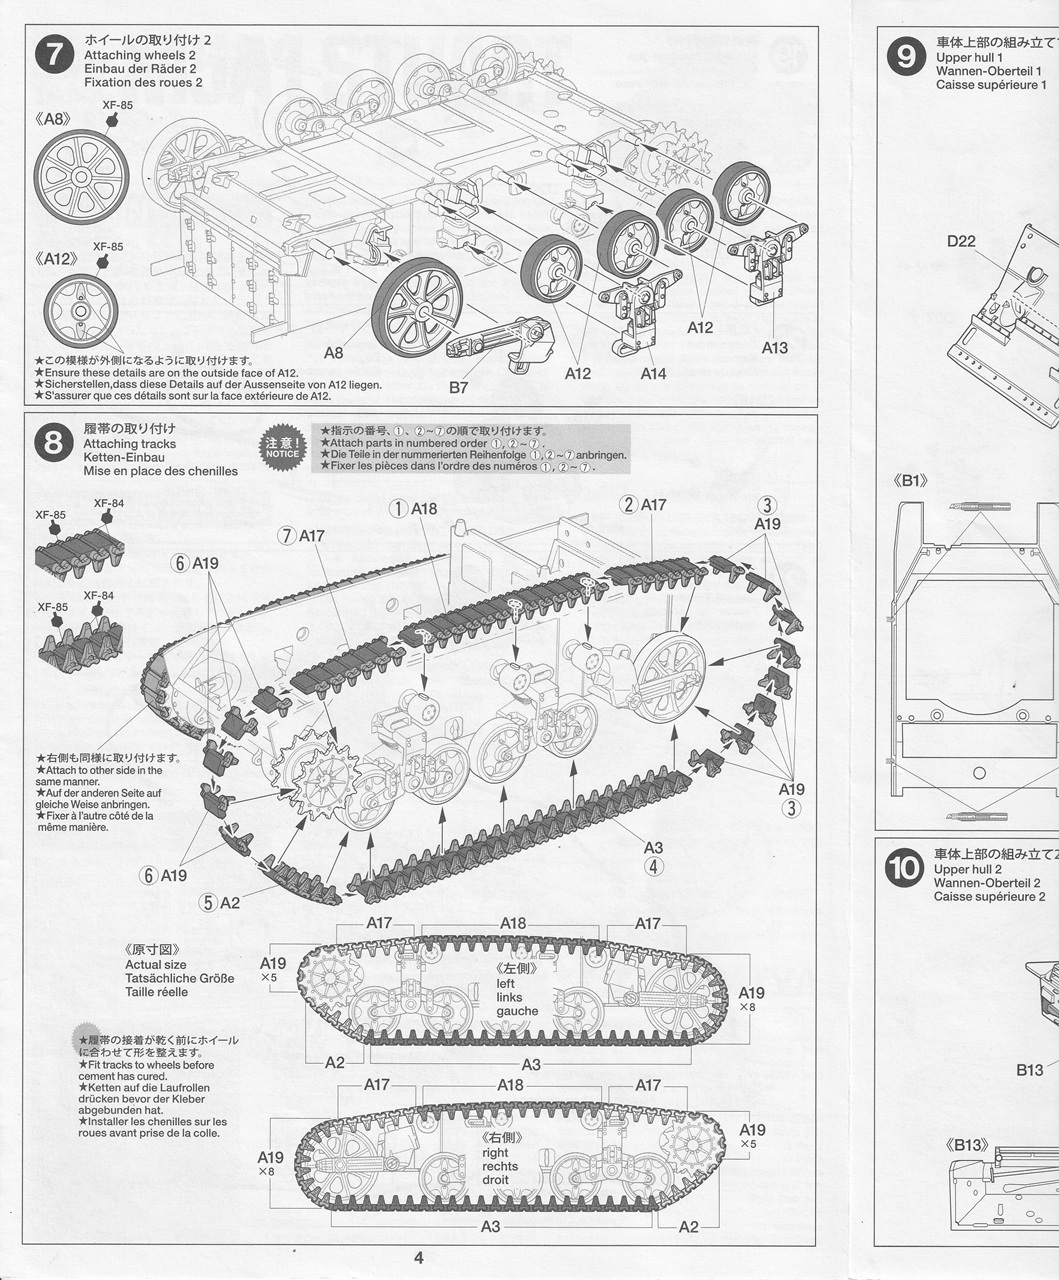
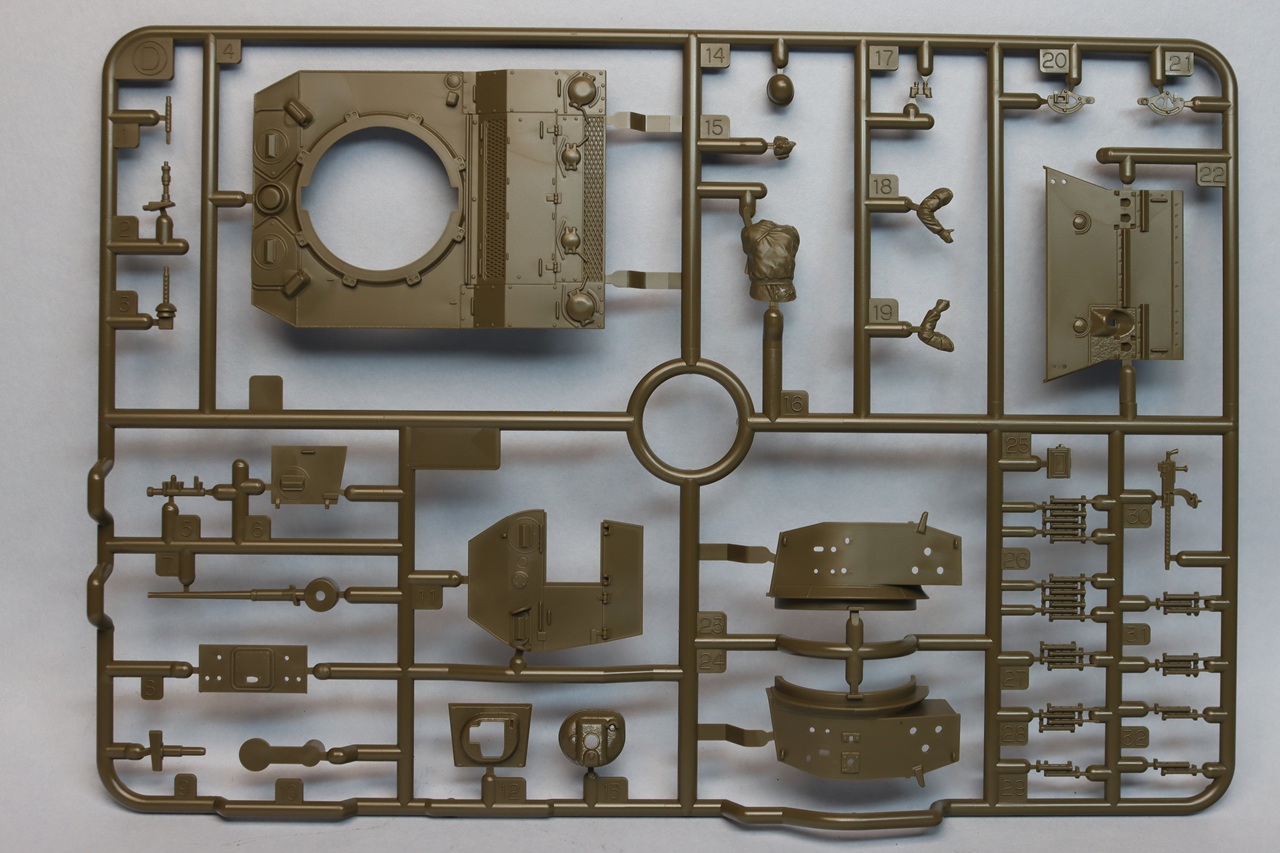
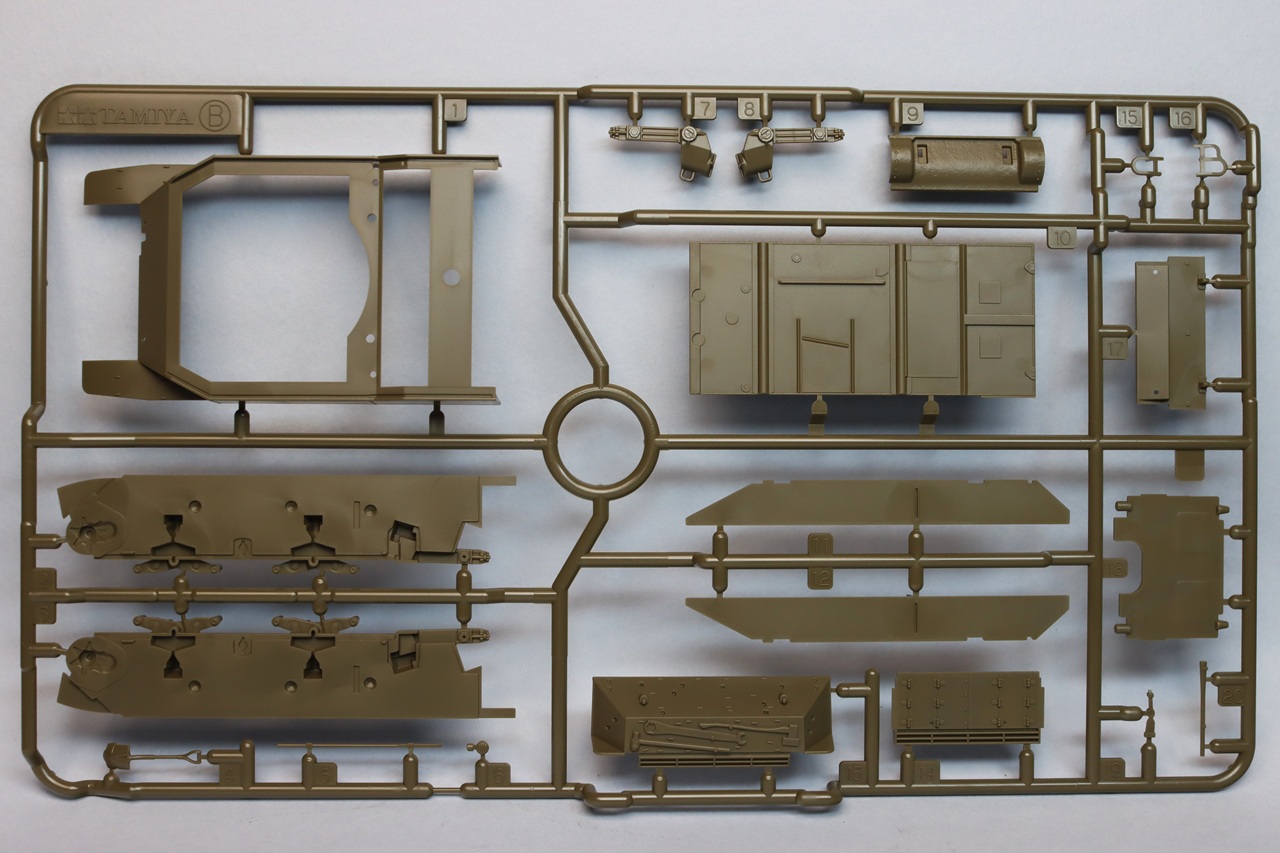
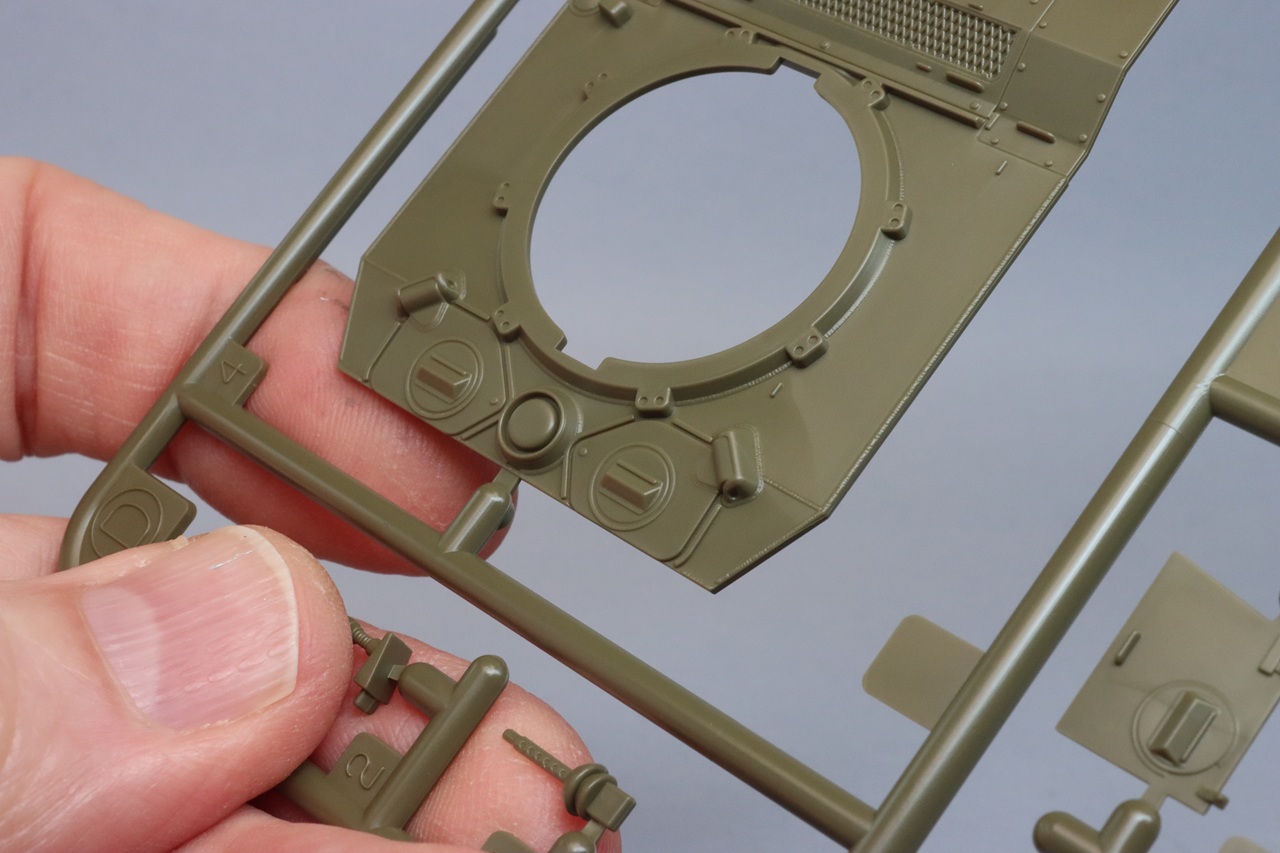
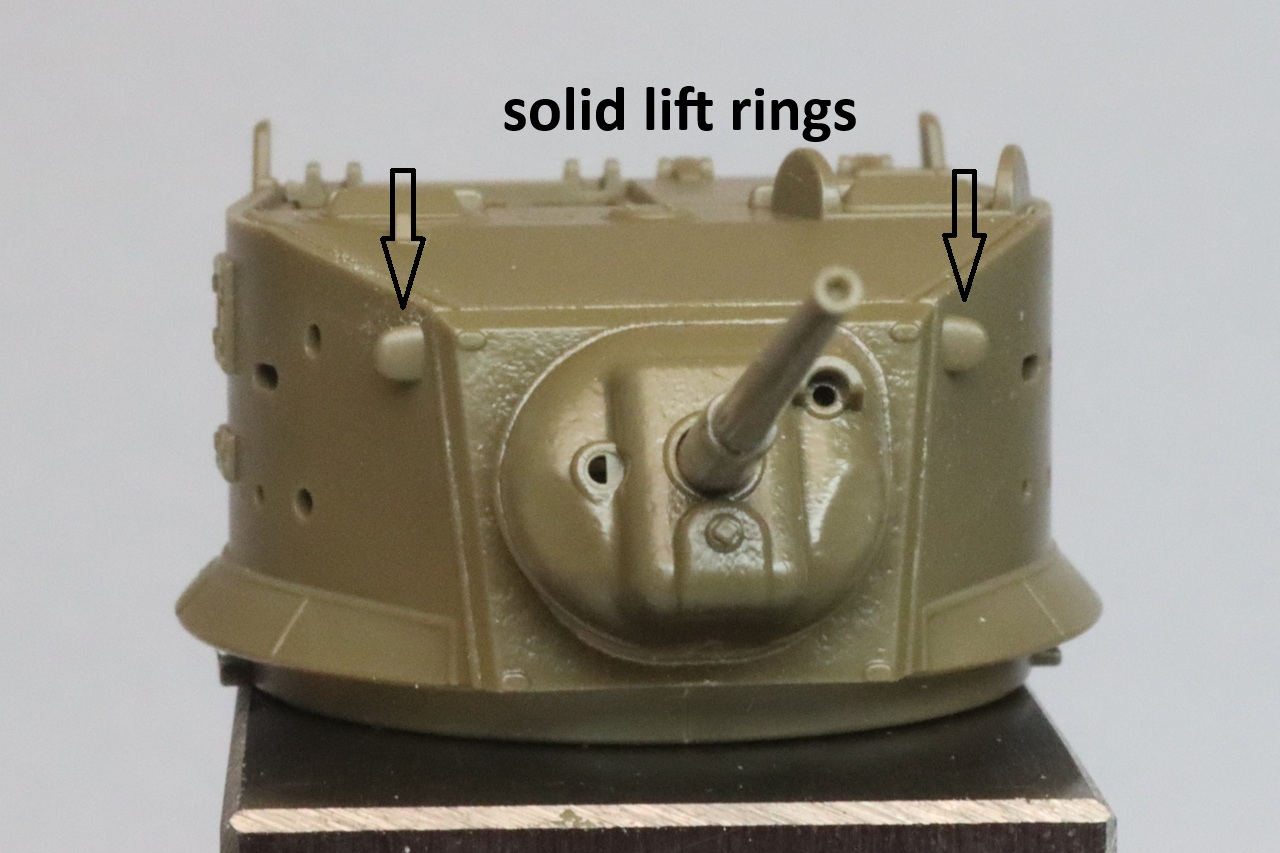
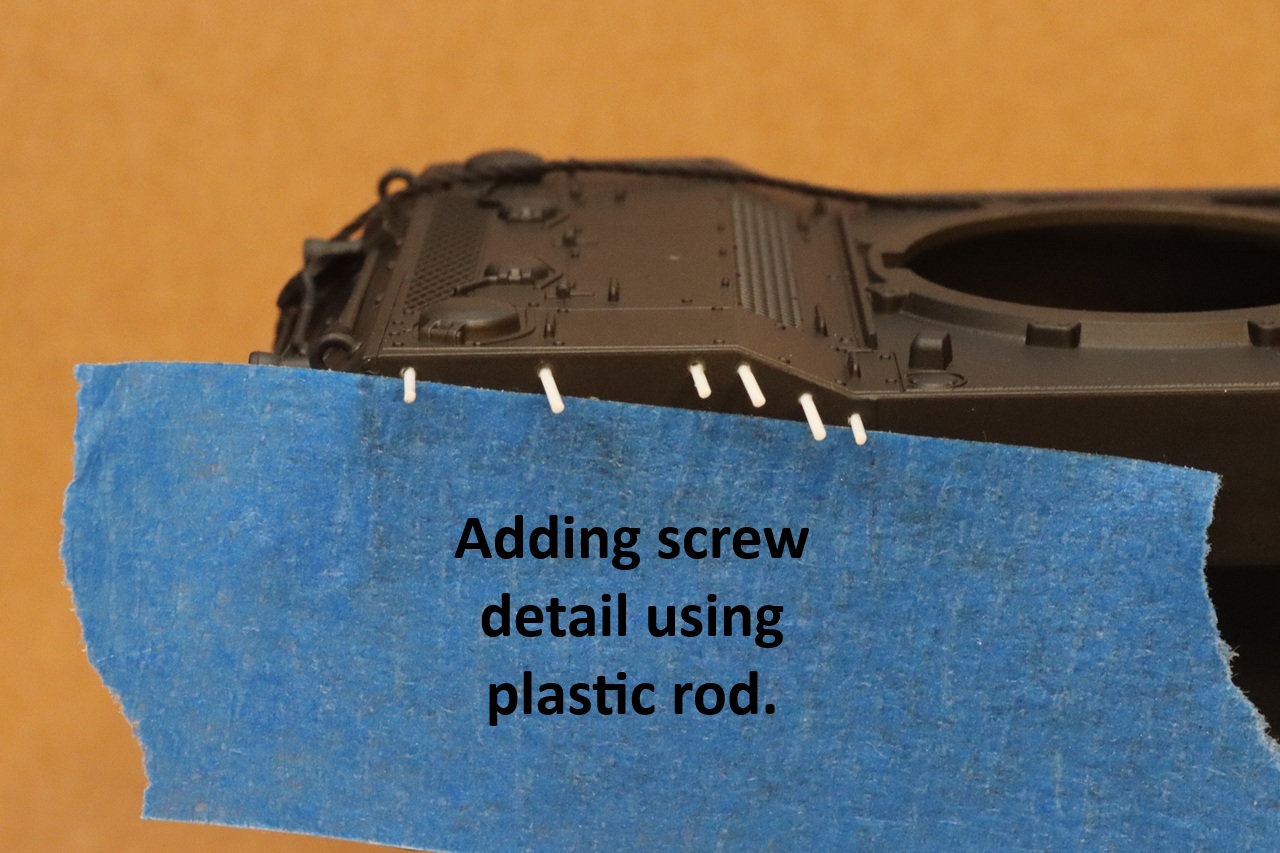
The plastic parts are cleanly molded with no flash and minimal parting lines. The design of this kit seems to emphasize ease of construction. Very nice details are included where it can be done without increasing complexity, but some details are omitted where they would require more parts. I assume that Tamiya wants their 48th scale kits to be simpler and cheaper than their 1/35th scale counterparts. The front and sides of the hull are molded as a single piece. The top and rear of the hull glue to it for a very simple assembly. Very nice weld beads are molded into the hull. The front of the lower hull has a convincing cast-metal texture. The inner half of the suspension bogies are molded into the sides of the lower hull, simplifying construction and making misalignment impossible. There are ejector pin marks on the lower hull sides. After the wheels are installed and some mud slopped around, they won’t be obvious. The pioneer tools on the vertical part of the rear hull are molded in place; on the sloping part they are separate pieces. Except for the commander’s hatch, all the hatches are molded in the closed position. The commander’s hatch can be installed either open or closed. If you install the hatch open, be aware that no part is provided to depict the lower half of the periscope. There are shallow ejector pin marks on the inner surface of the commander’s hatch. The tops of the periscopes are molded in the closed position. The periscope covers on M5s were either flat or humped and sometimes had protective cages on top. The periscope covers in the kit are the humped style with no protective cages. Through the use of slide molding, the 37mm gun has an open muzzle. The turret lift rings are represented by mouse-ear shapes molded to the turret sides. The appearance of the rings can be improved by carefully drilling out the centers. M5 Stuarts have six large screws along the upper edge of the rear end of the hull side. These screws are missing from the kit. I simulated the screws by drilling holes for thin plastic rod and then cutting the rods just above the surface. The light guards are molded a little thick to survive the manufacturing process. Their appearance can be improved by carefully cutting and filing away material while they are still on the parts tree. If you want to replace these parts with photo-etch, Hauler makes an upgrade set for this kit. Check out Andy Taylor’s review of the Hauler parts. I did not use any aftermarket parts in this build.
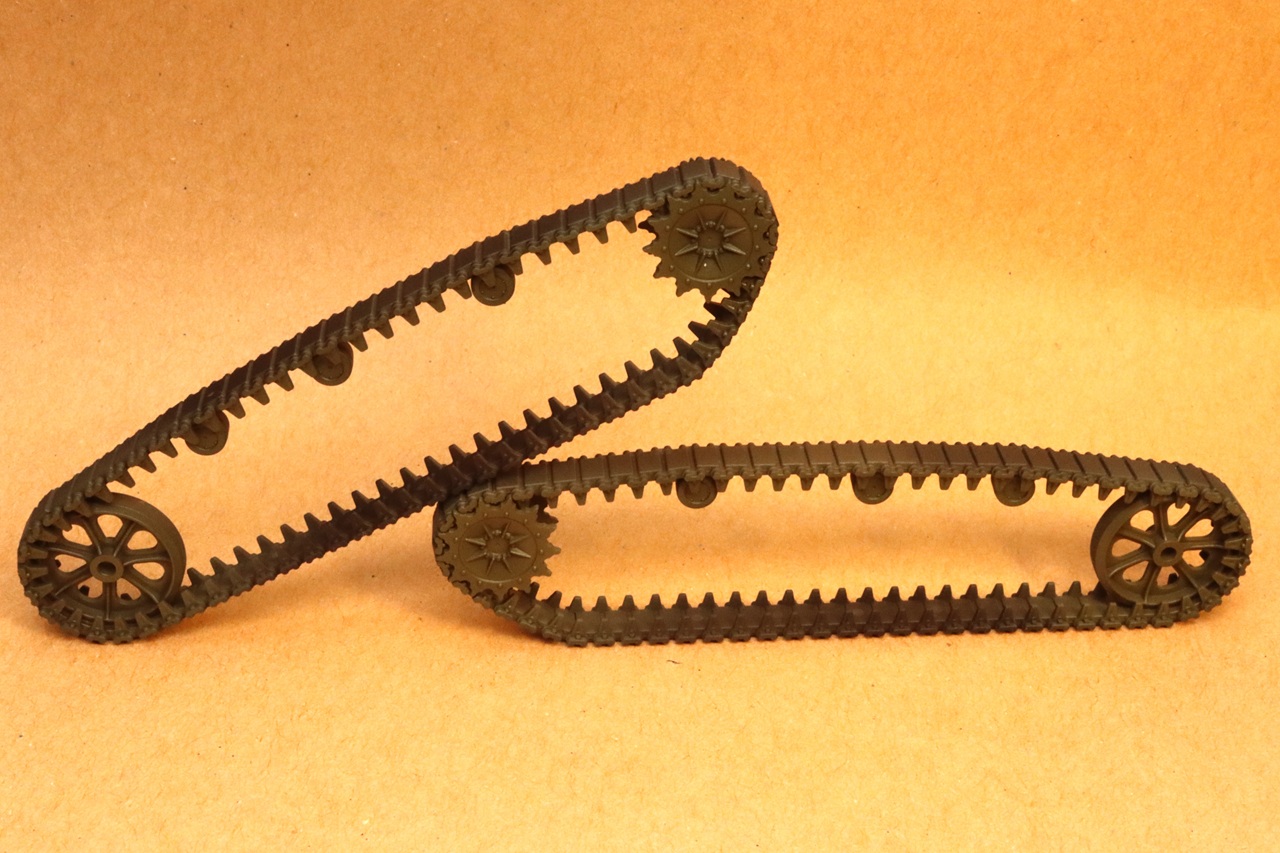
The tracks are of the link-and-length type. There are some shallow ejector pin marks on the inner surface of the track. The individual track links (A19) are tiny and easy to lose, fortunately two extras are provided. The tracks are meant to be built up around the assembled suspension. To make painting and weathering of the lower hull and suspension easier, I temporarily attached the wheels with white glue. This allowed me to assemble the tracks and then remove each run as a single piece. (soaking in water overnight loosened the white glue). The return skids molded in the tops of the bogie sides (A13 and A14) are not molded to scale thickness. Their appearance can be improved by slightly beveling the outer edge so that it appears thinner.
When installing the track grousers on the side of the turret, pay attention to the size and orientation of the mounting pins so that you get the parts right side up. On the front of the turret there is a little bit of play in the location of the grousers, so it is best to install adjacent parts at the same time so that they don’t interfere with each other. The tow cable is represented by a length of thread that glues into plastic shackles. The thread has a realistic texture and has no fuzz or fraying. The thread was slightly too large to glue neatly into the recesses on the plastic shackles. I found that if I saturated the ends with CA glue, I could shave down the ends so that they would fit.
The kit includes two steel weights to glue inside the hull to give the model some heft. The weights aren’t necessary to finish the kit, but if you tape some magnets to a block of wood you can have a temporary handle for your model. This will reduce the risk of breakage and fingerprints from too much handling.
The decals worked well using warm water and Tamiya Mark-Fit. The star decal for the top of the turret (#11) has cut outs in the carrier film to help it conform to the detail there. After varnishing over the decals, there was still a perceptible step at the edge of the decal carrier film. I was able to remove this by carefully sanding with a 4000-grit sanding sponge and re-varnishing.
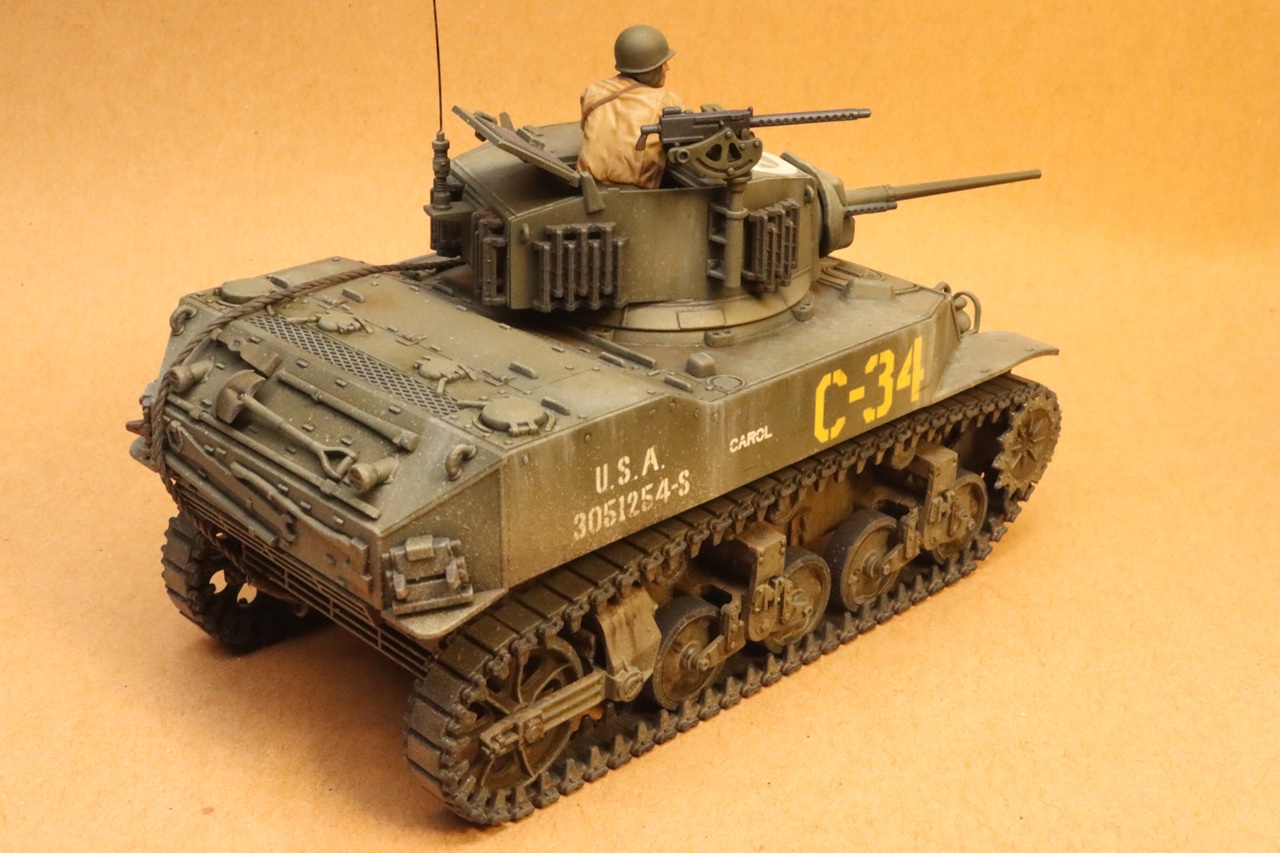
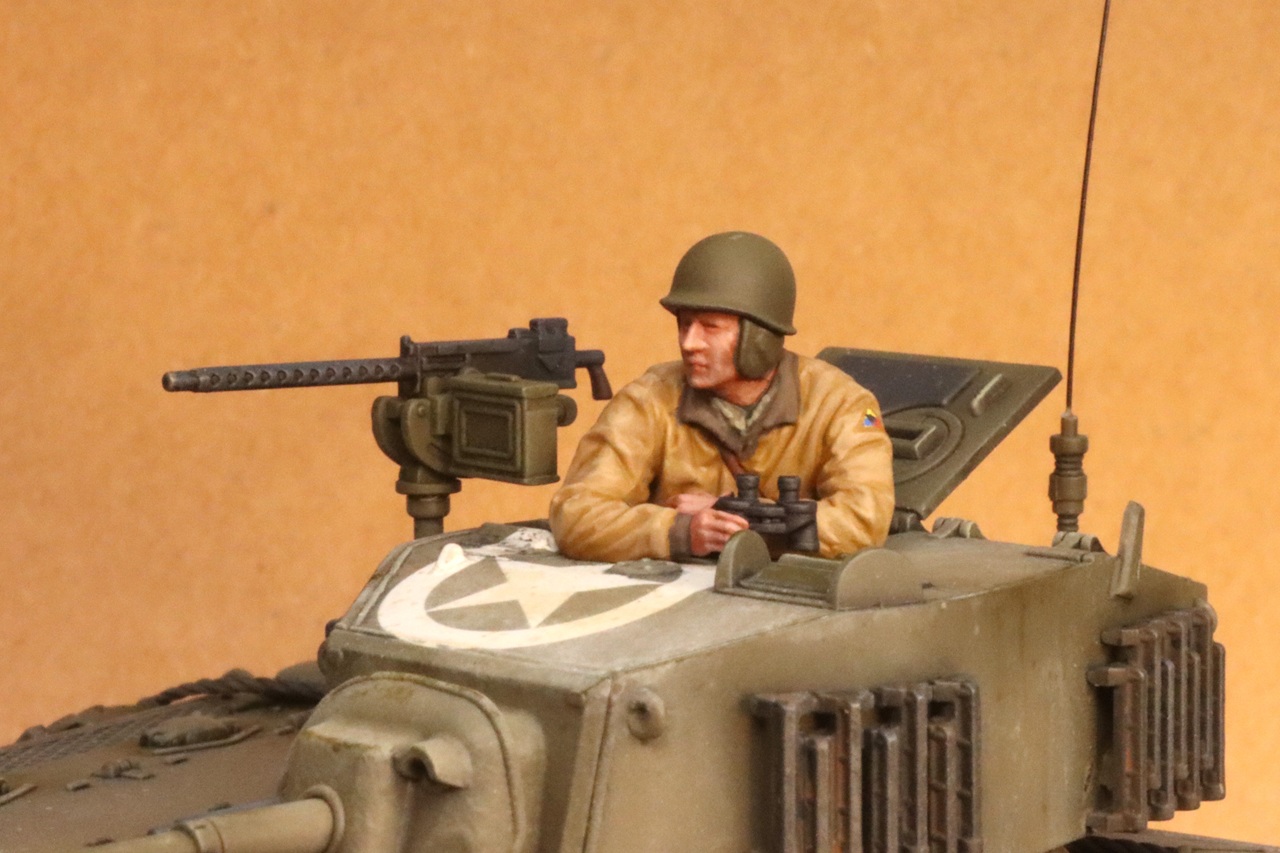
A legless tank commander figure is provided to go in the commander’s hatch. The figure is well sculpted and has a natural-looking pose. Although there is a lot of variety in how M5A1 Stuarts appeared, the kit doesn’t include any optional parts. Many photos of operational Stuarts show piles of stowage secured to the tanks, but no stowage parts ae provided. If you want stowage, sandbags, spoked wheels, sand skirts, or a machine gun shield you’ll need to source the parts elsewhere. I imagine that this lack of extra stuff is meant to keep the kit simple and below the cost of 1/35th scale kits. This is a very compact little model. If you are short on display space or are worried about complex dioramas getting too large or expensive, these Tamiya 1/48th kits are worth considering. This kit goes together simply and easily but still results in a good-looking model. This is a good entry-level kit for someone new to armor modelling, but it is not so simplified that a little extra effort won’t result in a satisfying build for someone used to more expensive and complex kits.
My thanks to Tamiya for producing this kit and my wallet for getting it!


Comments
Add new comment
This site is protected by reCAPTCHA and the Google Privacy Policy and Terms of Service apply.
Similar Reviews