
Stuka zu Fuss Sd.Kfz. 251/1 Ausf. B
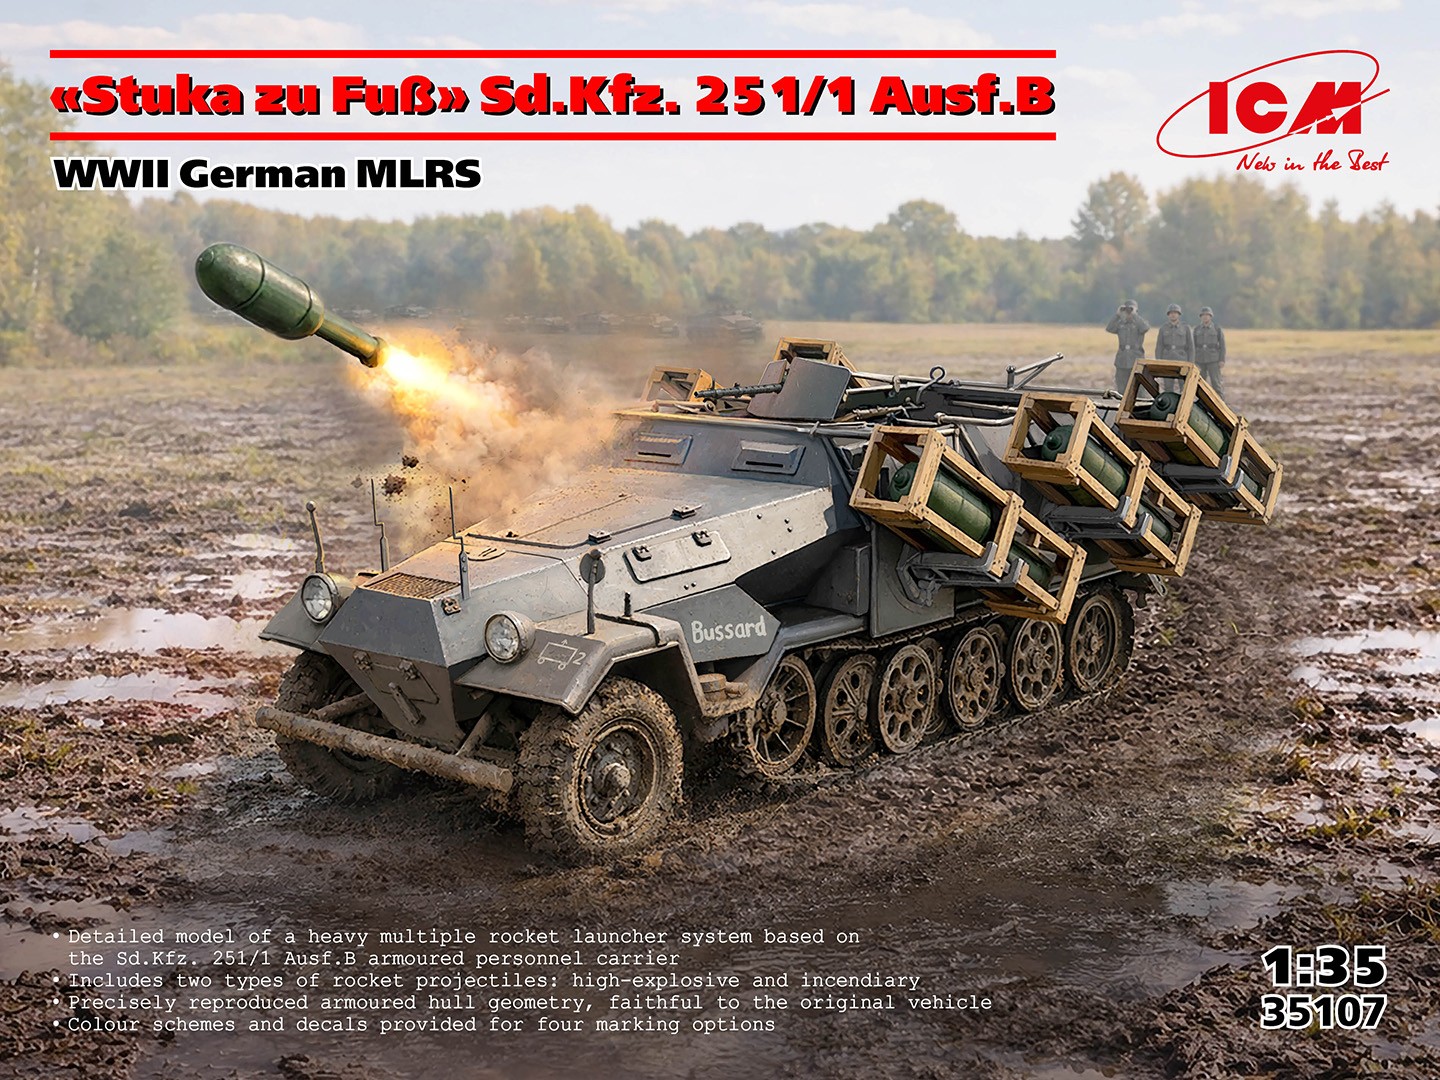
The “Stuka zu Fuss” was the name given to WWII Germany's Multiple Launch Rocket System (MLRS) that was commonly mounted on the Sd. Kfz. 251/1 Ausf B half-track. This was an effort to give German armored units some mobile artillery support, particularly in urban environments. The MLRS was employed on captured French (Renault Chenillette's) and American (M3 half-tracks) vehicles as well.
The MLRS consisted of from four to six launch crates draped over the side of the carrier vehicle. These disposable crates were also the shipping container for the projectiles. These projectiles came in three versions:
- 280 mm high-explosive (HE) rockets
- 300 mm HE rockets
- 320 mm incendiary (napalm) rockets
These rockets were spin stabilized and had a range of 2300 meters, or about 1-1/2 miles. All of that brings us to a review and assembly of ICM Holding's “Stuka zu Fub” Sd. Kfz. 251/1 ausf. B.
For fans of ICM Holding, the Sd. Kfz. 251/1 should come as no surprise as a half-track (Ausf. A) kit has been released prior to this latest iteration. While most of those are the Ausf. As, they do include separate kits for a command, observation, ambulance and personnel carrier version. An Ausf. B version has been released of the standard personnel carrier (kit 35106). In fact, the plastic sprues for this kit include some unused parts from that release.
The box has five light gray plastic sprues that provide all the parts. There are five smaller sprues that host all the rocket bits and mounts. Both the 28 cm (High Explosive) and 32 cm (Napalm) rockets are included in this kit. There is also a clear sprue for the headlight lenses. The clear sprue clearly belongs to another one of ICM Holdings offerings, as the lenses are all that get used with this kit.
The decal sheet has three marking options, four if you count the one vehicle in winter camouflage. Additional decals are available for instrument gauges and national/unit markings. All the vehicles were stationed on the Eastern Front in 1941/1942. Stenciling/ordnance markings associated with the rockets and aiming/elevation marks are also provided. Pay attention to the decal placements guide as some of those ordnance stencils are upside down. The decals are thin and go down nicely but do exercise some caution as some of them folded up on me. In addition, the front tires are provided in soft, black vinyl as are the rubber band style tracks. Do not be put off by that as the detail on the tracks is excellent, as is the tread pattern on the tires. Besides, the rockets are the star of this show.
The 24-page assembly instructions are in ICM Holdings usual style. I have found their assembly instructions to be clear but occasionally a tad vague as to where a part should be attached. In short, you might want to break out the old reference materials. With a part count of approximately 425 items, assembly might not be a breeze, but easy enough if you don't try rushing things or skipping around with the assembly sequence. Also bear in mind that about 200 of the parts belong to the MLRS weapons system...the cool part.
To begin at the beguine, the hull and chassis come first. This entails assembling the bottom hull plate to both sides and then attaching that to a single, molded part that is the side skirts and interior floor, which is a real plus. Other manufacturers tend to provide the side skirts/fenders as separate pieces that can be a bit of a bore to get aligned properly. Do exercise some caution when attaching the lower outer hull portions (parts B1/ B2). Get them misaligned and nothing else will fit properly. About those parts though, there are injector pin marks on each that you may wish to address. Anyway, nine steps later and you have a 251 hull!
Some additional items are added to the hull (front axle, steering linkage, etc.) as well as an access panel. It is a pity that some of that steering linkage detail gets hidden by that panel. Several posable access doors are available for the engine compartment. It all depends on whether you choose to show off the nicely detailed engine.
That engine consists of 20 parts that includes the fan assembly and requisite hoses. Detailers might wish to add some ignition wires, additional hoses, and other fiddly bits for an added touch of realism. You cannot hurry love, and you should not hurry assembling this engine. There are plenty of small parts that don't exactly snap into place. Some boop in my shop got the intake/exhaust manifolds mixed up, and I had to step in to correct that mistake, but you are rewarded with a very detailed engine...right out the box.
Work on the interior now begins in earnest with all the expected accouterments. The driver’s seat, shift levers, crew seating, neat little gas mask container, etc. There are oodles of goodies that need to be attached to the inside of the top of the half-track before you can add that to the main assembly. All the vision ports are posable with latches for each. With a modicum of finesse, all the vision ports are posable. The rear doors are the final bits to go onto the vehicle and are also posable.
Merrily rolling along, the next order of business is the running gear. Torsion bars are added each side as are the drive sprockets, road wheels, idlers and front tires/rims. Exercise some caution when affixing the road wheel axles. While ICM does provide some assistance in getting these straight, in the form of notched mounting holes, the fit of the axles is still a tad wonky. Aside from some more fiddly bits(machine gun/shield, pioneer tools, etc.) the base vehicle is complete.
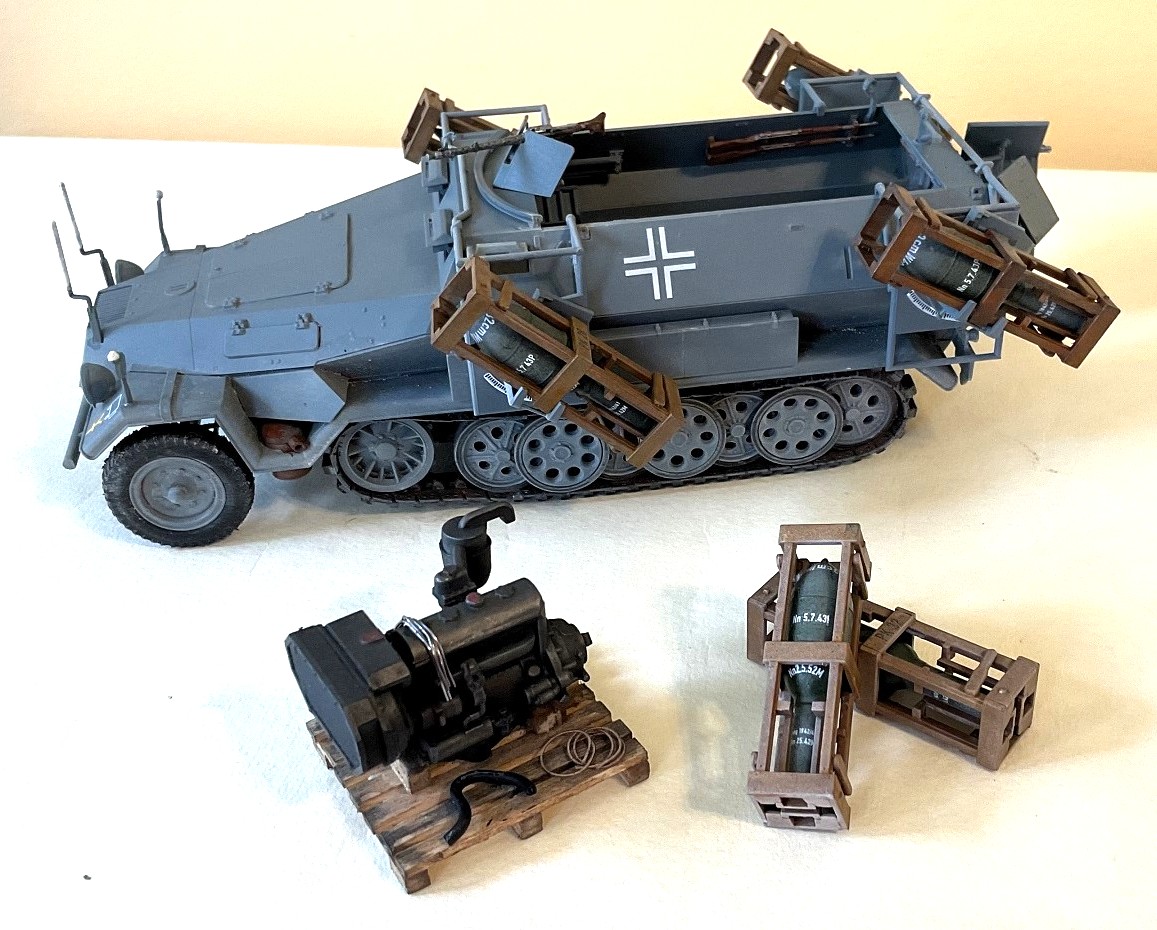
Now comes the neat part. Putting all the rocket stuff together. That stuff includes the somewhat intricate assemblies that support the panels that the rocket crates were/are attached to. The real cradles were manufactured in such a way that allowed them to just be draped over the sides of the 251 without much bother. ICM's kit replicates them beautifully.
The common load out for these vehicles was either four or six rockets. ICM gives you six, three 28 cm and three 32 cm rockets. Each transport/launch crate consists of 18 parts. Each rocket gets sandwiched between the two sides of the crate. While the instructions seem to suggest sandwiching the rounds into the crate during assembly, they will slip into the finished crate without a lot of concern and make the painting process much easier. Those crates are then affixed to the previously mentioned cradles. These crates were either made from wood or metal. There are some slight variations such as different parts for the 28cm rockets when assembling the crates, so pay attention to the instructions. There is no wood grain molded into the parts, but some judicious painting could redeem that situation. Aiming was achieved by positioning the entire vehicle using aiming stakes mounted on the front hood. Do not concern yourself as those bits are provided and placing them on the kit completes assembly. I suppose that when firing this type of weapon, much like hand grenades or horseshoes, close enough works.
When assembly is finished, you will have some extra items. These are part of ICMs previous release of the 251/1. Fret not, should you wish to incorporate some of these items (notably radios) into your build, simply download the instructions for the previous kit (35106) from their website and attach them to your hearts content.
Before proceeding with painting this beast, it should be noted that all color callouts in the assembly instructions are for ICM paints. Sadly, these paints are not that widely available in my part of the world, so I went with Tamiya versions for the most part. Sprue Brothers and Stevens International, among some others, do carry the ICM line of paints, and they are also widely available via Amazon.
I began with the ammo crates and the projectiles. The projectiles/rockets were given several thin coats of Olive Green. The actuator/firing pin was augmented with an aluminum paint pen from AK. When I wish to apply a wood grain patina to anything I begin with a base coat or either Linoleum Deck Brown or Flat Earth, depending on how dark you want the wood to appear. In this case, the base coat of Flat Earth was followed with drybrushing/streaking the entire crate with Desert Yellow. That was then given a wash of Clear Orange. Once thoroughly dry, a brown panel liner was applied overall, and all of this was accomplished with a brush.
The main vehicle is far easier to paint as it is just a base coat of Panzer Gray. Actually, an airbrushed coat of Ocean Gray 2(RAF). I was all out of Panzer Gray and not being a stickler for getting the color exactly right, I just went with what I had on hand as close enough. When the paint had dried sufficiently the various details (ammo racks, gas mask container, side arm, etc.) were picked out with a brush.
Both the tracks and front tires were given a base coat of Mr. Finishing Surfacer 1500 (black) followed by a liberal application of aluminum from an AK paint pen applied to the tracks. The rubber tires on the road wheels were “painted” using Tamiya's panel liner (black). The entire assembly, road wheels and tracks, was then dusted with a rust pigment from Ammo. As an aside, the tracks were a bugger to attach. They are rubber band style tracks, and my example was stretched some, which necessitated removing a couple of links to get a proper fit. I also experienced some consternation getting the tracks around the drive sprockets. It seems to me that the trackpads may be too proud to fit with ease. My solution was to nip off some of the guide teeth on the track (those that would normally wrap around the drive sprocket) and glued the track to the road wheels with superglue. I also shortened the track length to get a better fit. Should you find it necessary to go this route, do a lot of test fitting before you commit to the knife.
There are some additional items that are added to the chassis: fender stiffeners, side markers (part C37), etc. that seem out of place. My current theory is that ICM may have used a post war, Czech manufactured vehicle to design their kit. It is just a theory of mine. You may also find that some of the parts, especially C37, will get in the way of the brackets that hold the launch crates/projectiles.
In conclusion, I do recommend this kit, and my thanks to ICM Holding and IPMS/USA for the review copy.
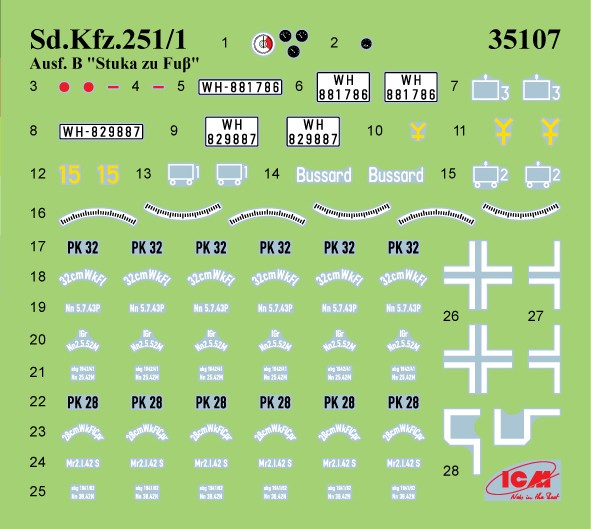
Decals
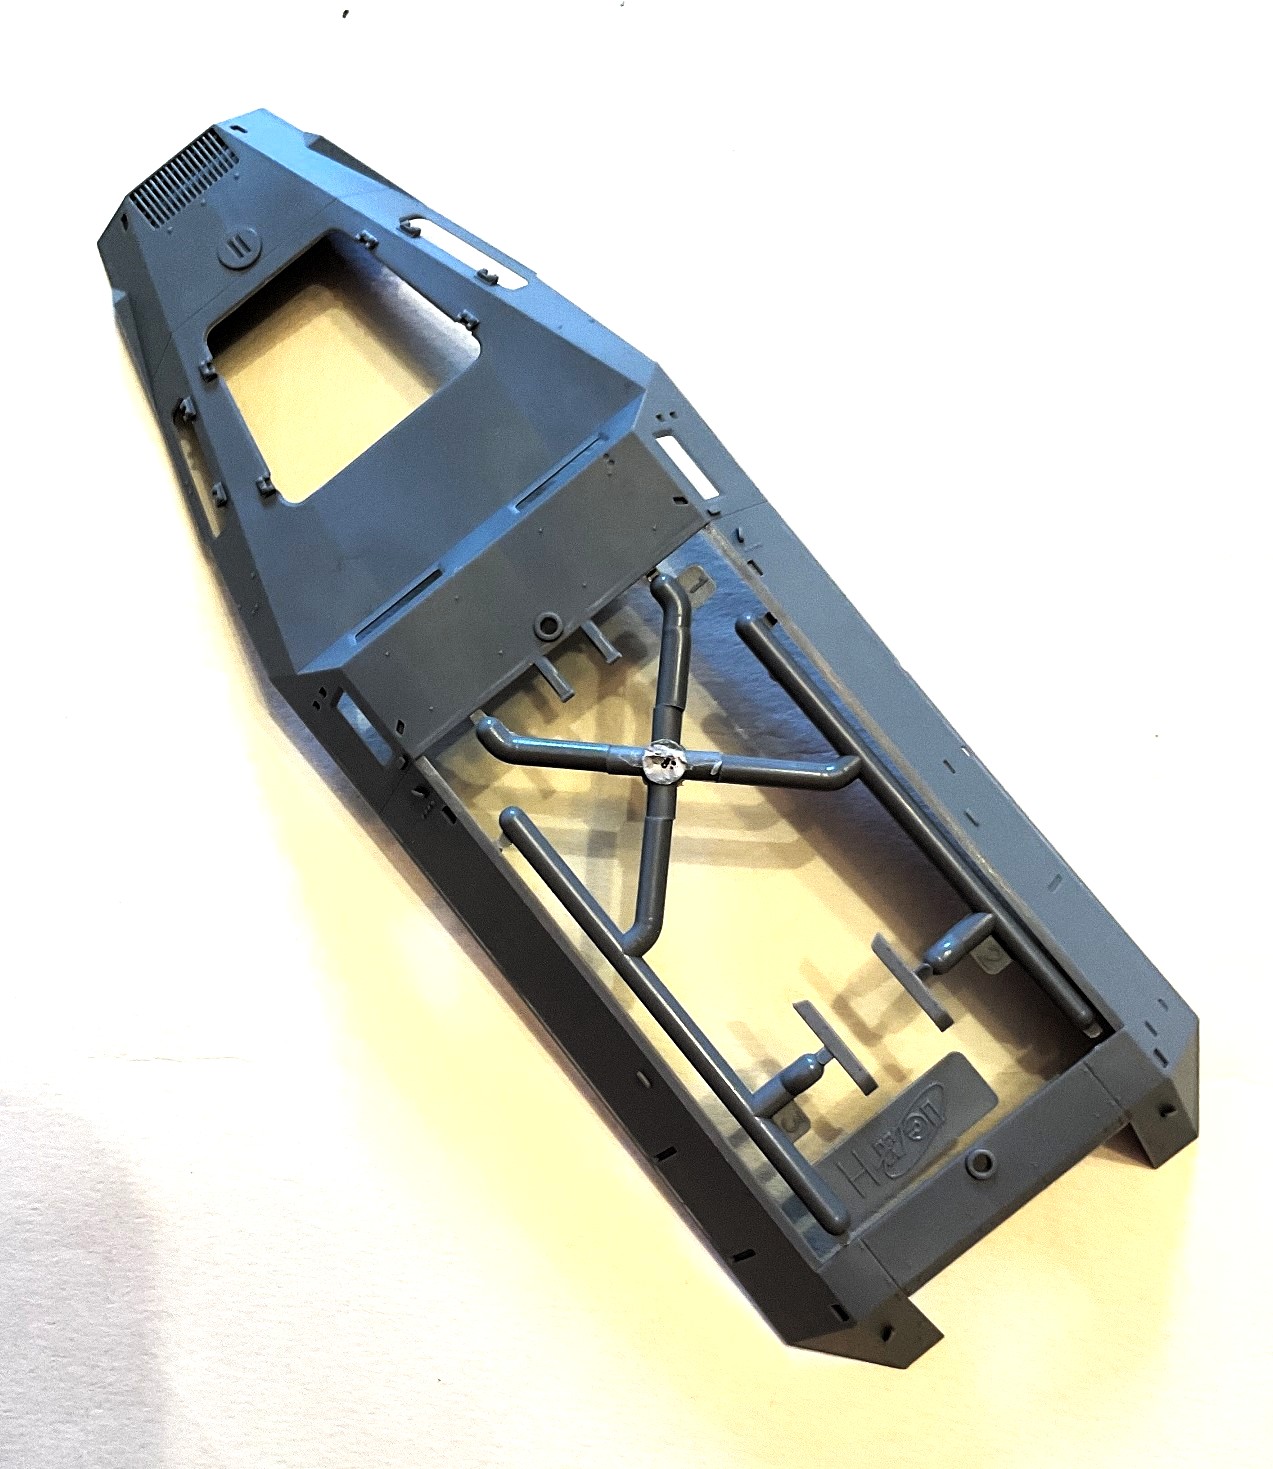
Top of Body
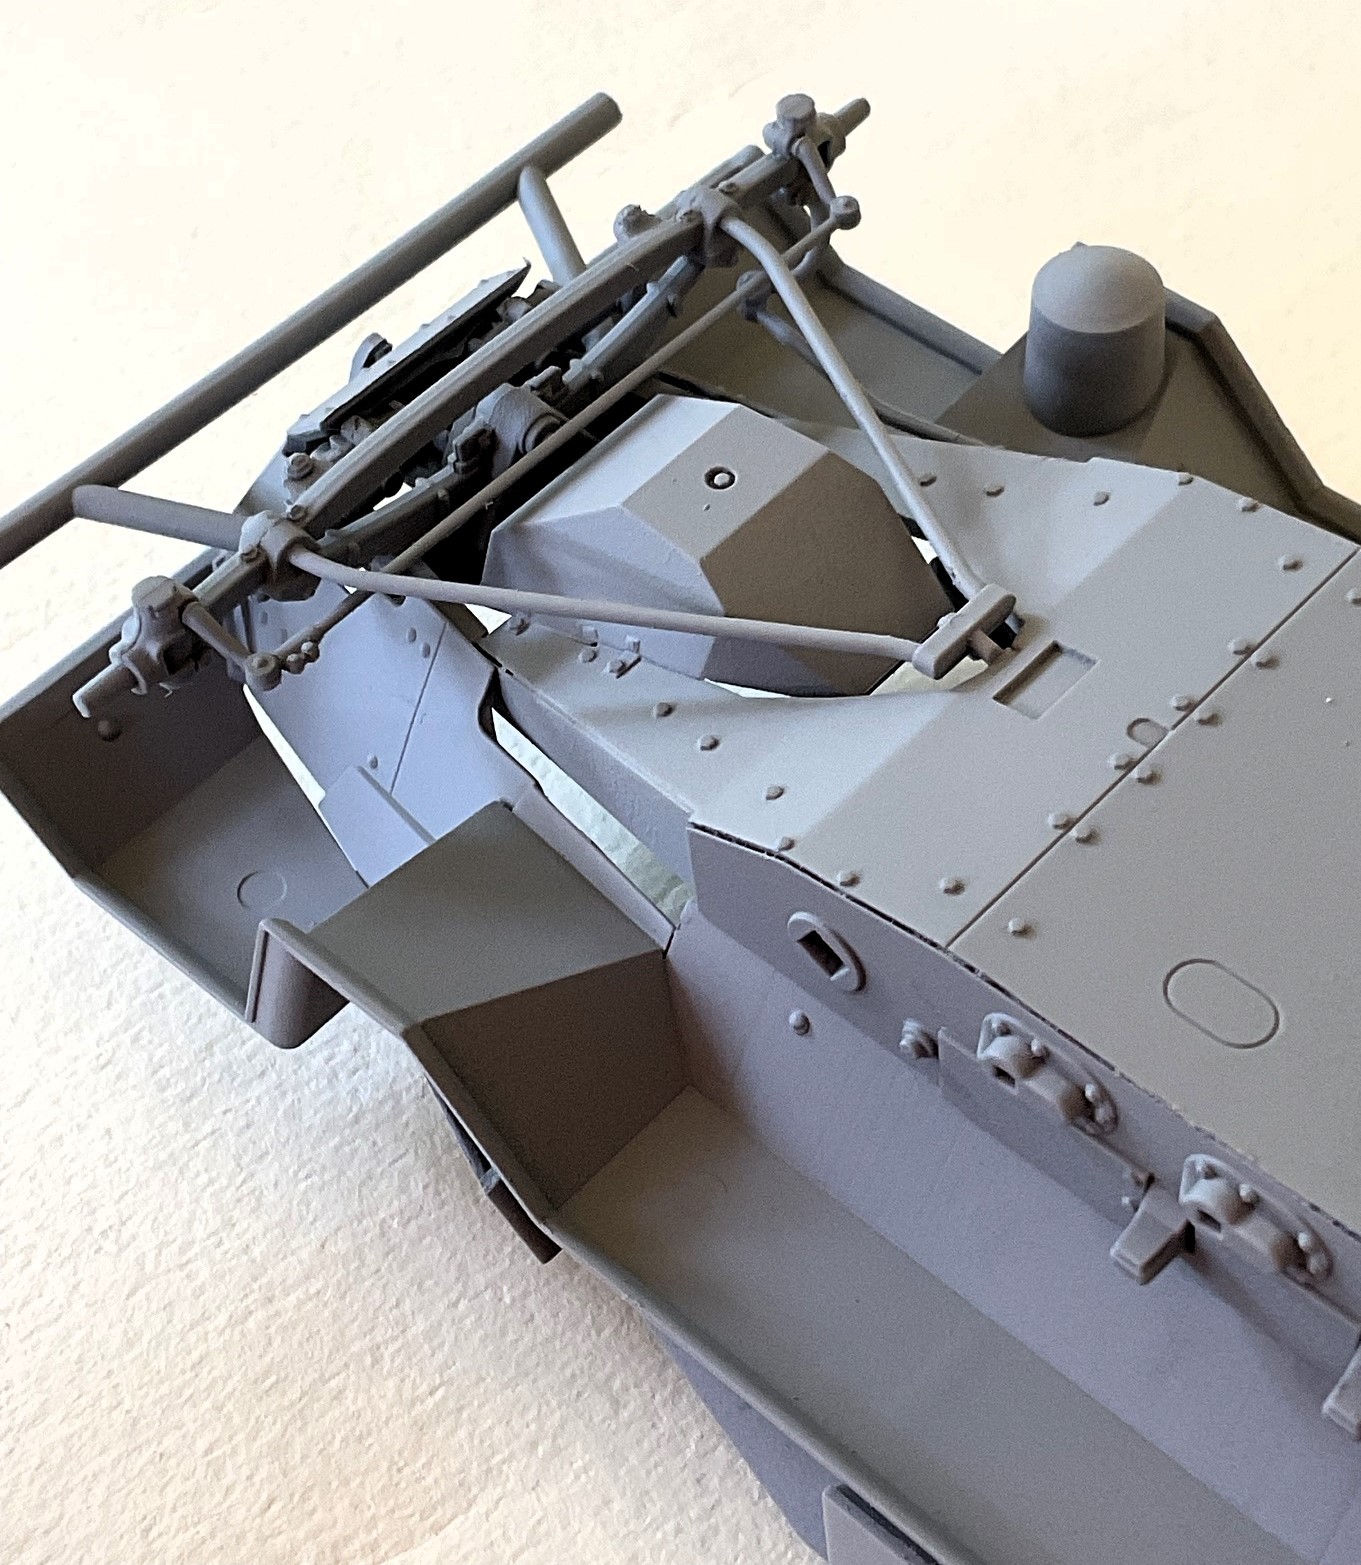
Front End Assembly
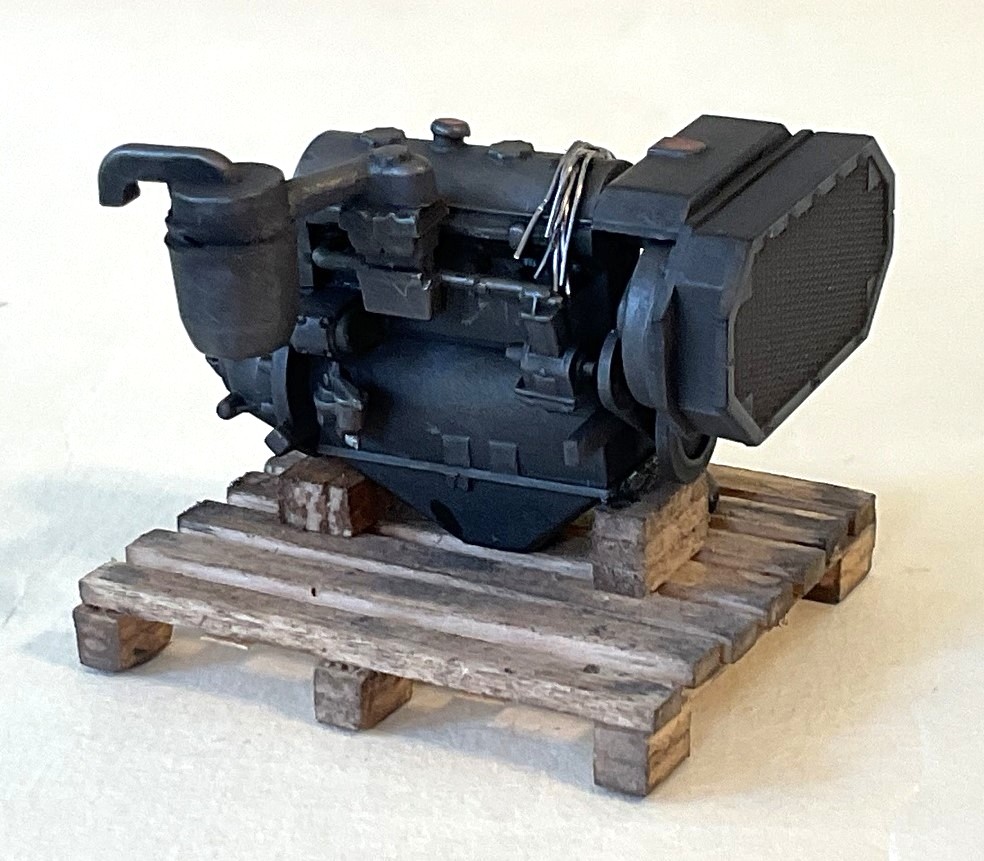
Assembled Engine
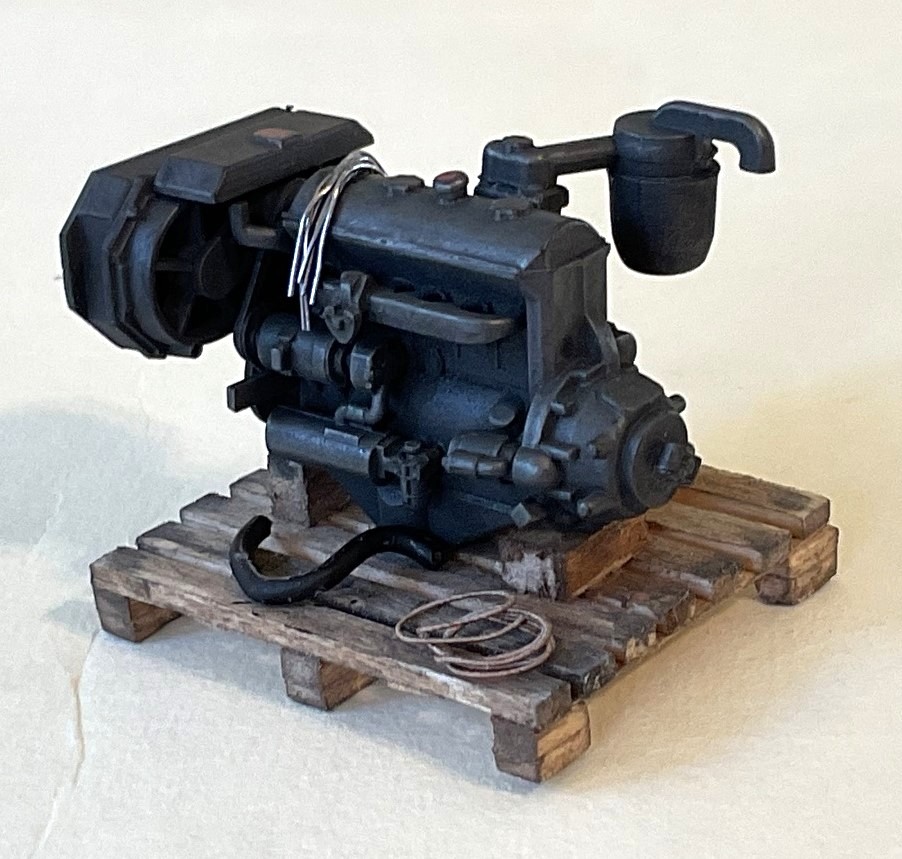
Assembled Engine 2
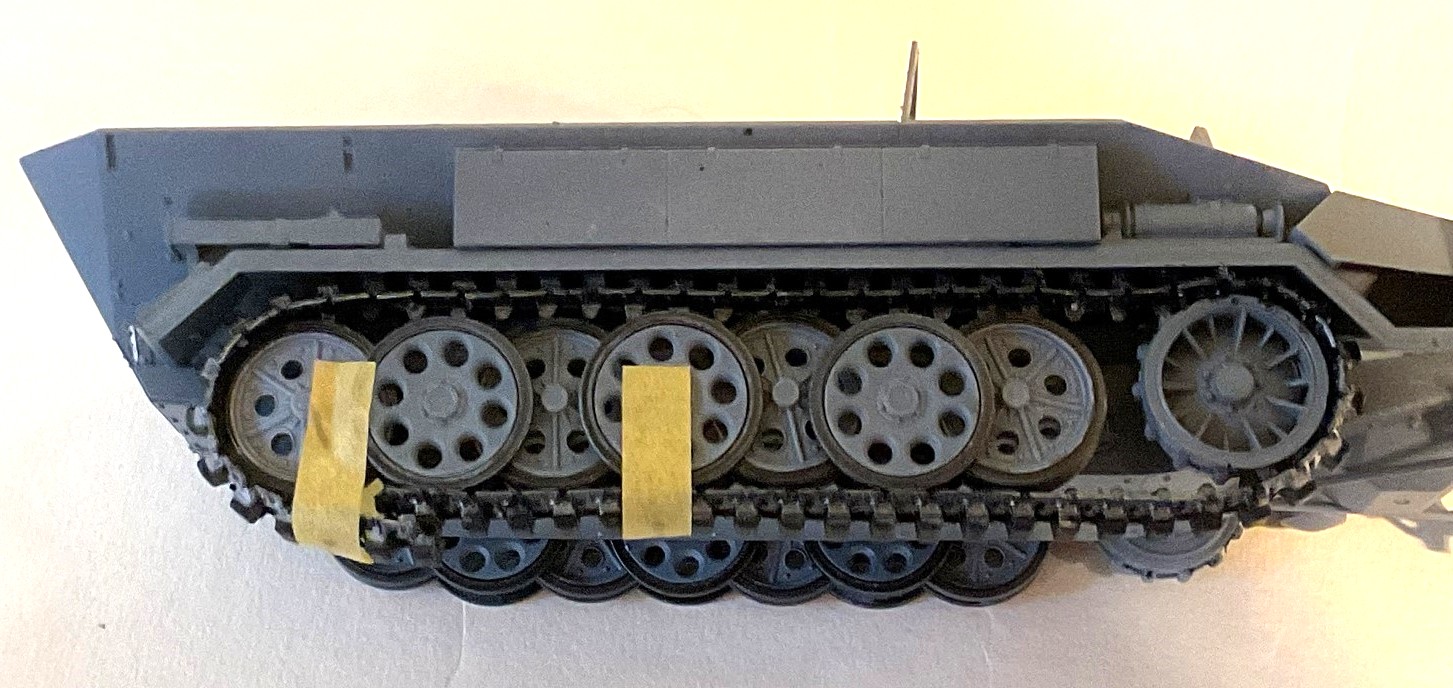
Right Side Wheels and Tracks
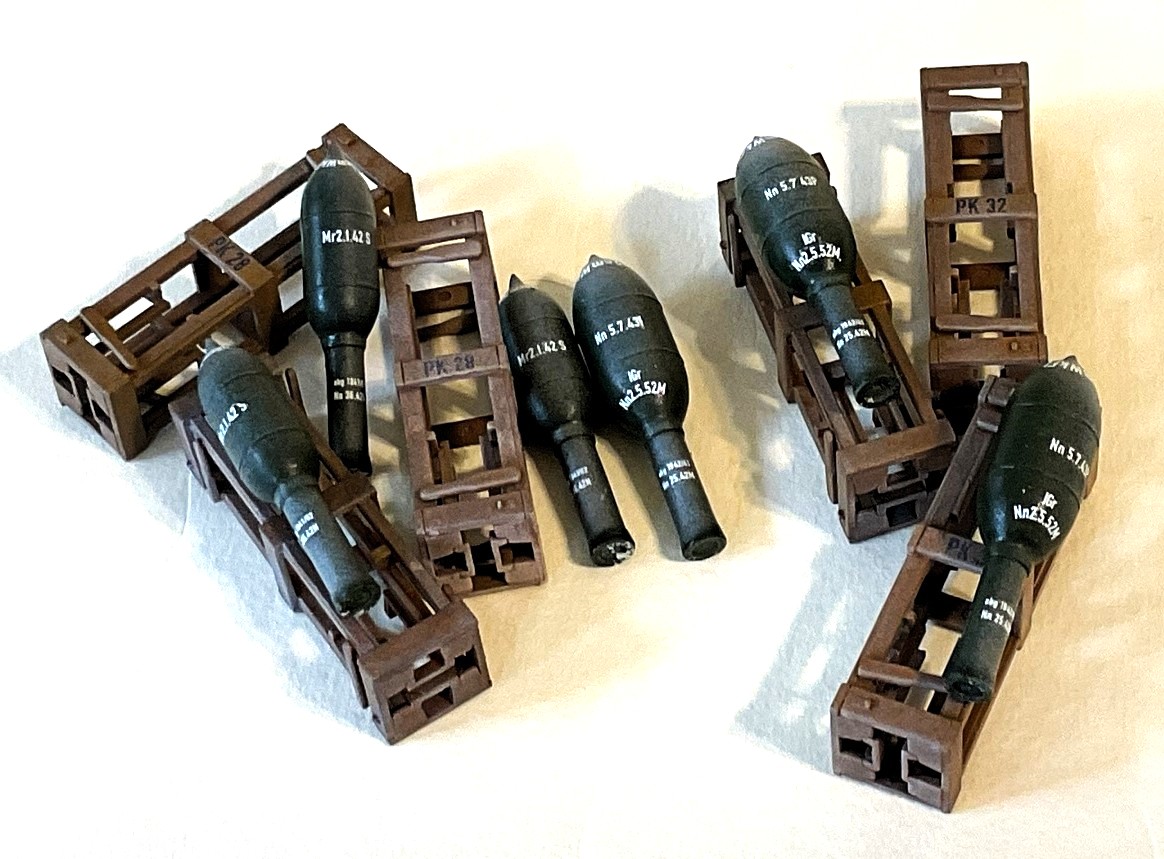
Rockets and Crates
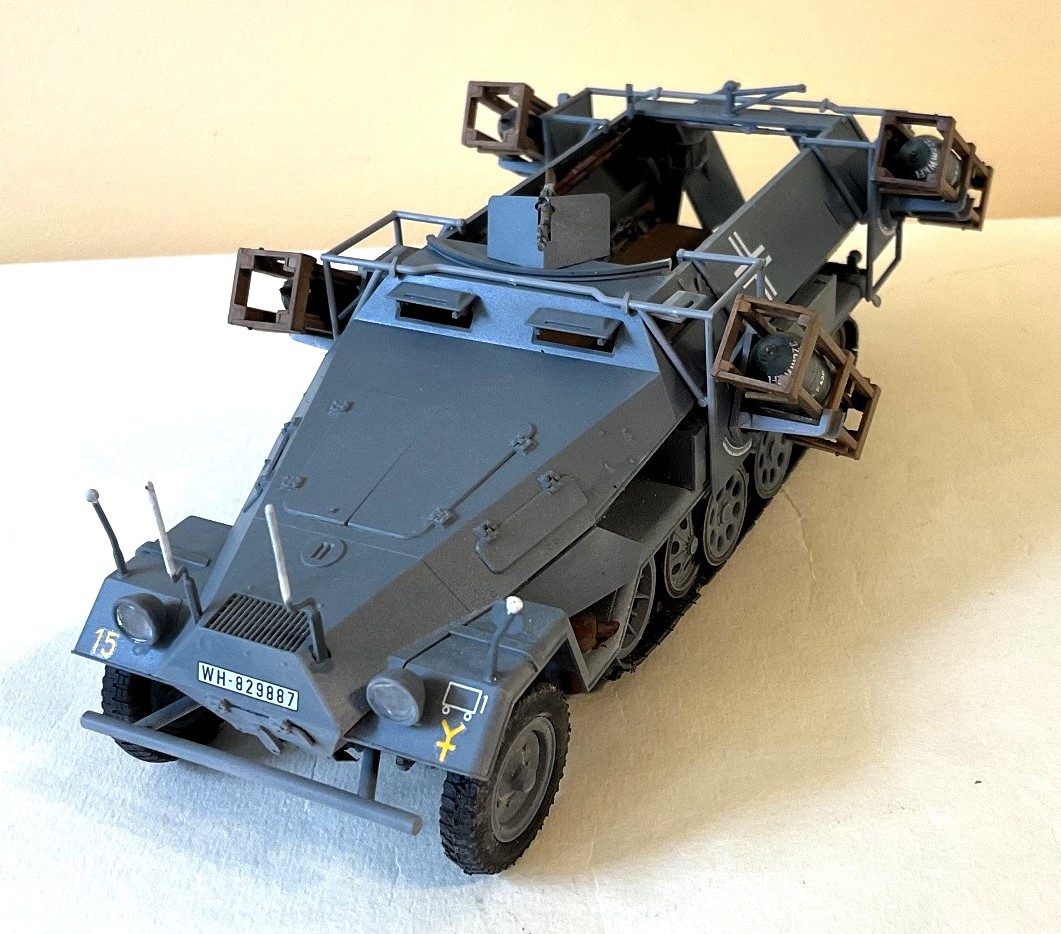
Completed Vehicle - Front-Left View
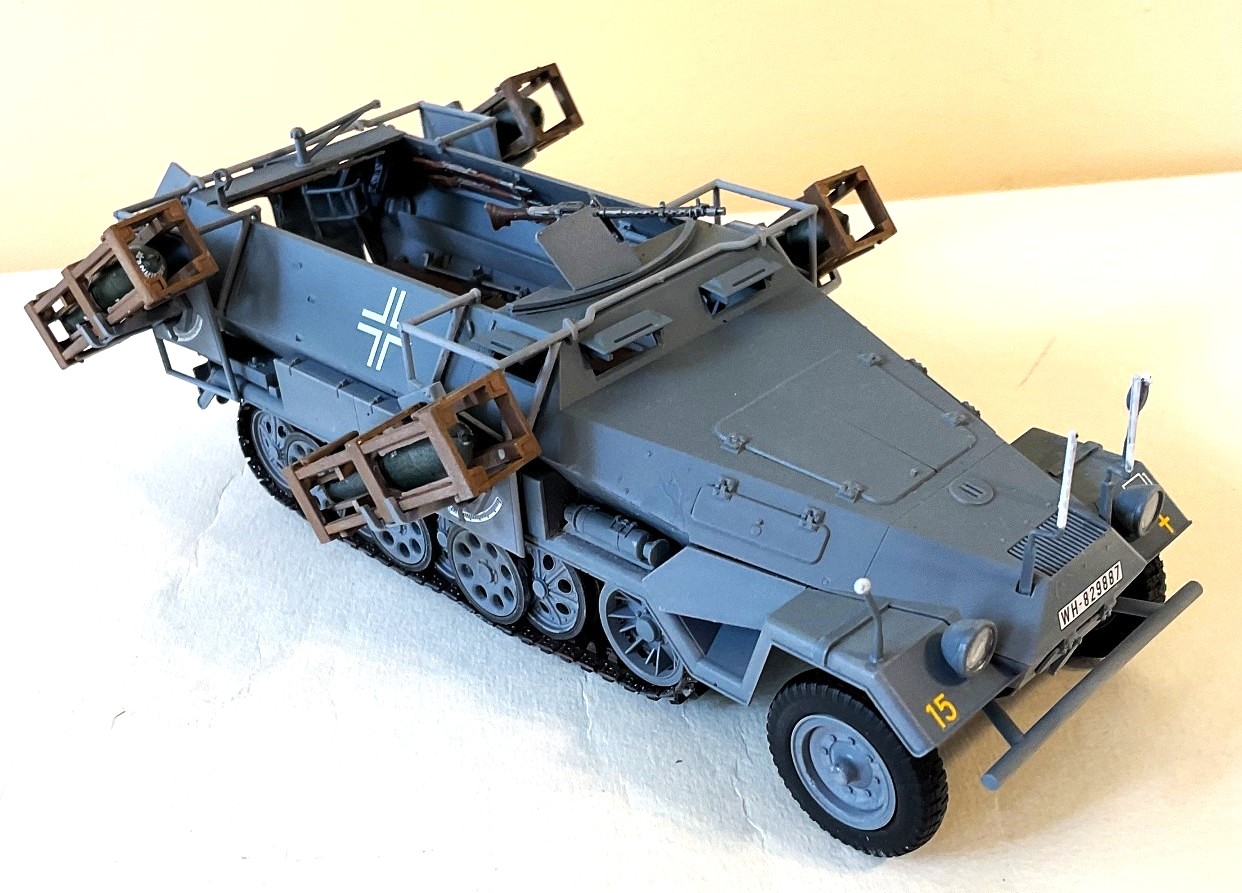
Completed Vehicle - Front-Right View
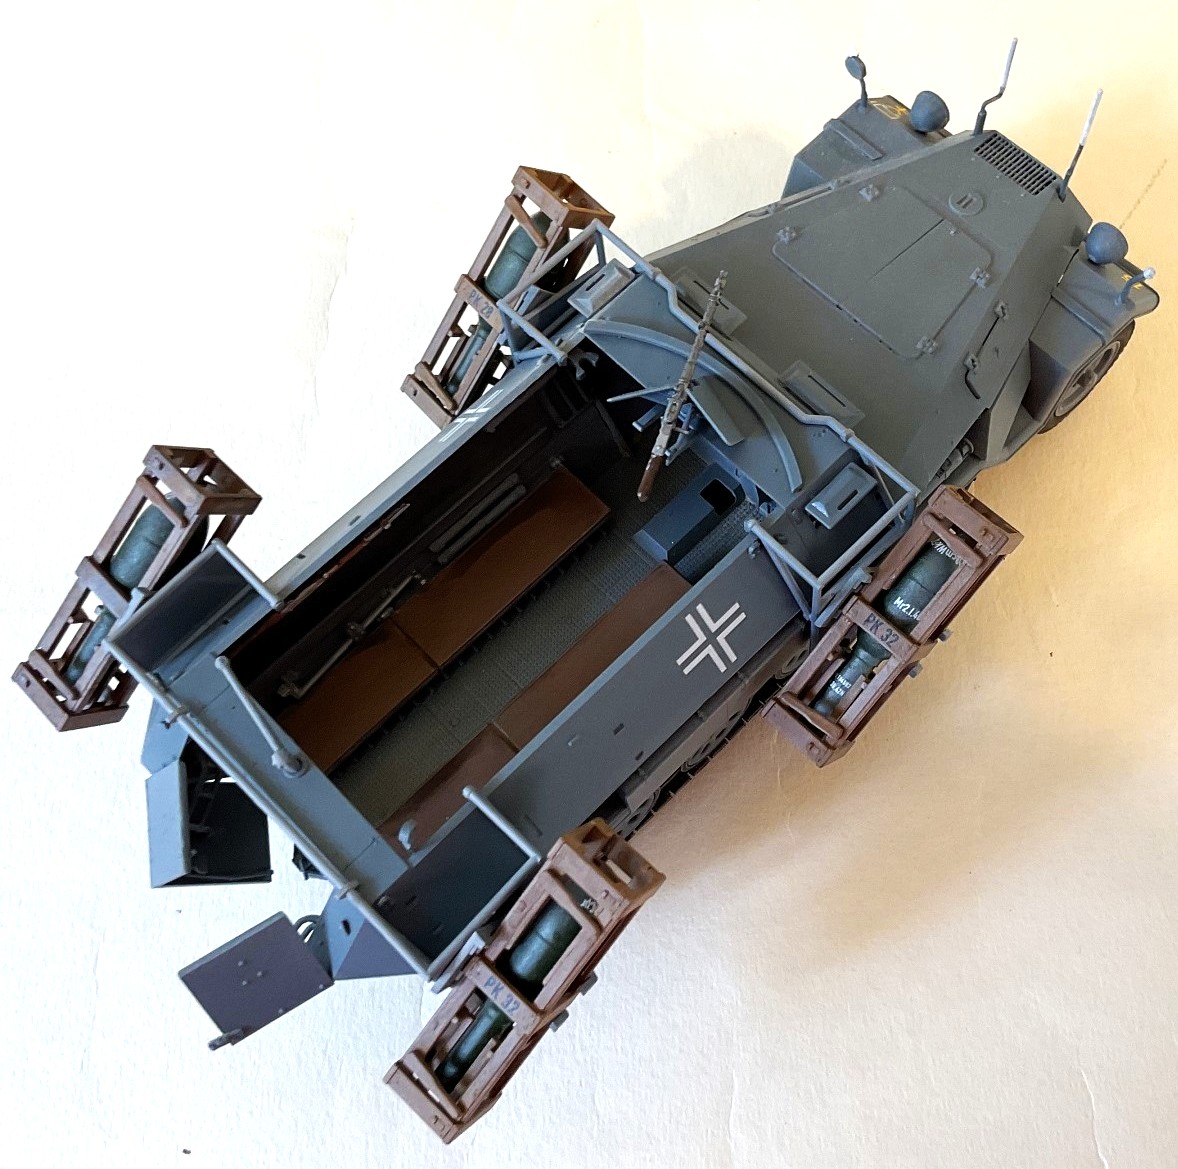
Completed Vehicle - Top View
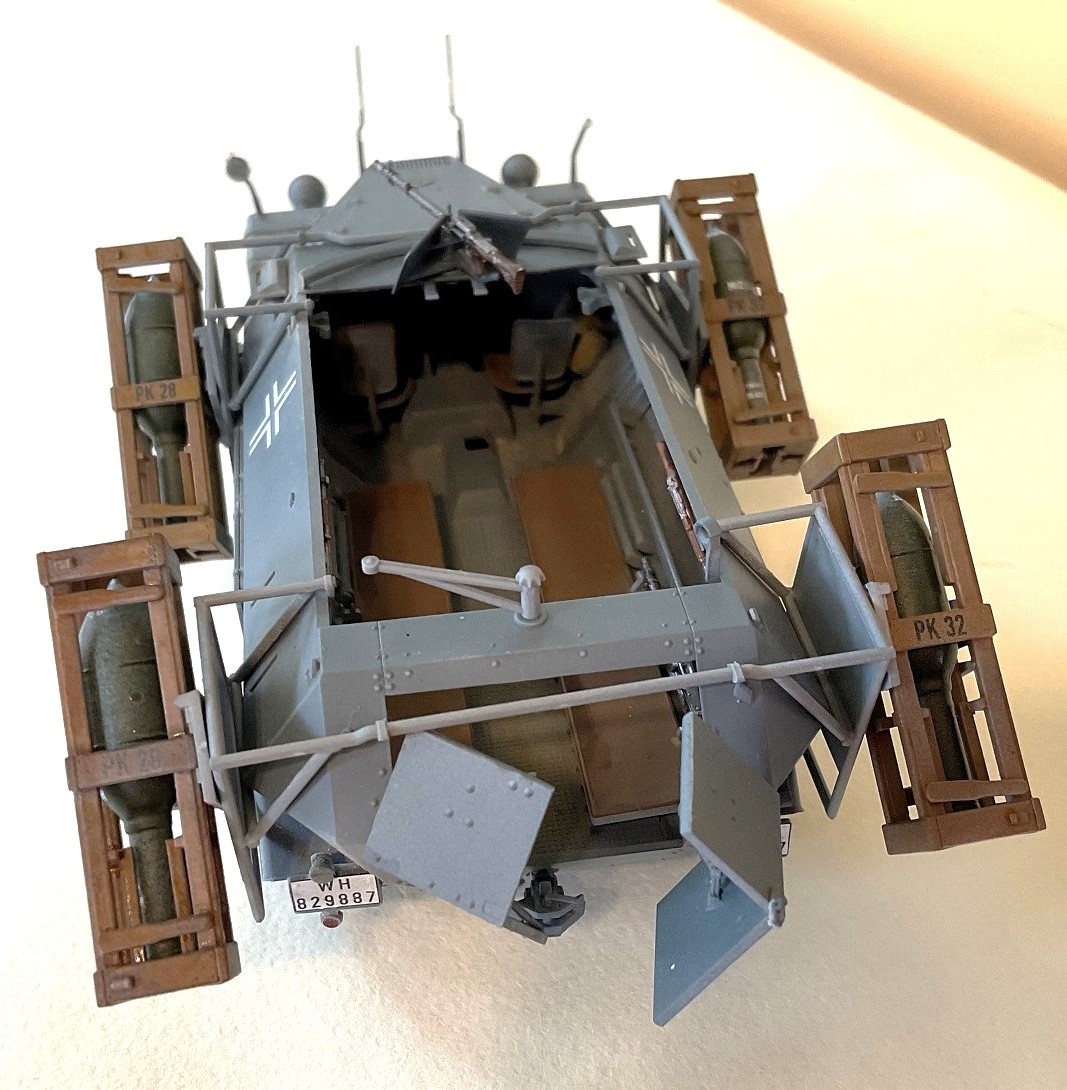
Completed Vehicle - Top-Back View
Comments
Add new comment
This site is protected by reCAPTCHA and the Google Privacy Policy and Terms of Service apply.
Similar Reviews