
Star Trek Romulan Warfleet Dual Pack
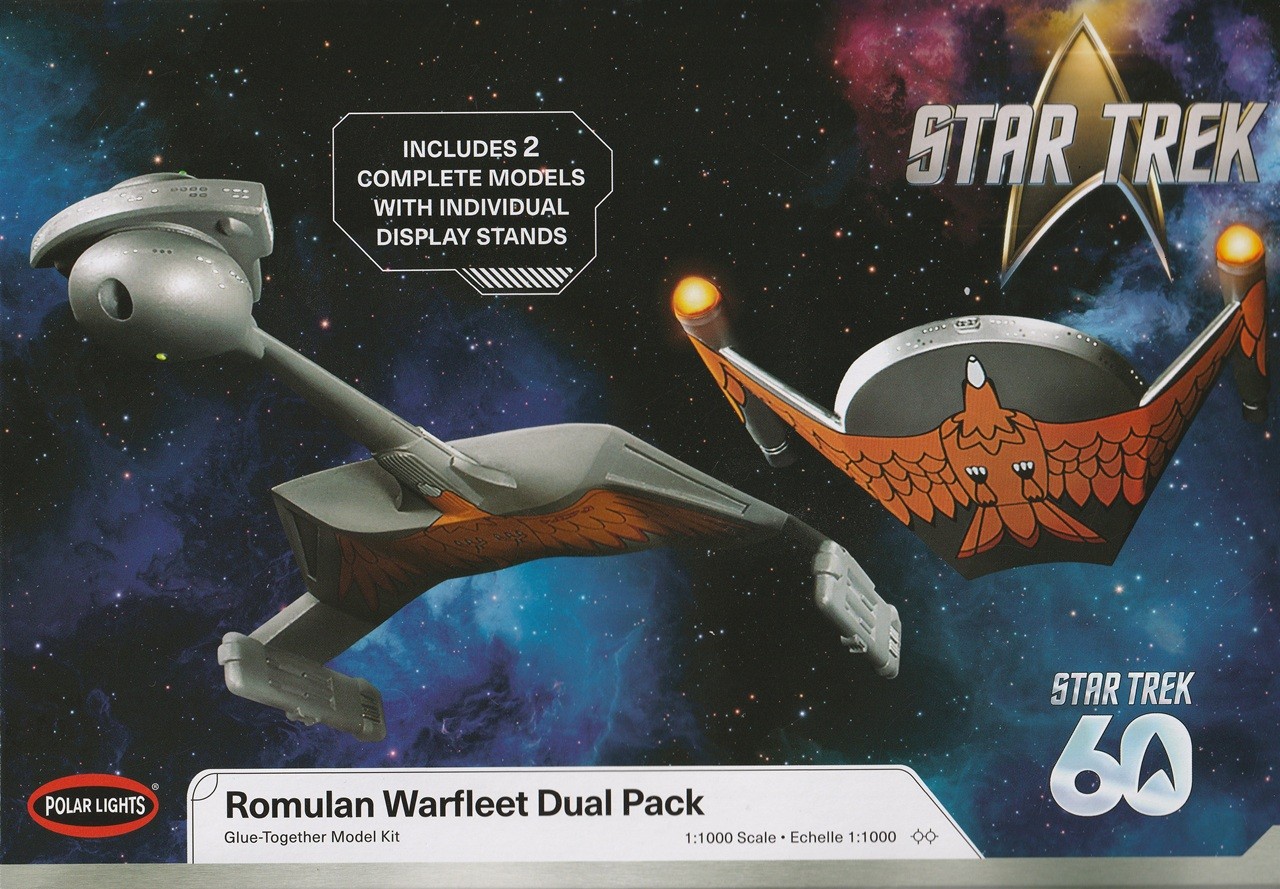
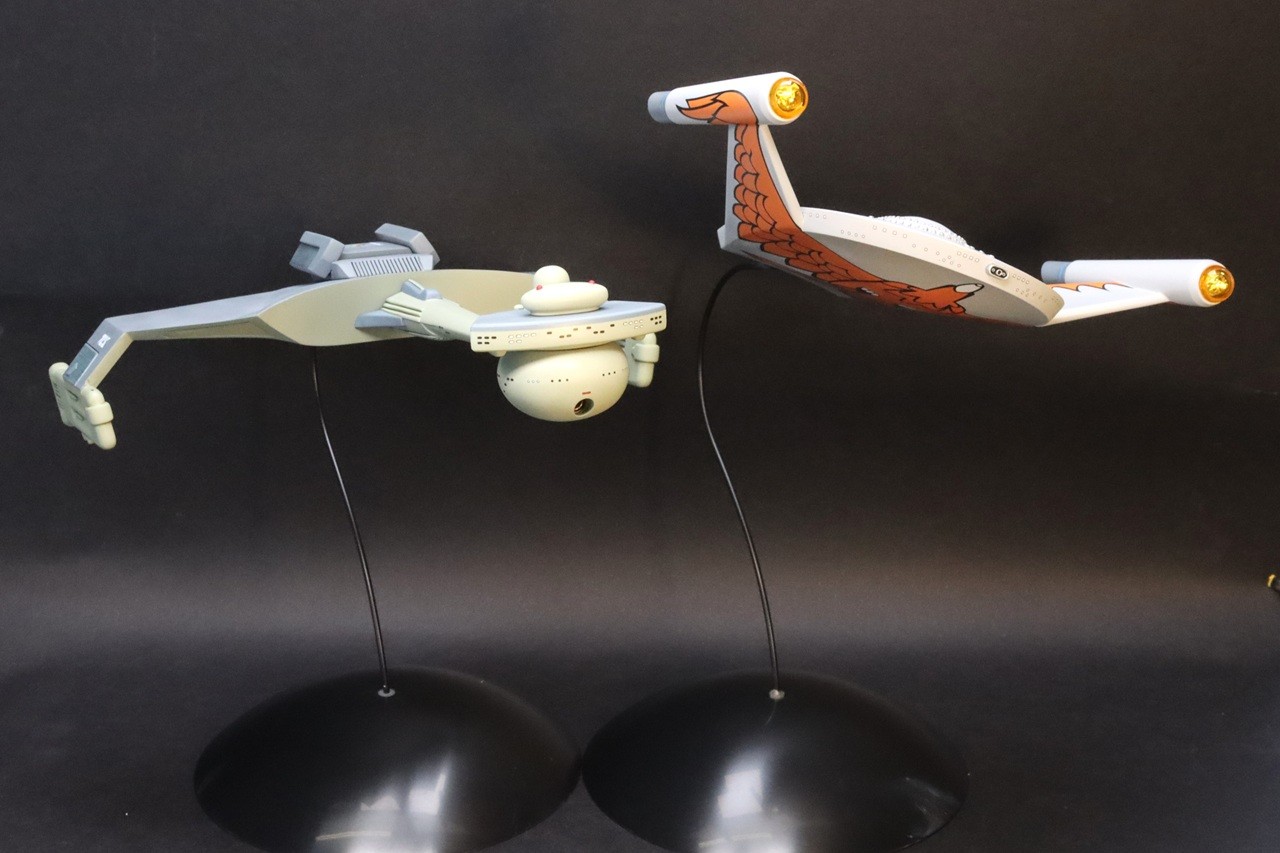
Polar Lights’ Star Trek Romulan Warfleet Dual Pack includes two kits: a Romulan Bird-of-Prey as seen in the first season of Star Trek and a D-7 battlecruiser as seen in the third season of Star Trek. The D-7 battlecruiser can be finished as either a Romulan or Klingon ship. The small box comes stuffed with parts. The main components of the two ships are molded in metallic gray plastic. Each ship’s parts are individually bagged so if you are not building both at the same time, the other ship’s parts won’t be loose in the box. Clear parts are provided for the engine domes of the Bird-of-Prey. Red and green clear parts are provided for bridge lights for the D-7 cruiser. There are chrome-plated parts for various details of the D-7 cruiser. The chrome parts are separately bagged with tissue paper to protect them from scratches. There are two sheets of decals (one for each ship). The D-7 battlecruiser’s sheet includes alternate marking for a Klingon ship. Two display stands are included. Each stand is composed of a black plastic dome-shaped base and bent steel wire. Both ships in this kit have been issued previously as snap-together kits. The Bird of Prey was first issued in 2015 and the D-7 Battlecruiser dates to 2004. The box-top of this issue of the kits now identifies them as “glue-together” models.
The Bird of Prey
Since the Bird of Prey was the first of these ships to appear in the TV series, I’ll discuss that kit first. The original studio model was designed and built by the artist Wah Ming Chang. Wah Chang also made several costumes and props for the first season of Star Trek. Since Wah Chang was not a member of the prop-maker’s union that the studio was contracted with, the union threatened legal action if the studio continued to pay Wah Chang. The Bird of Prey studio model was returned to Wah Chang without payment. That model hasn’t been seen publicly since the 60s.
Due to the simple shapes of this ship, the model consists of only a few parts. Since this kit was originally designed as a snap-together kit, locating pins and sockets are large and a tight fit. The large sockets on the inside of the lower hull cause some subtle sink-marks on the outer surface. To make test-fitting of parts easier, I enlarged the holes for the locating pins so the parts wouldn’t get stuck together until I was ready to glue them. There are ejector pin marks on the inner surfaces of the “wings”. You will need to smooth these surfaces to get the halves of the wings to join without gaps. When attaching the wings to the lower half of the hull, bevel the underside of the locating tabs for easier assembly. The fit of the dorsal fin to the hull and the engines to the wings is not perfect, and there will be gaps that will need filling. When gluing the engine halves together there will be a visible seam inside the “exhaust?" end. I dealt with this by sanding the seam with sandpaper wrapped around a dowel and inserting disks punched from a sheet of styrene.
The front ends of the engines are depicted with clear plastic domes. I painted these with Tamiya clear orange to match the box art. I put a small ball of wadded-up aluminum foil behind each dome for a more sparkly look and to hide the seam at the front of the engine.
The painting instructions for the Bird of Prey call for “silver metallic” as the overall color. The ship looked gray to me when I watched the show on my dad’s Heathkit TV back in the day, so I just painted the ship with Tamiya gray primer.
The decal sheet for the Bird of Prey is sharply printed and in good register. The carrier film of these decals seems thicker than most decals that I have used. Since the decals are unusually large, the thicker carrier film reduces the chances of tearing or folding the decals while getting them positioned. The thick carrier film does create a noticeable step on the surface even after a clear coat. I put on several coats of clear, sanding between coats to level the surface and hide the edge of the carrier film. The instructions show the windows on the front of the hull depicted by decals 10 and 11. The decal sheet has decals 10A, 11A, 10B, and 11B. The “A” and “B” decals are identical except that the A decals have mostly dark centers and the B decals mostly light centers. I used the B decals.
The finished model is just over five inches long. Because the engines of the Bird of Prey are on the ends of the upswept wings, the center of gravity of the model is above the socket for the wire of the stand. Since this fit was loose on my model it tended to flip upside down. (OK there is no up or down in space, but there is on TV). I used pliers to kink the wire of the stand so that it would bind in the mounting hole. This is a relatively simple model to build and would be a good kit for a beginner.
The D-7 Battlecruiser
There is an interesting backstory to the appearance of the Klingon/Romulan cruisers in the third season of Star Trek. After the very successful issue of the AMT USS Enterprise in 1966, AMT wanted to continue to capitalize on the Star Trek franchise by offering an adversary kit. But since the show was almost cancelled after the second season, the studio didn’t have a budget for more filming models. The art director for the series (Matt Jefferies) designed the ship, but it was AMT that built the filming model. AMT built a second almost identical model that they used to cut the tooling for their kit. The model used for filming is now in the Smithsonian but has been repainted since it was filmed. The model that was used to make the tooling for the AMT kit is now in the Seattle Museum of Pop Culture.
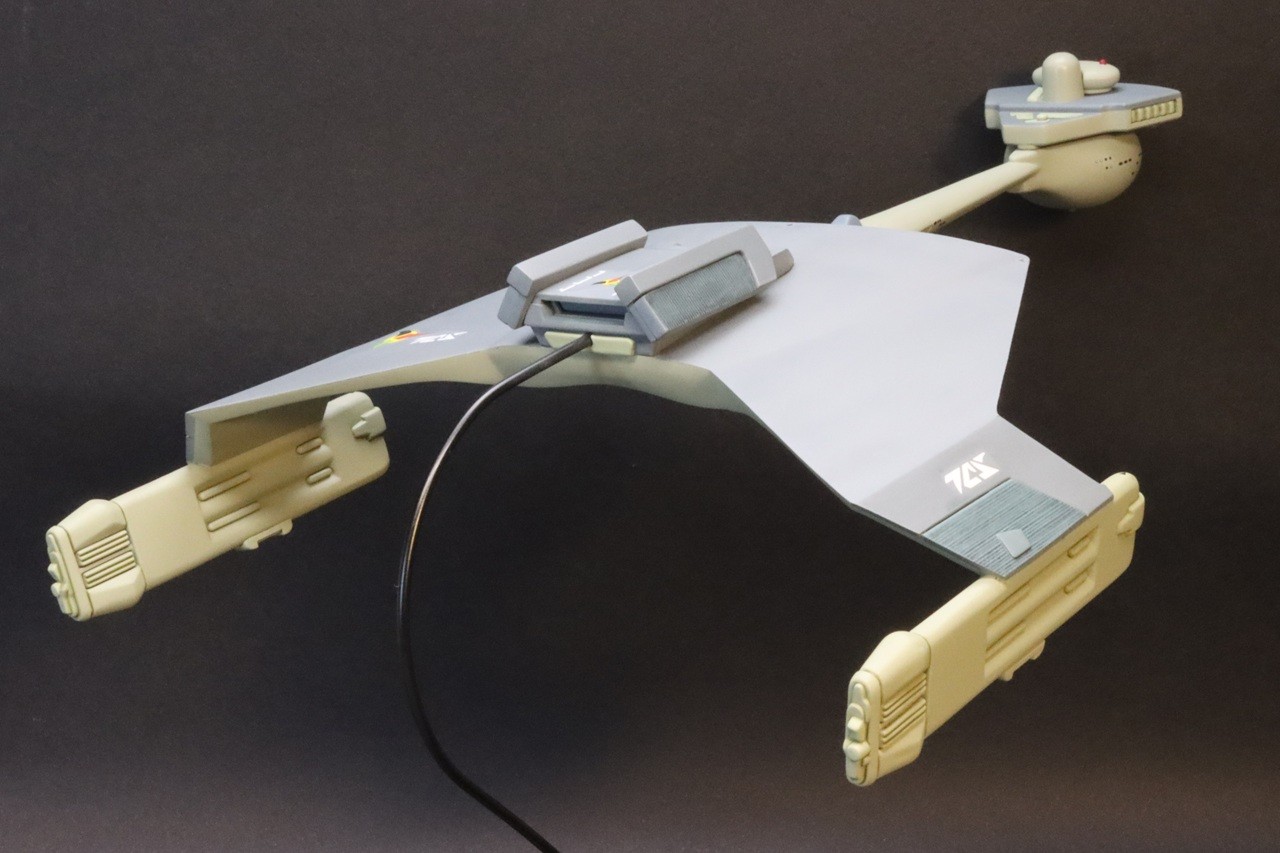
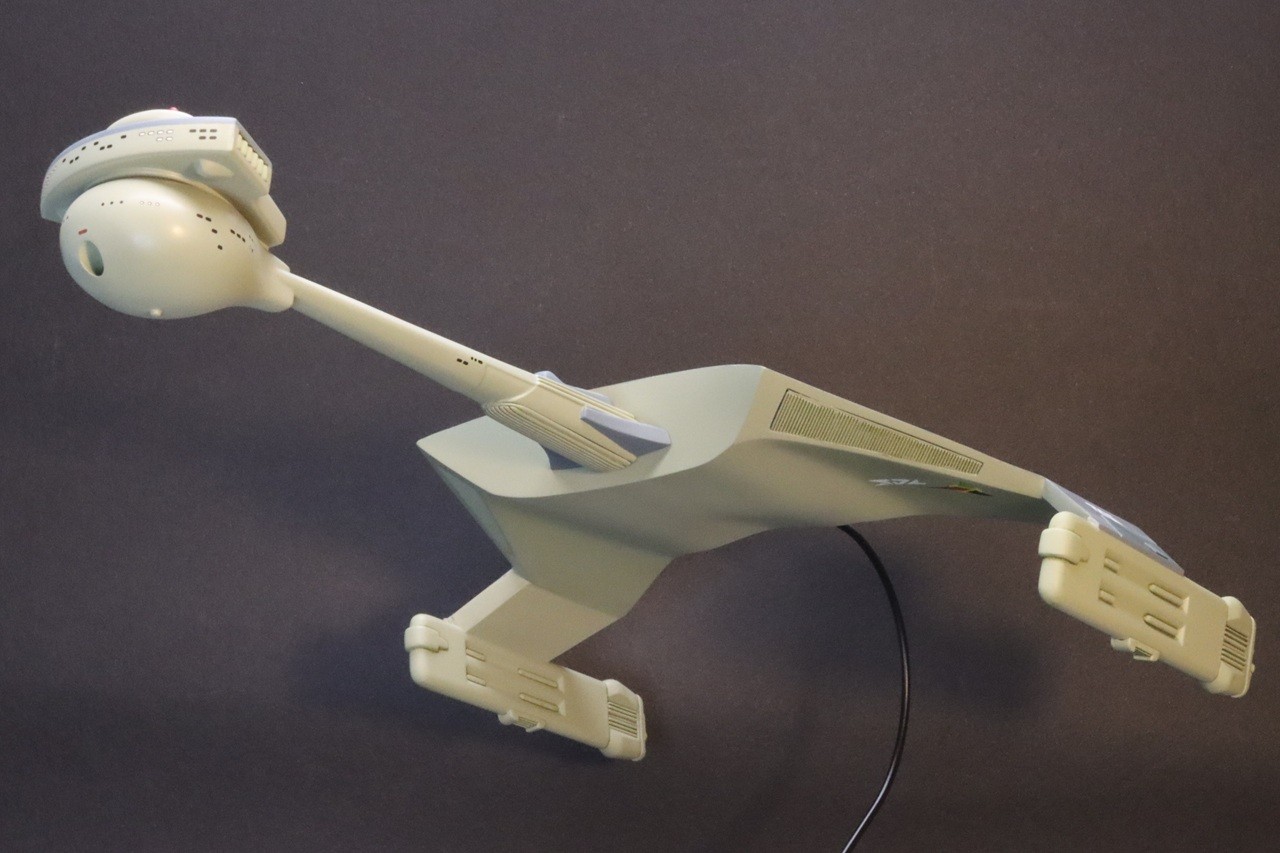
The Polar Lights D-7 Battlecruiser at ten inches long is a smaller model than the AMT kit of 1968. This model is a more complex build than the Bird of Prey. This kit’s origins as a snap-together kit are apparent when examining the parts. The parts are thickly molded and locating pins, sockets, and tabs are quite chunky. Sprue gate attachments tend to be thick. Some of the parts are quite rough on the mating surfaces, resulting in obvious seams after assembly. Expect to spend some extra time on parts clean-up and filling and sanding of seams. The complex shapes and details of this ship don’t lend themselves to a no-glue approach, and if you built this model as a snap-together kit, it would be very difficult to get a good result. This is likely the reason that glue is now recommended for construction.
To make test fitting of parts easier I recommend enlarging all the holes for the locating pins. On some of the smaller parts it may be easier to simply cut the locating pins off. The thick locating pins and sockets inside the hull halves result in sink-marks on the outer surfaces. The hull inserts (12A for a Romulan ship, 12 for a Klingon ship) have locating tabs on their backs. Cut these tabs off so that you can adjust the fit without the parts getting stuck in place. Parts 17 and 19 have some robust ejector-pin defects that need to be smoothed for subsequent parts to fit well. The “torpedo launcher thingy” (part #3) is a poor fit in the nose section with a visible gap between the part and the outer surface. The opening for part #3 is uneven. Rather than try to fill a gap on the inner surface of a cylinder, I fixed this gap by enlarging the opening to accept a length of styrene tubing that I trimmed flush with the outer surface. This resulted in a seam on the outer surface which was much easier to clean up.
In step 2c the sequence of construction matters. Chrome parts 128 need to be installed before joining parts 5 and 6. The chrome pieces 131 and 129 stick out past the sides of the engine pods, so I carved them flush with the sides of the engines.
When attaching the neck of the front hull to the main hull, cut back the upper locating lug. If you don’t trim this lug, assembly will require so much force that is likely you will pop open the seam on the front of the main hull.
The parts trees include an alternate stand with a Klingon badge as a base. These parts are not mentioned in the instructions. To use this stand, you would need to drill holes in the bottom of the hull. The base of the stand is narrow compared to the size and weight of the ship and doesn’t look like it would be very stable.
The decal sheet for the D-7 cruiser provides markings for either a Romulan or Klingon ship. The Romulan decals look very good. On the Klingon Empire logos, the red, green, and yellow areas are printed larger than the underling white color, resulting in areas of the decals that are not opaque. The carrier film of these decals seems thicker than most other decals I’ve used. This thickness is helpful in positioning the large Romulan markings without tearing or folding. The thickness of the carrier film is noticeable after clear coating the model. I did a few iterations of clear coating and sanding to get a level surface.
The Klingon cruiser has a two-tone paint job. In the painting instructions the underside and front-view illustrations contradict each other regarding the color of the front of the main hull. I painted the front of the hull in the underside color to match the photo on the bottom of the box.
My D-7 cruiser fits snugly on its mounting wire. Due to the weight of the model, the ship tends to bounce for a while when my six foot teenager runs around the house. Although this kit was marketed as a snap-together model in previous boxings, the need for filling and sanding of seams would make it a challenging build for a beginner to get a good-looking result.
I’d like to thank Round 2 models for generously providing this kit to the IPMS/USA for review.
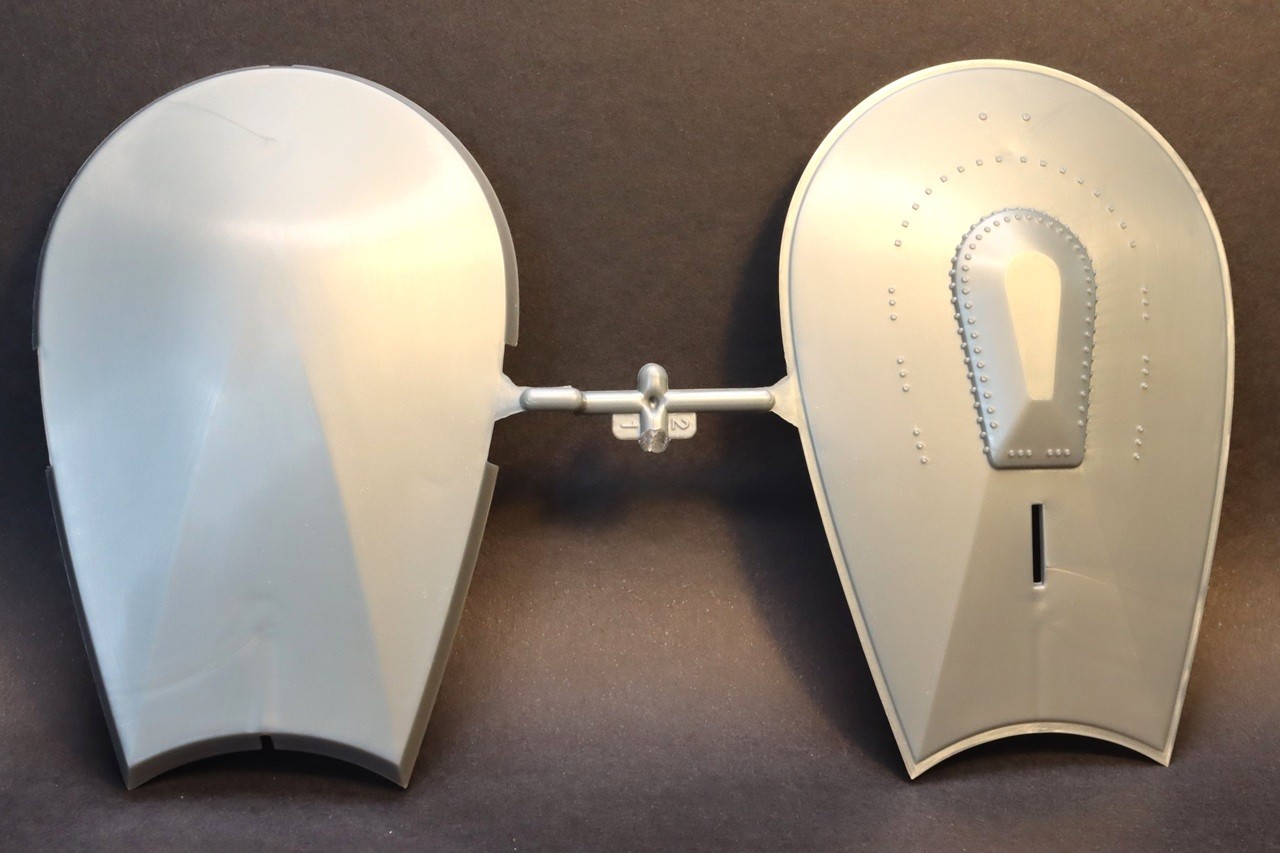
Bird of Prey Hull Parts
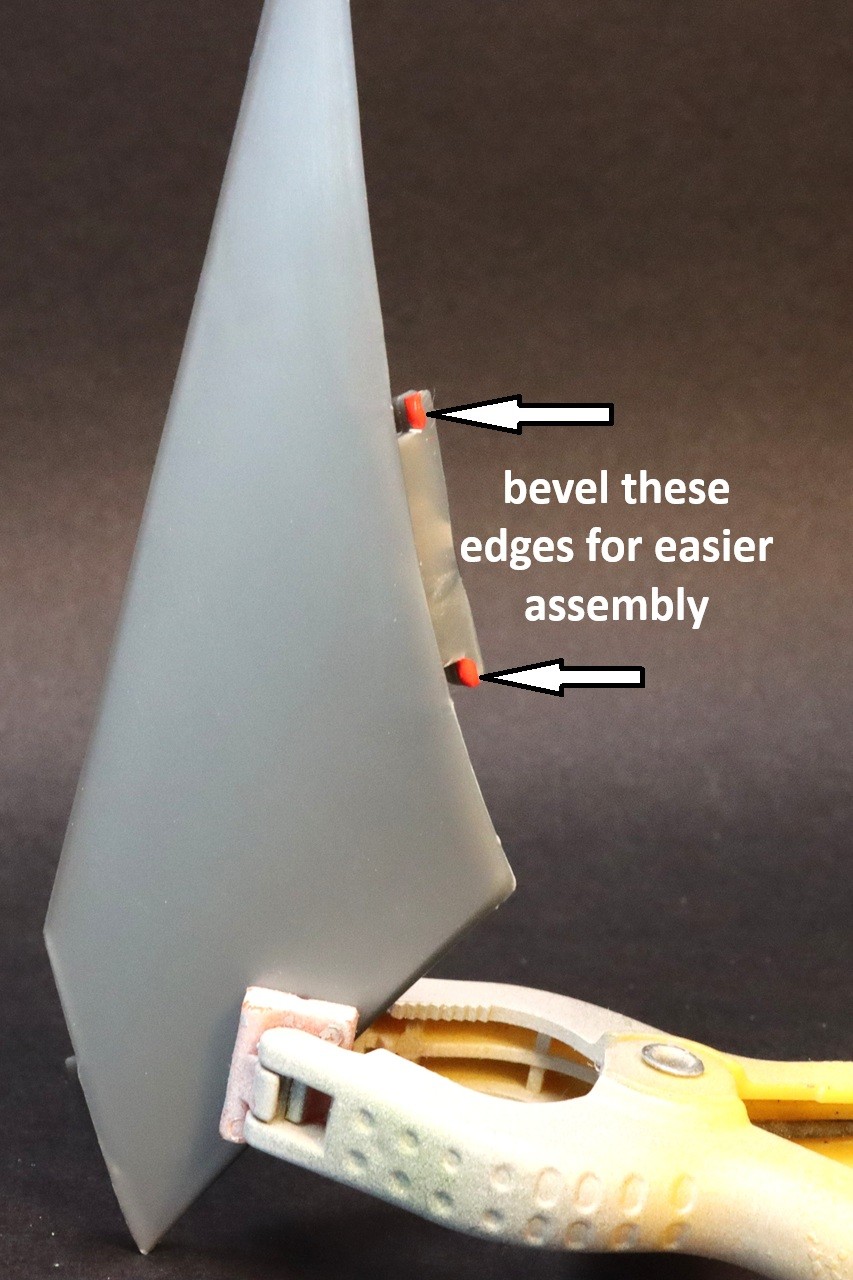
Bird of Prey Modified Tabs
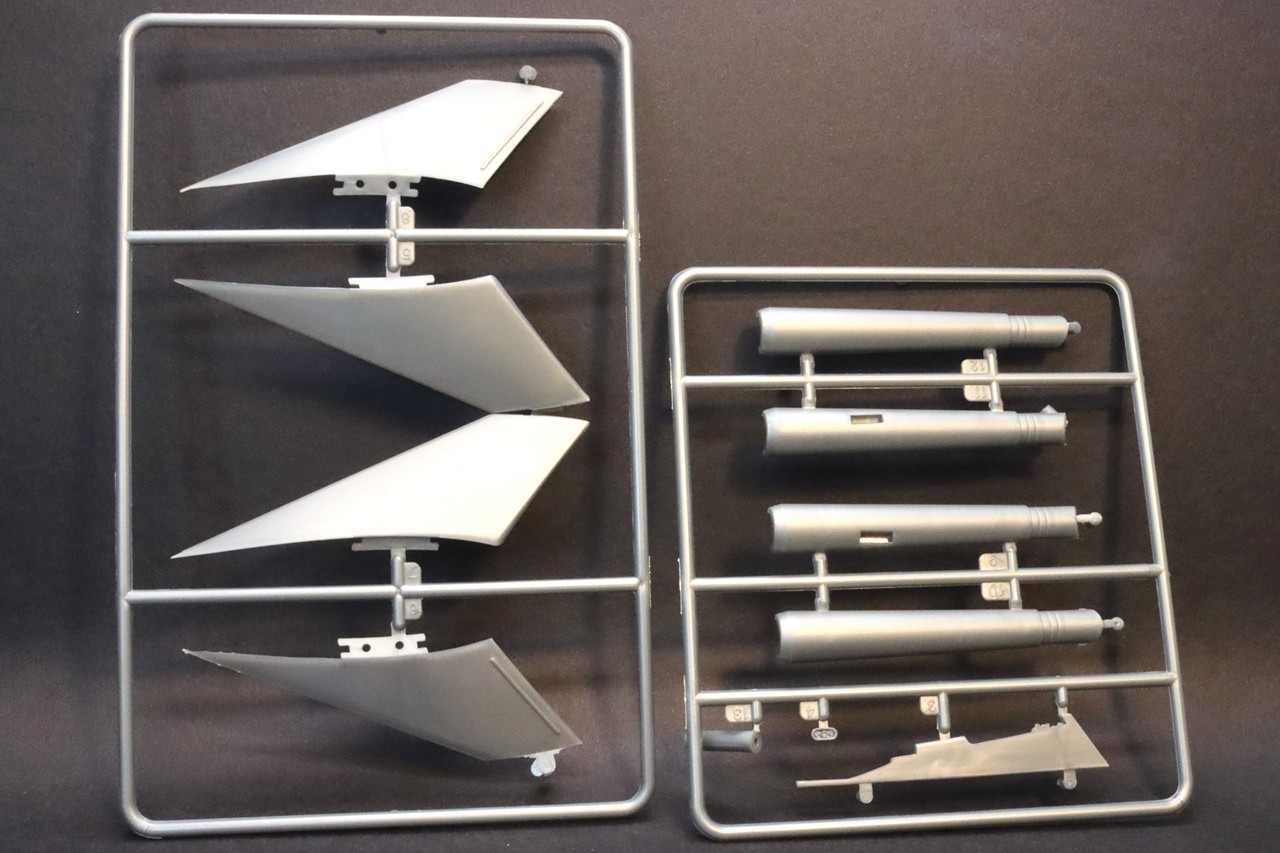
Bird of Prey Parts
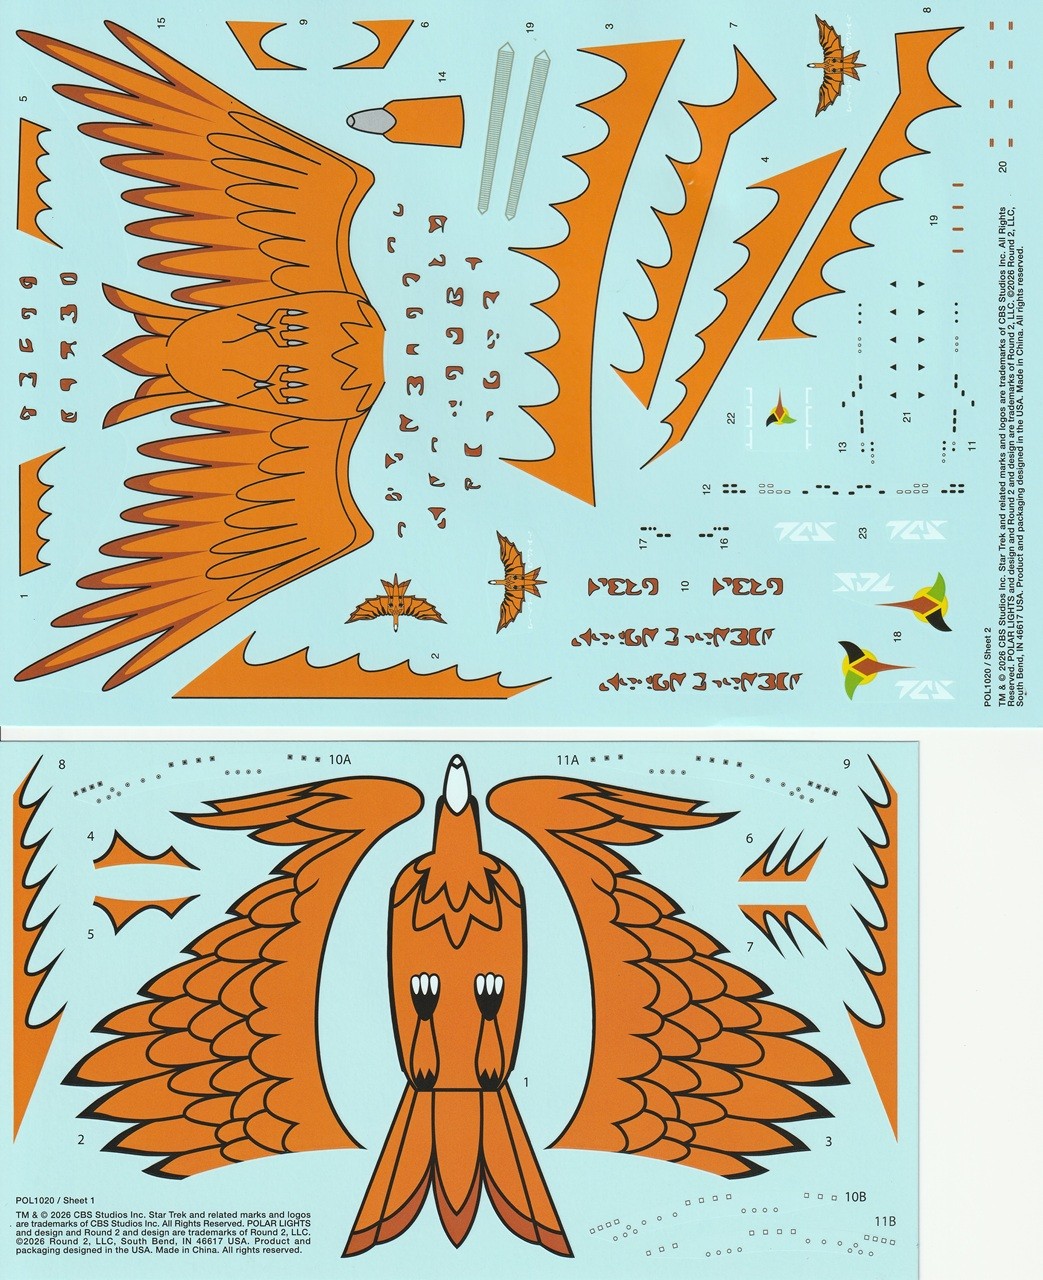
Decal Sheets
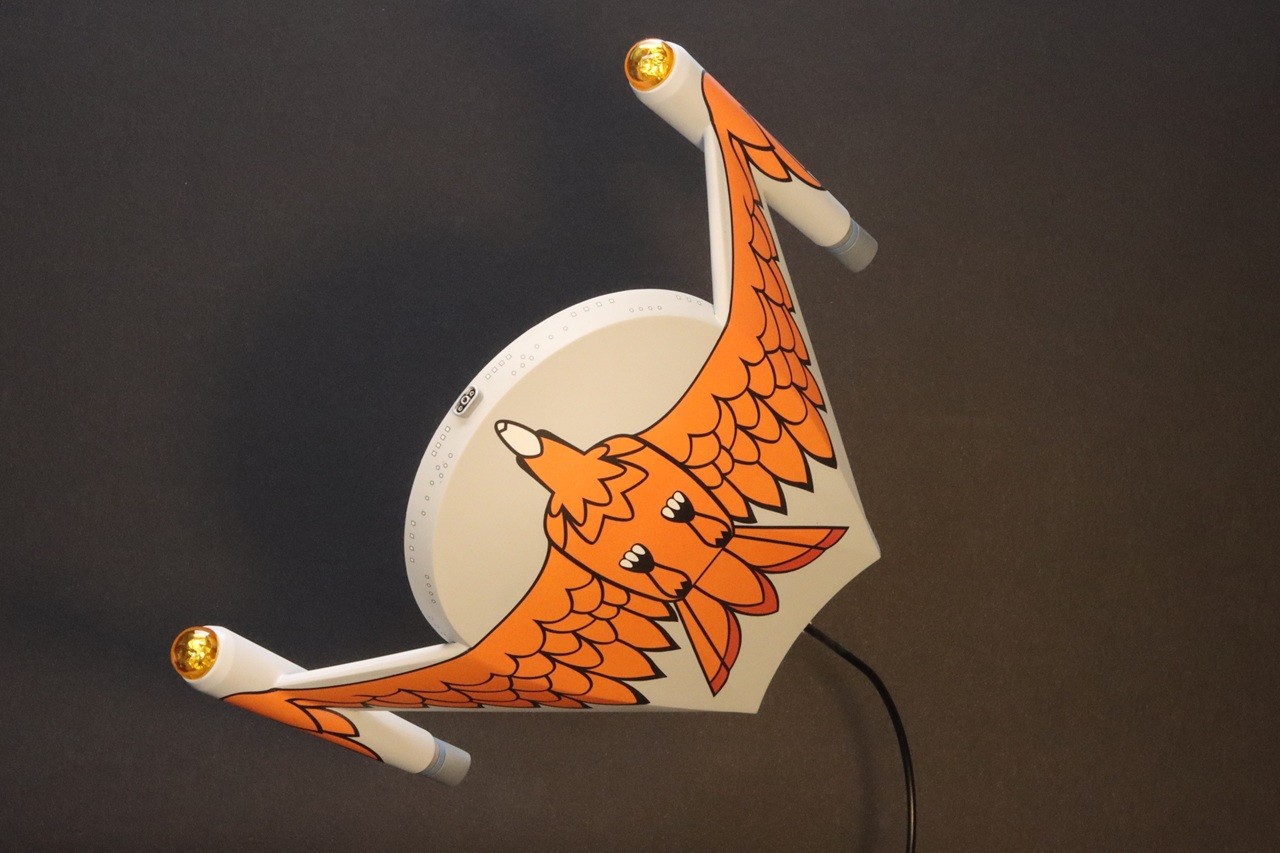
Bird of Prey Decal On Ship
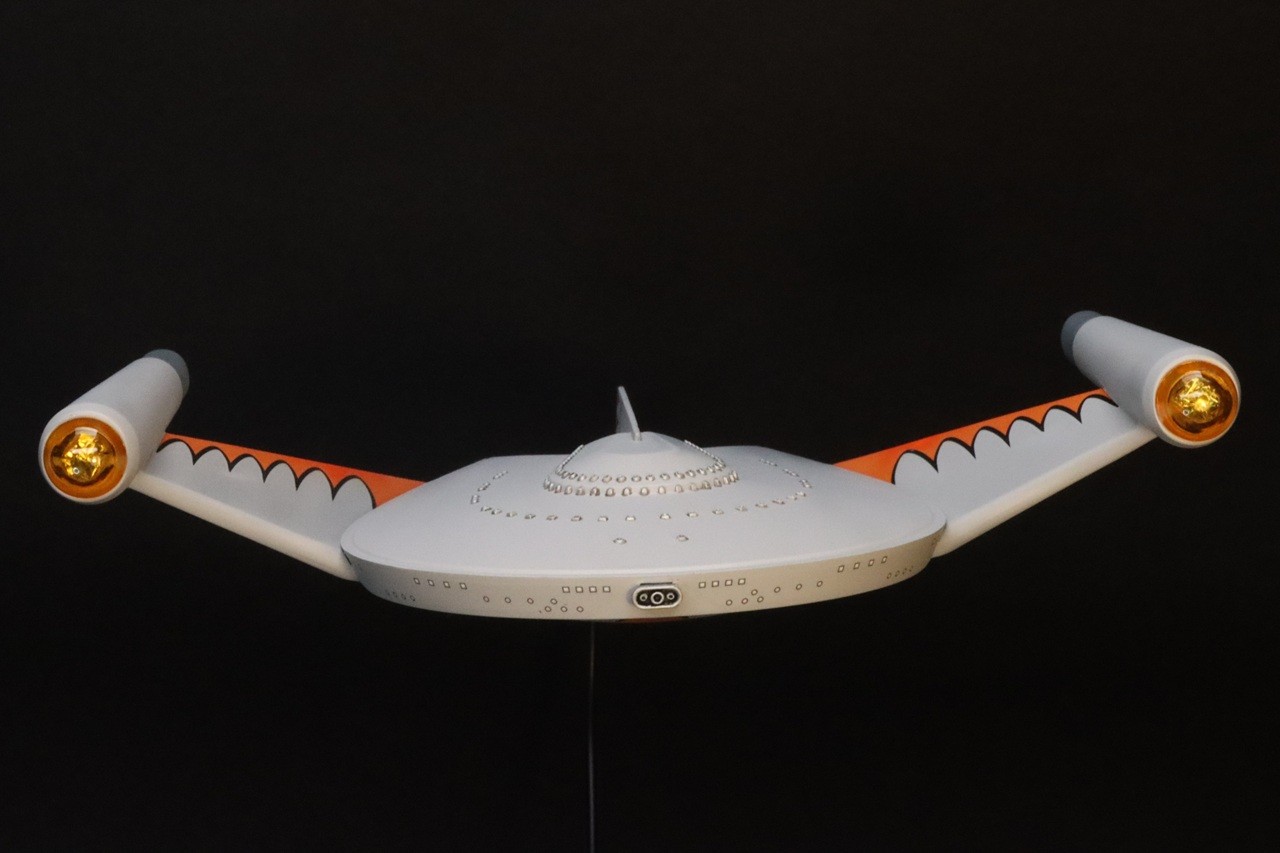
Bird of Prey - Front View
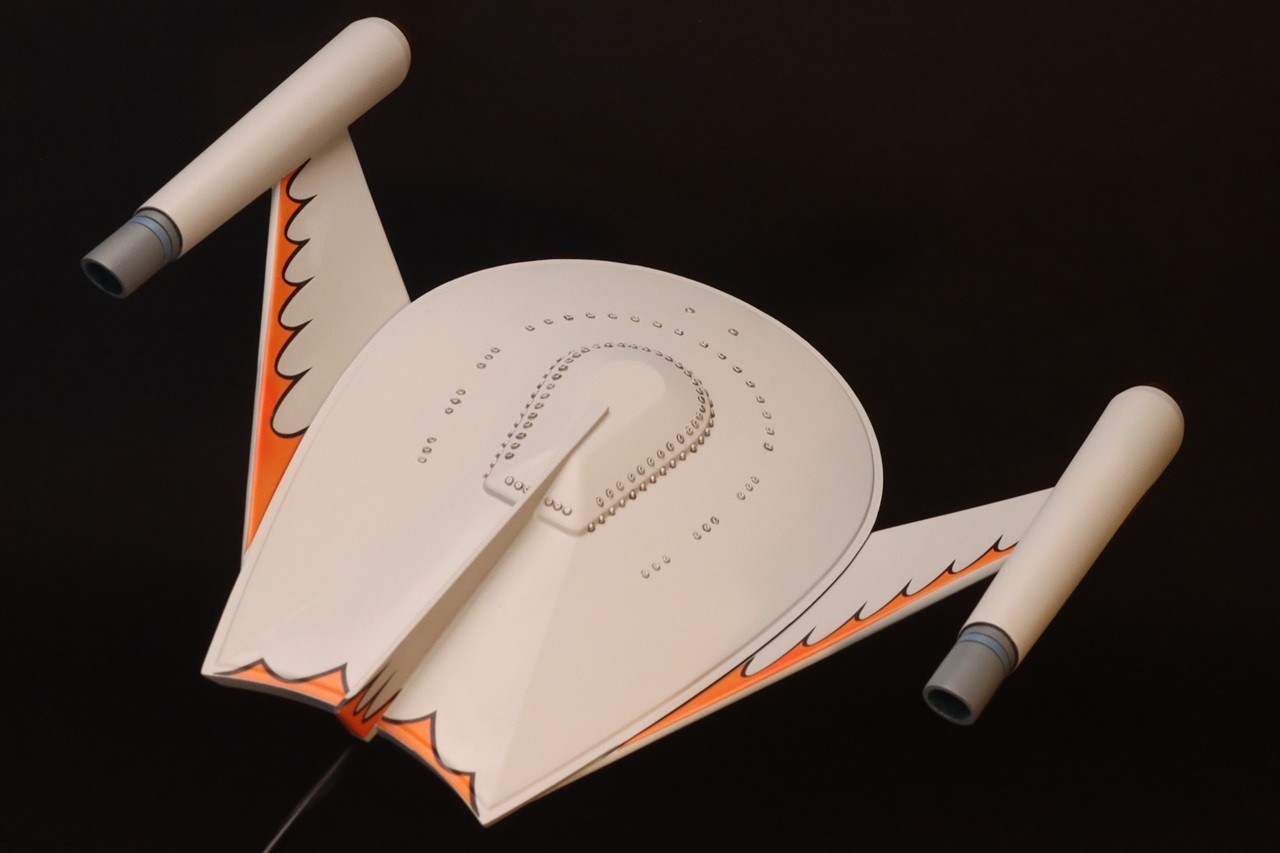
Bird of Prey - Top View
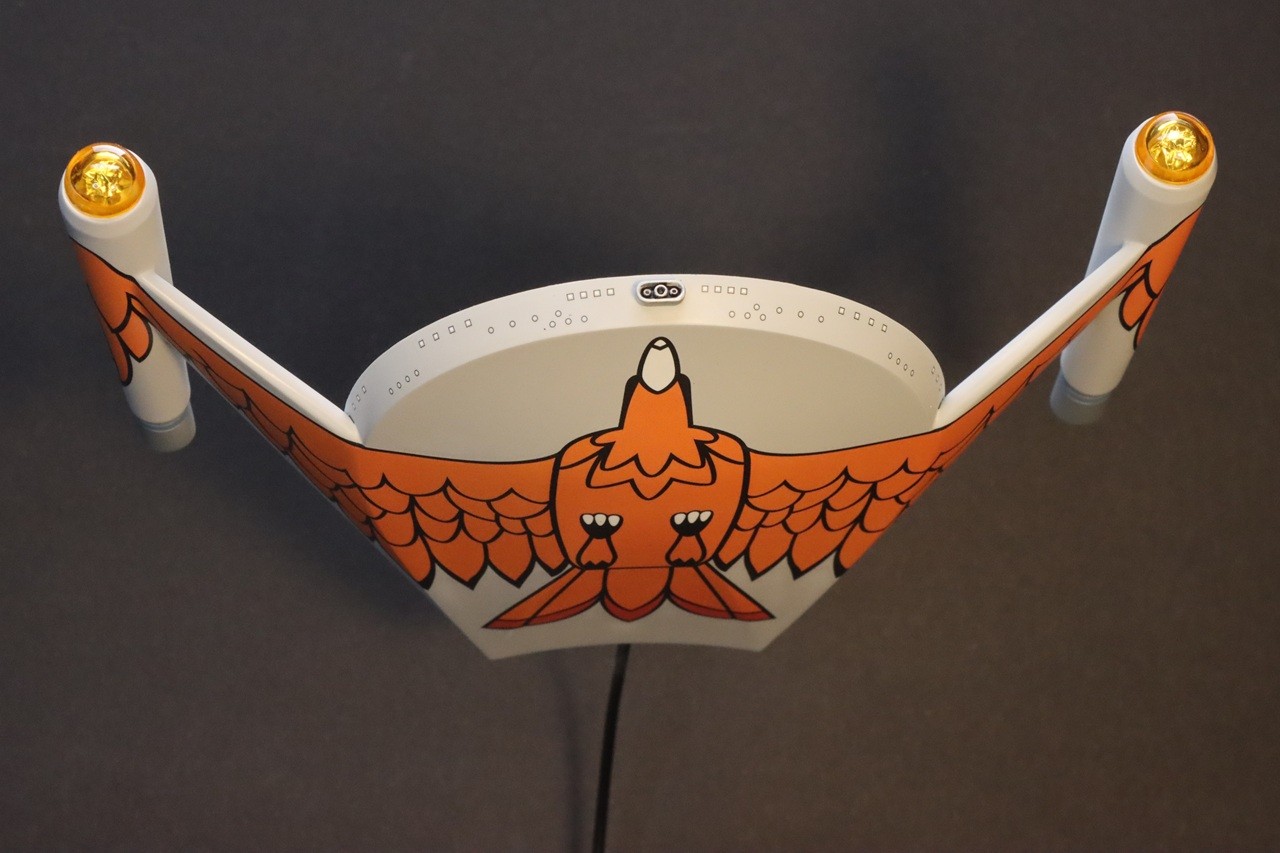
Bird of Prey - Underside
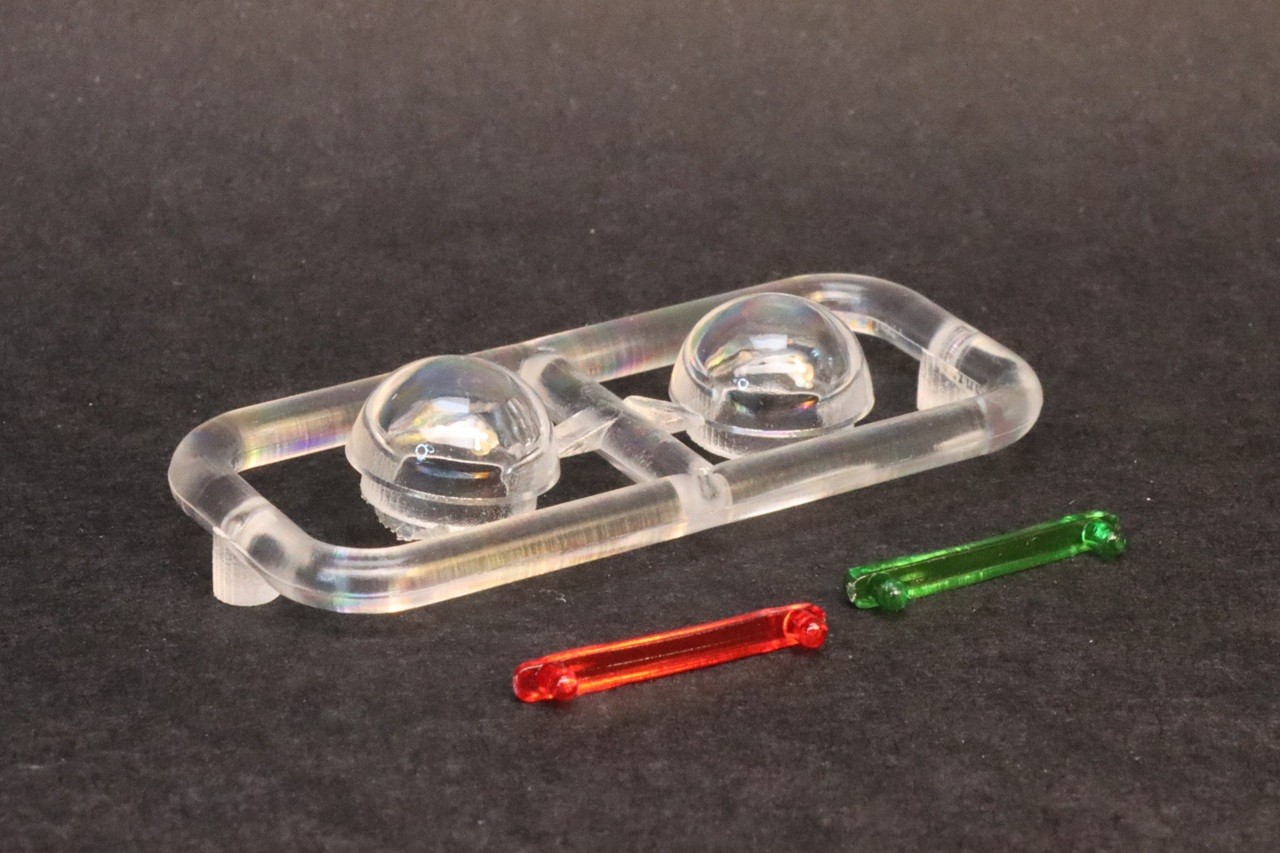
Bird of Prey Clear Parts
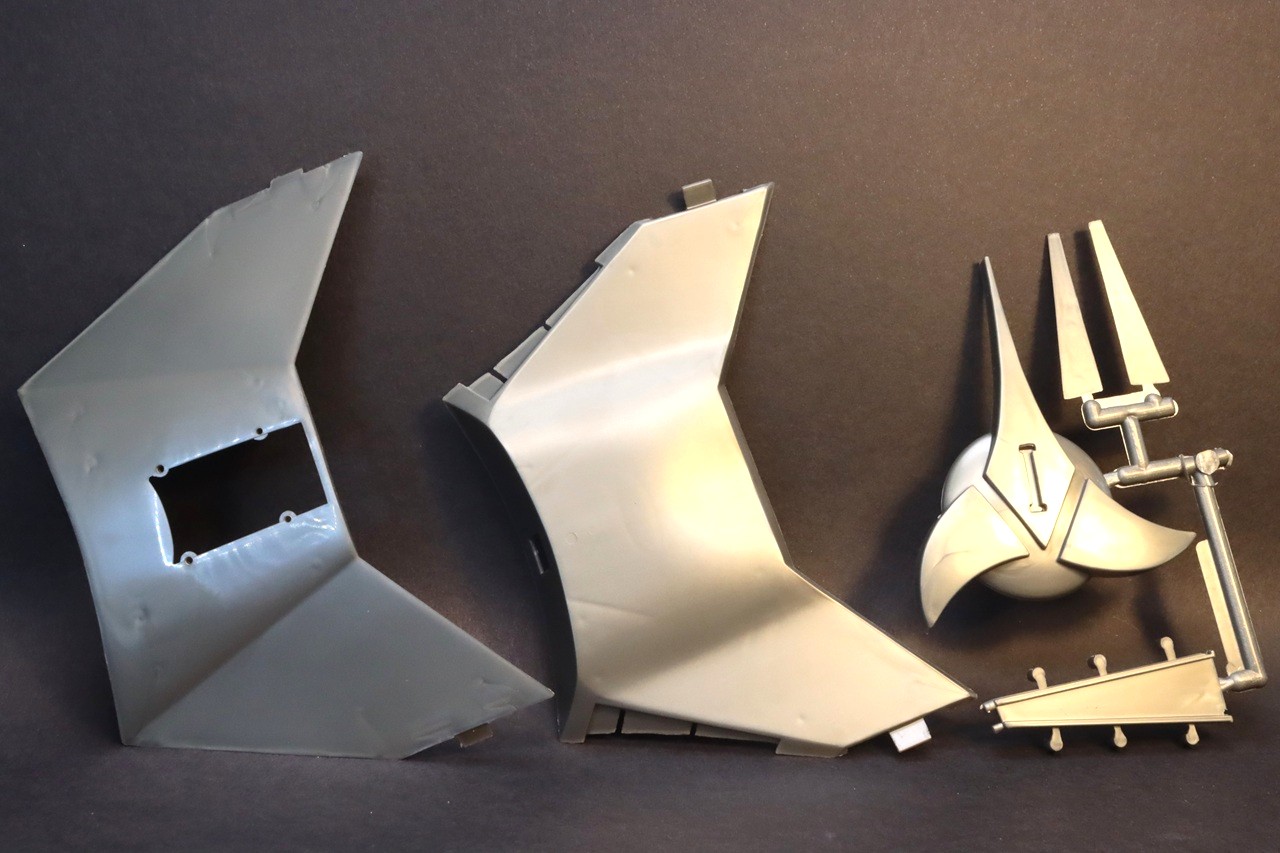
Cruiser Hull Parts
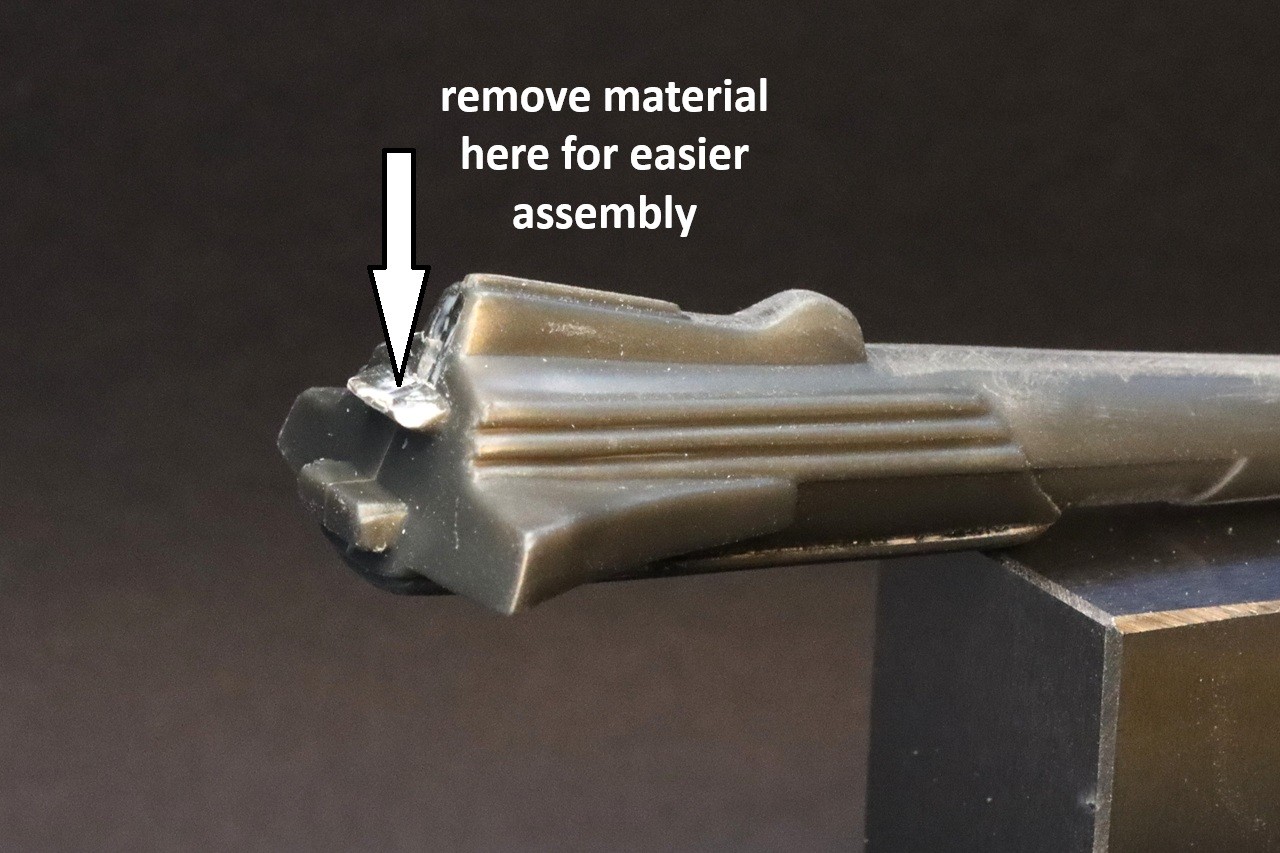
Cruiser Modified Boom
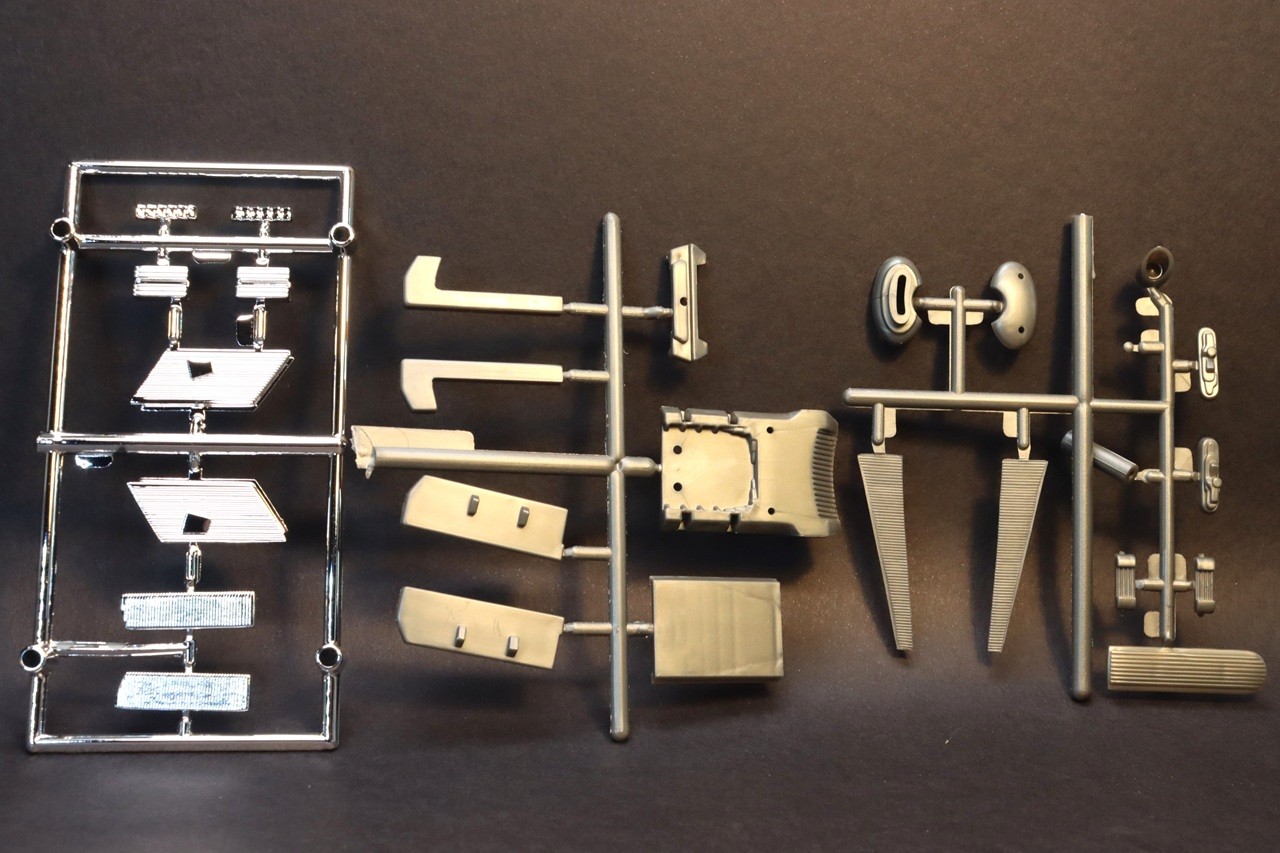
Cruiser Parts 1
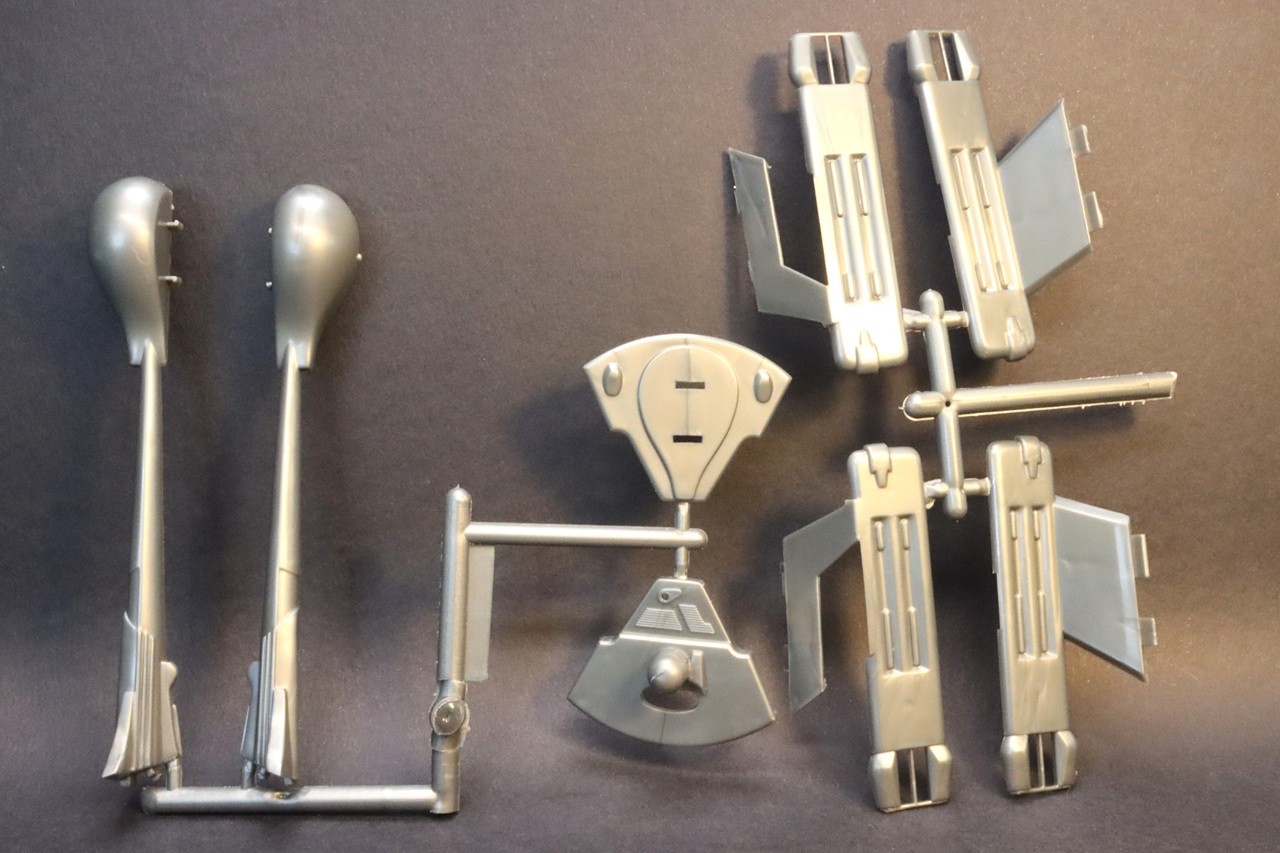
Cruiser Parts 2
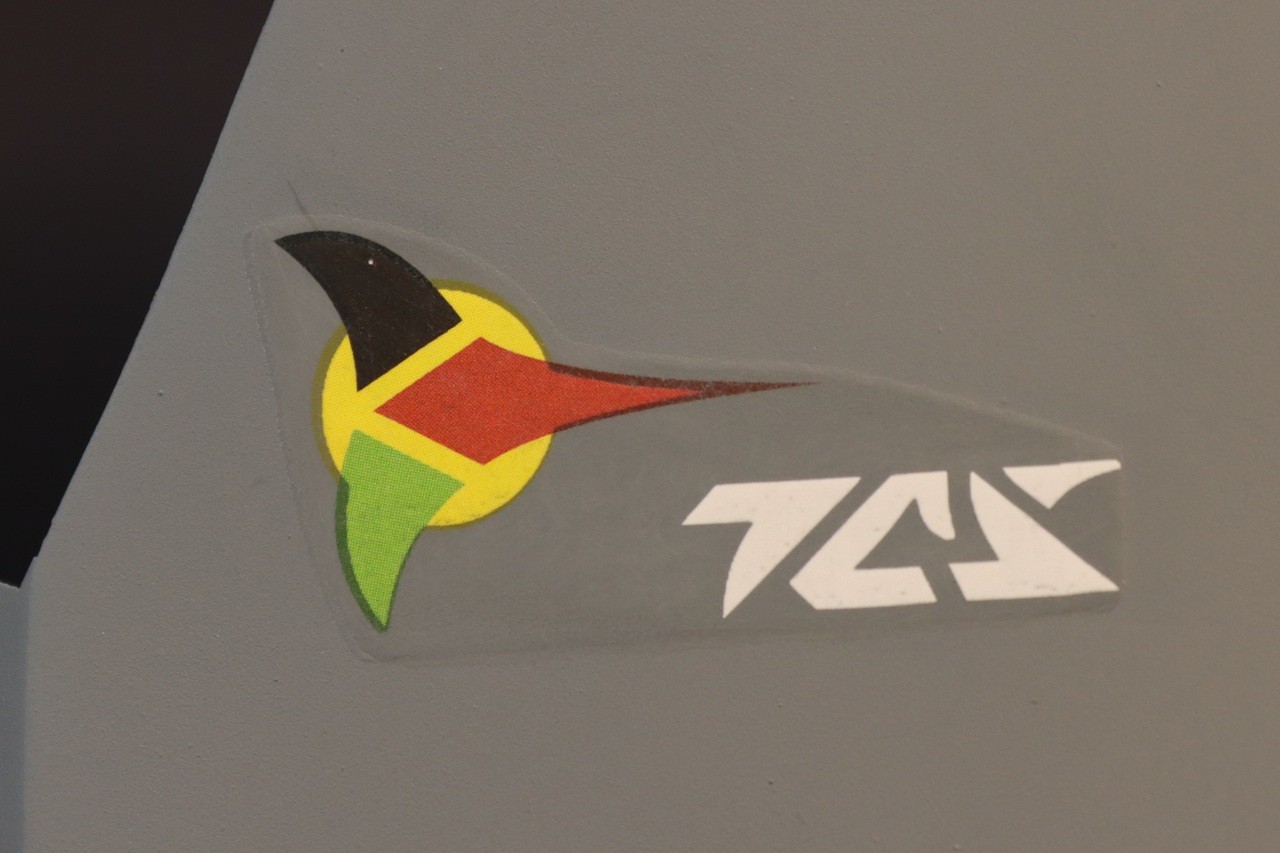
Decal Opacity Example
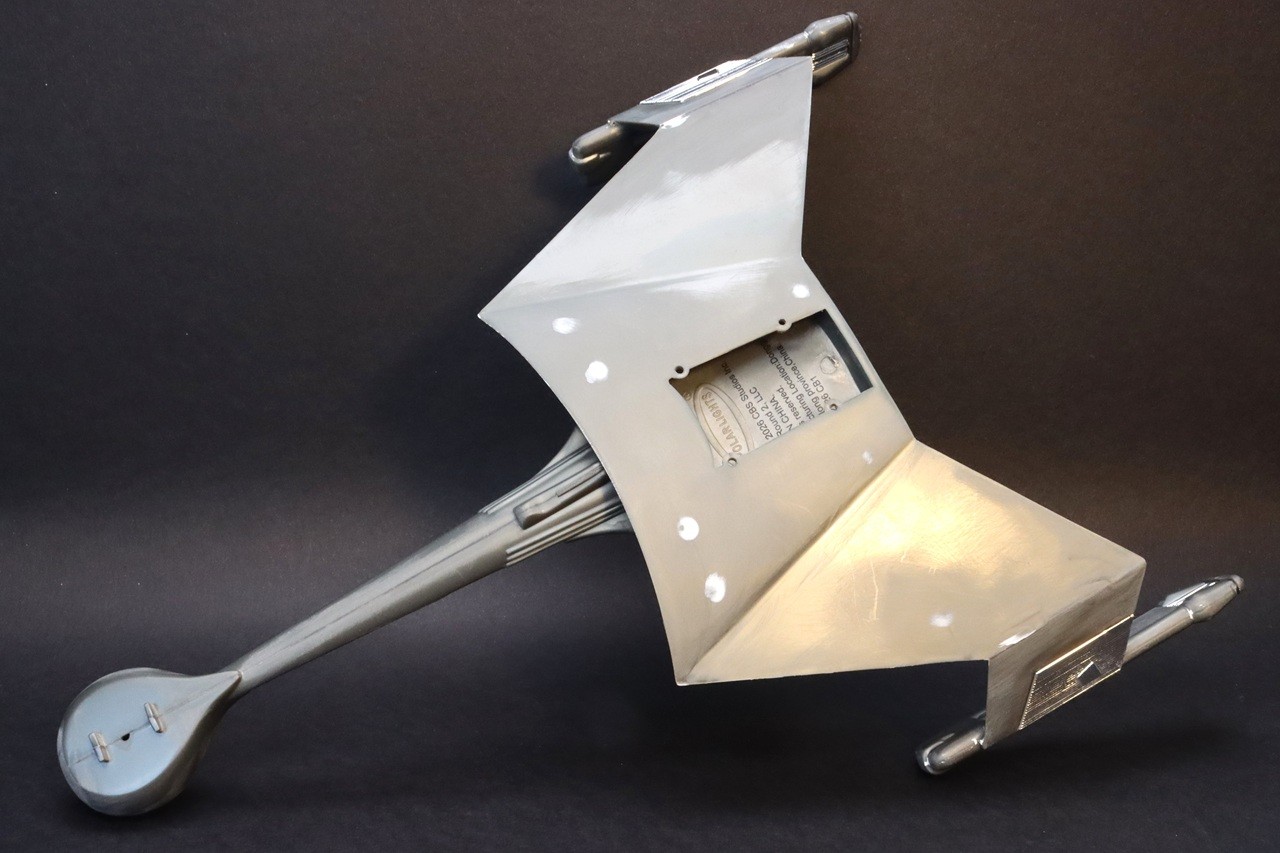
Cruiser Sink Marks Filled
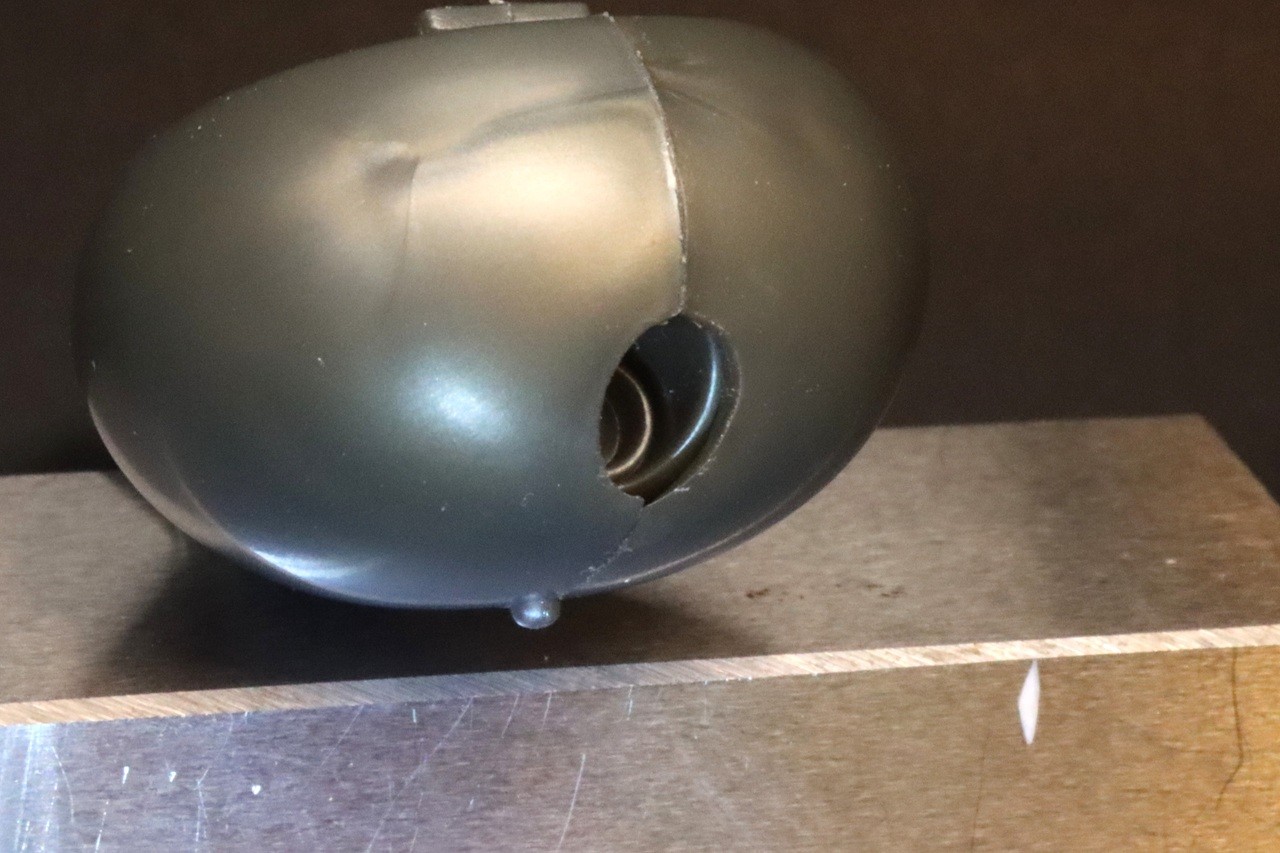
Torpedo Launcher Fit
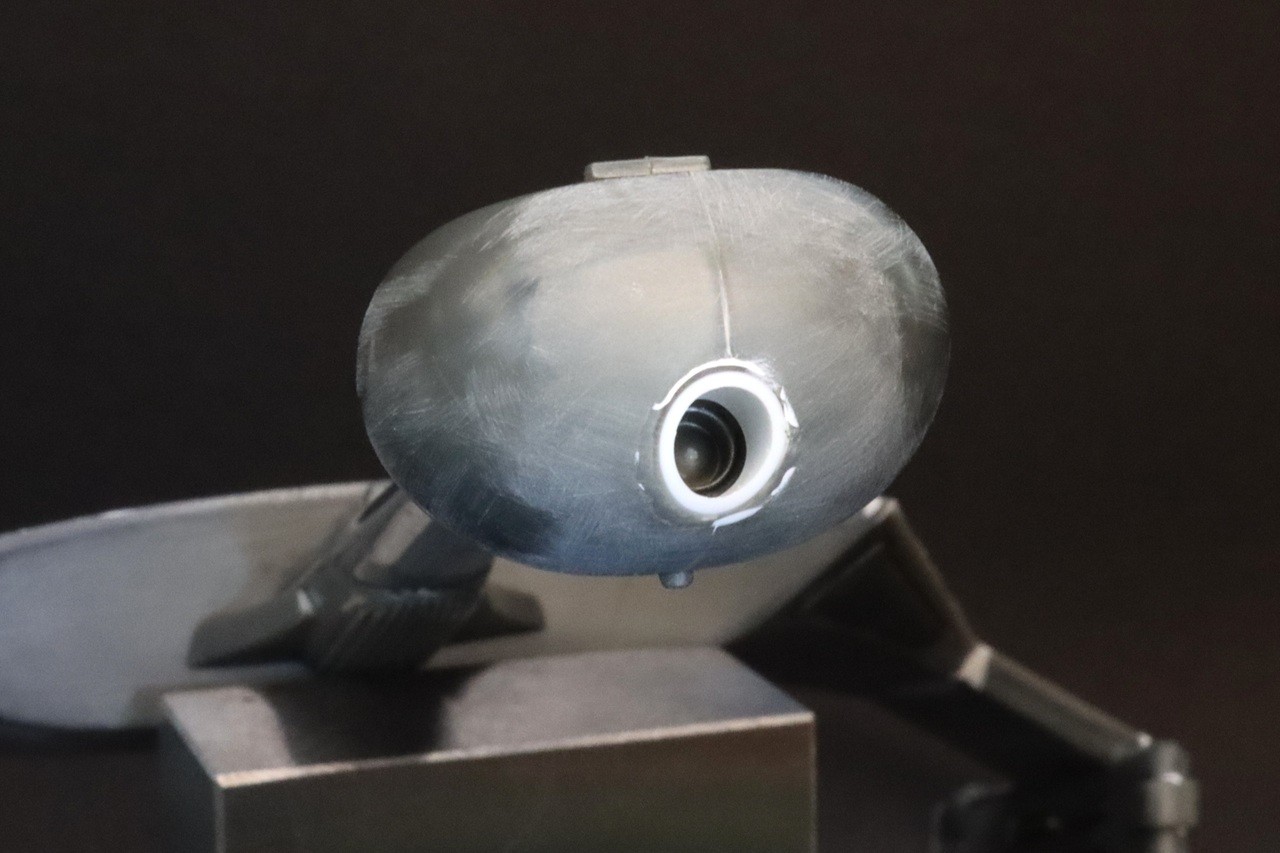
Torpedo Launcher Fixed
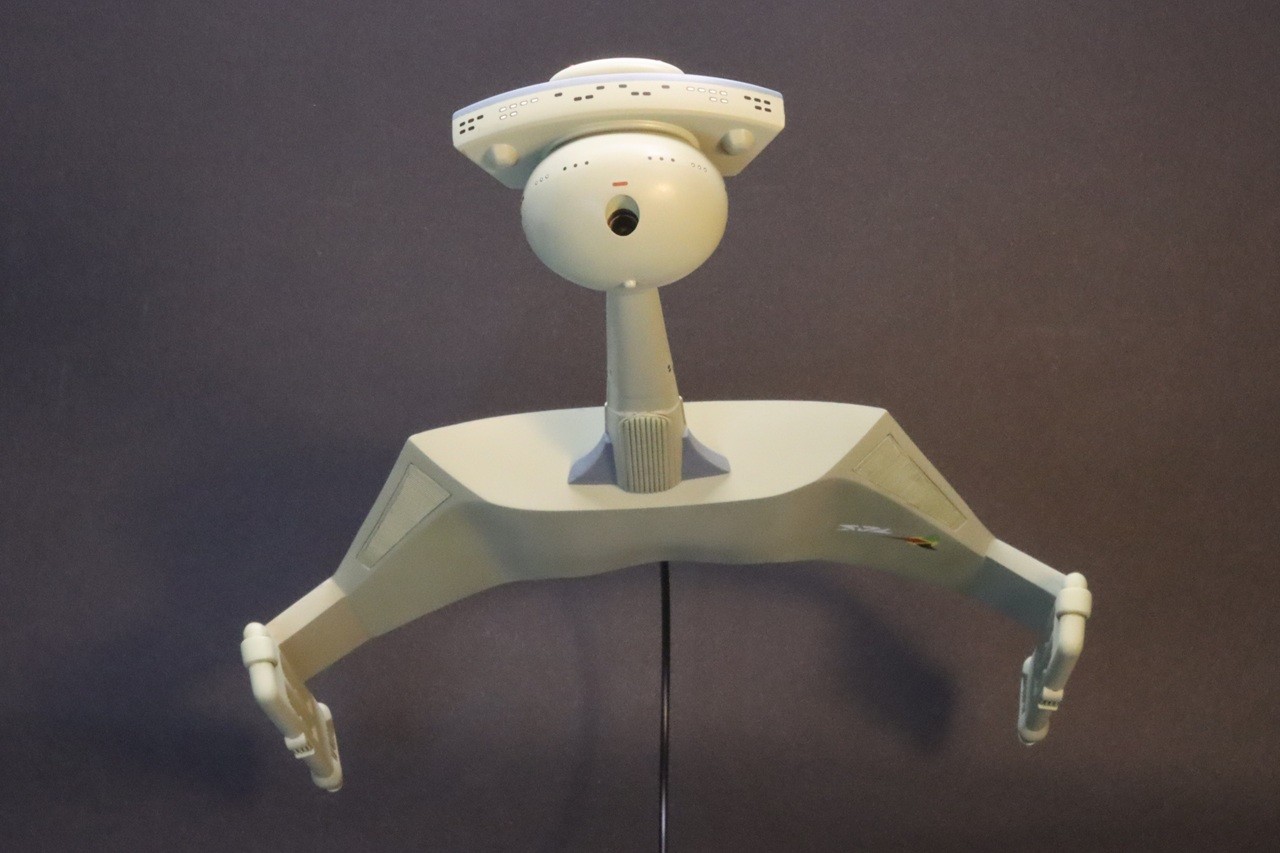
Finished Cruiser - Front View
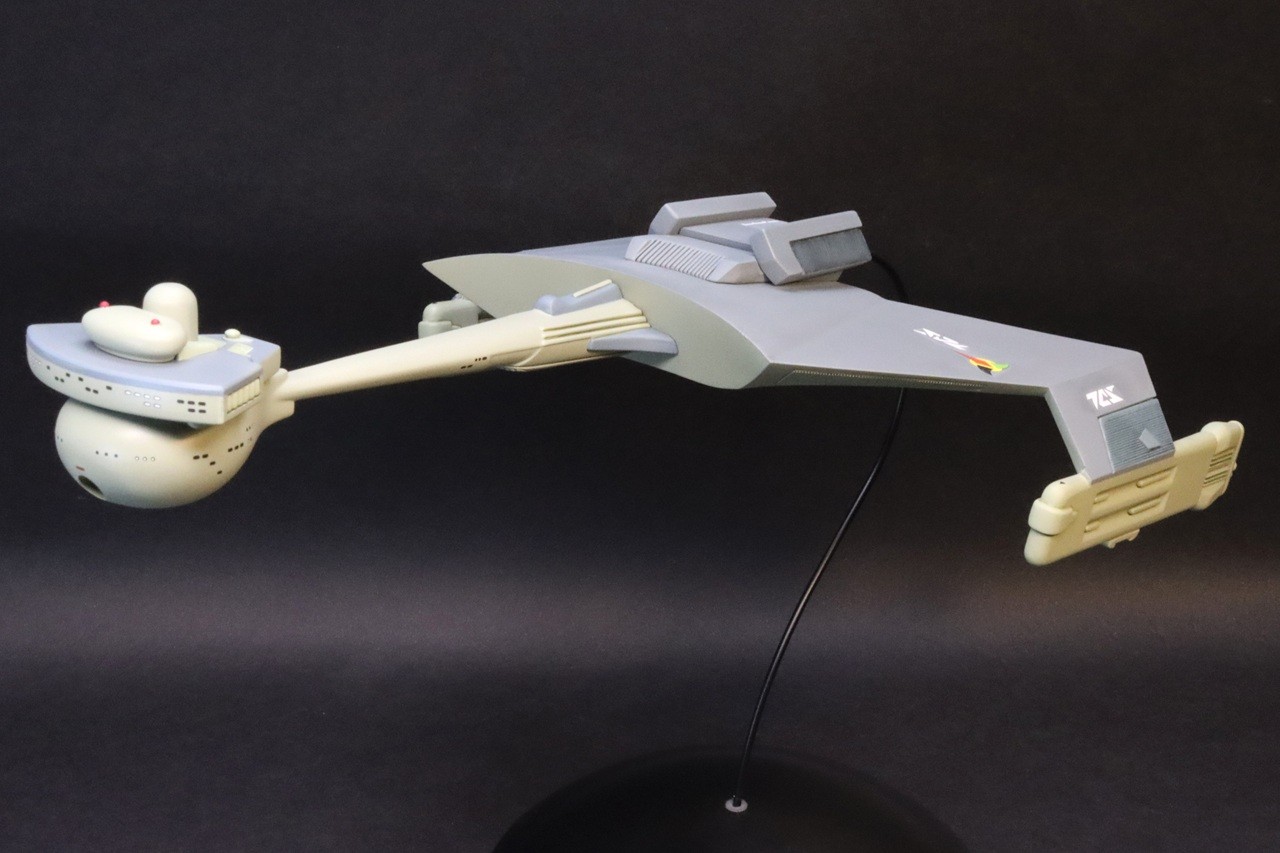
Finished Cruiser - Left Side View
Finished Cruiser - Rear View
Finished Cruiser - Underside View
Comments
Add new comment
This site is protected by reCAPTCHA and the Google Privacy Policy and Terms of Service apply.
Similar Reviews