
Sea Hurricane
Like many limited-run model companies, Fly Models’ first kits were fairly small. I had the distinct pleasure of building one of their Ba-349 Natters when they first came out, and was impressed by the level of effort expended on this design by this fledgling company. It’s still one of the prides of my collection.
Fly has started thinking a lot bigger, and their new series of 1/32nd scale Hawker Hurricanes certainly picks up where Revell’s venerable offering leaves off. I’ve built the Revell offering numerous times over the years, and the difference between the two offerings is dramatic. The Sea Hurricane comes with a small batch of light tan sprues, another of clear plastic and numerous resin and photoetch items to fill in the details. Surface detail is excellent, and the various rivet types are accurately portrayed. They’ve even captured the elusive shape in the bottom of the nose – something no one else has been able to do in this scale. Like most limited-run kits it’s not for the faint-hearted but the level of detail makes it well worth the effort.
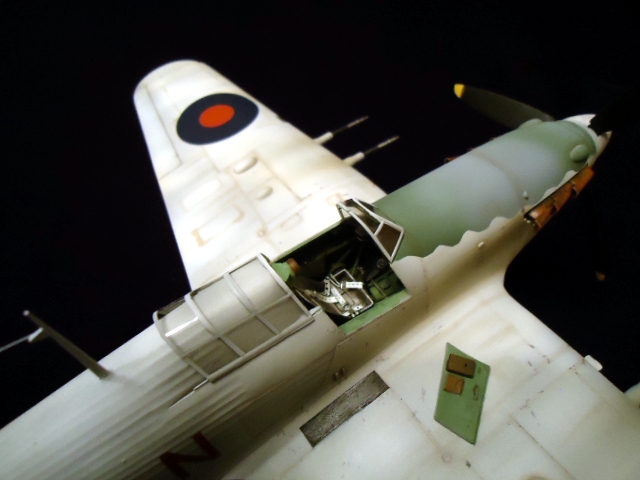
Construction begins with the interior, and they’ve recreated the framework style fairly well, although it’s a bit frustrating to assemble, as there are few positive locators. The control column was exceedingly fragile, and mine broke in two places before it was even off the sprue. However, I didn’t have any difficulty in replacing parts of it with Evergreen rod. The real bugaboo, though, is the triangular frame that cuts the cockpit in half. There is LITERALLY no way to install it as they suggest – it’s topographically impossible. That being said, the bottom mount is actually underneath the nice resin seat, so I just cut one end of mine off and left the upper portion alone. There are numerous tiny photoetch bits to the cockpit, and I was having quite a struggle with them for awhile. The photoetch provided is paper thin and doesn’t really accurately reflect much of the interior assembly. I found that it was easier and far more realistic to replace a lot of this with bits and pieces of styrene. Once that decision was made, assembly became a whole lot more fun. I also backed the control panel with some sheet plastic to make it more likely to stay put once installed.
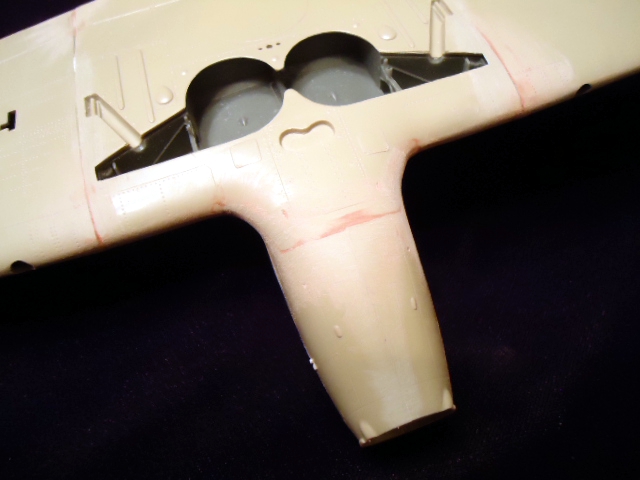
One of the big challenges for me after the interior assembly was tackling the resin insert for the Sea Hurricane landing hook. I’m pleased to say that what promised to be a major headache went off without a hitch. I glued the two fuselage halves together and once dry, sawed out the space for the insert, which fit perfectly, even emulating the fabric covered stringers of the rest of the body. Most impressive! The other big resin piece is the landing gear bay which, once the mold plug was ground off, again fit without complaint. Be sure to clean out the fine mold webbing inside the bay – I almost missed this on mine.
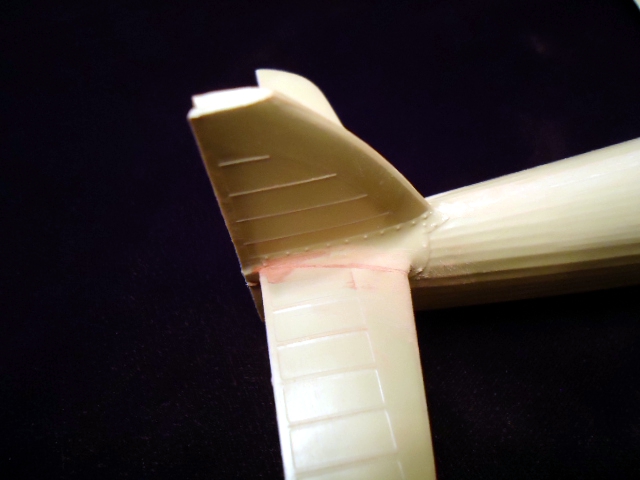
The wings are a five part affair that actually fit together pretty well. You’ll want to take the time to drill out the shell ejection ports, however, before doing so, as well as install the landing light frames. The seams on the bottom of the wings are covered with photoetch strengthening bands so you can afford to do a bit of sanding without worrying about losing surface detail.
At this point I was able to install the cockpit and assemble the fuselage and wings together. As carefully as I assembled the wings, there was still a considerable gap at both wing roots along the top, but I used some styrene strip and filler to finish the job with minimum loss of detail. This represented the only real external fit issue of the model.
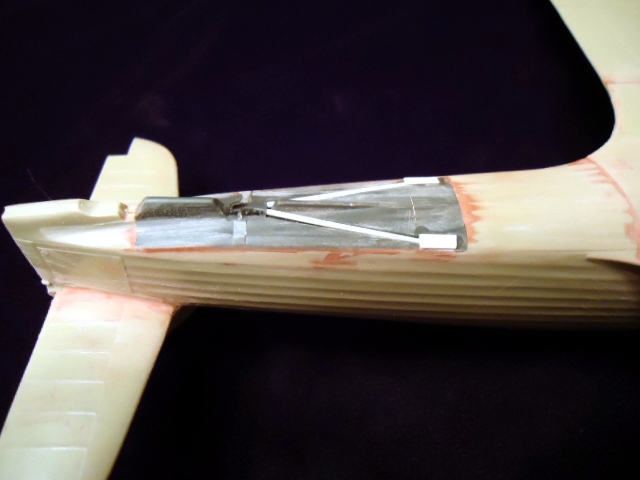
That done I moved onto the big bath intake on the bottom, which features some fairly complex photoetch assemblies to replicate the internal radiator. I was pleased to see that these fit together well and fit inside the intake shell without fuss. The landing gear and stabilizers went on next with no complaints and this thing was starting to look like a Hurricane!
At this point I was essentially ready to get down to the business of painting. Fly Models thoughtfully provided a set of their after-market marking masks, so I decided to try them out on the fuselage numbers. Unlike many I’ve used in the past, these were in a thin transparent vinyl which didn’t want to snuggle down into the ripples on the fuselage sides very much. I finally opted to use their decals instead which are, I must say, some of the best I’ve ever seen – incredibly thin, with virtually no carrier film. However, because of their thinness, they tend to want to wrap around themselves, so care must be used in application.
Another item Fly kindly provided was an aftermarket vacuform of the canopy, and this I found much more useful, as the sliding portion of the Hurricane canopy never really looks right in the open position. However, with this item it looked just right. The resin wheels and exhausts added that lovely final touch, although the landing gear is just a wee bit wobbly. If they come out with some metal replacements I’ll be first in line.
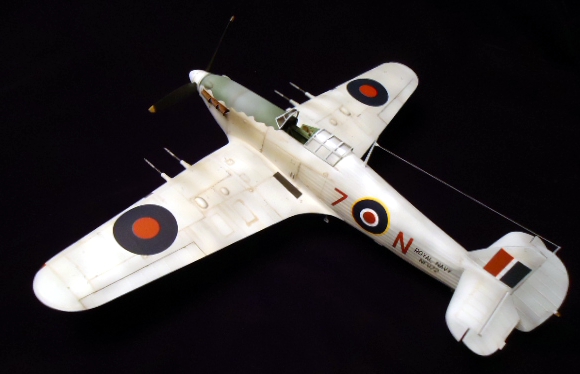
Ultimately, I found few difficulties in finishing this model and it does look handsome in the near-all-white livery. As far as looking the part, I don’t think I’ve ever had quite as lovely a Hurricane in my collection – and I’ve had quite a few! Although not a model for the easily discouraged (especially the interior) this is a relatively trouble-free build for a short-run kit, and the end the result looks fantastic. I’d happily make a couple more if time permitted. My thanks to Fly Models for a very special kit and to IPMS/USA for the sheer pleasure of building it.


In Progress Front End Left

In Progress Front End Right
In Progress Tail Right

In Progress Tail Left
In Progress Tail Underside
In Progress Front End Underside

In Progress Wing Root Underside

In Progress Wing

Finished Left Front
Finished Left Rear

Finished Right Side
Finished Left Right Side Detail

Finished Underside Tail

Comments
Add new comment
This site is protected by reCAPTCHA and the Google Privacy Policy and Terms of Service apply.
Similar Reviews