
Rommel’s Mammoth DAK AEC Armored Command Vehicle
AFV Club kits for me have always been a bit of a challenge - multi-part assemblies that could easily be presented as lower part count builds are usually the norm for me. This particular build for the most part avoids this issue, except for the undercarriage. The only real issues encountered for me was in the order of assembly in some cases which will be outlined as we go. The kit is a rebox of the AEC Dorchester kit from 2012. Obviously these three examples were basically captured Dorchesters so the only changes were in the interior equipment and schemes of the three examples captured by the Germans as we will soon see.
What’s Inside the Box
The kit has an assortment of different media-plastic, resin, and PE, but not in overwhelming amounts. Inside we get:
- 12 tan plastic sprues
- 1 green sprue which I believe came from the original kit as there are British radios and equipment present
- 1 clear sprue
- 4 vinyl tires
- A printed sheet of maps (12 in total)
- Tissue paper for the awning
- Bag of resin parts including radio equipment, Enigma machine, field telephone
- Decal sheet
- PE fret
- A4 sized instruction sheet
Construction
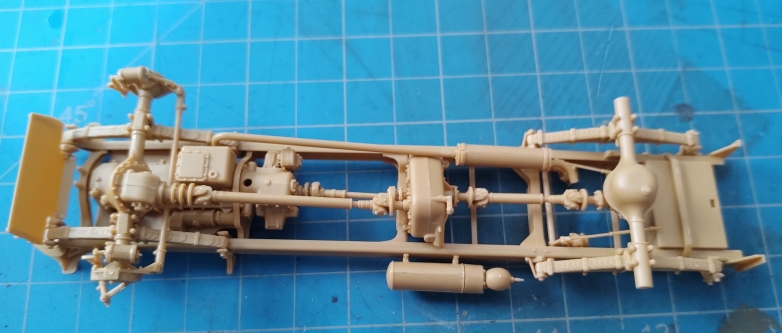
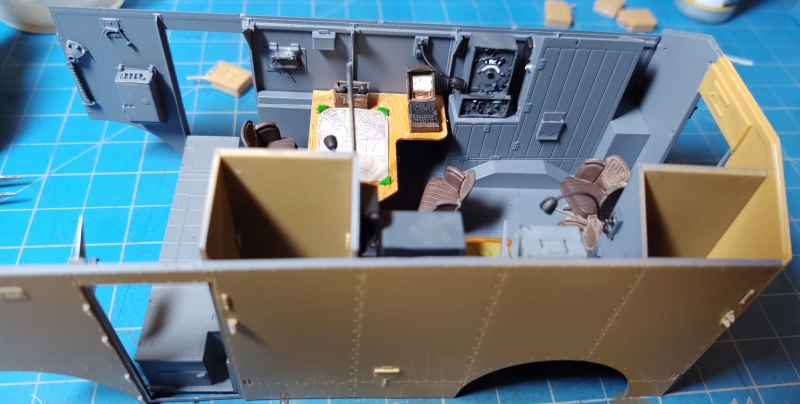
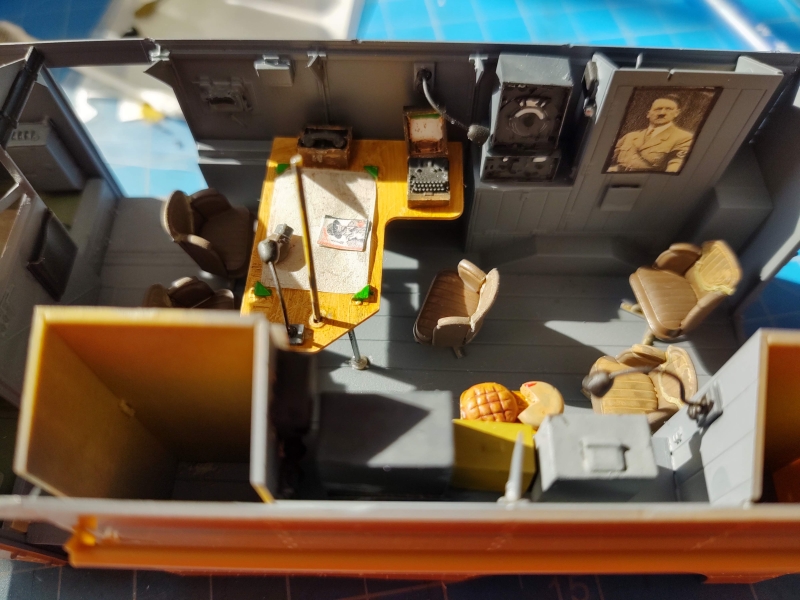
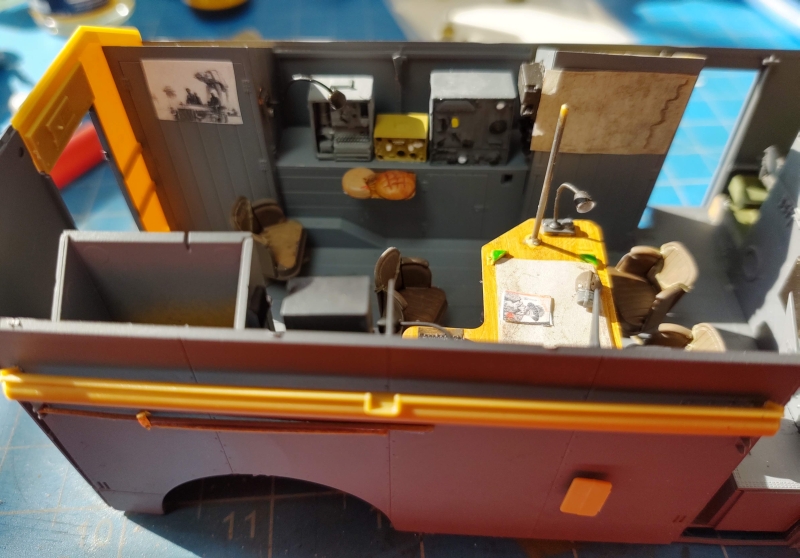
Out of 22 steps in the assembly, the first five feature work on the partial engine, lower frame and suspension, and exhaust and wheels. All told- this took up a total of 136 parts if I counted correctly. From there, we can take a break as we move to work on the interior of the main compartment. There are numerous holes to drill and are well indicated. Assembly of this interior comprises seven more steps. Some of the features of this section include assembling five comfortable looking leather chairs- each comprising seven parts. We get painting details for the resin pieces that are added here and these include the 5 watt sender, the UKW-Empfänger d1, the Enigma machine, and Feldfernsprecher 33. The map table is quite detailed and includes small lamps and those previously mentioned maps that have excellent graphics on them.
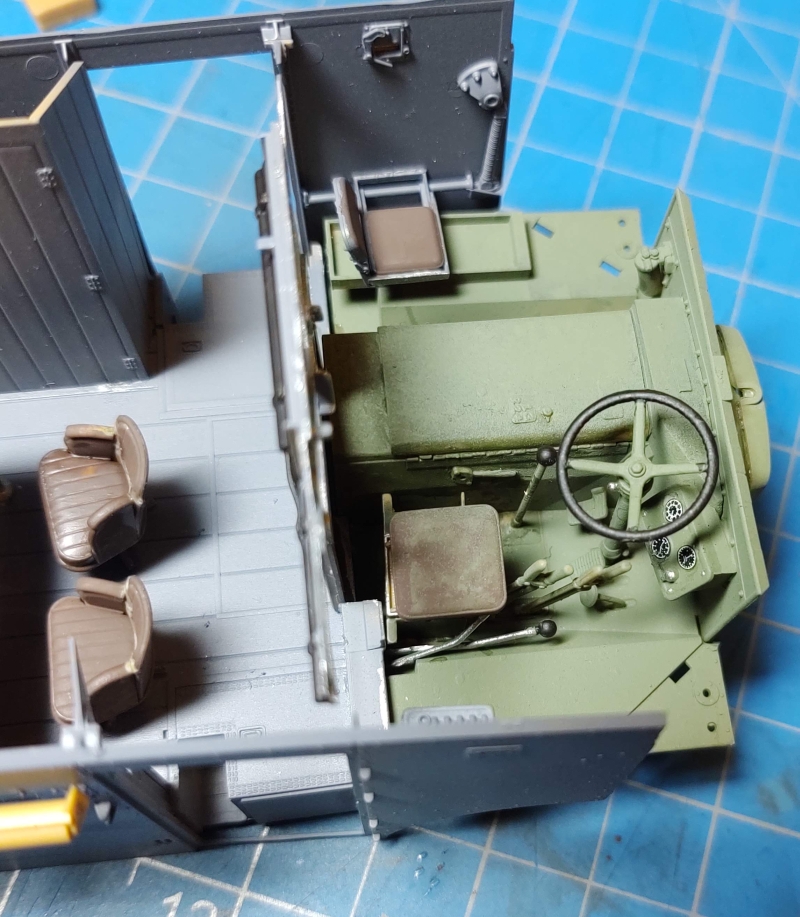
More resin is added to the other side- including the 100WS transmitter, Torn. E. b radio, and Hell Feldfernschreiber. From there we move to the driver’s position. This assembly is a bit tricky with the front grill and radiator fitting in tightly with the other parts. Any misalignment here will cause great difficulty when you go to attach the front compartment to the rear main body. I had great difficulty here and no matter what I did, I had to break out the AMMO putty. The front windscreen assembly and hatches are next and can be posed open or closed. I chose closed so there would be one less thing to knock off while handling later. All told, there is a lot of space between here and the read side to add all sorts of extra details like helmets, weapons, maps and magazines and the like. I printed a lot of stuff off of the web and added a few of the maps and weapons from the spares box to populate the interior.
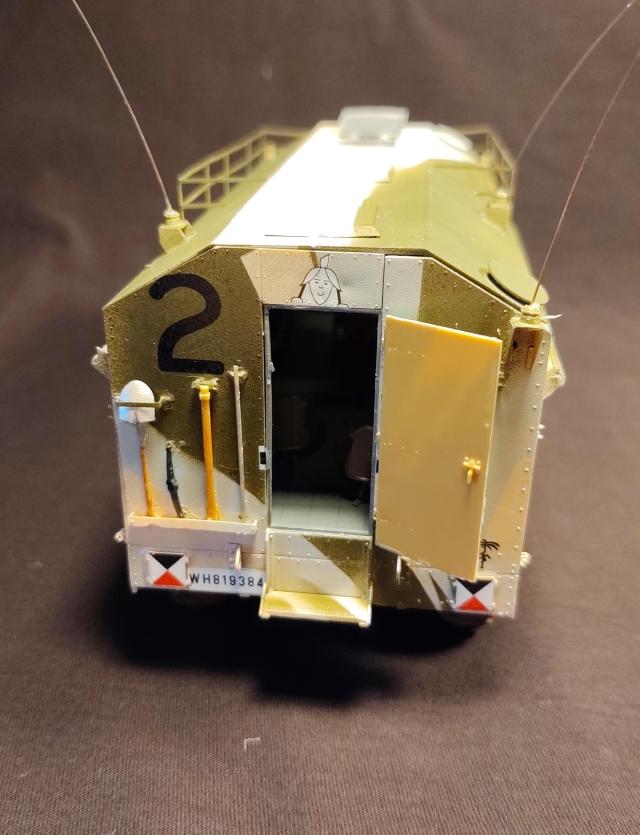
Step 20 starts with the exterior details and there are loads here. The front fenders, doors, and side awning assemblies are all nicely detailed. Doors can be posed open for you to show off some of that excellent detail inside. The tissue paper included for the awning serves the purpose but you may chose something else if you wish. I usually use the outer foil layer from a Klondike bar wrapper as I like the textured detail. Step 21 is probably the busiest step, barring those for the lower frame. Loads of brackets, pins, and grab handles to attach here. Some of the area to attach to are lacking including raised details that make it difficult to apply to.
Step 23 gives a detailed assembly of the roof and vents with some nicely detailed vent fans. You can choose to leave the three vents open or closed. The jerry cans included give different options including open and closed spout covers, and even additional pour spouts to attach. There are no indications for where to add them to the vehicle however. The last step includes adding the roof and PE rails to it, as well as instructions to stretch sprue for the three antennas.
Therein lies the biggest issue for me in the entire build (other than the putty work between the front side and the rest). Nowhere in the instructions does it indicate where to add the undercarriage to the body. It just appears in the last step. As someone who followed the instructions to a T, I would suggest adding the undercarriage long before you get all the excellent detail added. Waiting to the end like I did was not easy-it is near impossible to get the assembly in square and fitting as it should. I really wished I had added it back in step 6 when assembly of the floor begins. I would’ve been so much easier and if I had it to do again, that’s the route I would take.
Painting and Weathering
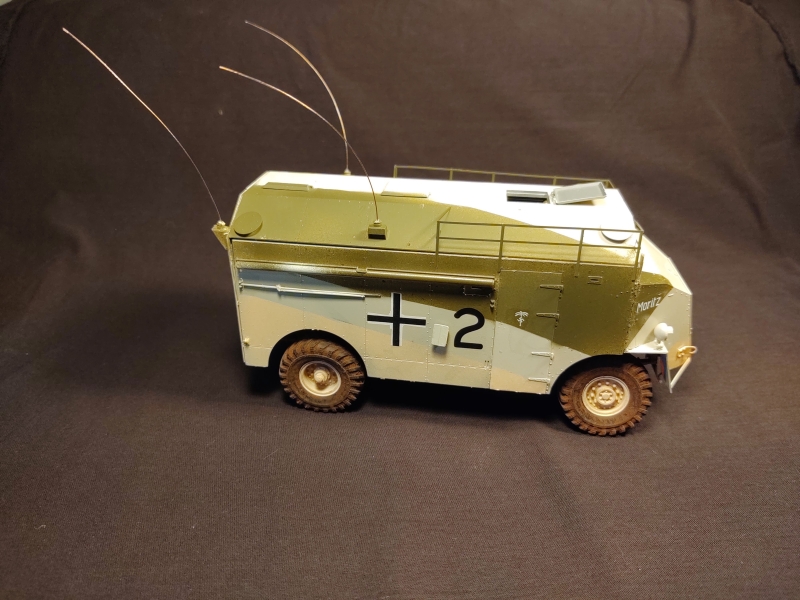
As mentioned previously, there are three scheme included in the kit- for each of the three captured German vehicles. Two are known to have been used by Rommel himself- Max and Moritz. The last scheme is unnamed but all three sport very similar paint schemes. A base of Light Stone 61 was painted on first using Mission Models paint. I followed it with Vallejo Model Air Light Gull Grey and RLM71 Dark Green. Stock up on your favorite masking tape for any of these schemes as you’ll use lots of it. Decals went on quite smoothly using AMMO Decal Set and Fix. I treated the vinyl tires to my “bag o’ dirt’ pigment mix and will hold off the rest of the weathering until I mount the Mammoth to a base.
Conclusion
Overall, I found this to be one of the easier AFV Club builds for me. Loads of excellent detail, and this is a great way to introduce novice models to using resin and PE with a not so overwhelming amount at once. The resin was easy to handle with only small pour stubs to remove. The radio sets and equipment are nicely detailed with no bubbles I could see. The plastic had no flash and everything went together pretty well. The lower frame took quite a bit of time and patience and care but looks great. I highly suggest you add it right away despite no indication in the instructions to do so. Other than that, the build really looks great and there is loads of detail to add for those who love to do so. Also, in the end, there is plenty to add to the spares box for later builds. Total win-win. I left the roof loose so I can show off all that interior detail. My only extra wish was for a Rommel figure- but Master Box has an excellent set that seems to fit on top of the Mammoth quite well if folks want to add it on and I added the Field Marshal to one of the finished photos.
My sincere thanks to AFV Club and IPMS/USA for the review sample.


Comments
Add new comment
This site is protected by reCAPTCHA and the Google Privacy Policy and Terms of Service apply.
Similar Reviews